While we'd be lost without our transient shaping plugins, there are occasions when more drastic action is required to achieve the punch and drive we crave in our drum and percussion parts. Yes indeed, when you really want to take your drum (or other) sounds to the editing limit, you're going to have to get surgical.
By dividing hits up into transient and sustain portions on separate tracks/channels, not only can their relative levels be balanced with ease in the mixer, but further editing and processing can be applied, both creatively and correctively.
In this tutorial, we'll use detailed splitting, layering and processing techniques to bring power and character to a kick/snare drum pattern. For more transient shaping advice, pick up the June edition of Computer Music.
Click here to download the files you'll need to complete this tutorial.
Step 1: We can use surgical cuts, chops and processing to deconstruct and rebuild drum hits so that they sound markedly different from their original form - or even construct Frankenstein drum hits from scratch! Set your project tempo to 128bpm, then import Backing.wav and Kick.wav onto the arrange page - we’re using Steinberg Cubase Pro 9, but any DAW will be fine.

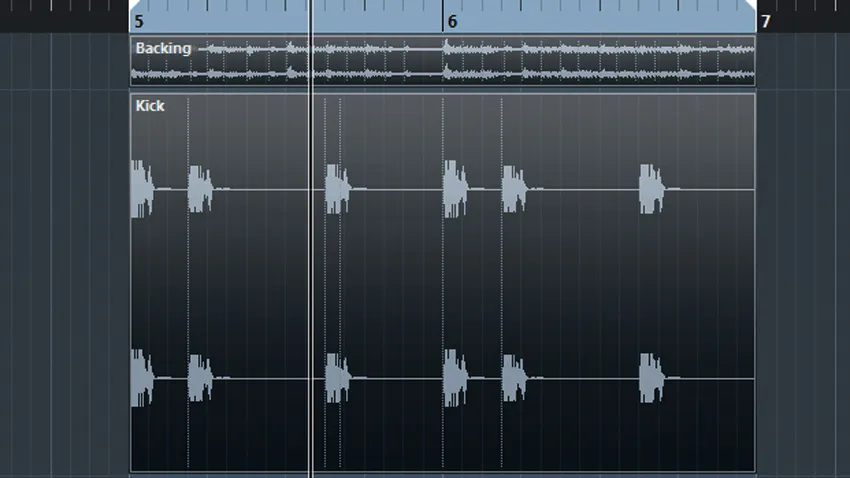
Step 2: By dividing the kick into separate transient and sustain portions, then placing them on separate tracks, we can process each part independently for unique, customisable results. Set Cubase’s quantise grid to 1/128 and turn on Snap to Zero Crossing to avoid clicks or pops when editing the audio. Cut the first 128th-note of each kick out, then move the transient section to a new audio channel.

Step 3: Distorting the kick’s sustain will add some grit - load AudioThing’s ValveFilter CM onto the sustain channel, turn on the Valve Drive, then push the Drive dial up to around 12 o’clock to give the kick’s sustain a crunchy, distorted tail that works well as part of the drum break. Set the filter Cutoff to around 10 o’clock to add a resonant thump.

Step 4: Next, load any transient shaper (we're using Cubase’s Envelope Shaper here) onto the kick’s transient channel and add a small Attack boost to give the kick more punch. Now we’ve transformed our boring kick into something more punchy and unusual, let’s turn our attention to building a snare. Start by importing SnareClick.wav and SnareBody.wav onto two fresh audio channels.

Step 5: These two layers are the basis of our custom snare, but the click is lacking sharpness - to remedy this, load Melda’s MTransient onto the SnareClick channel, then add a 6dB Attack boost for extra punch. After this, we can add some density to the snare’s body layer using Acon Digital’s excellent CM Verb: load the plugin over the snare body track and choose the Studio A Reverb program.

Step 6: A CM Verb Reverb time of 0.4s tightens up the body snare; setting the High Cut-off to around 500Hz adds ambient density to only the low mids. Now that we’ve added space and punch to our snare, an acoustic layer will add much needed character - load SnareReal.wav onto another blank audio track and duplicate the hit so that it plays at the same time as the other layers.

Step 7: We’ll use iZotope Trash 2 to give the live snare a crusty feel. Add a fresh instance to the SnareReal channel, then call up the Bit Wrench preset for bitcrushed crunch and loudness. Dial in a -5dB Output gain adjustment to balance this. Next, we’ll group the layers to a single bus for further processing.

Step 8: Add a new stereo group channel, then route all three snare layers’ outputs to it. We can add aggressive compression to really gel the parts together - we reach for Sly-Fi’s Deflector. A THD setting of 2 adds grungy distortion to the snare; Release at around 9 o’clock increases the compressor’s snap.

Step 9: After adding a little Output gain in Deflector to level the snare’s volume, we shape the layered snare as a whole using Soundtoys’ SieQ. After adding SieQ to the snare group, we apply a 9dB Low boost alongside a 6dB High boost - this gives the snare some high-frequency crack and a gelled low-end. Finally, a 3dB Drive boost saturates our snare more for glue and grunt.
