We've covered the potential minefields surrounding the tuning of bass drums and toms elsewhere, and now it's the turn of the all-important snare drum. While it too offers up a number of hazards, the snare does give us the best opportunity to experiment with different sounds.
So let's have some fun, test our tuning skills to their limits and avoid those pitfalls. Here are the 14 simple steps to tuning your snare drum…
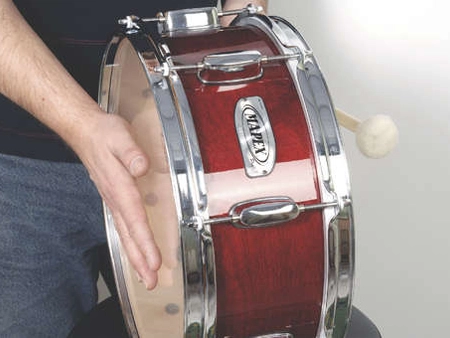
1. Understand your drum
Firstly, let's split the shell types into broad groups: wood, metal, synthetic (acrylic, carbon fibre, etc) and others (paper, glass and other bizarre materials) and try to understand the key properties of these types.
For instance, metal-shelled drums tend to produce more ring and volume than wood, but even then the spectrum of sounds across the different types of metal is quite wide. Aluminium will normally produce a much drier sound than brass, and steel is very different to copper.

2. Don't eliminate ring completely, tune without wires
One of the biggest villains in tuning drums is the obsession many drummers have with eliminating ring. In live situations in particular - even when miked - some ring is healthy, as long as it's even and not discordant. Removing it will make your snare sound boxy to the audience, especially if you are playing at a moderate/loud volume.
Most of the ring will be absorbed by the rest of the band. Tune the snare drum without the wires at first (except in a gig situation). Why? Well, how can you really know if the drum is in tune if you have this other sound going on? The setting of the snare wires is also very important and a fundamental part of the snare drum's sound.

3. Start with the resonant head
Start with the resonant head with the snare wires and batter head off the drum. Bear in mind that the resonant (snare-side) head is generally very thin, weaker than other heads but light enough to seat itself (without pressing). Make sure that it is installed in a centred way and use the two-key method initially to settle it into place…
WARNING: Be very careful not to over-tighten as it is possible (albeit unlikely) to pull the head out of its hoop!

4. Begin to tune
To begin tuning, start from finger tight. You should have wrinkles between the lugs either side of the snare bed. Rather than removing them by tuning the rest of the head really tight, use two keys (one either side) and tension enough to remove wrinkles.

5. Hit it, use your ears
Now, take each lug (except the lugs either side of the snares - more on that later) up by quarter-turns until they are fairly tight and the head starts to produce quite a tinny or toppy sound with a little ring. The head needs to be evenly pitched and, in the case of the snare, we have to be even more fussy than usual.
The pitch you choose is up to you, but in most cases the drum will work at its best if the resonant head is pretty tight, regardless of size. We're talking much tighter than we've had before on other drums, but ultimately always use your ears to determine the point at which you stop.

6. Now the batter head…
Turning to the batter head, seat the head using the same method described for toms and bass but tension the batter head very tight using the two-key method described before and, if possible, leave the drum overnight so that the head really forms to the drum.
Take the batter head back to finger tight and using the two-key method take the tension up in half-turns around two or three times depending on the drum's diameter. Check to make sure the head is evenly tuned across the drum and continue on with smaller turns. The main focus of the batter head is to get the feel right but think about the amount of ring you want (or don't want) from your drum.

7. Tune the top head lower
To get the best all-round sound, it's usually effective to tune the top head a little lower than the snare side. Some drummers aim for a pitch difference of a third or fifth. You can simplify that approach by listening out for a pleasing and obviously harmonious pitch difference. - mute one head while tapping the other and adjust as necessary.
8. Don't fiddle with the resonant head
When making adjustments at this stage, it should almost always be on the batter head. Drummers often complain of too much ring and put gaffer on the head. Try to think about the 'out front' concept (your audience will hear it differently).

9. Follow the checklist
If you still think it's too much, it usually means one of the following three things:
A. The batter head is too tight
B. You have an inappropriate head for the drum and style
C. You have the wrong snare for the sound you want

10. Return to the wires
Having lower tension either side of the snare wires is effective because it allows the wires to sit better on the head. It also stops them from rattling by being half on and half off. A similar effect can be achieved by tightening the resonant head more than 'normal', pulling the skin down over the snare beds.
Some argue this approach increases sensitivity, but it does over-stretch and unnecessarily distort the already thin head to gain a result that can just as easily be achieved without doing so.
11. Set up the wires (carefully)
Replace the snare wires and make sure they end up dead centre, both across the width of the drum and square to the shell. Attach them initially so that the wires sit slightly nearer the butt end, so when you make the final adjustment with the release lever, the wires will be pulled to centre.
Loosen the snare release mechanism to its loosest working tension and place the lever in the 'on' position. Important because snare wires stretch over time and you'll need to build in some scope for taking up the slack.
12. Play the drum (finally!)
Now play the drum. If it rattles (too much), tighten the adjustment knob on the snare release a little at a time (quarter or half-turns), playing the drum between each adjustment. Never crank up the snares too much. If you have to make the snares really tight, you've probably tuned the drum badly and you'll end up choking the drum.

13. Follow the checklist #2
Two key give-aways to over-tight snares:
A. Tap the centre of the batter side very softly. If there is no clear snare sound, the wires are too tight
B. When putting the release into the 'on' position, a snap of the wires occurs some way before the lever reaches its fully on position. It shouldn't happen before the lever reaches its final position
14. Eliminate buzz
If you have a six-lug drum (such as a 10" snare) you will need to start by applying even tension to all lugs and tuning evenly all round. Complete the method as described above, but if you do experience buzz problems (less likely with smaller snare drums) either when you strike the drum, or in relation to your other drums (this is known as 'sympathetic vibration'), try loosening each pair of lugs either side of the snare wires on the bottom head by a tiny amount (a quarter-turn should do it).
Compensate for tuning of the whole head by tightening the remaining lugs by a similar amount. This should do it. If you still get sympathetic vibration from other drums, you've probably matched the pitch of the snare too closely to another drum (often the smallest tom). So, retune one or both offending drums.
Liked this? Then try:
8 simple steps to tuning your toms
7 simple steps to tuning your bass drum
The 17 most outrageous drum kits on the internet
Sign up for our free weekly newsletter
The free MusicRadar newsletter serves up the week's biggest artist and product news stories alongside exclusive tuition and gear reviews. Sign up here!
Follow MusicRadar on Twitter
Get instant updates and bonus content plus chat with the team. Start here!
