How to create an effective buildup and breakdown: "The key to a good breakdown is developing contrast between the drop and the break"
How to build the tension leading to that magic moment
In dance music, the breakdown and buildup are the parts of a song that come just before the drop. The main purpose of these two sections is to build tension, and prepare listeners for the drop. An effective breakdown and buildup creates a high level of anticipation and makes listeners aware that something exciting (the drop) is about to happen.
In the breakdown, elements of the track are stripped away to provide a sparser musical landscape, and during the buildup, tension is added through the use of risers, snare rolls, and long crashes.
Before beginning to structure your buildup and breakdown, it’s a good idea to have a solid idea for your drop written. Listen to references in the same style to hear how other producers created their breakdowns and buildups.
If there are any types of effects or elements that you like, make a note of them so you can include similar sounds in your track. The key to a good breakdown is developing contrast between the drop and the break.
Creating the elements for your breakdown
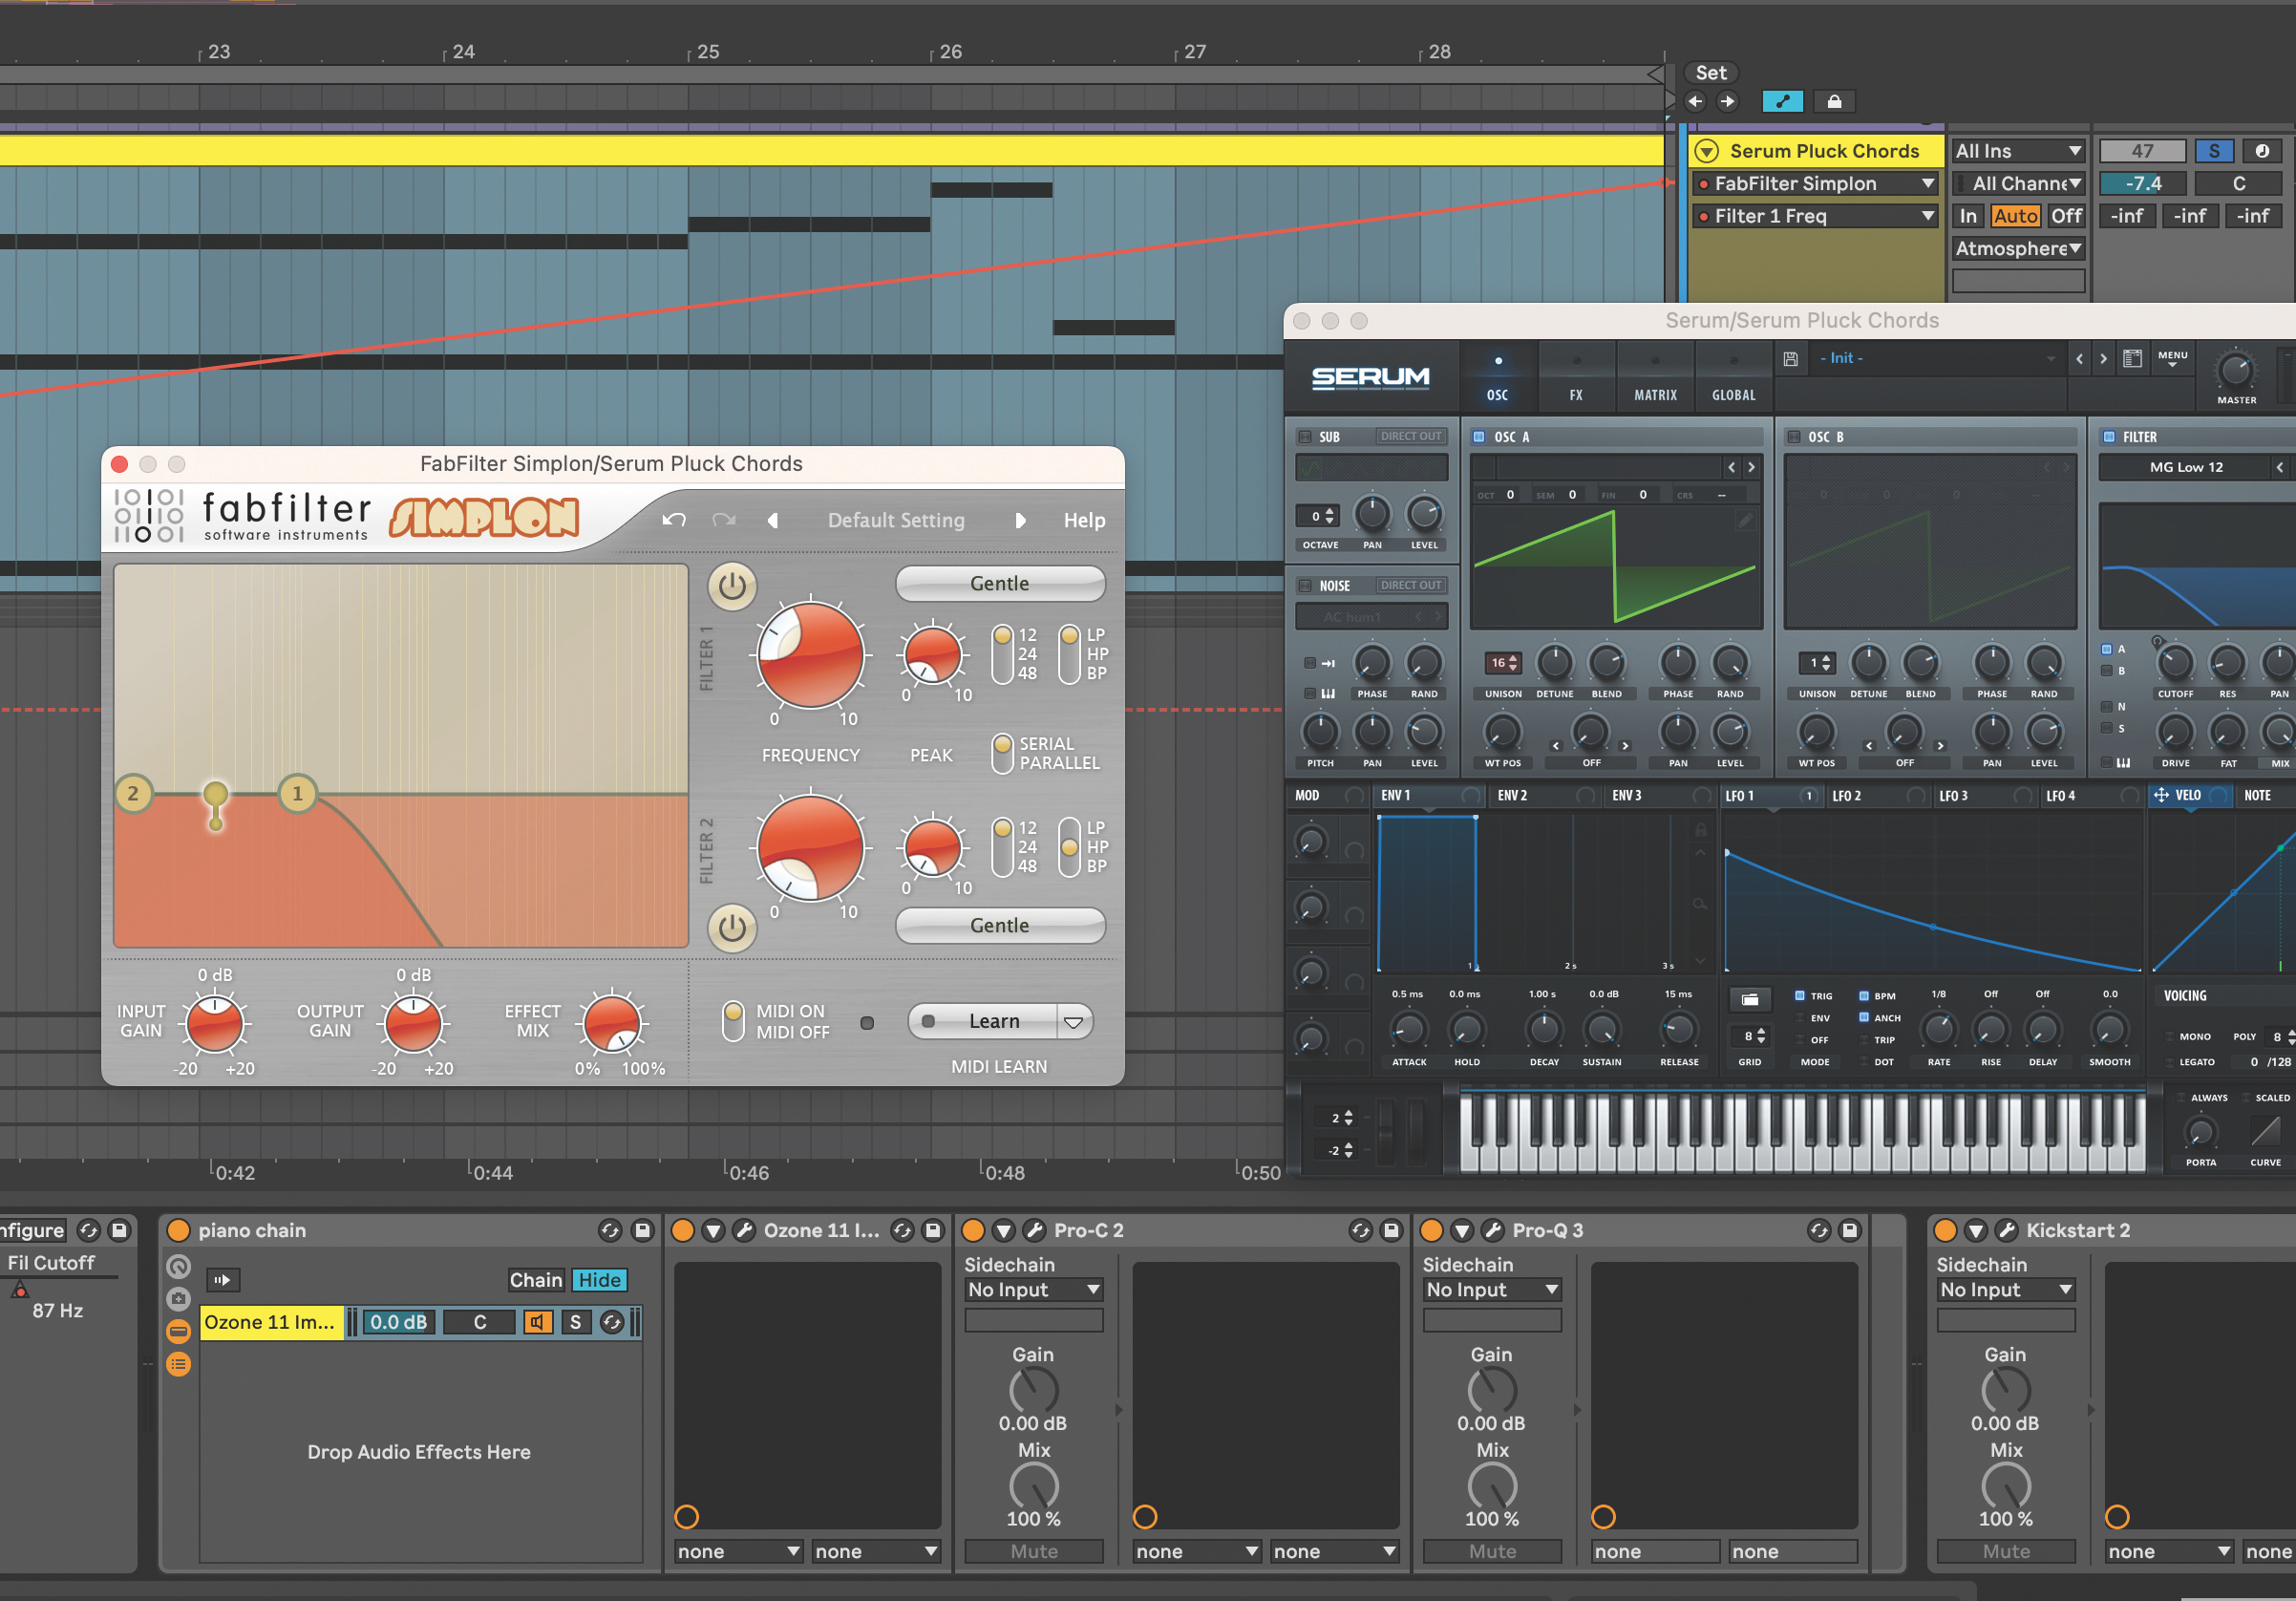
Add a chord progression in the key of your track. Add movement to the chords by automating an EQ or filter, and using a high-pass filter to cut off the high frequencies. At the start of the breakdown, begin with the filter at 200 Hz and open up the frequency of the filter to 20 kHz over the duration of the breakdown.
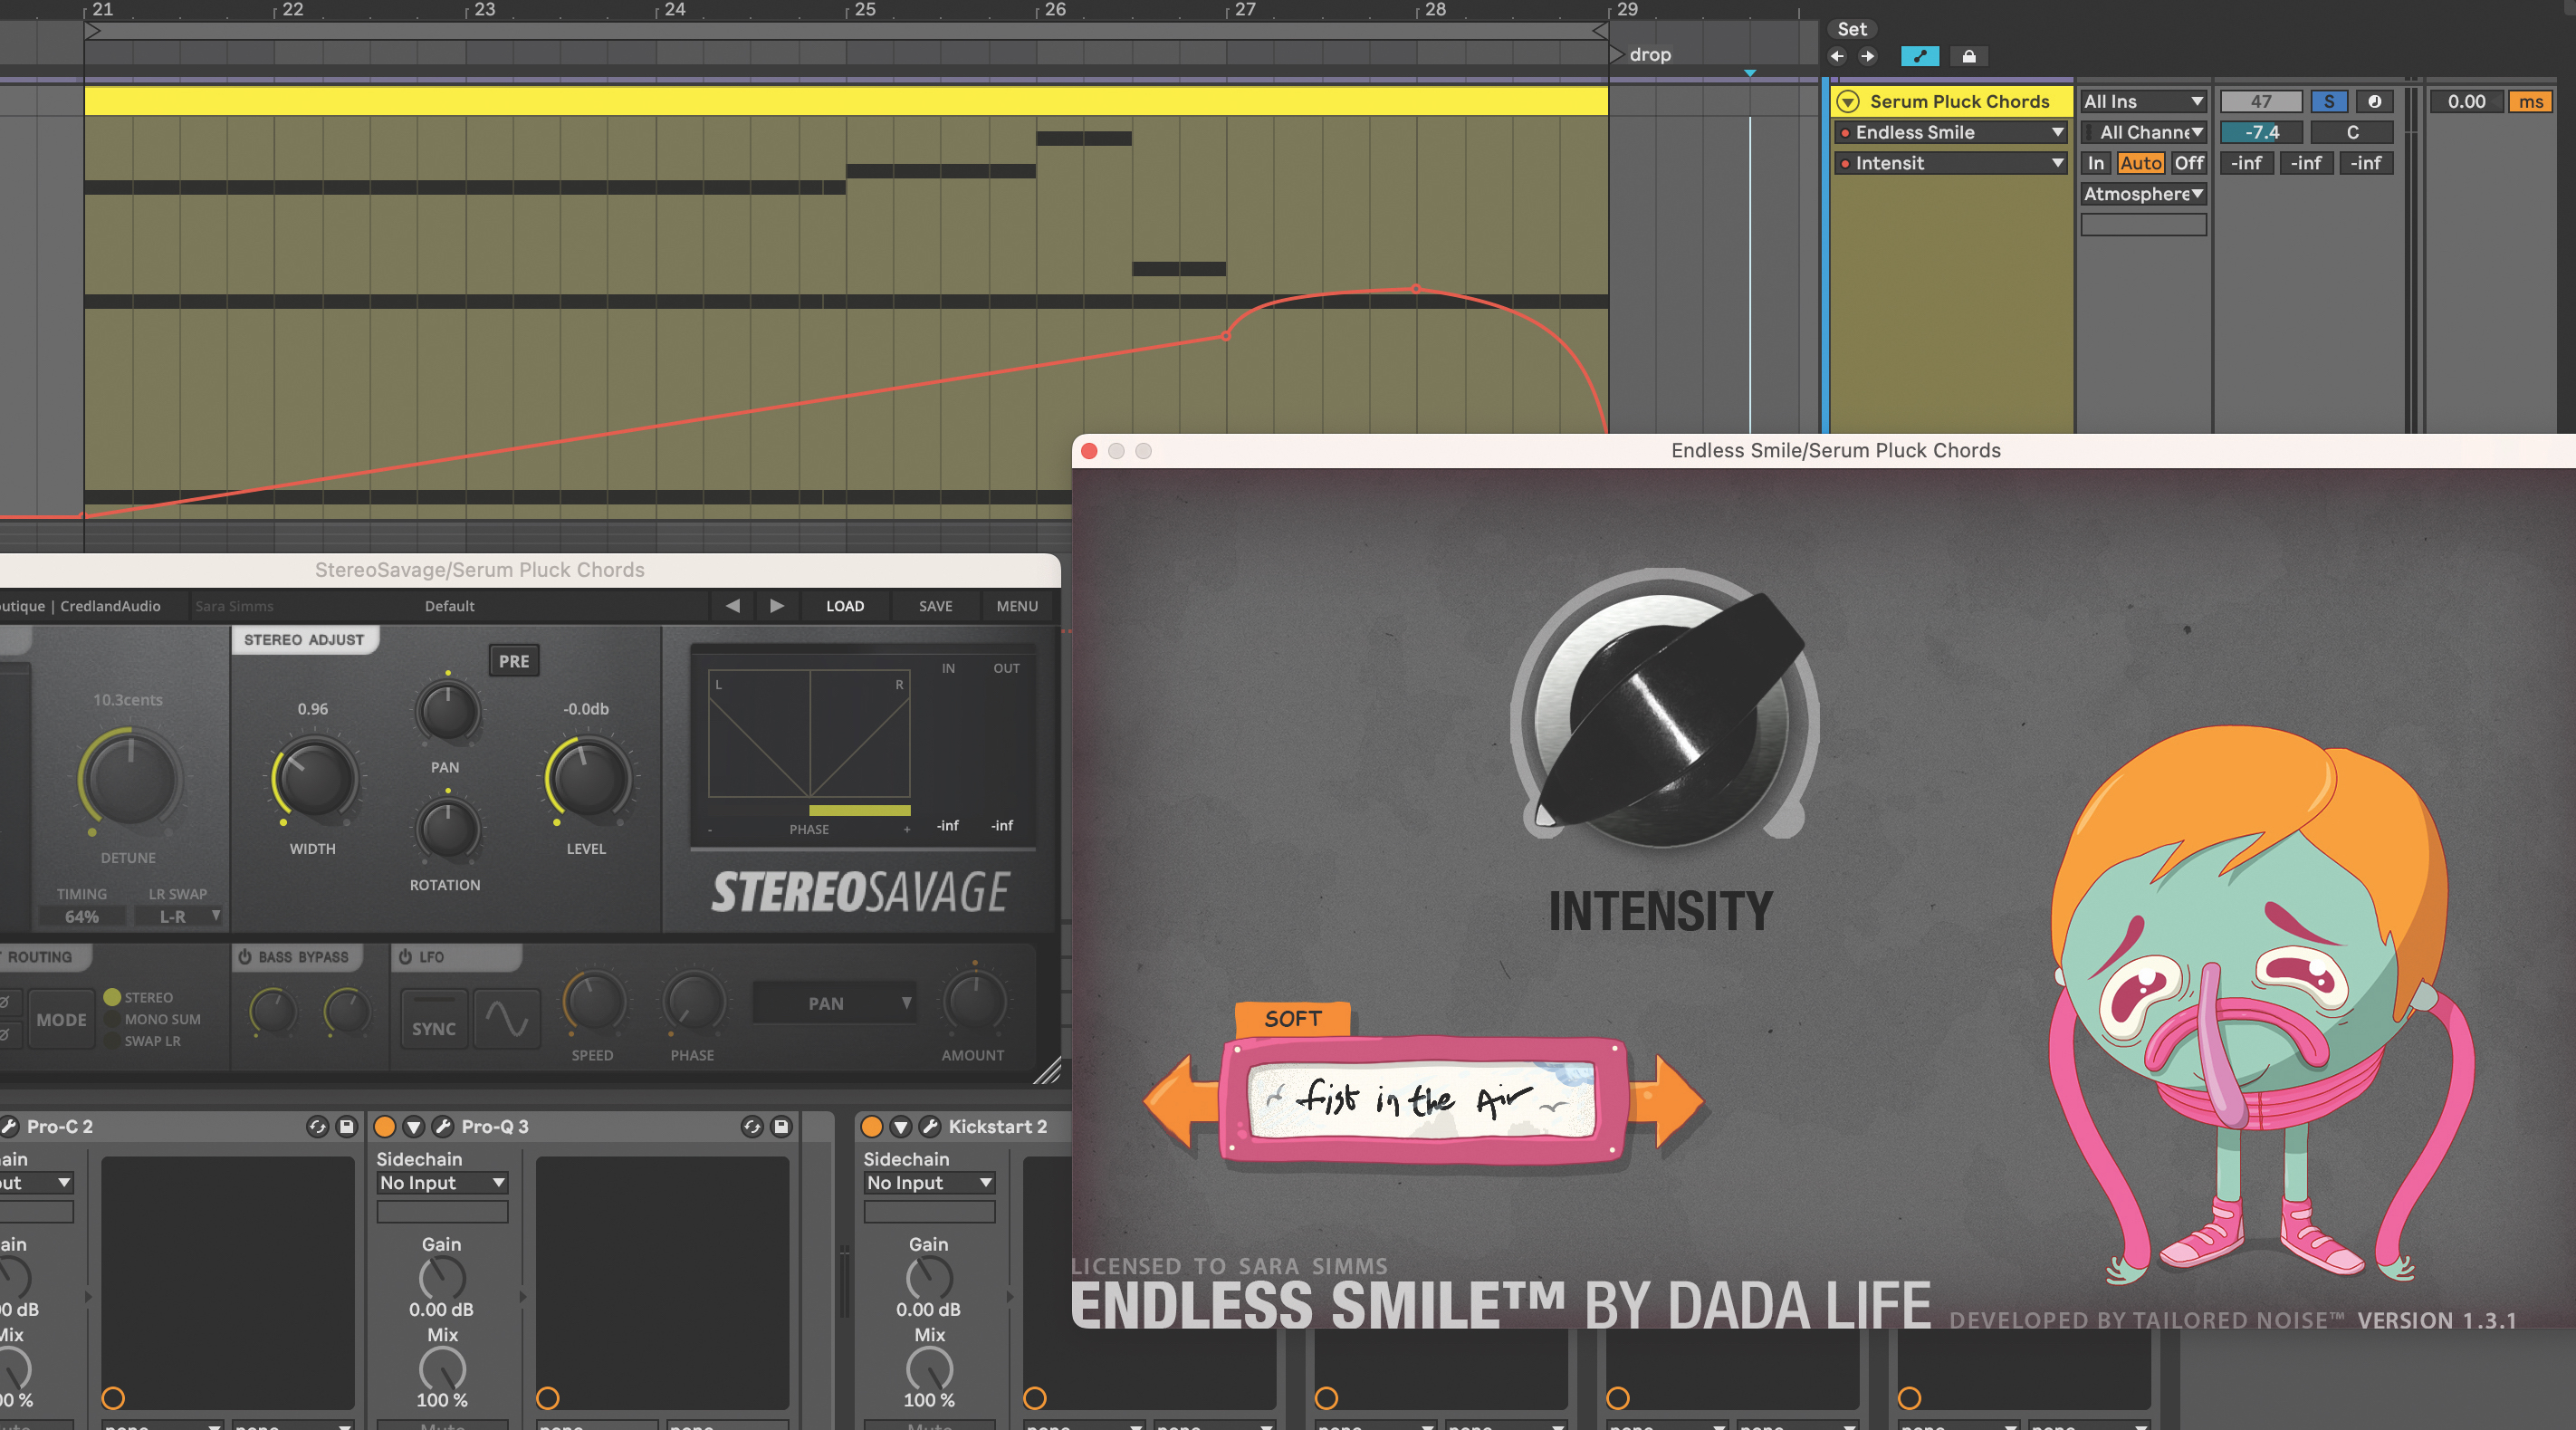
Try adding a stereo-widening plugin like StereoSavage to the chords, and automate the width so that the chords get wider over time. Use an automation plugin, such as Endless Smile, to automate both reverb and delay at the same time. Start with the intensity at a low setting and dial it up so the chords become more washed out during the breakdown. Turn the intensity down to zero when the drop hits.
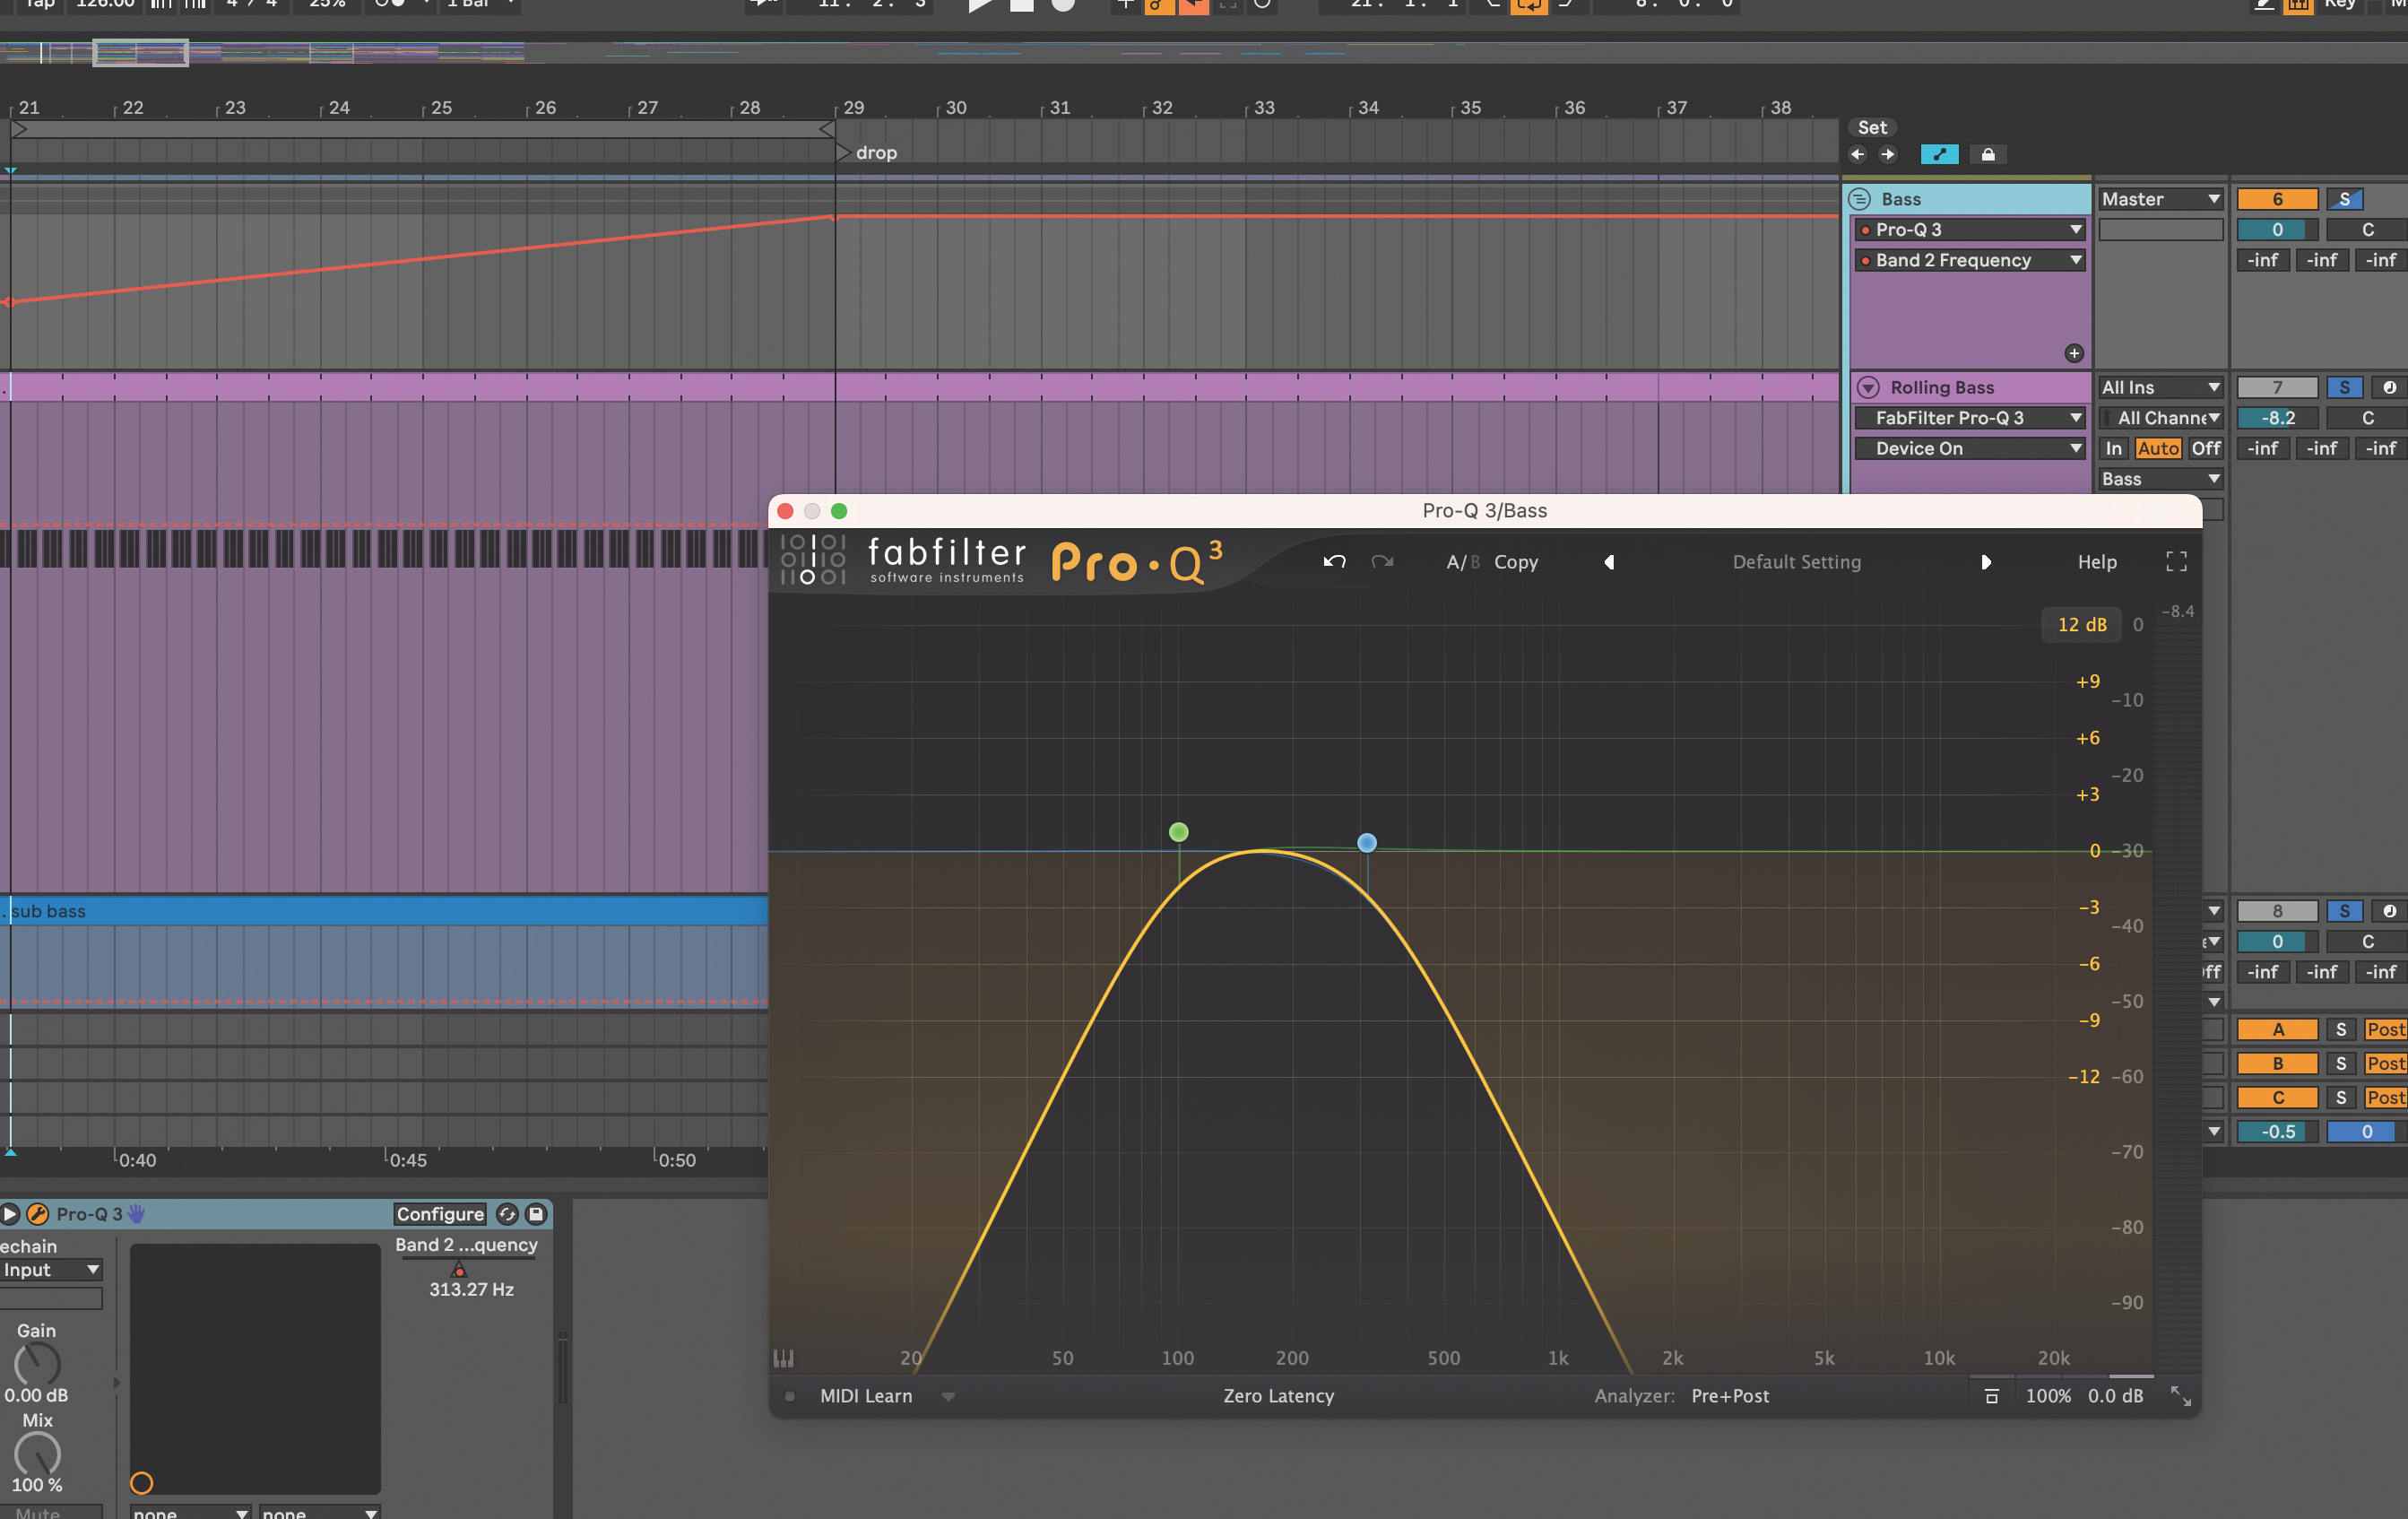
Make your bass sound a little lower in the breakdown by using EQ to reduce the low end. You don’t want to have a really strong bass in the breakdown. Add a filter or EQ and open the filter cutoff of the bass sound throughout the break, starting by having only the lower frequencies audible, and gradually opening up over time.
Want all the hottest music and gear news, reviews, deals, features and more, direct to your inbox? Sign up here.
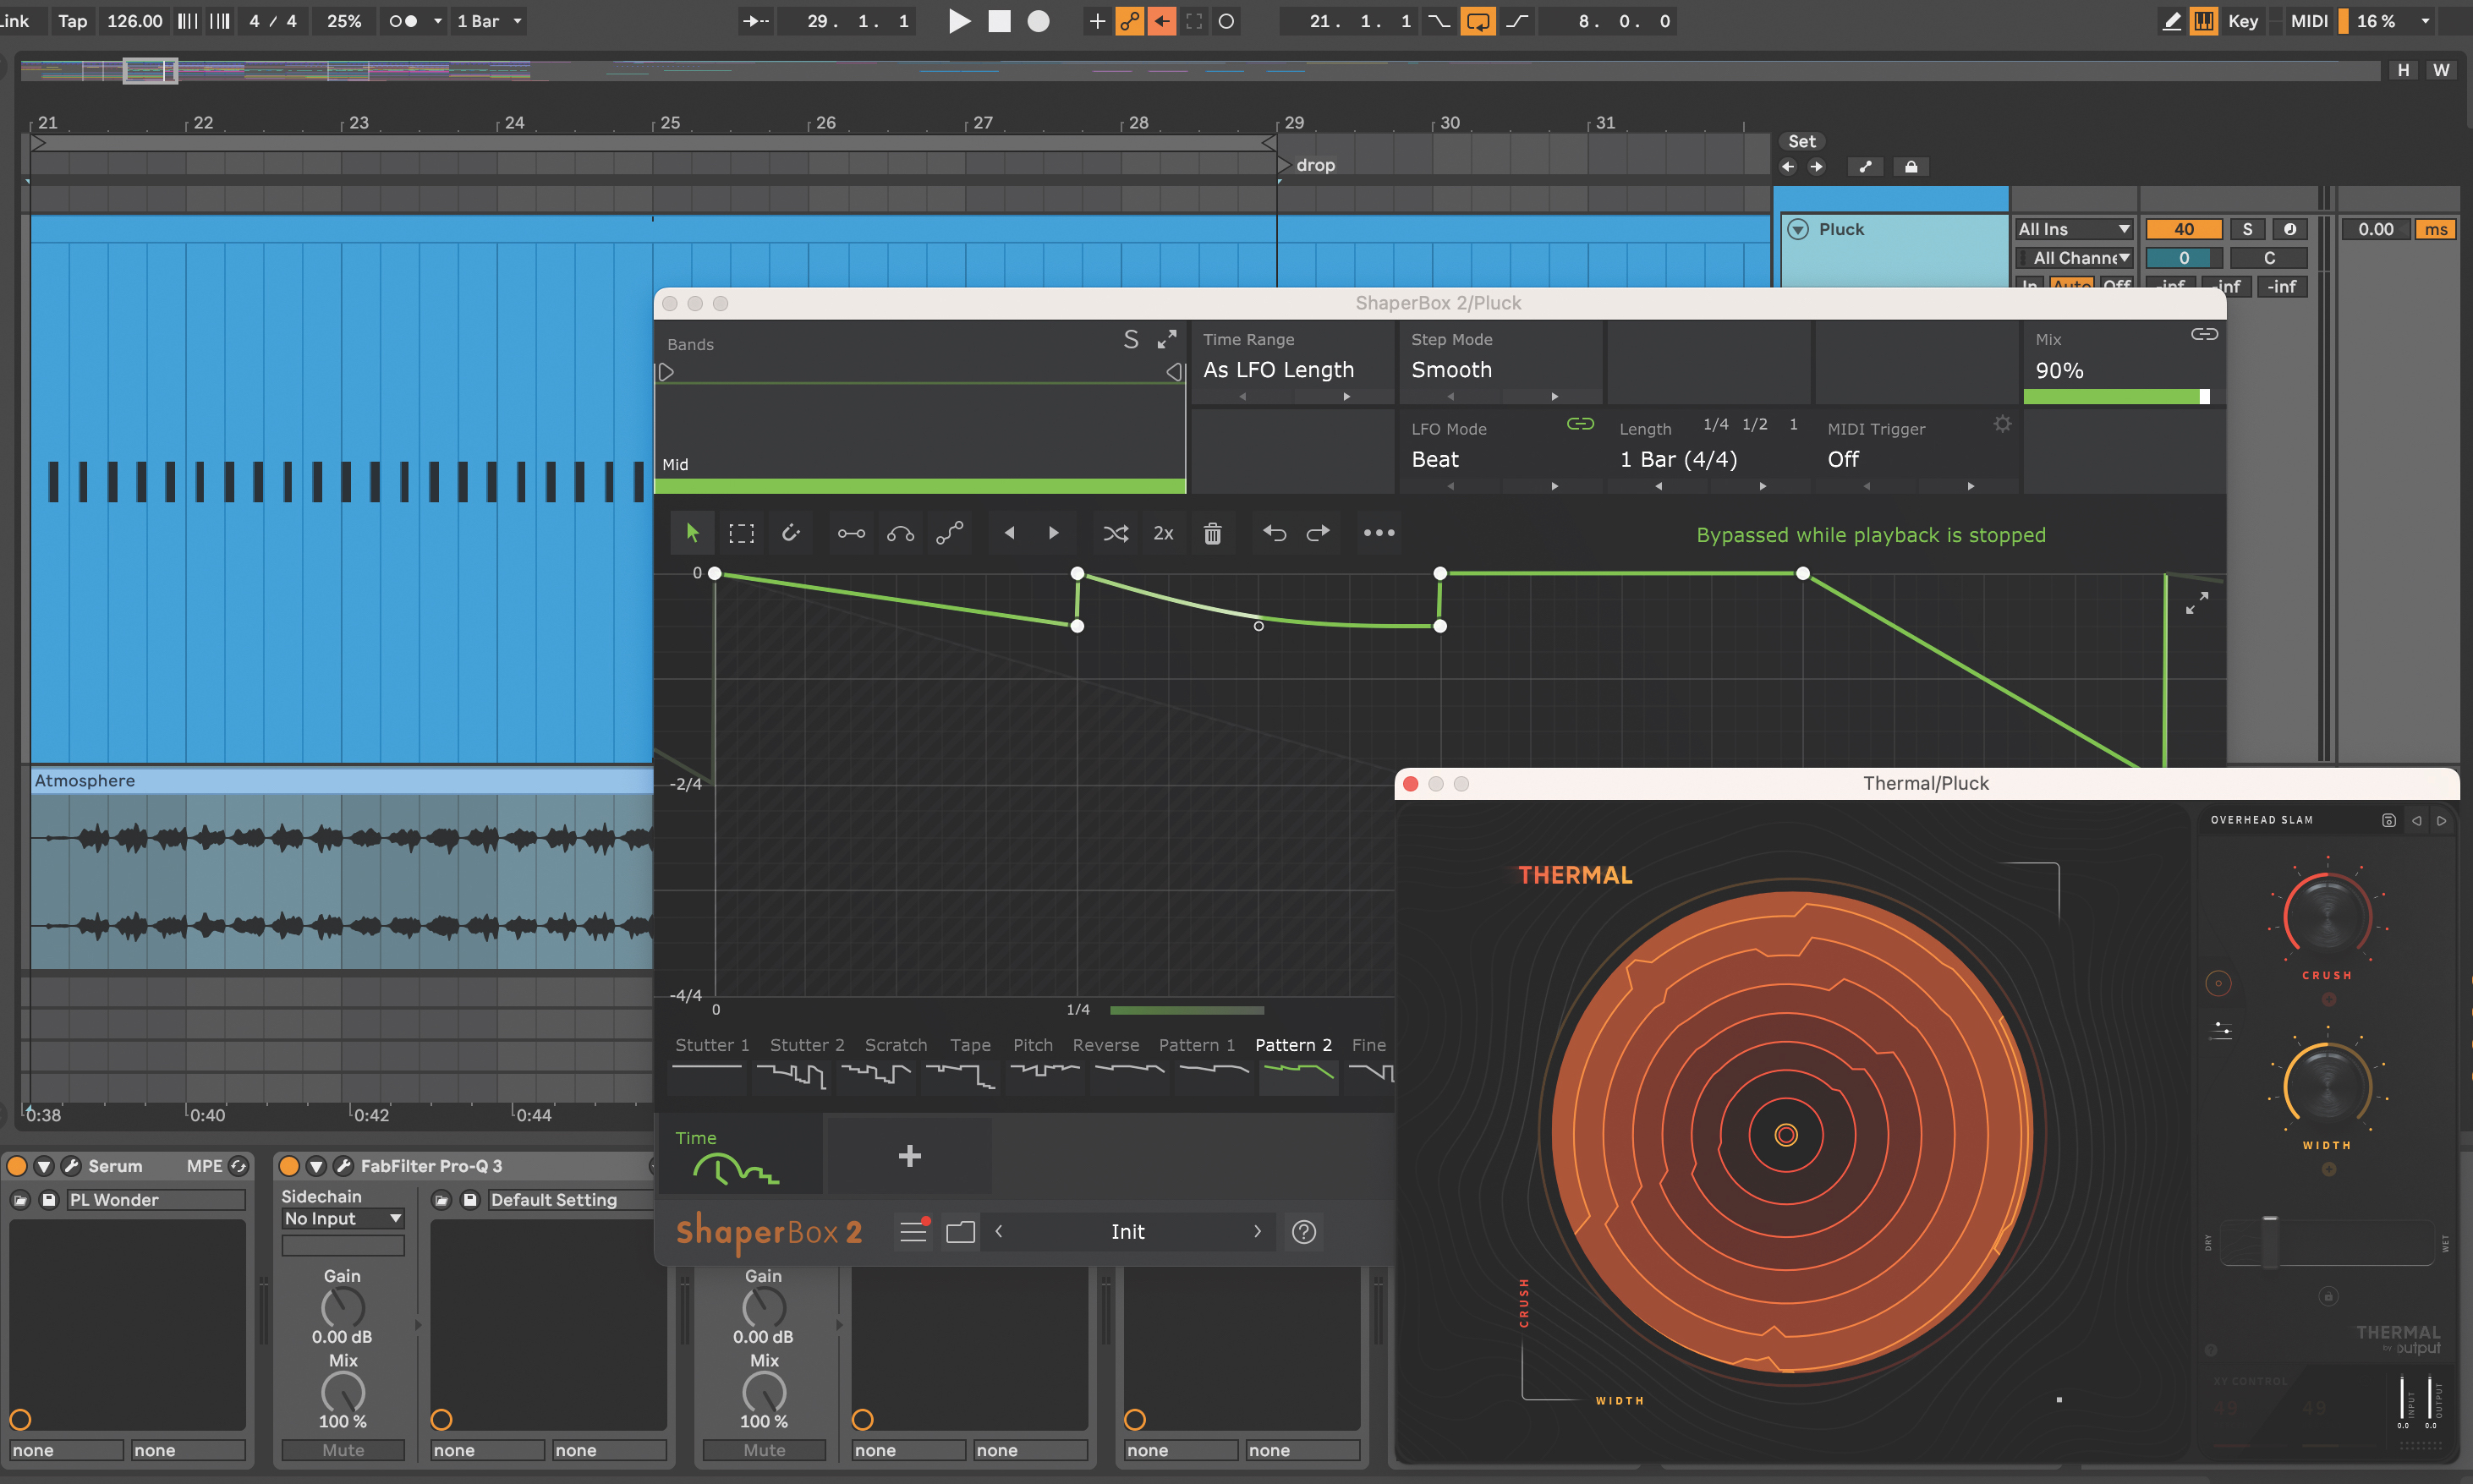
Add atmosphere to the break by choosing a synth sound and creating a simple pattern. We’ve made some wonky effects using Cableguys’ Shaperbox and Output’s Thermal to creative effects. If the sound needs reverb, try adding a reverb with a large hall setting or use Ableton’s reverb and freeze it. Bounce the track to a new audio file and use EQ to cut the low end.
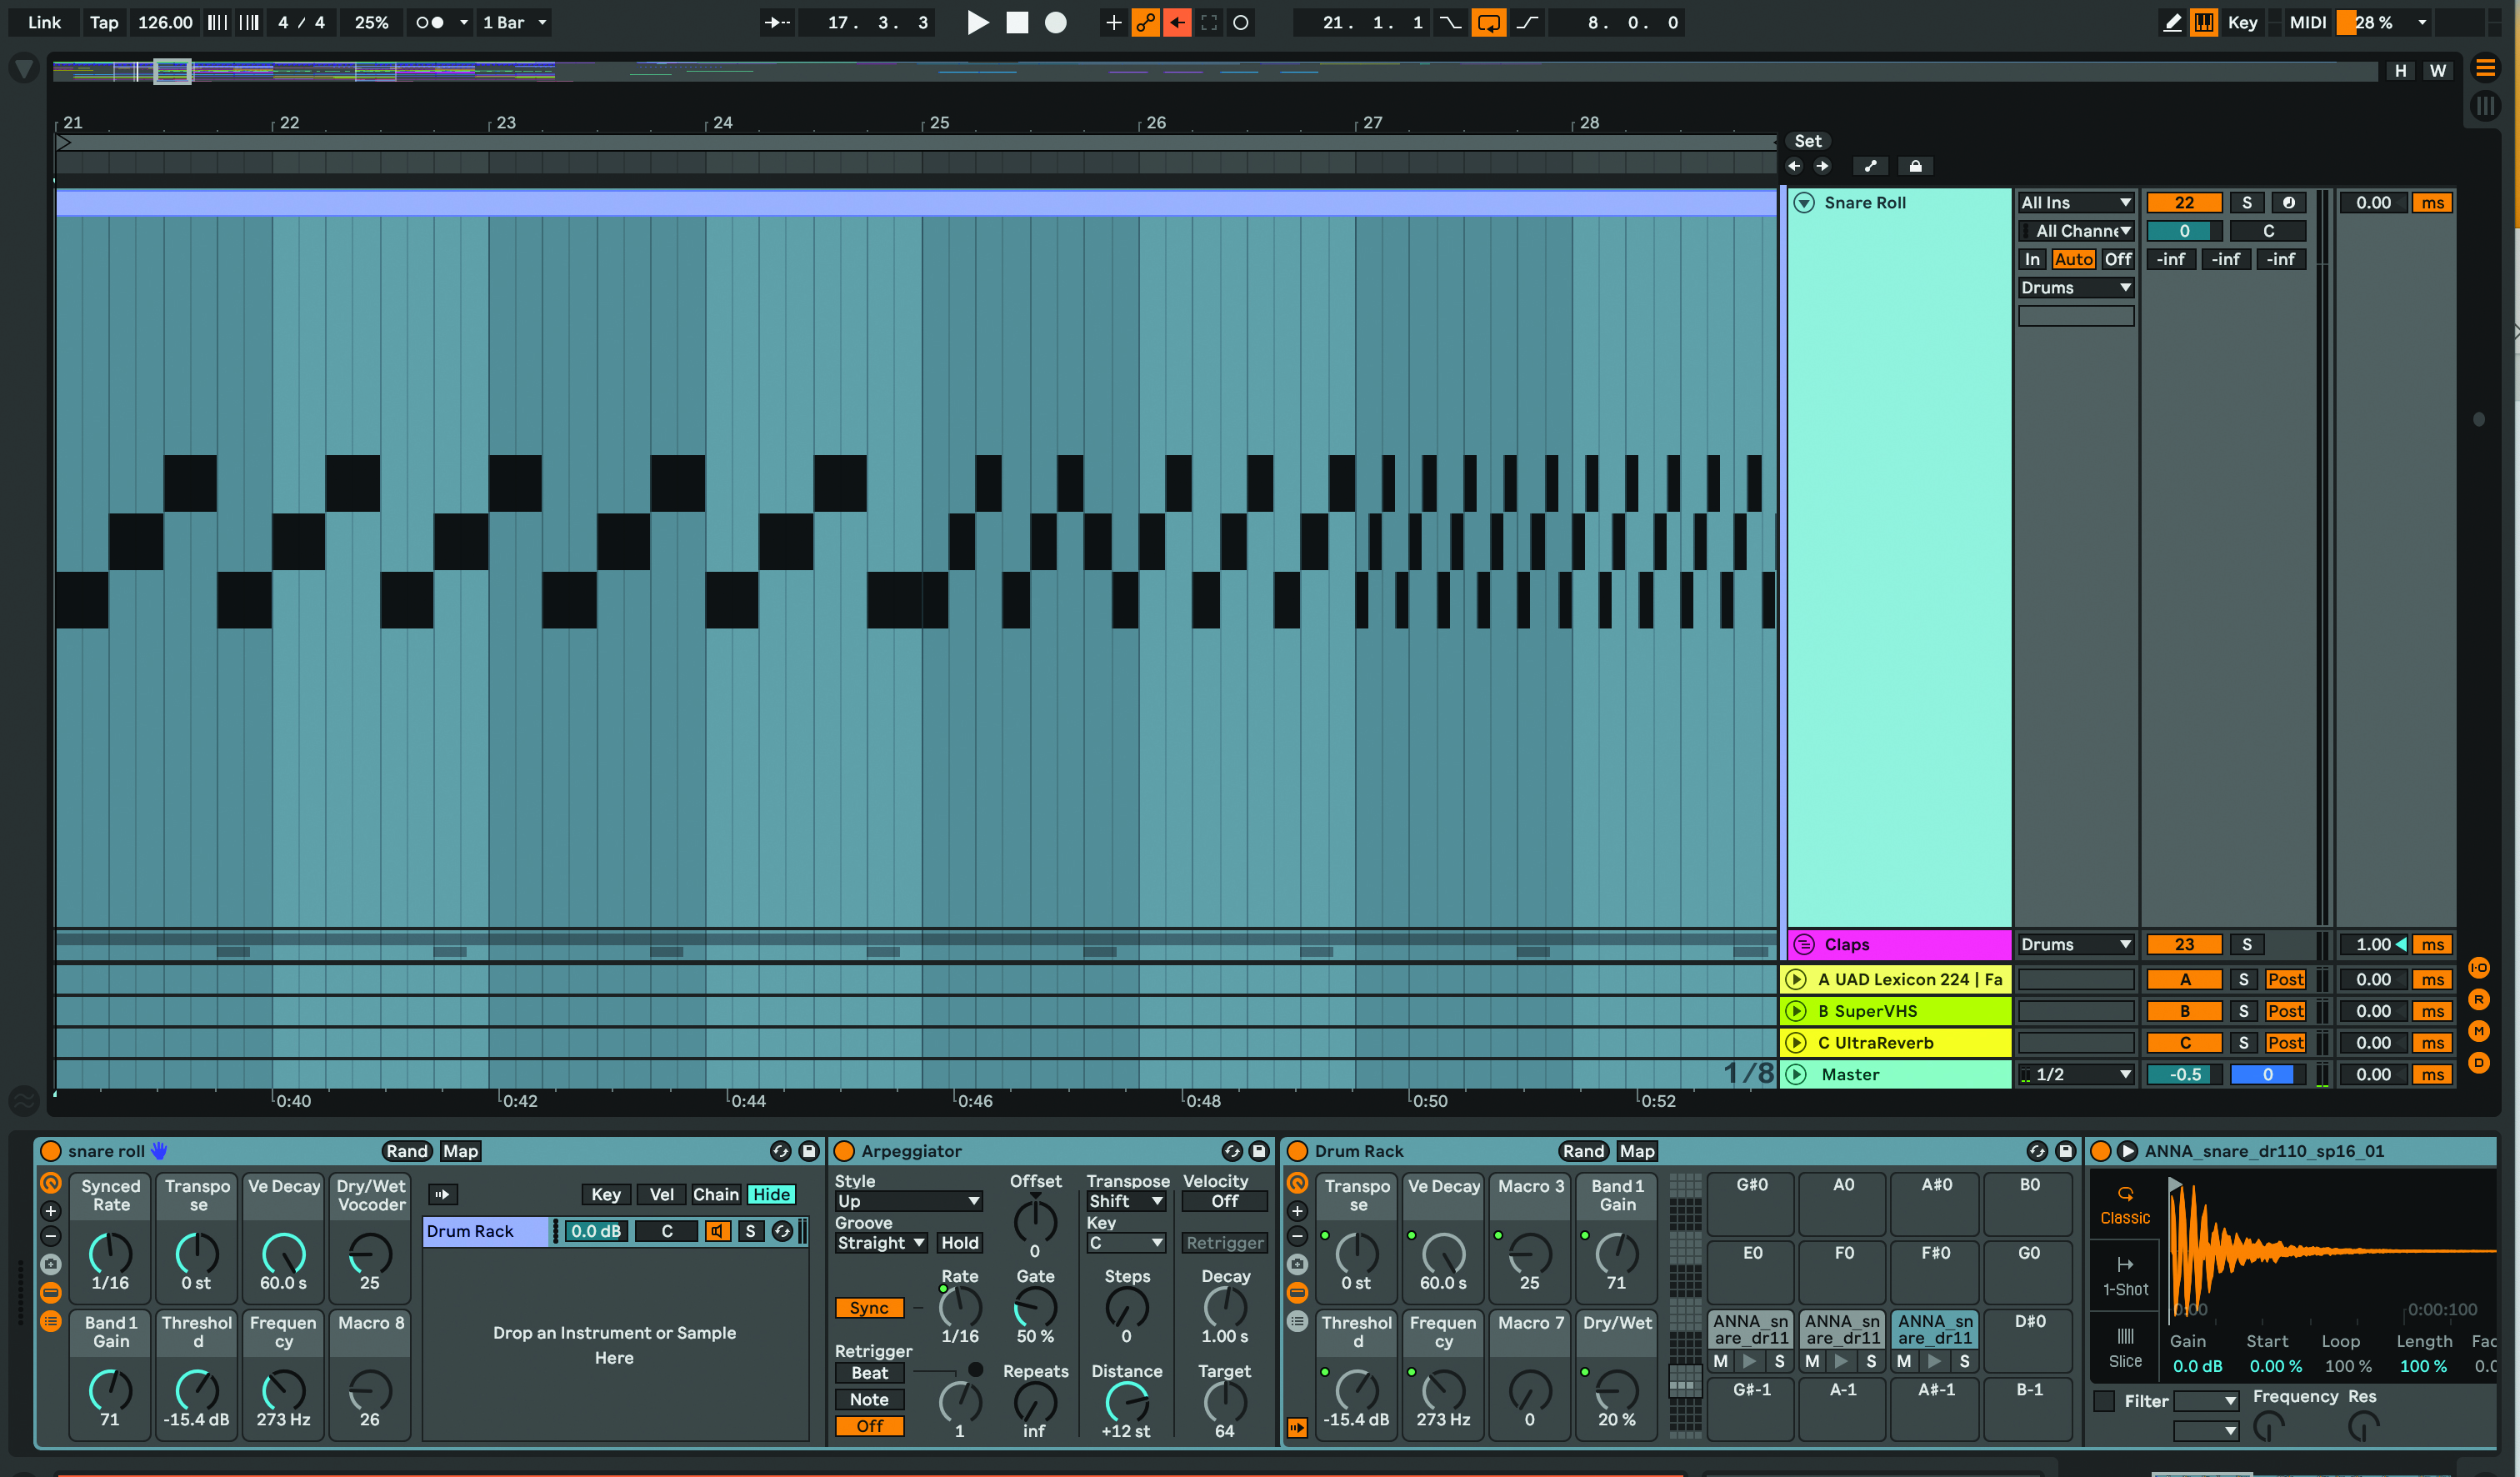
Add in a few percussive parts to keep the rhythm moving and add a snare roll. For a unique sound, create a drum rack, add the same snare three times and EQ each one a little differently. Create a MIDI pattern and add snare hits as eighth notes, then cut the note value in half to 1/16 notes, and then to 1/32 notes.
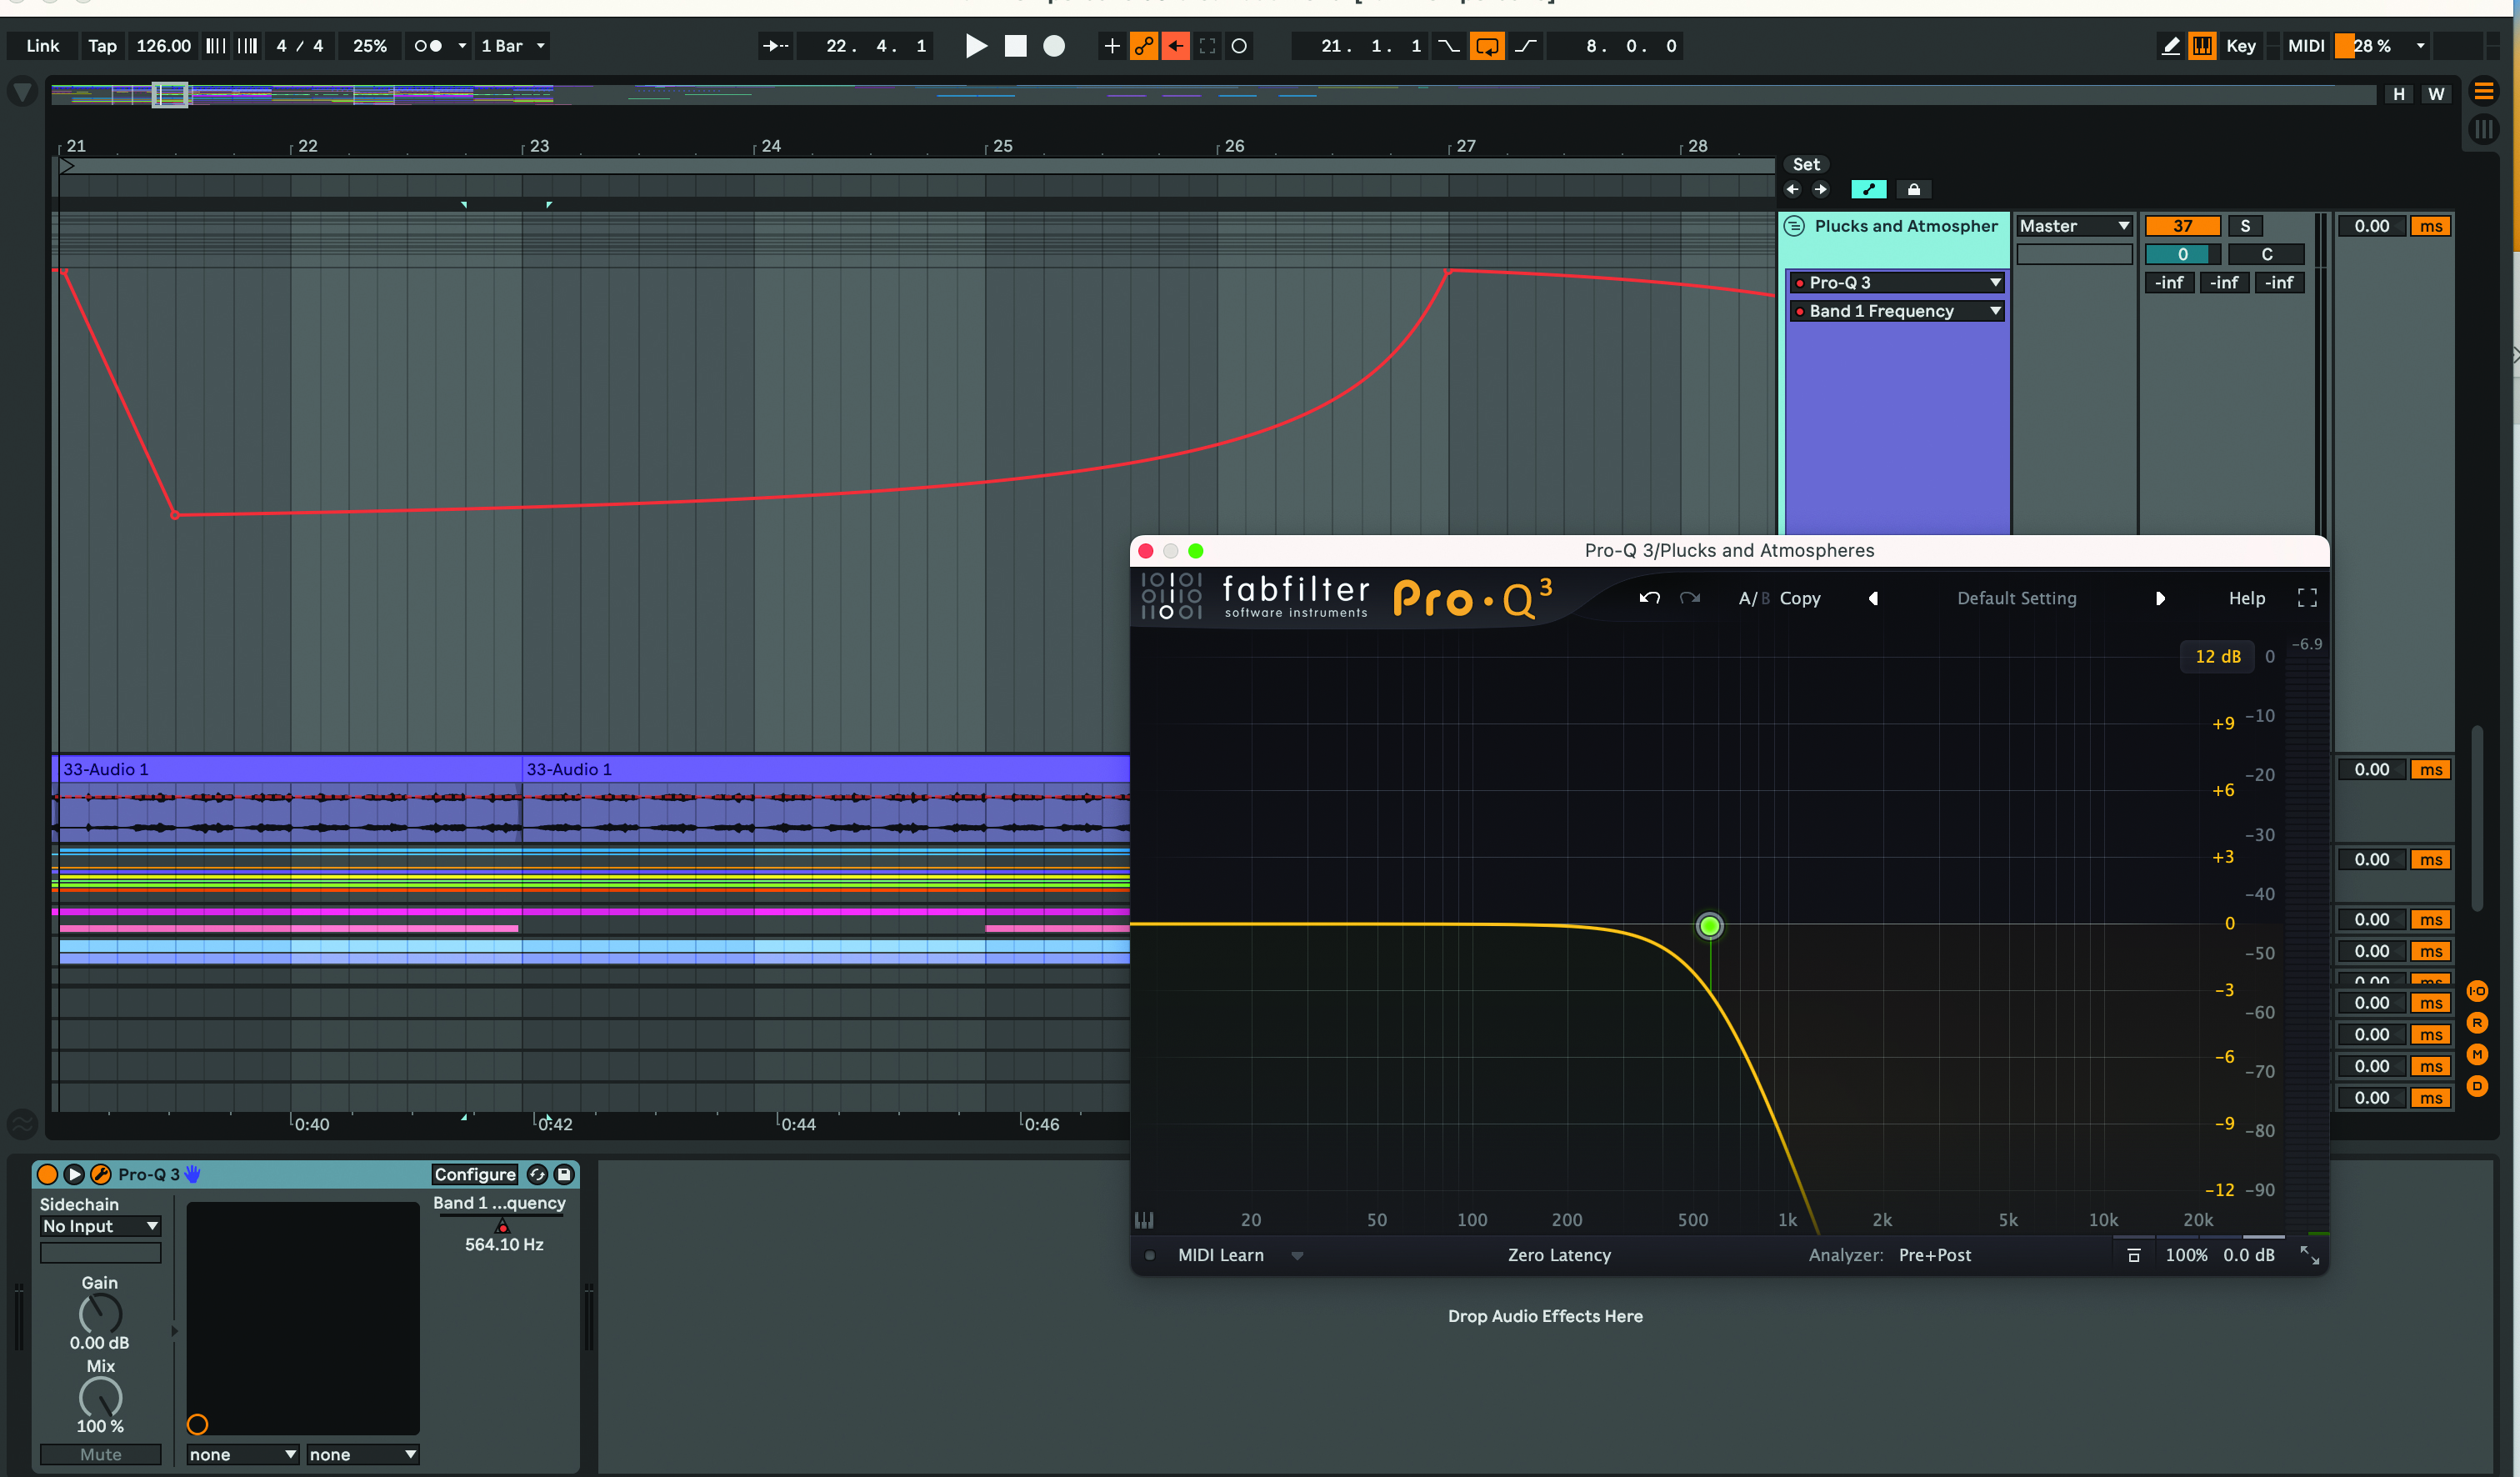
Group all your synths together and add an EQ to automate down the entire synth bus. This is a great technique to use if you have a track that has a vocal. Bring down the filter frequency to 200 Hz or to taste when the vocal comes in and gradually raise up the filter towards the end of the break.
Creating effects and risers for your breakdowns
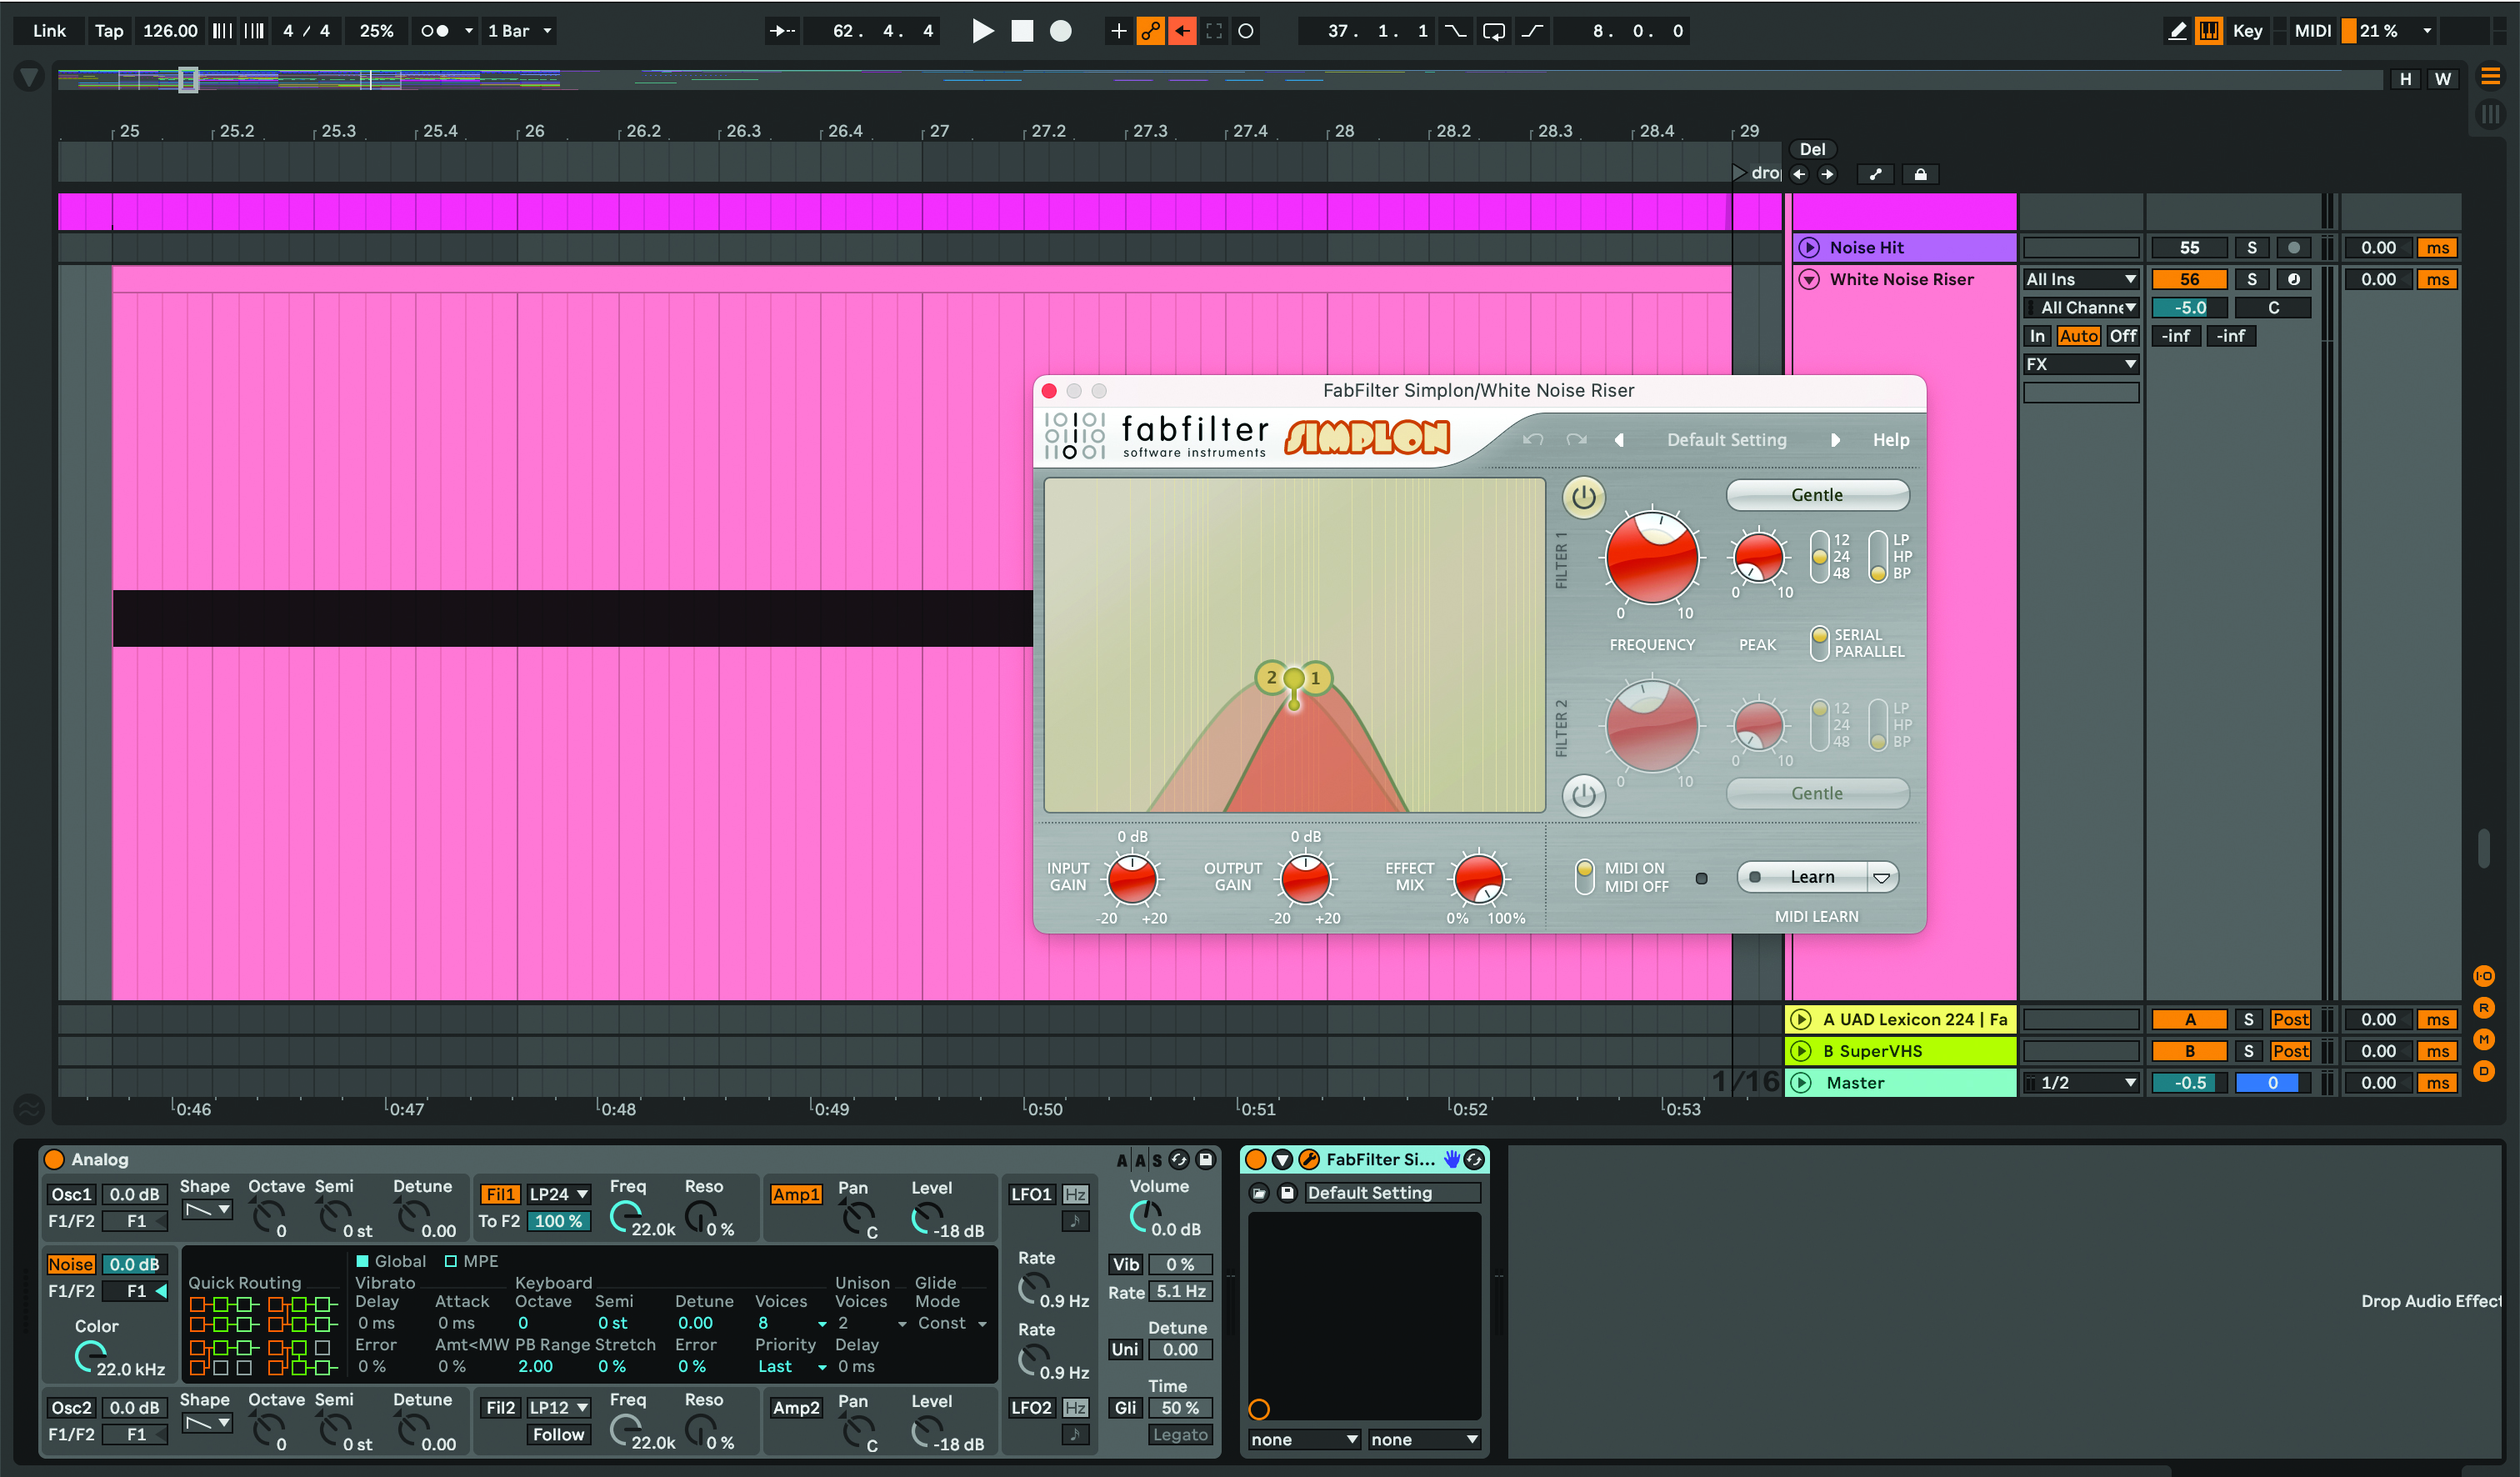
Add a white noise riser to your track. Use a synthesizer plugin, disable the oscillators and turn on the noise. Create a MIDI track and draw in a note for eight bars. Add a filter to cut out the low end, then automate the cutoff frequency for the duration of the noise from around 1000 Hz to 10 kHz.
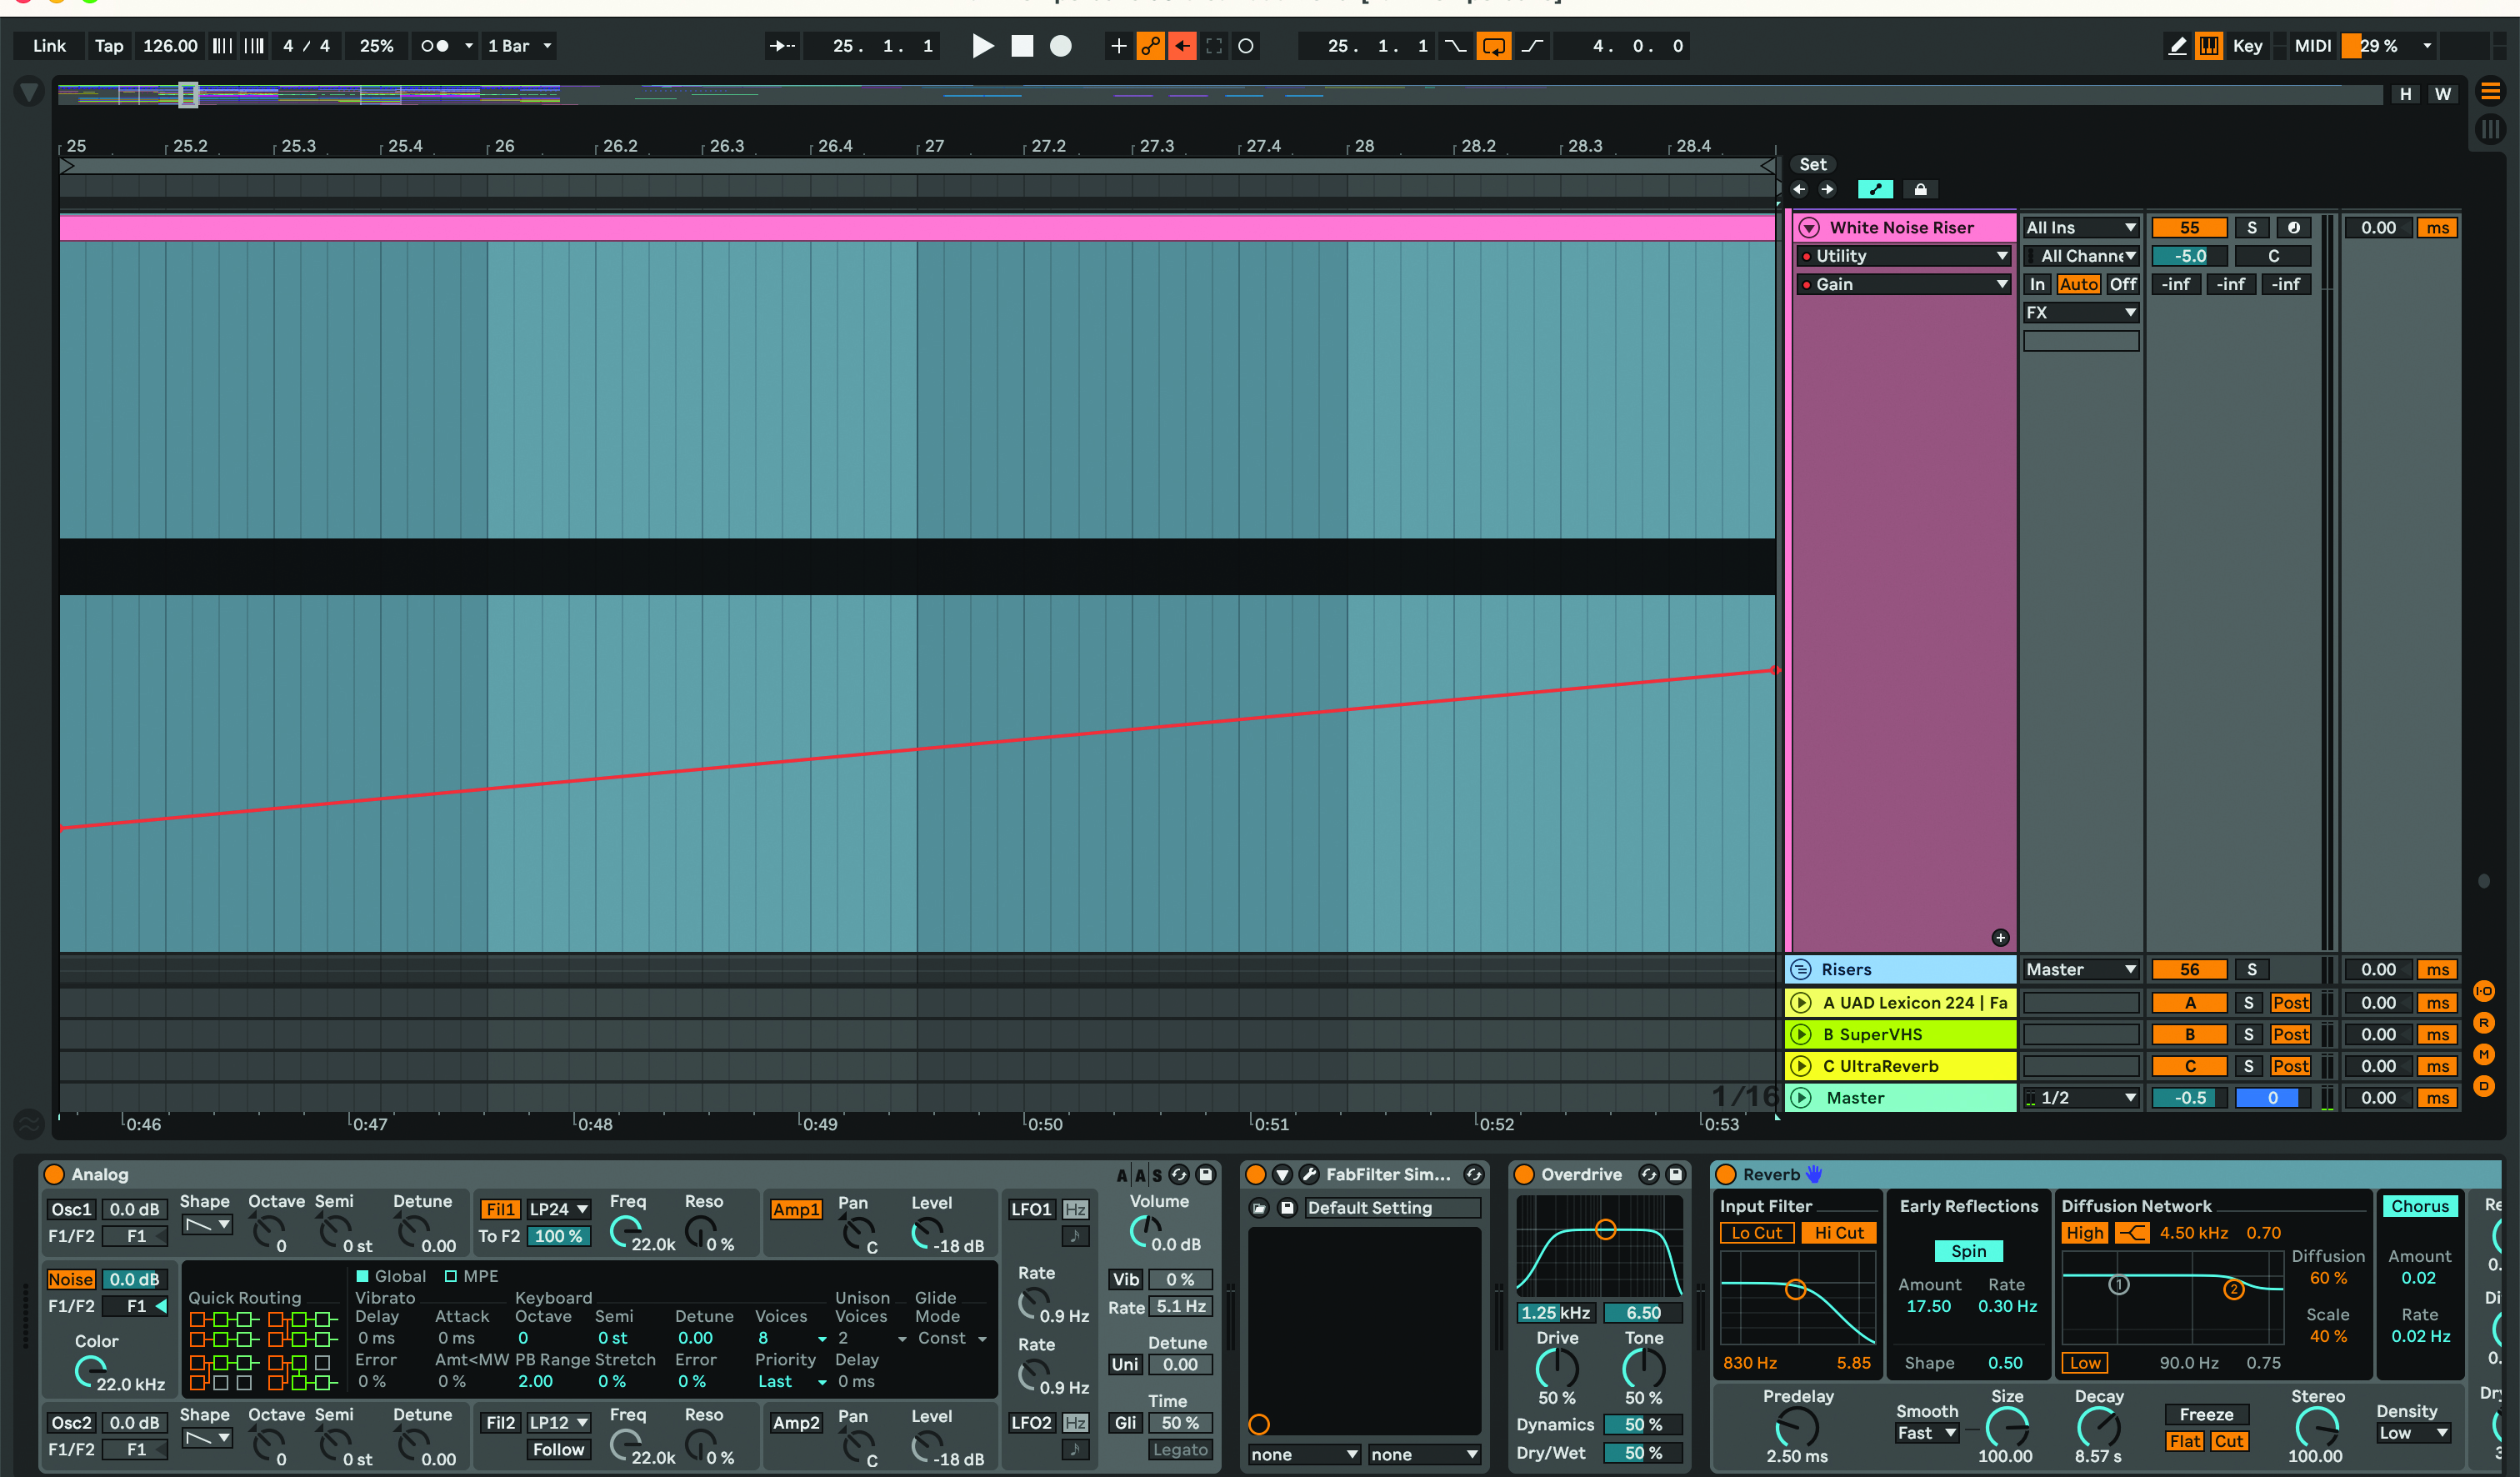
Try adding effects like overdrive and reverb to the white noise. Add a reverb plugin and increase the decay to 8.50 sec, or to taste. Lastly, increase the volume of the white noise over time by adding a utility plugin, and automating the volume from a lower volume at the beginning of the break to a higher one towards the drop.
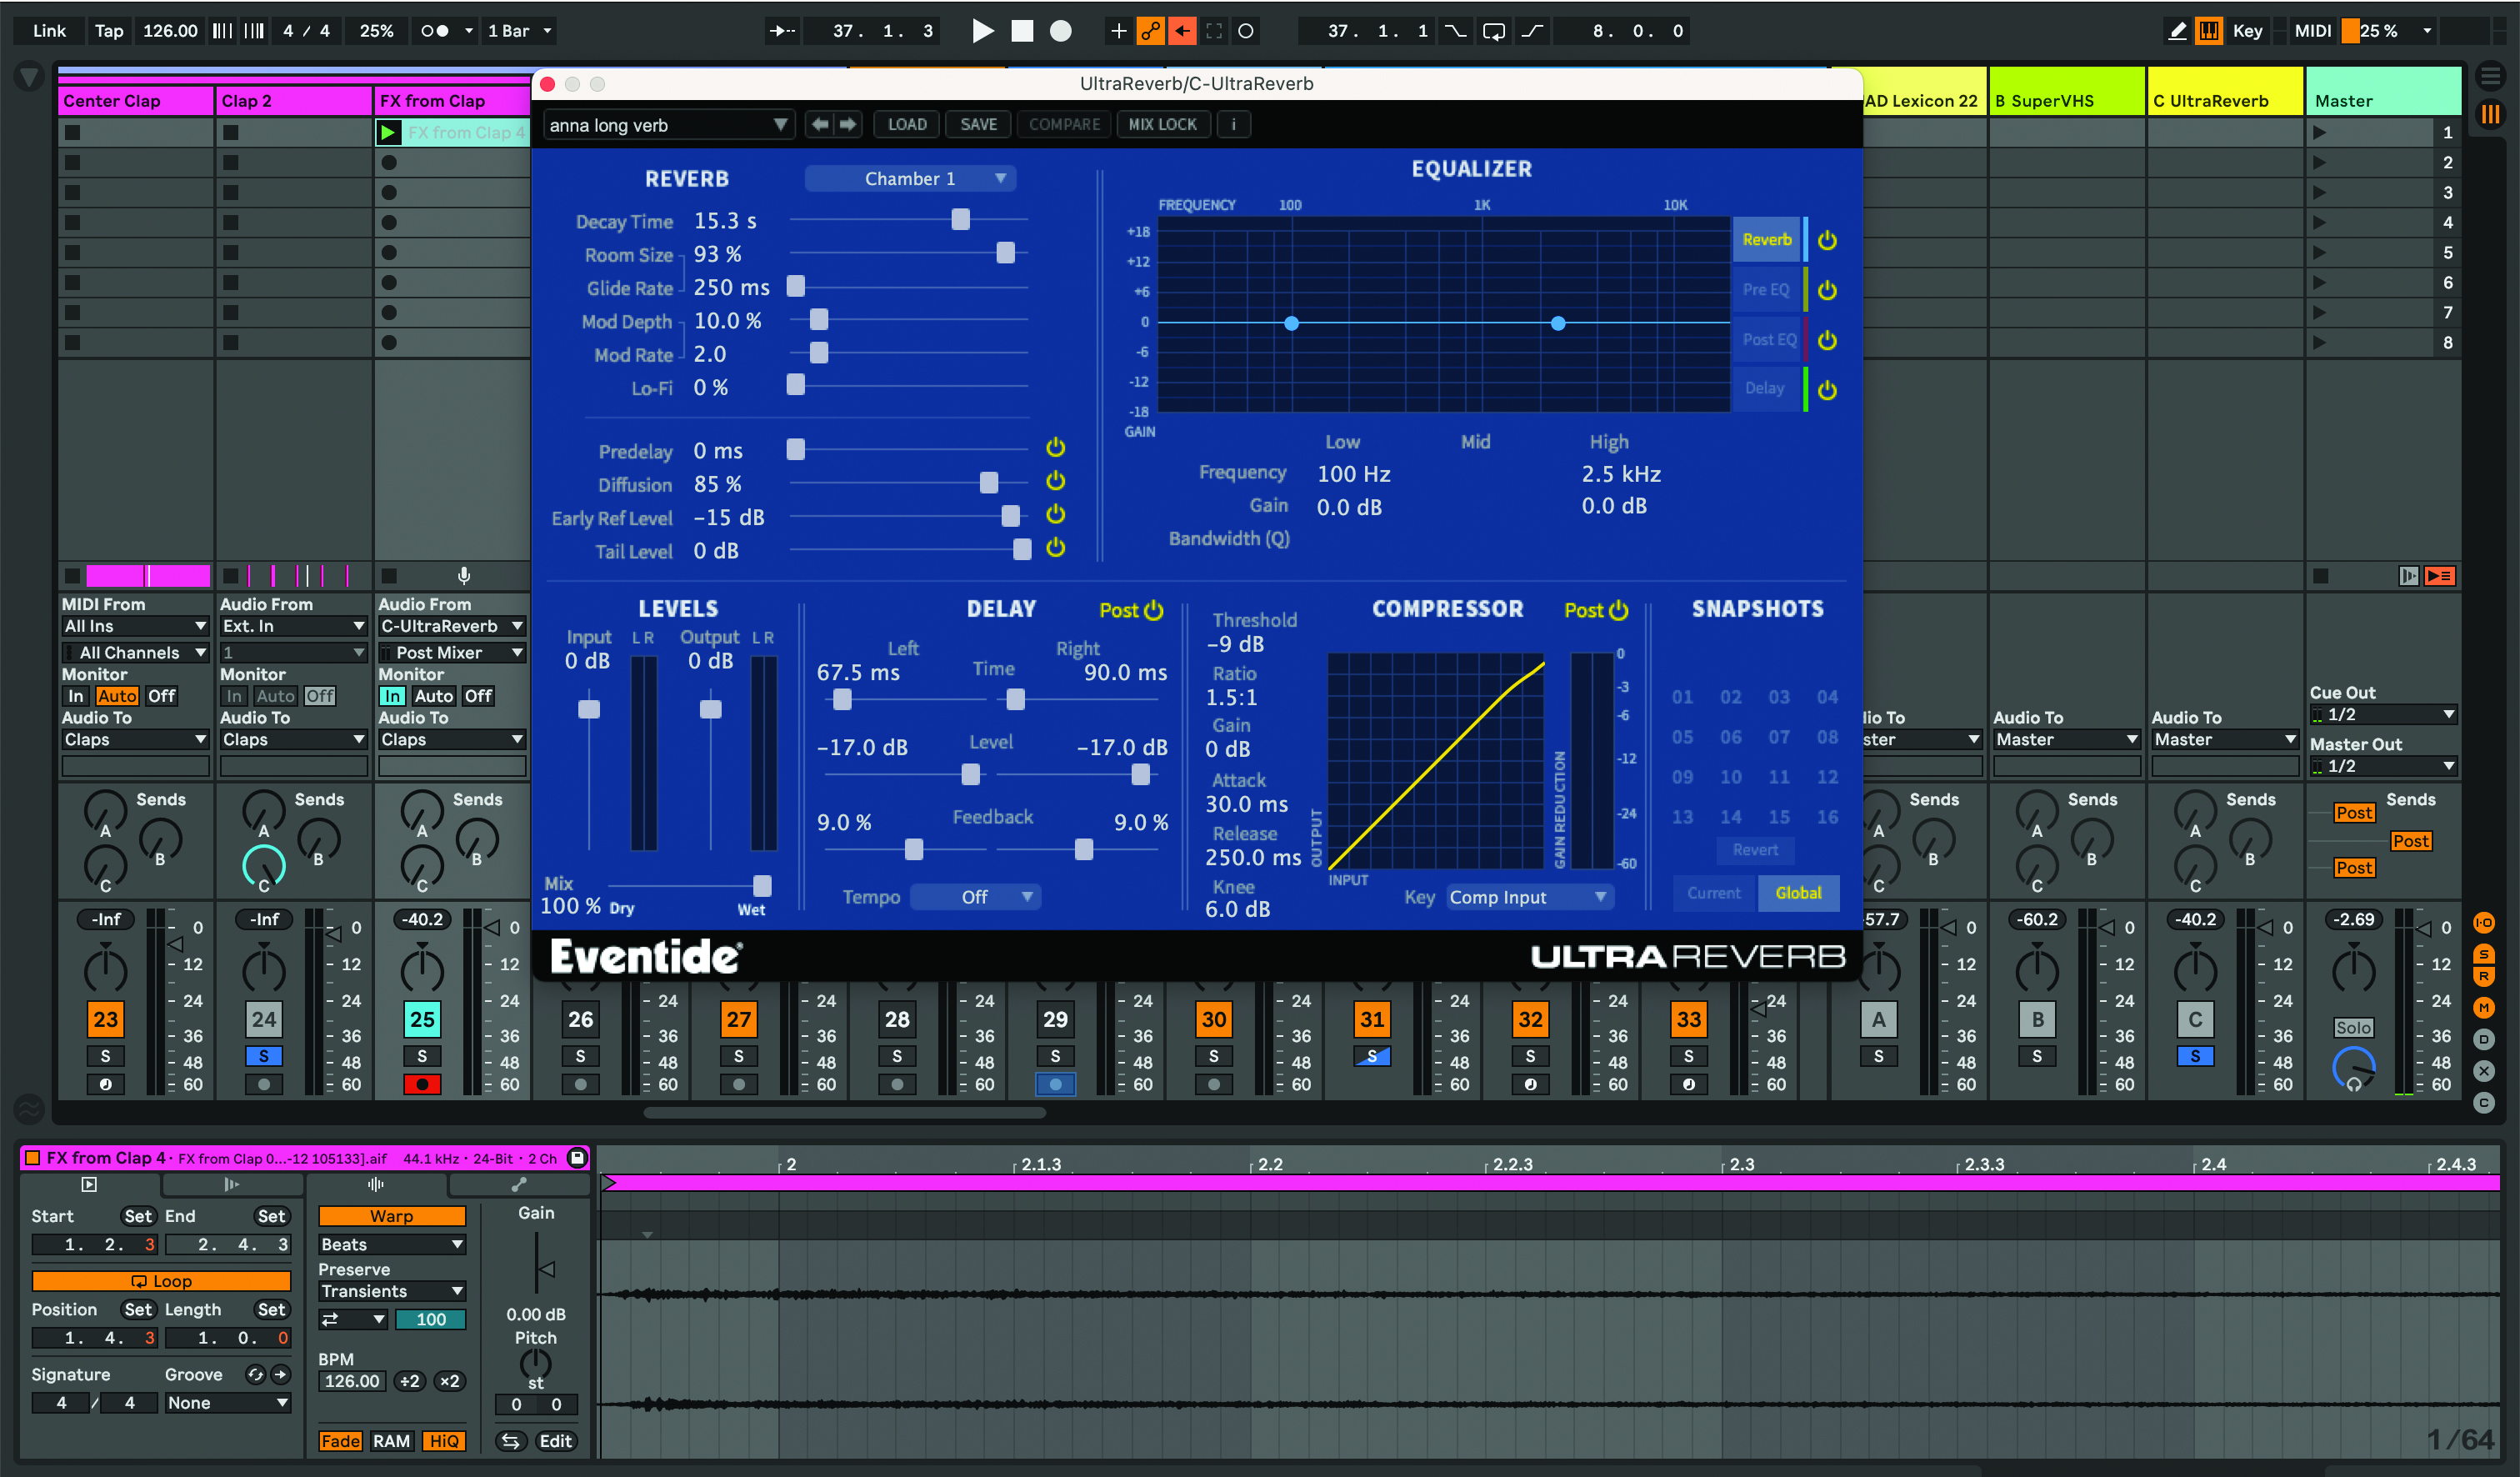
Make effects from crash or clap sounds by inserting a Return Track and adding a reverb like Eventide UltraReverb. Set the decay time to 15.3 sec, room size to 93% and mix to 100% wet. Send a crash from your track to the Return Track. Create a new audio track and set the input to the Return Track and record the crash.
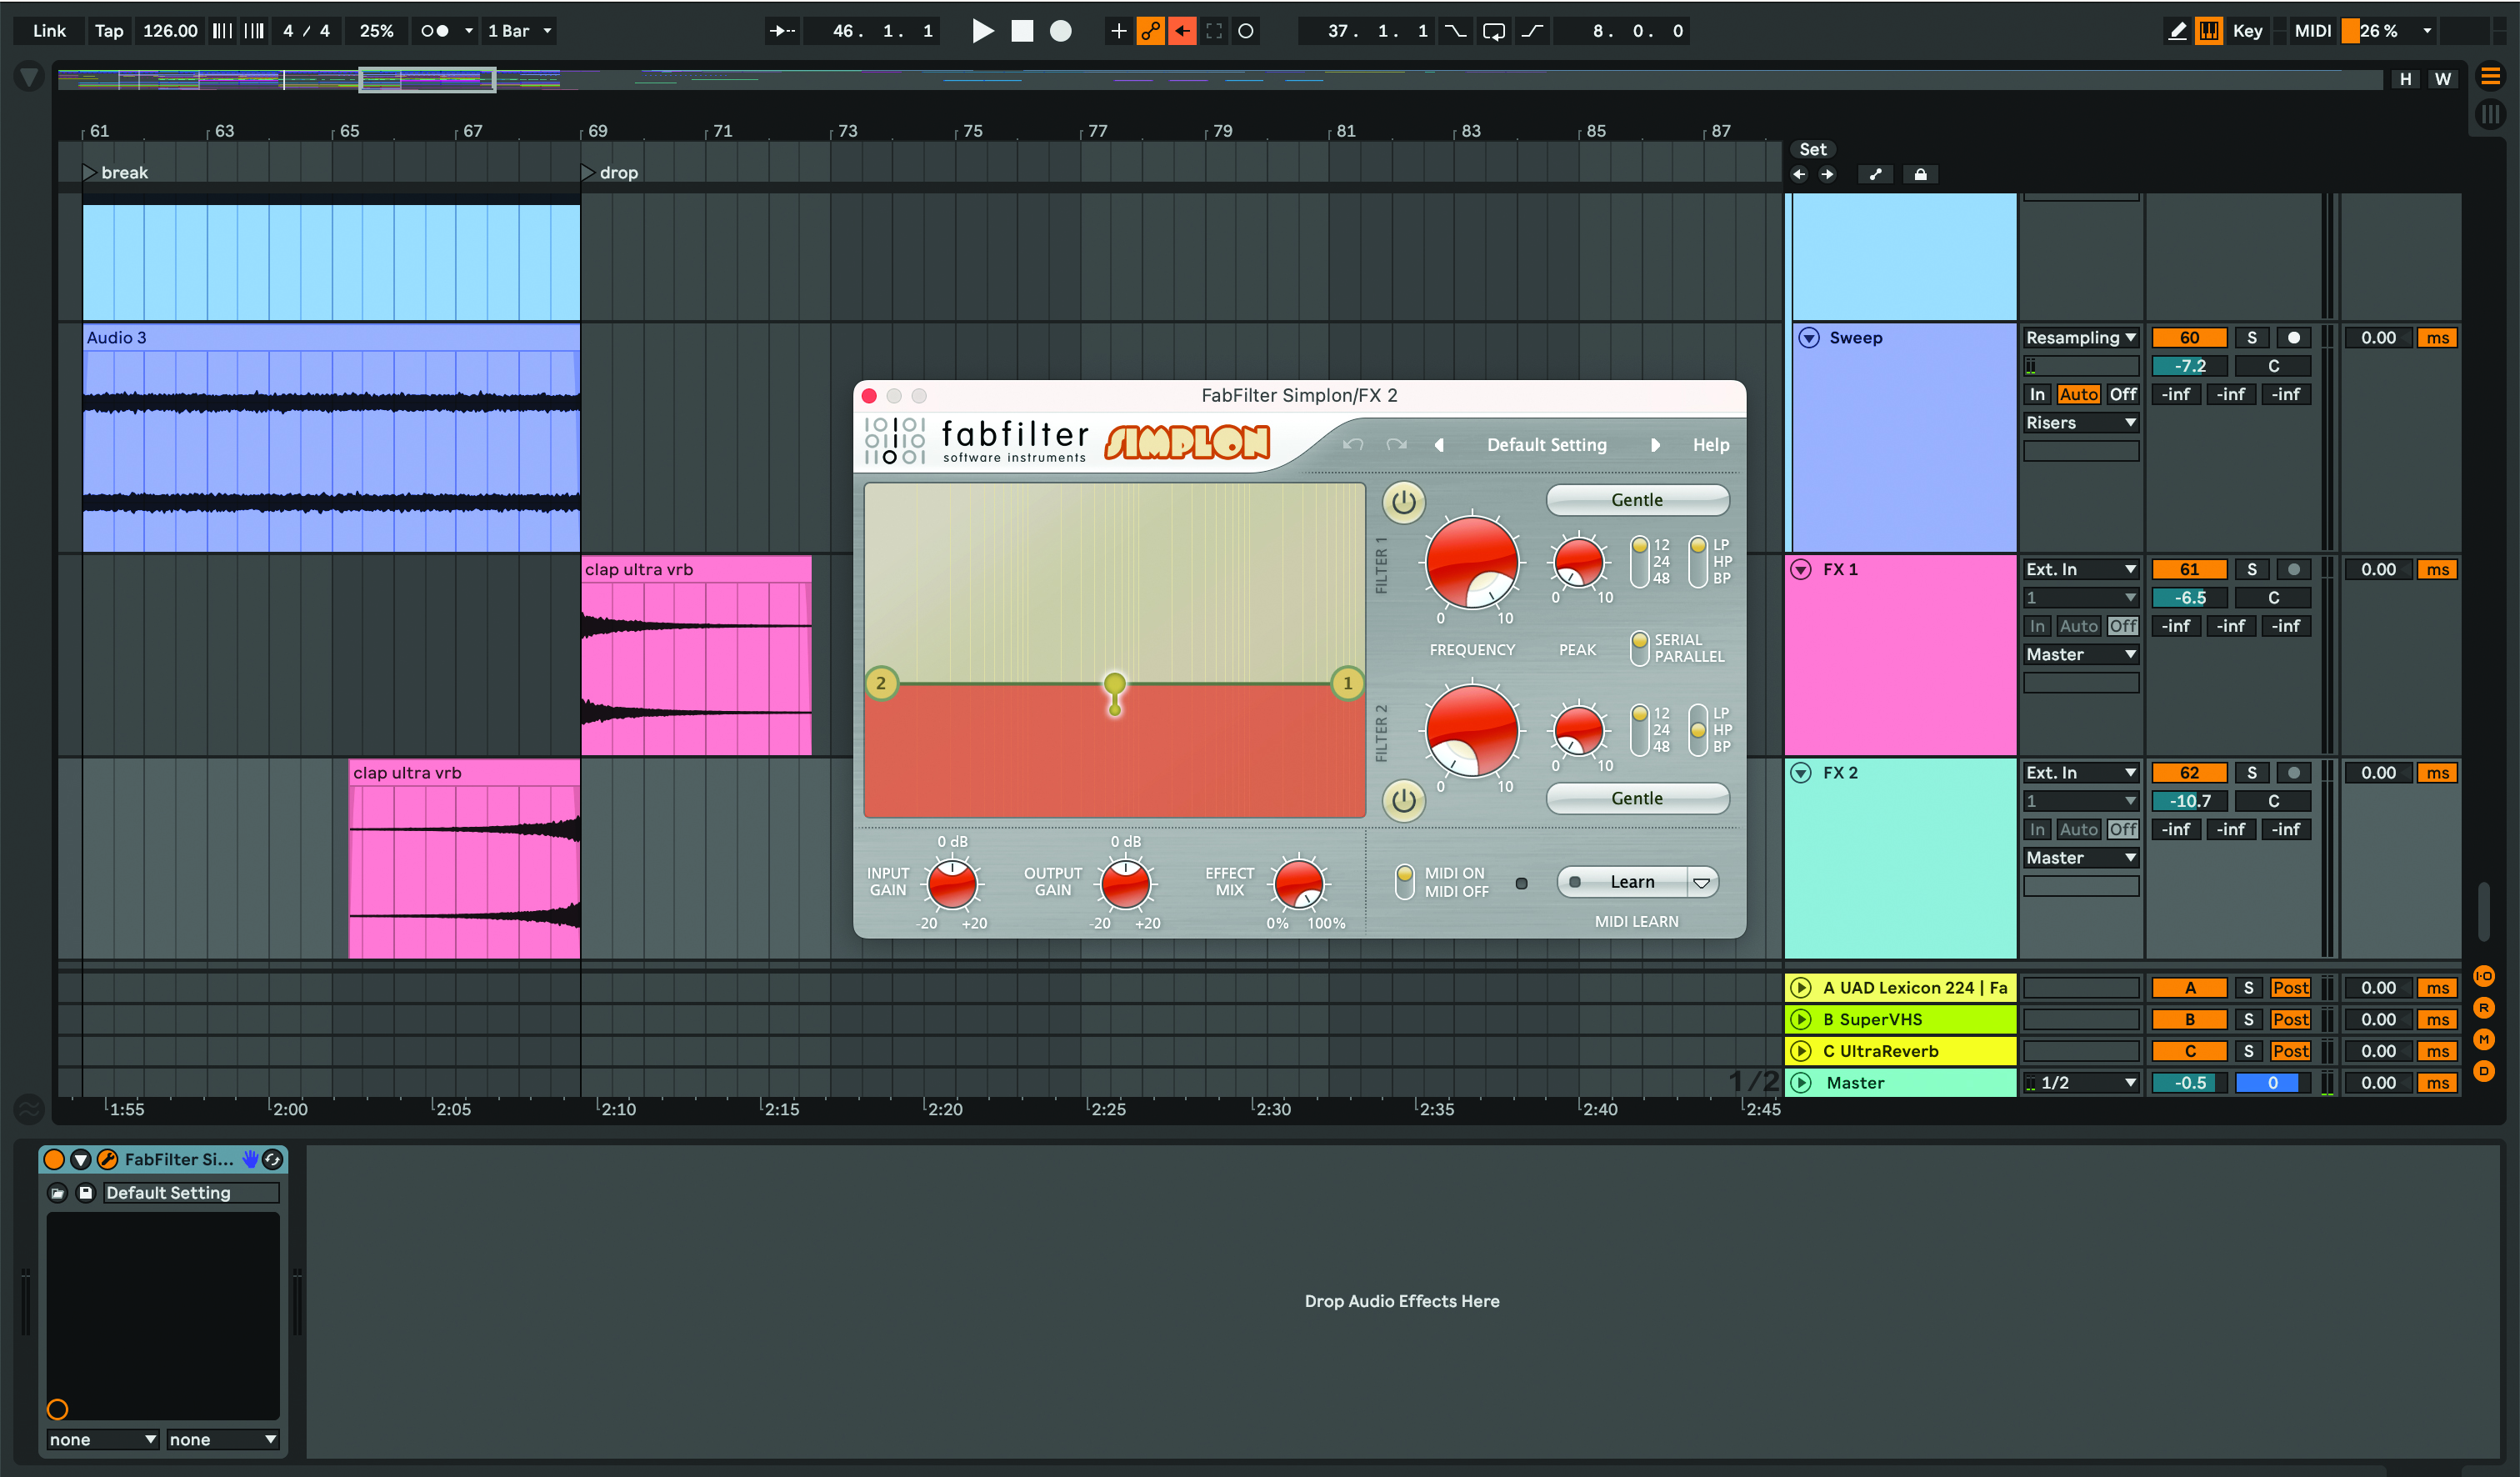
Reverse the crash and place the loudest part just before the drop hits. Use a filter like FabFilter’s Simplon to cut the low end below 300 Hz out of the crash effect. Try creating other effects from your claps or percussive elements using the same technique in step 3. It may work in your buildup to add one more effect that isn’t reversed.
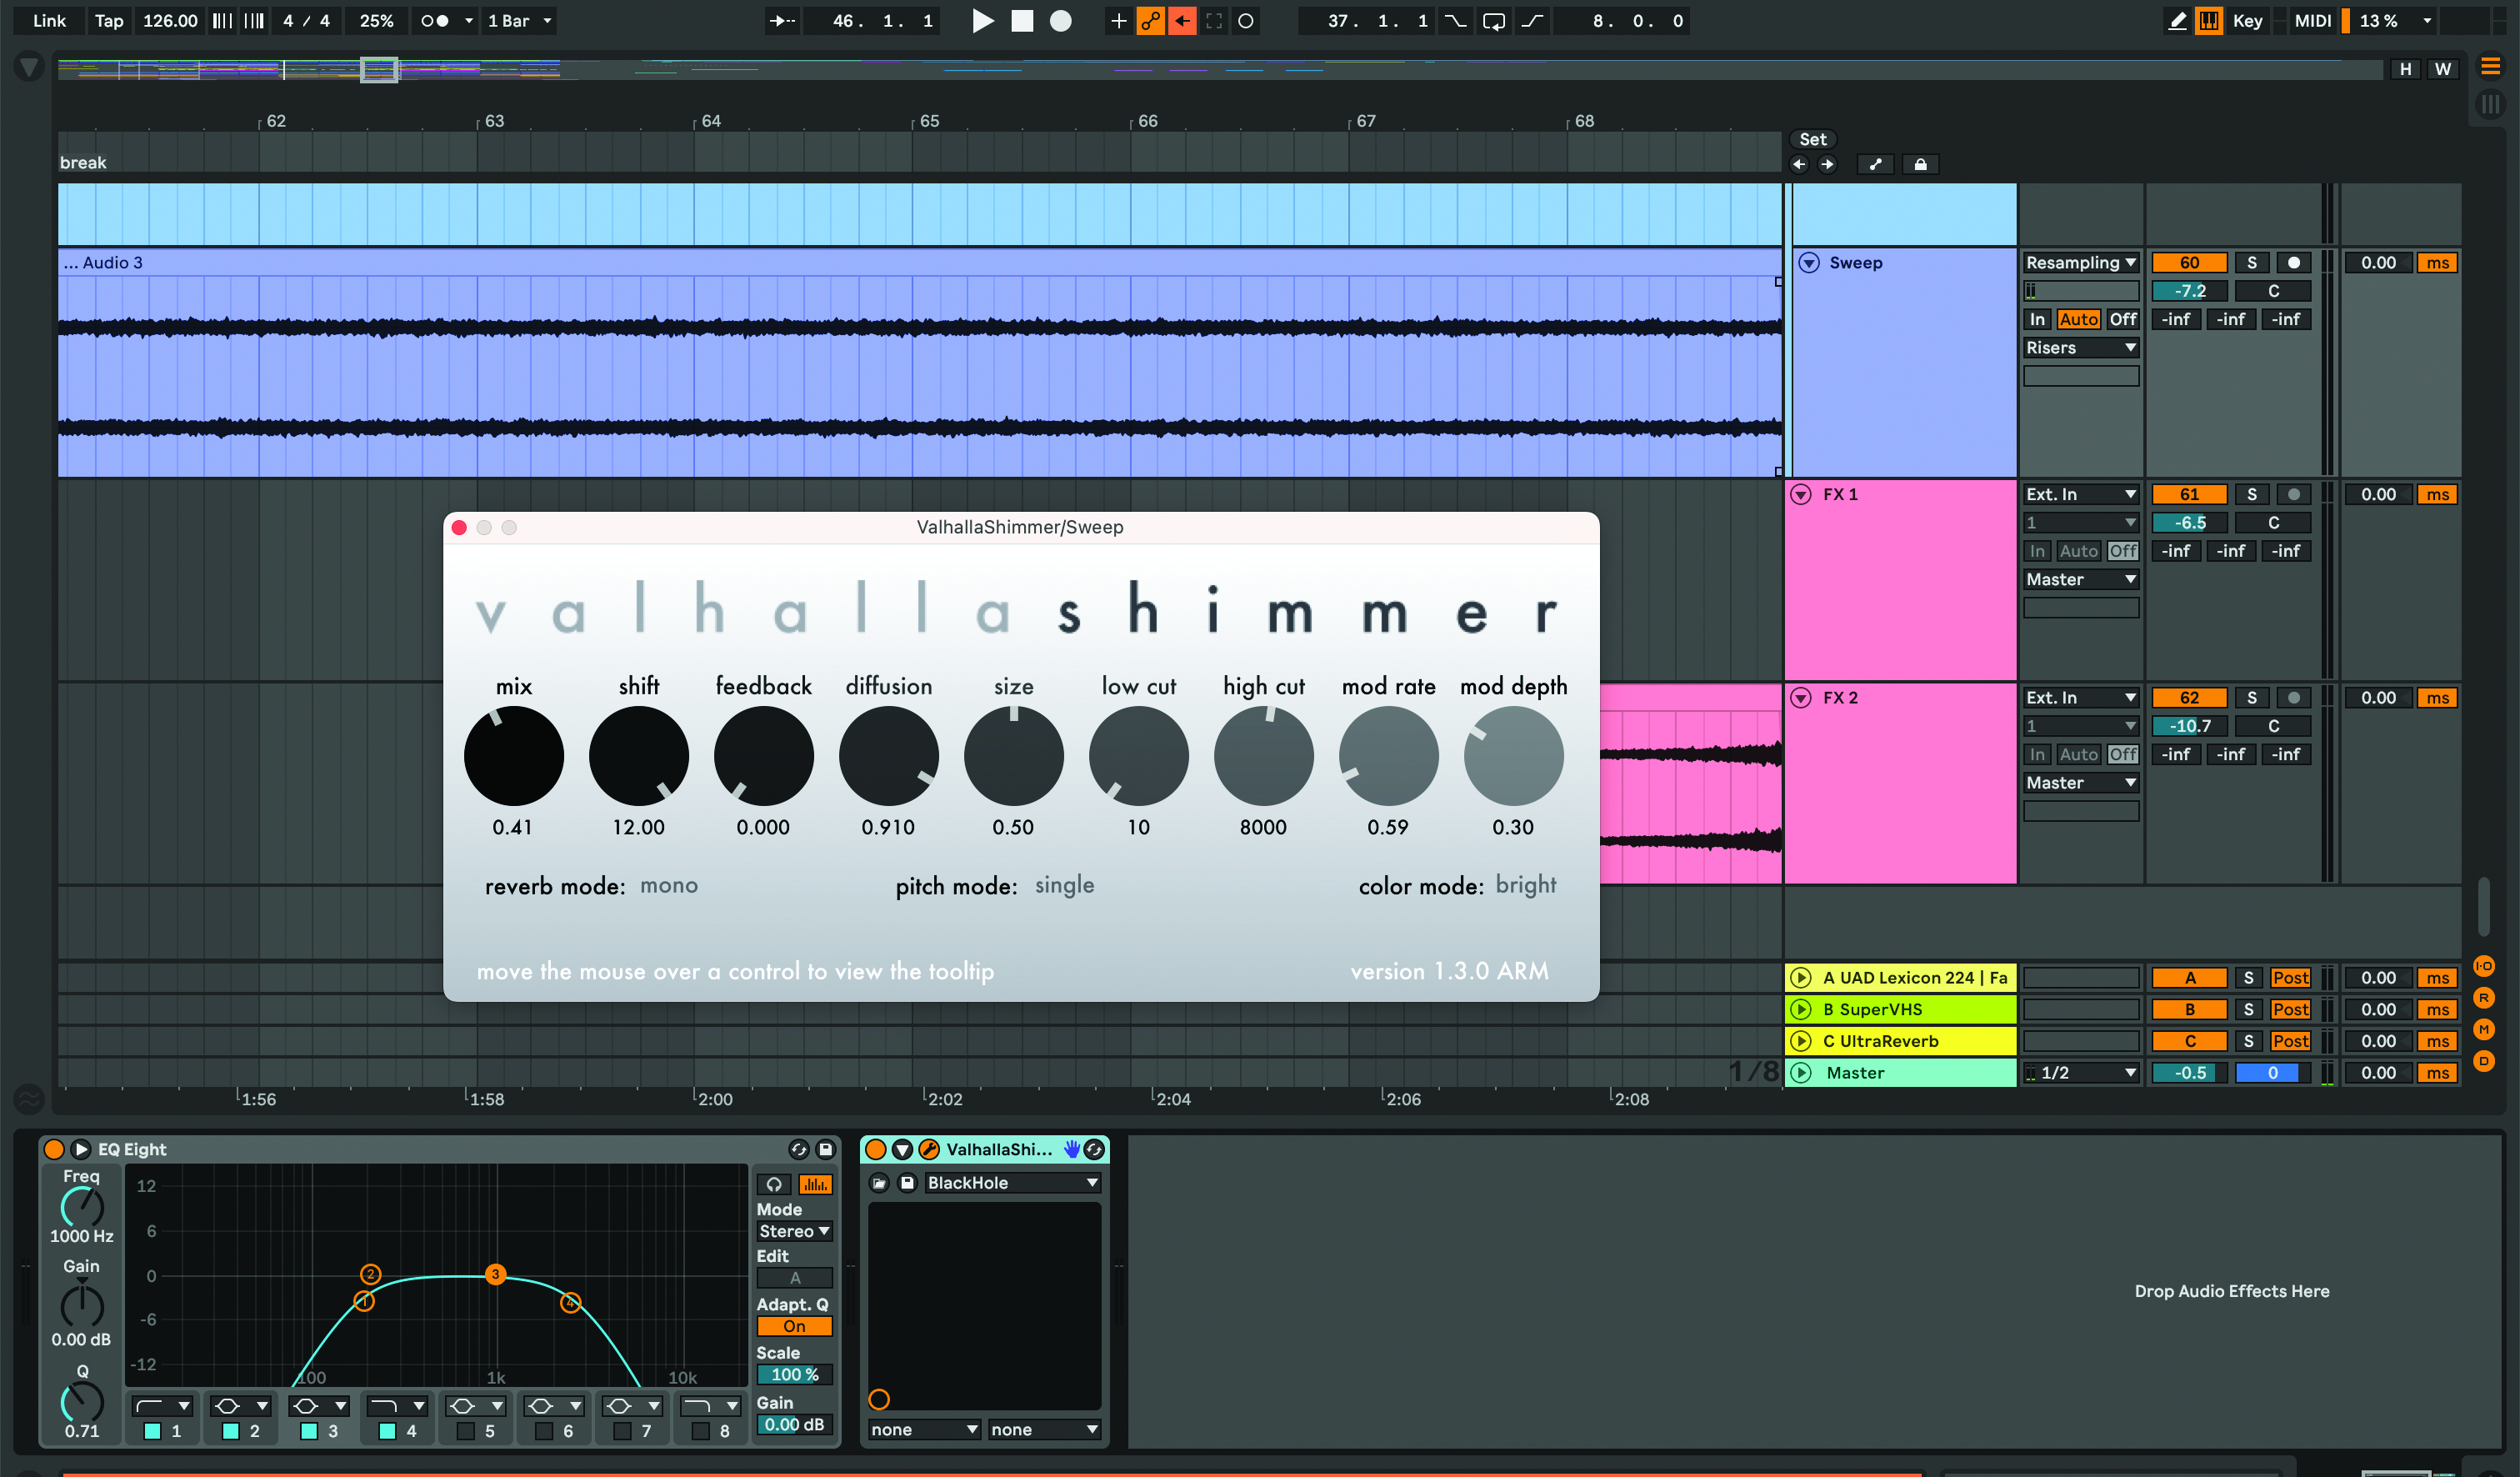
Create a sweep using a synth from your track and record a MIDI note or pattern in your track’s key. Place a big reverb like Eventide UltraReverb on the track and re-record the sound to another track. Use an EQ or filter to cut the low and high end out. Smear the sound by adding a pitchshifting reverb to bring enhanced harmonics.
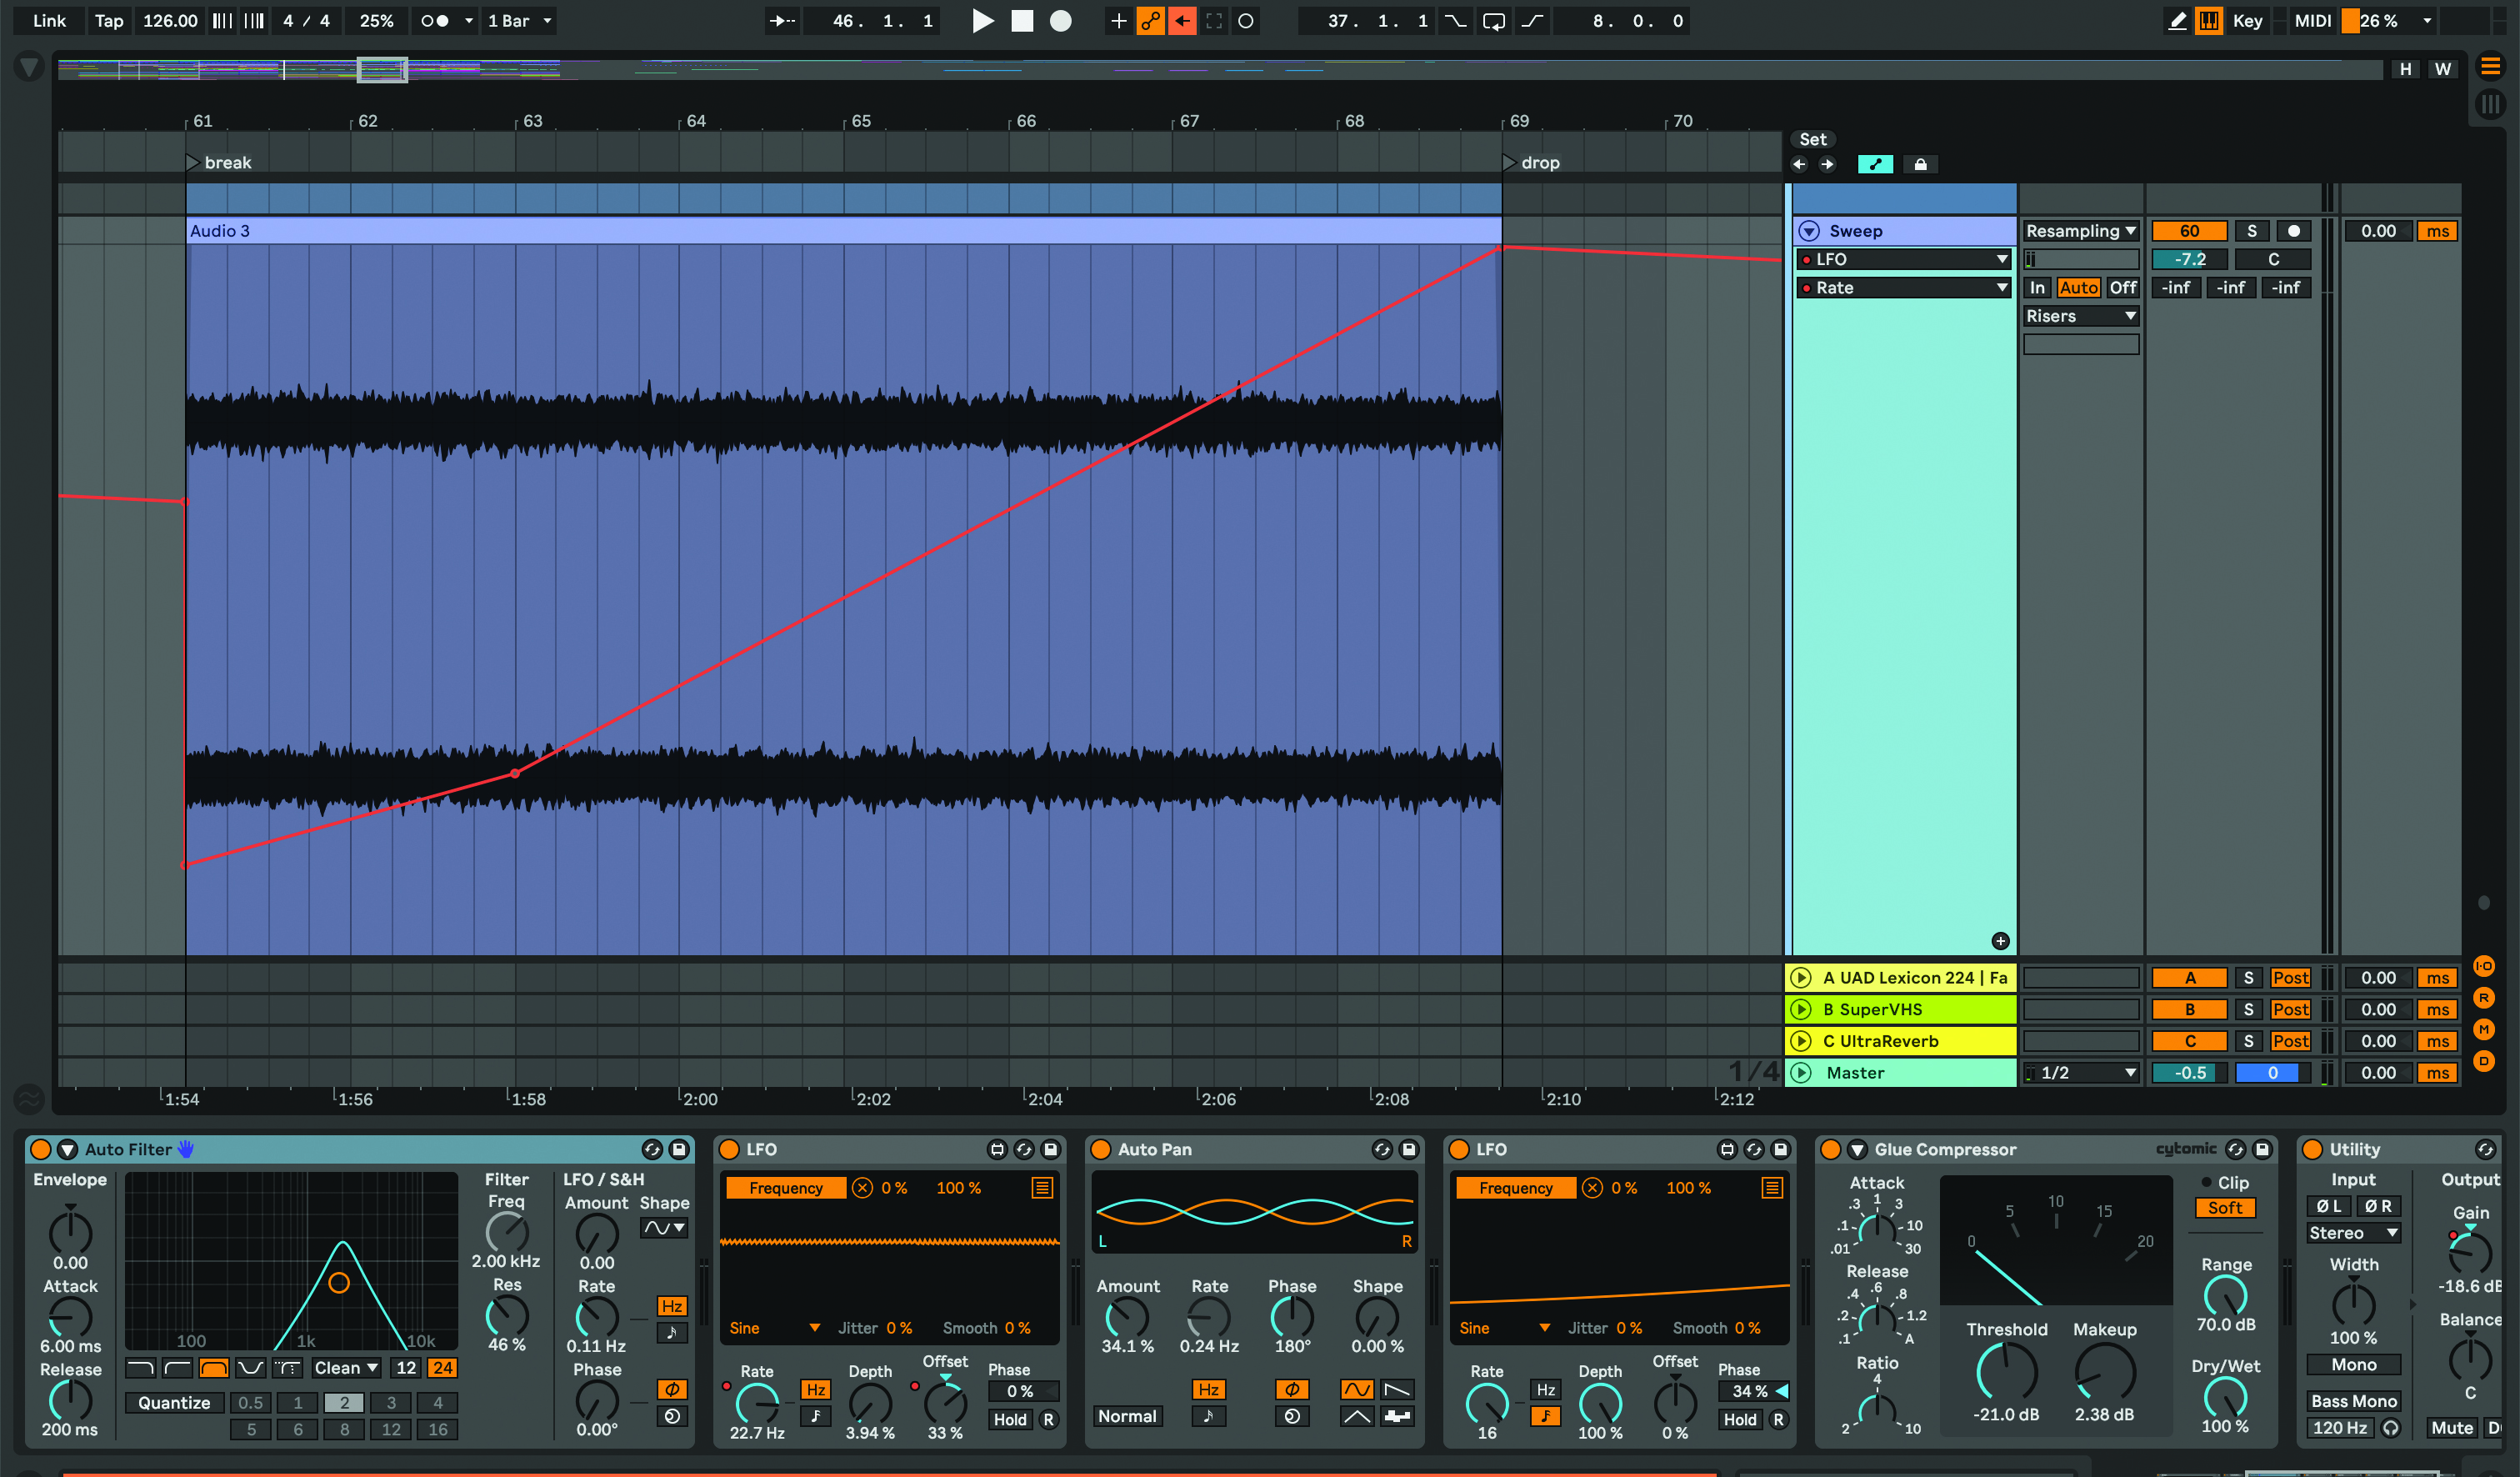
Add an Autofilter and set the filter type to bandpass, resonance to around 46%. Add an LFO and map the LFO to the Autofilter’s Frequency by clicking Map, then Frequency. Automate the Frequency Rate from 0.16 Hz to 40 Hz and automate the Offset from -39% to 48%. Add an Autopan with the amount set at 34%, and a Glue Compressor.
Pro tip
Aim to build anticipation for the drop in the breakdown by removing elements and adding risers, sweeps and percussion. Try experimenting with automating existing sounds to create movement. In any synth, there are a few parameters you can automate to create tension, including the filter cutoff, decay and sustain.
Try automating one or more of these parameters leading up to the drop and bring them back down as the drop begins. Another idea is to create reverb automation by sending synths in your breakdown to a Return Track with a long reverb.
On the reverb, set the Pre Delay to 7.54 ms and the Decay time to six seconds or longer. Start sending your synth to the Return Track with the reverb, bring up the automation on the send to the reverb, and bring it back before the drop.

Use simple sounds, process them with reverb and delay and add a Utility gain plugin to add volume automation to the spaces in between the notes. You can have more control over the dynamics and produce powerful swells and cutouts by automating your track’s gain after the reverb and delay.
Experiment by adding different types of automations to the elements in your buildup. You could add Pan Automation on a track, and automate the Wet signal up over the break, then bring it back before the drop. If it sounds exciting to you, then it will to the listener!
Recommended listening
1. KSHMR & Maddix - Close To You
This stunning track has a long breakdown that strips down the track to the bare essential elements to prepare listeners for the drop.
2. Vorwerk & Jimmy Clash - Wake Up Call
In this gem of a track, the breakdown introduces a dramatic melody that transitions seamlessly to an acid line to build anticipation before the drop hits.

![KSHMR & Maddix - Close To You [Official Visualizer] - YouTube](https://img.youtube.com/vi/VnZOtJR3g14/maxresdefault.jpg)
