DAW basics: How to program a chord progression and synth melody in GarageBand
Getting to grips with GarageBand? Here's how to program a melody and chord sequence using the software's built-in synths
Want all the hottest music and gear news, reviews, deals, features and more, direct to your inbox? Sign up here.
You are now subscribed
Your newsletter sign-up was successful
In our DAW Basics series, we’re going to show you around the latest version of Apple’s GarageBand, guiding you through the steps you need to take to create your own song, and taking stock of the program’s most essential features along the way.
We’re kicking off by demonstrating how to quickly and easily lay down a synth melody, with a simple chord sequence to back it up.

Step 1: Open up GarageBand and start a New Project. Then, when the above prompt appears, select Software Instrument. This will create a new Software Instrument track, which will enable us to select an instrument we can play within GarageBand to create our first track.
Article continues below 
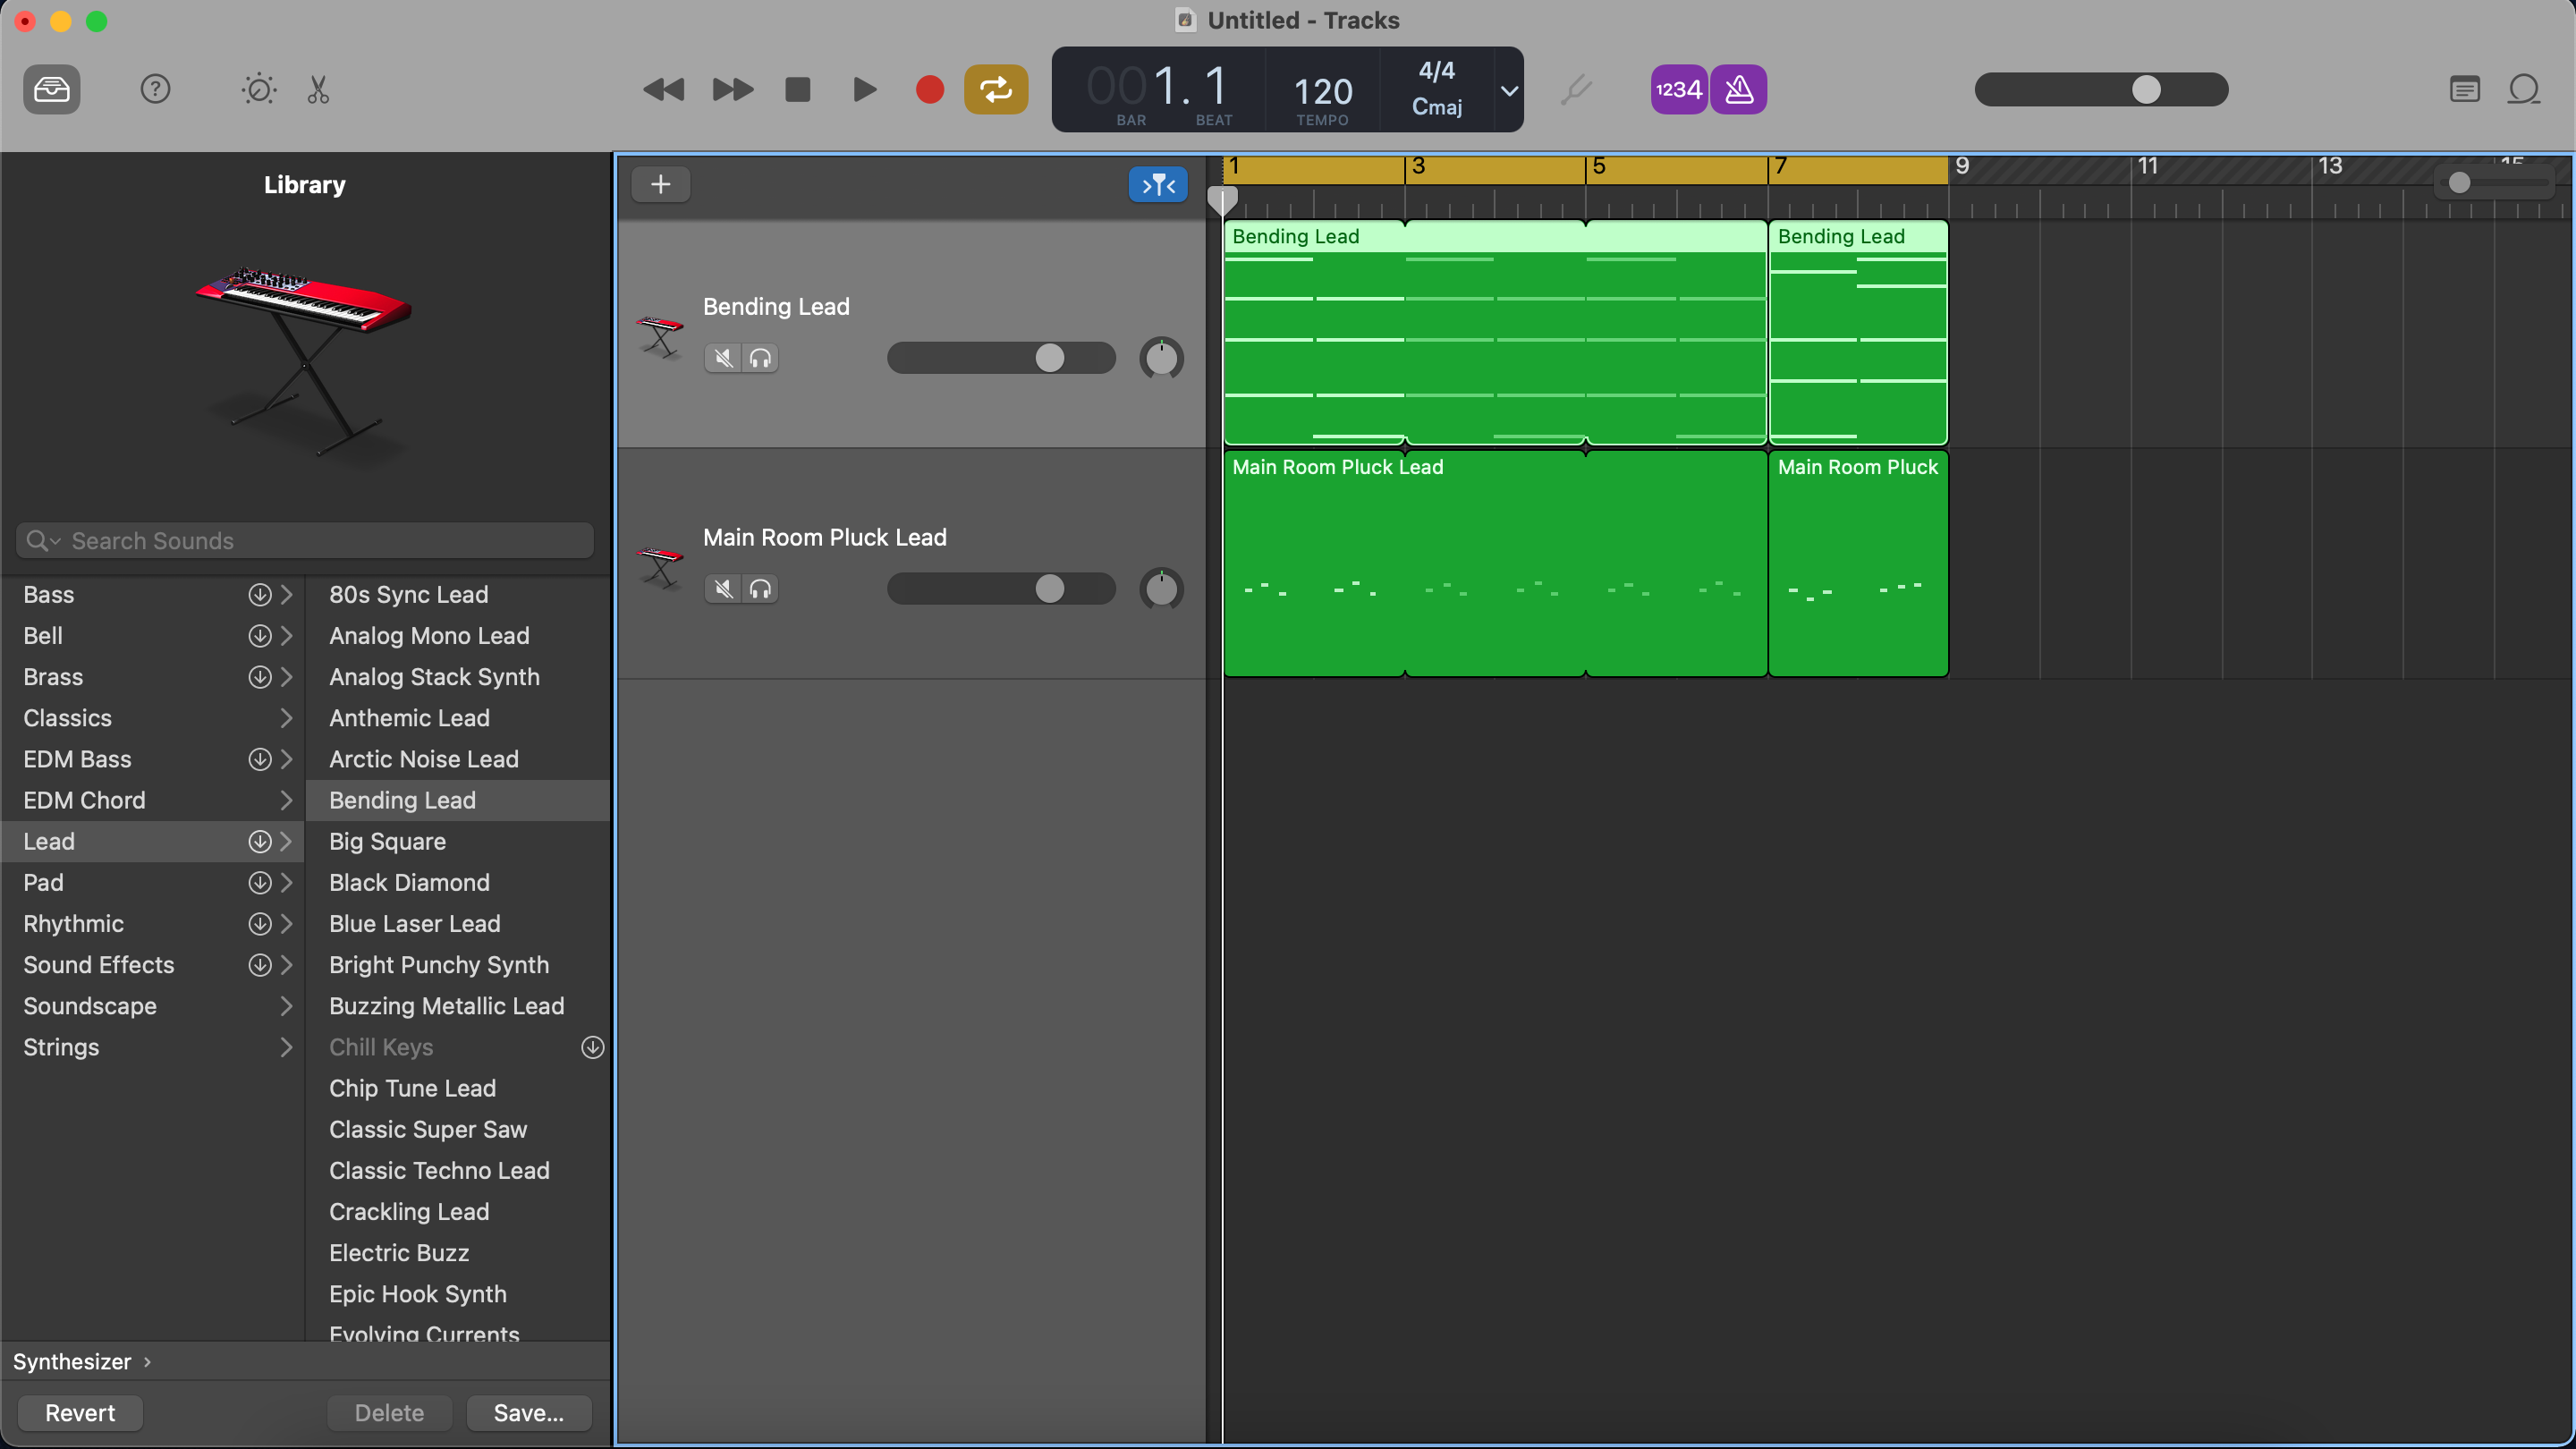
Step 2: Now we’d like to select a Software Instrument to use in programming our supporting chord sequence, to sit underneath our melody line. To browse GarageBand’s available instruments, hit the Library button in the top left. Then select Synthesizer, and Lead, to narrow the preset selection down to lead synth sounds. Finally, select a patch from the available options. We’ve gone with Bending Lead.
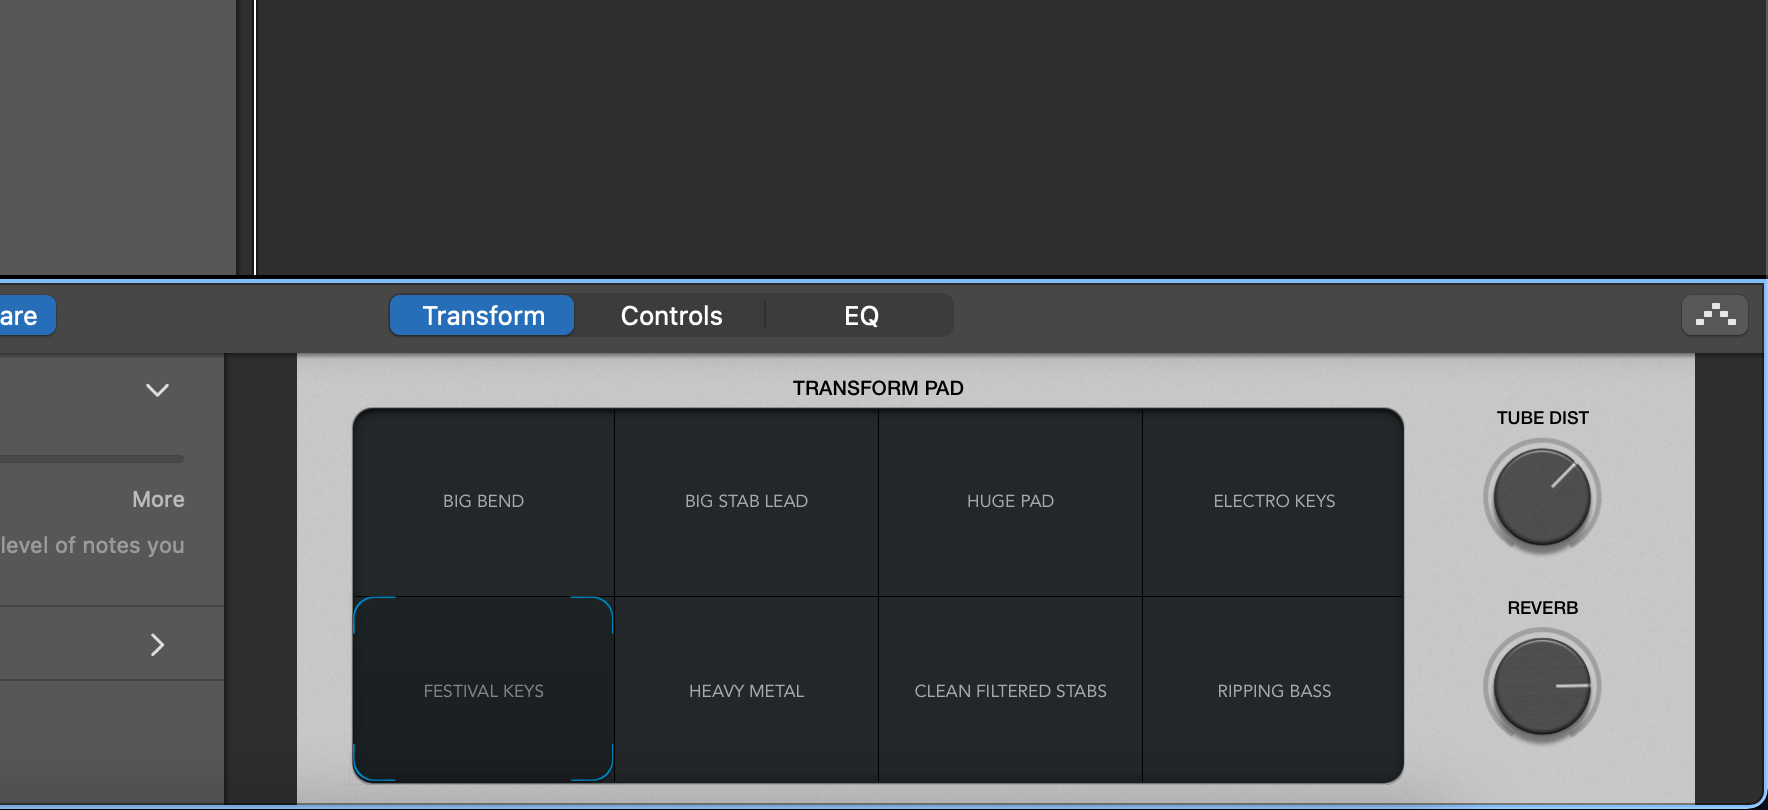
Step 3: Once we select this patch, we can see seven alternative variations on this sound available in the Transform panel. Apple calls these Snapshots. We’ve selected Festival Keys, an alternative sound that’s going to be more suited to a supporting chord sequence. There are also two dials in this panel, which give us the option to increase or decrease the level of two effects that are applied to the sound, Tube Distortion and Reverb. We’ve turned both of these up to give the sound a more interesting character.
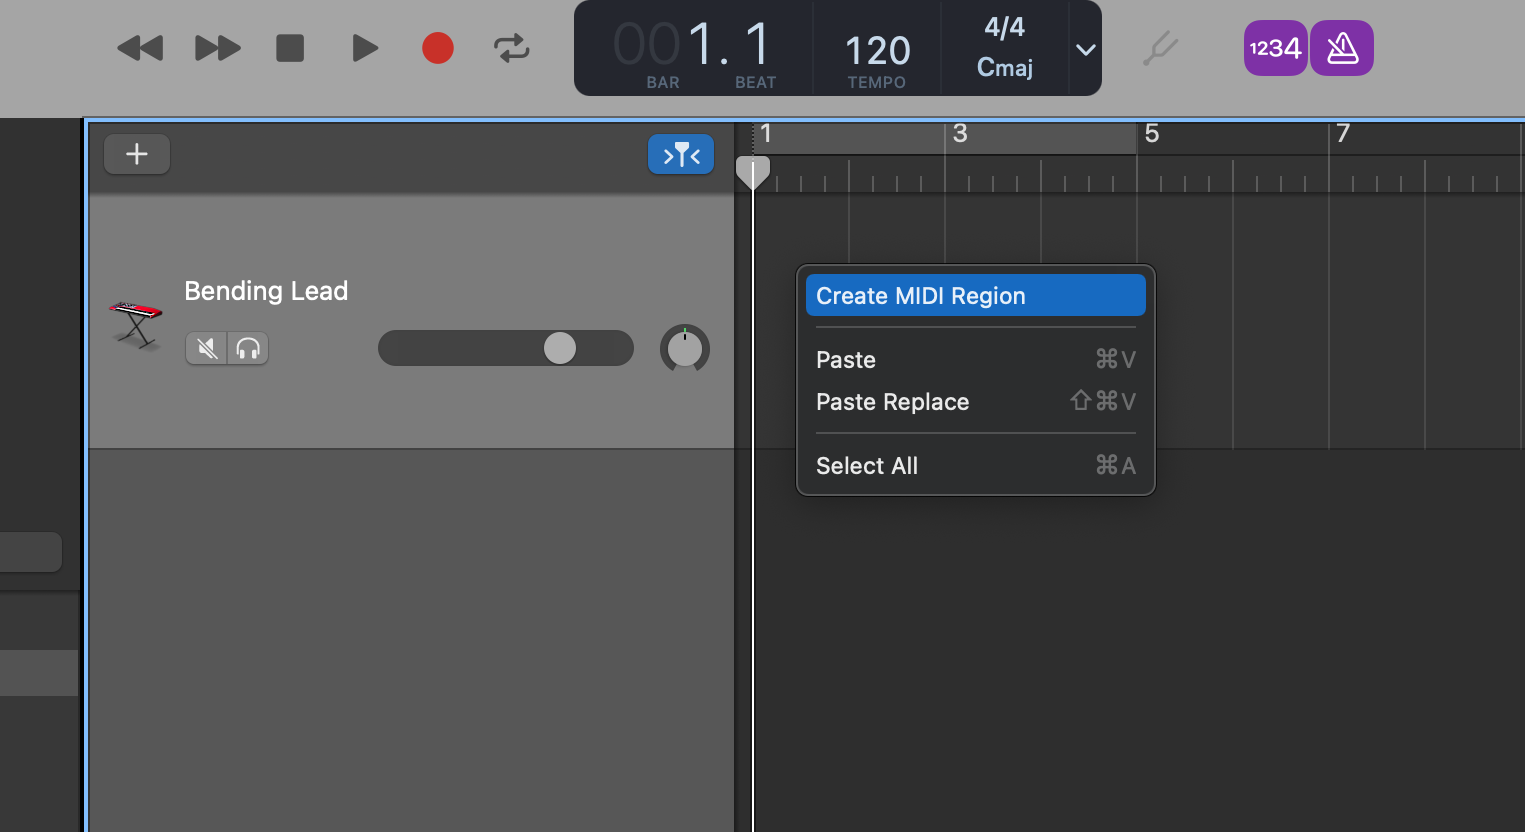
Step 4: Now we’ve selected the sound we’re going to use for our chord sequence, we need to program the notes into GarageBand. The first step here is to create an empty region in our Software Instrument track. This creates a space on the timeline for our notes to sit in. We do this by right-clicking the space within the track and hitting Create MIDI Region.
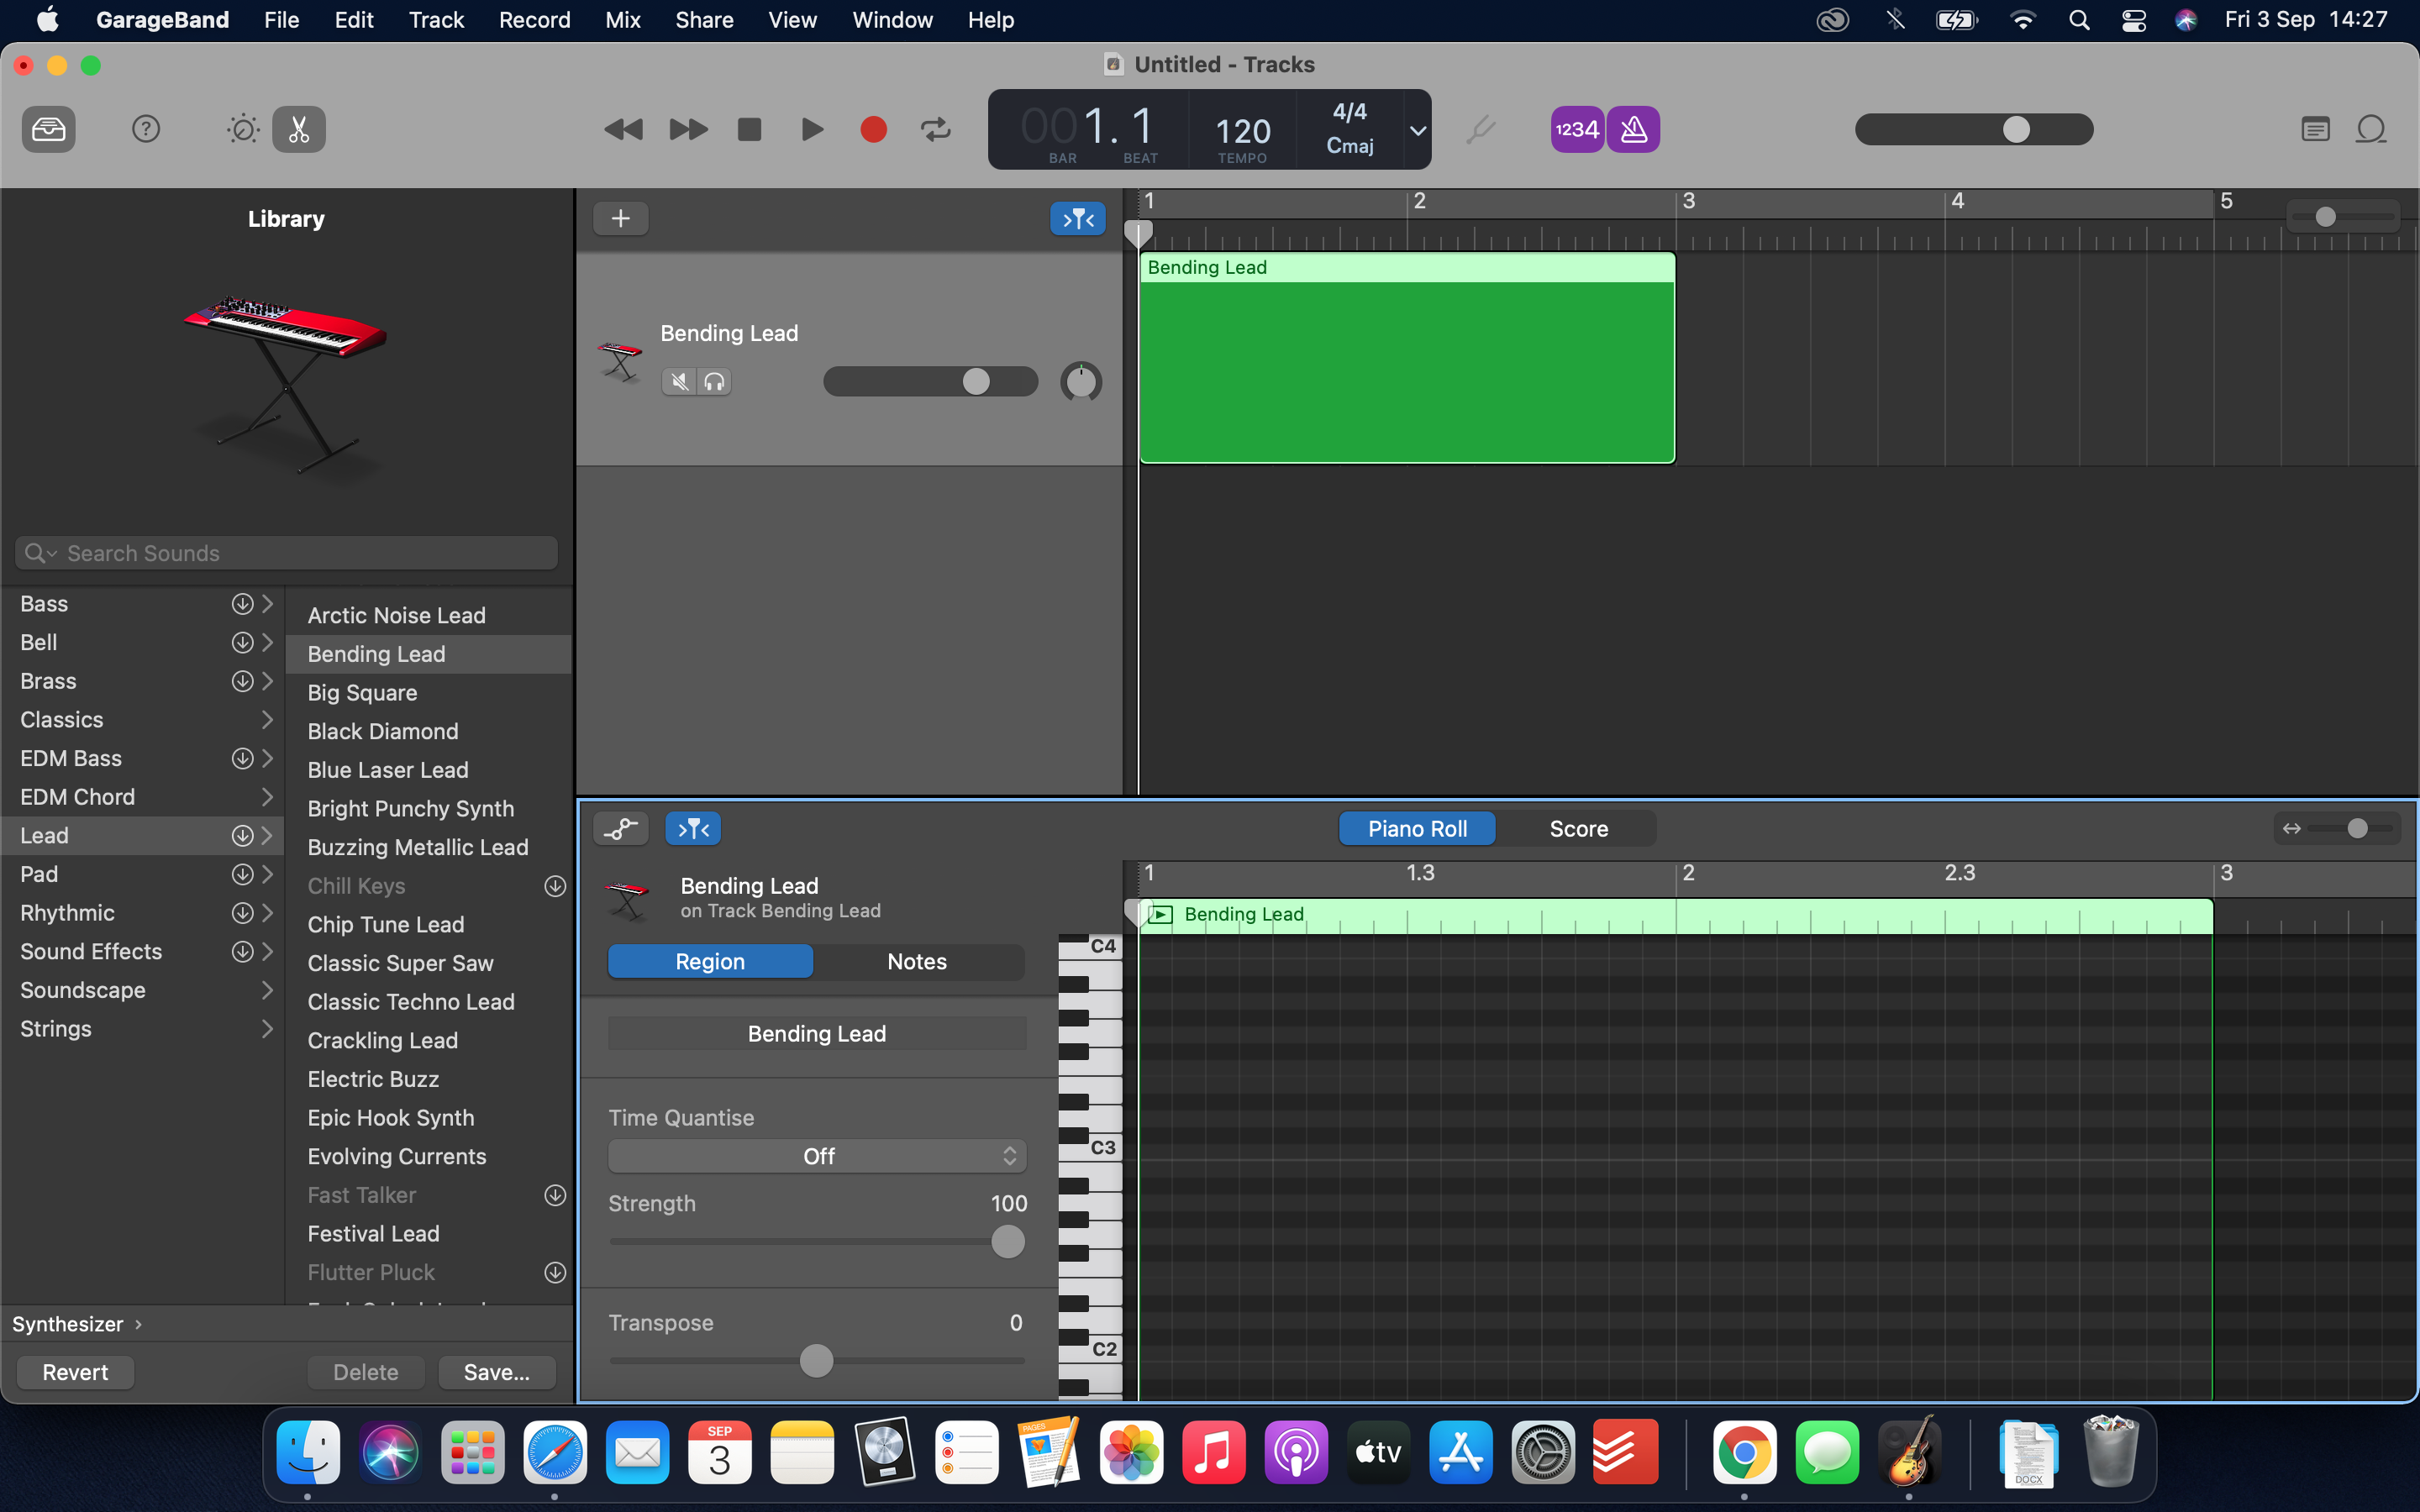
Step 5: The green box that just popped up is our region. This is a space in which notes can be entered, either through playing a MIDI instrument or using our keyboard and mouse. We want to expand our region to fit a two-chord sequence. We can do this by clicking and dragging to the right from the bottom-right corner of the green box, until it reaches the 3 on the timeline that signifies the start of the third bar.
Want all the hottest music and gear news, reviews, deals, features and more, direct to your inbox? Sign up here.
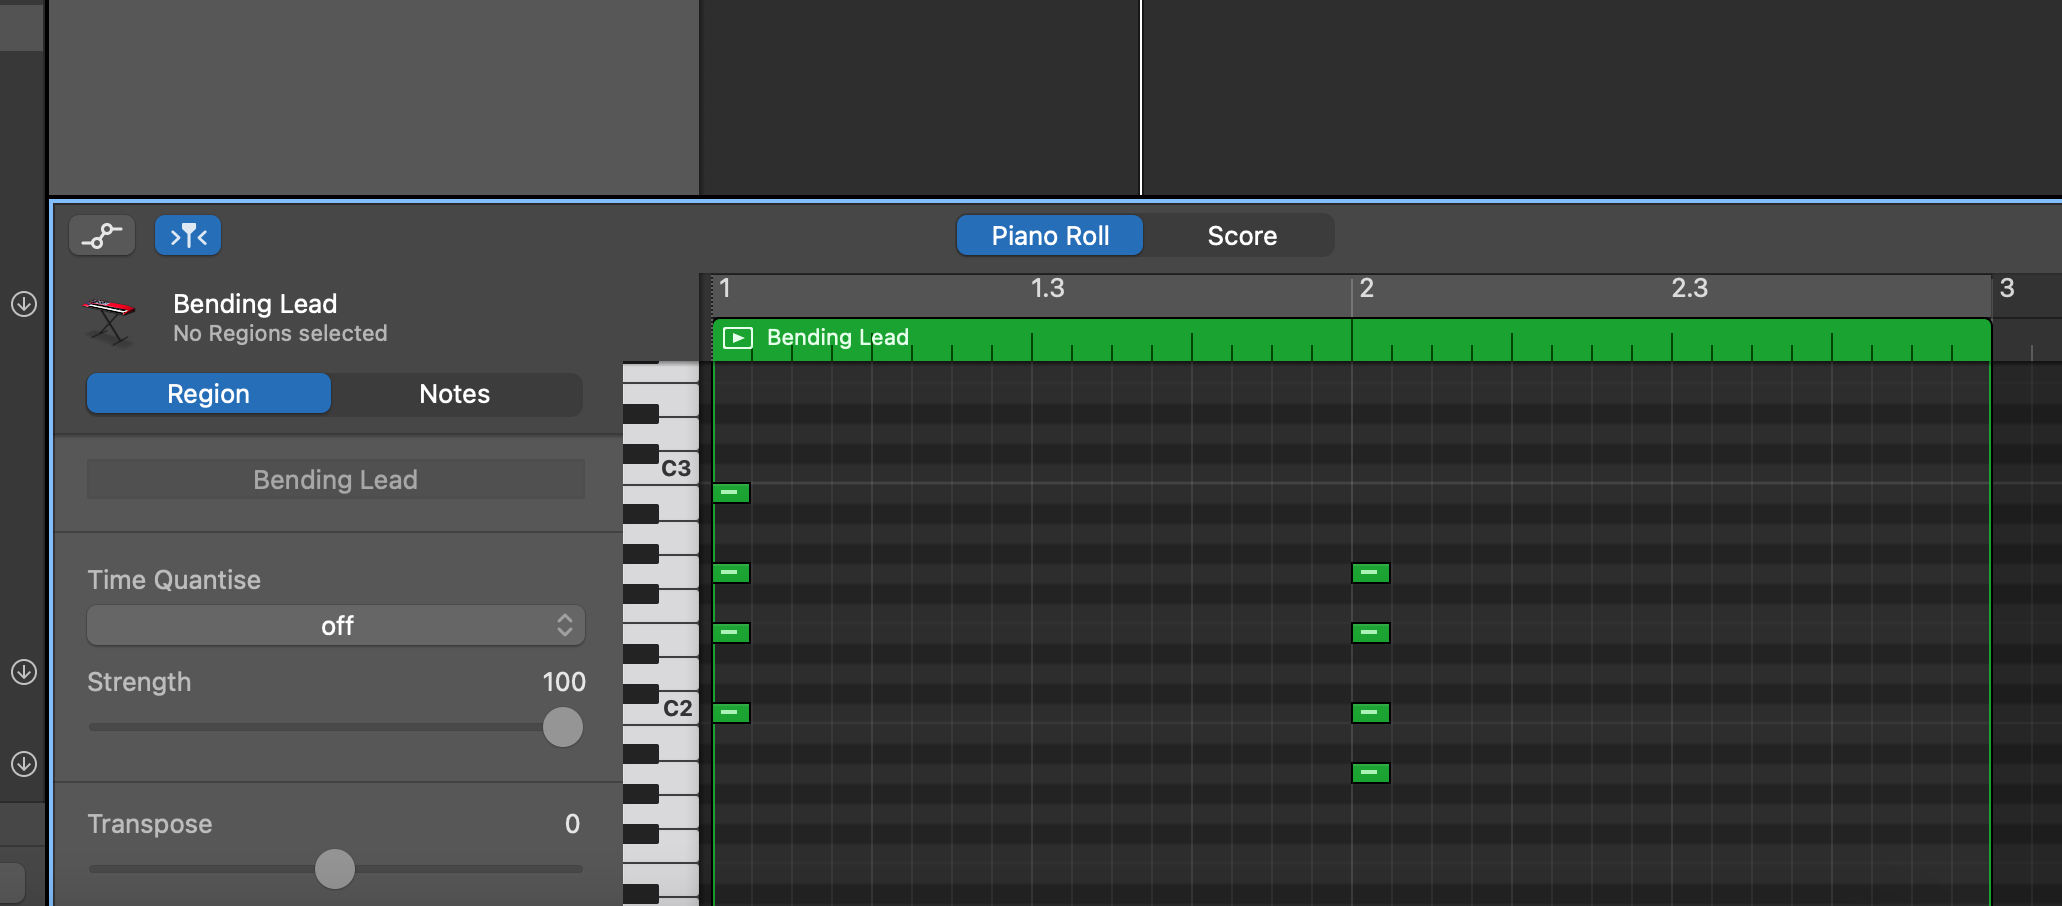
Step 6: It’s time to enter our chords into the region. We're going to enter a two-chord sequence, with each chord playing at the start of the bar. The two chords we've selected are C Maj7 (C Major Seven) and Am7 (A Minor Seven). If that doesn’t make sense right away, don’t worry - skim the top note off both chords and they’re the more recognisable chords of C Major and A Minor. Our track is going to be in A Minor, which is a scale that uses all of the piano’s white keys, starting on A.
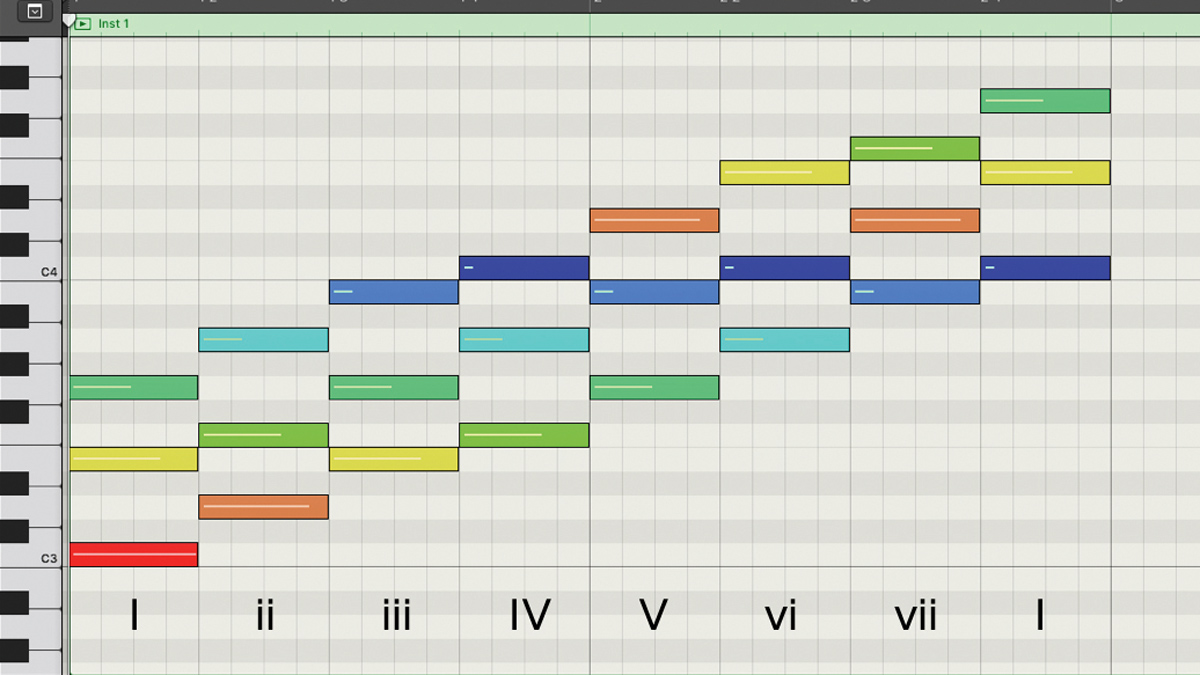
Music theory basics: what are notes, intervals, scales and chords?
Double-click the region to open up the Piano Roll at the bottom of the screen. This is a zoomed-in map of the region that allows you to enter notes for the Software Instrument to play. You can see a 'piano roll' running vertically up the side, which you can use to determine which notes you’re entering into the region. Notes are entered by holding the Command key and clicking into the region - try to replicate the chords in the image above within your piano roll. The first chord is made up of C, E, G and B, and the second chord is made up of A, C, E and G.
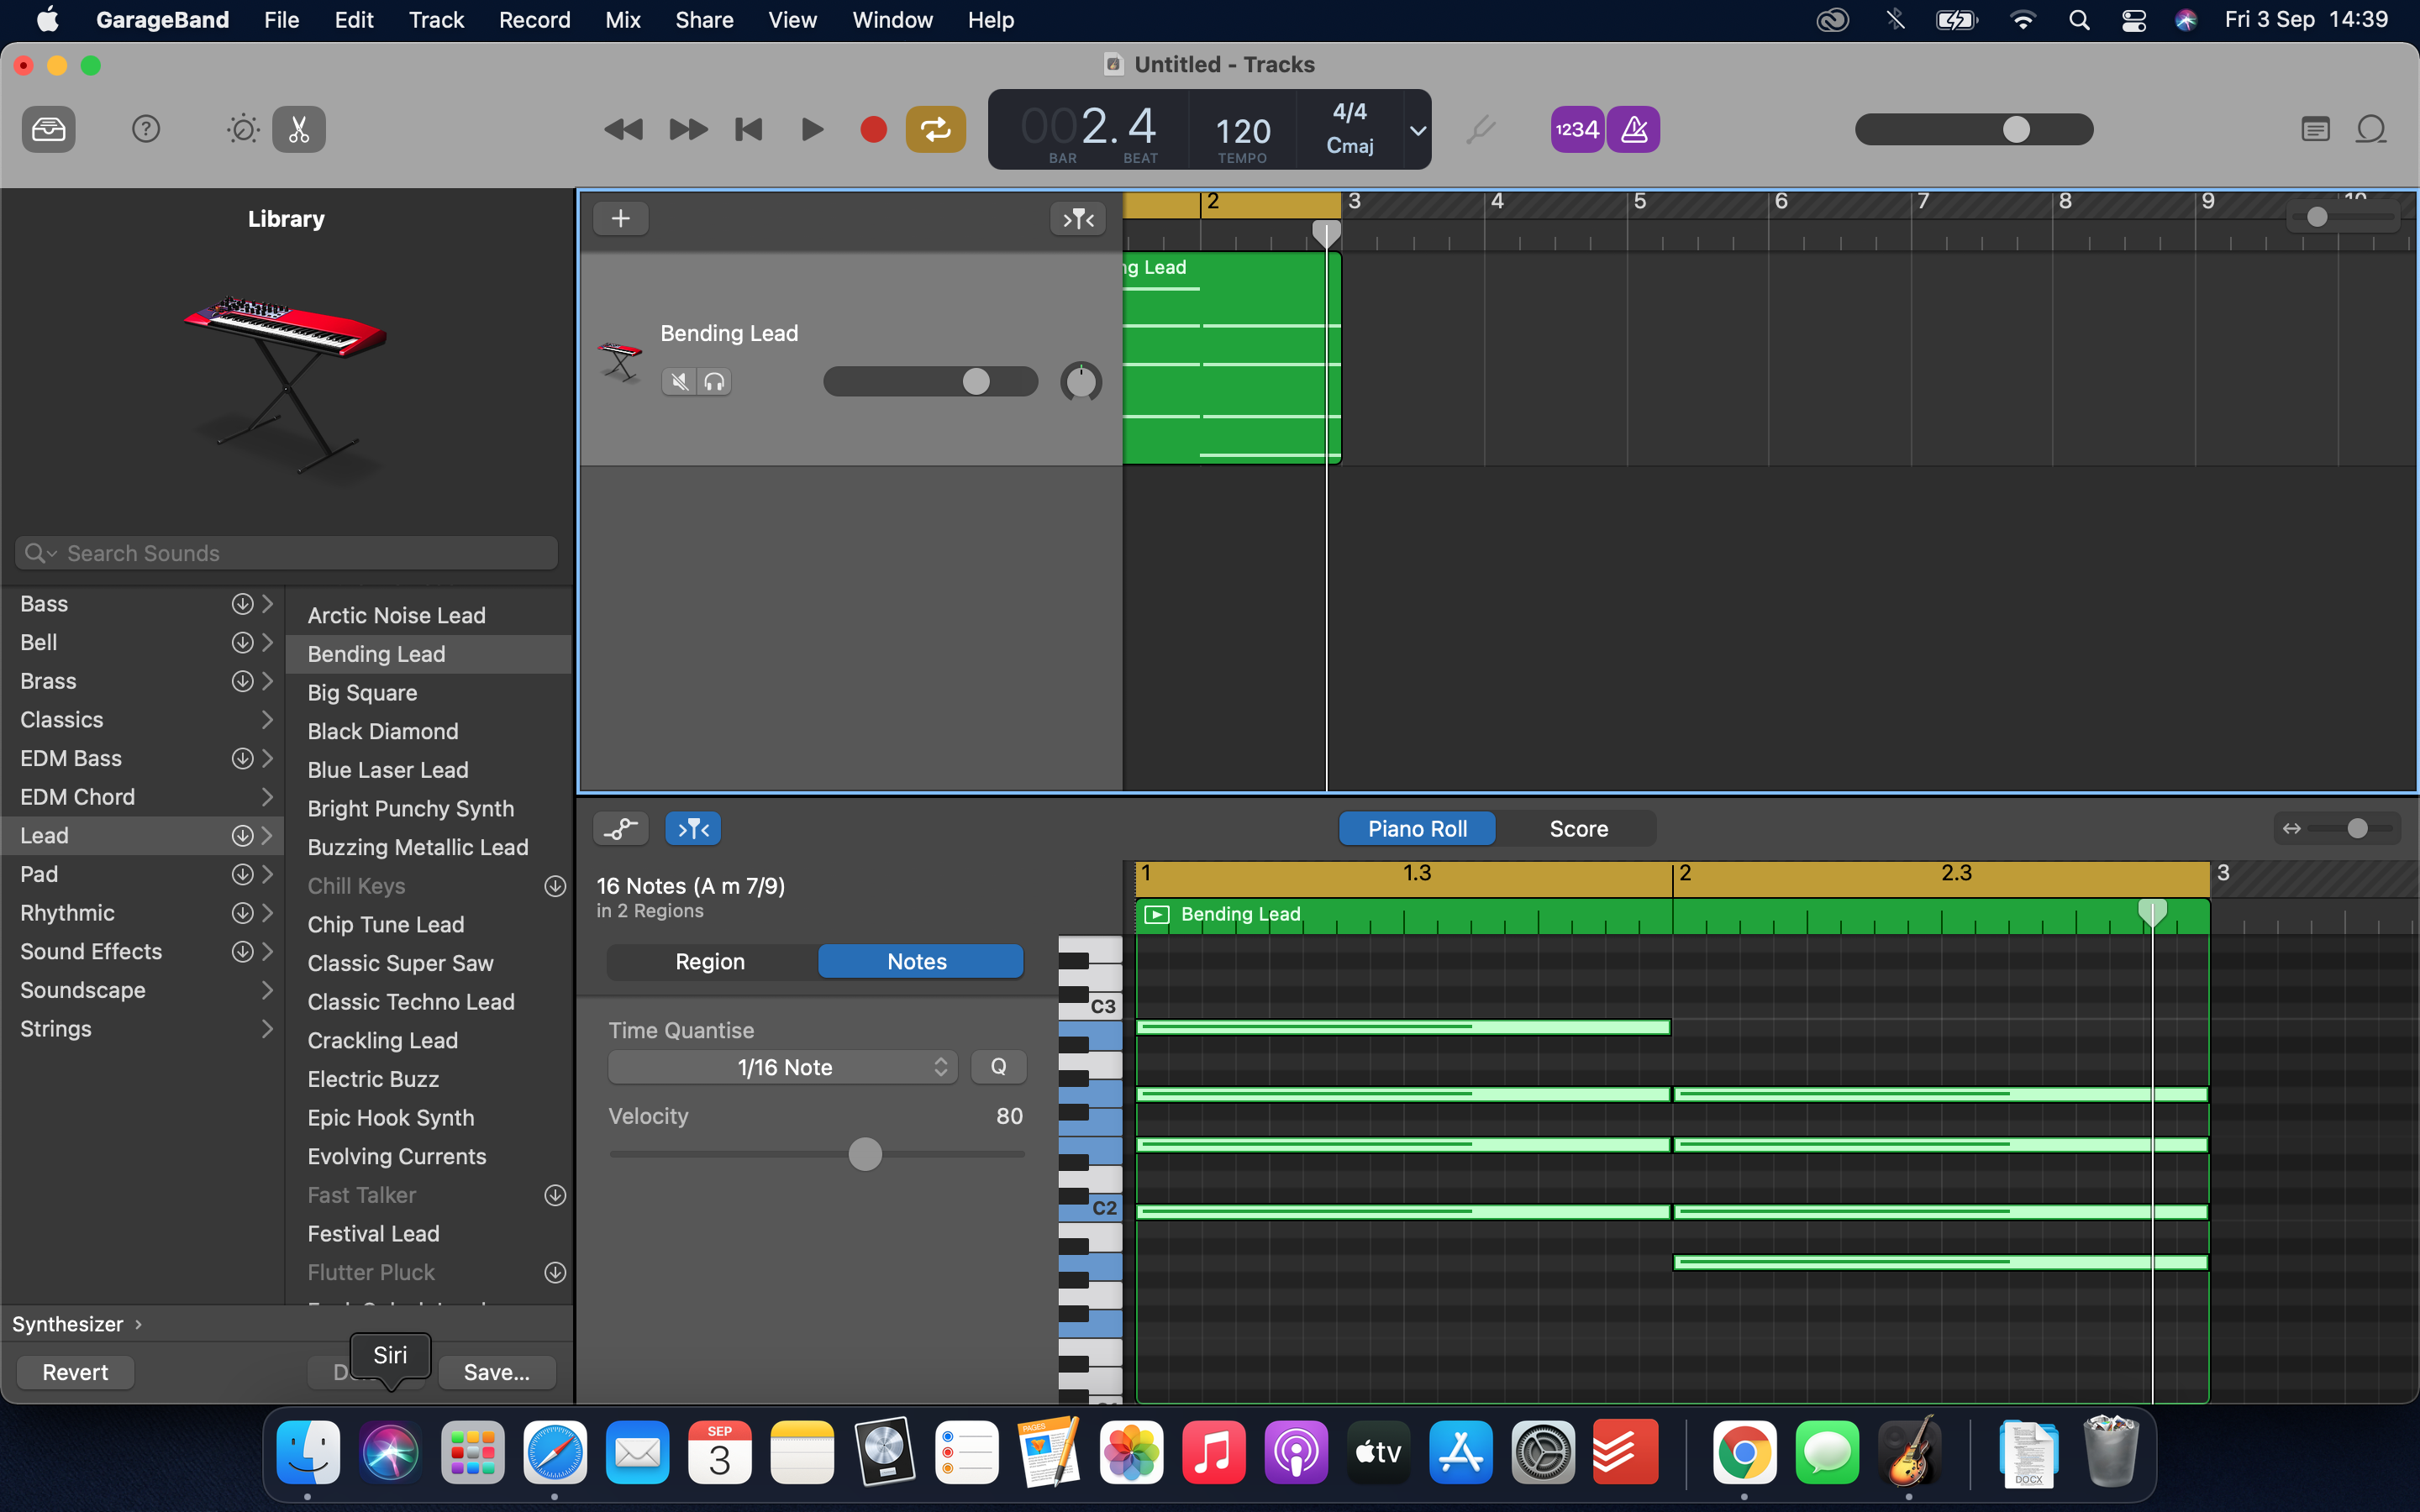
Step 7: Now that we have the notes that form our chord sequence entered, we want to extend them so that the chords are playing throughout the whole region. We can do this by highlighting the notes within the piano roll (just click and drag over them to highlight) then clicking on the right side of one note, and dragging across to the right, until they’re spread across the piano roll as pictured.
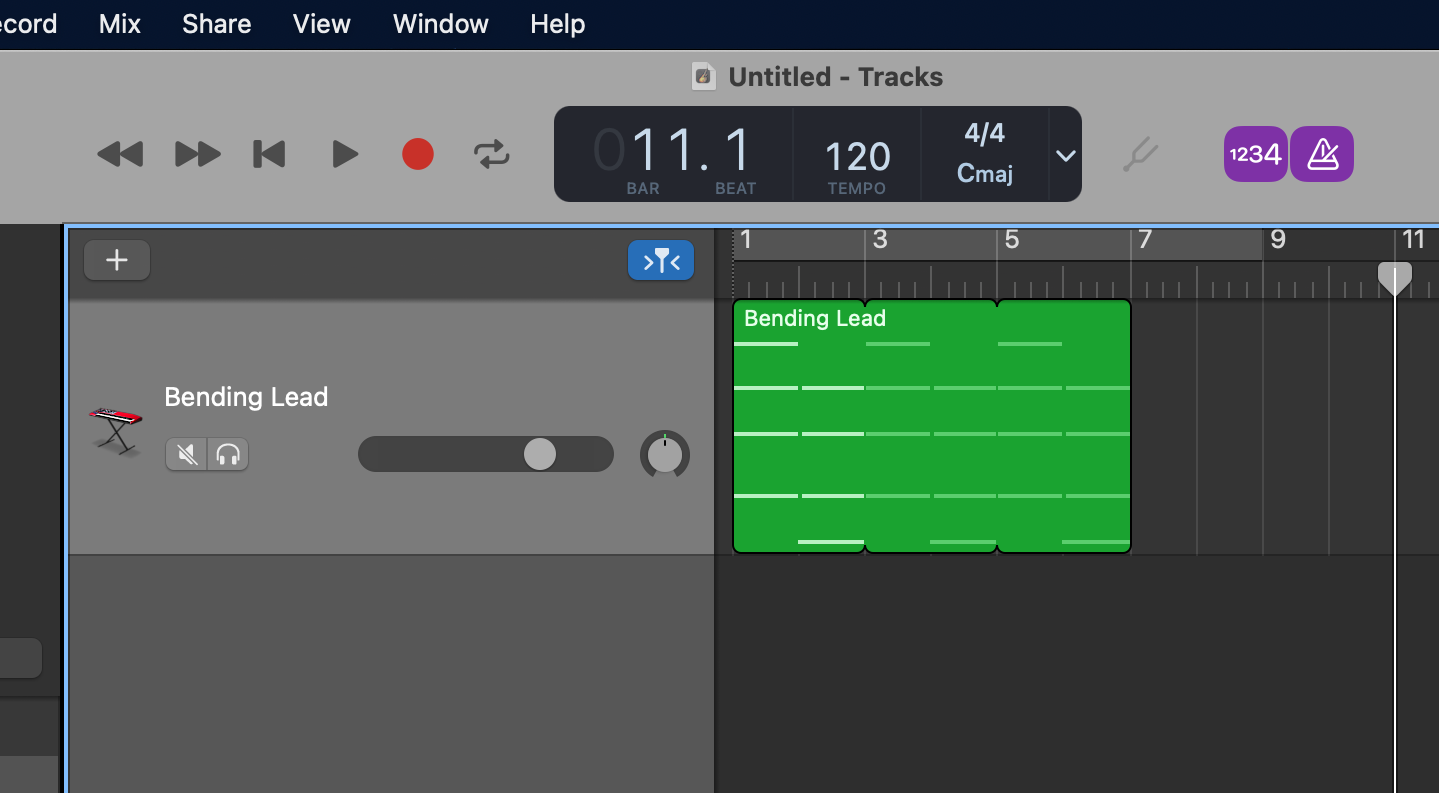
Step 8: This chord sequence might get a little repetitive, so we’re going to create a variation that can play on the fourth repetition. First, we need to loop the original sequence so it plays three times. Click on the top right corner of the region and drag to the right, so that it’s looped three times.
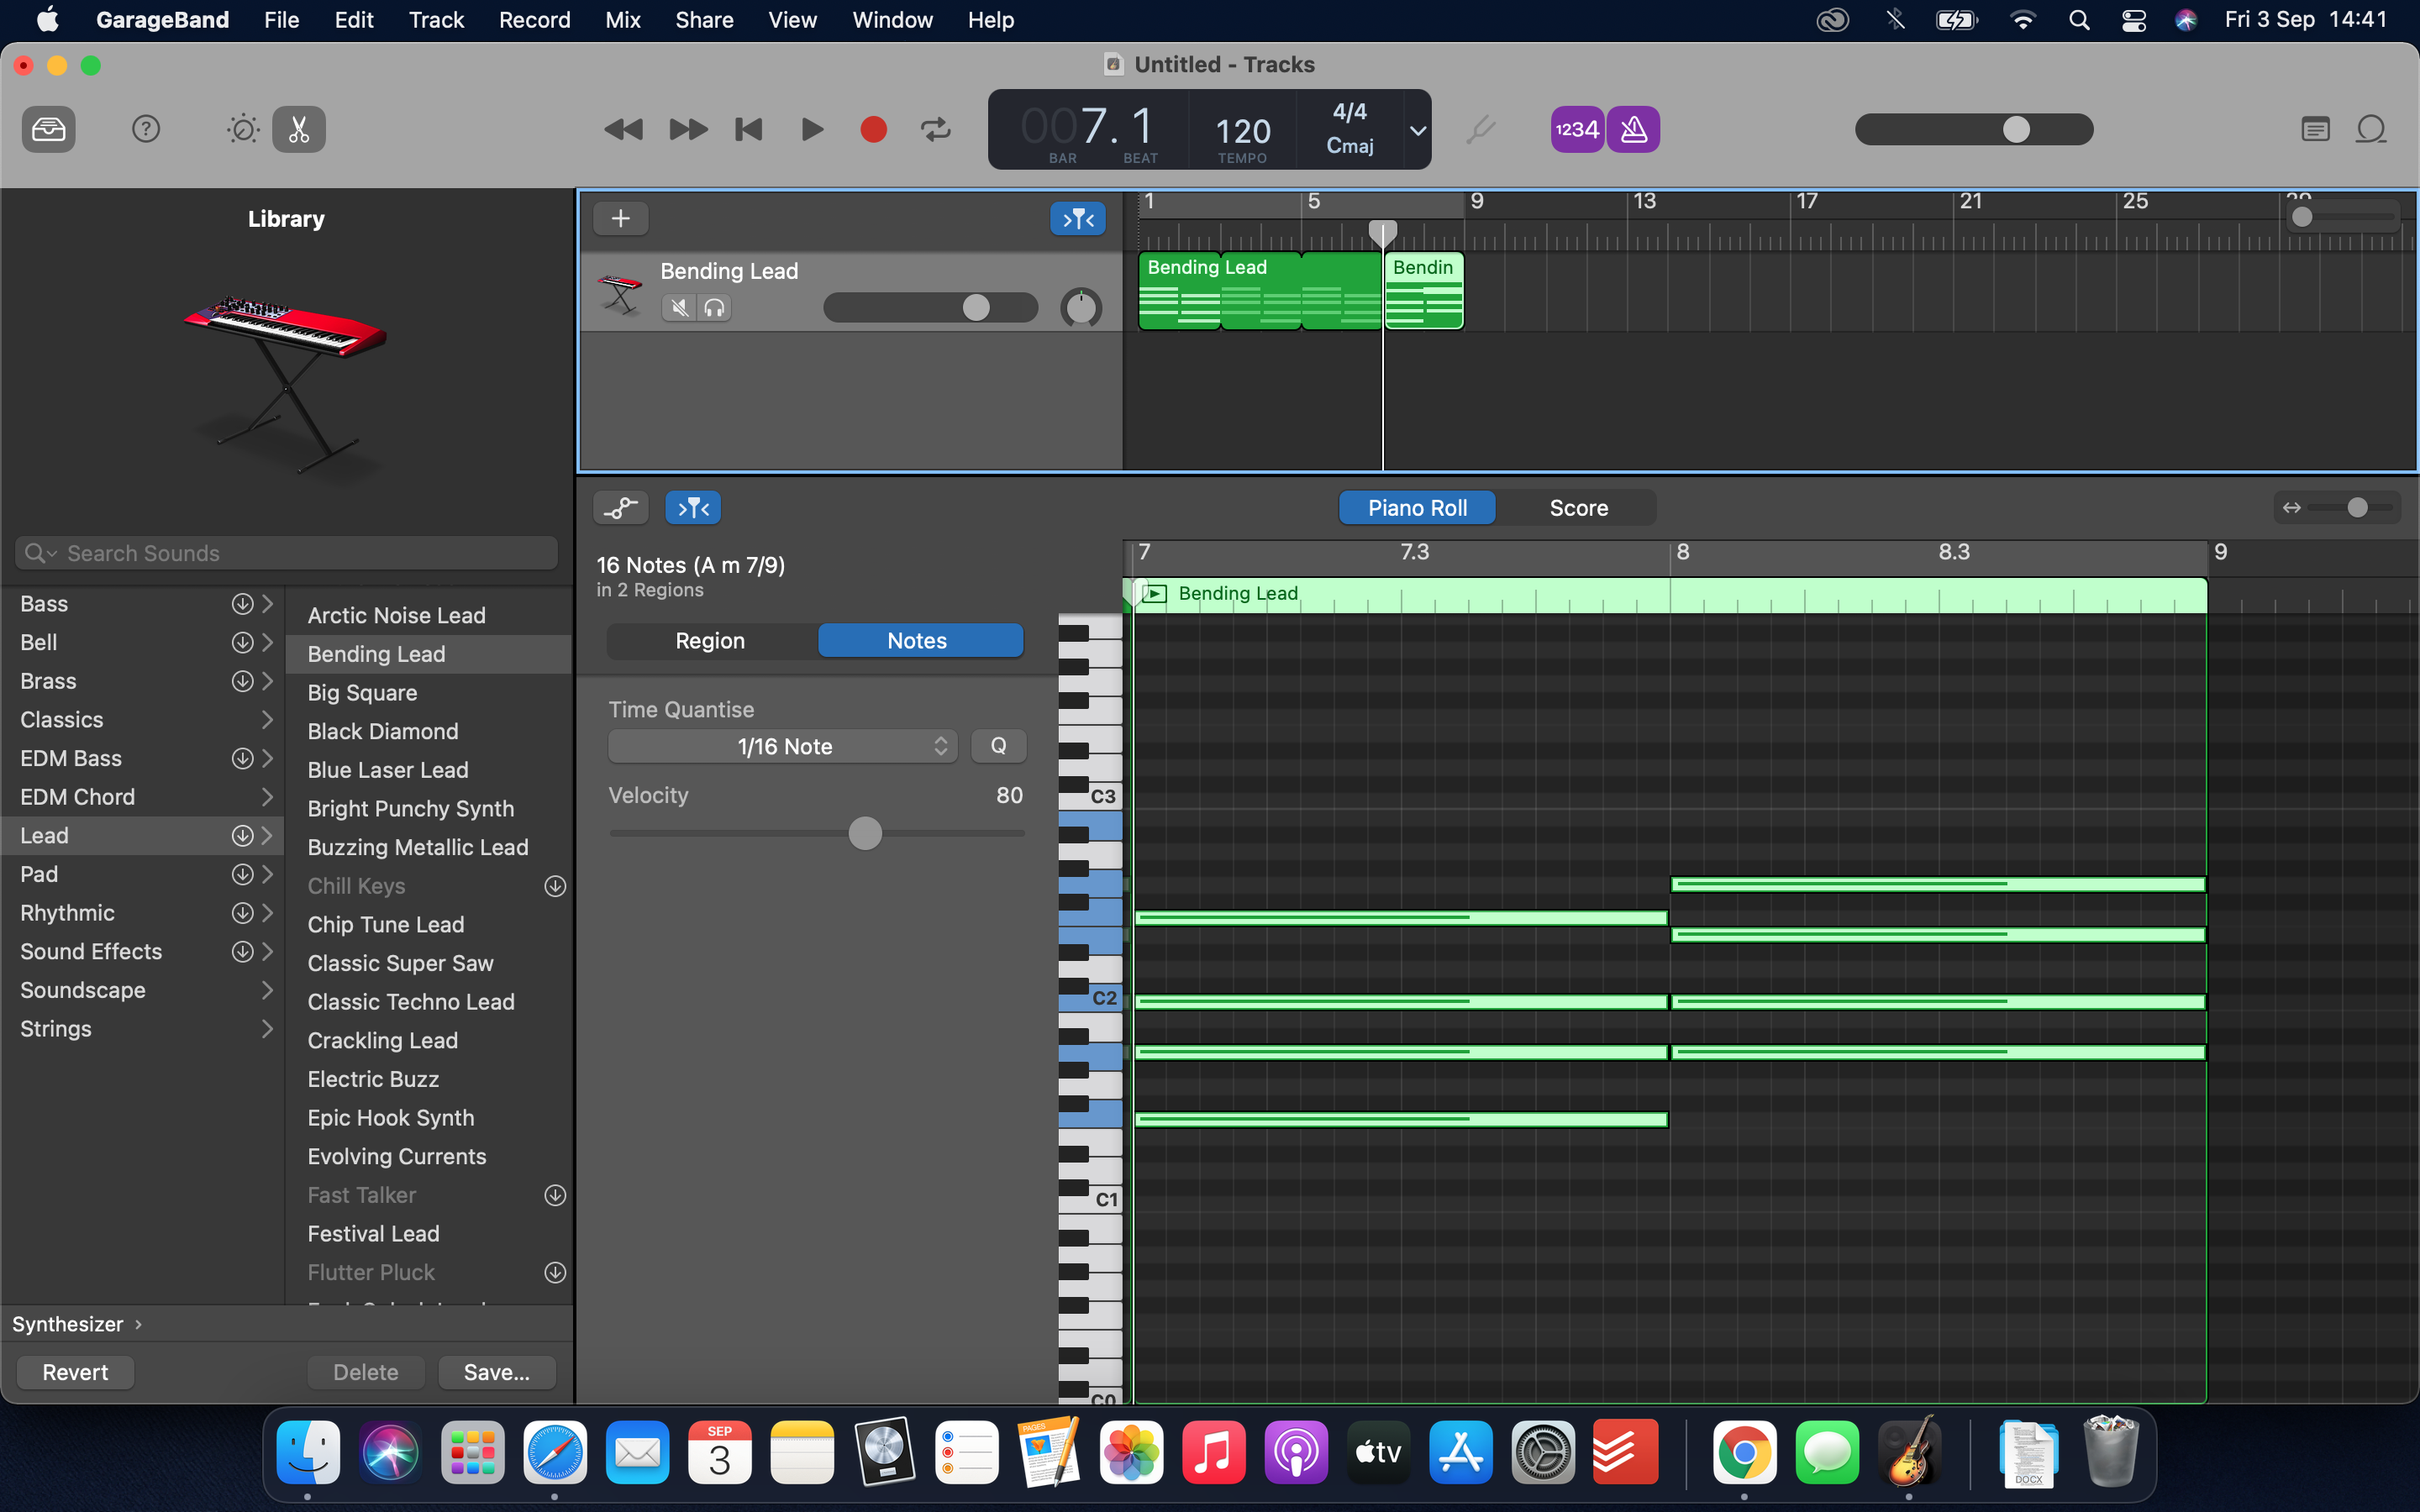
Step 9: Next, we’re going to follow the same process as before to create an empty two-bar region. Then, we’re going to enter one new chord, F Major, at the start of this region, along with a repetition of the A min7 chord from before. F Major contains the notes F, A, C and F. Remember to drag out the notes to fill the bar once you’ve entered them.
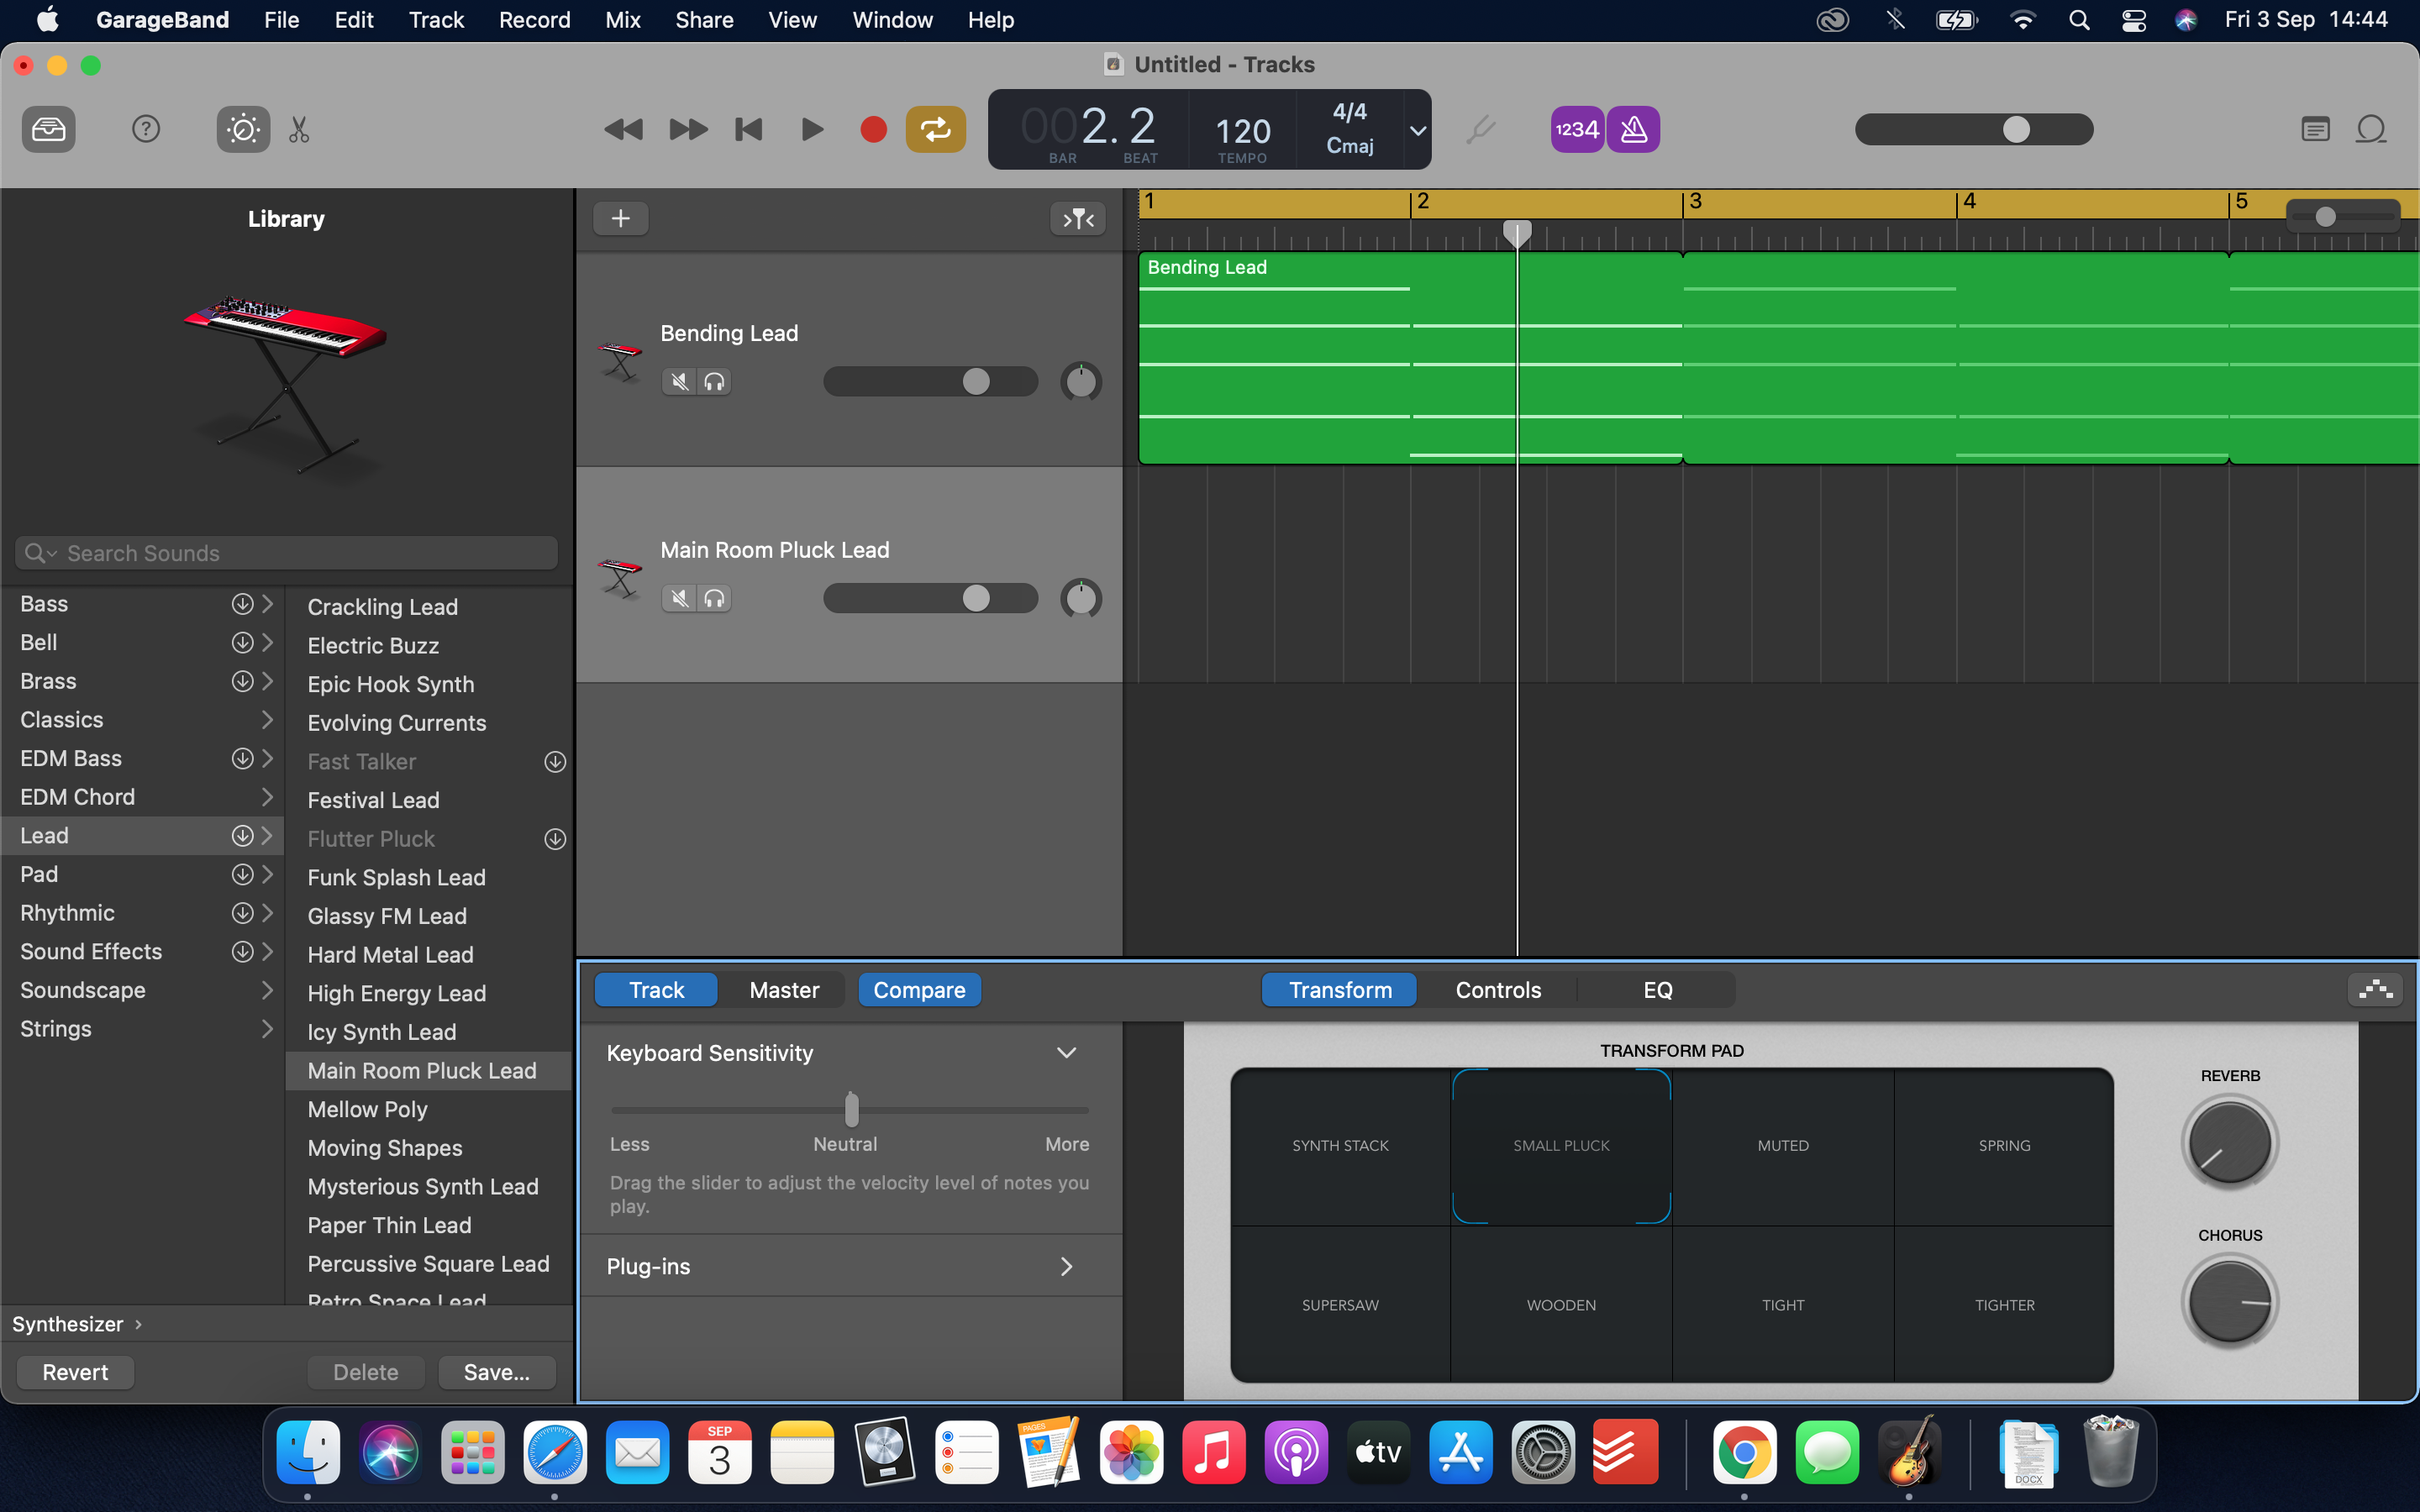
Step 10: We’re going to program a lead synth melody in a new track, to play over our chord sequence. To open up a new track, select Track at the top of the screen, then hit New Track. Then, use the Library navigator on the left to load up the Main Room Pluck Lead patch in our new track, and select the Small Pluck snapshot in the Transform window. Finally, turn the Reverb down (to help the lead sound stand out) and the Chorus up.
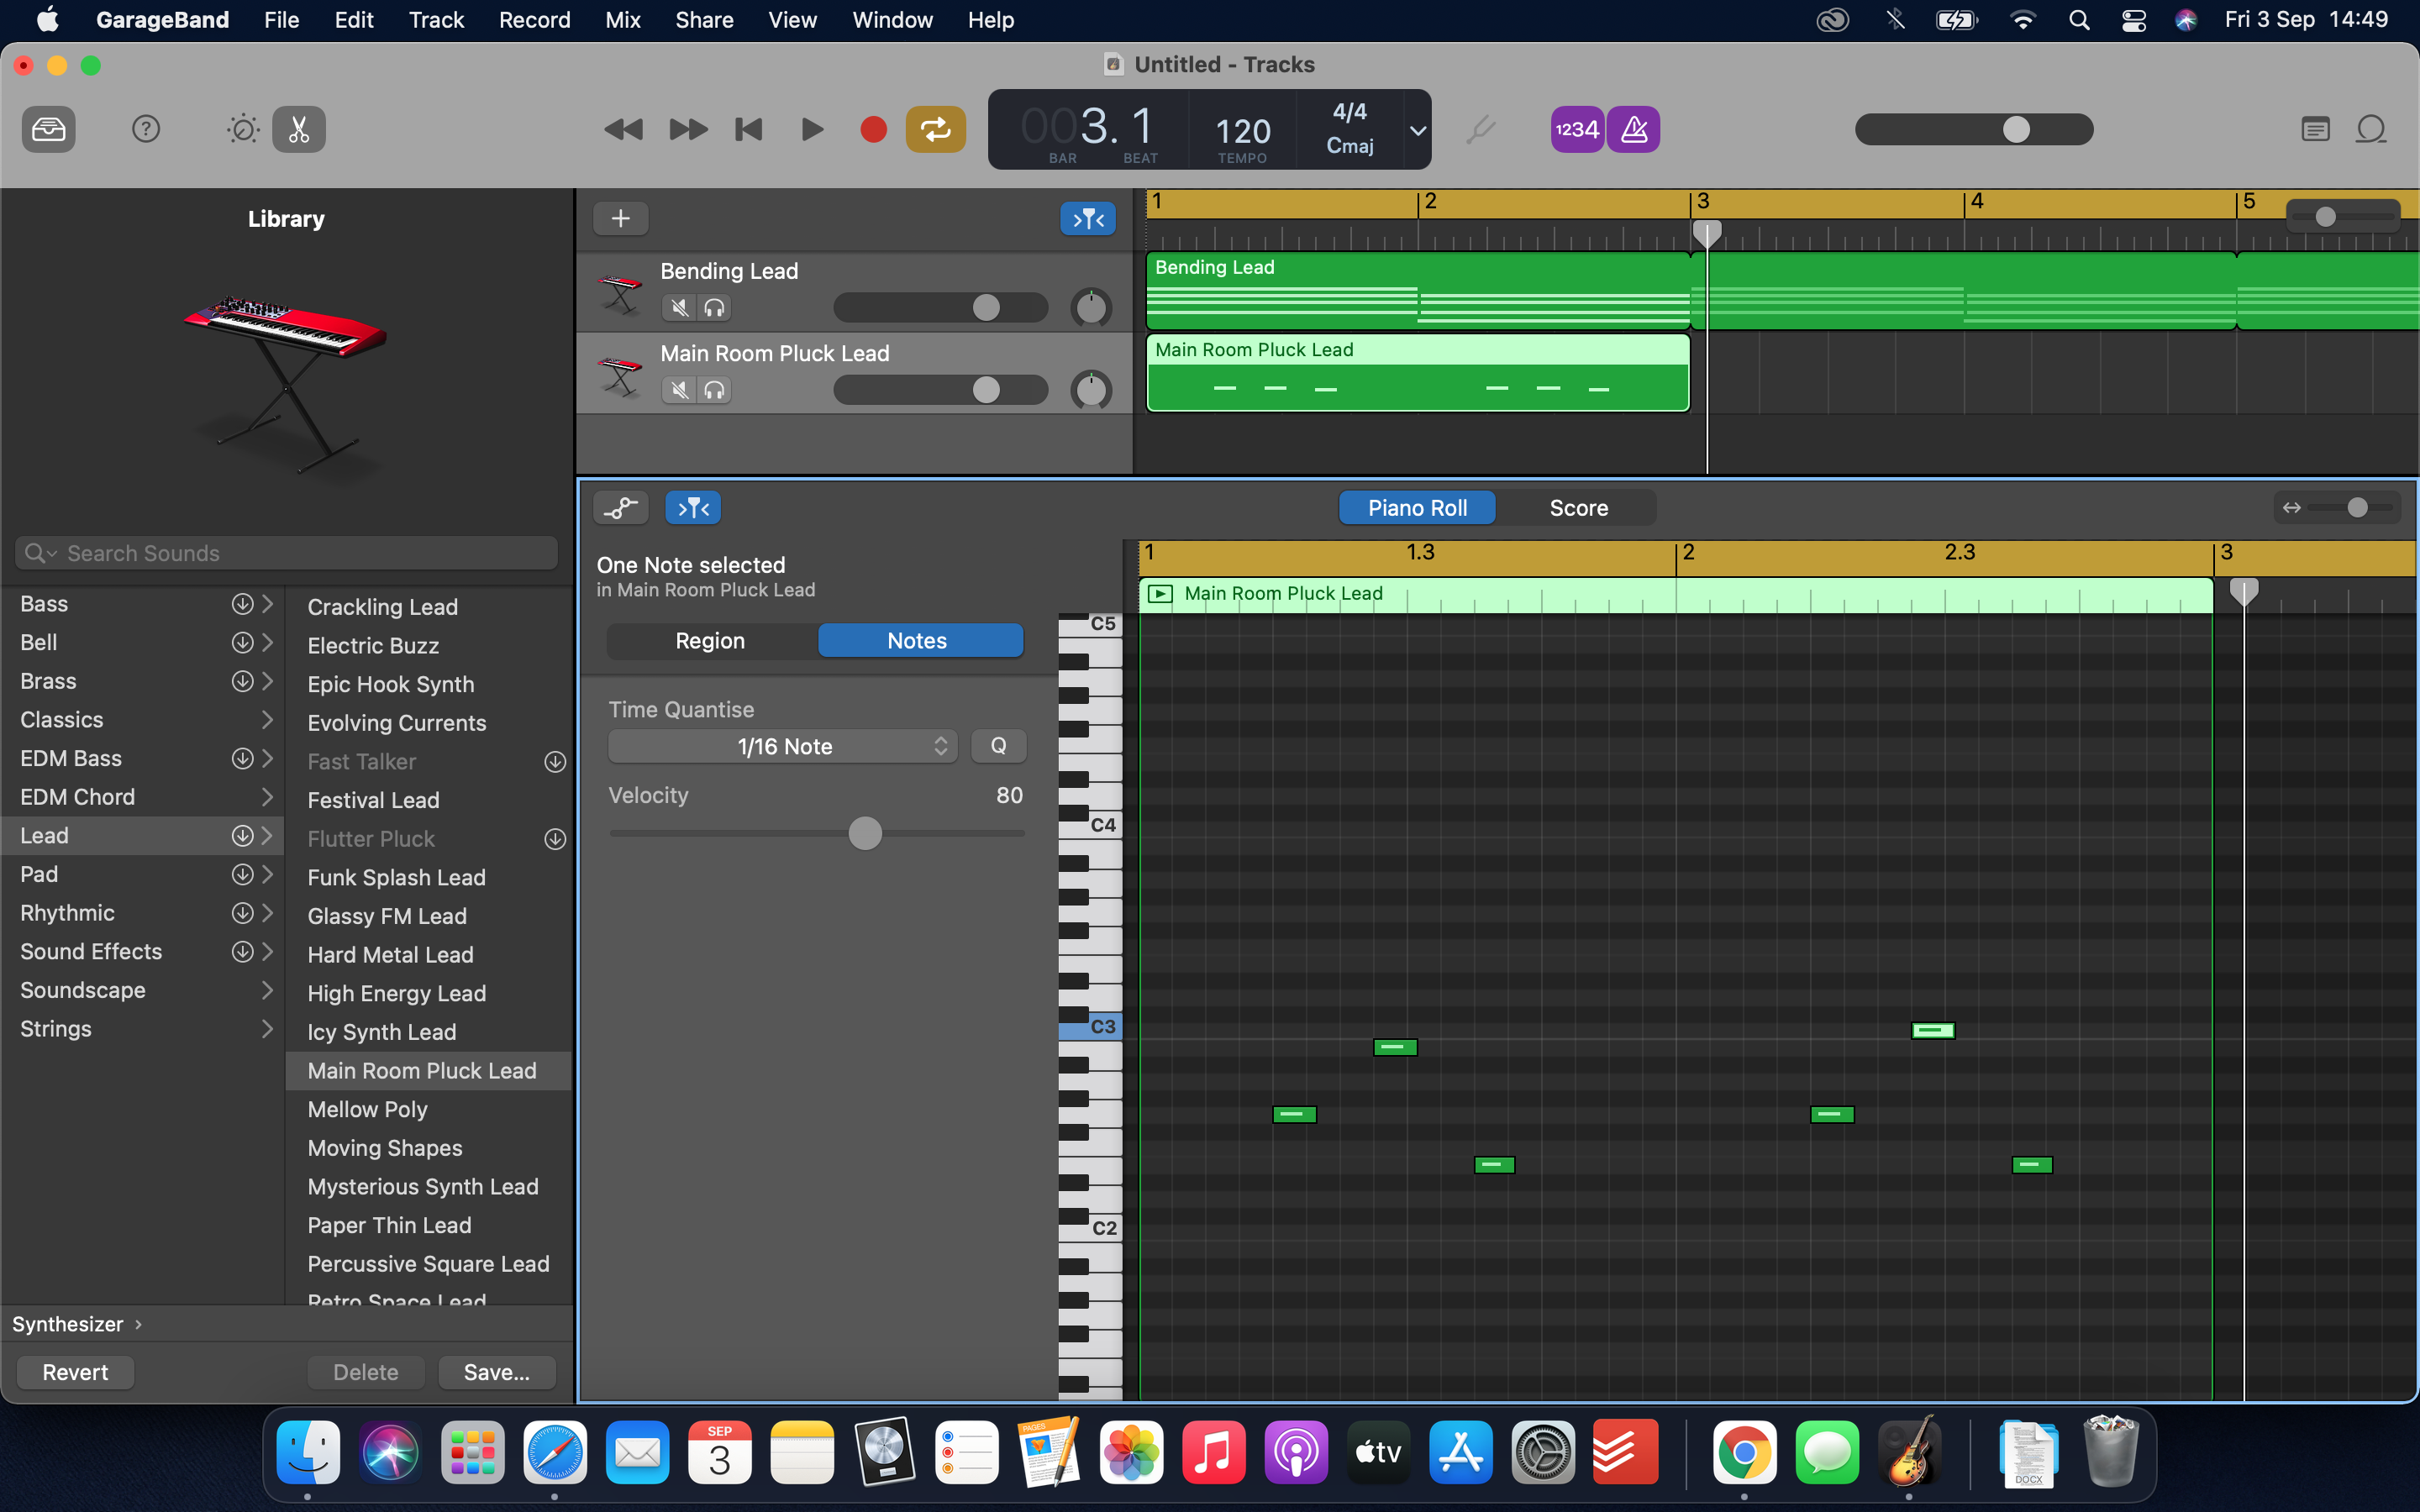
Step 11: Follow the same steps as before to create an empty two-bar region in the new track. Then, use Command + Click to enter in some notes that form a melody. Here, we want to use notes from the key of A Minor (hint: any of the white notes!) and we want the notes to line up with the vertical divisions within the region, so that they’re on beat and in time. We’ve used a three-note motif that varies on the repetition, from G-B-E to G-C-E.
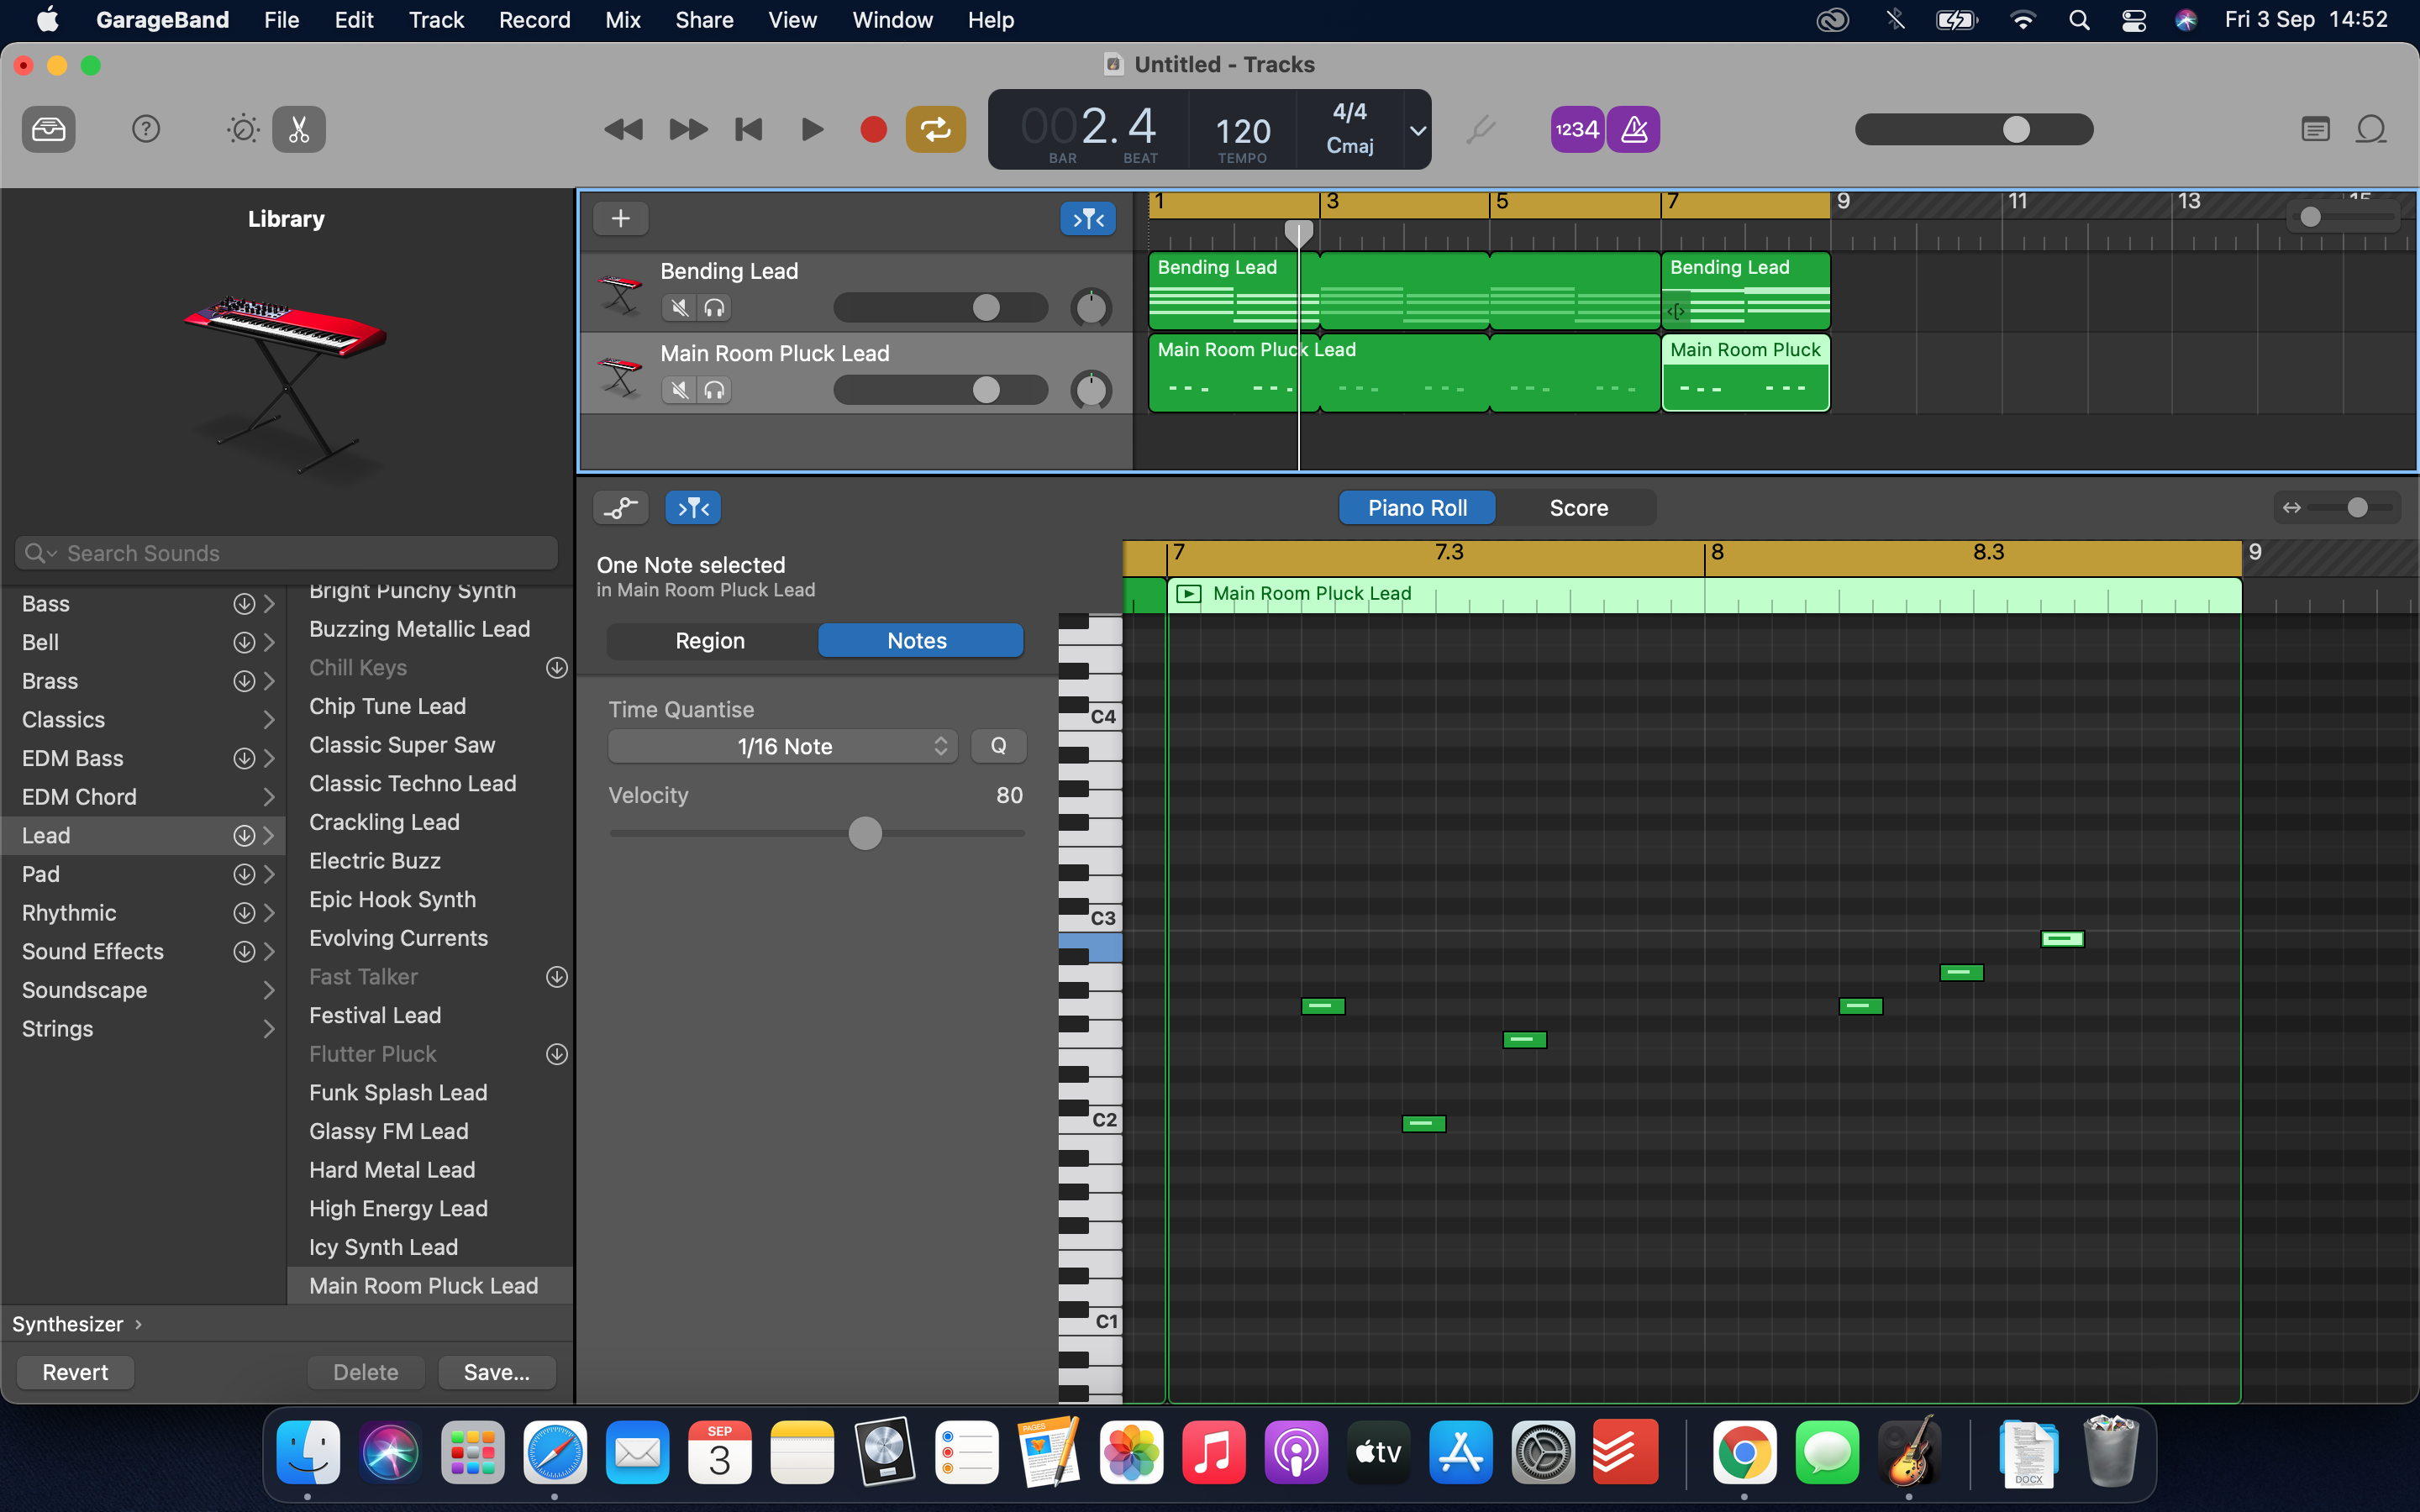
Step 12: Just like we did with the chord sequence, we want to loop our lead melody line so that it repeats three times. Then, we can open up an empty region to create our variation. Try experimenting with entering new melody lines in here - anything that’s in time and uses the notes from A Minor should sound OK!
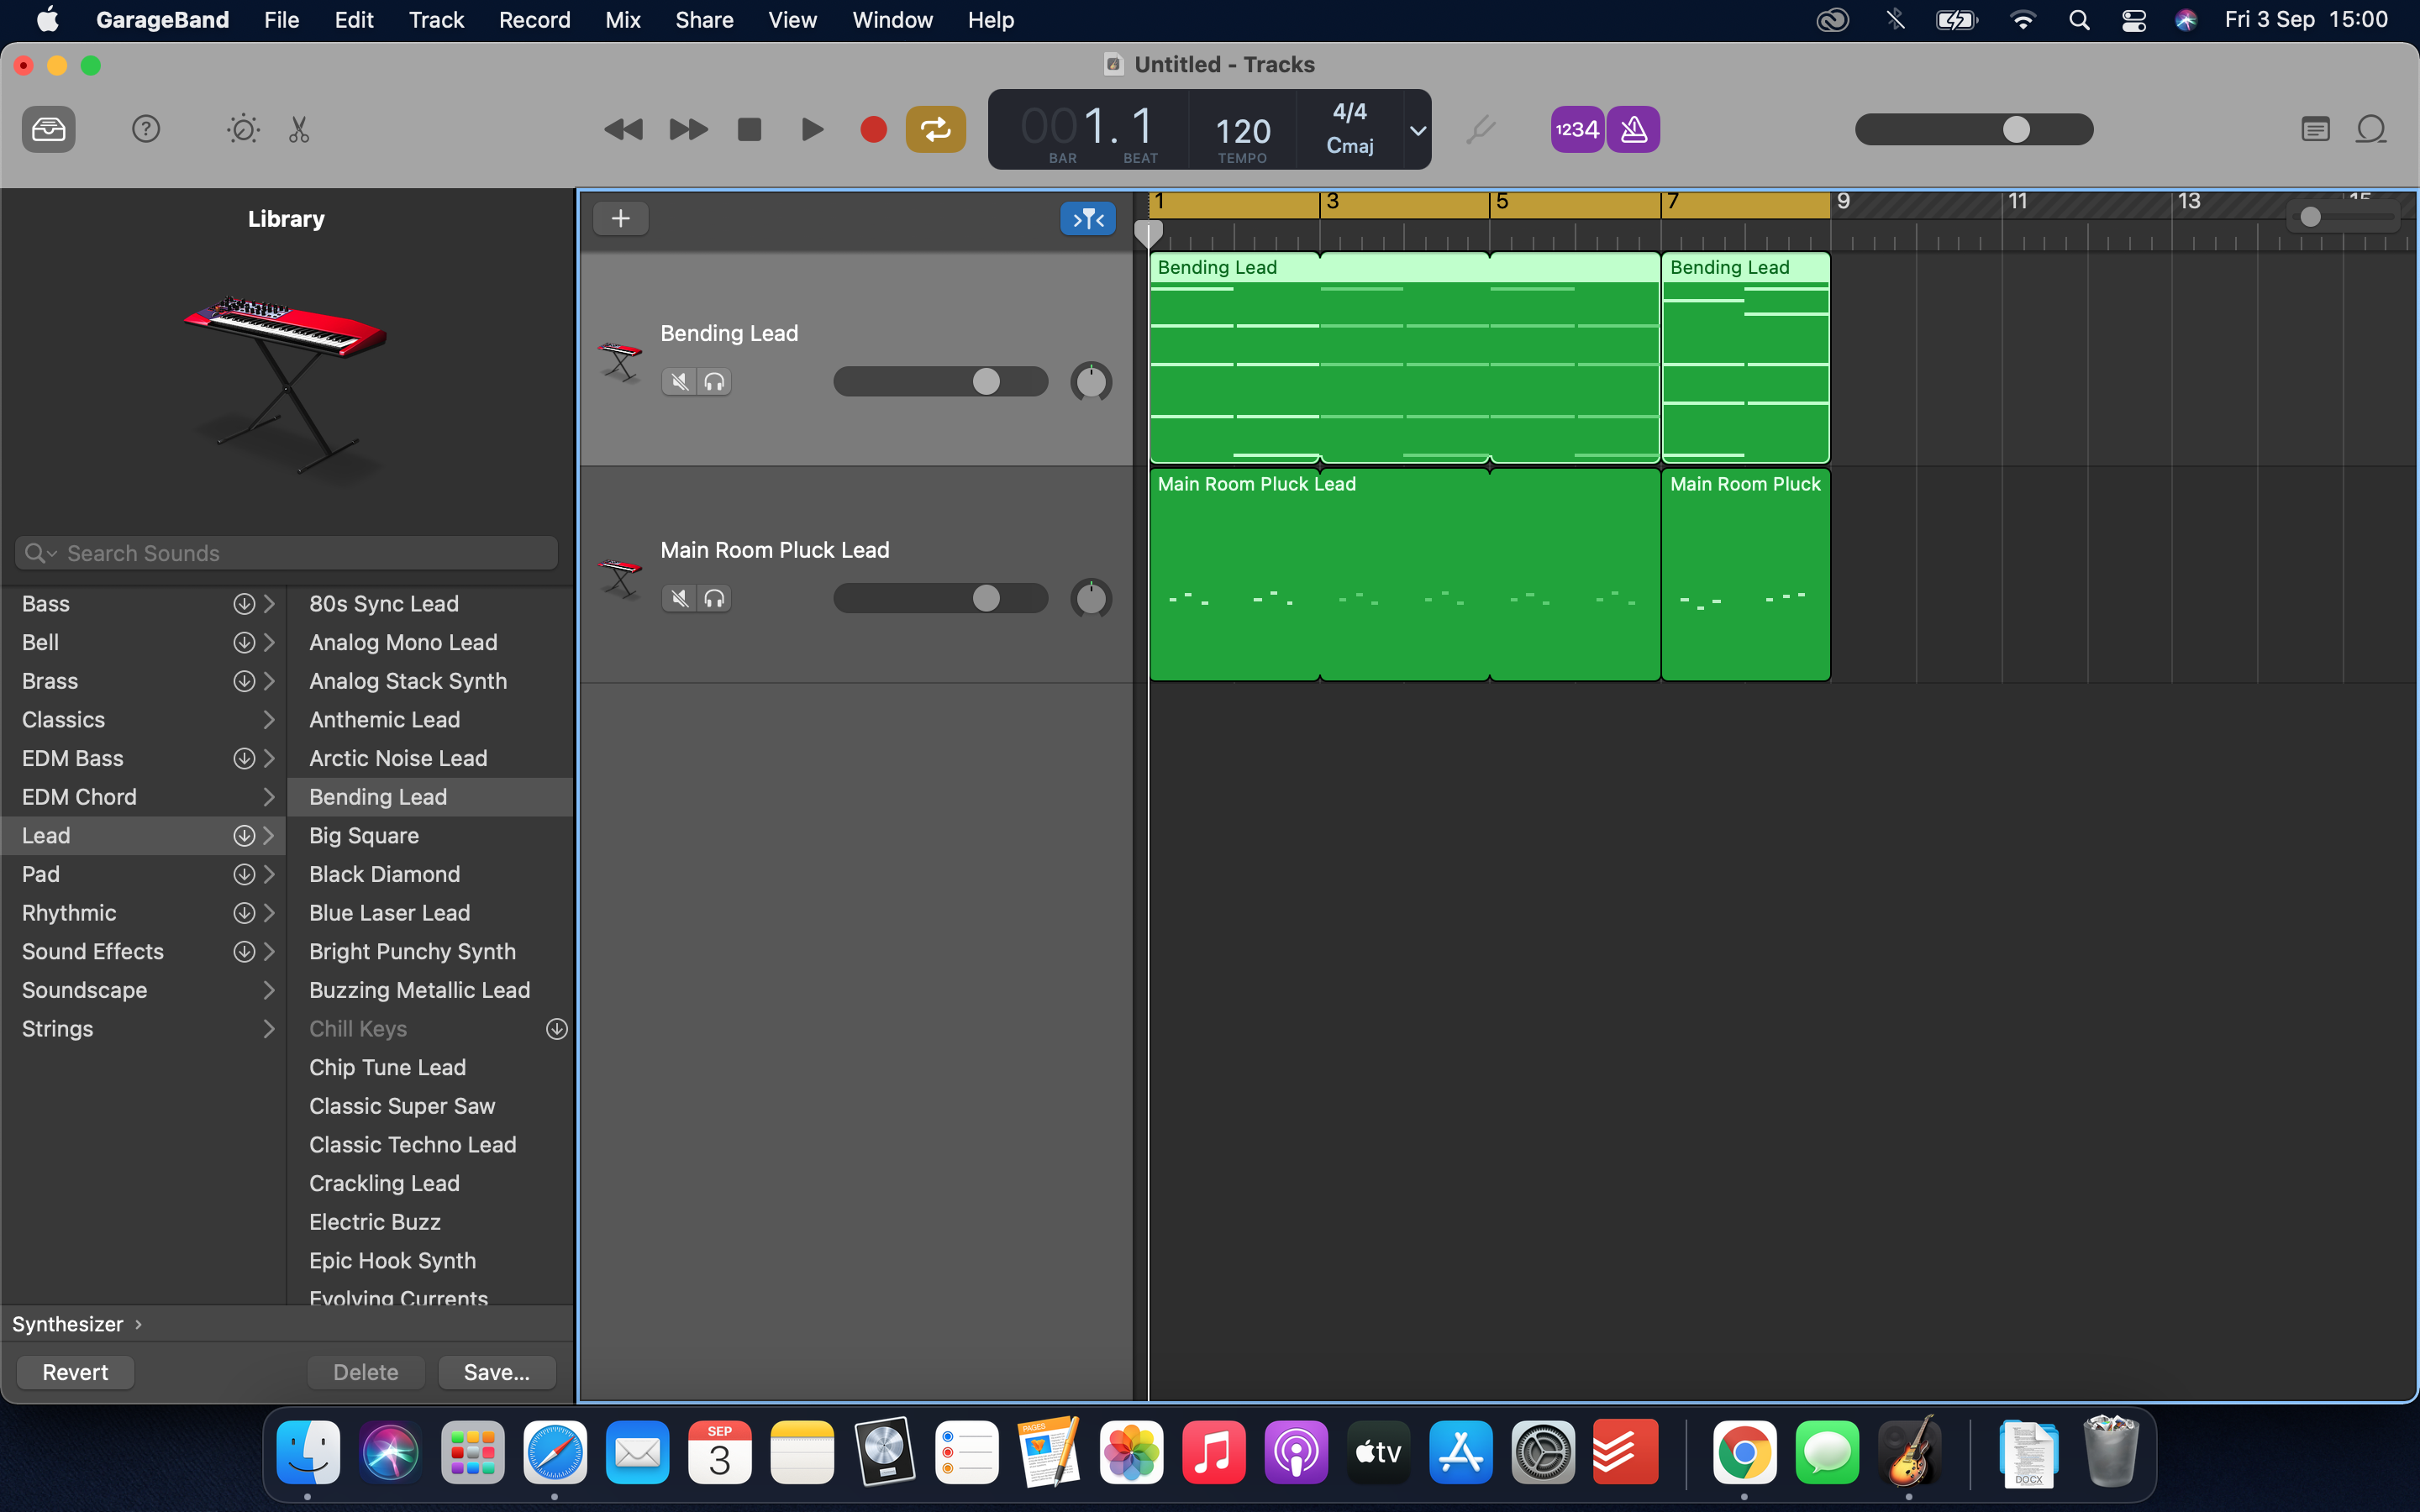
Step 13: You’re done! We now have a chord sequence, with a variation, on our first track, and a lead melody and variation on our second. Hit the faint grey bar that you can see above your regions to enable the Cycle Region, then drag this to the length of your 8-bar sequence. Then, when you hit play, GarageBand will play your sequence on a loop. Your next step is to experiment by changing the patch that’s loaded into your software instrument tracks to hear what other sounds GarageBand has to offer.

I'm MusicRadar's Tech Editor, working across everything from product news and gear-focused features to artist interviews and tech tutorials. I love electronic music and I'm perpetually fascinated by the tools we use to make it.