8 things you can do with Ableton Live's updated Auto Filter device
Given a major overhaul in Live 12.2, Auto Filter features a variety of creative filter types, new modulation options and real-time visualization
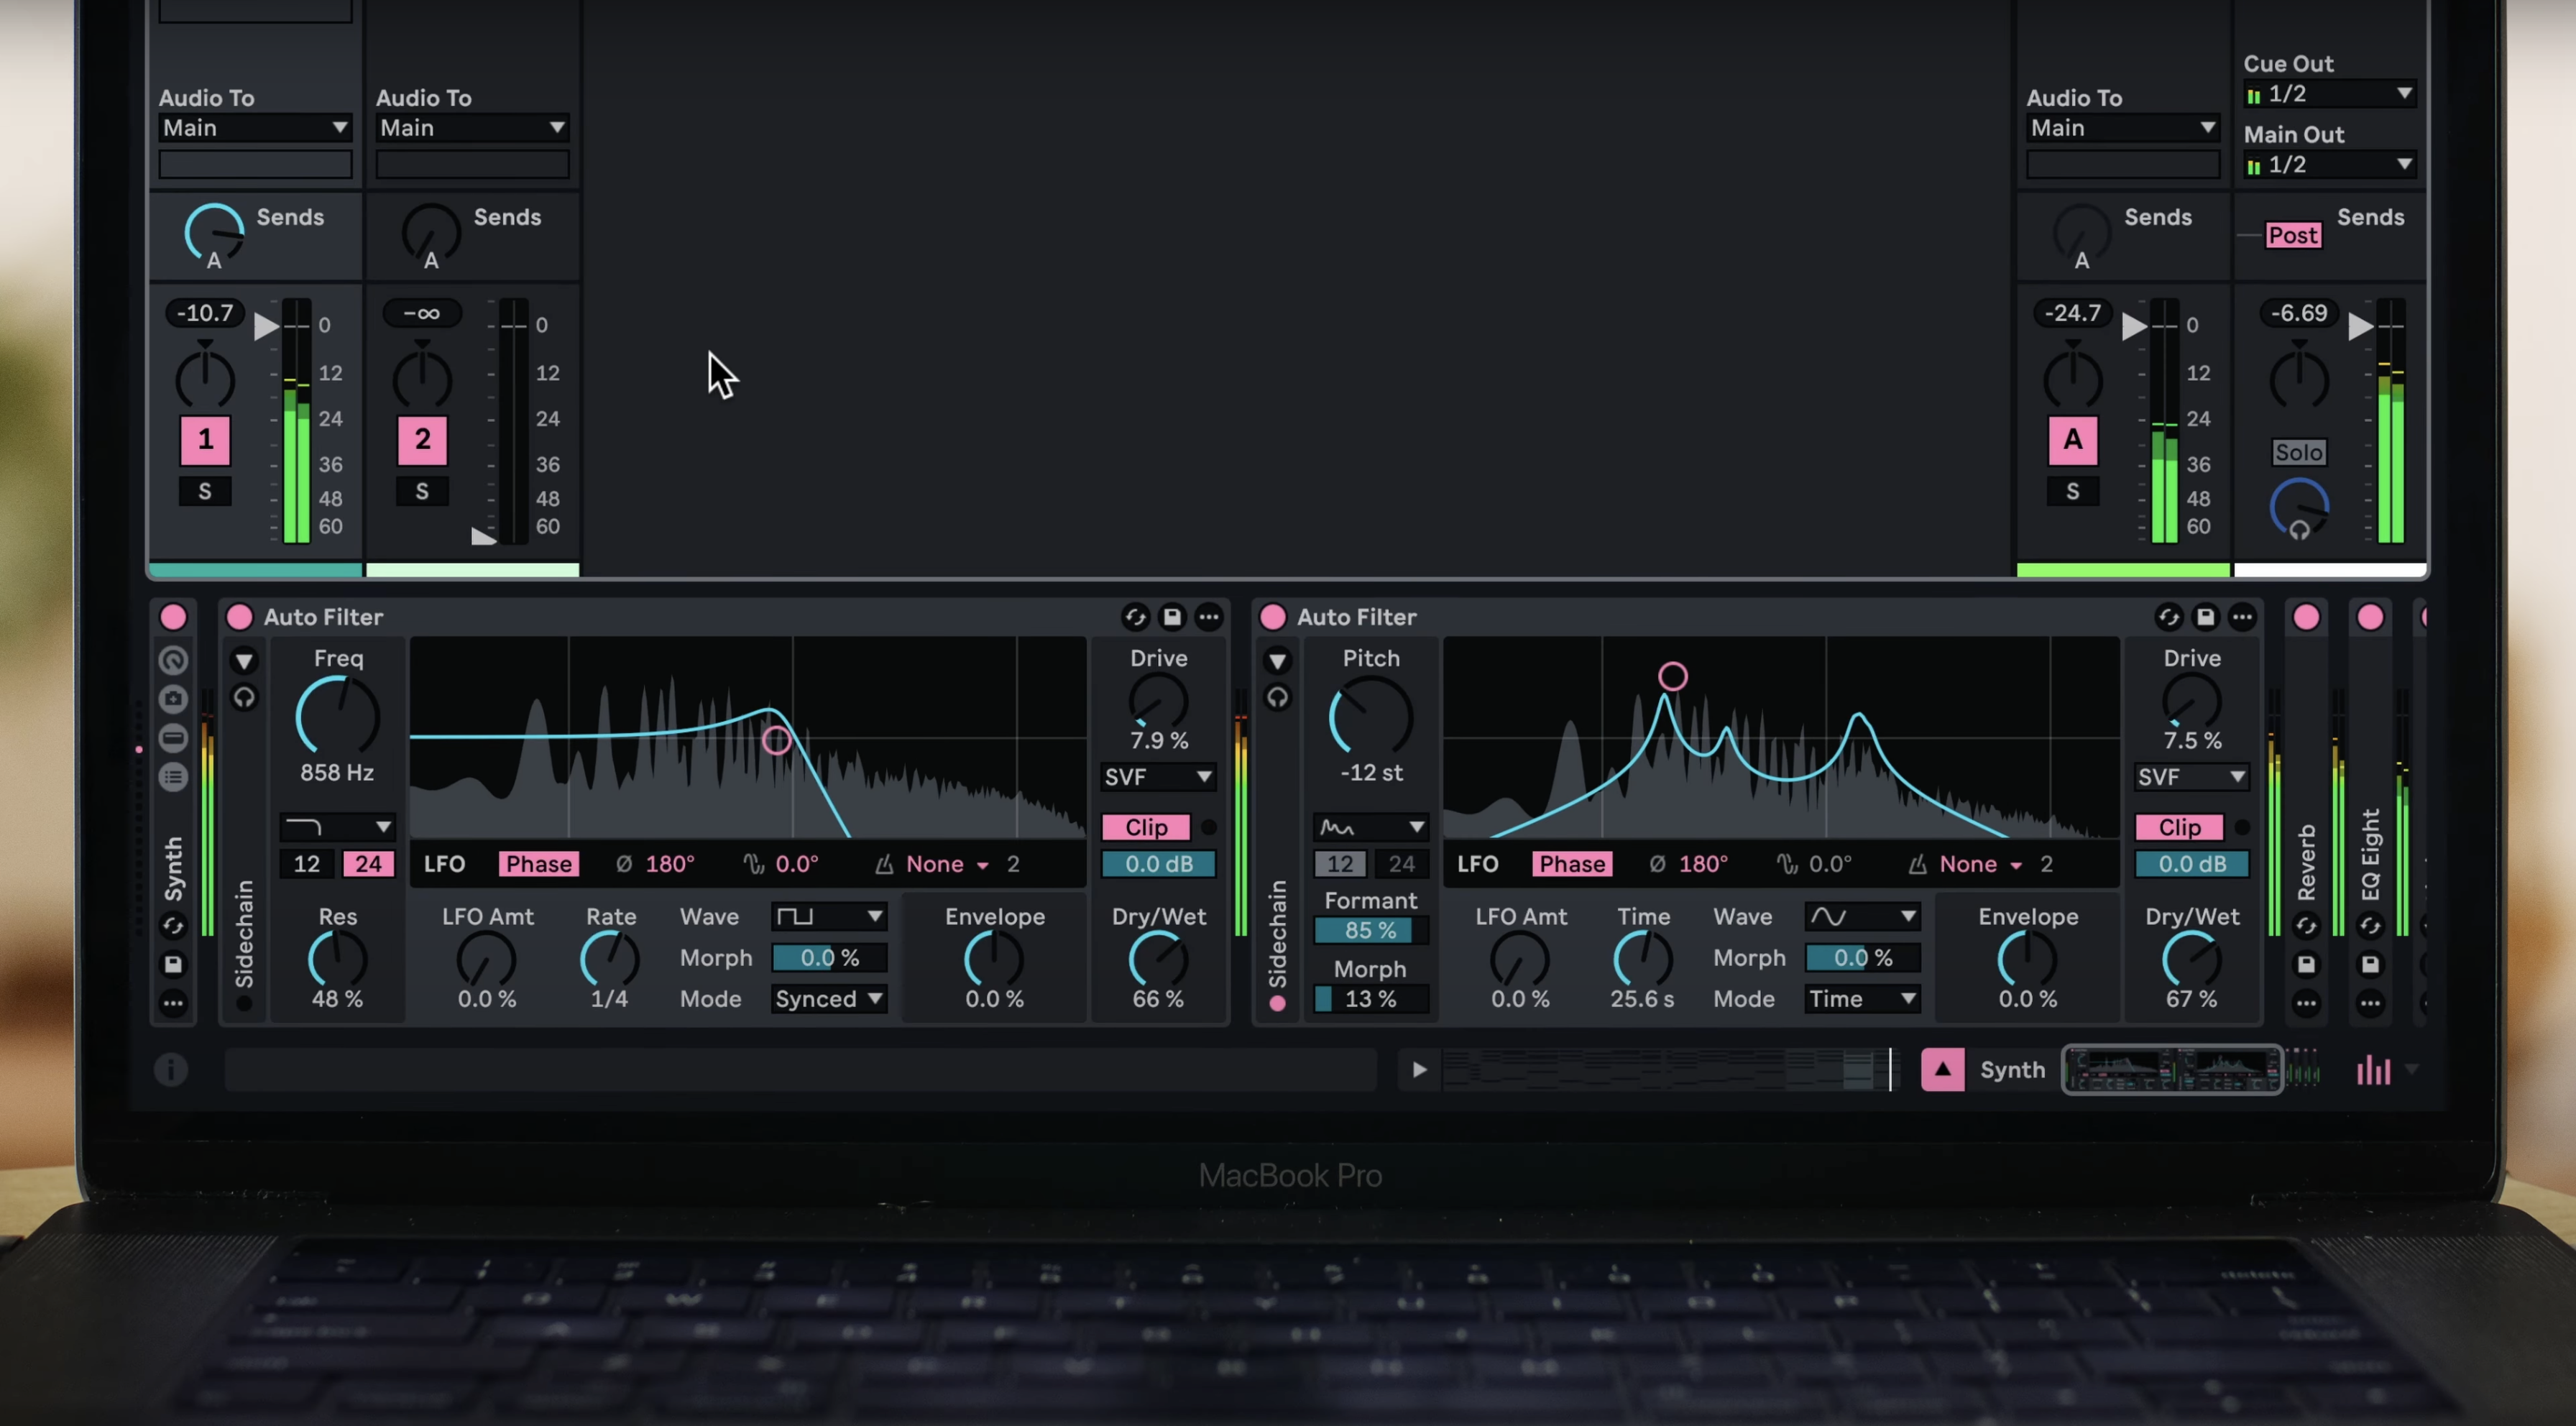
Auto Filter is one of Live’s tried and tested effects, and is (mostly) based on emulation of hardware filters. Not only shaping the frequency spectrum, a filter can also bring a repetitive sound to life, transforming it into something with dynamics and movement.
It’s always been a favourite device of ours, and recently it received an update in Live 12.2 - probably the biggest Auto Filter update so far. This includes new filter types and circuits, enhancements to the LFO and sidechaining, and new options for managing the output.
Here we’ll be looking at some of our favourite Auto Filter features, including a few updates alongside the classics. In our audio examples, you'll hear four bars of the unprocessed sound before hearing Auto Filter in action.
Article continues below1. Basic manoeuvres
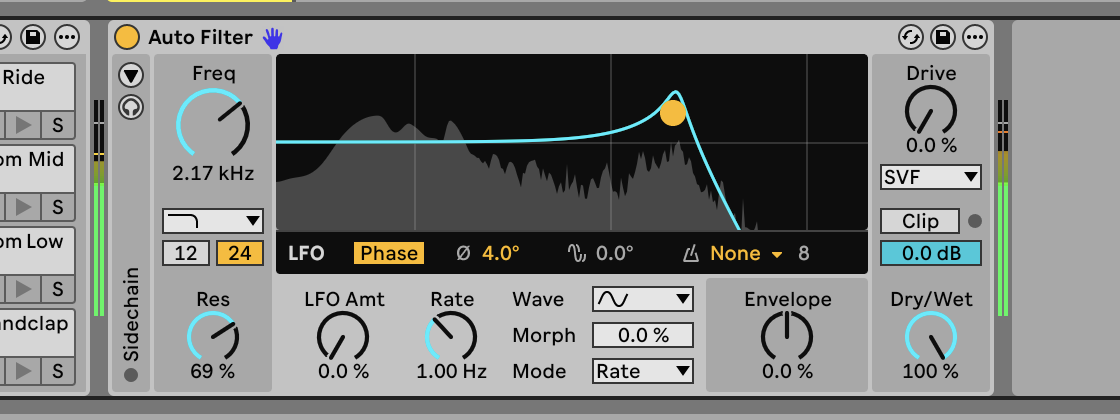
Open up Live 12.2, then add and trigger a drum loop. Drop Auto Filter into the same track, then click and drag the yellow XY dot in the black rectangle. As you do so, you’ll see the Freq(uency) and Res(onance) values changing on the left-hand side. These are core sound-shaping features - Frequency selects a frequency to cut or boost, and Resonance sets the amount of cut or boost at the selected point. Hearing these move is what filters are all about. A real-time spectrum visualiser for the output has been added to Auto Filter, giving you a visual representation of what’s happening.
2. Not my type
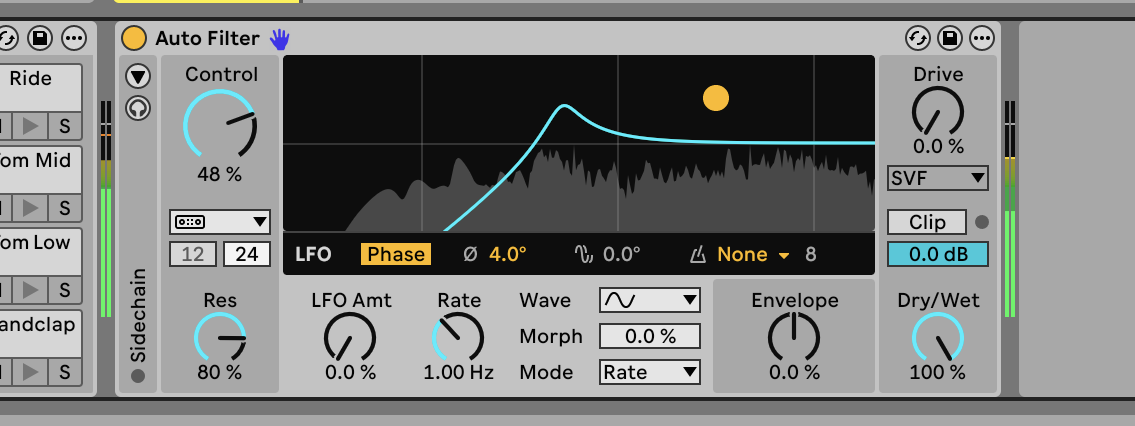
The most important aspect of filtering is choosing what type of filter to use - this determines what range of your sound will pass through unaffected. Auto Filter includes low-pass, high-pass, band-pass, notch, and morph filters, as well as new additions, including DJ, which gives an easy way to control low and high pass with one control. This is a great one for just playing around and getting an effective result quickly, try it, it’s very DJ mixer-like. Vowel is also interesting, attempting to resemble the character of the human voice, with the ability to cycle through each vowel. Hear both the DJ and Vowel filter types below.
3. Circuit training
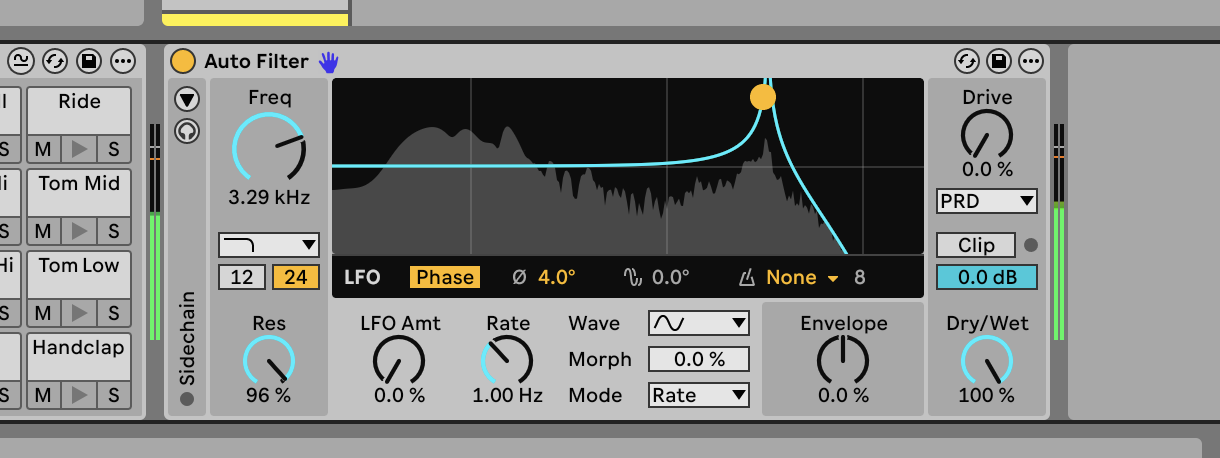
Auto Filter includes emulations of classic analog hardware filter circuits, and it’s absolutely worth taking your time to experiment with these, there’s no ‘right or wrong’, just see what works for your music. These circuits work in conjunction with the chosen filter type, and will add another layer of character: SVF is a clean state variable filter, while the new DFM circuit internally feeds back more distortion for a more aggressive sound. MS2 is based on classic Korg hardware filters, and PRD is based on the Moog Prodigy’s filter. These circuits can sound very distinct from each other, especially when pushed to extreme settings. Below you can hear the PRD filter type going from low to high.
4. Get moving
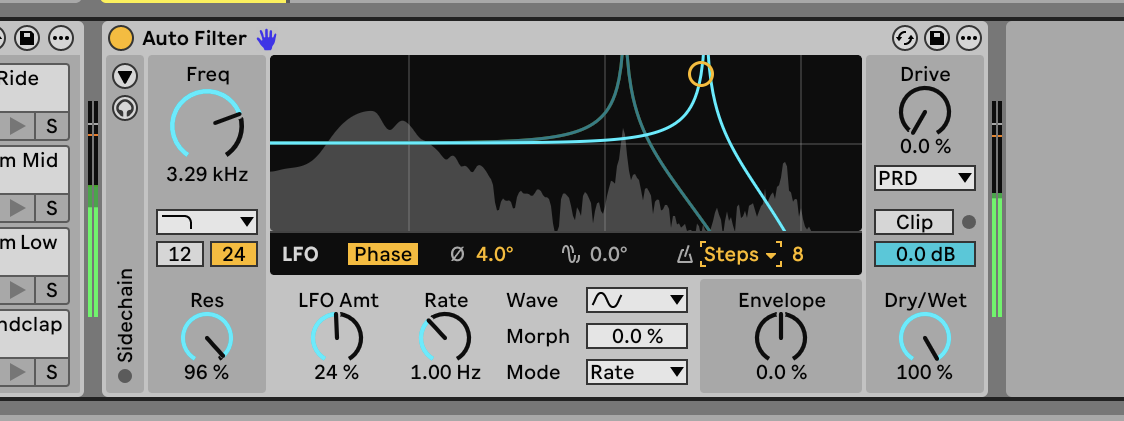
We already mentioned how important movement is, and there are options for how to achieve this, other than dragging the XY control around. Auto Filter’s built-in LFO is applied to filter frequency, with controls for rate and depth, and importantly it can be either synced to the project tempo or left free-running on a specified Hz value for a more organic feel. The LFO can be quantised, with three available settings for this: Off, Steps, and Sample & Hold. We like using Steps to imprint a really obvious pattern feel, and cycling through the range of steps from 2 to 64, listening to what they do.
Want all the hottest music and gear news, reviews, deals, features and more, direct to your inbox? Sign up here.
5. Going for a Wander
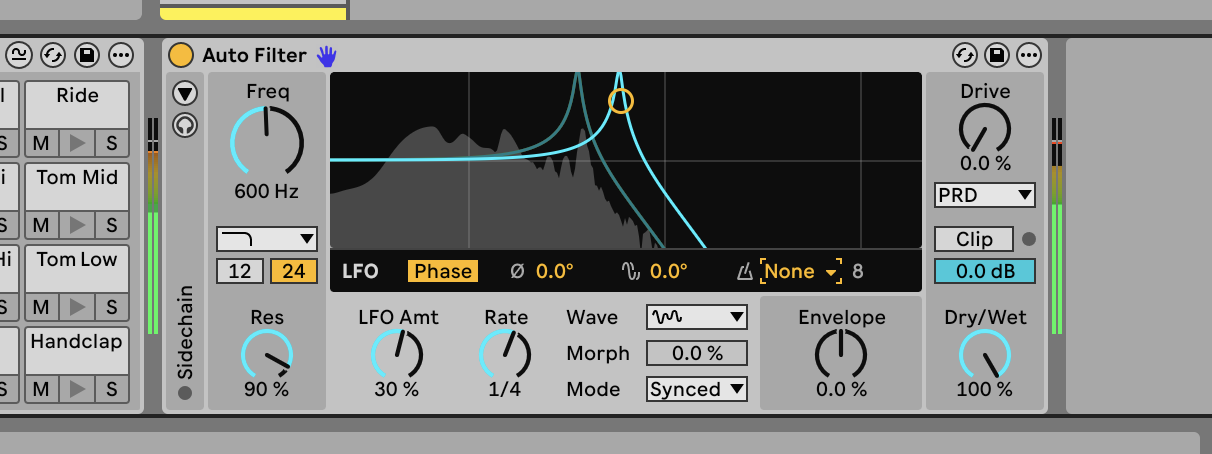
Of course, everything in Auto Filter can be automated, like pretty much everything else in Live, but the LFO feels more hands-on. One thing we particularly like to do is take the PRD circuit, set Res to around 90%, Freq to around 600 Hz, LFO waveform to Wander (come on, who’s not going to use something called ‘Wander’?), Amount to around 30%, rate to 1/4. You don’t have to use those exact settings, of course, but it’s a good starting point depending on your source material - there’s a lot of potential for movement there.
6. Break the chain
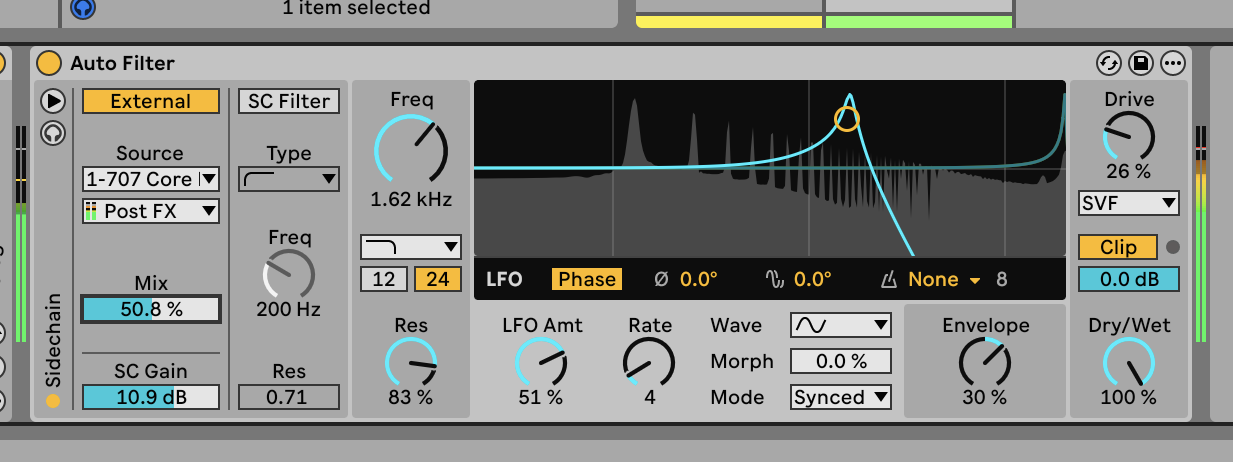
You can use sidechaining to ‘lift’ the timing from another track or a live input, and apply it to the filter frequency. Click the little triangle at the left of Auto Filter to reveal the sidechaining controls, turn on the External switch, then select a source track. Even if the source track is muted, the audio signal from it will reach the sidechain. You could even create a special sidechaining source track for an independent input. Move the Freq control until it hits a good spot. The sidechain mix control is useful for blending the effect in and out.
7. Just a phase
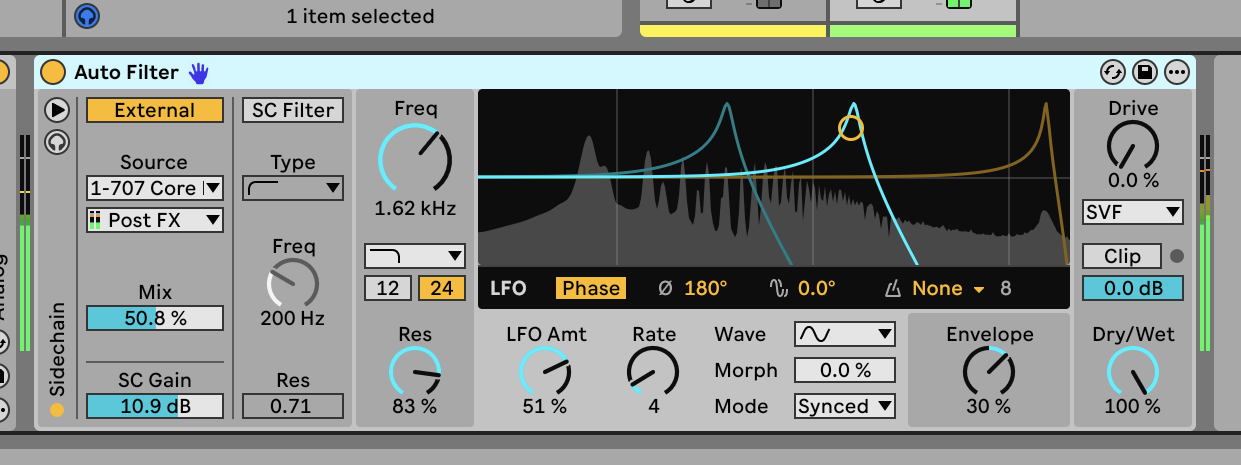
When the LFO is active (on any Amount higher than zero), we have two stereo modes to choose from: Phase and Spin. These controls manipulate the available space between the LFO’s stereo channels. If Phase is on, moving the control and changing values at the right of the switch will offset the left/right signal, indicated in degrees. At 0 they are totally in phase and you only hear one unified signal, as you move the control upwards the stereo width becomes obvious. Spin does the same job, but the offset occurs automatically over time.
8. Drive me crazy
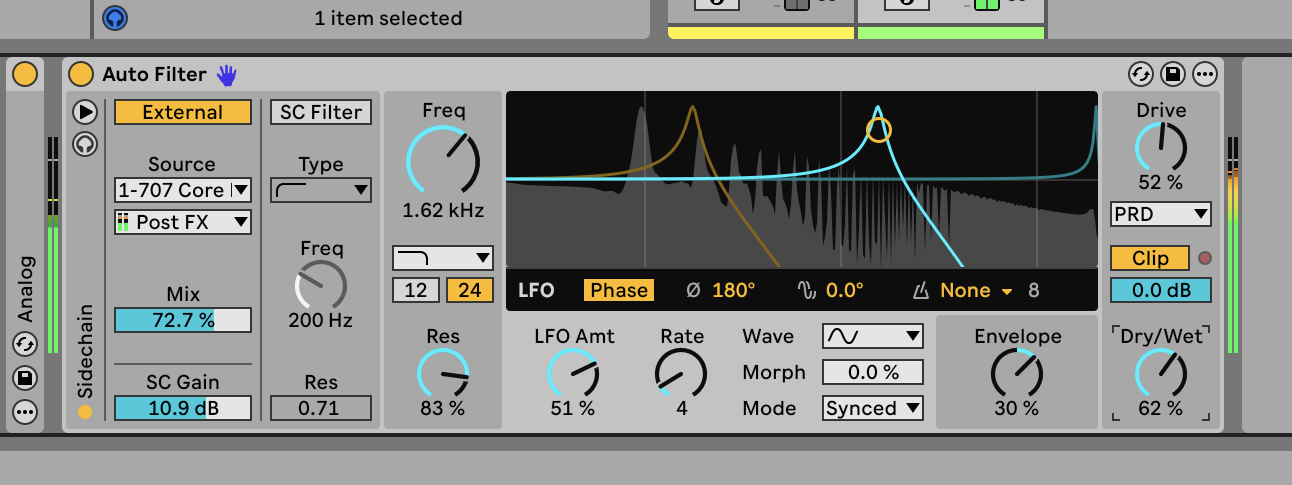
Auto Filter has new options for the output stage at the end of the chain, with the Drive control at the top-right dialling in a more saturated sound. Try combining the Drive with a high Resonance setting and a modulated Cutoff to create a dramatic sweeping effect with added punch. You may be advised to enable Clip, which will help to contain any peaks. The Output control sets the level of the wet signal, while the Dry/Wet below balances the original source sound with the filter output.
Live’s Auto Filter is an effect device that works wonders for simple mixing tasks but also rewards in-depth exploration, opening up an array of possibilities for creative sound design. Our favourite features are probably the LFO Step quantisation - there’s something about it that draws us in, and we will overuse it. The LFO Phase controls are also fun to play with, as they really start to work the stereo image a bit harder. In fact it’s so easy to get carried away with Auto Filter, sometimes we have to rein it in to avoid swamping the rest of the track we’re working on. But give it room to shine, and it will.
Martin Delaney was one of the UK’s first Ableton Certified Trainers. He’s taught Ableton Live (and Logic Pro) to every type of student, ranging from school kids to psychiatric patients to DJs and composers. In 2004 he designed the Kenton Killamix Mini MIDI controller, which has been used by Underworld, Carl Craig, and others. He’s written four books and many magazine reviews, tutorials, and interviews, on the subject of music technology. Martin has his own ambient music project, and plays bass for The Witch Of Brussels.
You must confirm your public display name before commenting
Please logout and then login again, you will then be prompted to enter your display name.