Few sounds in dance music are as recognisable and nostalgically evocative as the classic drum machine snare build. From house and techno to garage and drum ’n’ bass, that ramping percussive onslaught has led into more drops than we could even begin to count.
In this walkthrough, we'll take a single TR-909 snare sample and turn it into an energetic, building roll that increases in volume and intensity through modulation and automation of various parameters.
Click here to download the files you'll need to complete this tutorial, and scroll to the bottom of the page for a playlist of audio examples. For more advice on creating builds and drops, grab the May edition of Computer Music.

Step 1: We’re going to create the classic dance snare roll build-up, then use parameter automation and effects to enhance it. Start by importing House.wav onto a new audio track in a 127bpm project, then put D16 Group's Frontier limiter on the master bus. On a MIDI instrument track, create a sampler instrument - most DAWs include one.

Step 2: Import 909 snare.wav into the sampler, and program an eight-bar-long MIDI clip with a constant stream of 16th-notes. Use the sample’s root note to begin with - that’s C3 on Ableton’s Simpler, which we’re using here. You can tune the drum to fit the key of the song or just to give a different sound - -3 semitones slots it nicely into this particular build-up.
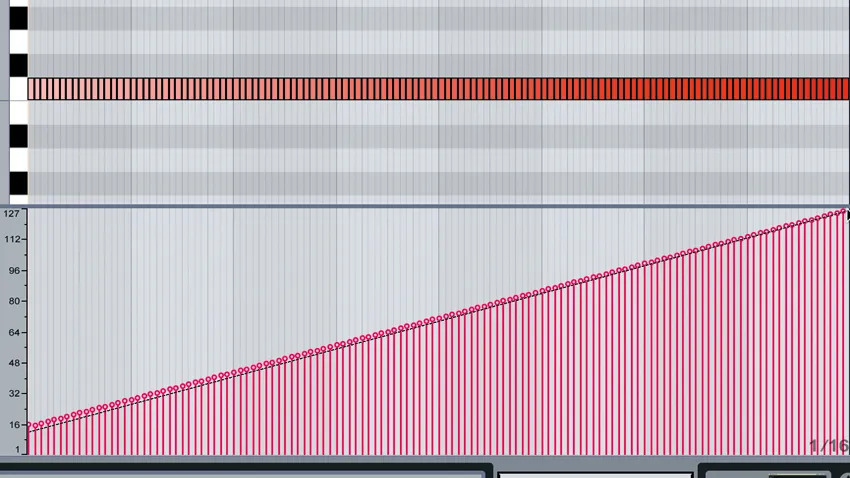
Step 3: Now program the velocity so it starts low (at 16) and increases to maximum over time. Some DAWs let you draw a straight line to achieve this. If you’re not hearing the snare drum get louder as velocity increases, ensure that MIDI Velocity is assigned to control Volume in your sampler. Delete the final four snare hits to make space for the short vocal fill that ends our build-up.

Step 4: Velocity isn’t just for controlling volume - let’s assign it to filter cutoff too. In Ableton Live's Sampler, set the filter’s Frequency to 5.6kHz and Resonance to 35%. To make it velocity-sensitive, set Velocity (under the Controls tab) to 42%. Now the snare’s fizzy top-end is revealed gradually. To restore front-end snap, use a short, ‘plucky’ filter envelope with 0ms Attack, 20ms Decay, zero Sustain, and Amount at 20.

Step 5: You can use automation to modulate parameters independently of velocity. We set the amplitude Attack to 0ms, Sustain to -inf. dB and Release to 20ms, then automate the Decay to go from 666ms to its maximum, so it starts out tight and punchy but gradually opens up. Pitch is another good parameter to modulate, automate, or, of course, control via MIDI note.

Step 6: So far, it’s a typical snare build, but effects can radically transform it. We use automation to progressively mix in reverb and heavy chorus, and roll up a high-pass filter, gradually turning the punchy snare into a wash of stereo noise, like a riser. Finally, if you think snare rolls are old hat, simply swap out the snare for a different sound - try a vocal chop or synth blast!
