How to make a track in Ableton Live 11 Lite: using audio effects
Ableton Live 11 Lite comes free with this month's Computer Music Magazine - grab a copy and follow our tutorial
Want all the hottest music and gear news, reviews, deals, features and more, direct to your inbox? Sign up here.
You are now subscribed
Your newsletter sign-up was successful
Ableton Live is a DAW that needs no introduction, and its combination of performance and production features mean it’s as popular with performers and DJs as it is with creators.
Live 11 Lite is a cut-down version of Ableton Live, with all of the essential workflows, instruments and effects, but with limited track count, and for many years this has been bundled with apps and hardware products. This month, you can grab a free copy of Ableton Live 11 Lite with the latest issue of Computer Music Magazine.
To mark this momentous occasion and also to get you started using this fabulous software, we’ve put together a series of tutorials that run through everything you need to get acquainted with Ableton Live 11 Lite, so you can learn how to build a track from scratch.
Article continues belowOur tutorials are primarily for new users, but that said, we’ll also flag some of the new features you’ll find in Live 11 Lite, so even if you’ve used Live Lite before, there may be some things for you to learn here.
Finally, although Live 11 Lite is awesome software, there are more fully featured versions of Ableton Live available on Ableton's website. So, let’s get creating in Live 11 Lite!
If you want to start from the beginning of this tutorial, find the previous steps below:
- How to make a track in Ableton Live 11 Lite: set-up and overview
- How to make a track in Ableton Live 11 Lite: programming a beat in no time
- How to make a track in Ableton Live 11 Lite: creating super-fast beat variations and mixes
- How to make a track in Ableton Live 11 Lite: produce a brilliant bass line with automation
- How to make a track in Ableton Live 11 Lite: creating easy chords with MIDI effects
- How to make a track in Ableton Live 11 Lite: recording external audio and using Warp
- How to make a track in Ableton Live 11 Lite: using sampling to get the perfect vocal
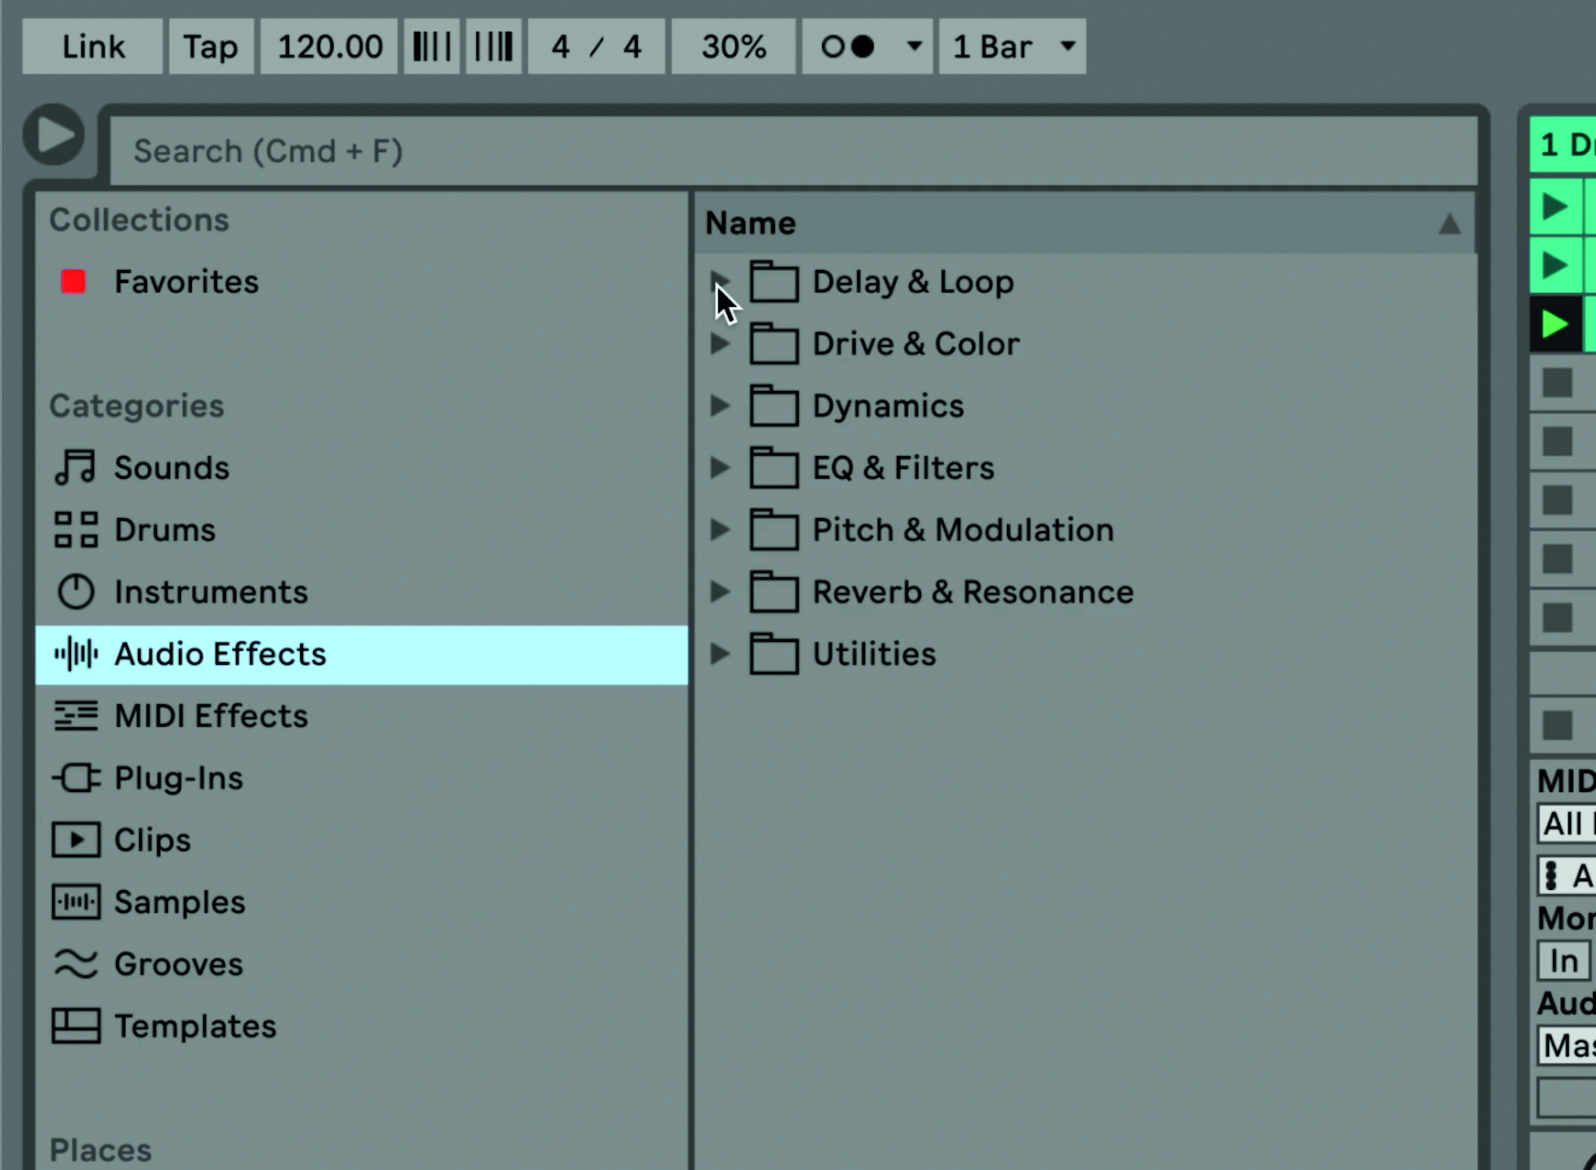
Step 1: There are plenty of effects in Ableton Live 11 Lite that we can use in our mix. Check them out in the browser under the Audio Effects tab.
Want all the hottest music and gear news, reviews, deals, features and more, direct to your inbox? Sign up here.
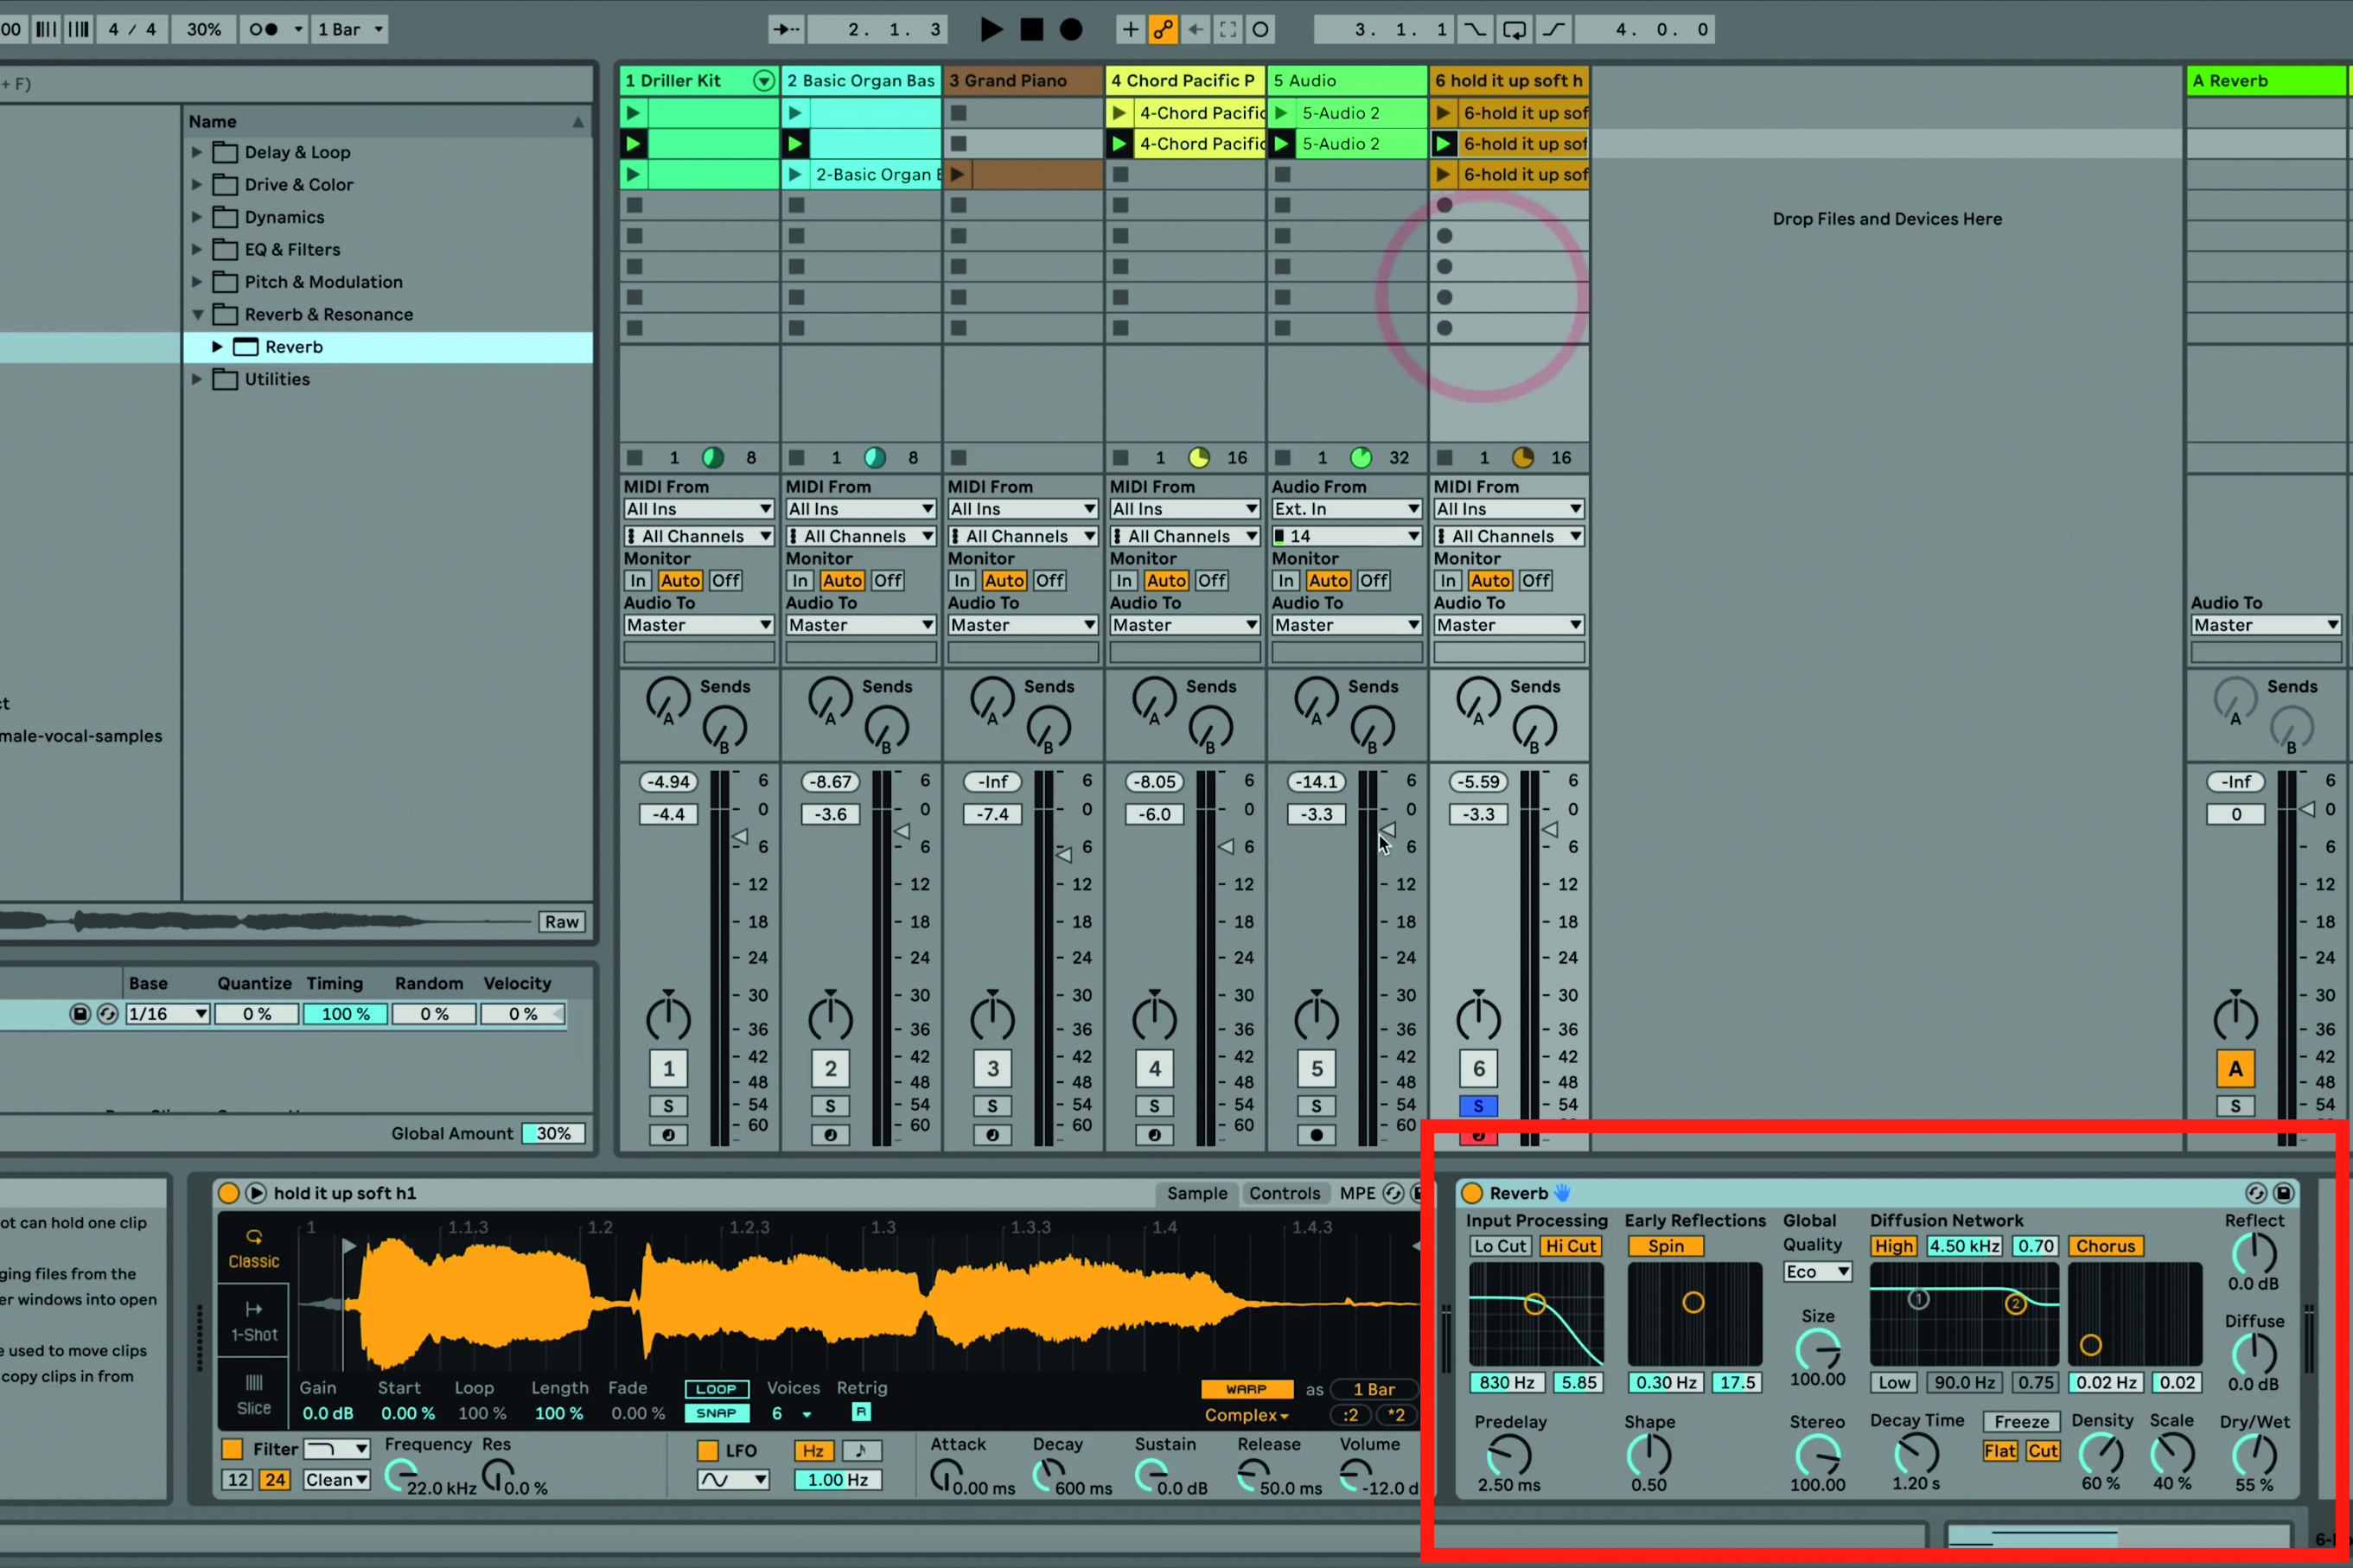
Step 2: We’ll try using a reverb first and drag it from the browser onto our vocal MIDI track. It then appears in the device chain.
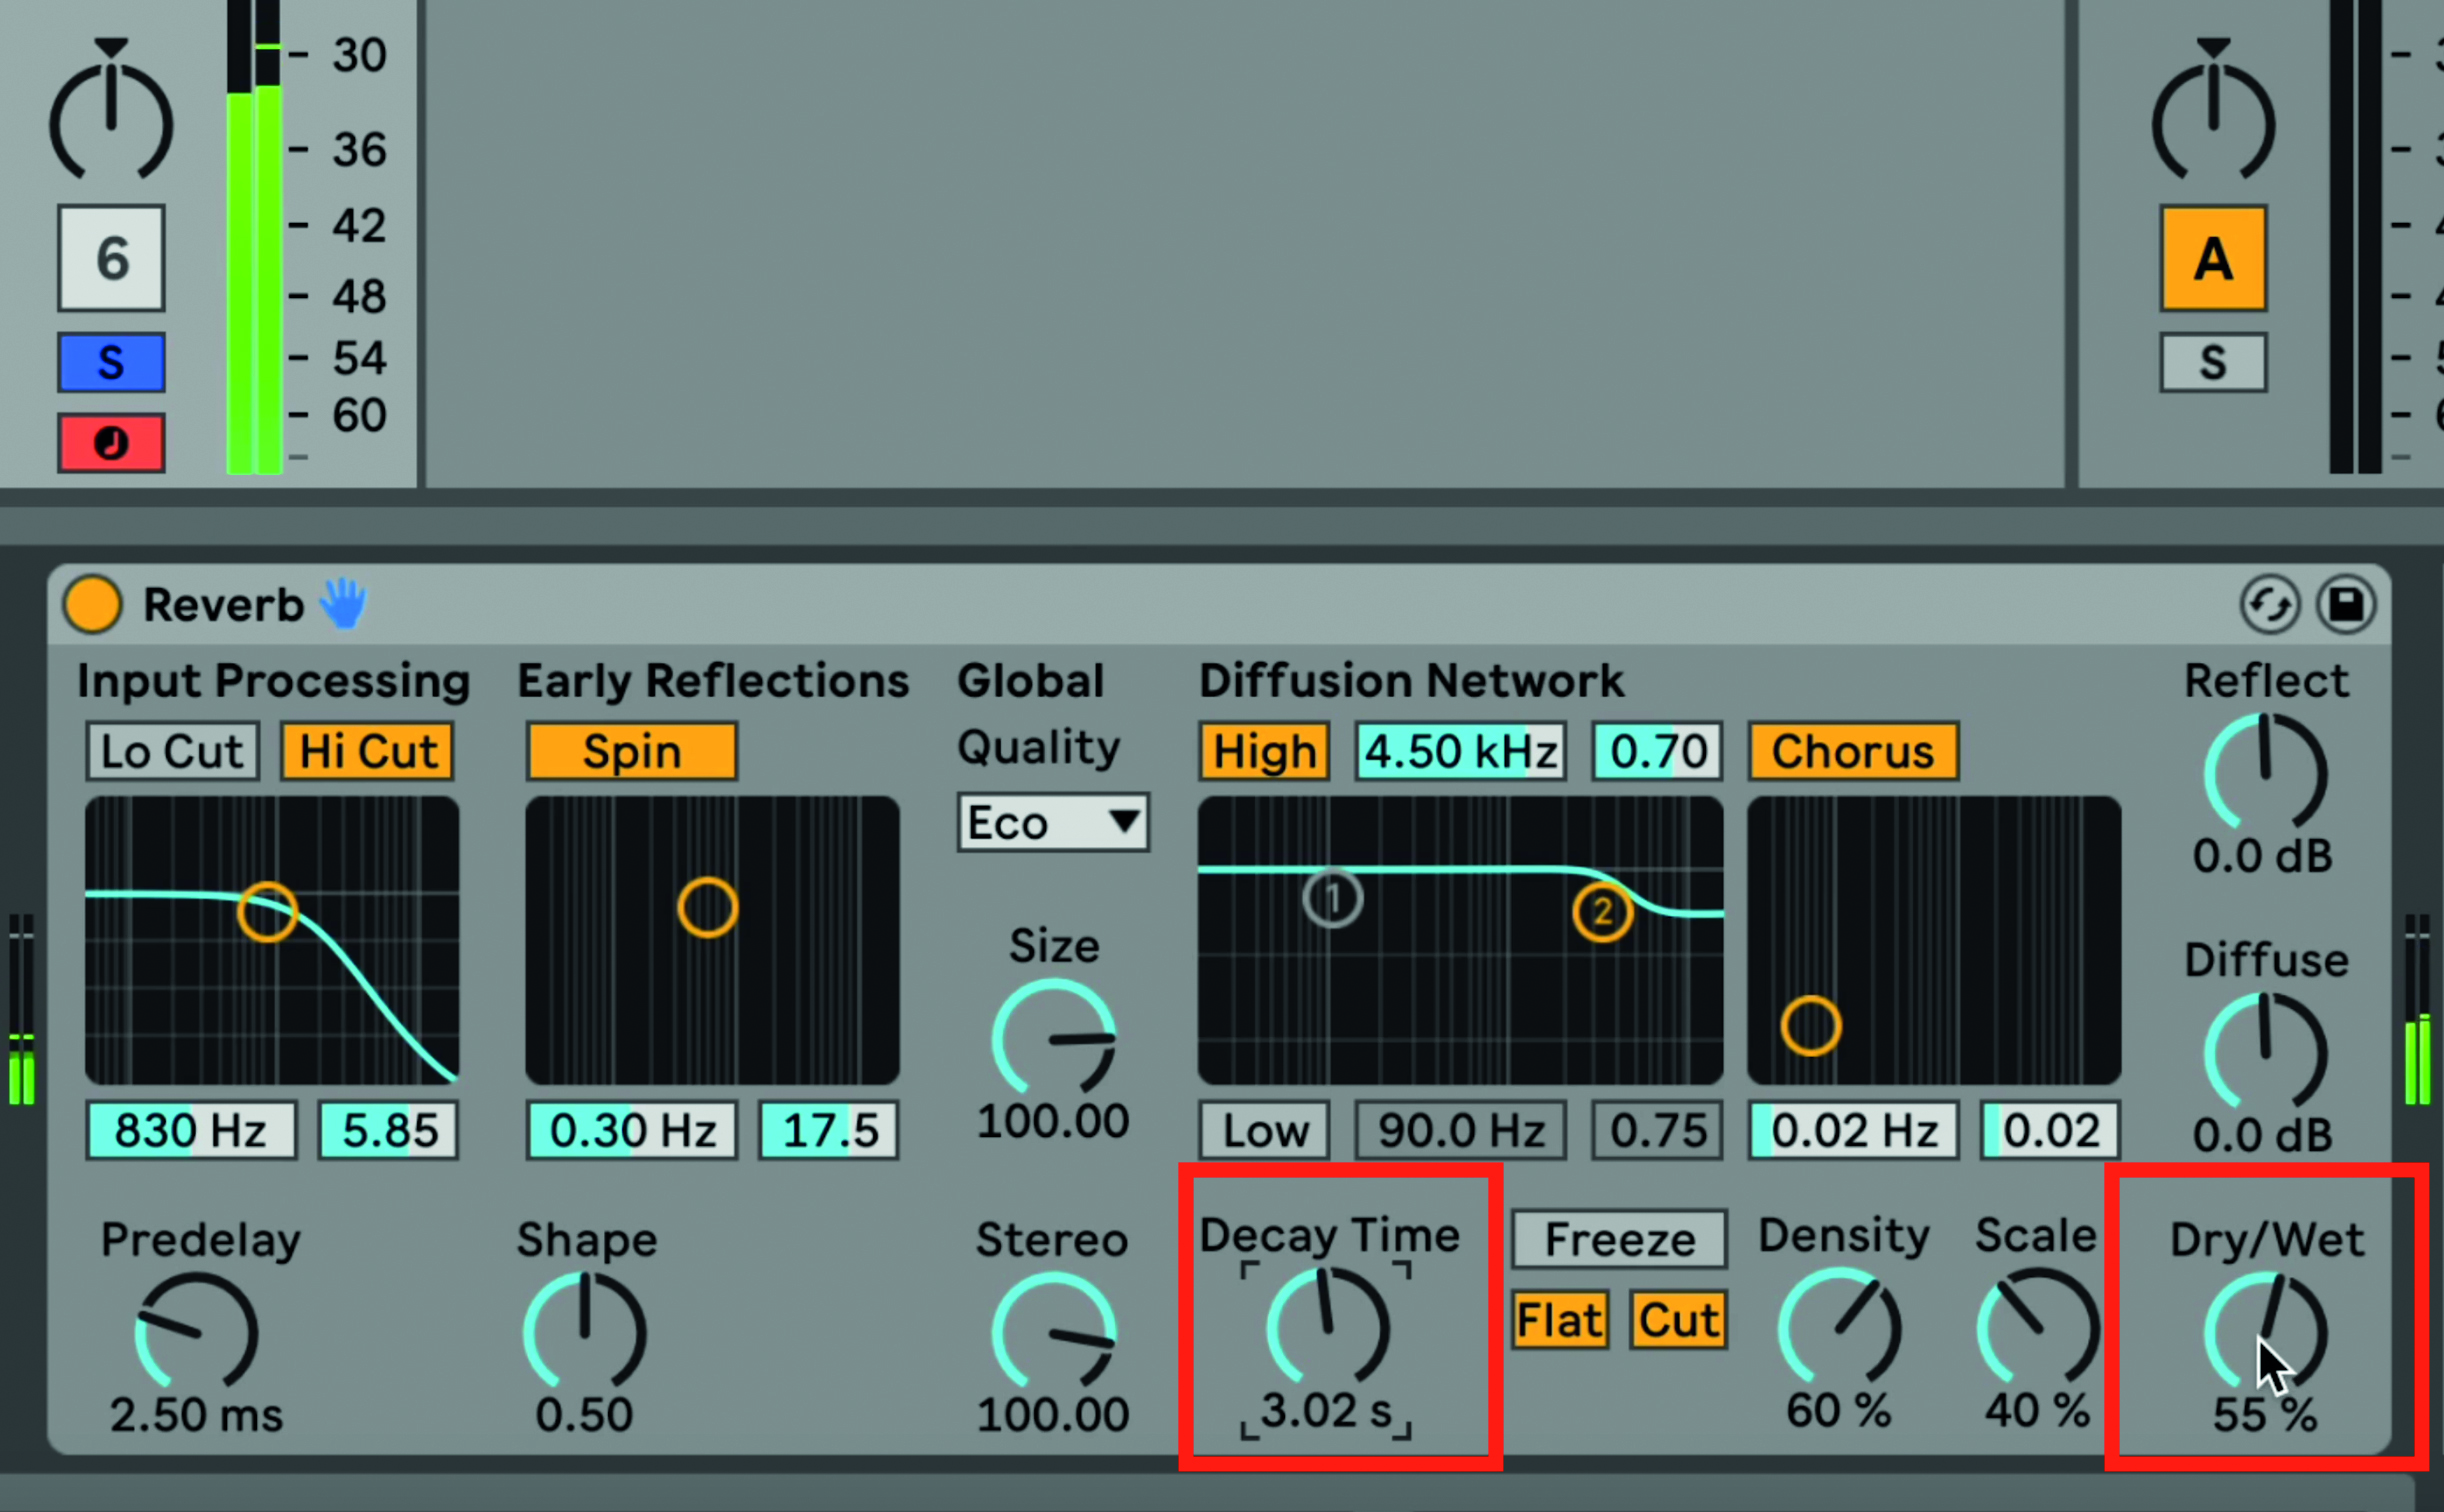
Step 3: For reverb, try changing the Decay Time dial or the Wet/Dry mix. Both of these increase the amount of the effect which, in reverb’s case, makes it sound like the vocal is being sung in a larger space.
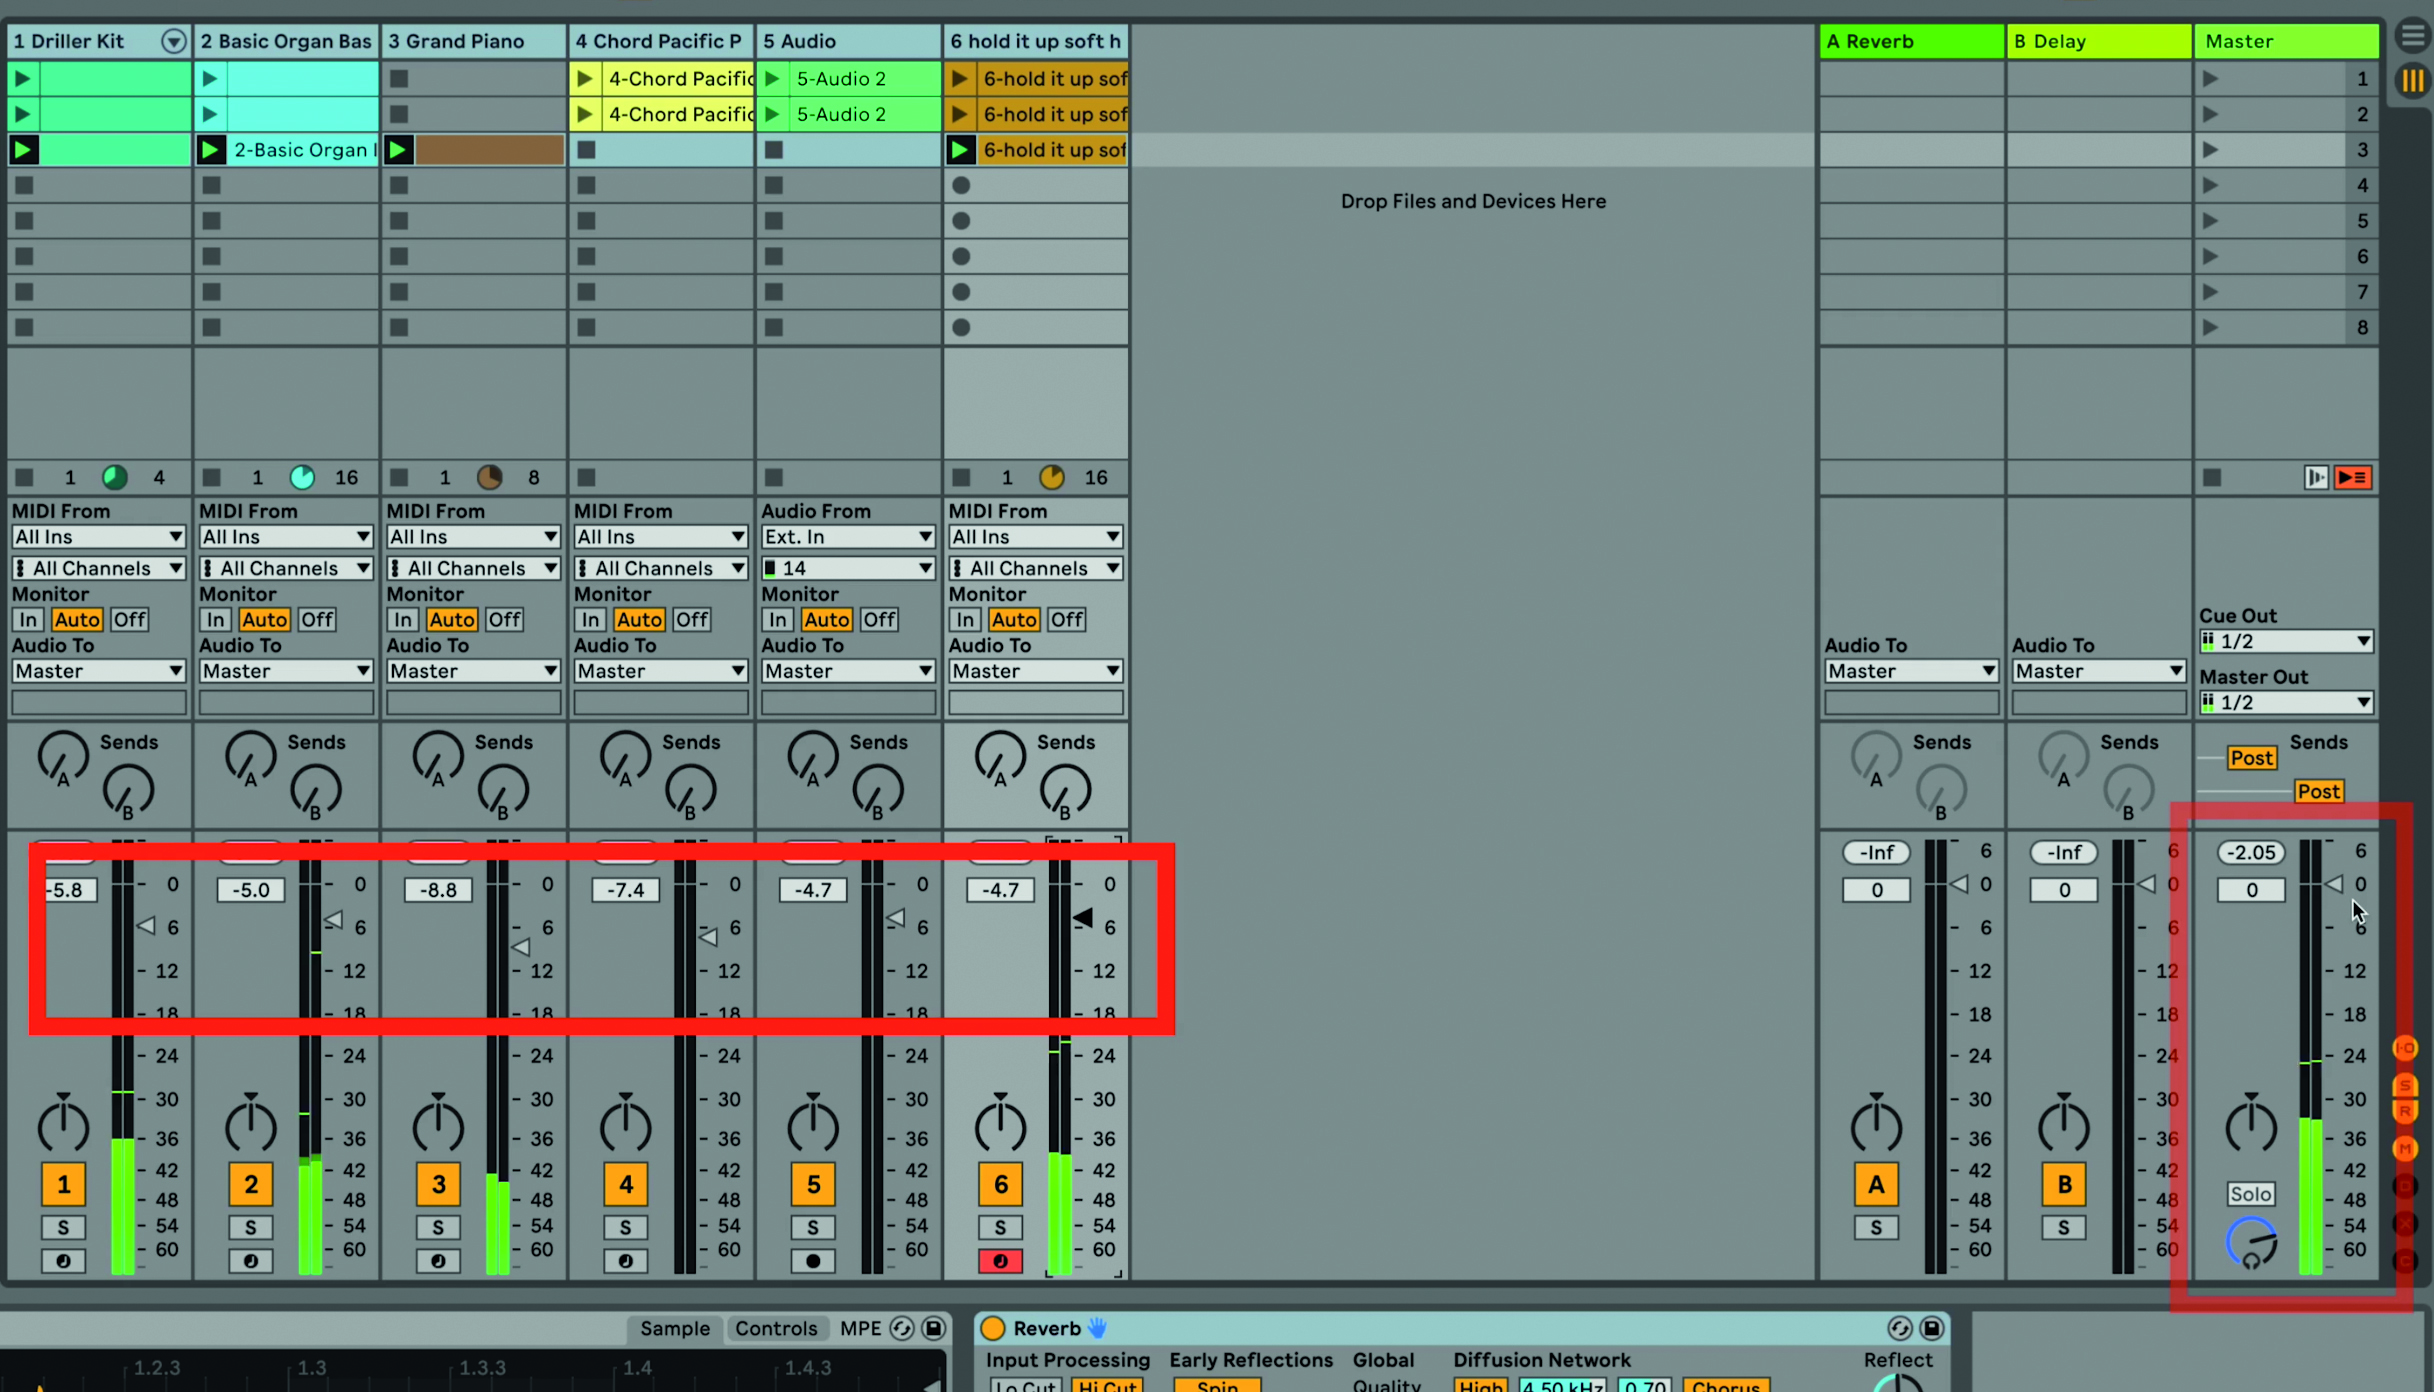
Step 4: One thing that is quite easy to do when using effects is to go into the red, levels wise. It’s therefore often wise to reduce your volume levels which you can easily do in one go by pressing Shift and clicking on each channel. Pulling the volume down on one channel will now reduce the levels of all of them as pressing Shift means all are selected.
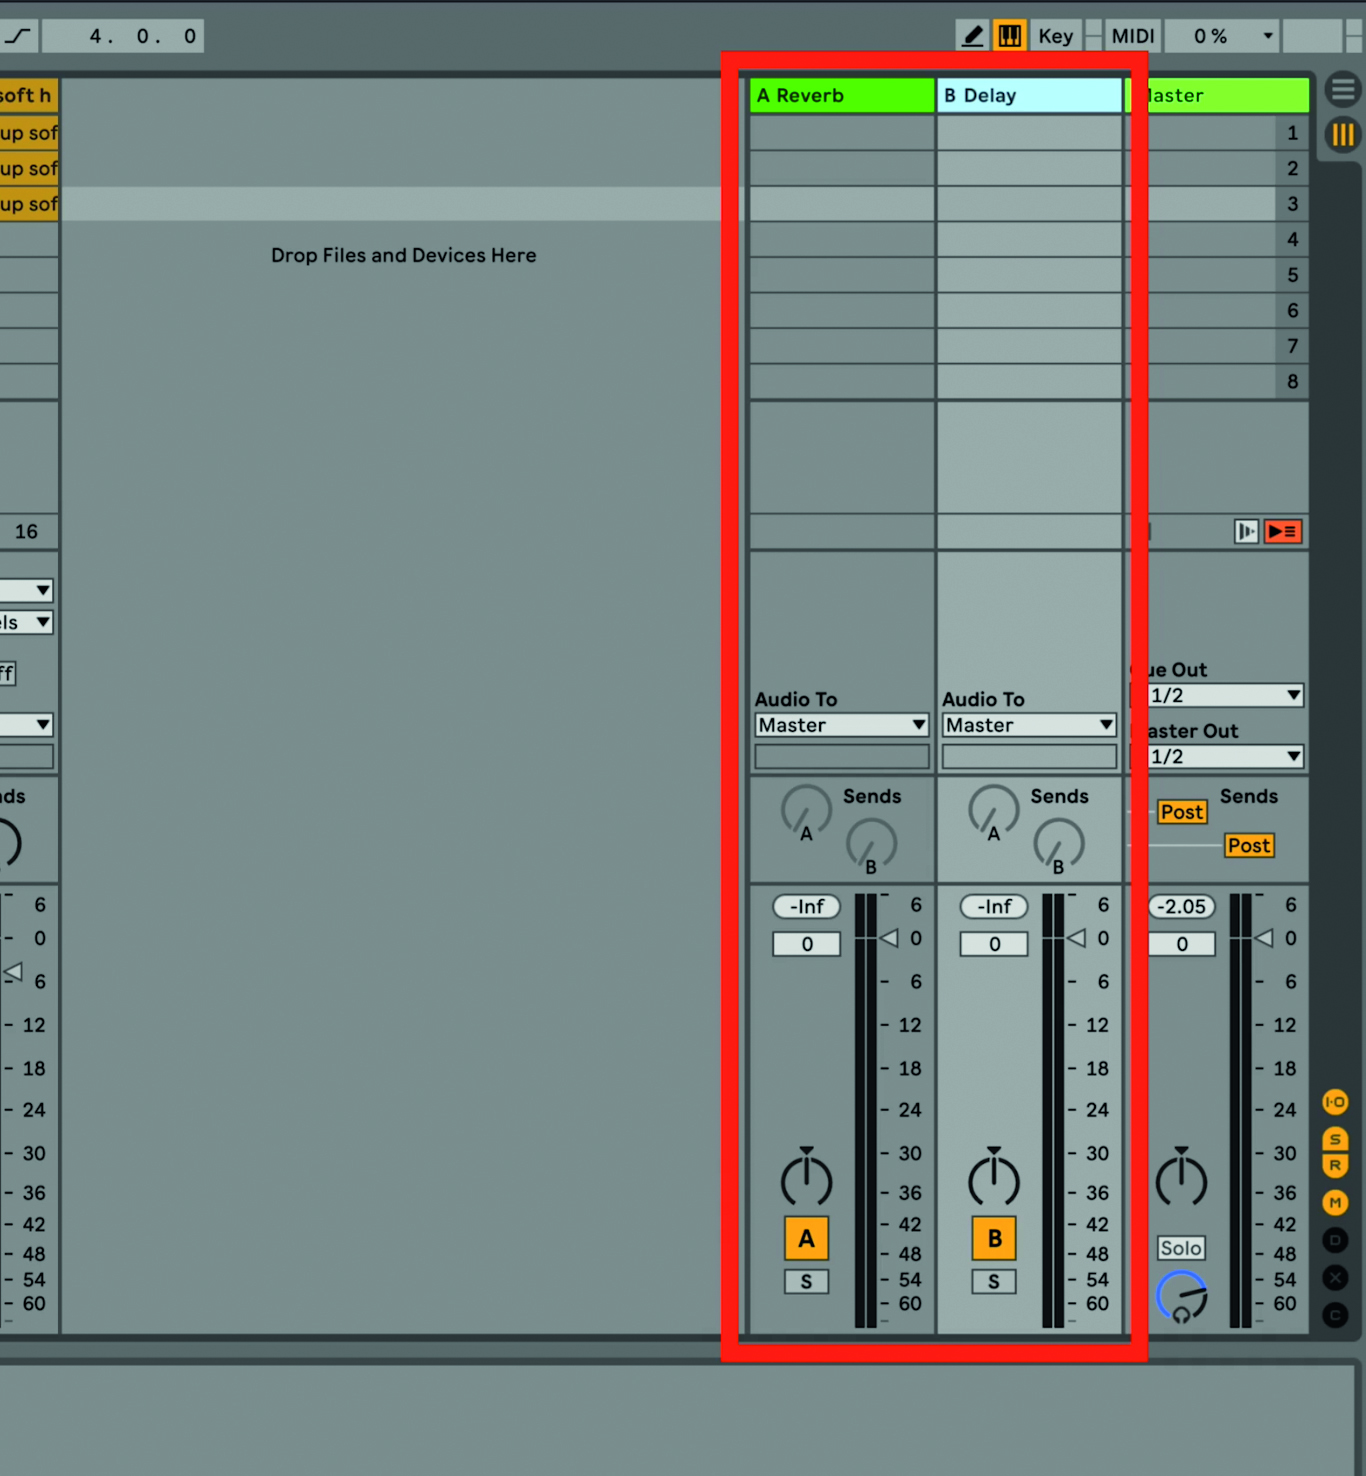
Step 5: For the reverb effect, we used it as an ‘insert effect’, putting it directly on the vocal channel. Now we’re going to add a delay effect and share it across different sounds by using the Return channels. These have a reverb and delay on each.
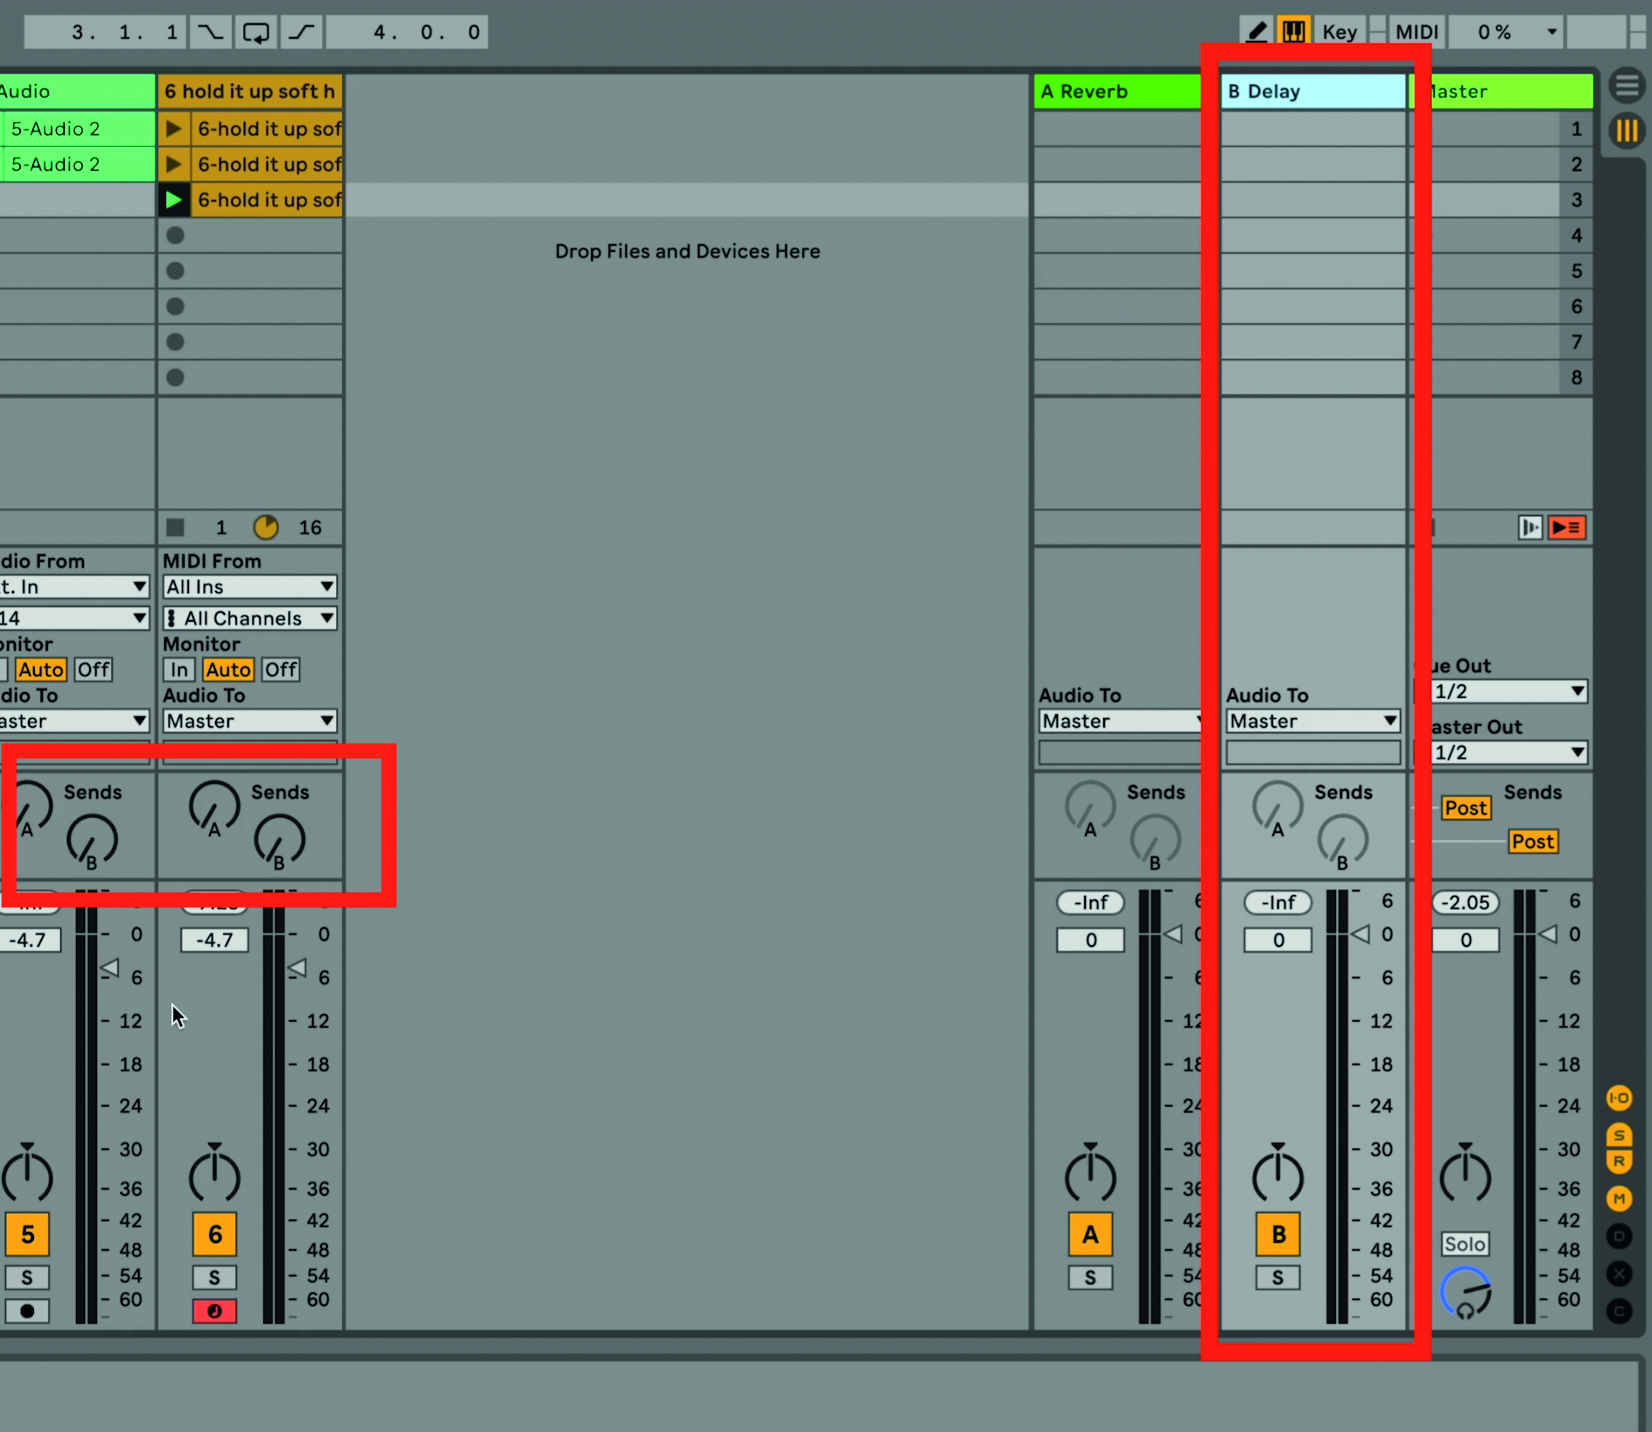
Step 6: The delay is set up on Return channel B so that whenever you raise the B dial on any track channel, a delay effect will be introduced on that sound.
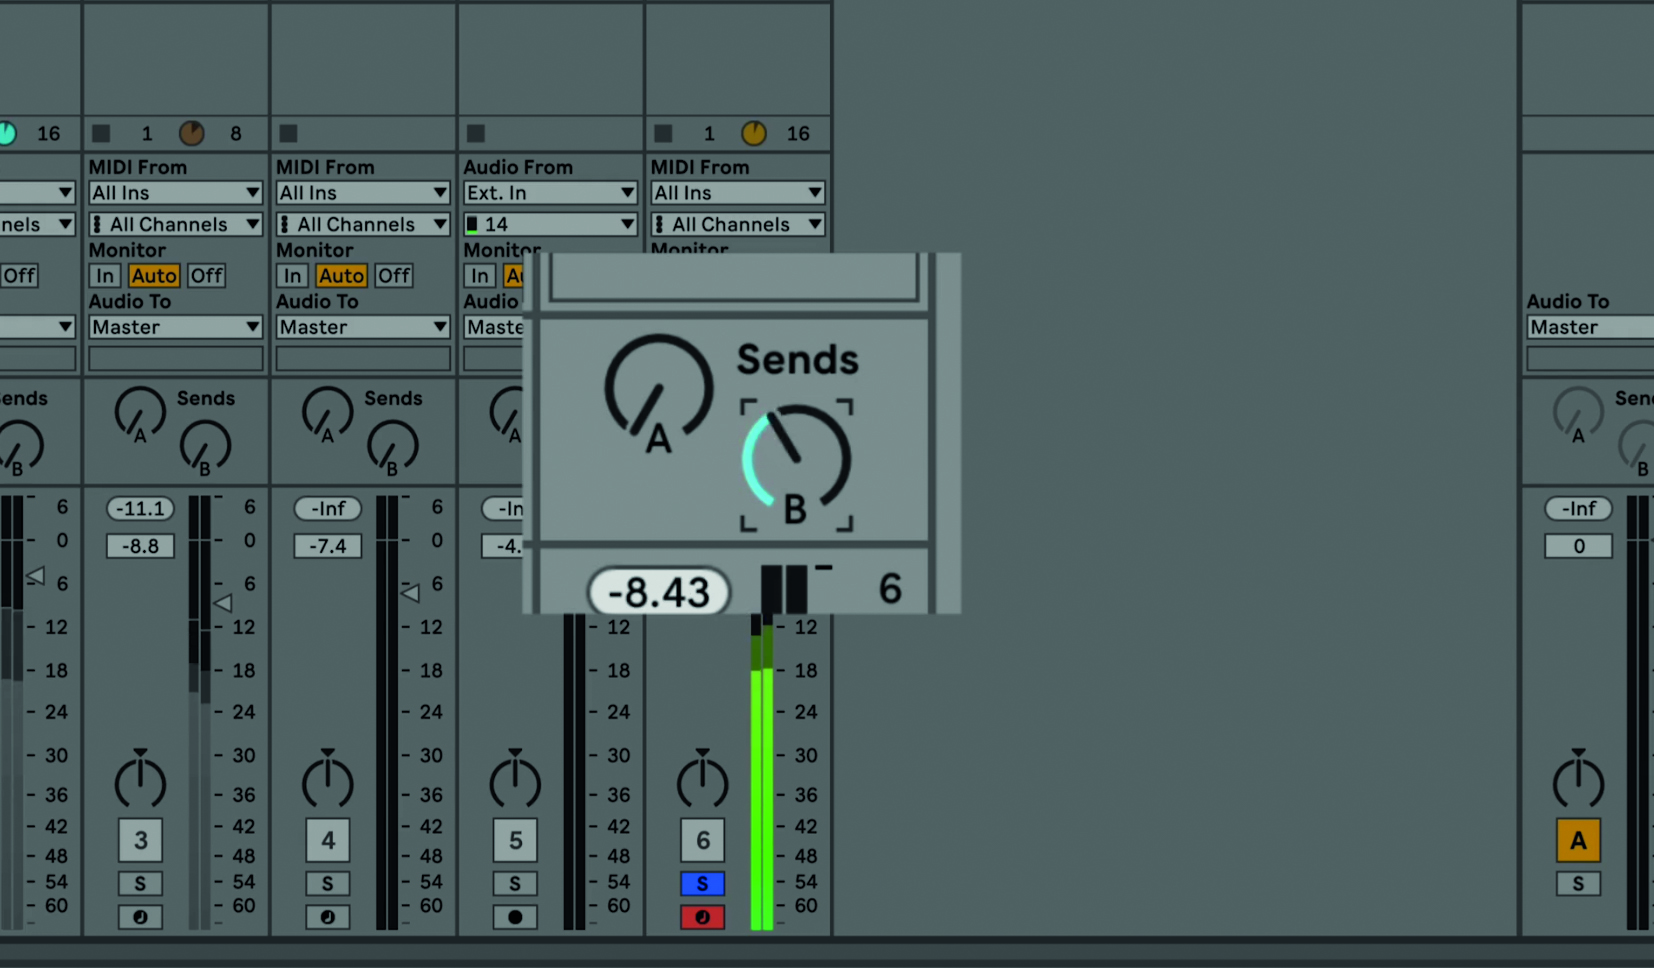
Step 7: Solo the vocal track by pressing the blue button on the channel and now raise the B dial and you will hear the delay introduced on the vocal. You can raise the B dial on any other track to introduce the delay (but unsolo the vocal track to hear each one).
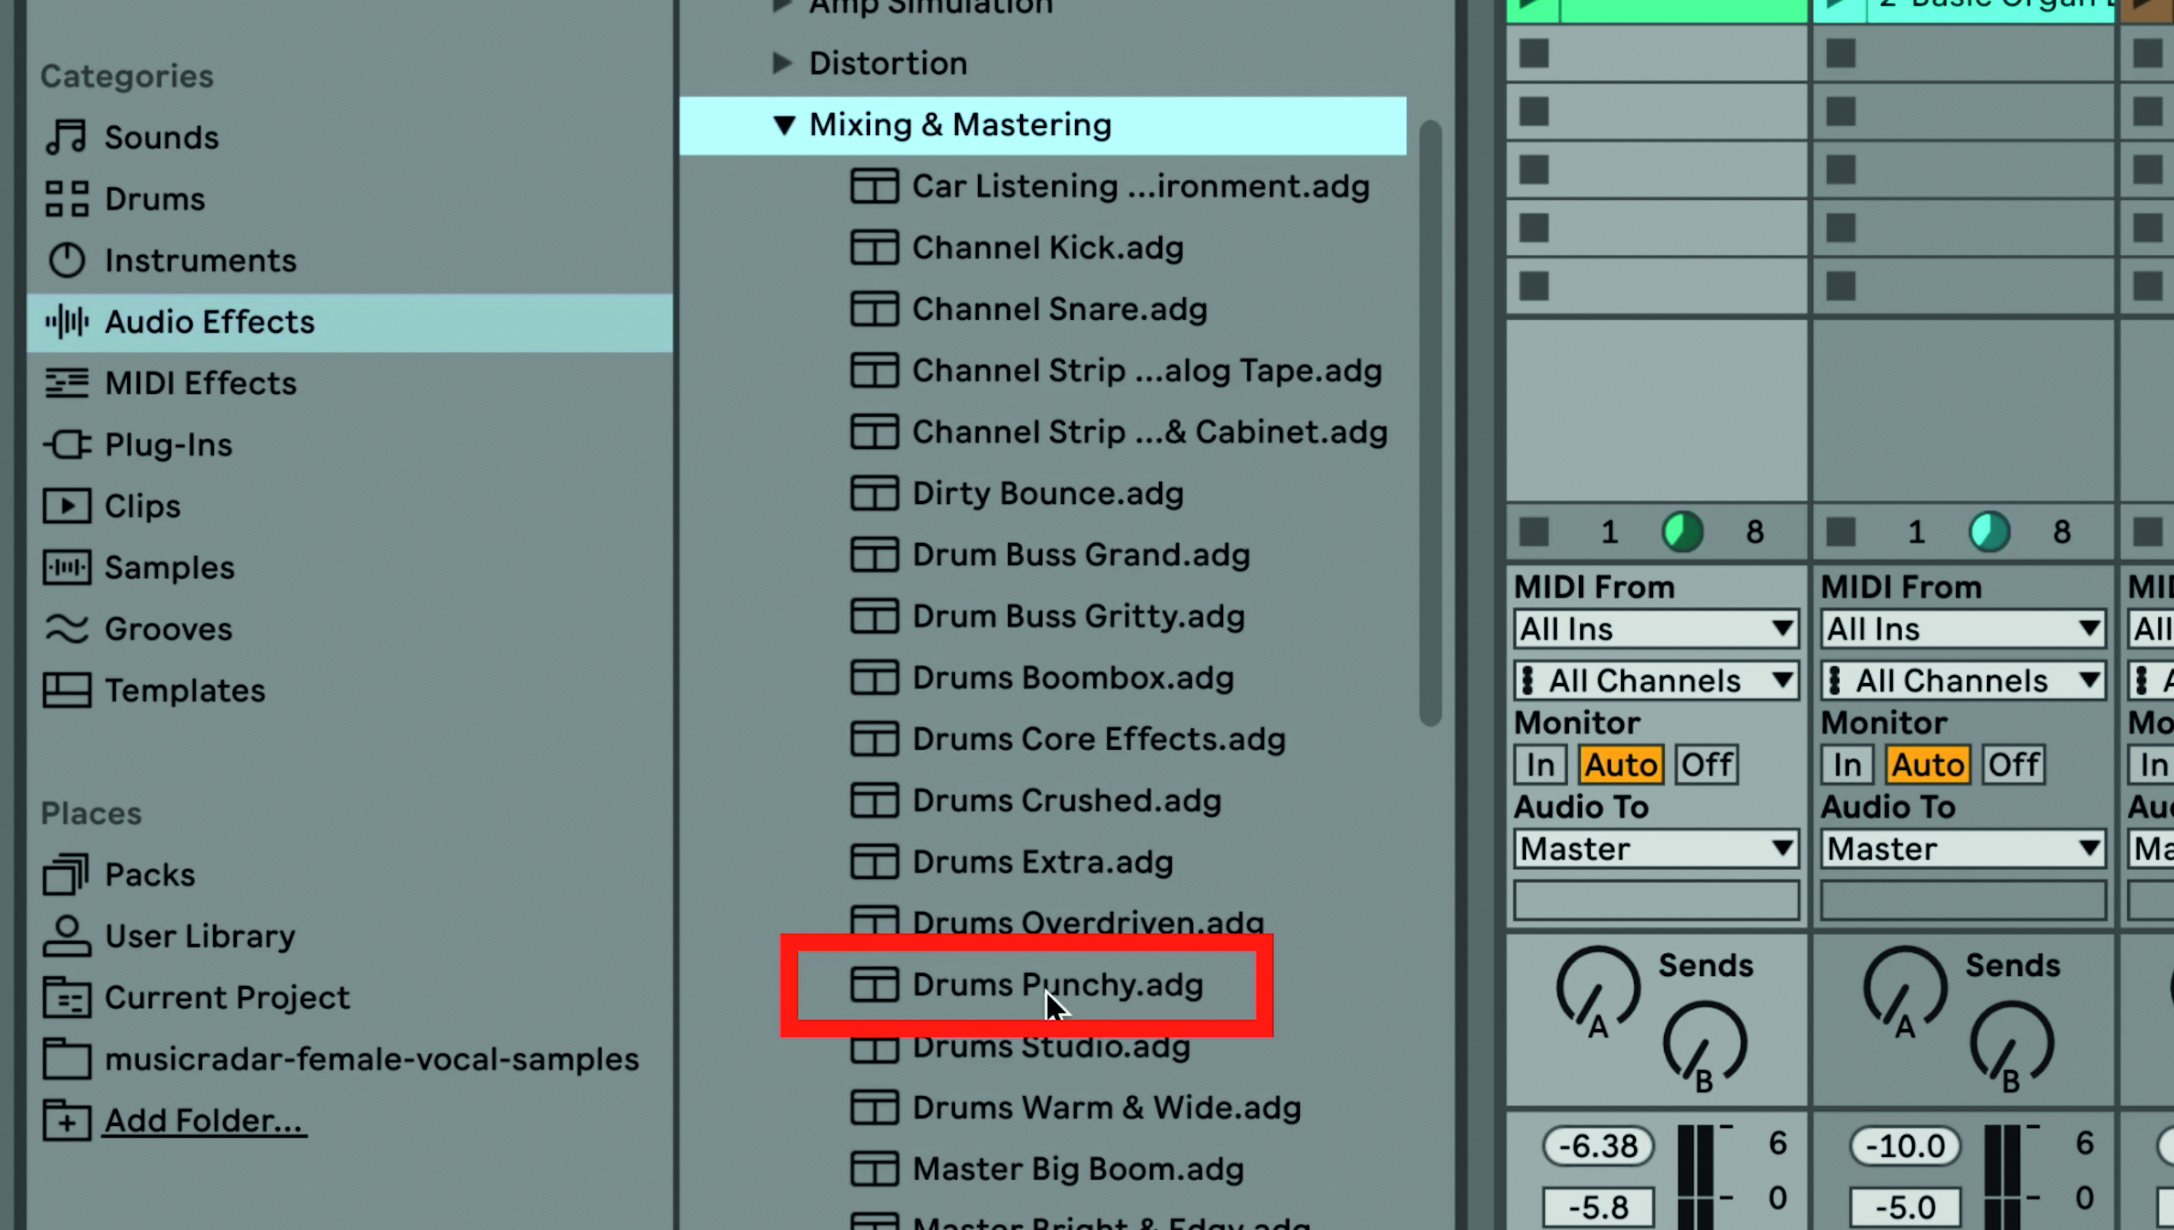
Step 8: Other effects you might consider using include Live 11 Lite’s Mixing and Mastering effects. Here we’ve dragged the ‘Drums Punchy’ effect onto the drums which makes them, yes, punchier!
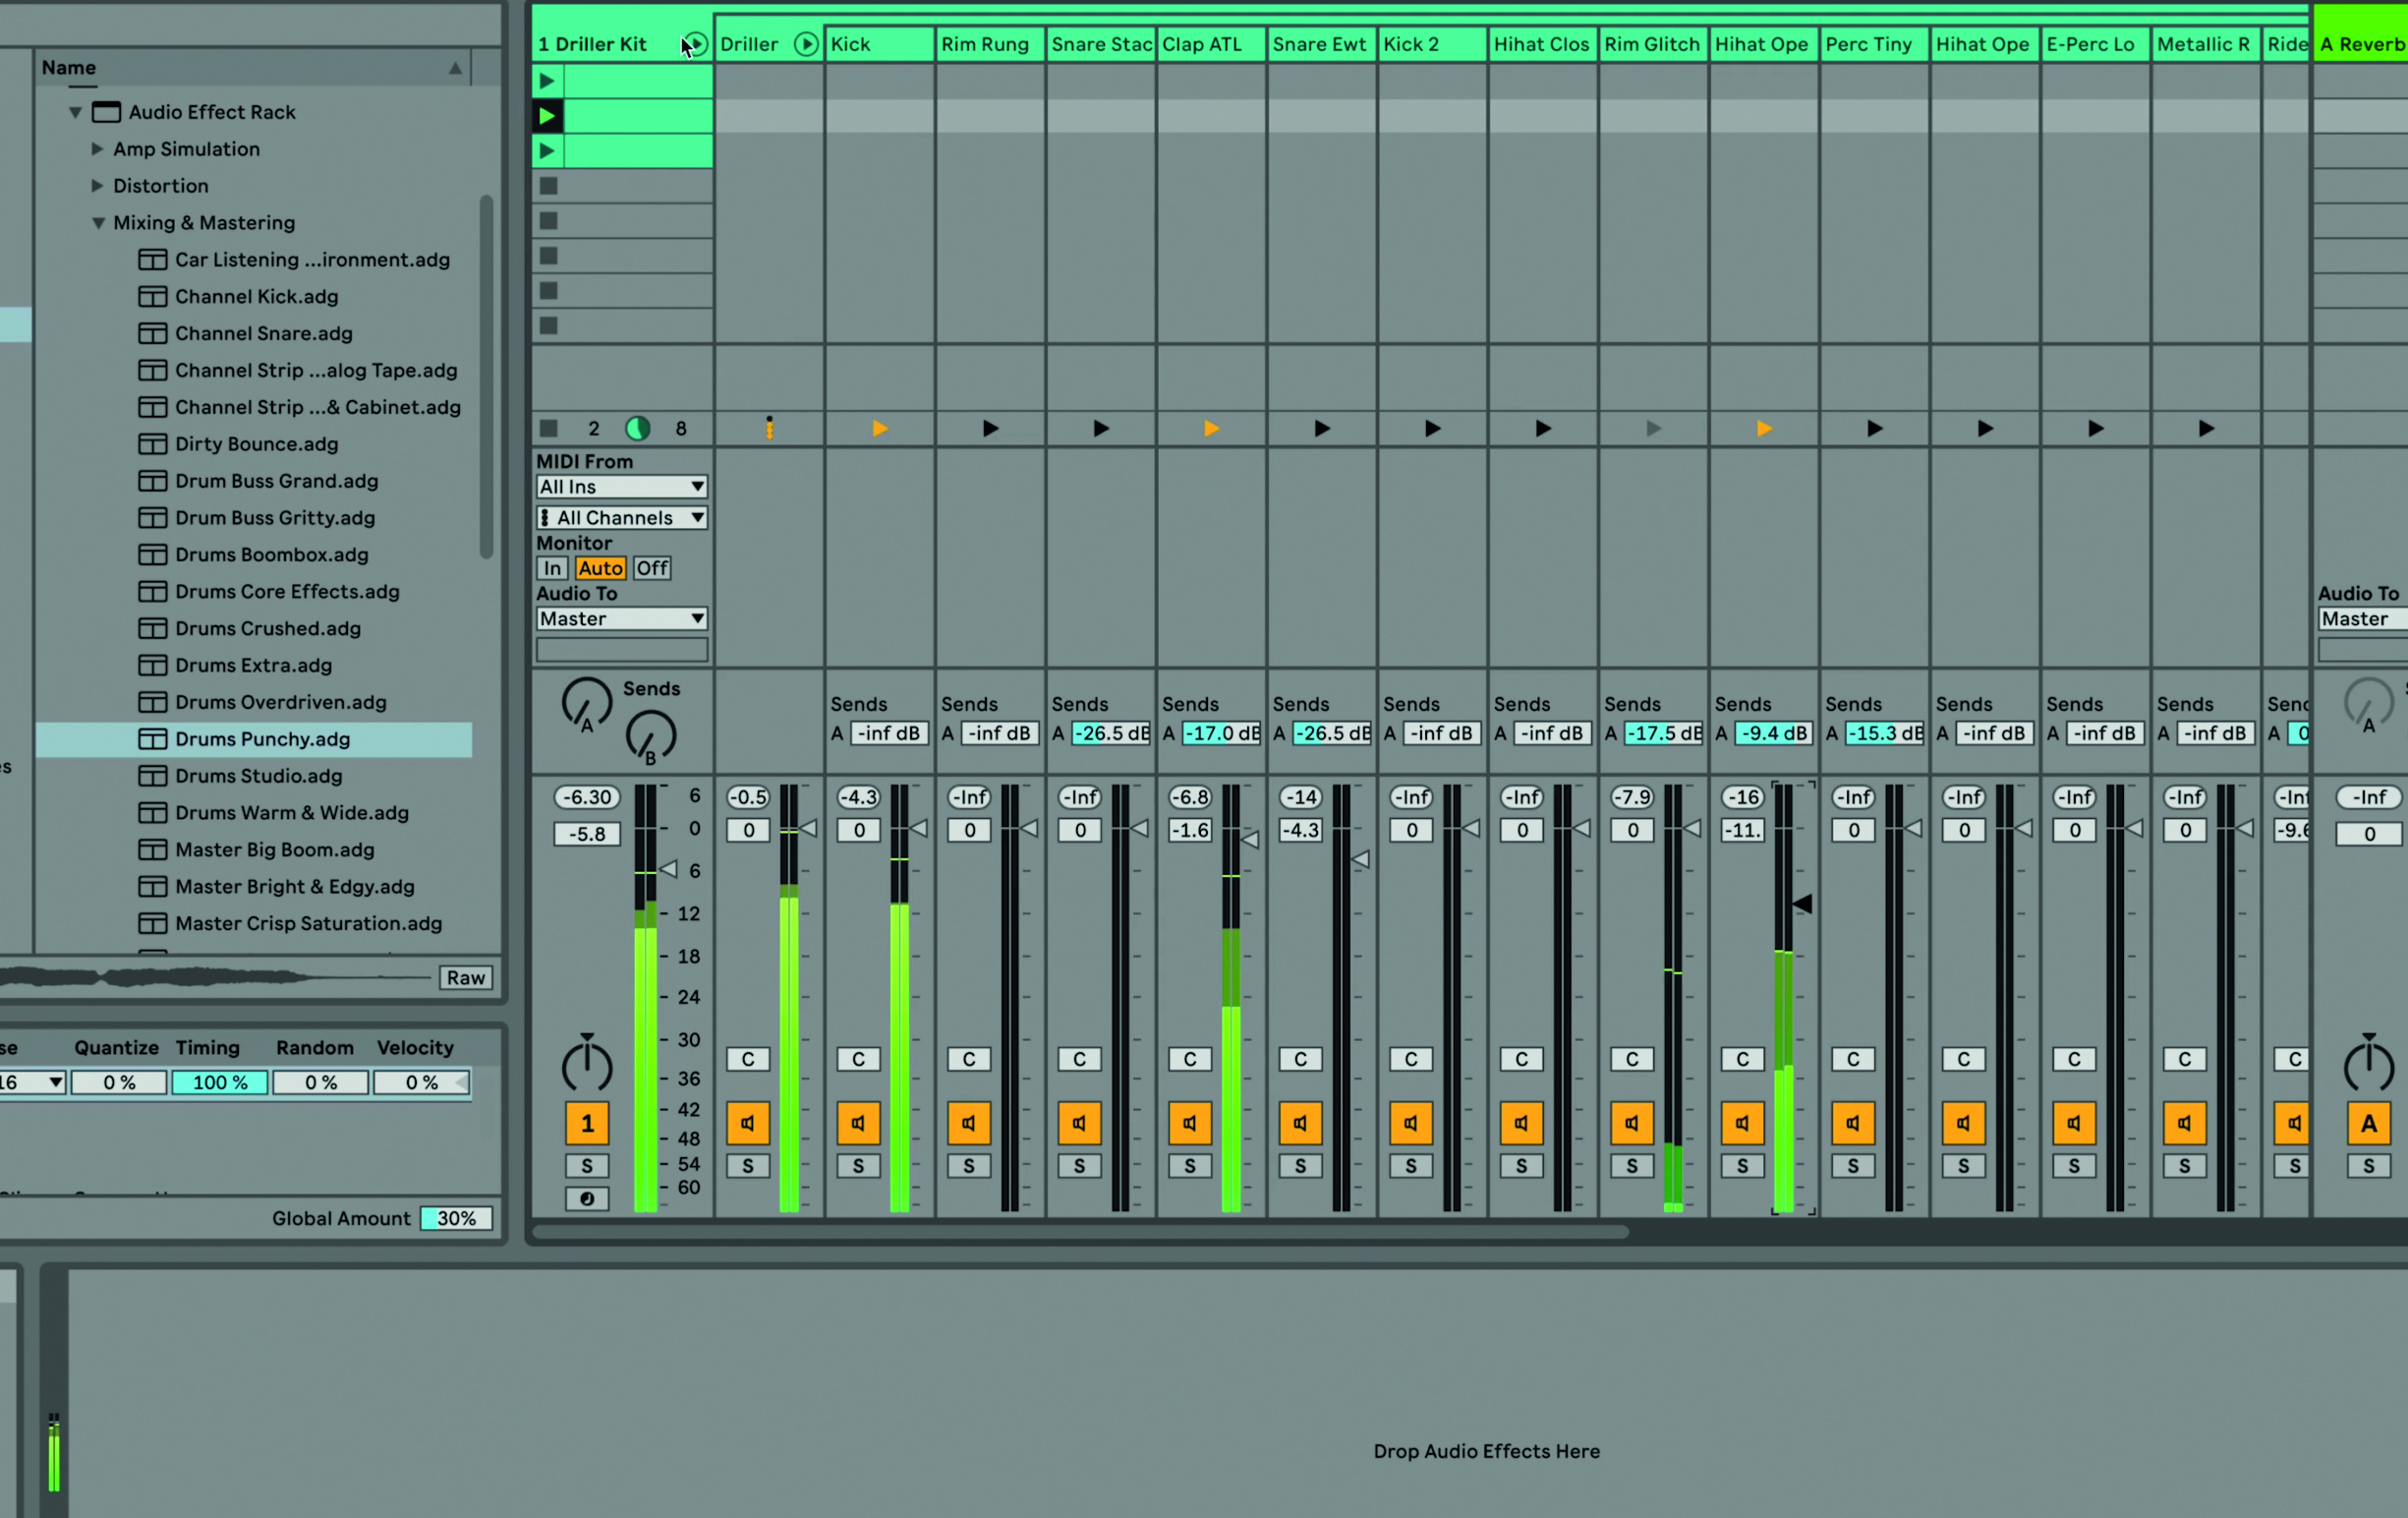
Step 9: Drums Punchy raises the hi-hat volume just a little so go into the drums mixer to lower this, and always be mindful that, again, effects will often change volume levels like this.
Computer Music magazine is the world’s best selling publication dedicated solely to making great music with your Mac or PC computer. Each issue it brings its lucky readers the best in cutting-edge tutorials, need-to-know, expert software reviews and even all the tools you actually need to make great music today, courtesy of our legendary CM Plugin Suite.
