How to make a track in Ableton Live 11 Lite: set-up and overview
In the second part of our tutorial series, Ableton Certified Trainer Ski Oakenfull takes you through how to create a complete house track from scratch
Ableton Live is a DAW that needs no introduction, and its combination of performance and production features mean it’s as popular with performers and DJs as it is with creators.
Live 11 Lite is a cut-down version of Ableton Live, with all of the essential workflows, instruments and effects, but with limited track count, and for many years this has been bundled with apps and hardware products. This month, you can grab a free copy of Ableton Live 11 Lite with the latest issue of Computer Music Magazine.
To mark this momentous occasion and also to get you started using this fabulous software, we’ve put together a series of tutorials that run through everything you need to get acquainted with Ableton Live 11 Lite, so you can learn how to build a track from scratch. Simply follow the steps below or watch the video embedded above.
Our tutorials are primarily for new users, but that said, we’ll also flag some of the new features you’ll find in Live 11 Lite, so even if you’ve used Live Lite before, there may be some things for you to learn here.
Finally, although Live 11 Lite is awesome software, there are more fully featured versions of Ableton Live available on Ableton's website. So, let’s get creating in Live 11 Lite!
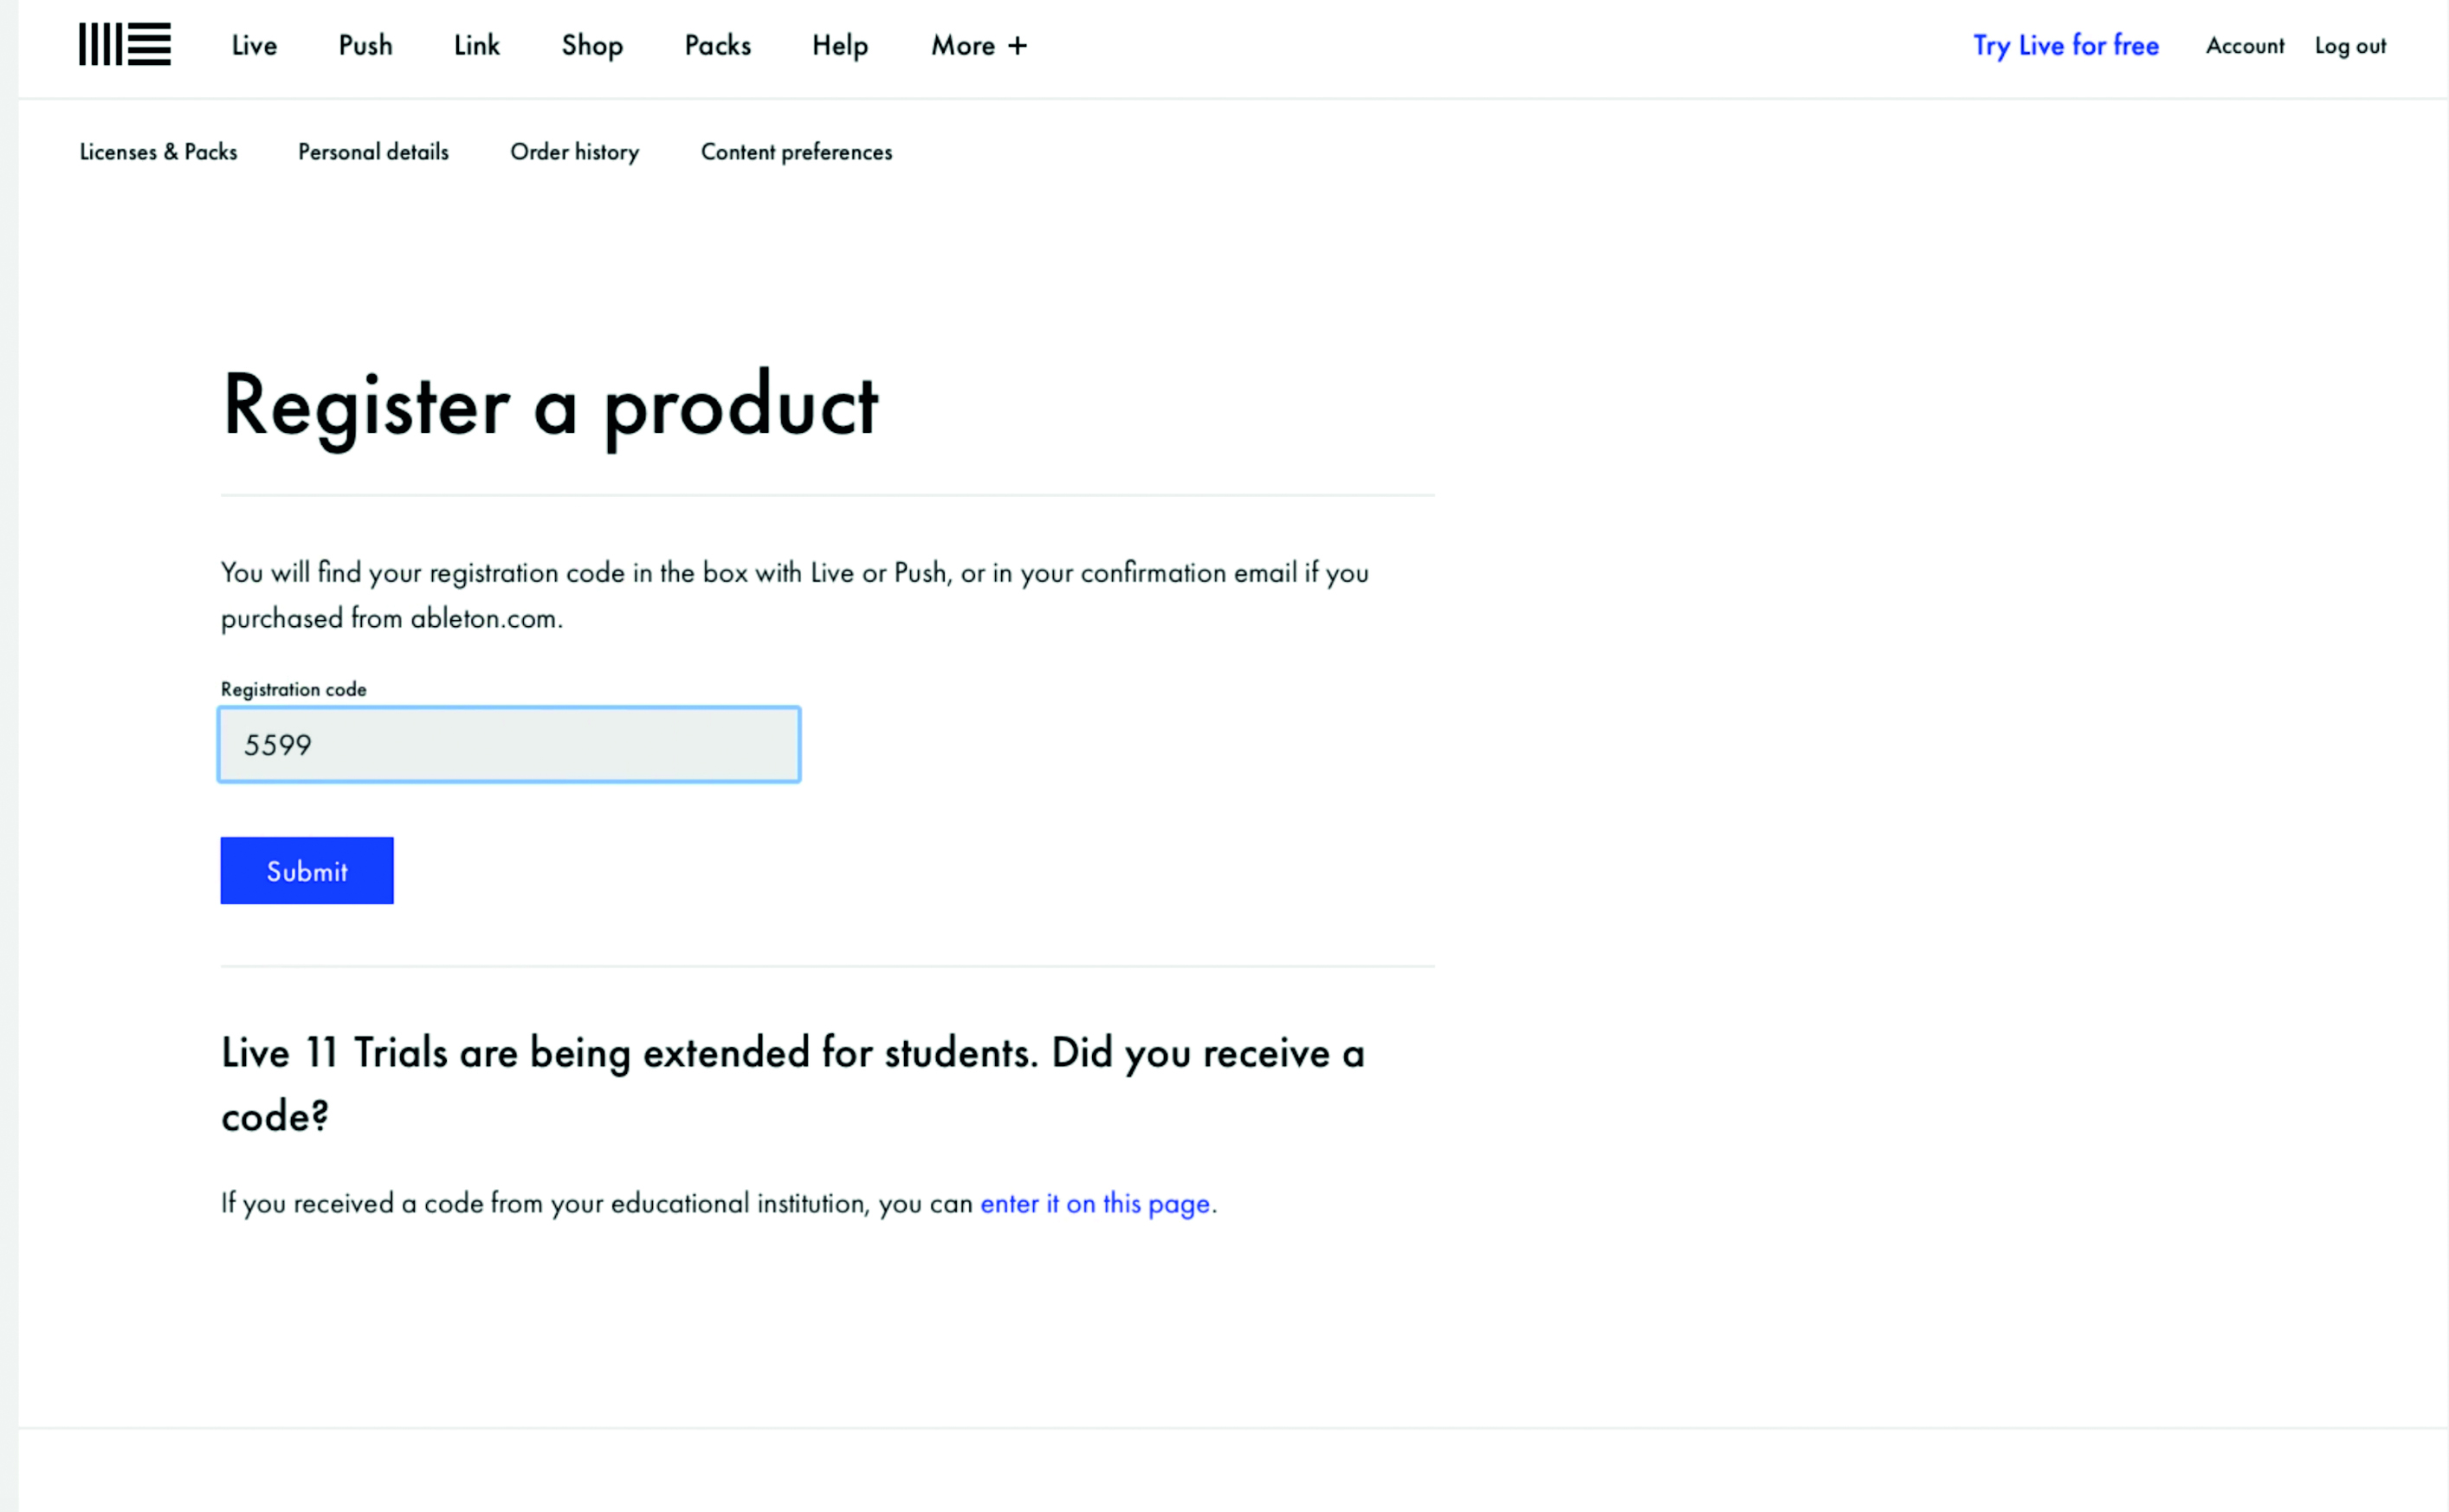
Step 1: We’ll assume you have an account at the Ableton site, and have used your unique serial code that comes with this magazine to download Ableton Live 11 Lite and have it installed on your Mac/PC. If not, there are more details in the first part of our tutorial series.
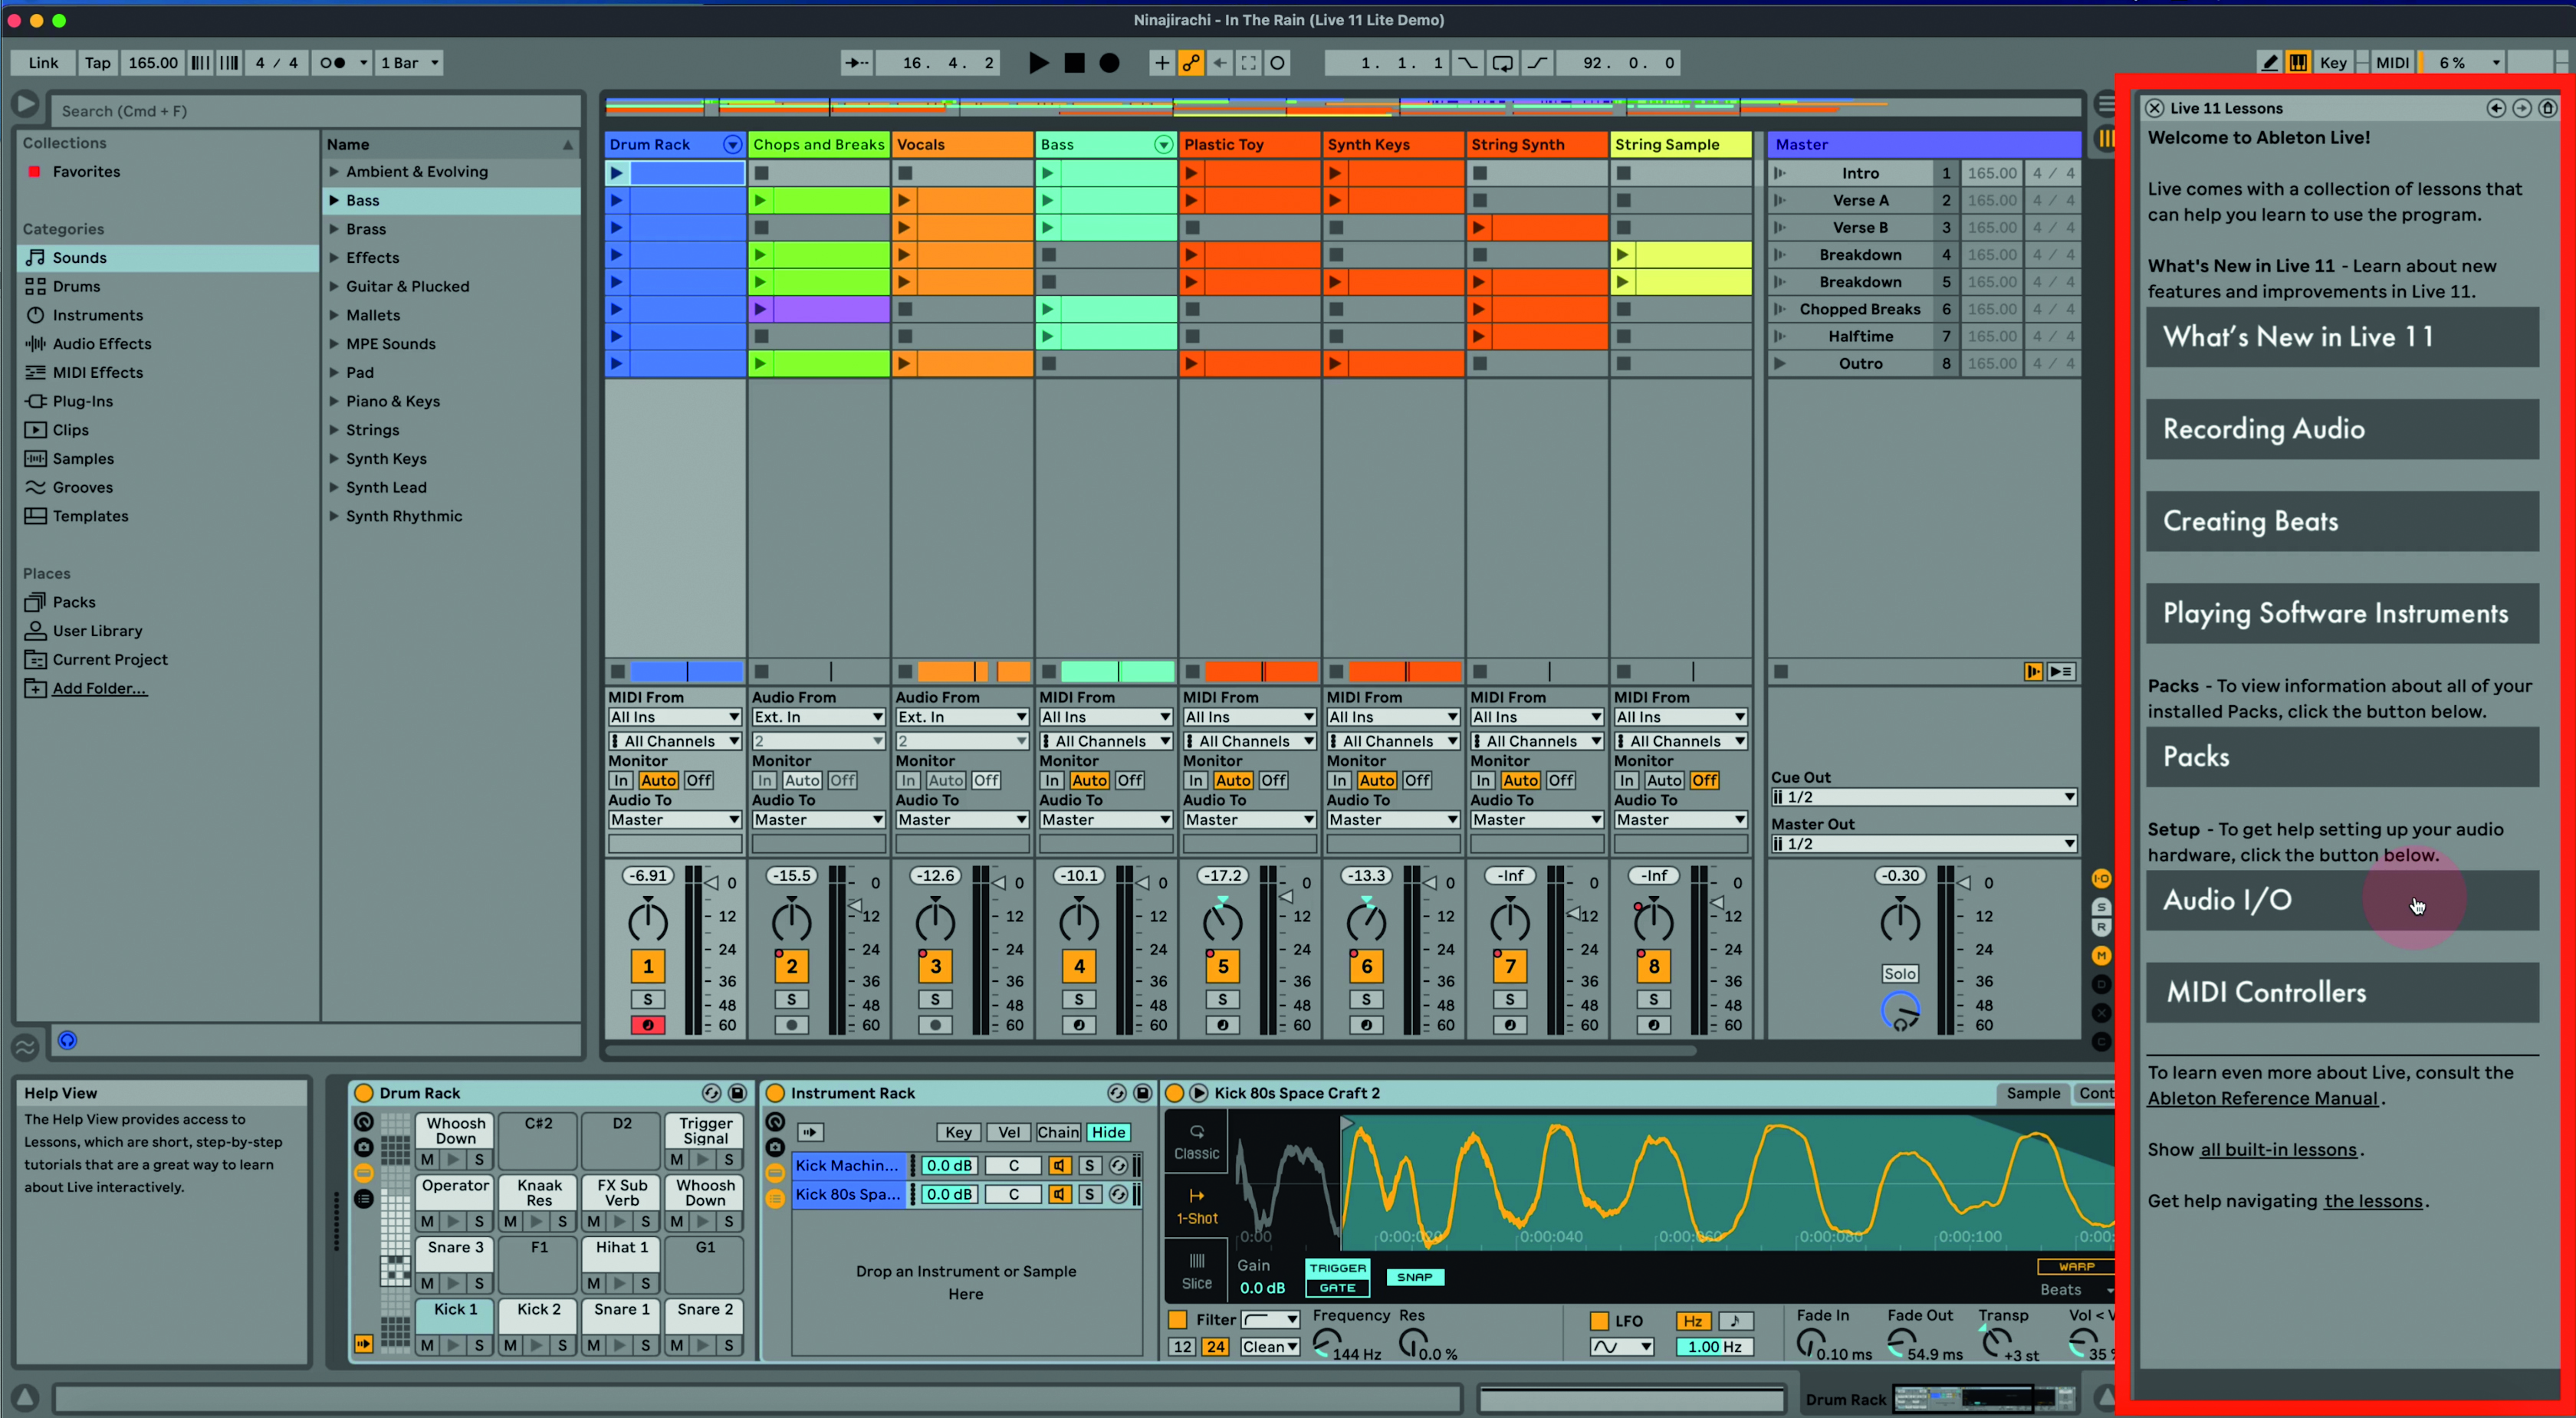
Step 2: When you load Live 11 Lite for the first time it will have the demo set loaded – a complete song for you to check out. On the right hand side of the screen (outlined in red in the above grab) is the Help View of Ableton Live 11 Lite which is very useful but which can be turned on or off by way of the View drop-down menu.
Want all the hottest music and gear news, reviews, deals, features and more, direct to your inbox? Sign up here.
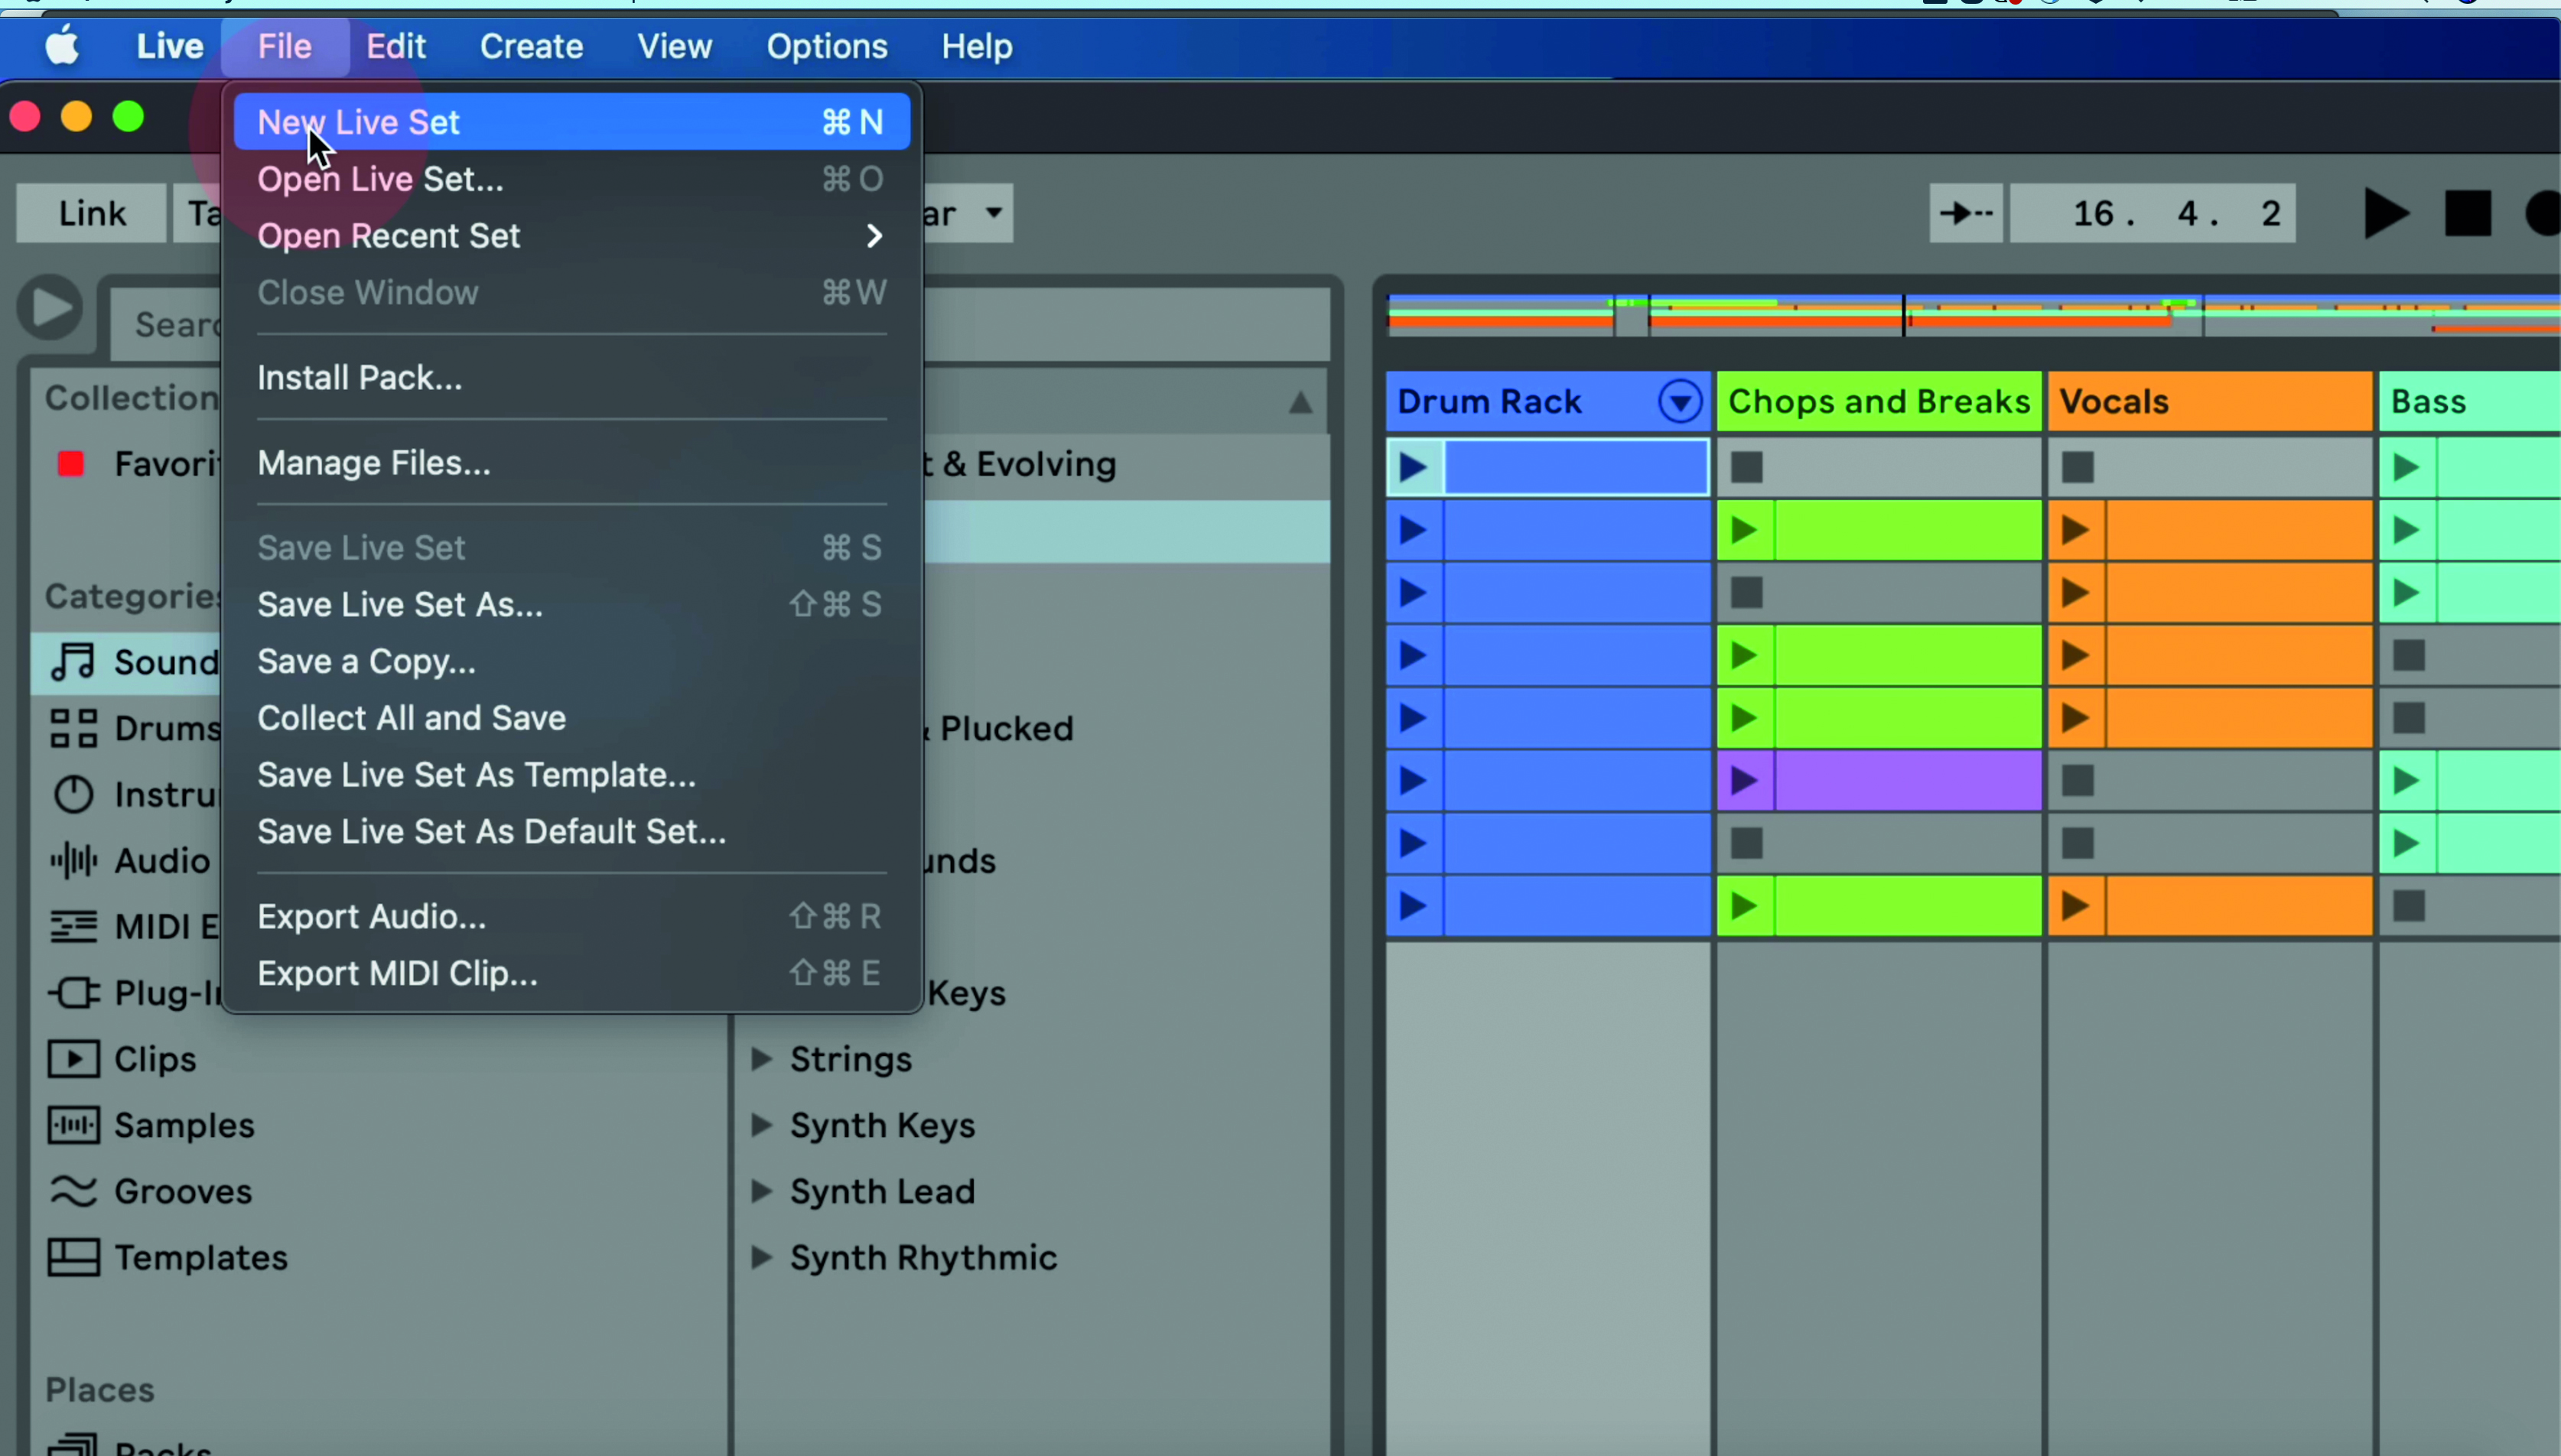
Step 3: We now want to start a completely new Live 11 Lite track from scratch and not use the supplied demo set. We therefore go over to the File menu and click on New Live Set as shown above.
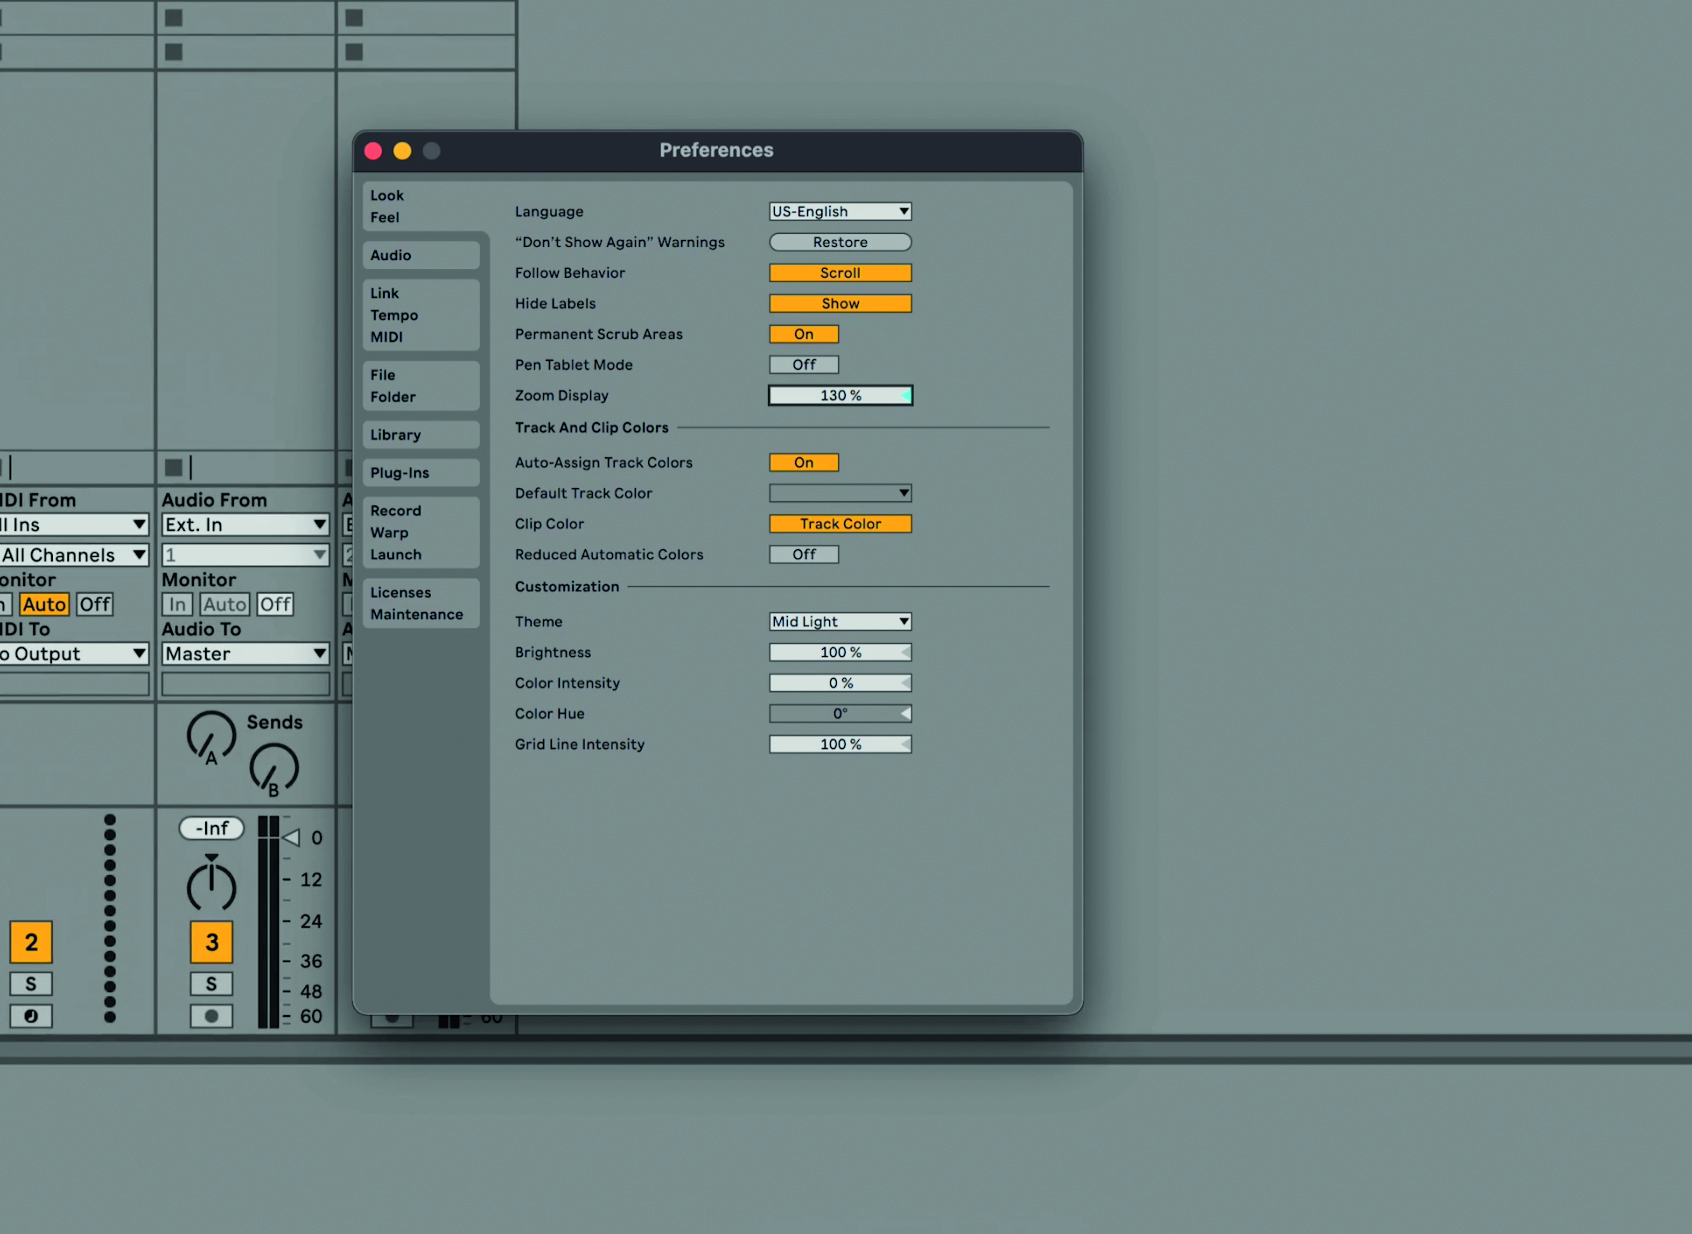
Step 4: Now’s a good time to customise the look and feel of Live 11 Lite according to your preferences so go to the Live menu and click on Preferences to adjust factors like Zoom (to make Live 11 Lite’s interface appear bigger or smaller).
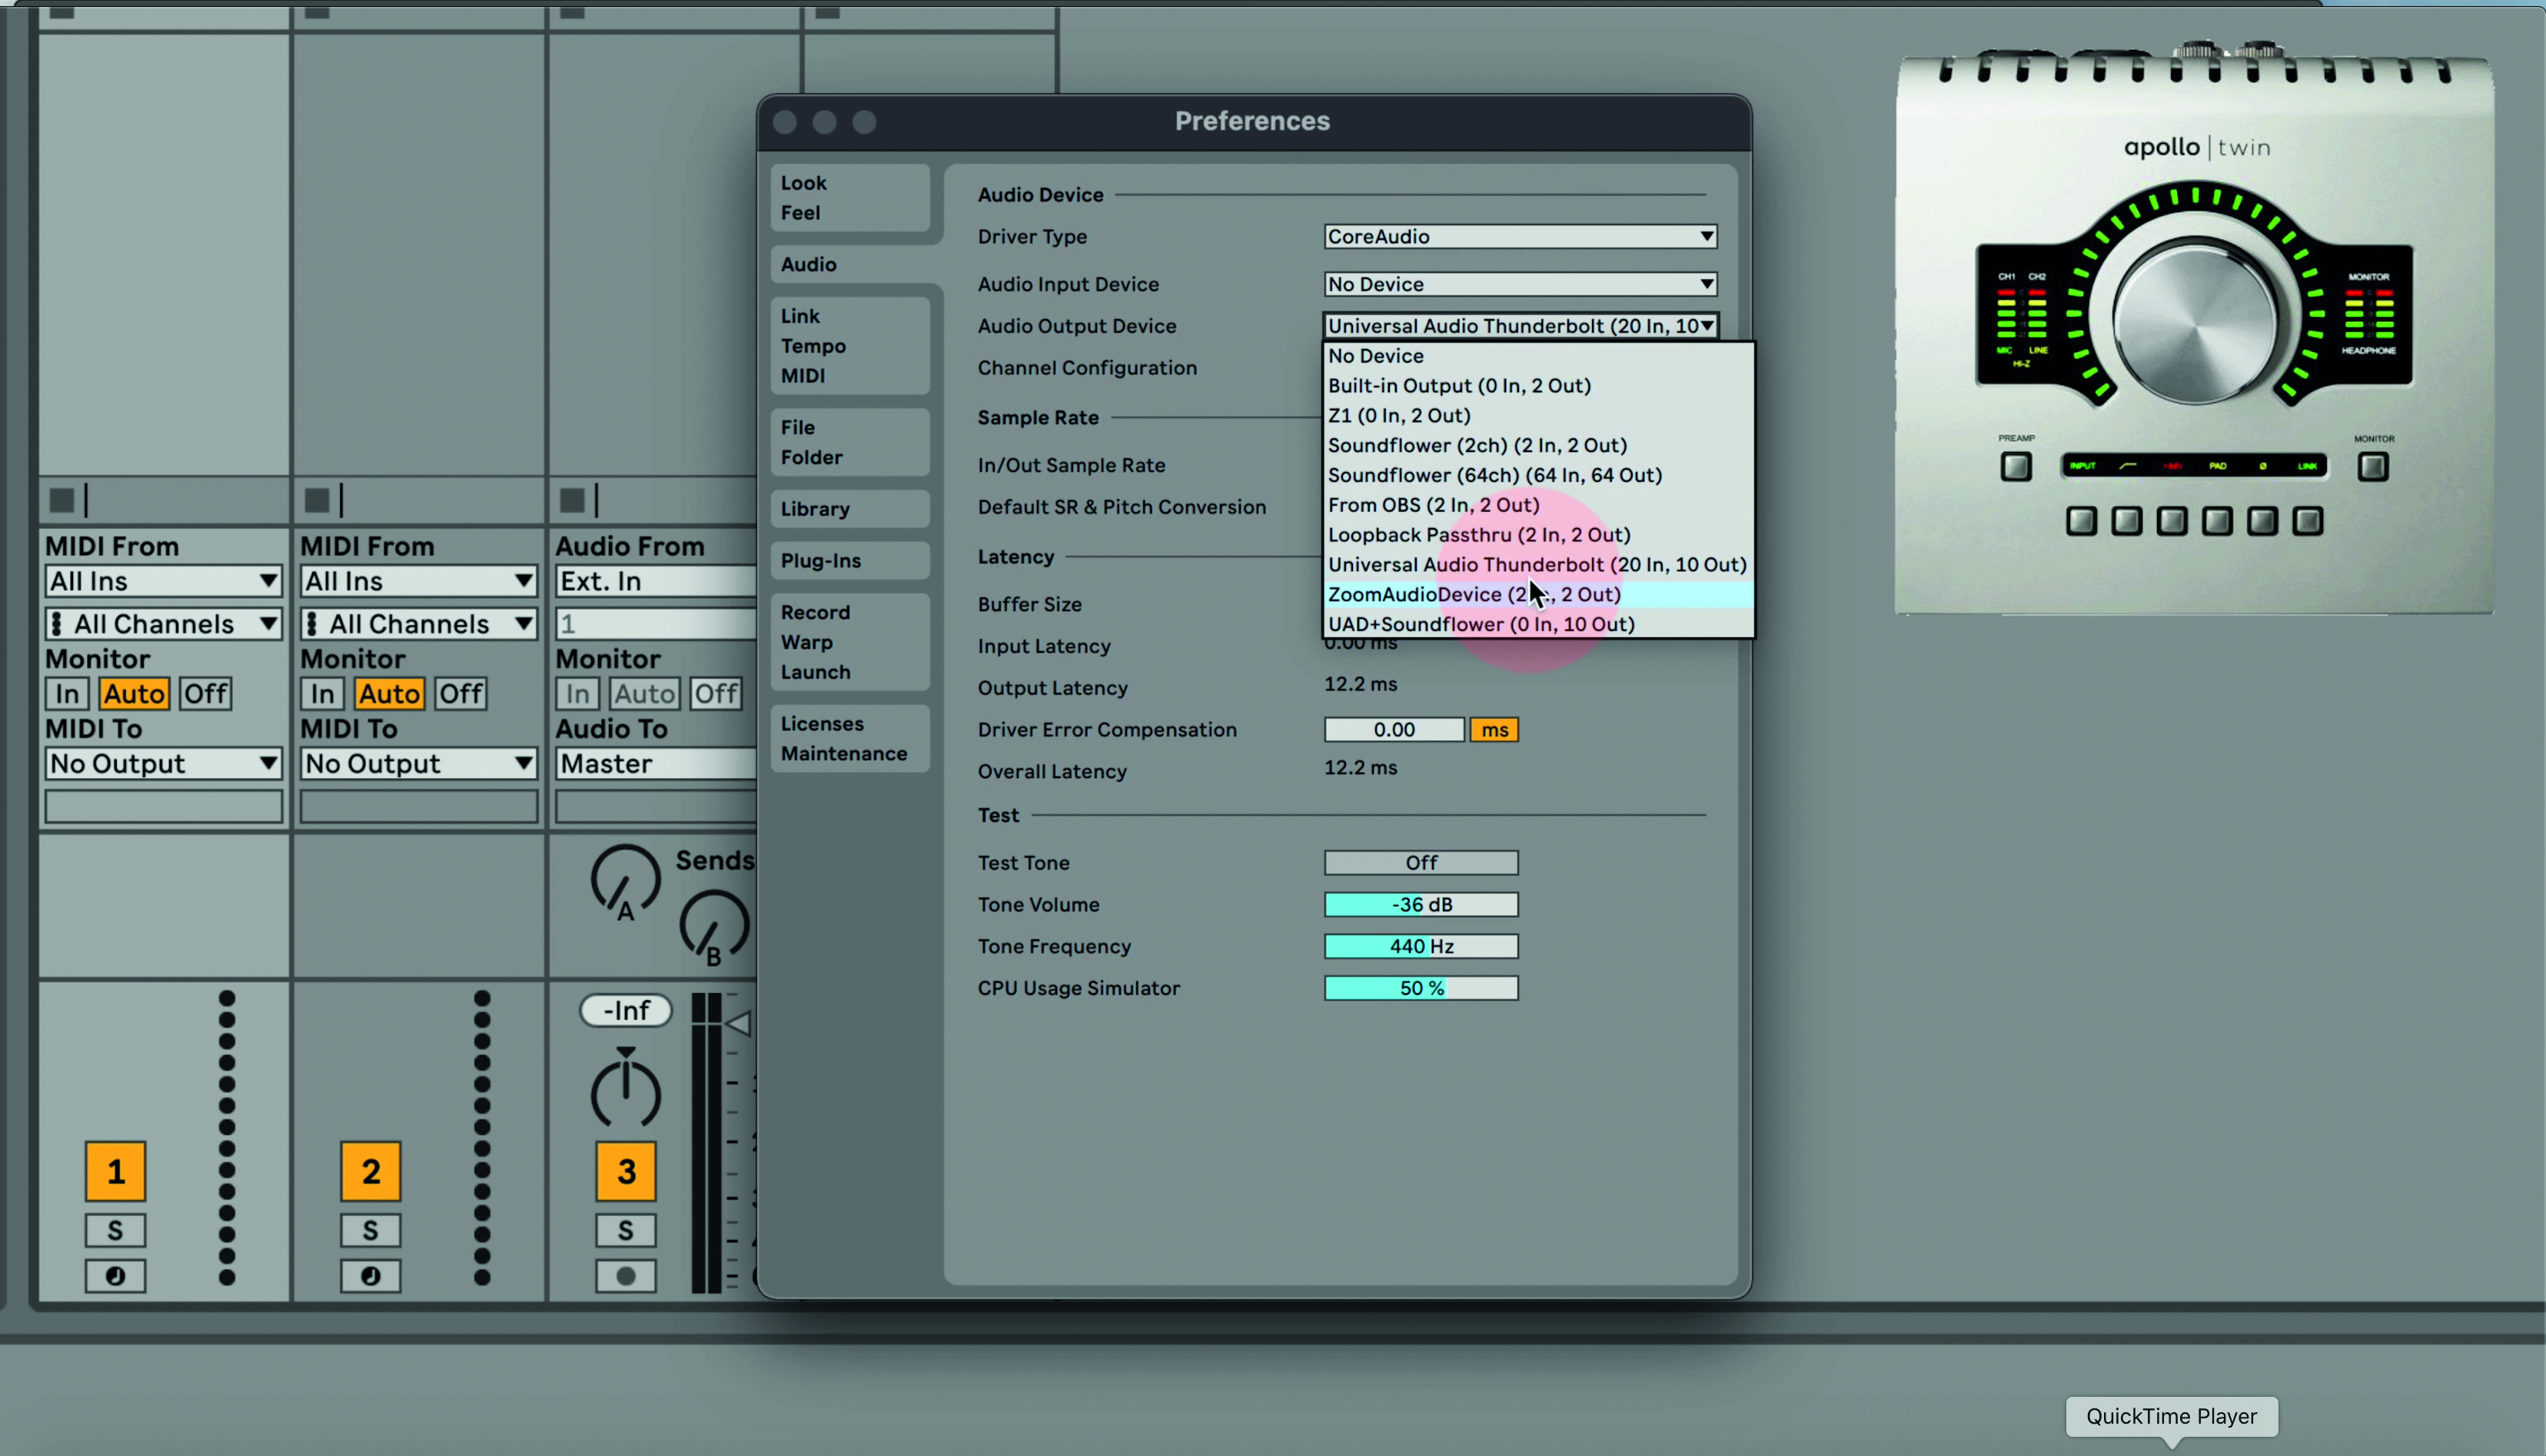
Step 5: While you are in the Preferences mode, you should also set your audio interface up, as both the Input and Output device. Go to each and select it from the menu, in which it should appear automatically. You can also simply select Live’s built-in input/output if you don’t have an interface, so that the audio comes out through your computer speaker.
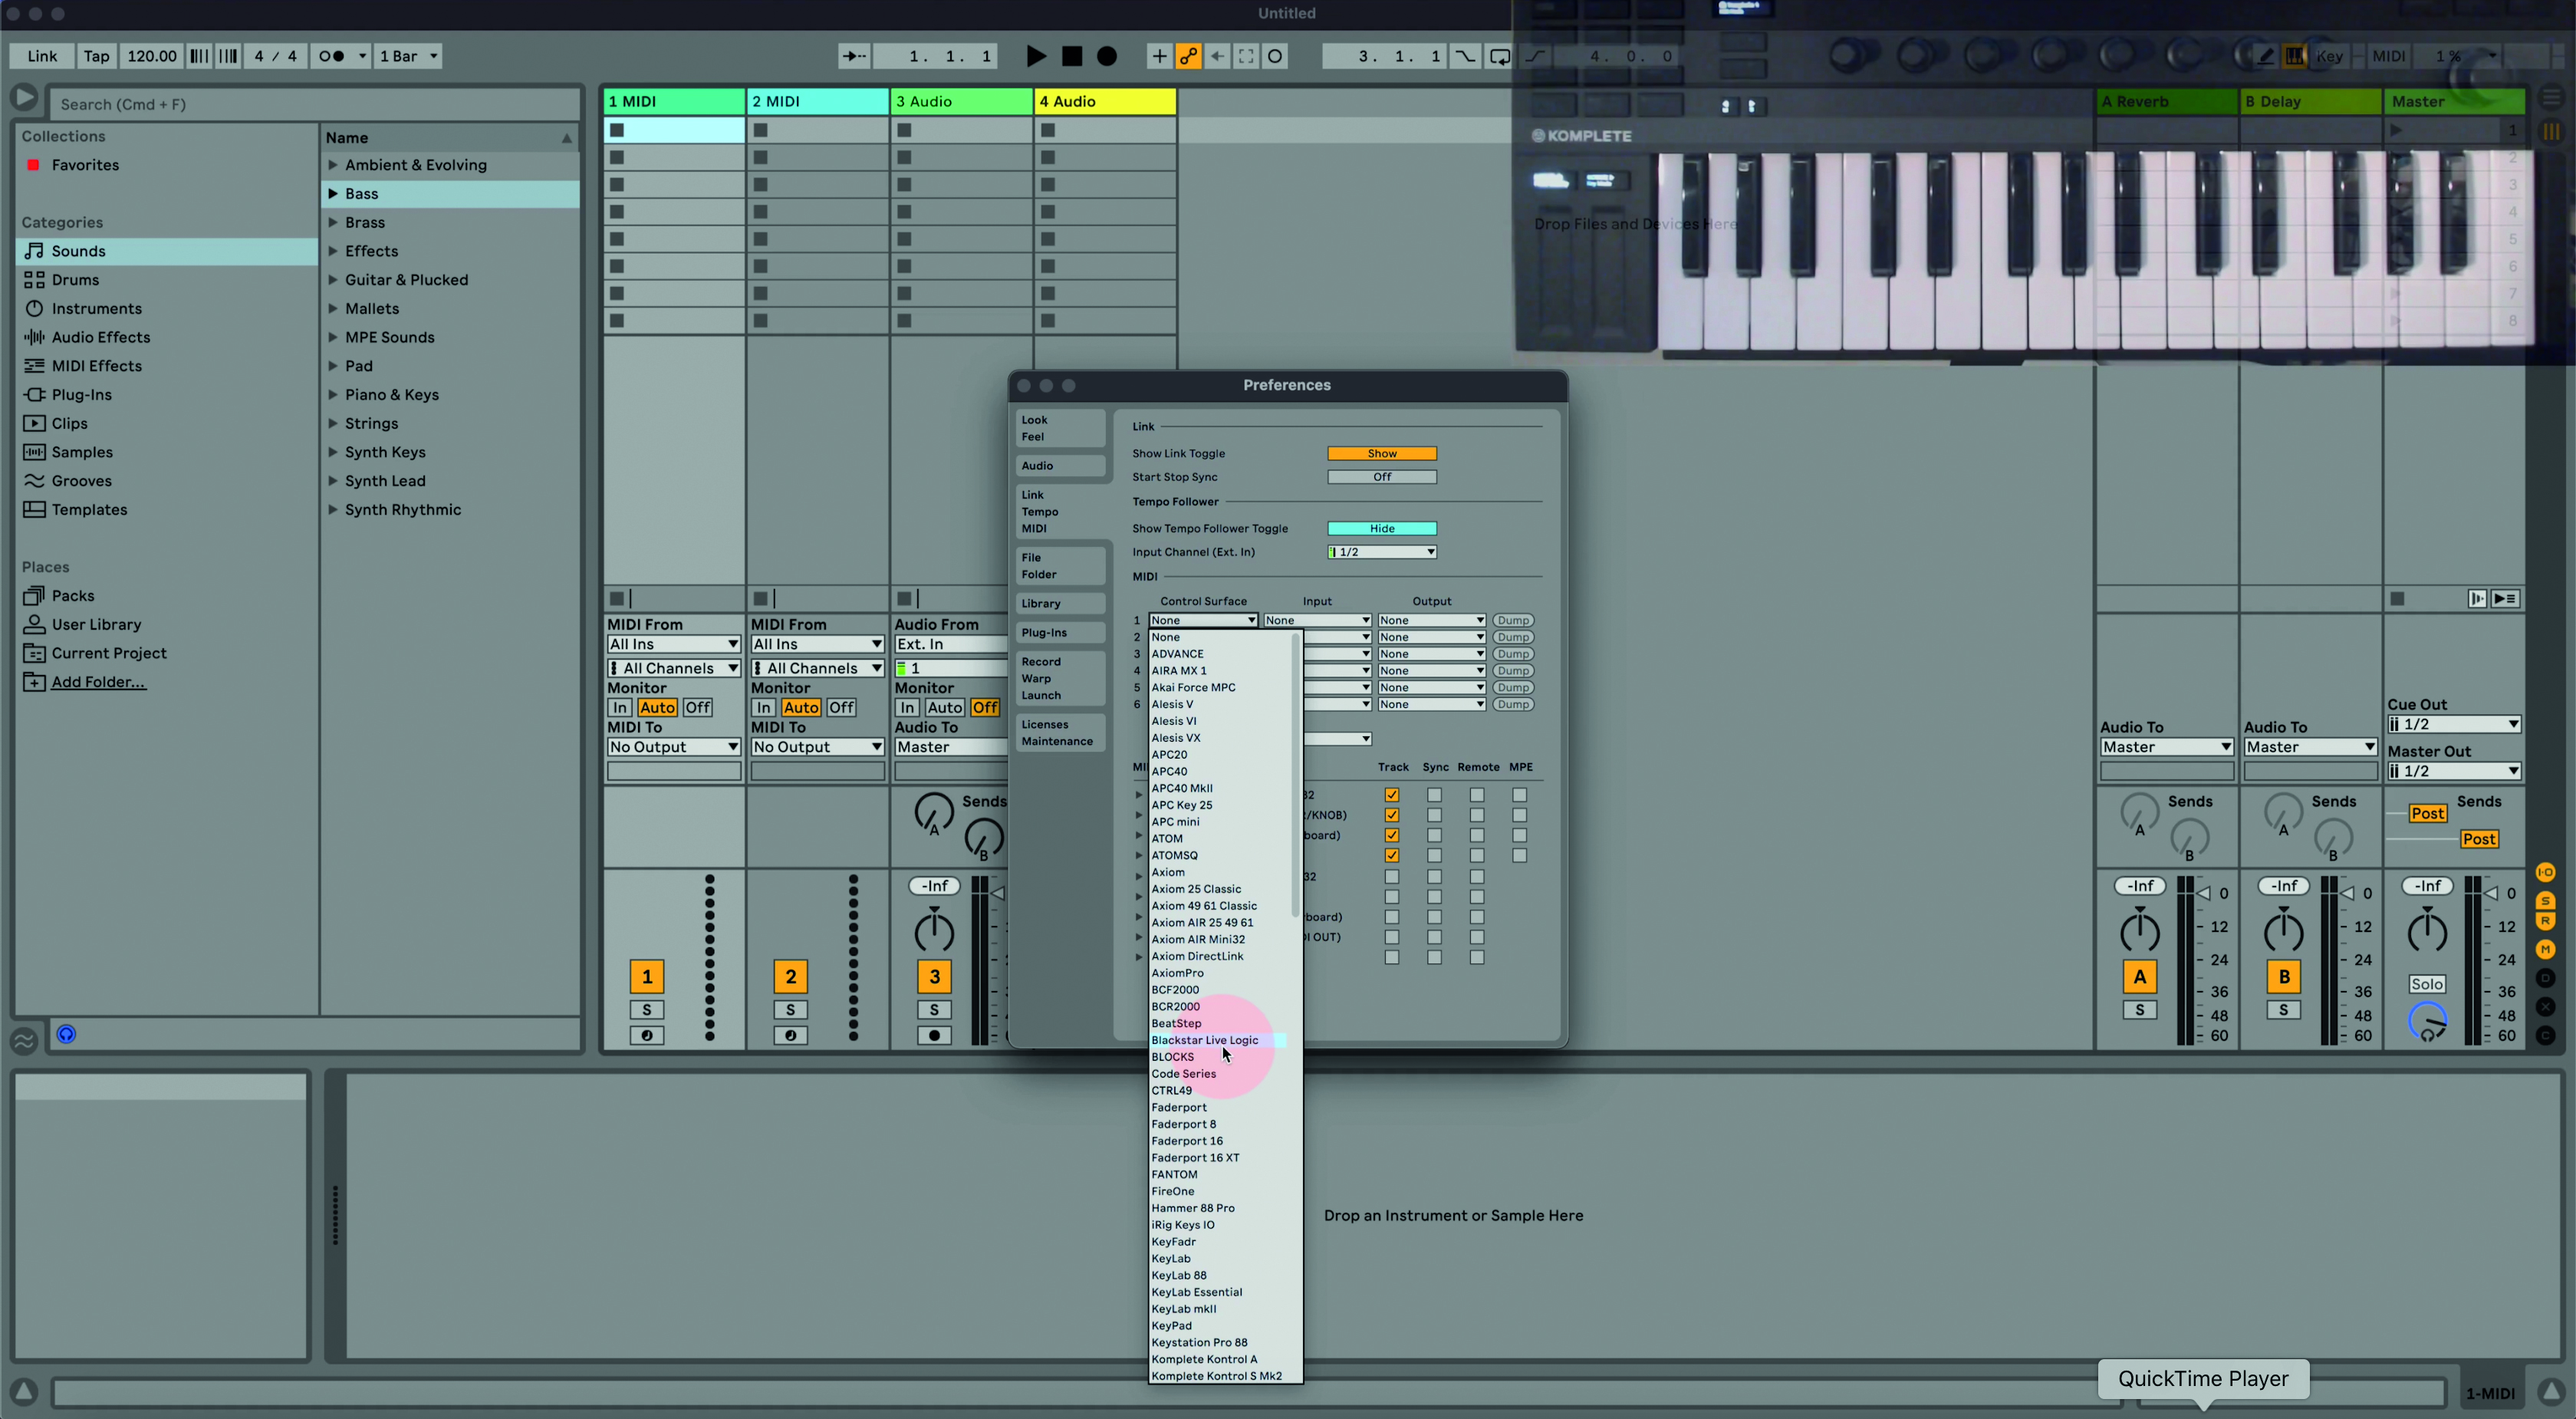
Step 6: Now do the same for any MIDI controllers you have set up – here we’ve got our Komplete Kontrol set up as our main MIDI controller.
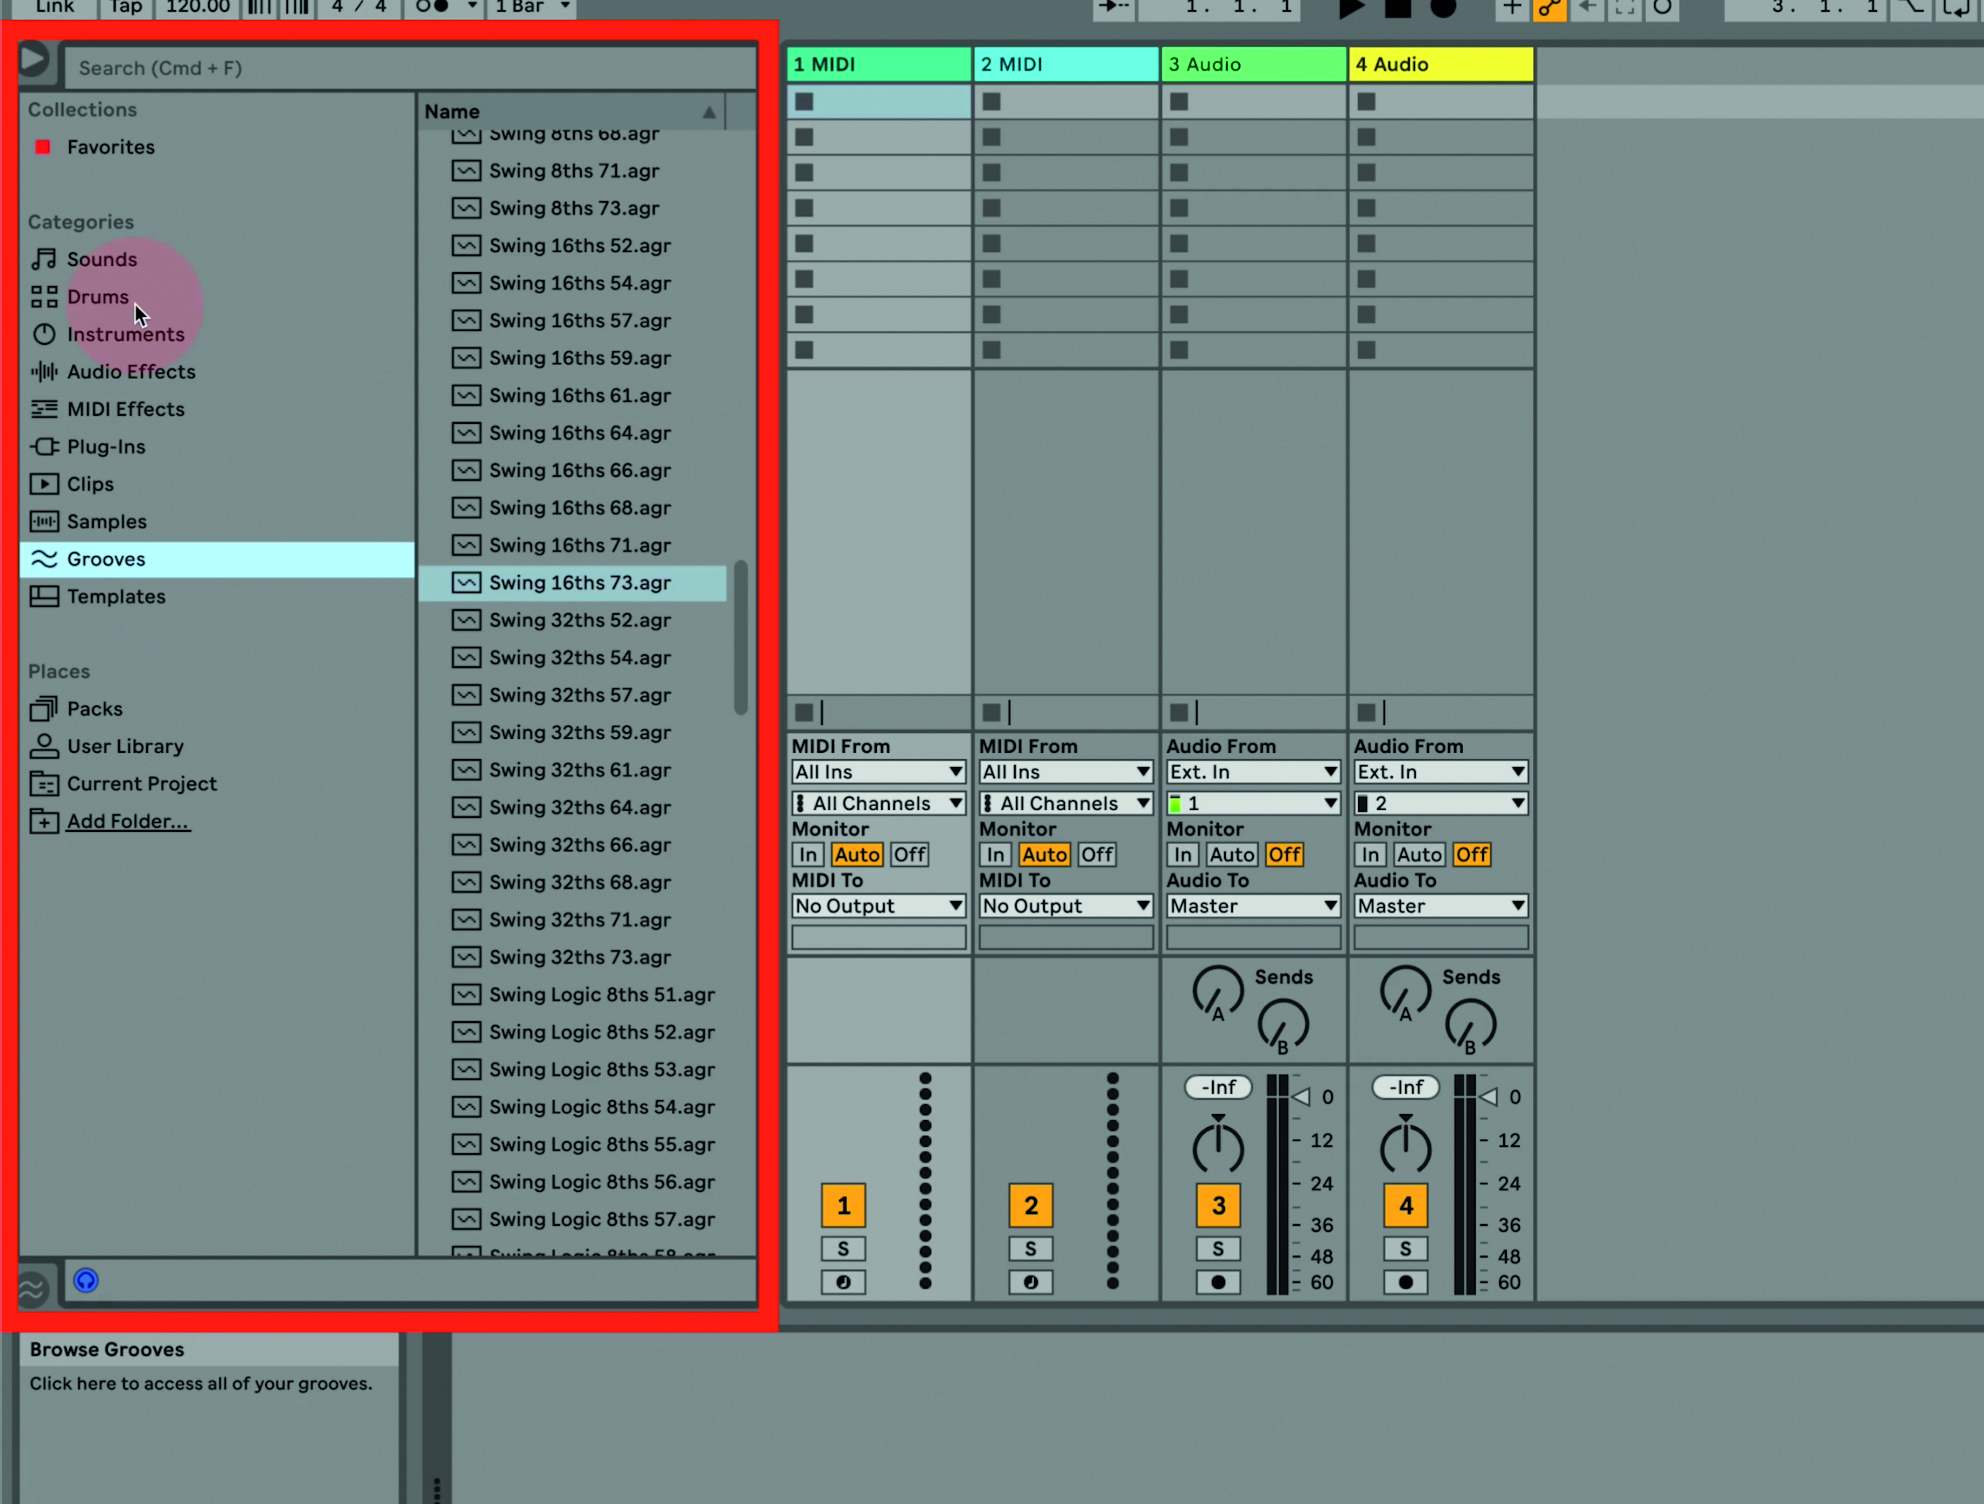
Step 7: Now there’s just time for a quick overview of the Live 11 Lite interface, also covered in more depth in our previous tutorial. Over on the left-hand side we have the main Browser area where you can select sounds, plugin effects, instruments and grooves.
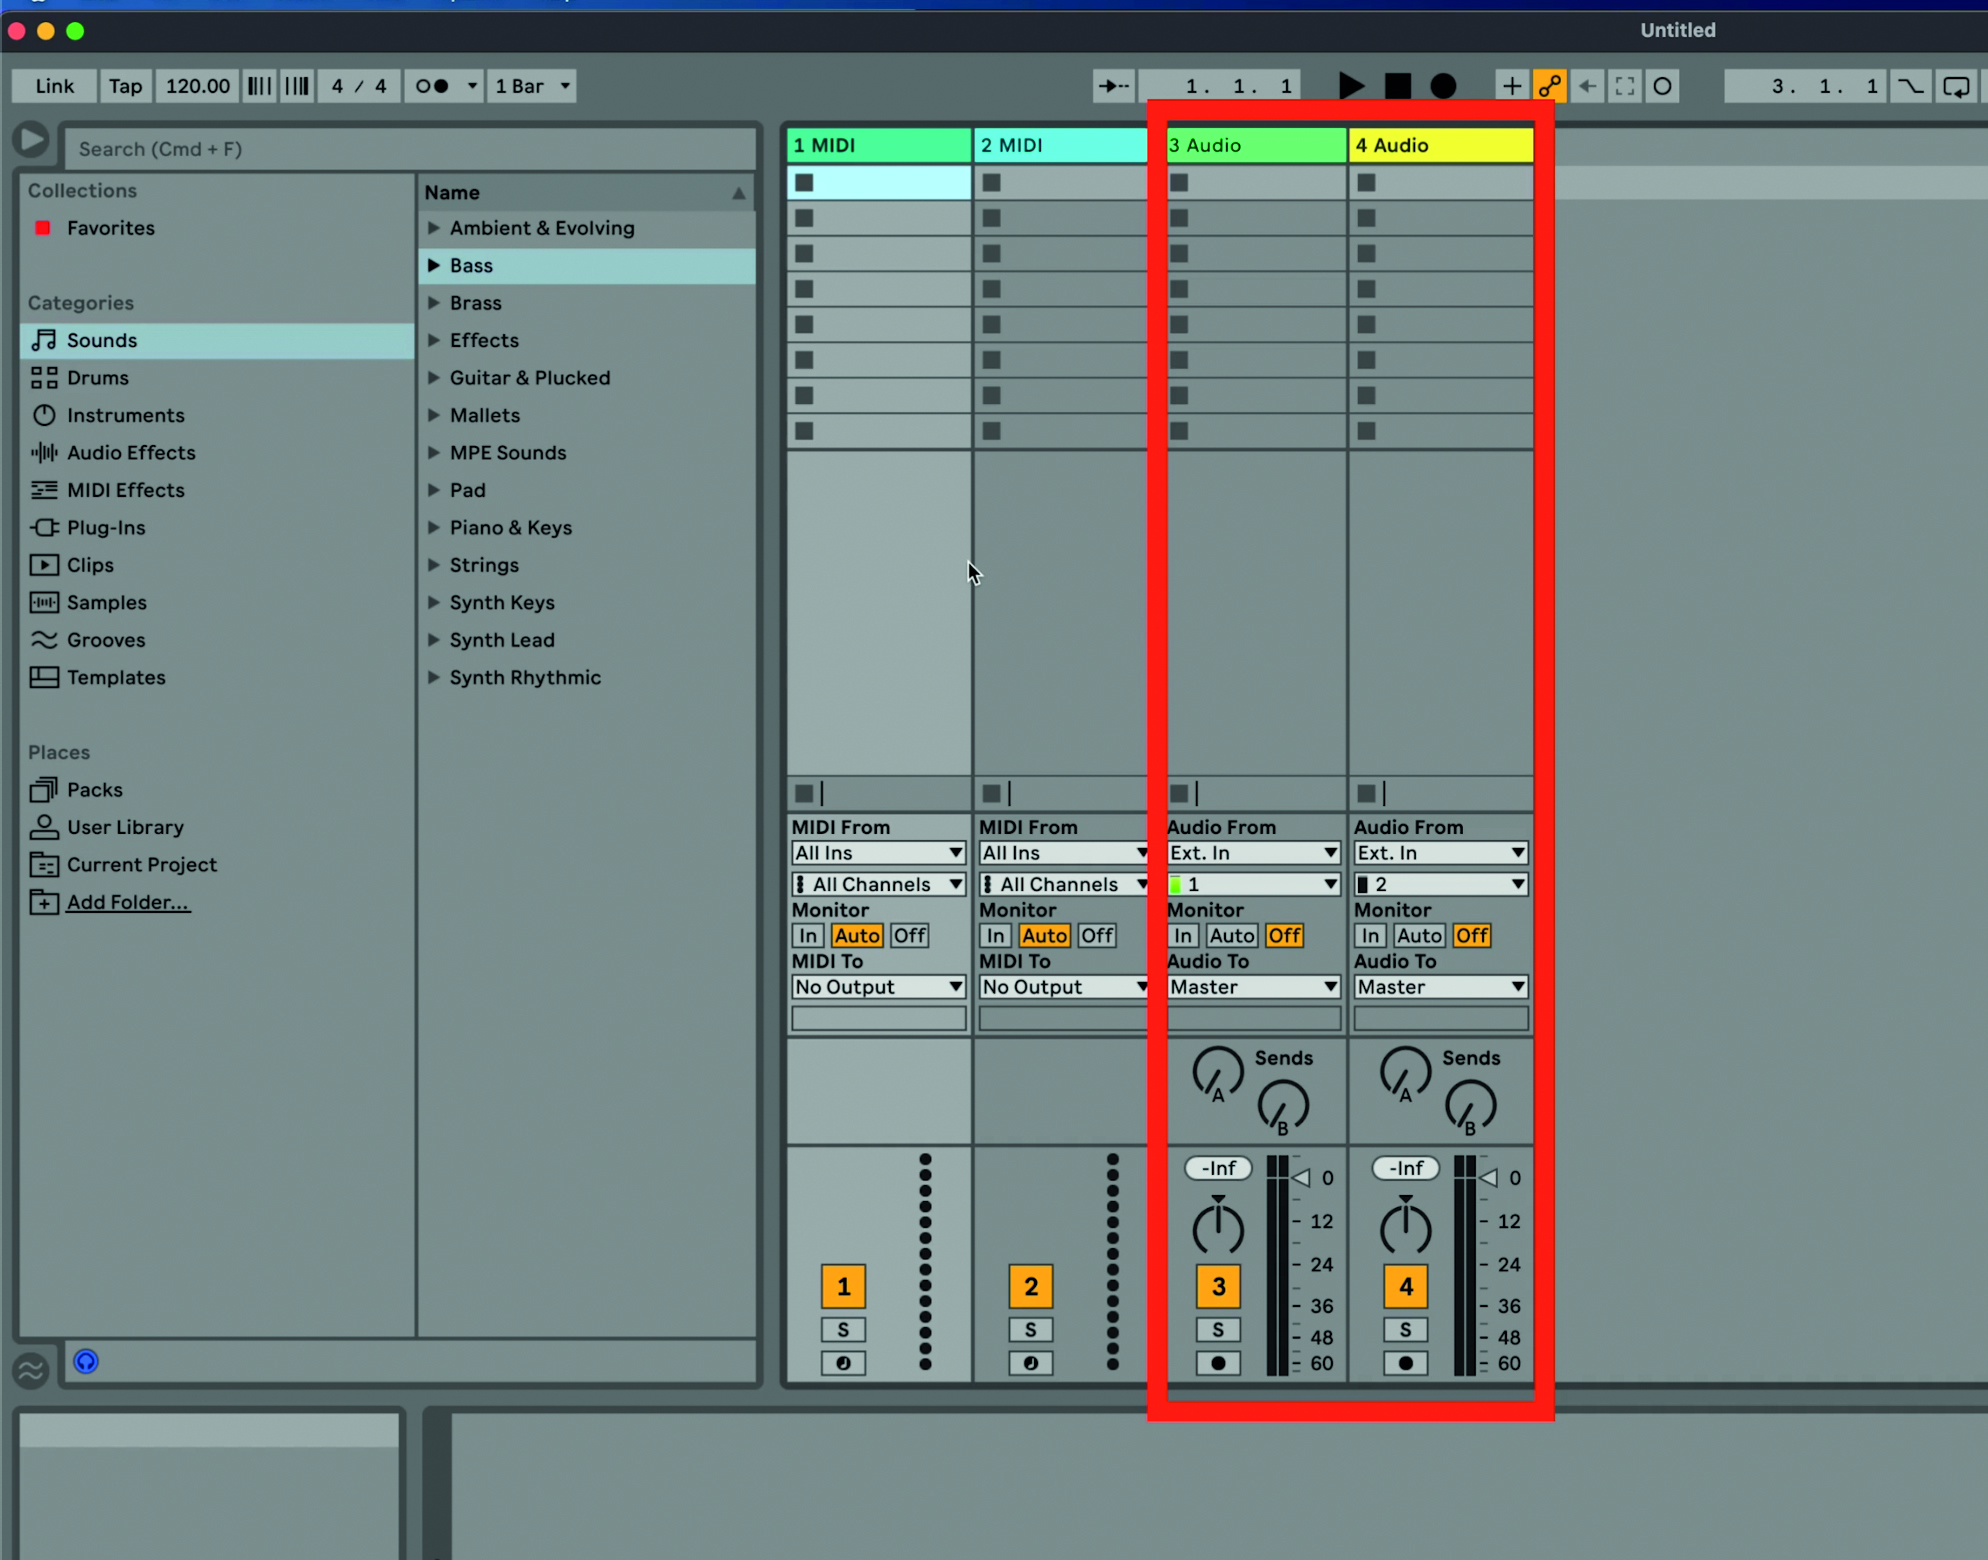
Step 8: The main view that we start off with in Live 11 Lite is the Session View, where the tracks are displayed vertically, as both MIDI (to trigger internal or external MIDI instruments) and audio (to play recorded sounds and music) tracks.
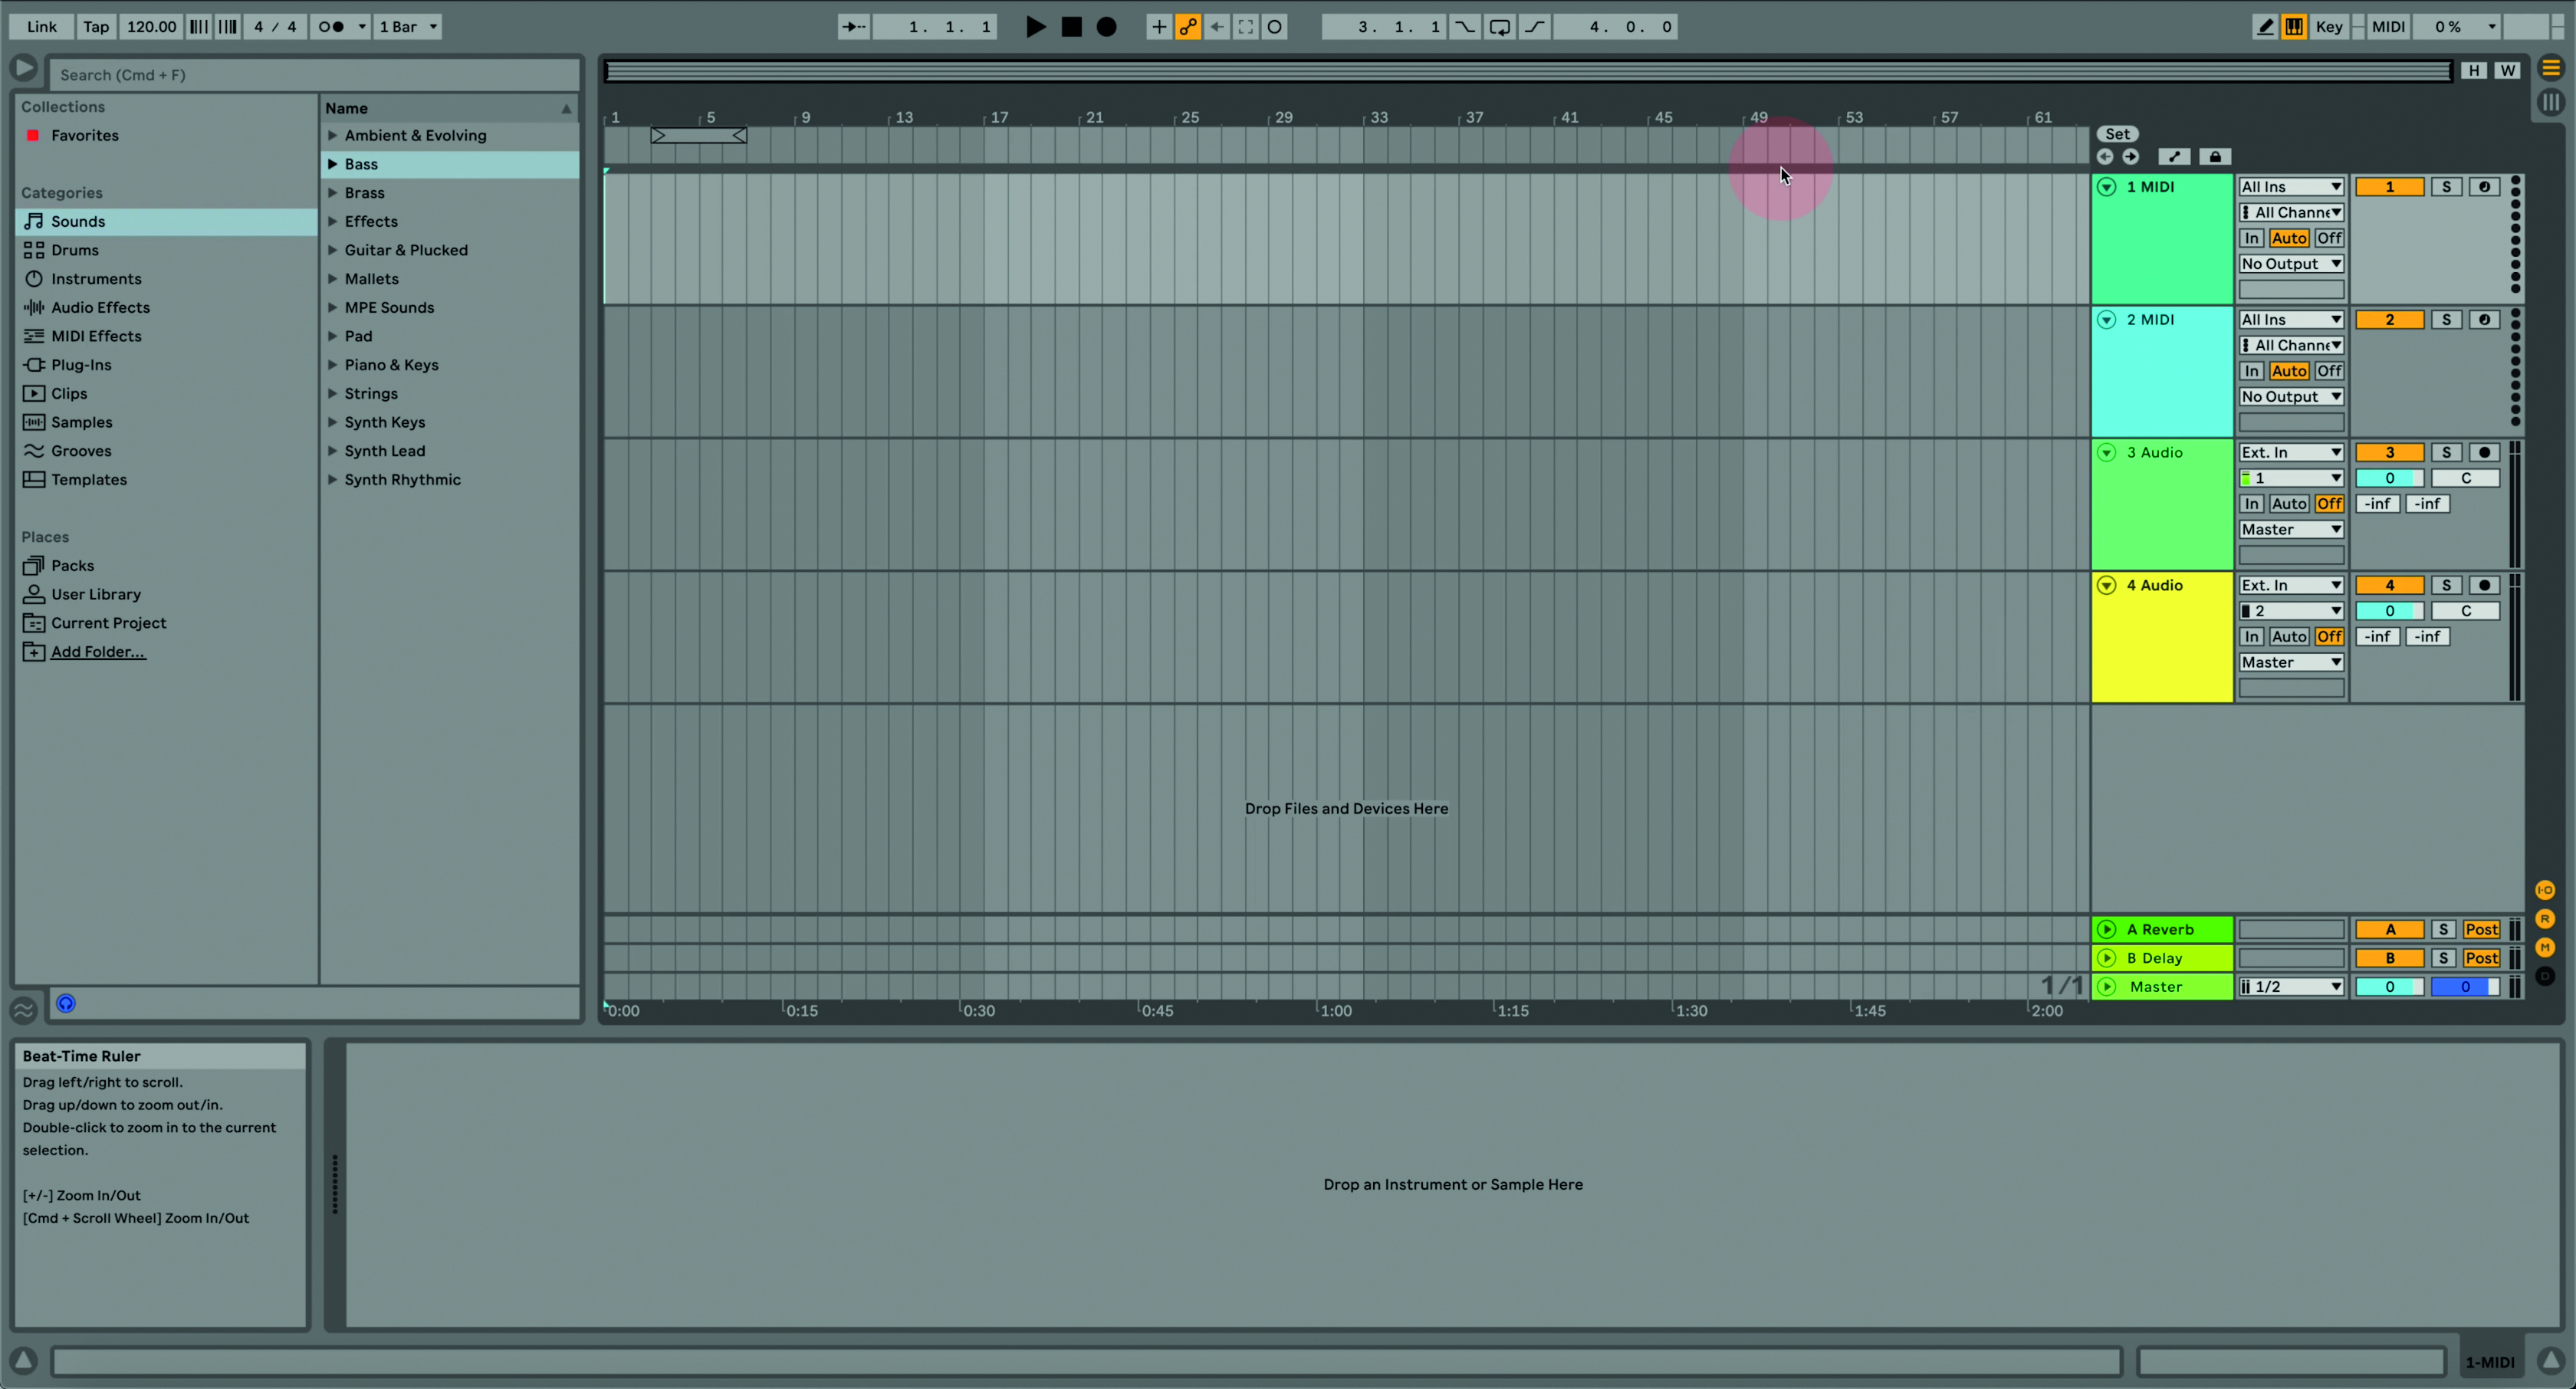
Step 9: Pressing the Tab key let’s you flip between Session View and Arrange View, the other way of looking at your song in a more traditional left-to-right fashion. More information on any part of the interface is usually given when you hover the mouse over it.
Computer Music magazine is the world’s best selling publication dedicated solely to making great music with your Mac or PC computer. Each issue it brings its lucky readers the best in cutting-edge tutorials, need-to-know, expert software reviews and even all the tools you actually need to make great music today, courtesy of our legendary CM Plugin Suite.
