The ultimate beginner's guide to Ableton Live 11 Lite: navigation and familiarisation
Get started with Ableton Live 11 Lite with our ongoing tutorial series - and grab a free download with this month's issue of Computer Music
Want all the hottest music and gear news, reviews, deals, features and more, direct to your inbox? Sign up here.
You are now subscribed
Your newsletter sign-up was successful
Ableton Live is a DAW that needs no introduction, and its combination of performance and production features mean it’s as popular with performers and DJs as it is with creators.
Live 11 Lite is a cut-down version of Ableton Live, with all of the essential workflows, instruments and effects, but with limited track count, and for many years this has been bundled with apps and hardware products. This month, you can grab a free copy of Ableton Live 11 Lite with the latest issue of Computer Music Magazine.
To mark this momentous occasion and also to get you started using this fabulous software, we’ve put together a series of tutorials that run through everything you need to get acquainted with Ableton Live 11 Lite, so you can learn how to build a track from scratch.
Our tutorials are primarily for new users, but that said, we’ll also flag some of the new features you’ll find in Live 11 Lite, so even if you’ve used Live Lite before, there may be some things for you to learn here.
Finally, although Live 11 Lite is awesome software, there are more fully featured versions of Ableton Live available on Ableton's website. So, let’s get creating in Live 11 Lite!
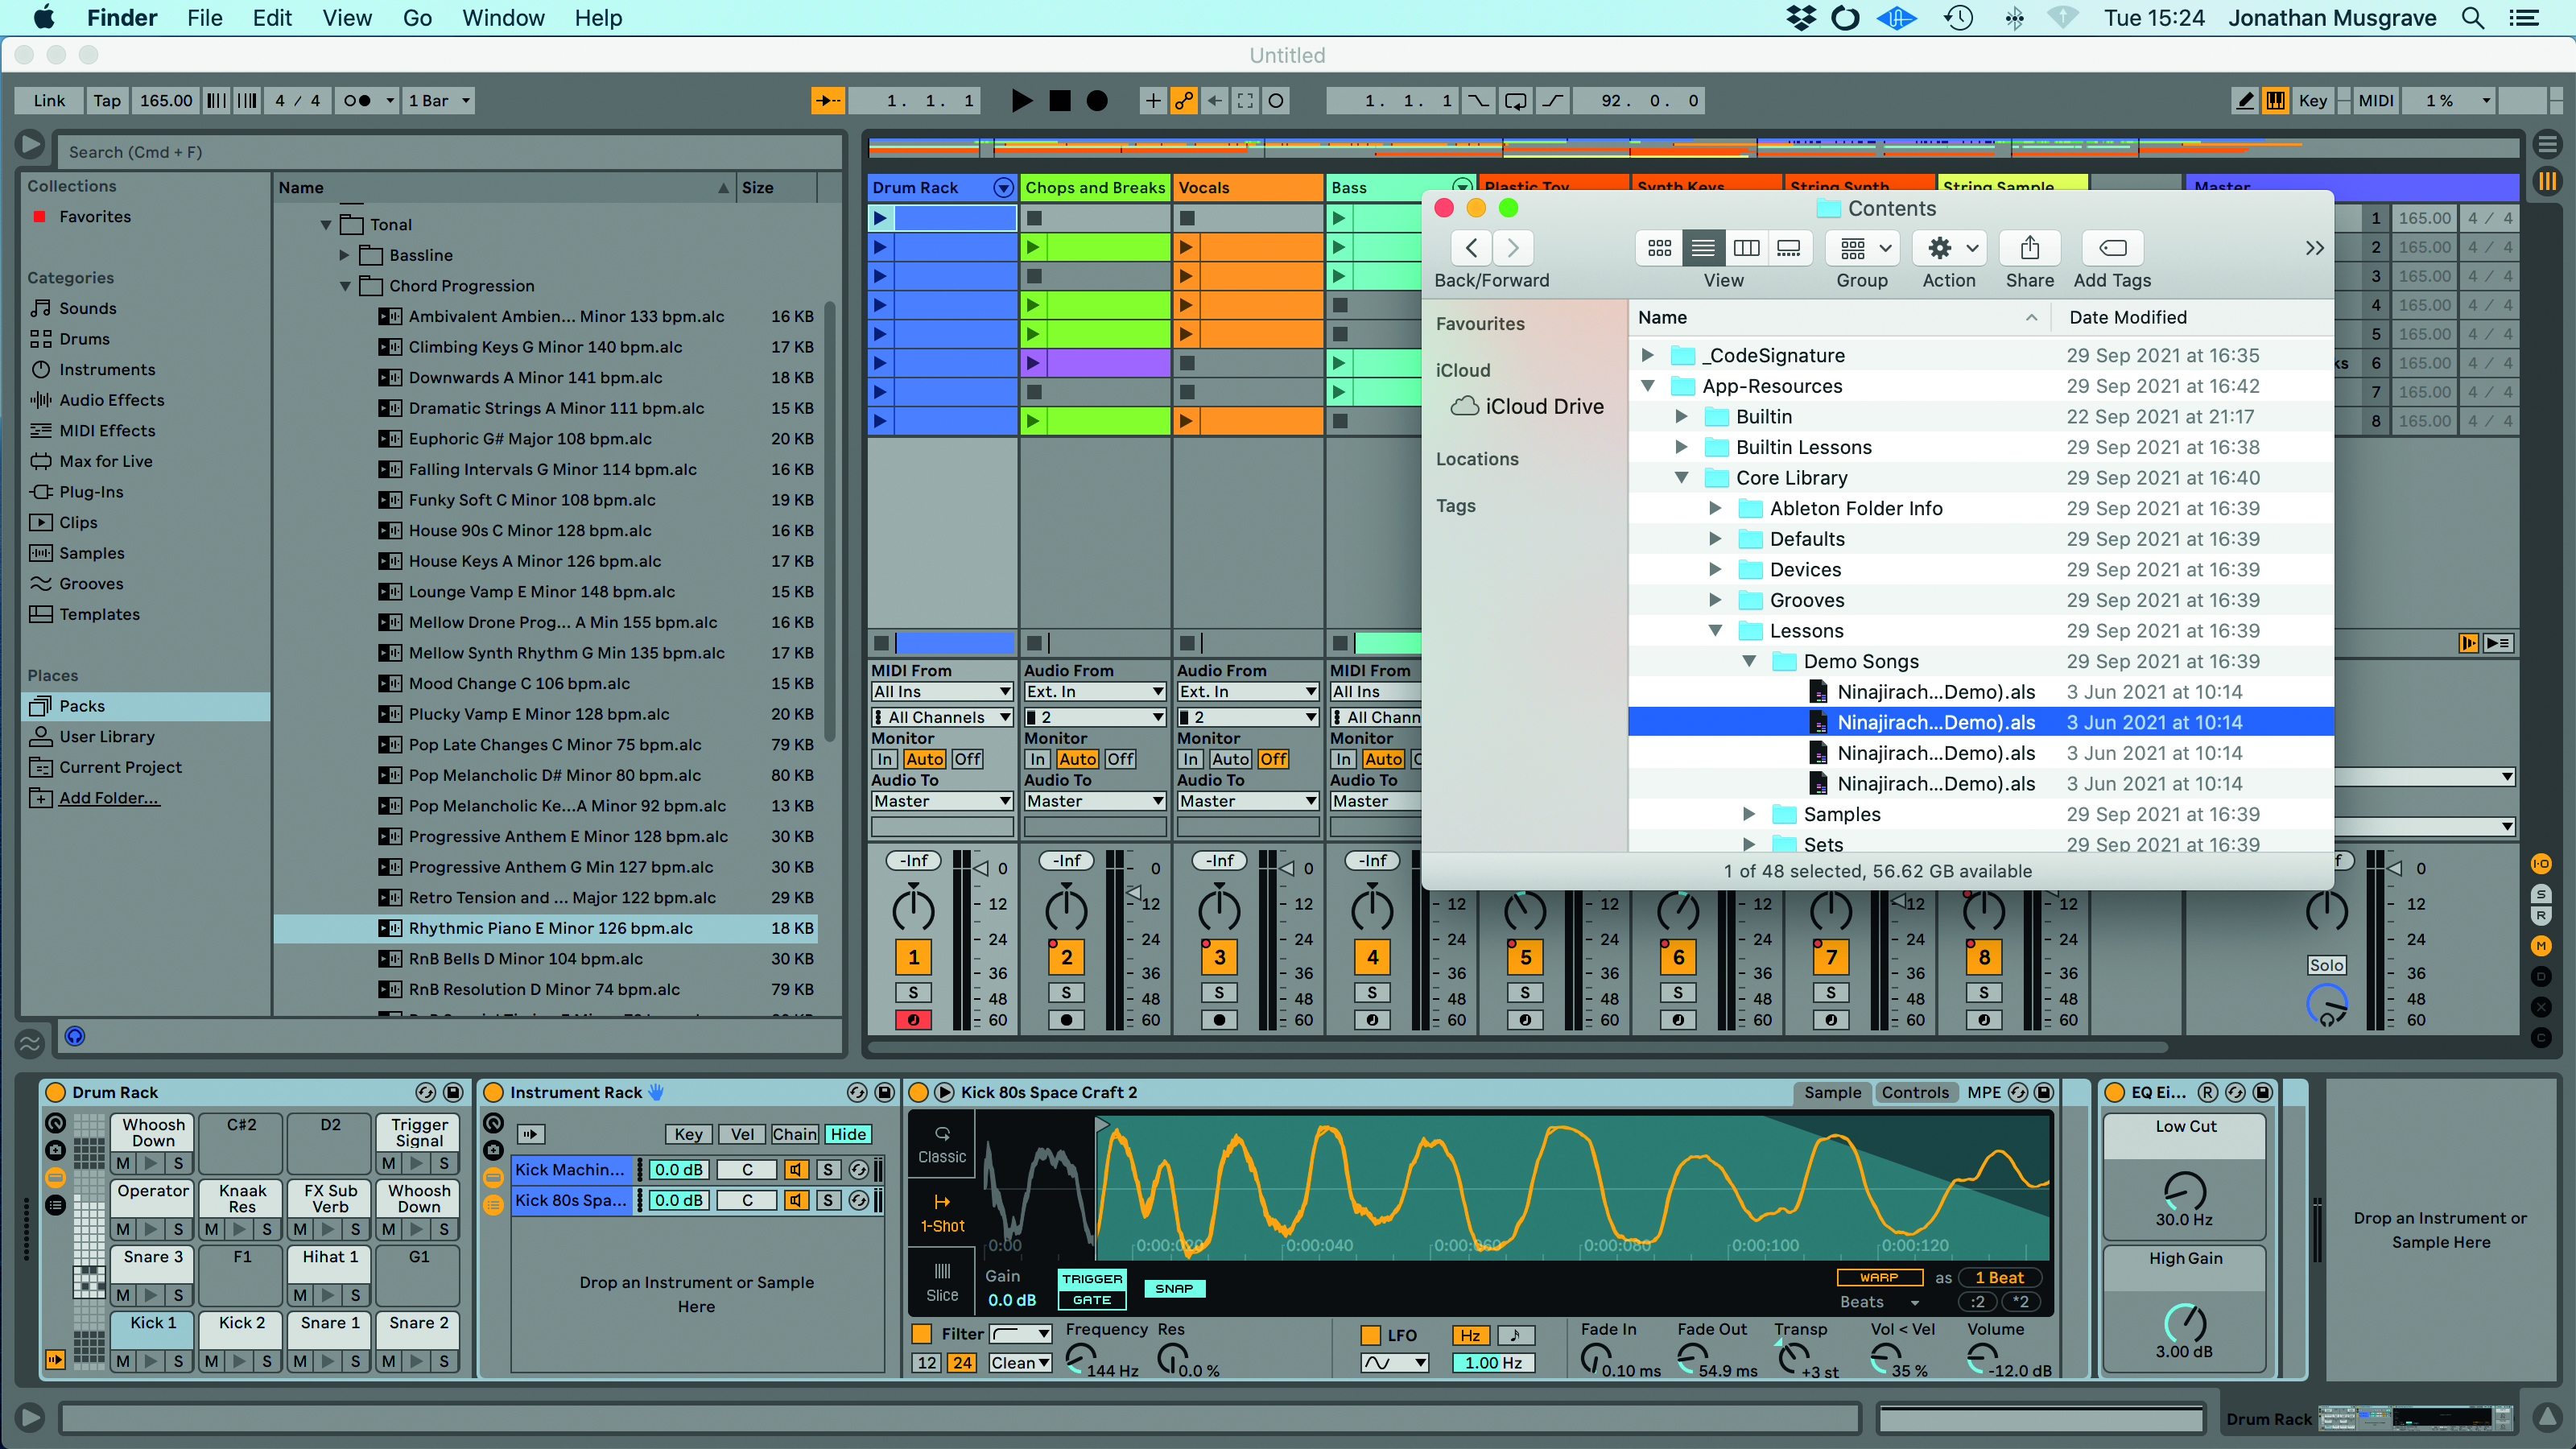
Step 1: For familiarisation, we’re using the Live 11 Lite demo track. This Live Set (.als file) should load up automatically when you authorise Live Lite. If you need to reload it, search for Demo Songs, which on Windows is in the Program Data folder, and on OS X is in the application file, so use “show package contents” to reveal it.
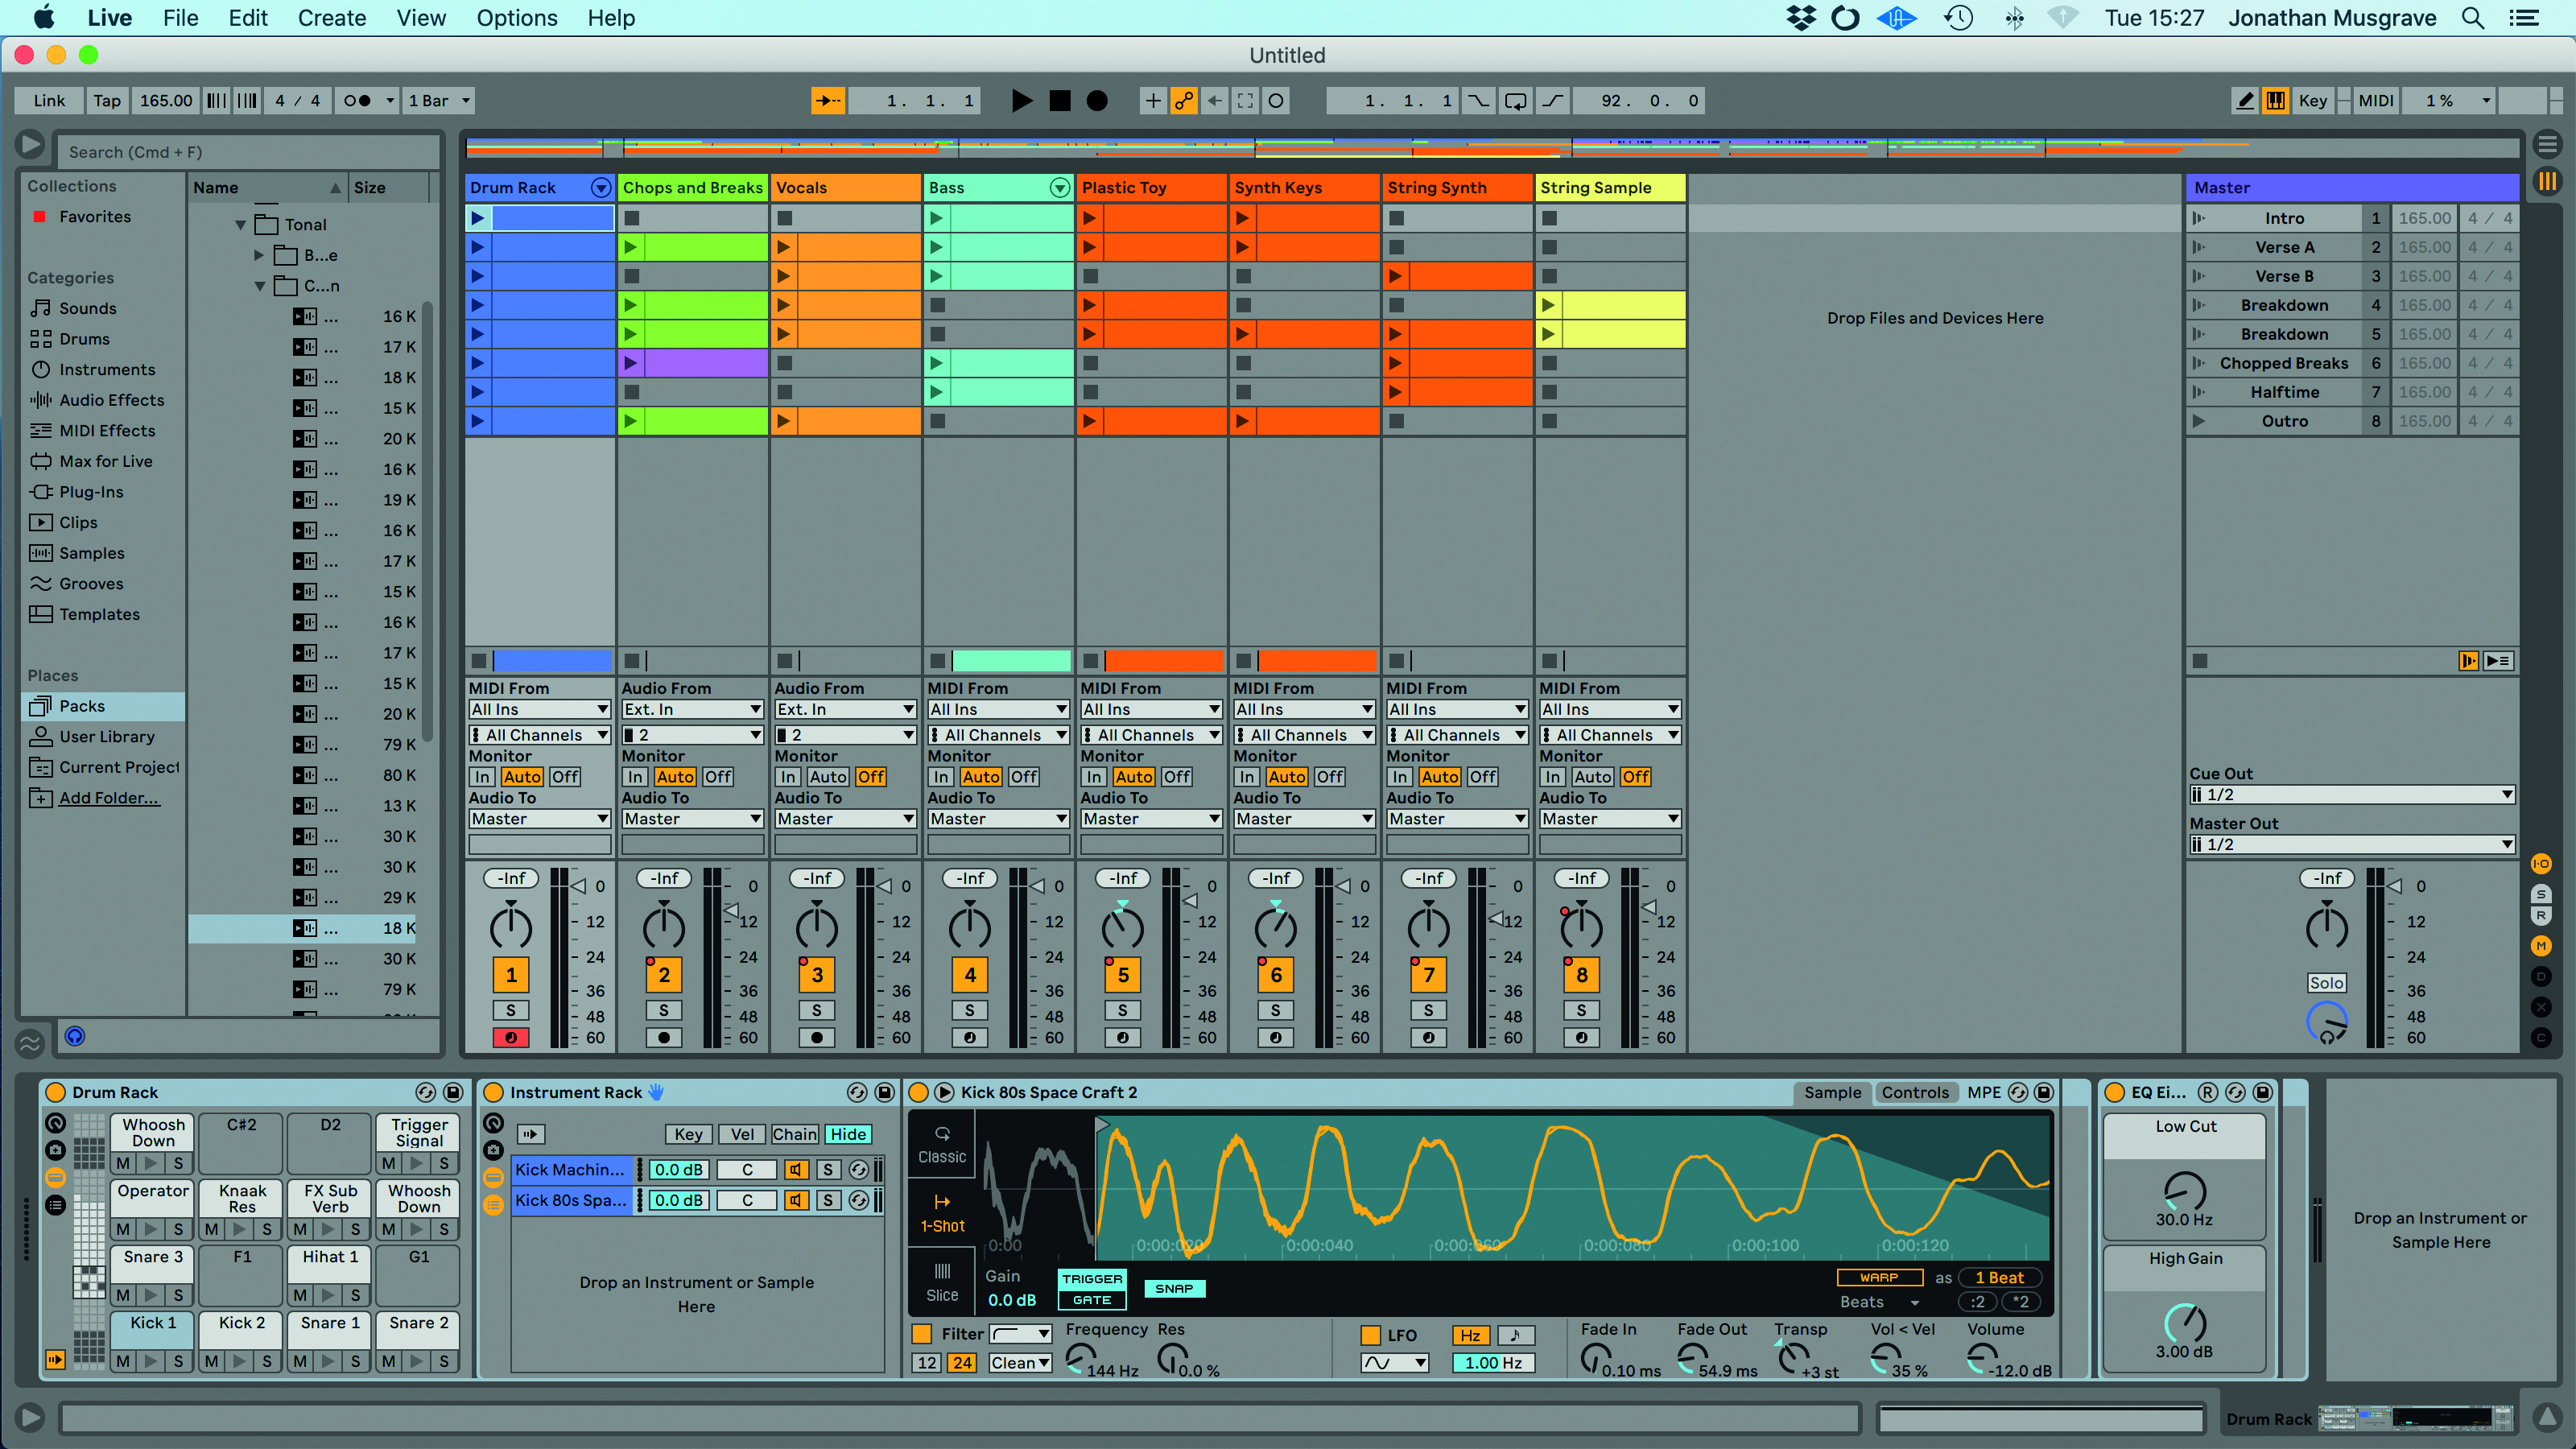
Step 2: Live 11 Lite uses a workspace layout with a central workspace flanked by various foldaway panels. Some of the panels are tabbed to allow for multiple sections and you’ll find the transport bar is at the top. Try dragging the panel dividers to resize panels.
Want all the hottest music and gear news, reviews, deals, features and more, direct to your inbox? Sign up here.
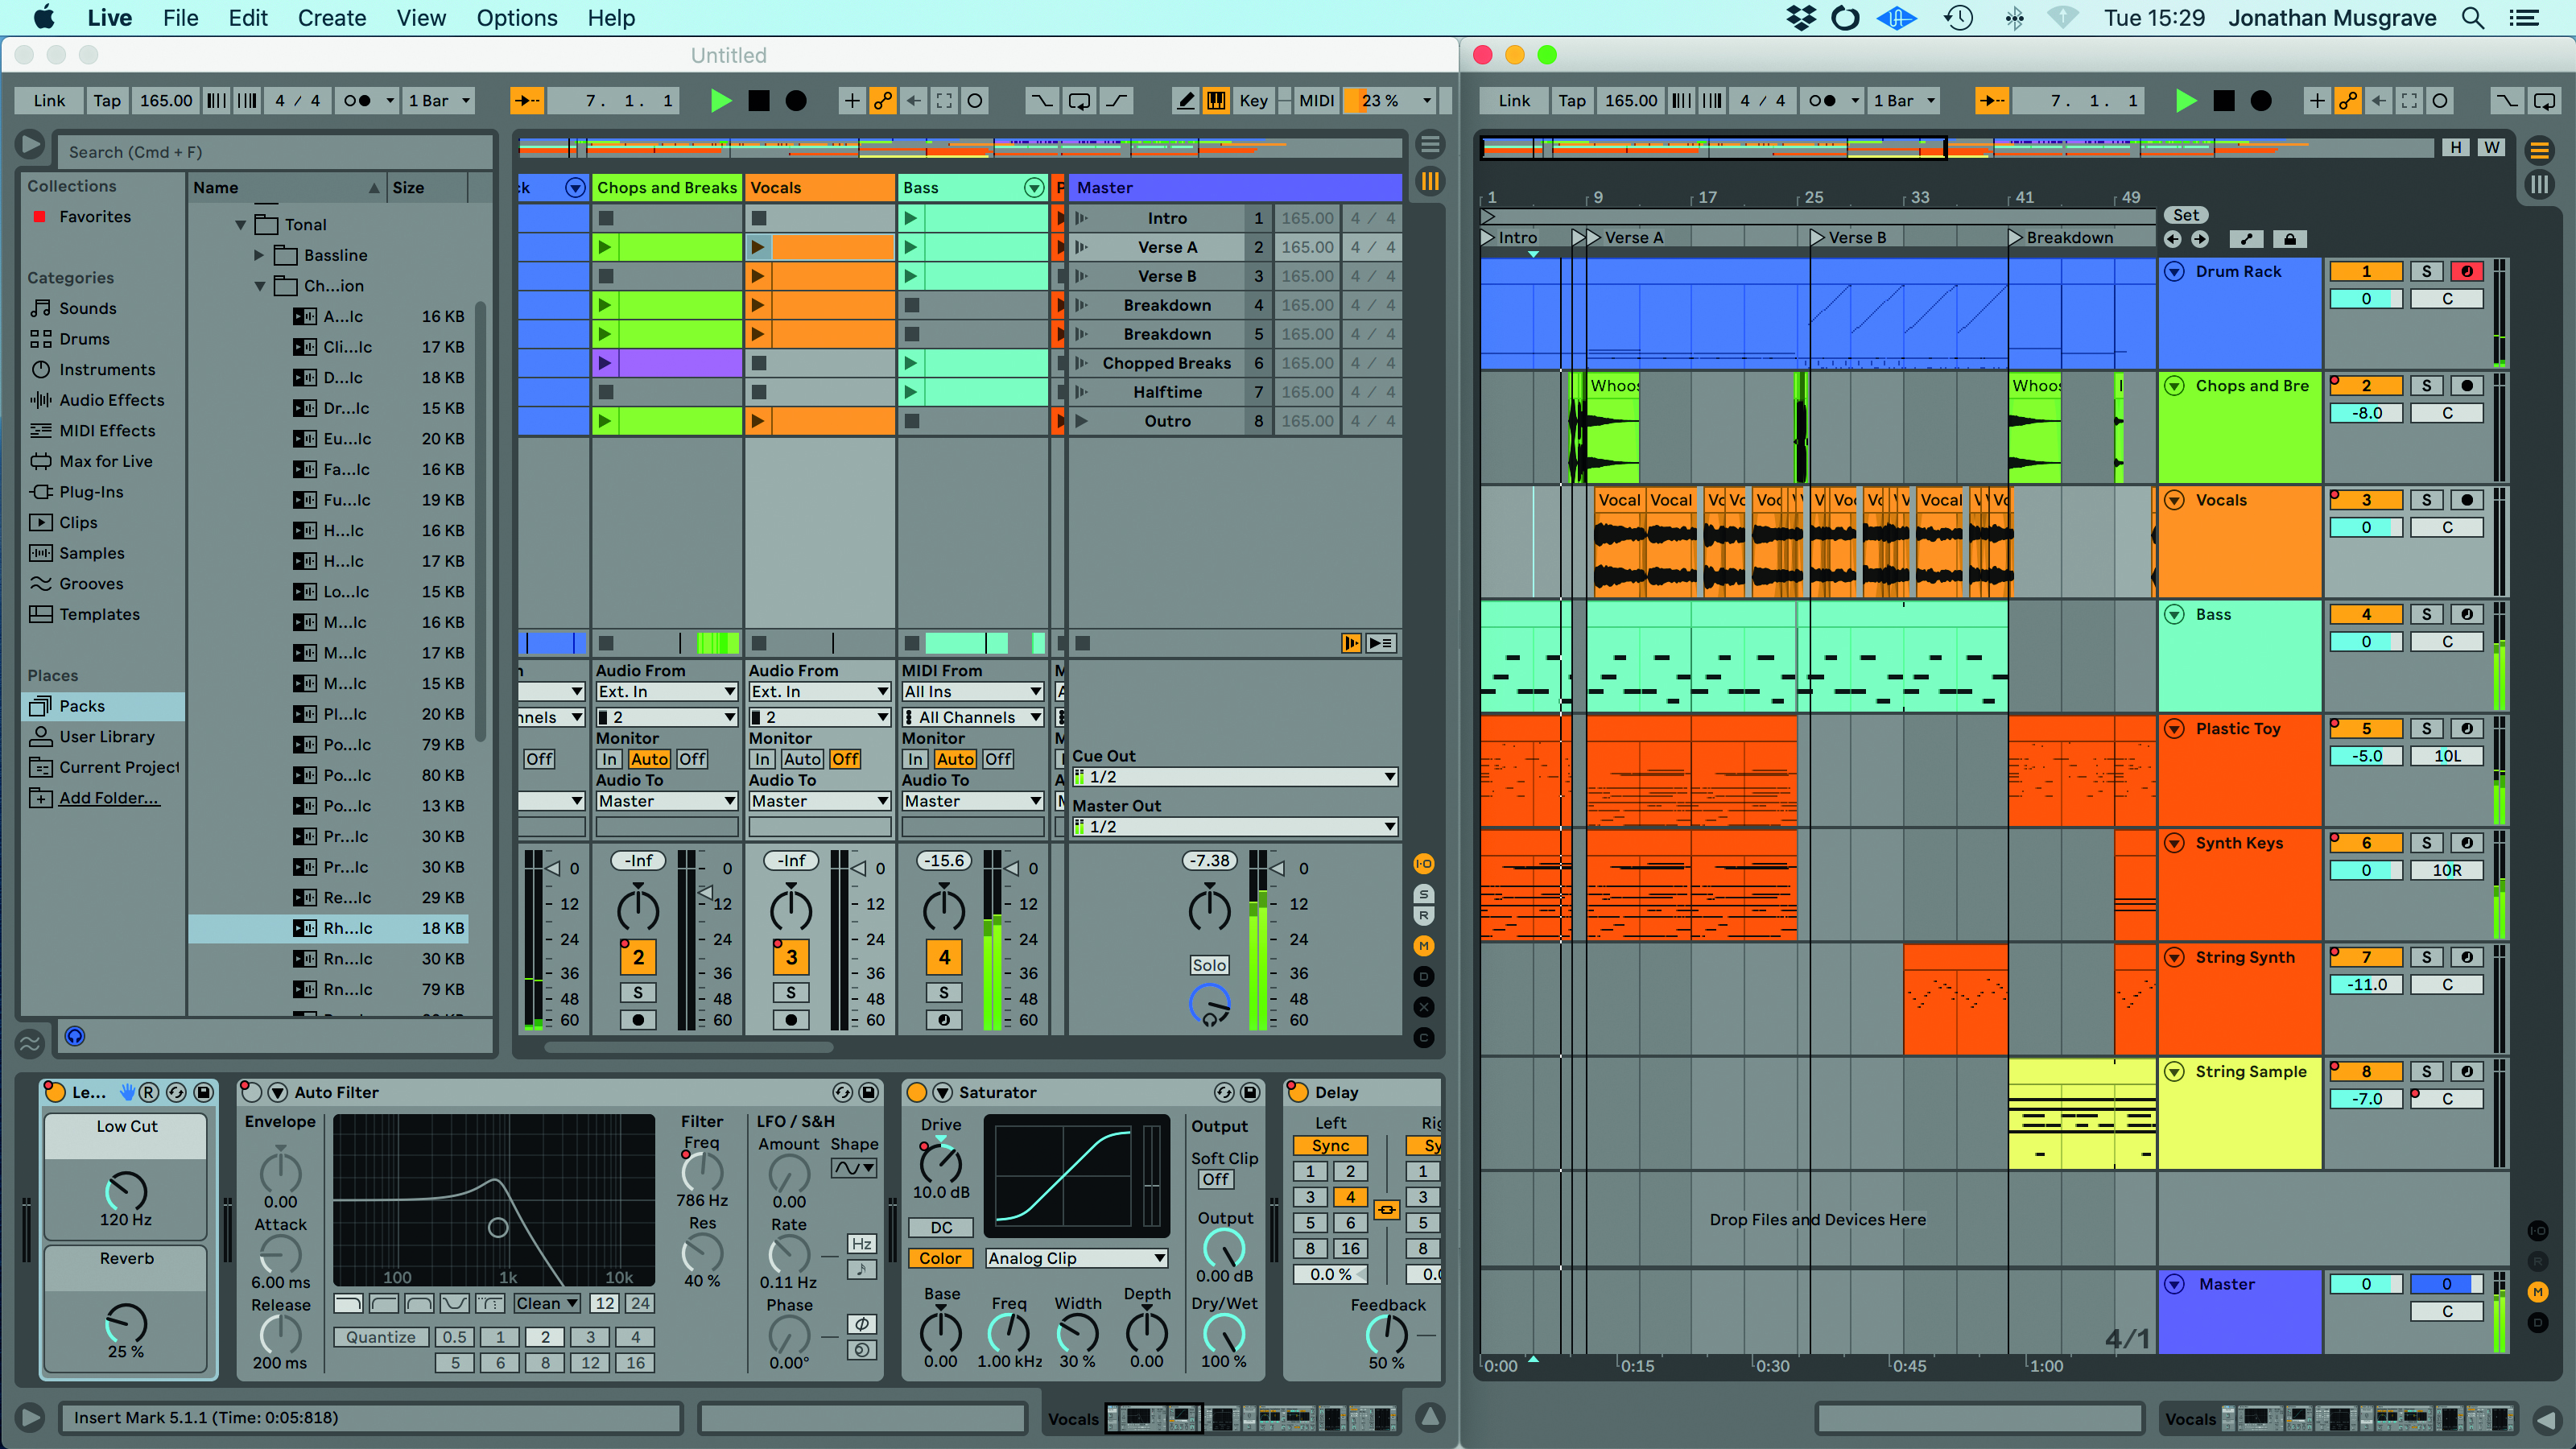
Step 3: Panels can be opened using their triangle icons or selected from the main View menu. The core workspace doesn’t employ floating windows, although third party plugins can launch in their own windows. Nevertheless, you can open a full Second Window from the View menu. This can be quite handy for twin monitors or used side by side.
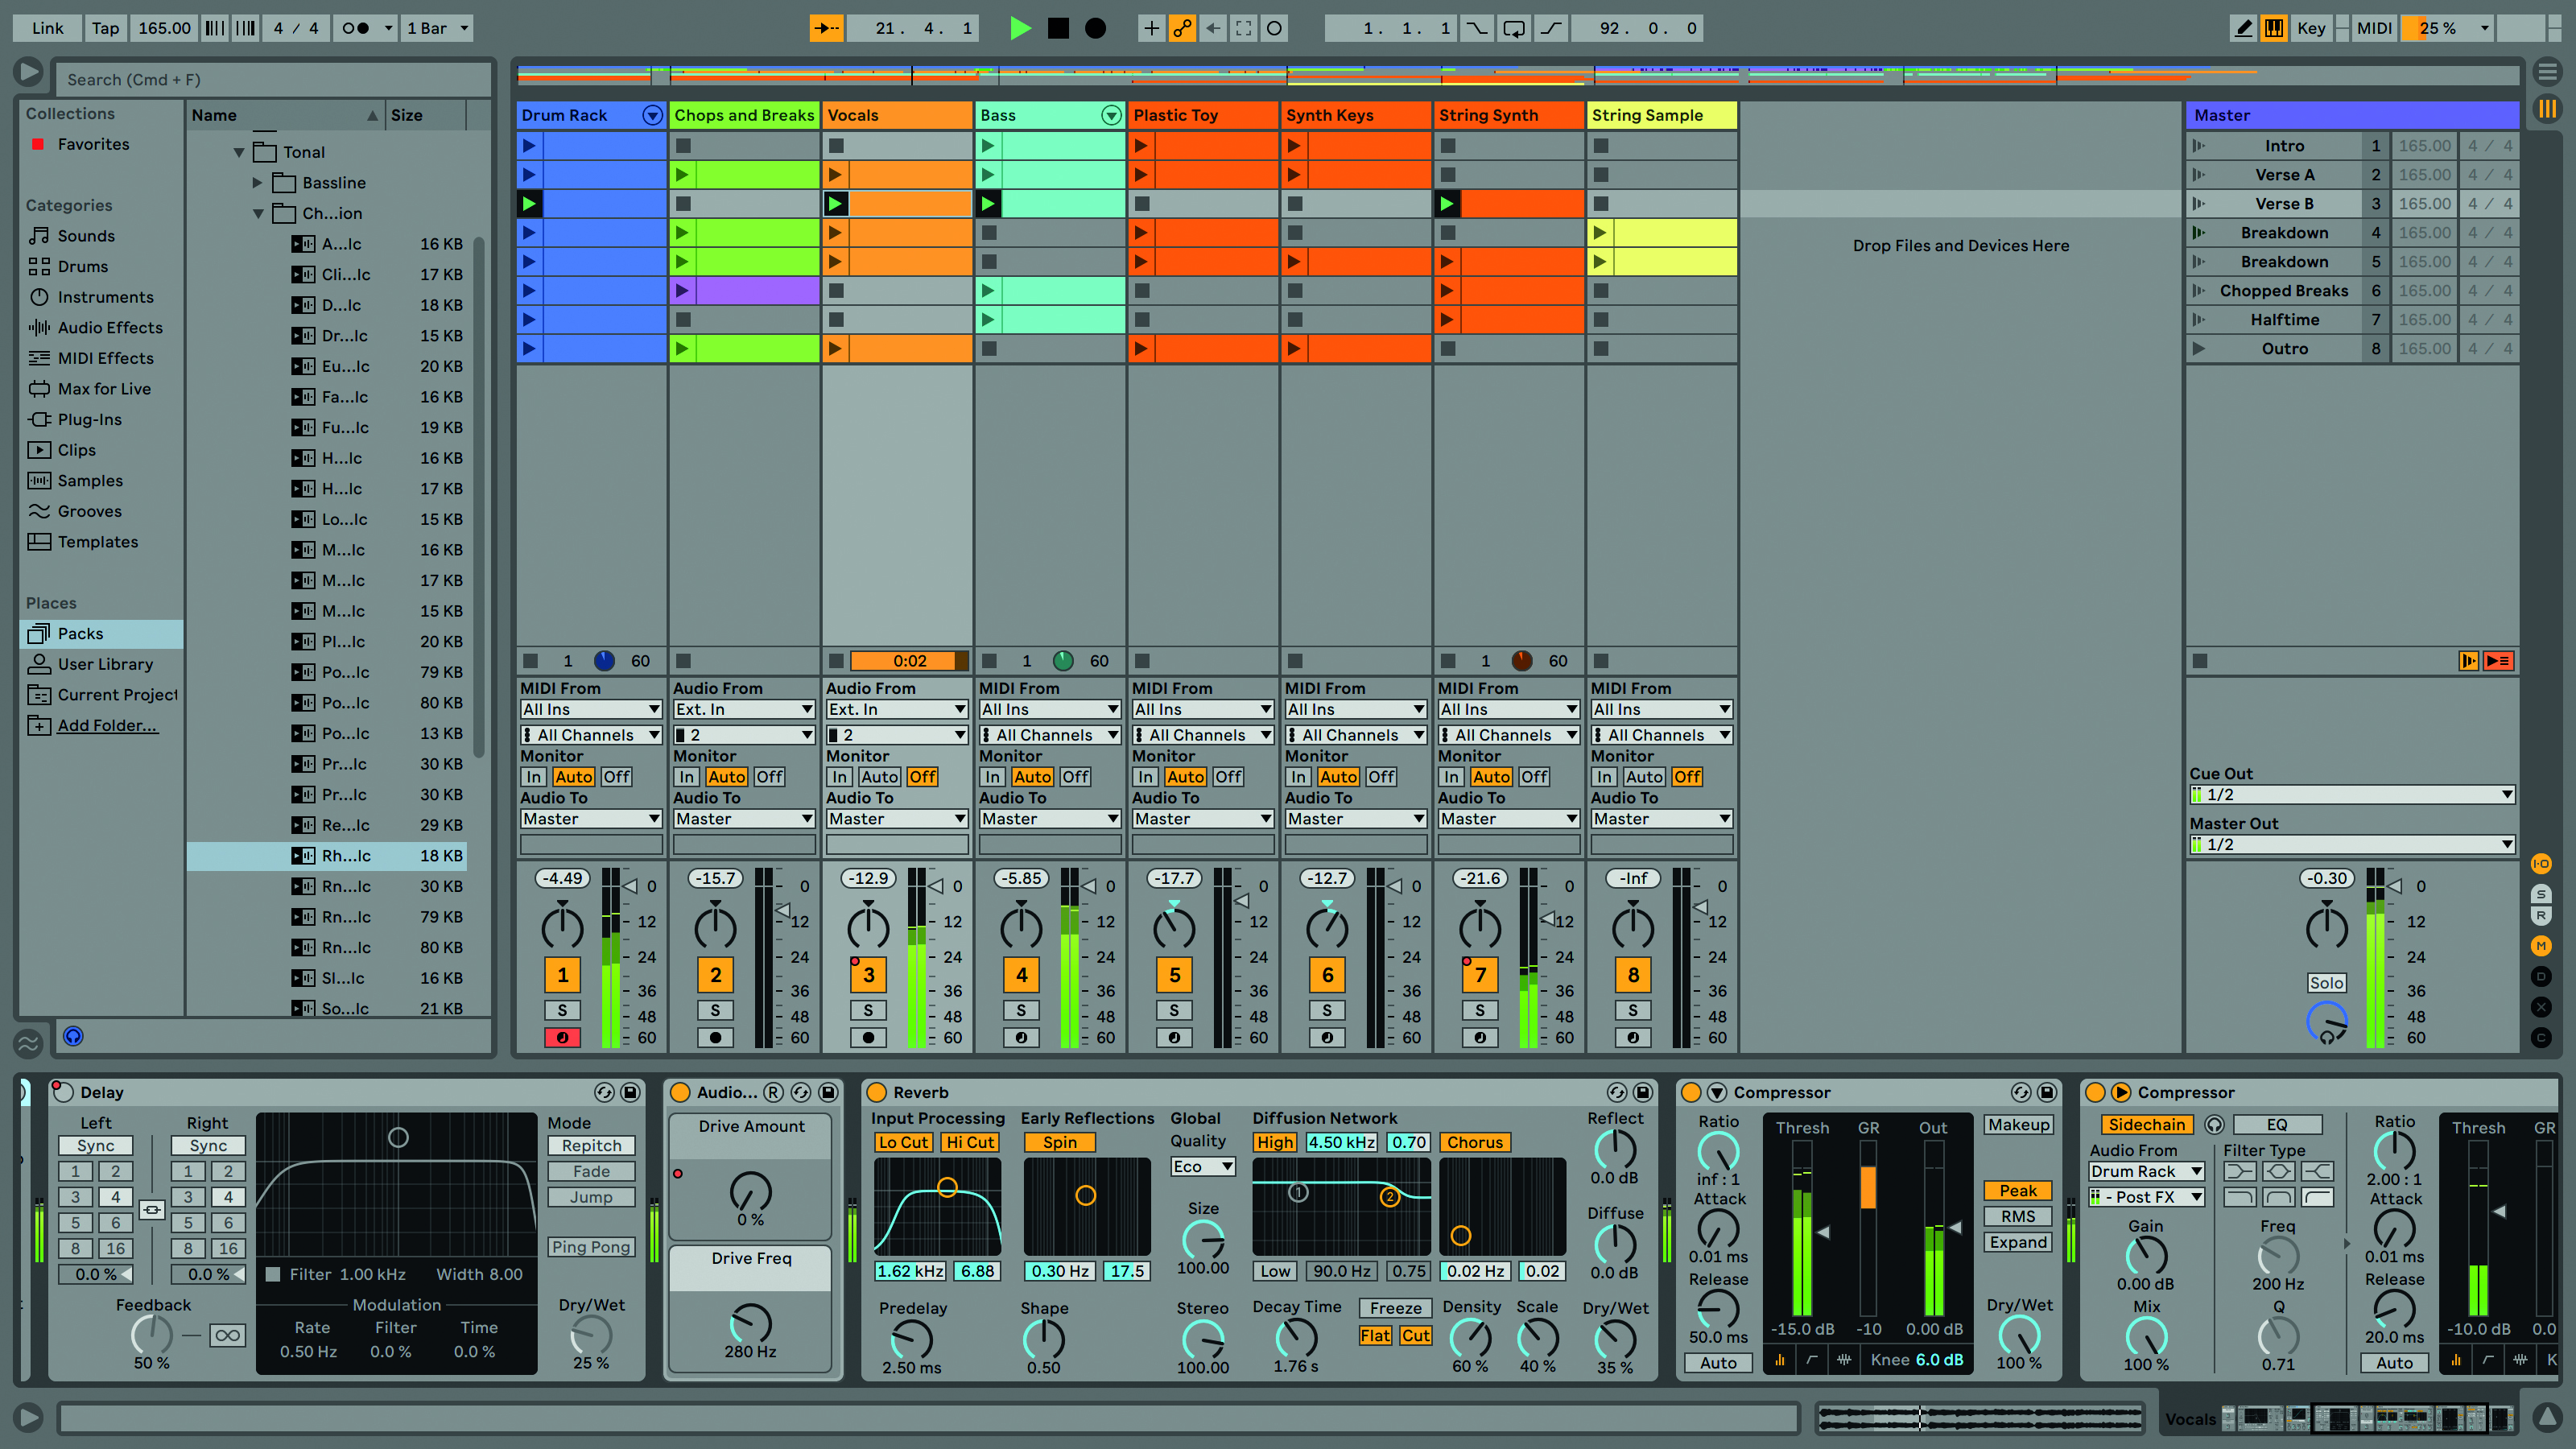
Step 4: At the bottom of the workspace is the Detail View and this has two tabs at the bottom: Clip View and Device View. In Clip View you’ll see MIDI or audio depending on the type of clip, and in Device View the devices used in that track. Click on the Vocal track and in Device View you’ll see various effects.
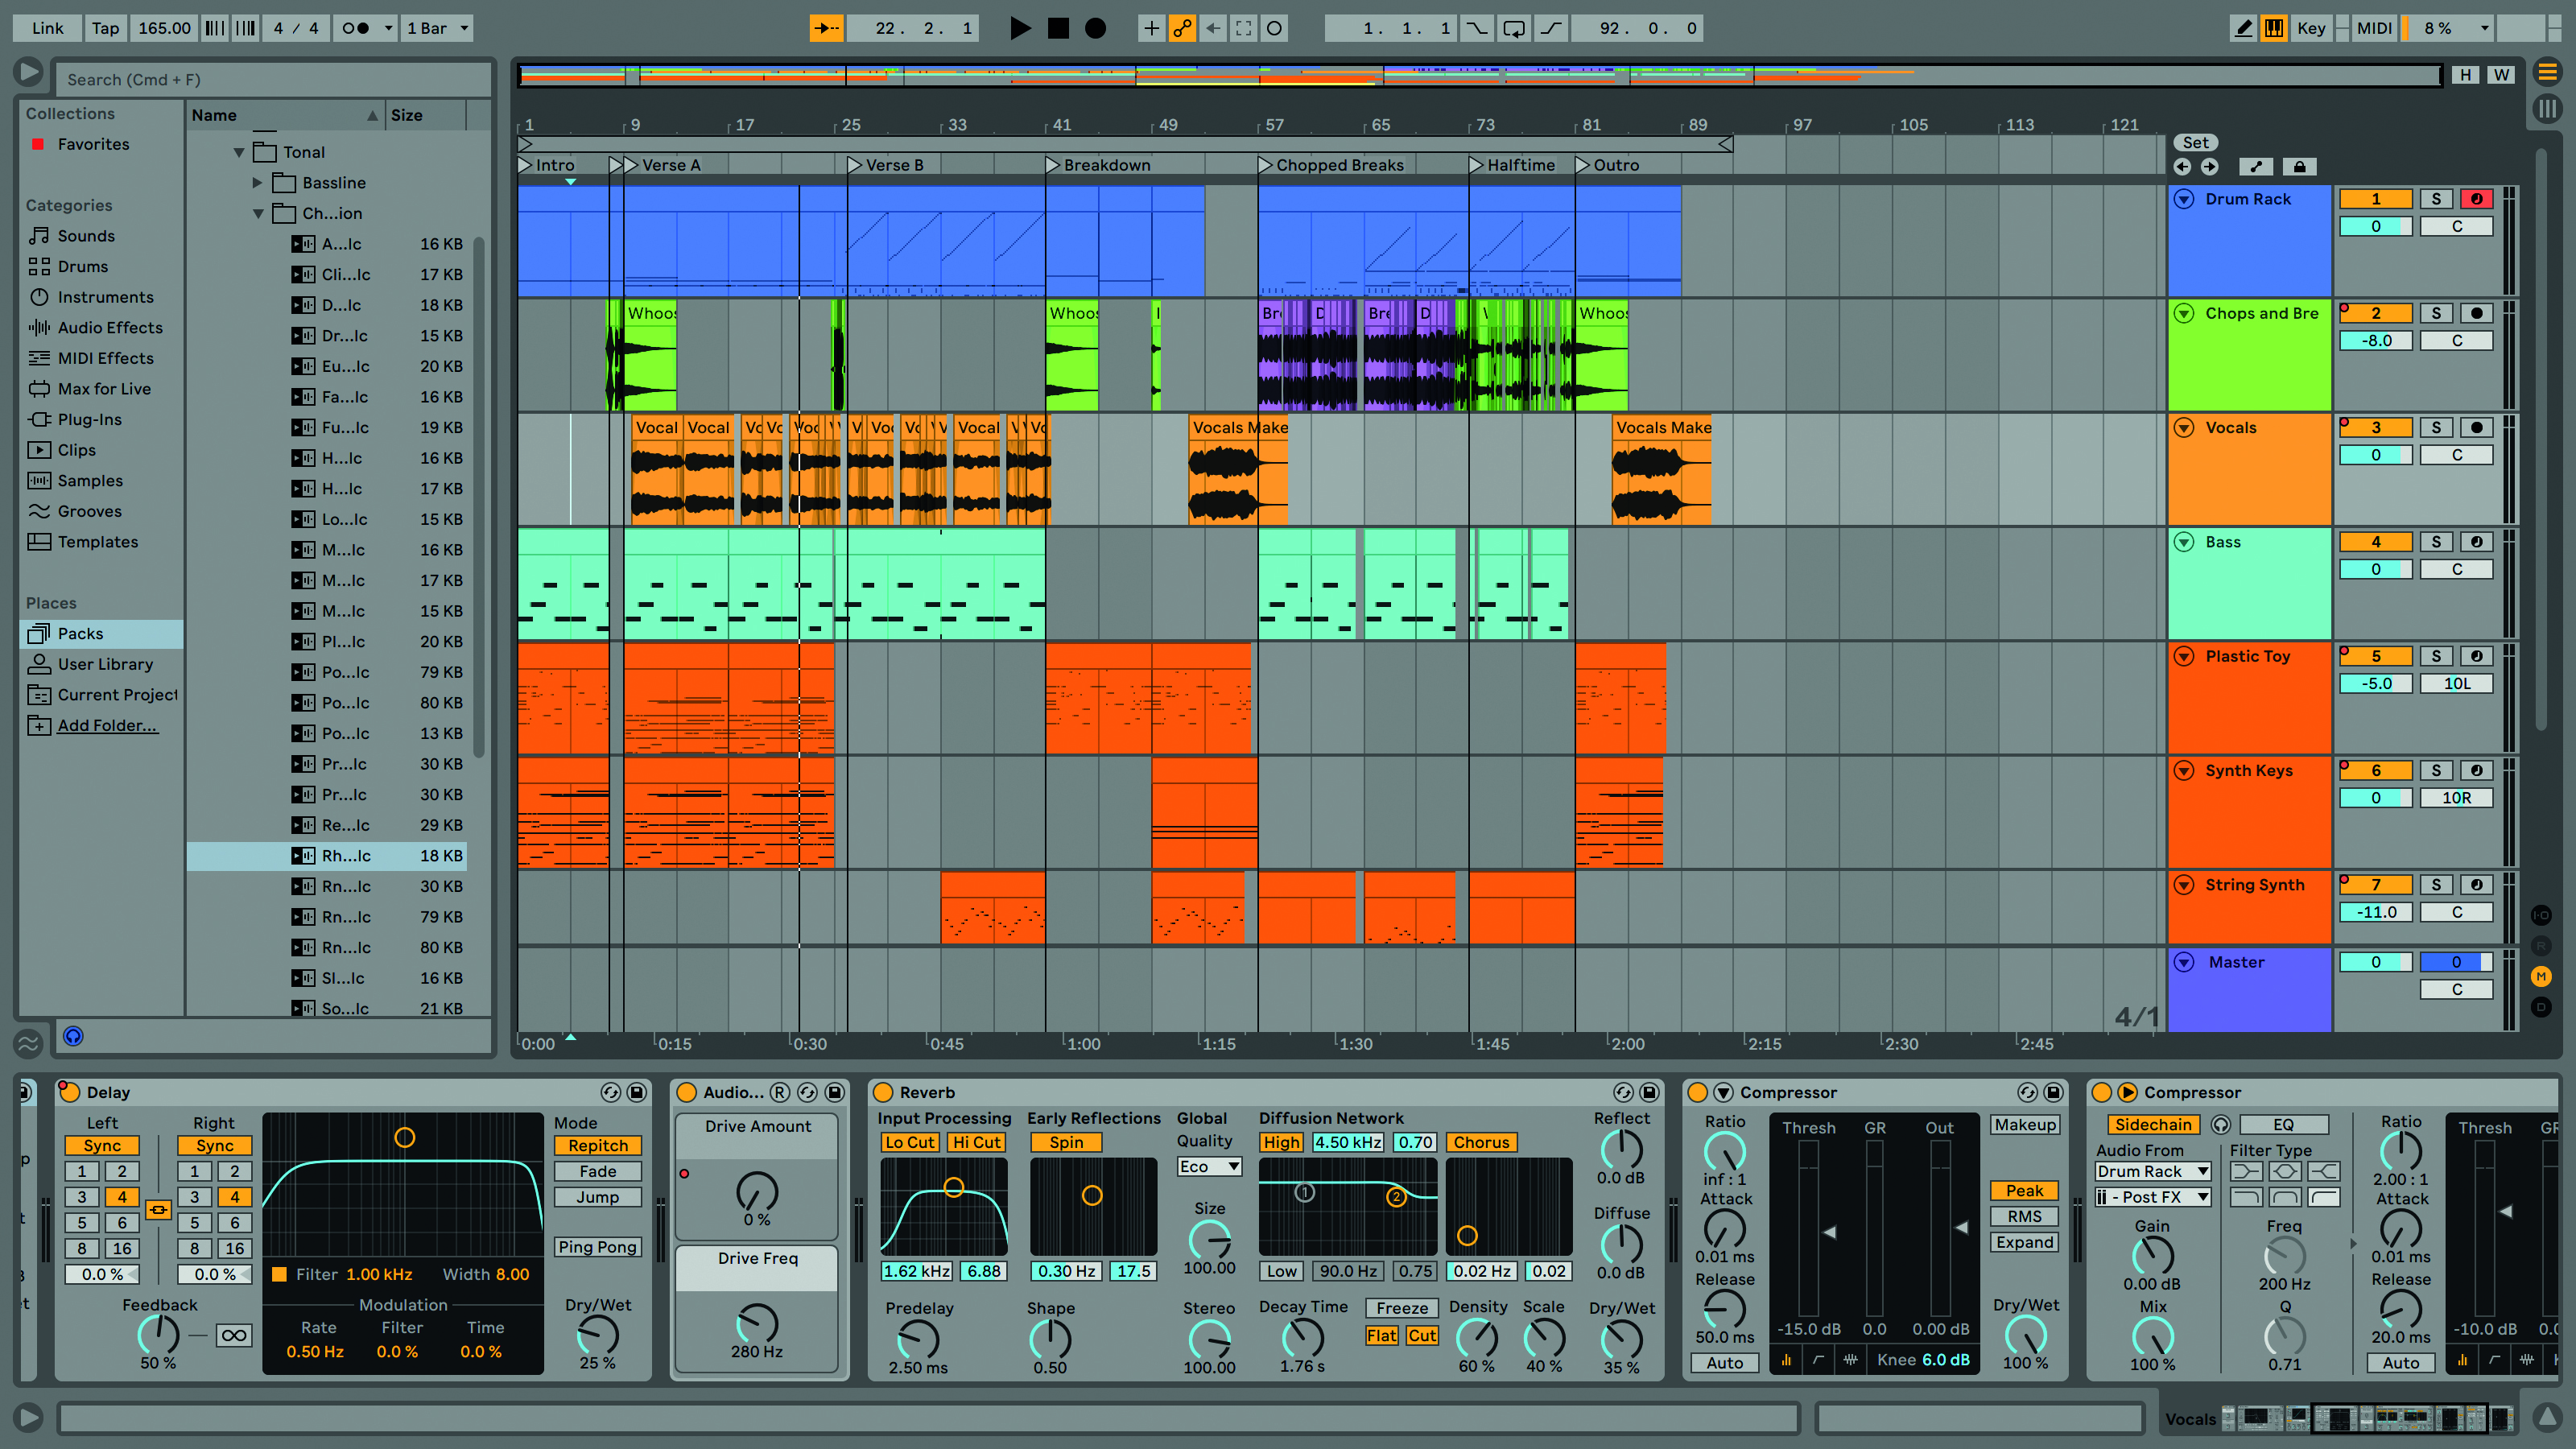
Step 5: Live has a dual way of working. The two views, Session and Arrangement, can be used on their own. However, they also coexist within your Live Set, so can work together, and we’ll look at that later on. Try toggling between the two views in the demo using the little icons with three vertical or horizontal lines or by using Tab.
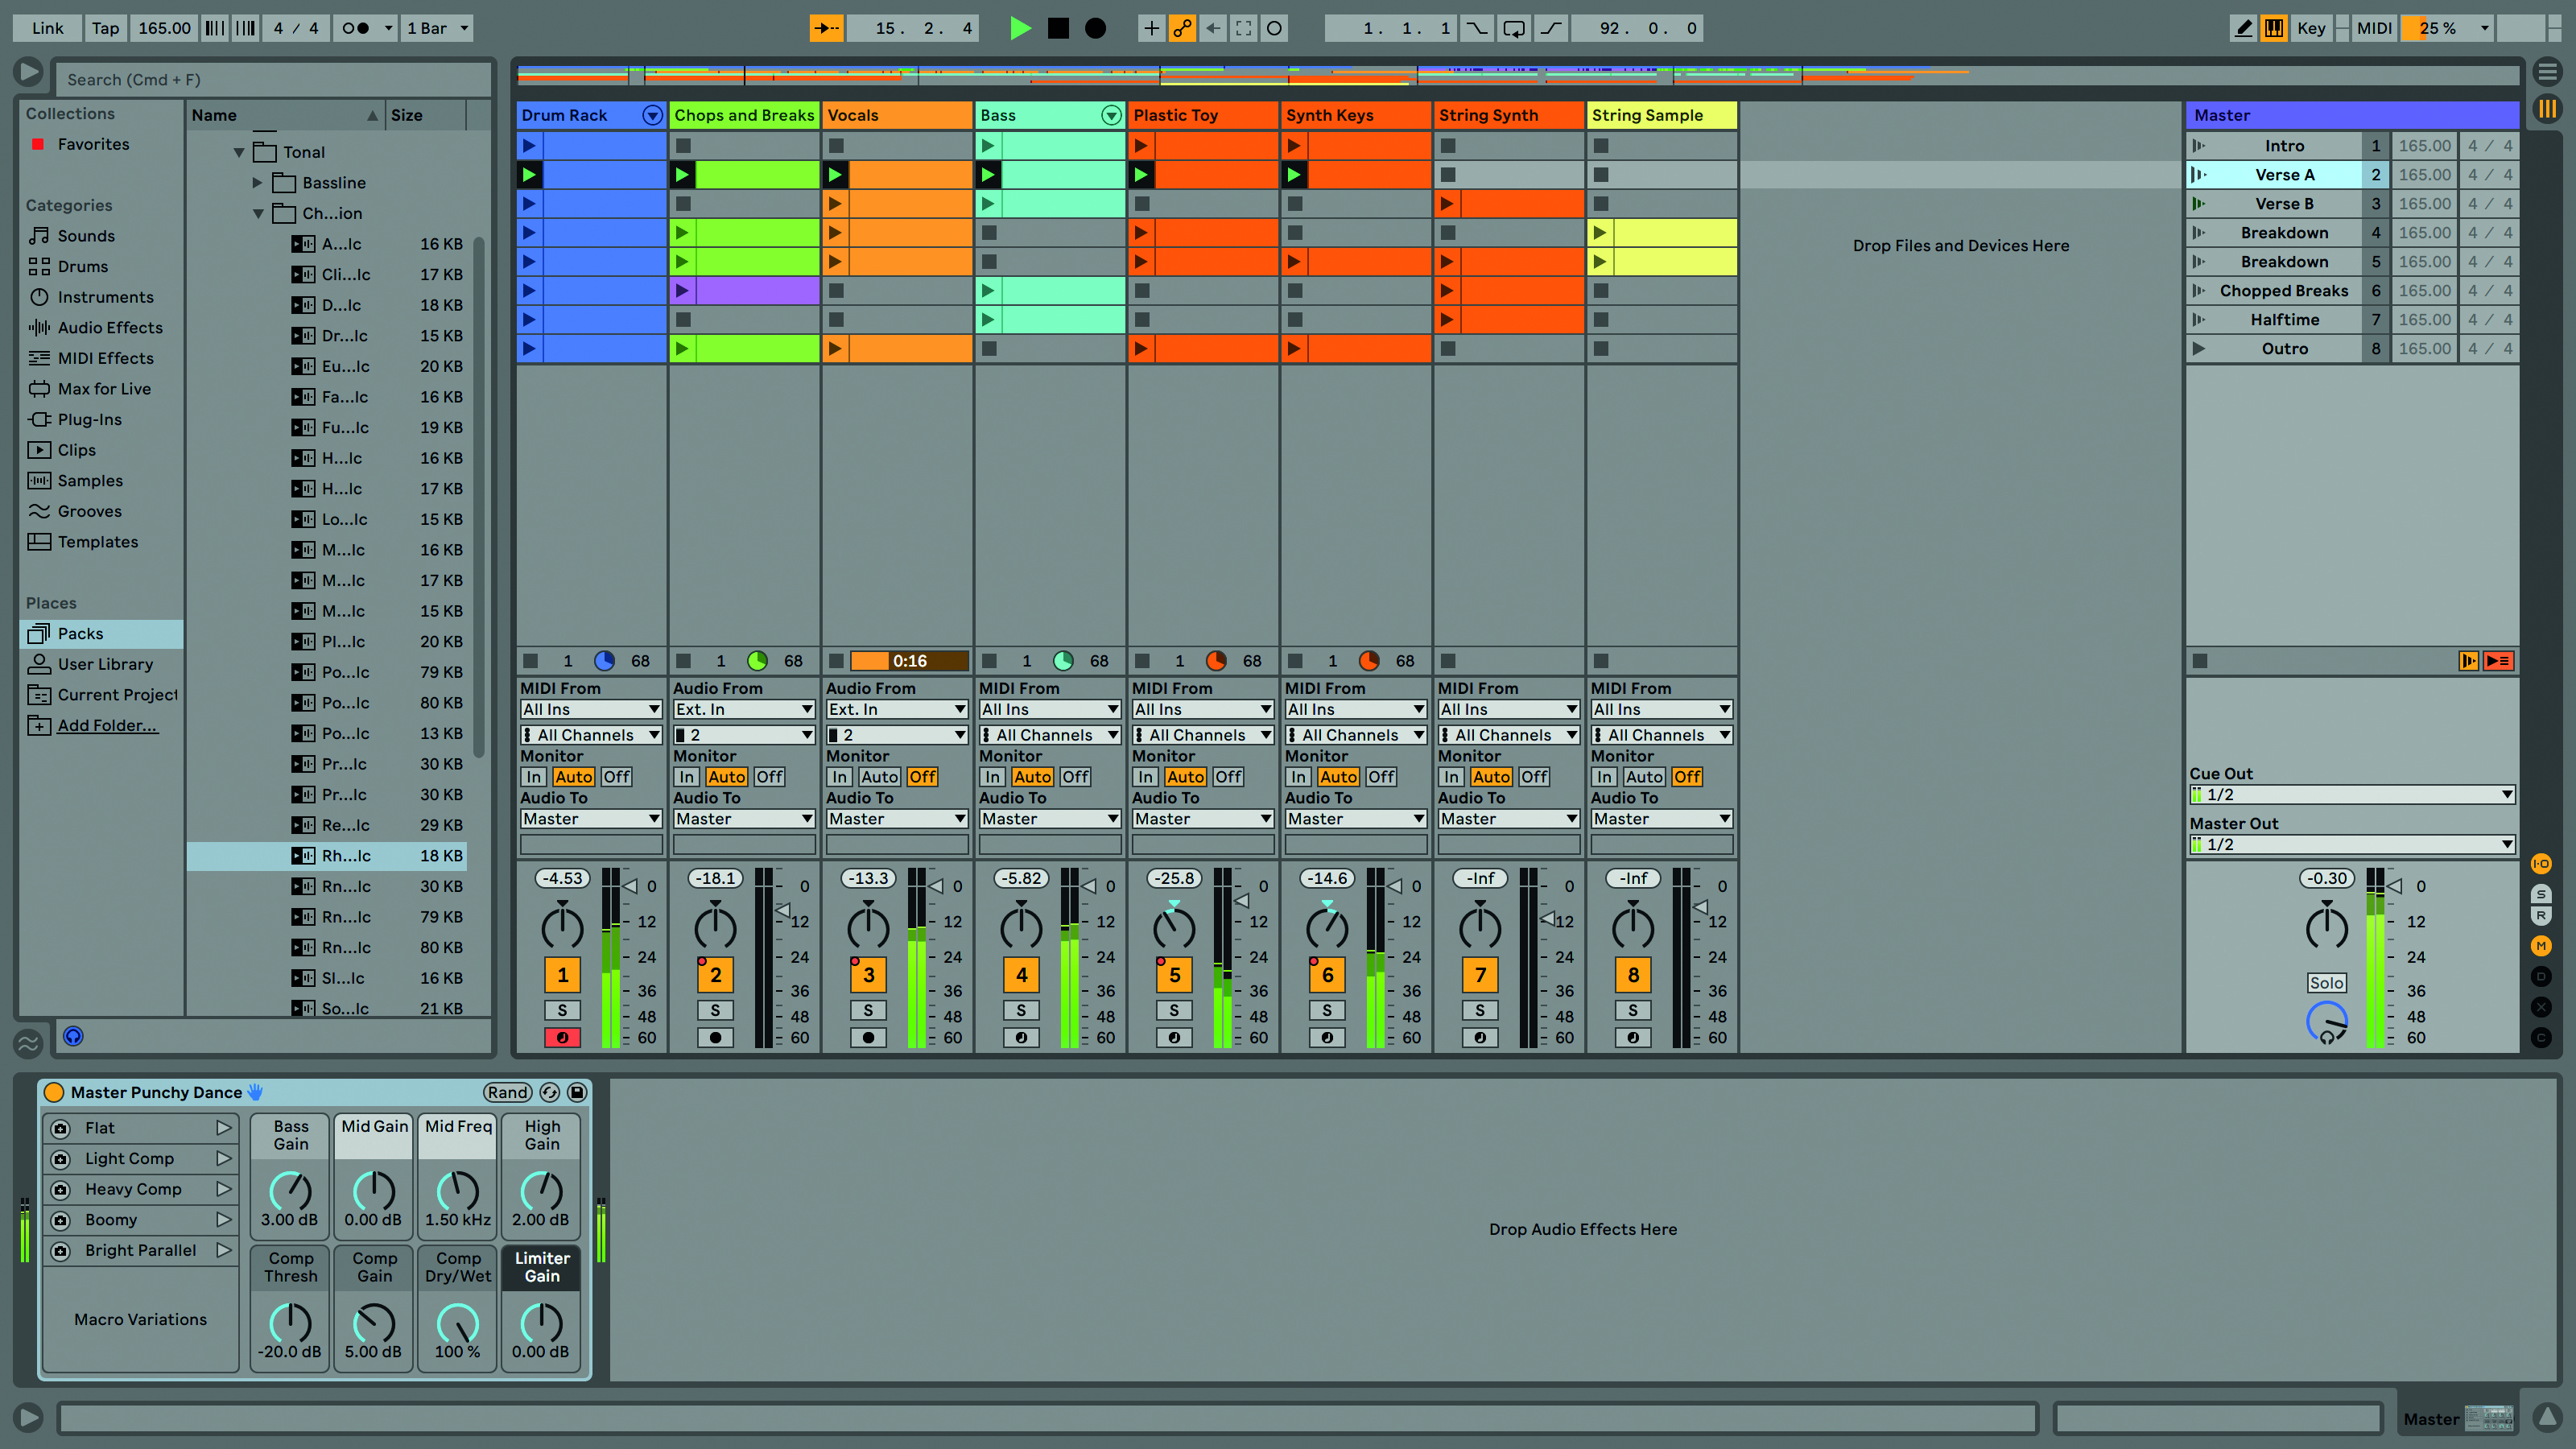
Step 6: Session View provides a non-linear workflow and is ideal for sketching out ideas or for live performance. The building blocks are MIDI or audio clips, which have a defined start and end point. These are arranged in vertical Tracks, and can be triggered individually or as part of horizontal scenes. Here we’re triggering Scene Verse A using its Play button.
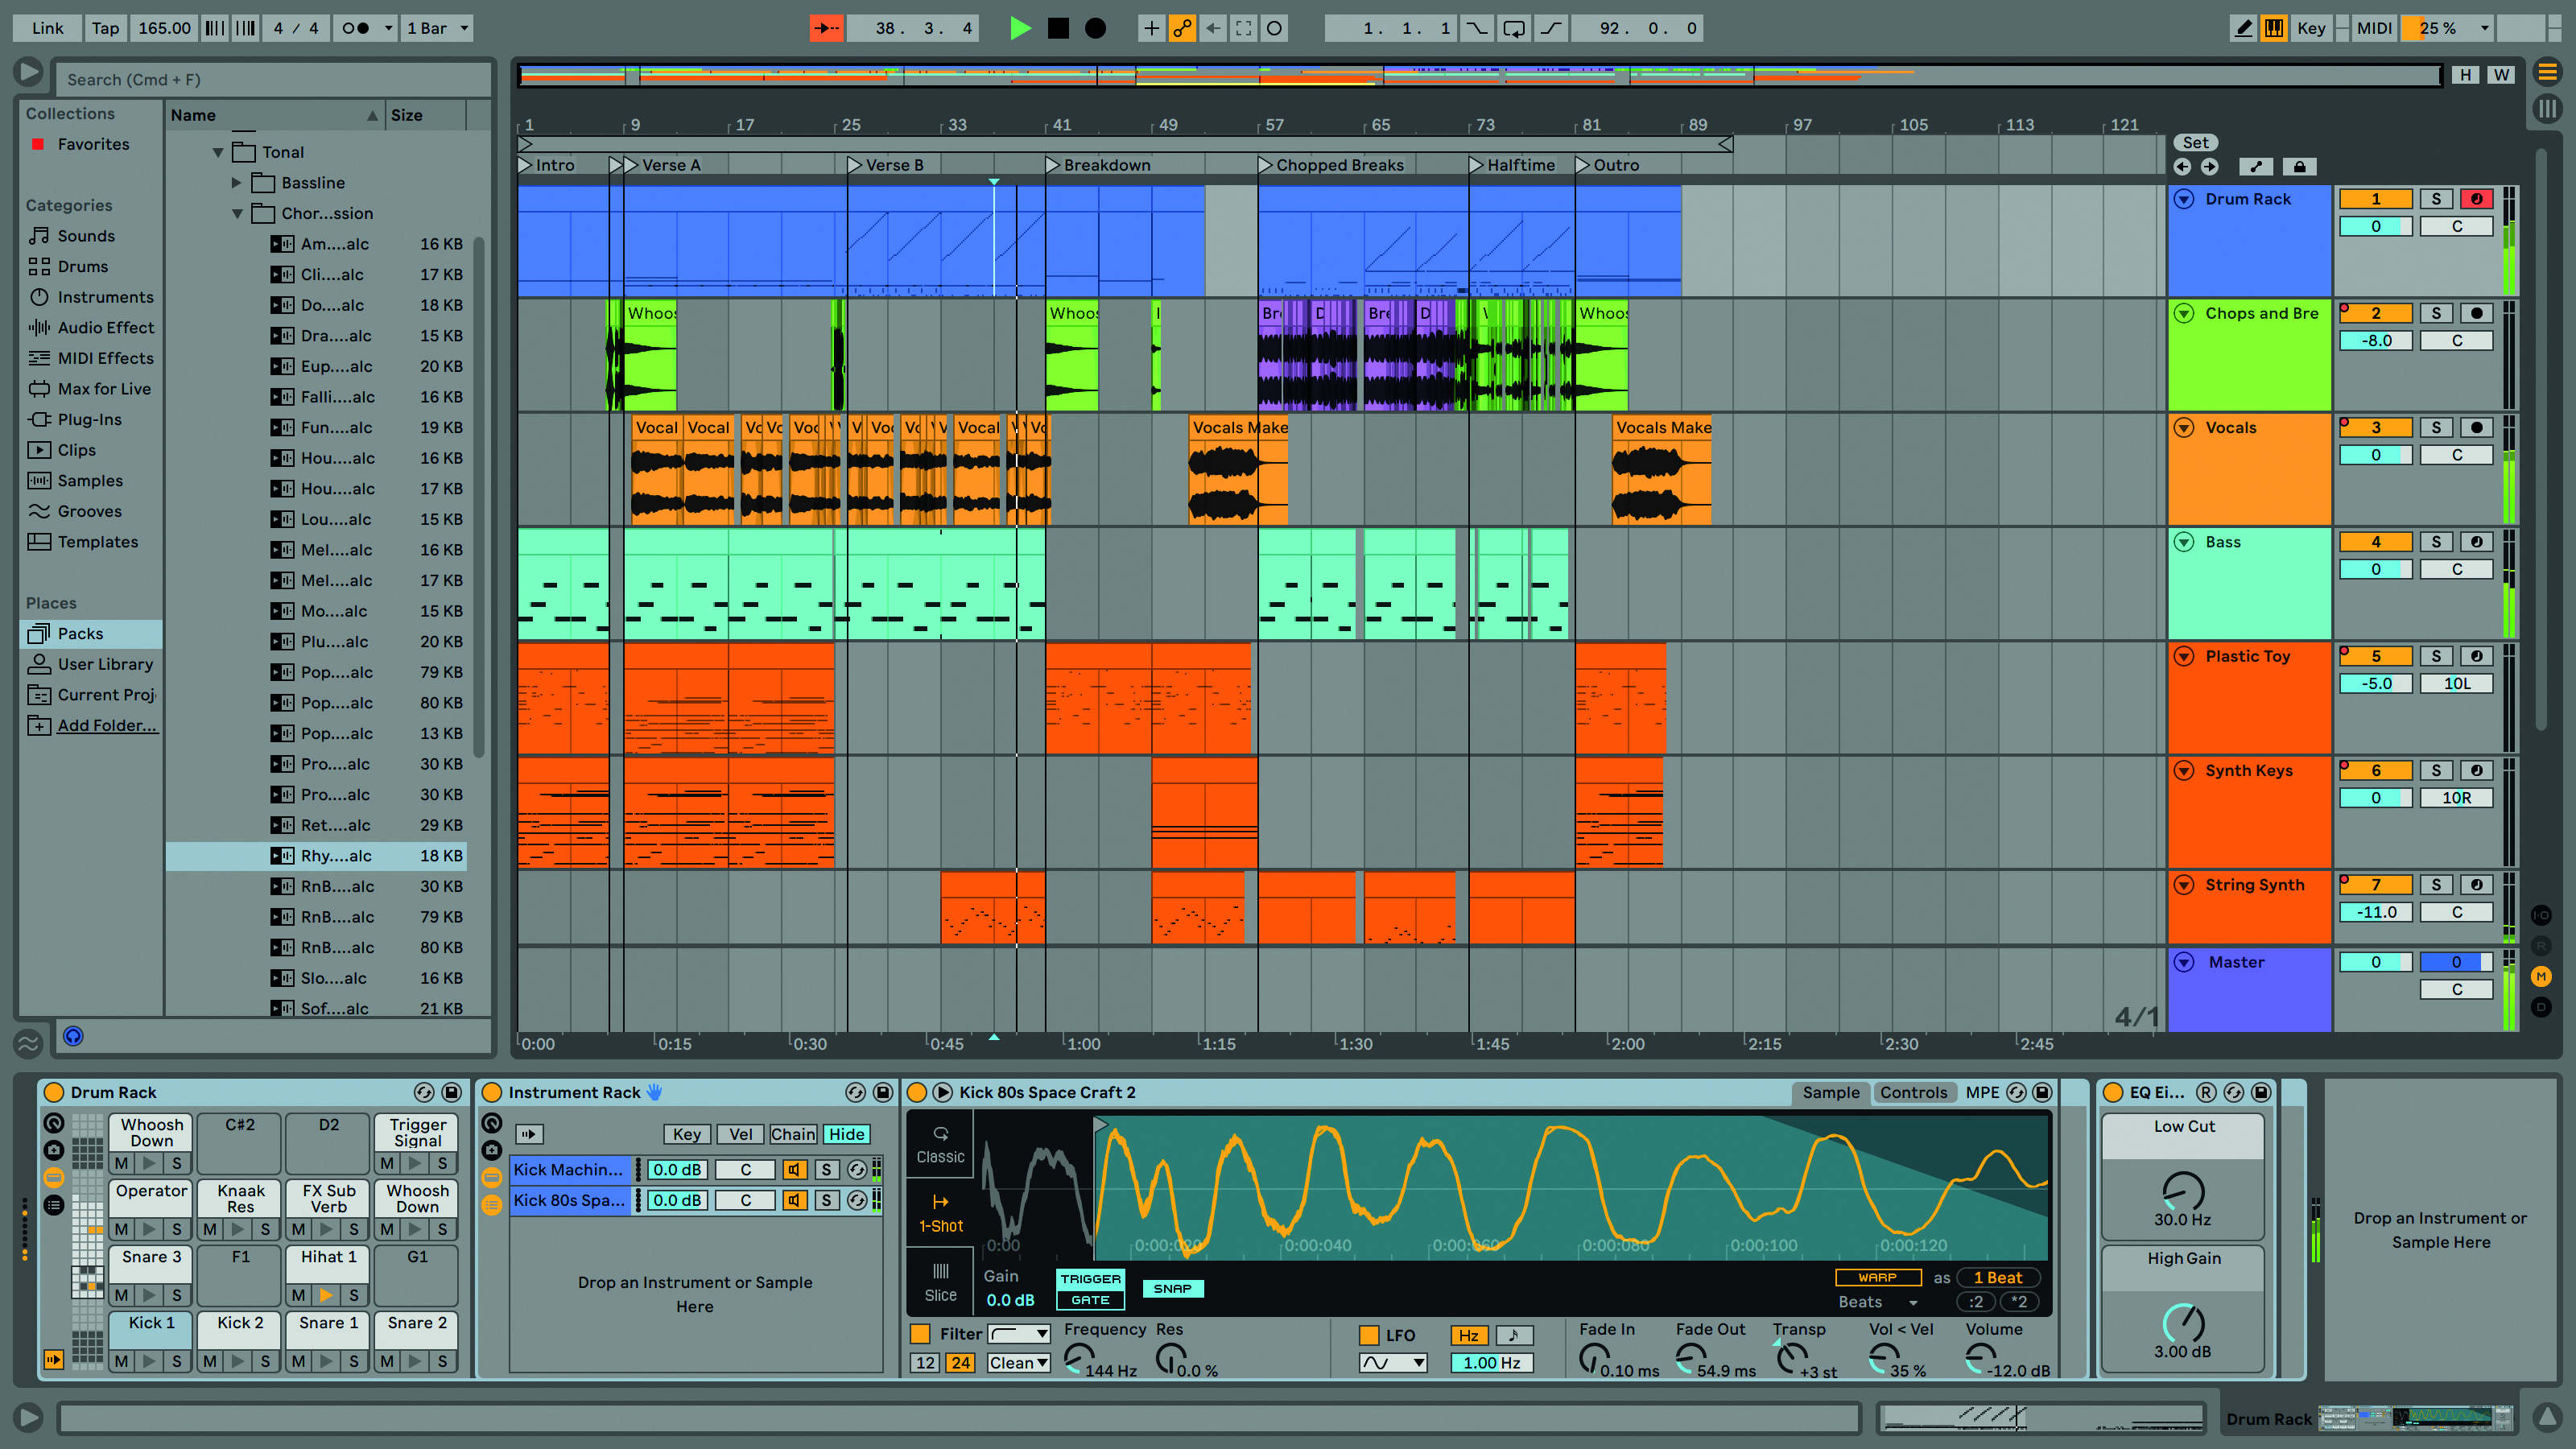
Step 7: Arrangement View is a horizontal timeline where you freely arrange and record MIDI and audio clips, and the tracks match those in the Session View. To zoom in and out, drag your cursor in the Beat-Time ruler at the top. Click in the arrange area to select your playback position, click on Scrub Area at the top for playback.
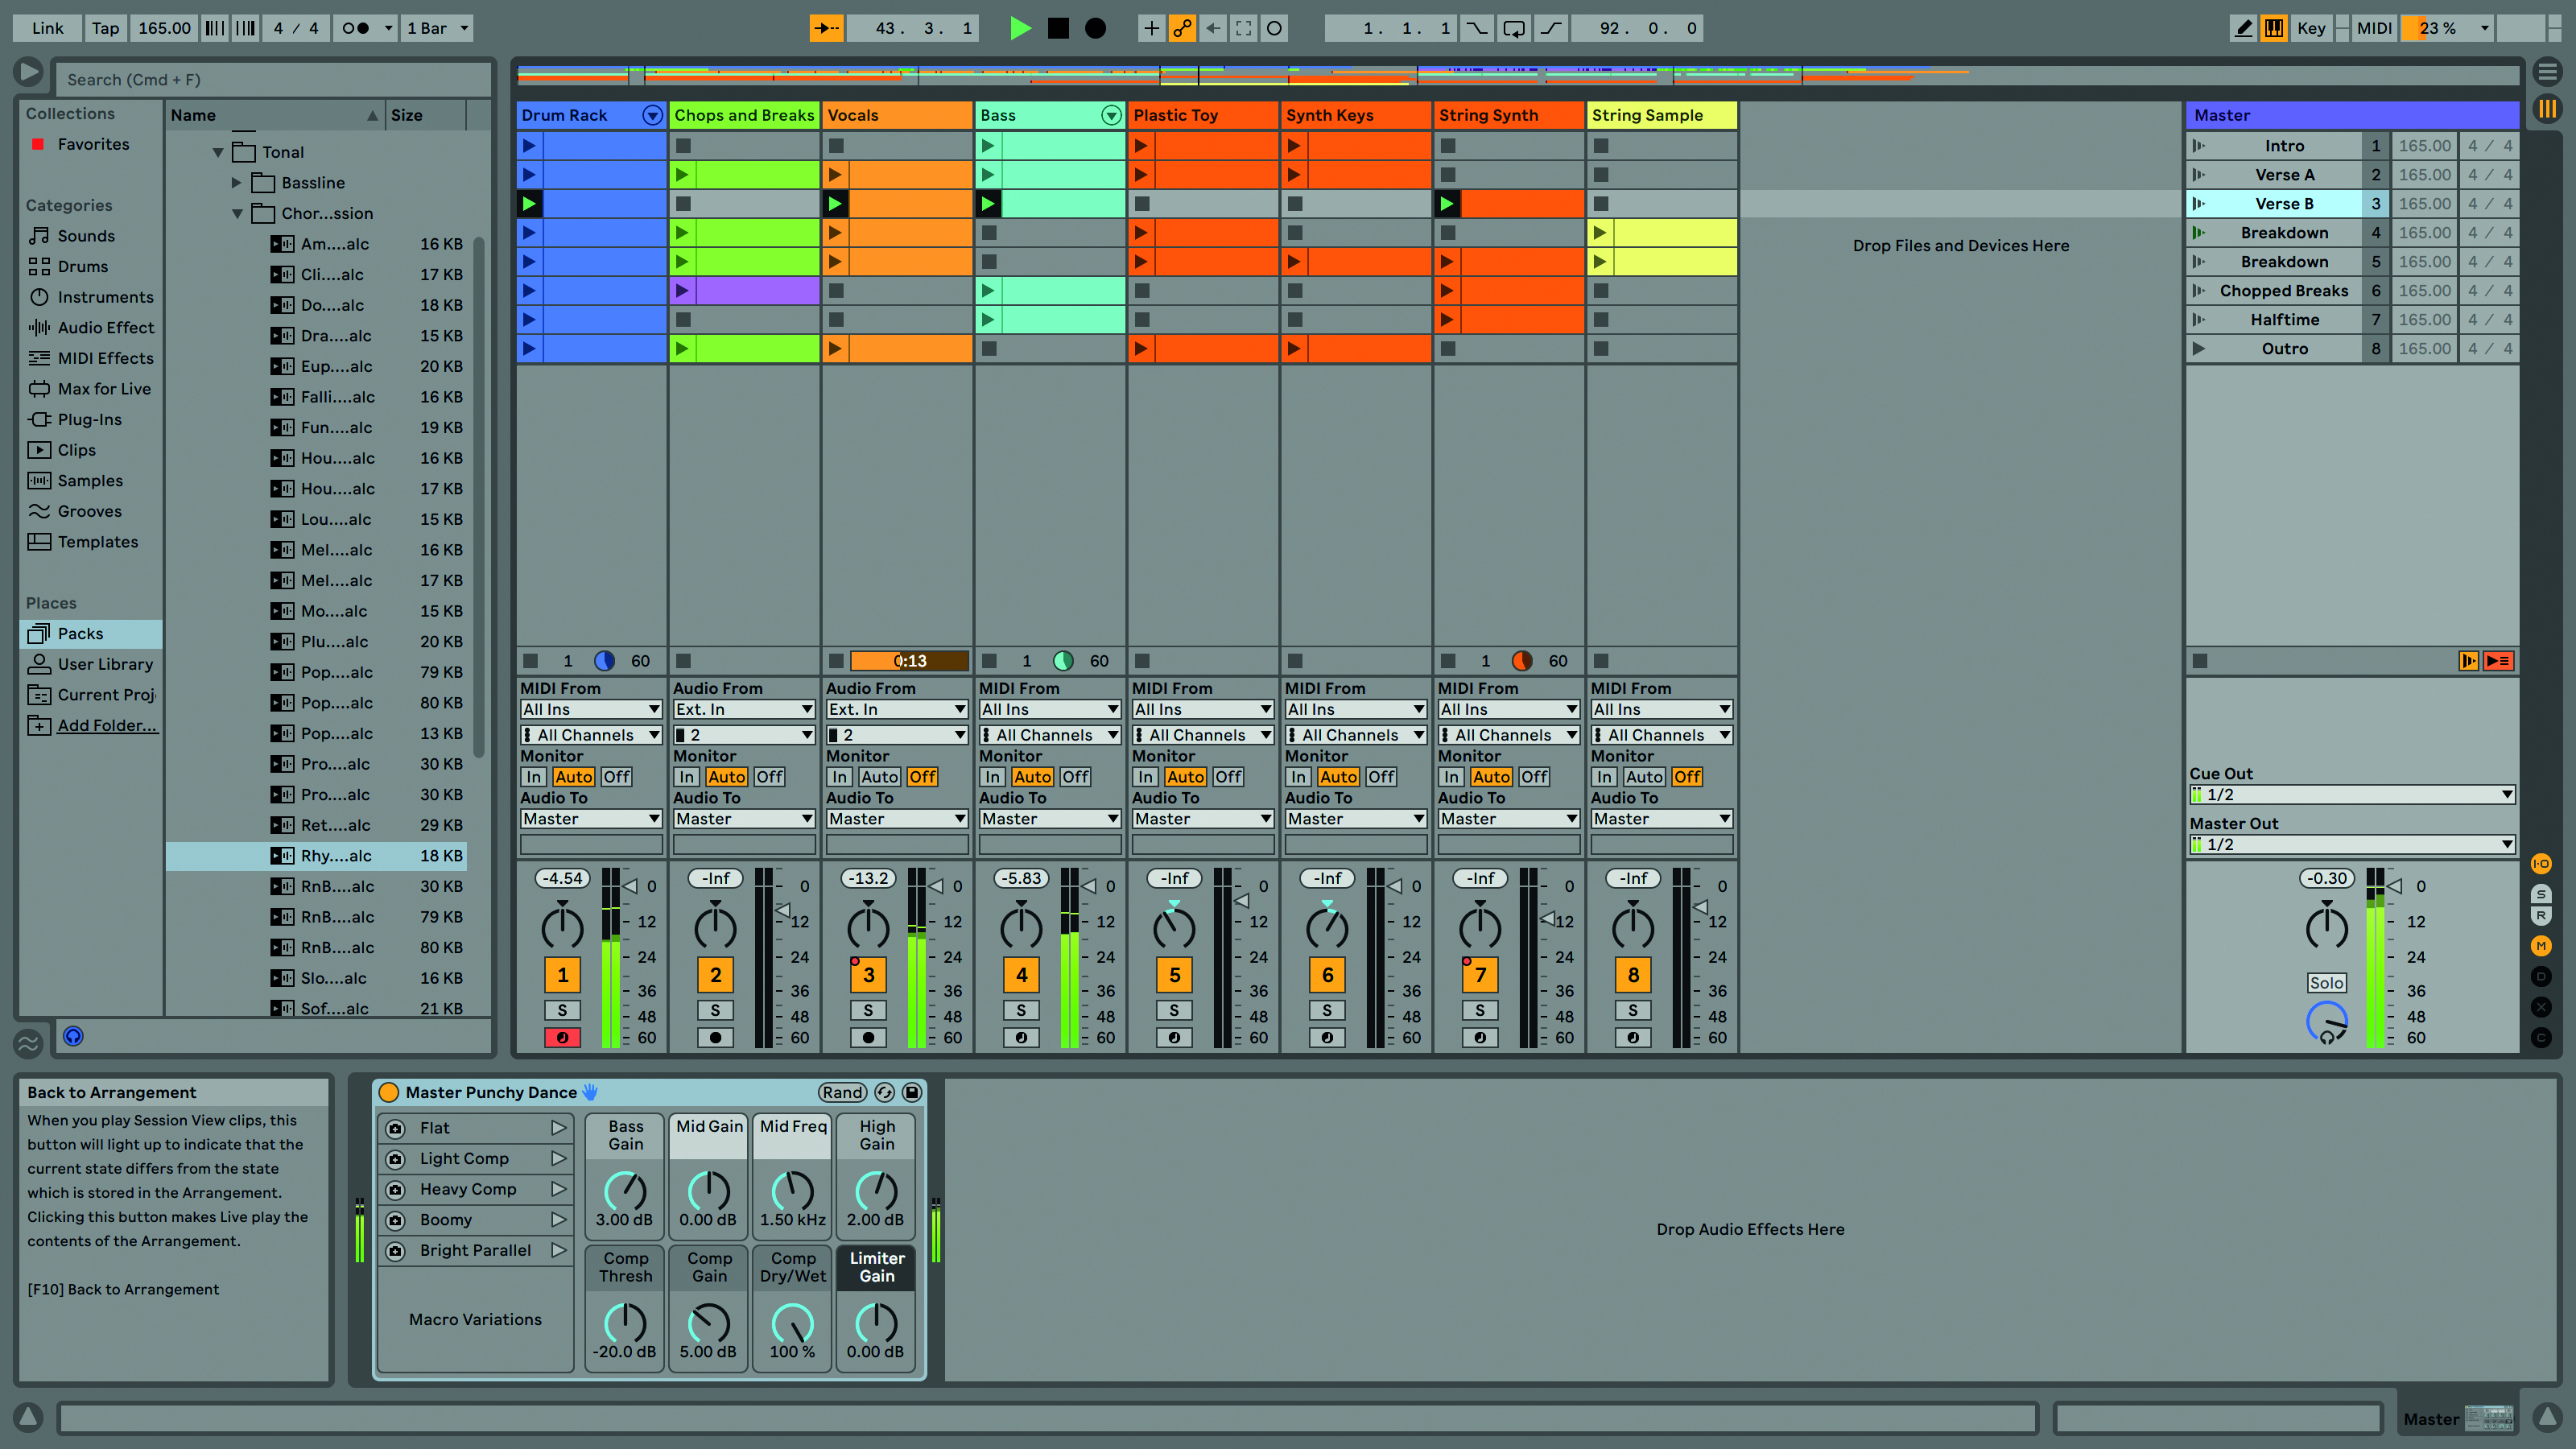
Step 8: There are many ways to initiate playback in Live Lite, including playing a Session Clip while the rest of the Set is playing in Arrangement View. Click on the orange Back To Arrangement icon to restore the Arrangement playback or hit the Stop All Clips transport button in Session View to return to Session View.
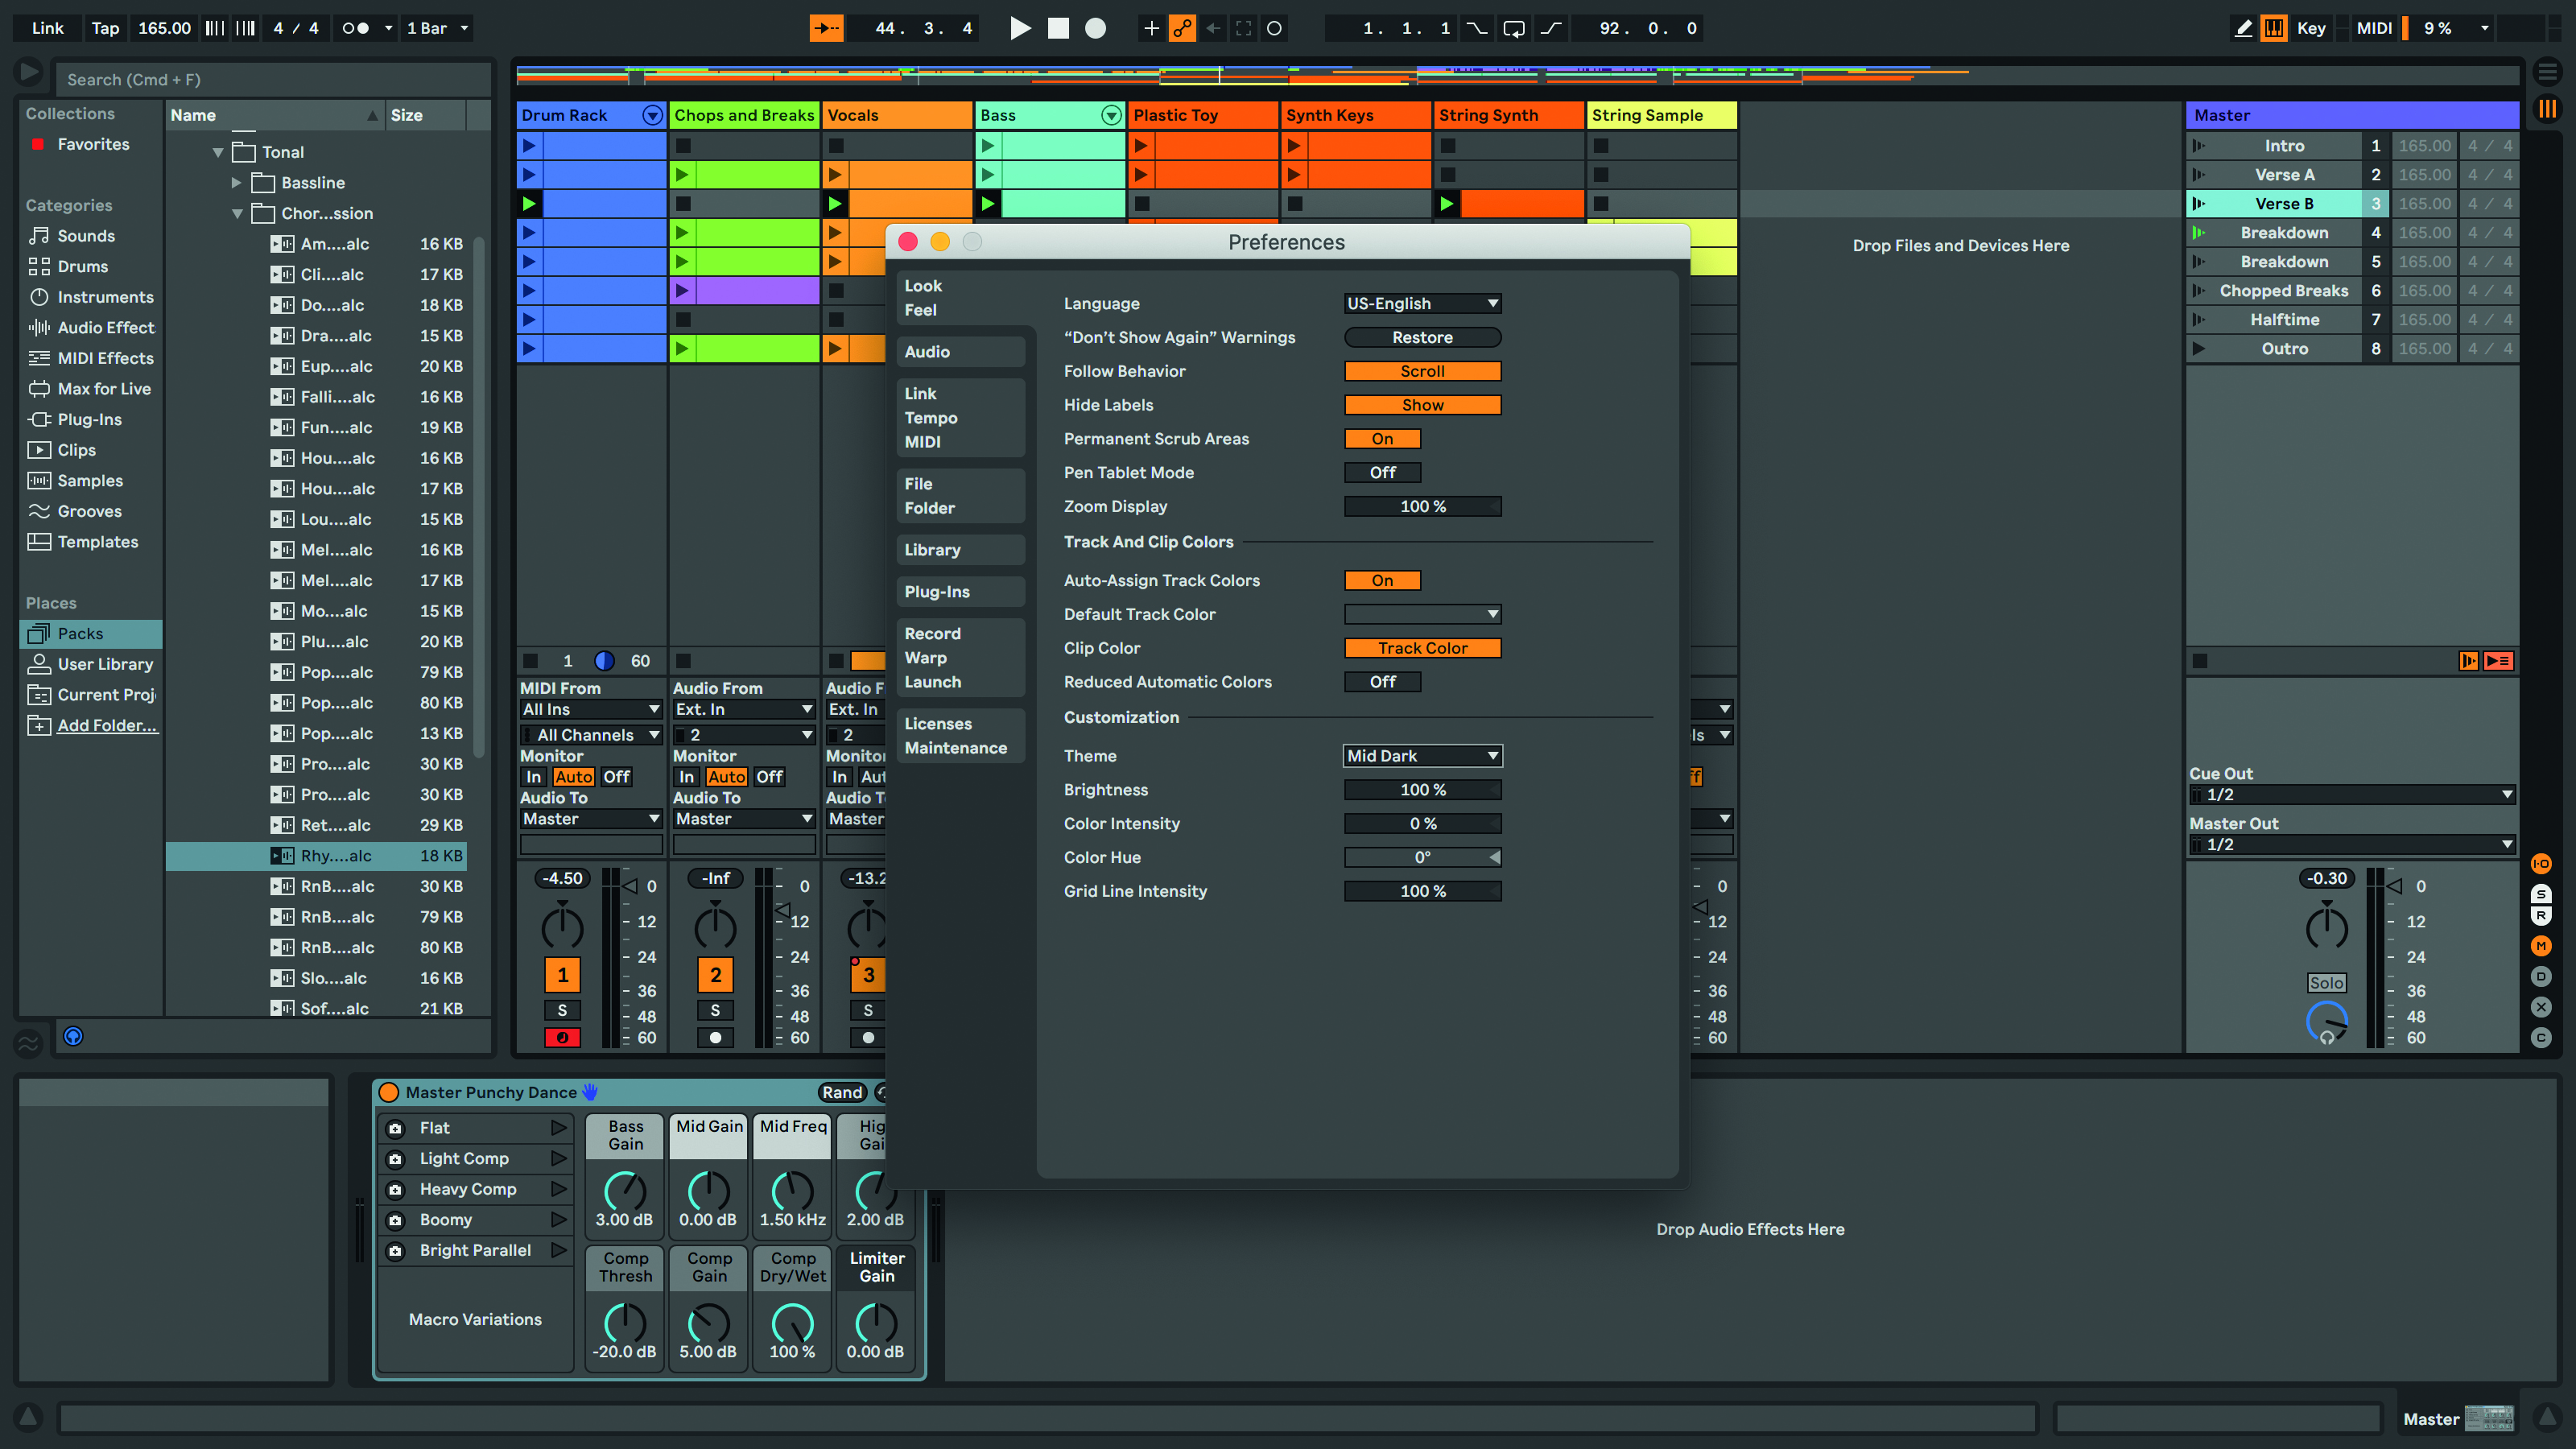
Step 9: Finally you can, if you wish, adjust the overall look of Live Lite. Head to the Preferences in the Live menu and open the Look Feel tab. Here you can select default track and clip colours, or choose from one of five overall colour themes, with settings for brightness, intensity and so on.
Computer Music magazine is the world’s best selling publication dedicated solely to making great music with your Mac or PC computer. Each issue it brings its lucky readers the best in cutting-edge tutorials, need-to-know, expert software reviews and even all the tools you actually need to make great music today, courtesy of our legendary CM Plugin Suite.
