How to make a track in Ableton Live 11 Lite: produce a brilliant bass line with automation
Ableton Live 11 Lite comes free with this month's Computer Music Magazine - grab a copy and follow our tutorial
Want all the hottest music and gear news, reviews, deals, features and more, direct to your inbox? Sign up here.
You are now subscribed
Your newsletter sign-up was successful
Ableton Live is a DAW that needs no introduction, and its combination of performance and production features mean it’s as popular with performers and DJs as it is with creators.
Live 11 Lite is a cut-down version of Ableton Live, with all of the essential workflows, instruments and effects, but with limited track count, and for many years this has been bundled with apps and hardware products. This month, you can grab a free copy of Ableton Live 11 Lite with the latest issue of Computer Music Magazine.
To mark this momentous occasion and also to get you started using this fabulous software, we’ve put together a series of tutorials that run through everything you need to get acquainted with Ableton Live 11 Lite, so you can learn how to build a track from scratch.
Our tutorials are primarily for new users, but that said, we’ll also flag some of the new features you’ll find in Live 11 Lite, so even if you’ve used Live Lite before, there may be some things for you to learn here.
Finally, although Live 11 Lite is awesome software, there are more fully featured versions of Ableton Live available on Ableton's website. So, let’s get creating in Live 11 Lite!
If you want to start from the beginning of this tutorial, find the previous steps below:
- How to make a track in Ableton Live 11 Lite: set-up and overview
- How to make a track in Ableton Live 11 Lite: programming a beat in no time
- How to make a track in Ableton Live 11 Lite: creating super-fast beat variations and mixes
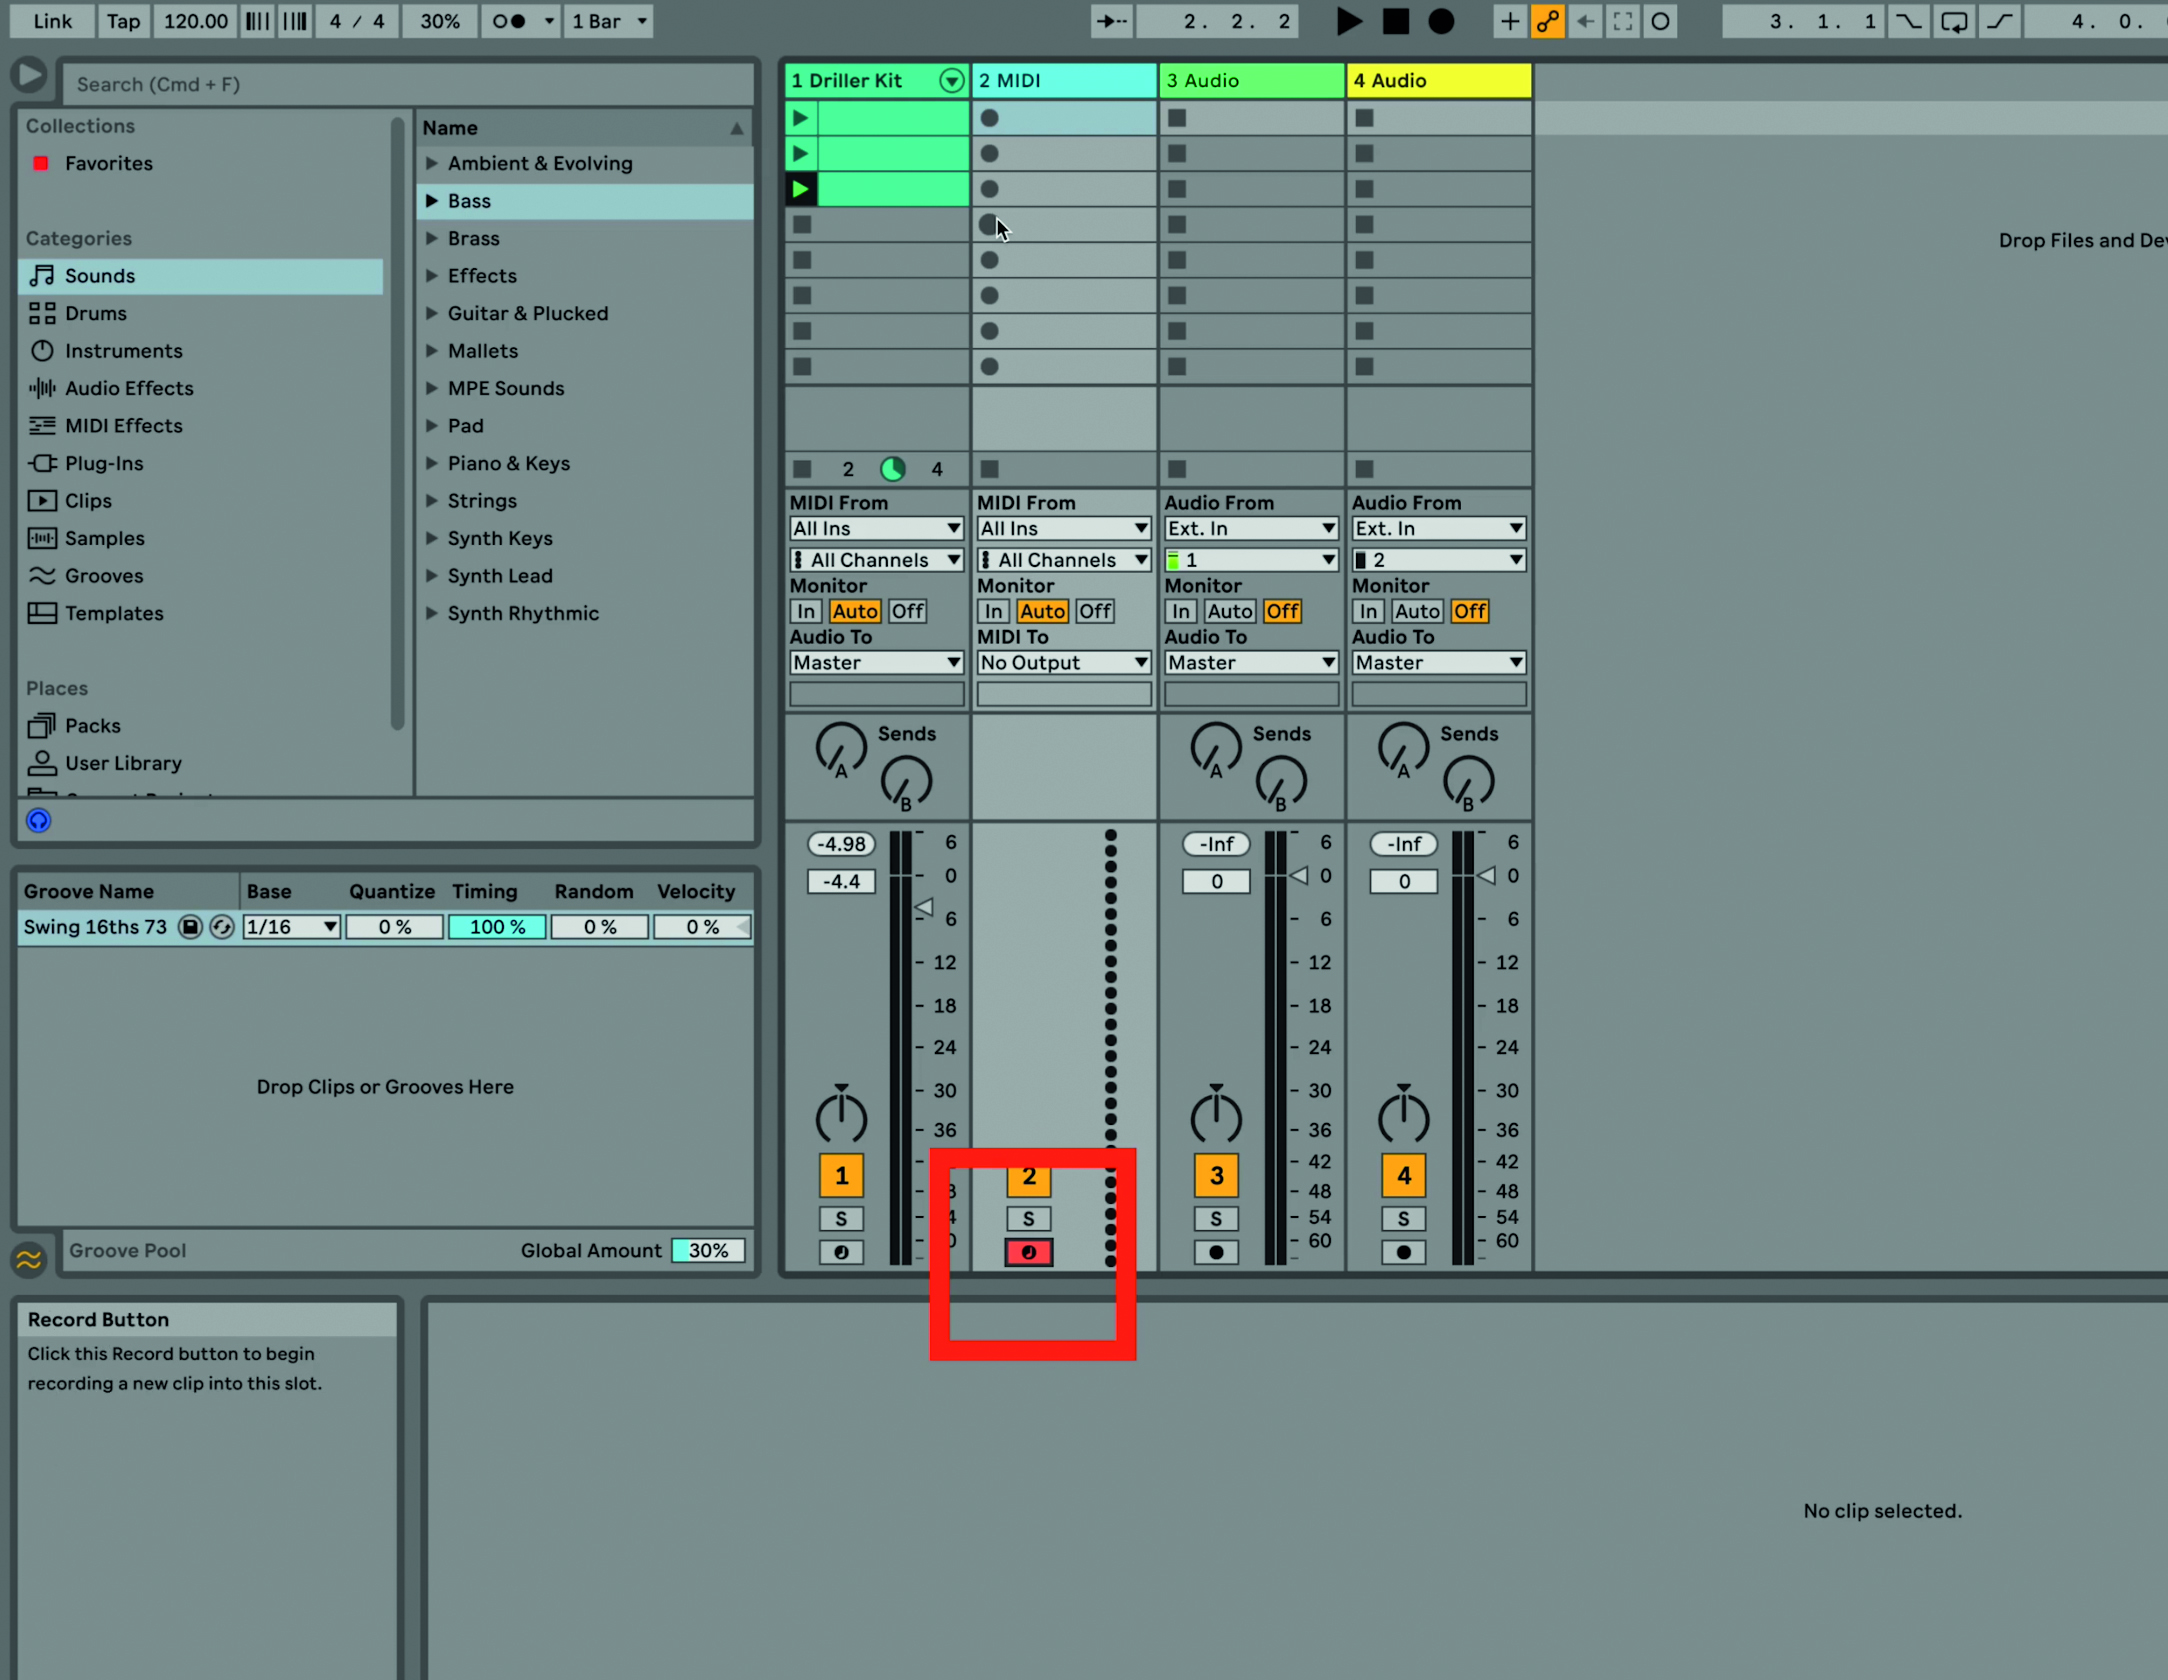
Step 1: We’re going to add a bassline to our beats. Click on the second, so far unused, MIDI track, and press the red ‘record arm’ as shown. This allows you to hear what we are auditioning.
Want all the hottest music and gear news, reviews, deals, features and more, direct to your inbox? Sign up here.
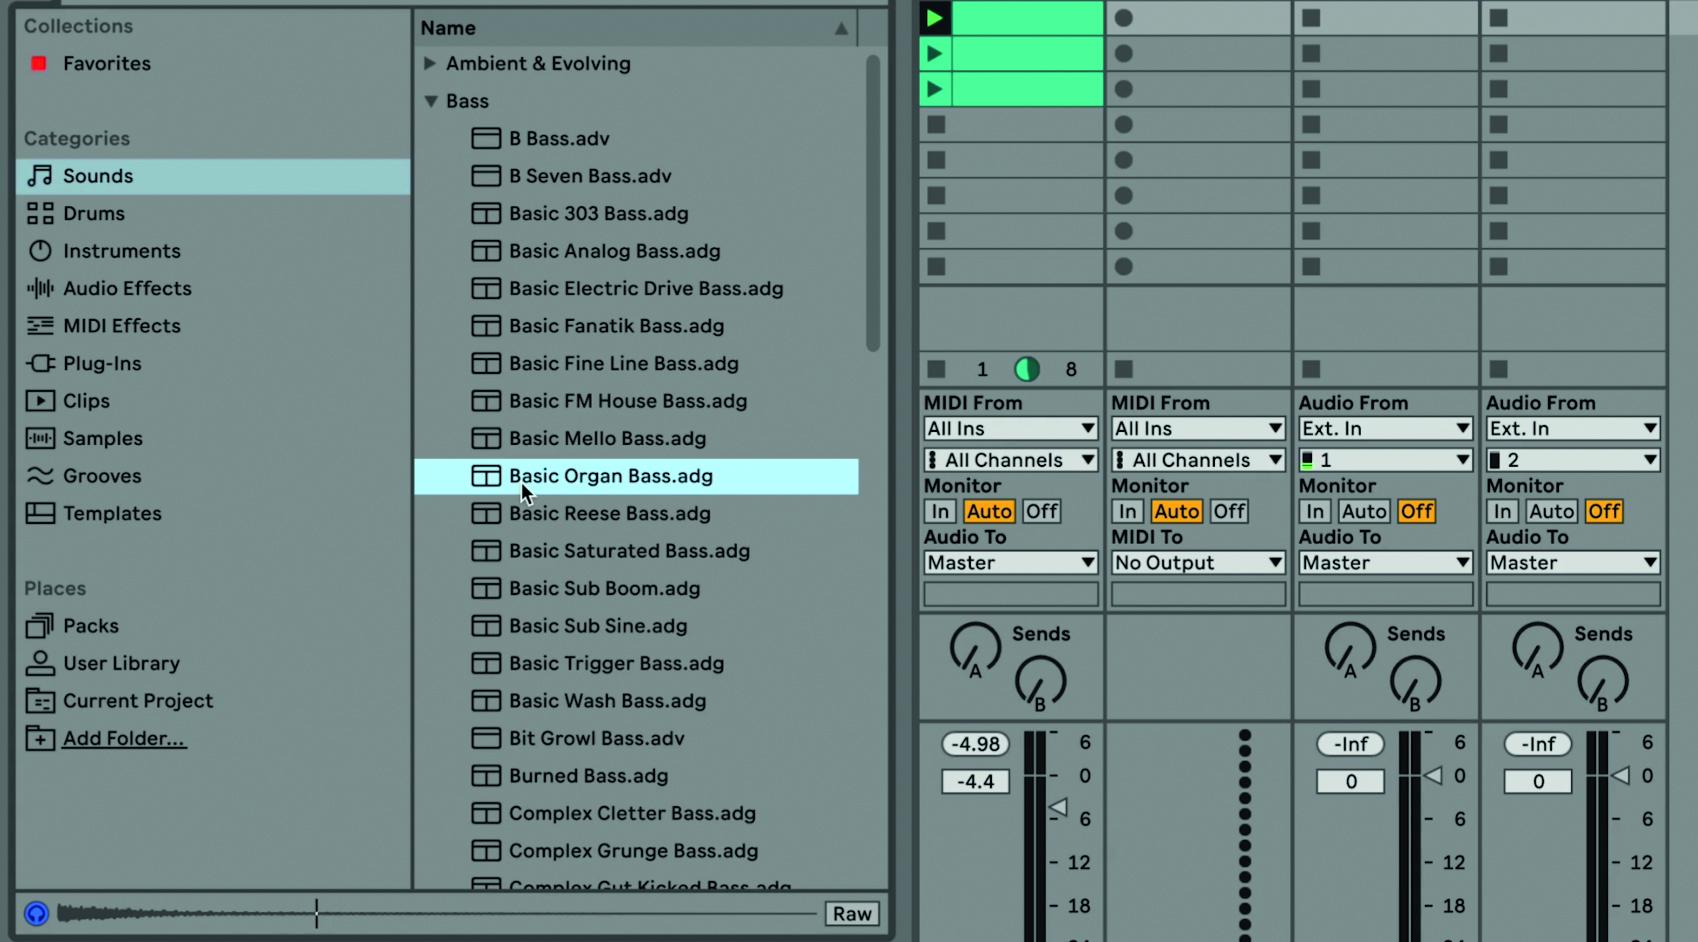
Step 2: We can now audition bass sounds to go with our drums. Click on the Sounds folder in the main browser and then the Bass folder. Press the up and down arrows to step through and hear each sound. We quite like the organ bass sound as shown as it goes nicely with our house beat.
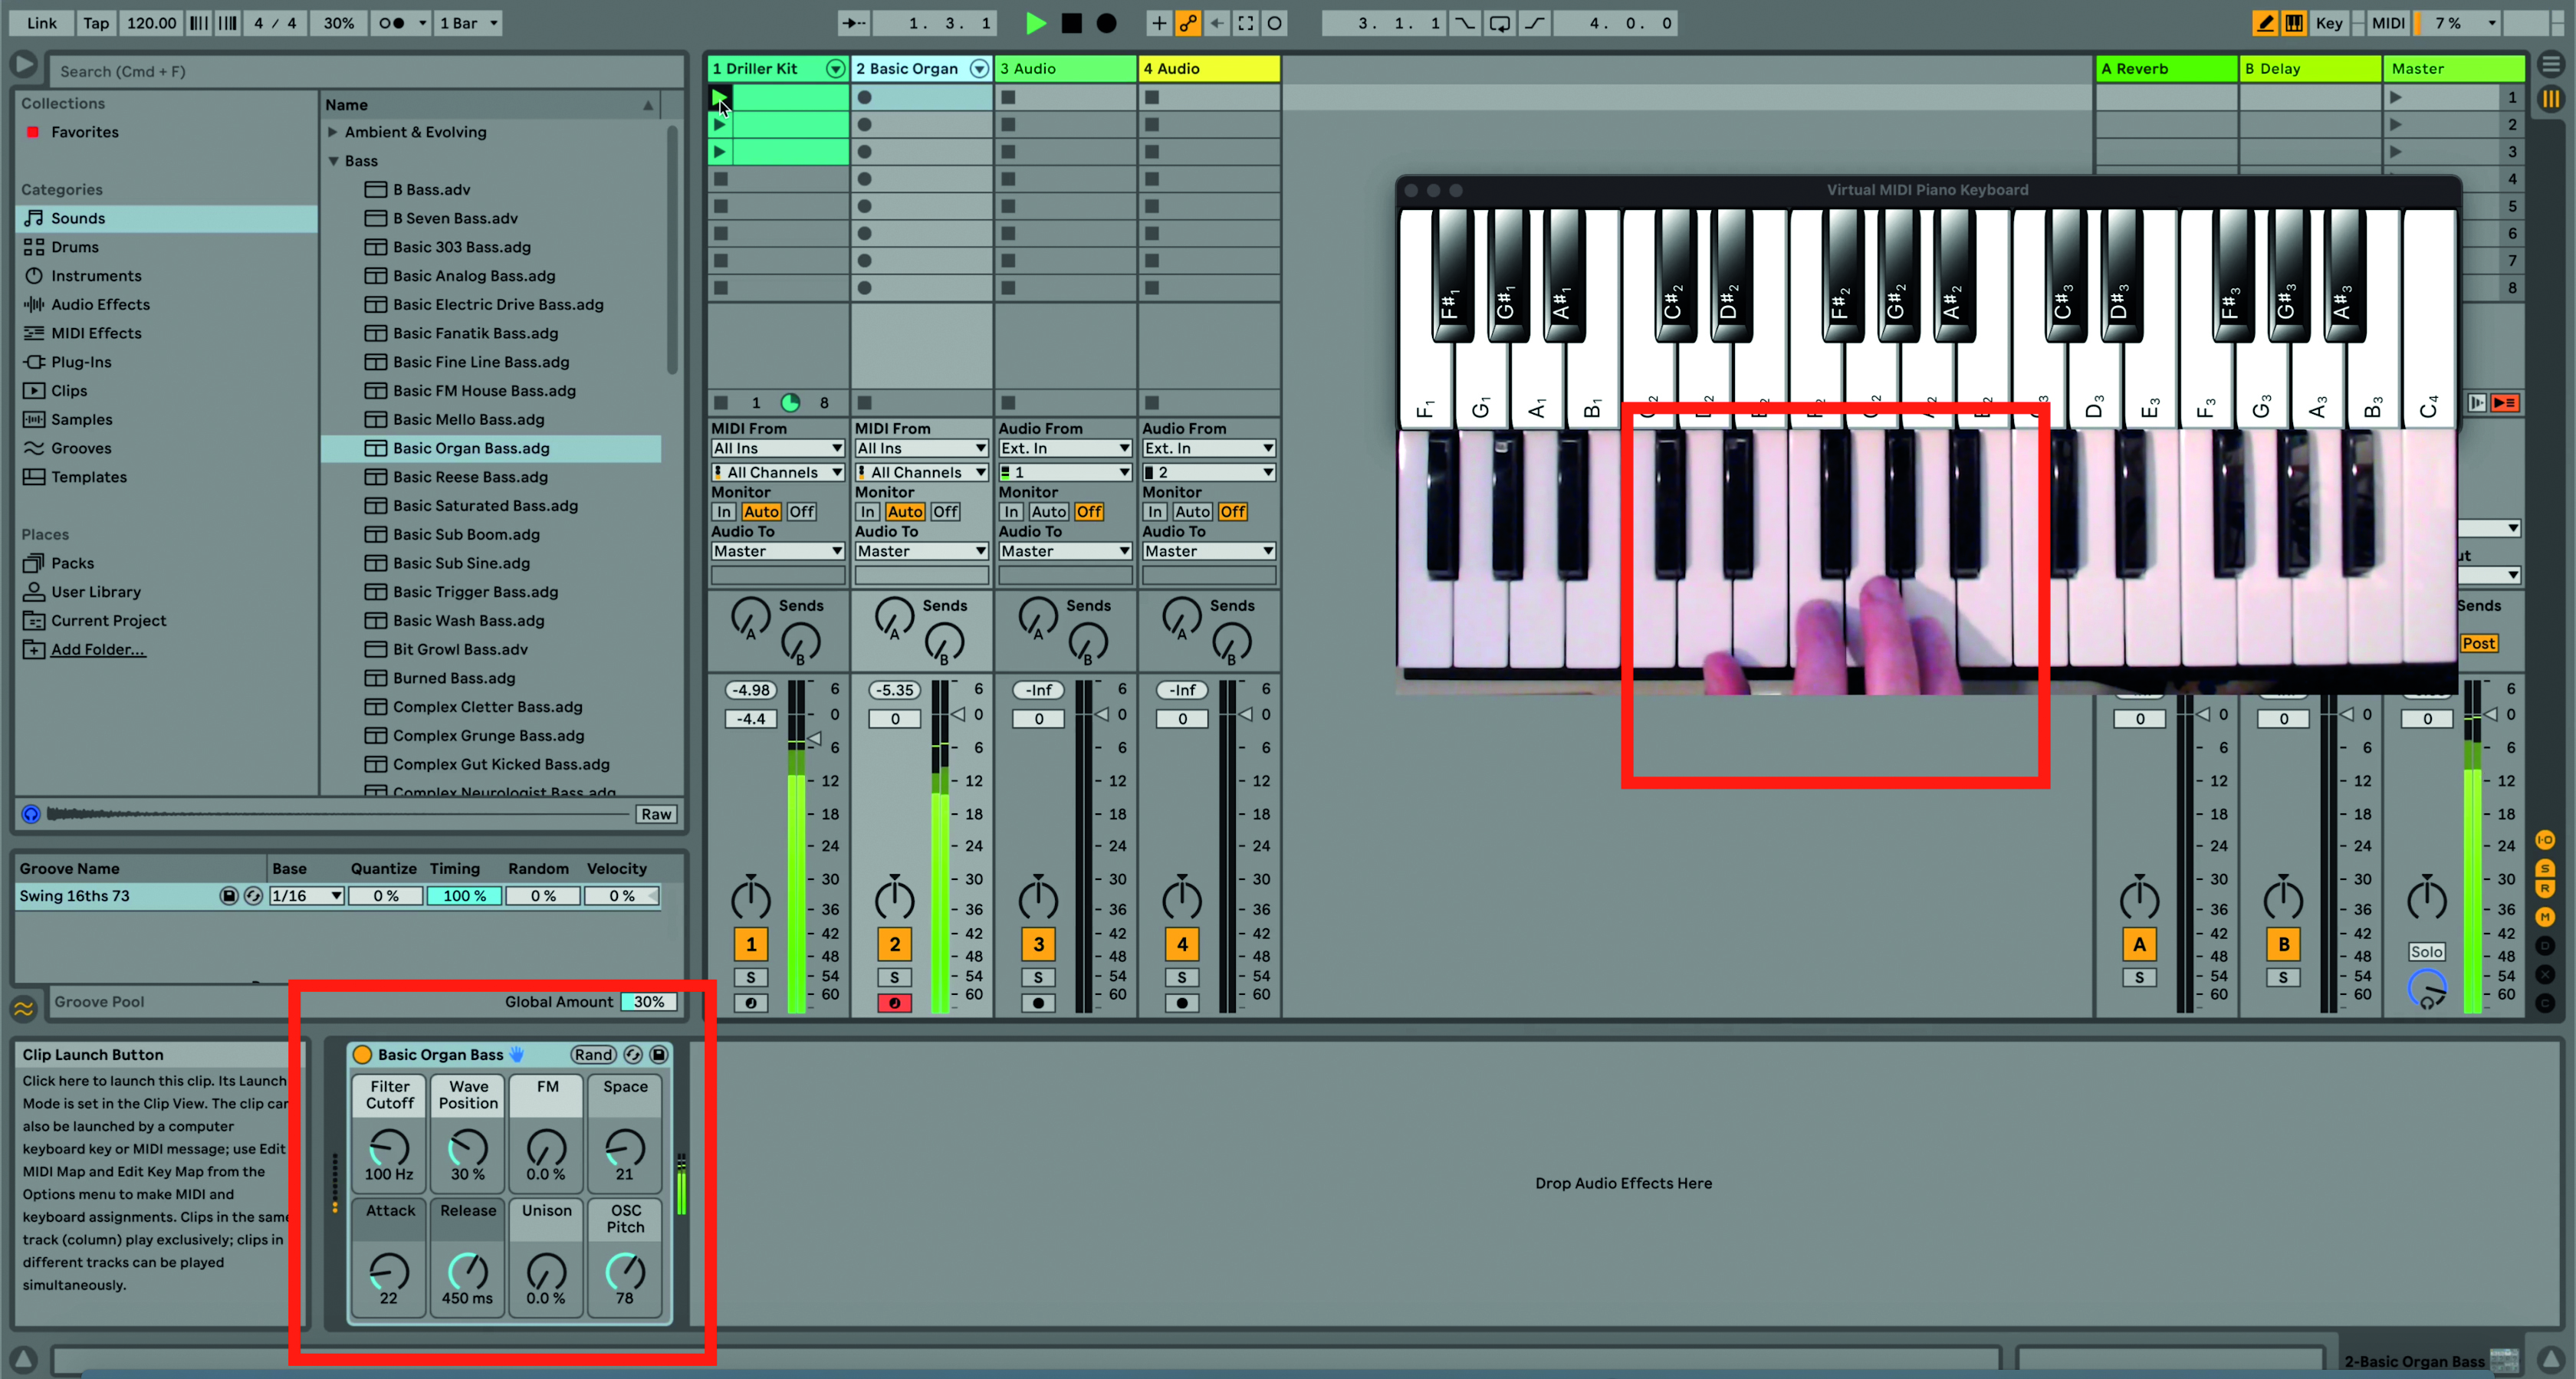
Step 3: The bass instrument has loaded into the MIDI channel, as highlighted in red, and we can play some ideas along with our beat either by playing our external keyboard or our QWERTY computer keyboard. We quickly come up with a riff that sounds great with the beat.
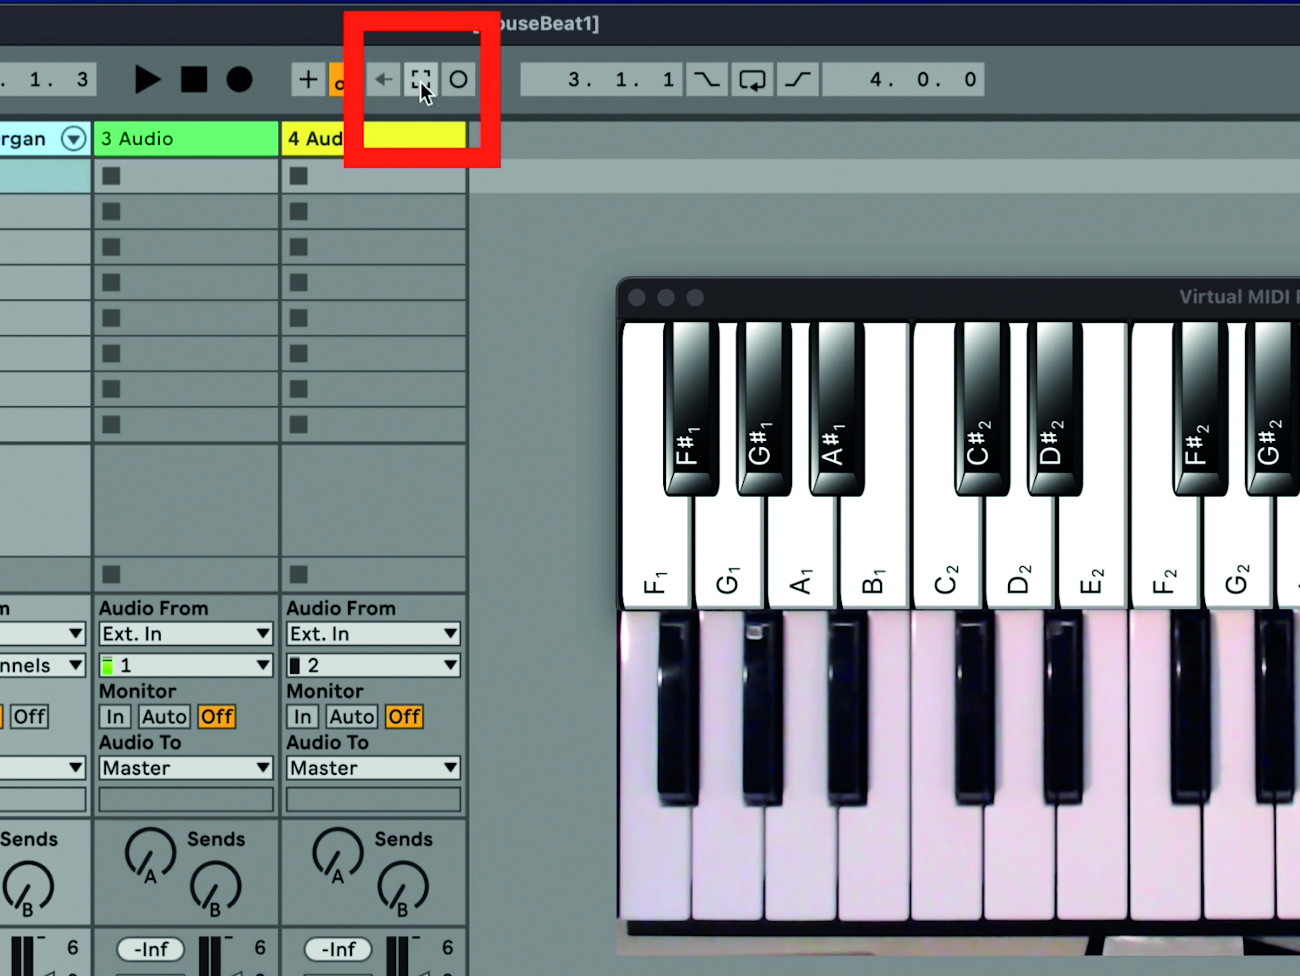
Step 4: We played a great part but didn’t press record. However, there’s another great feature in Live 11 Lite called Capture which records everything you are playing. To access the recorded part, hit the dotted square icon as shown.
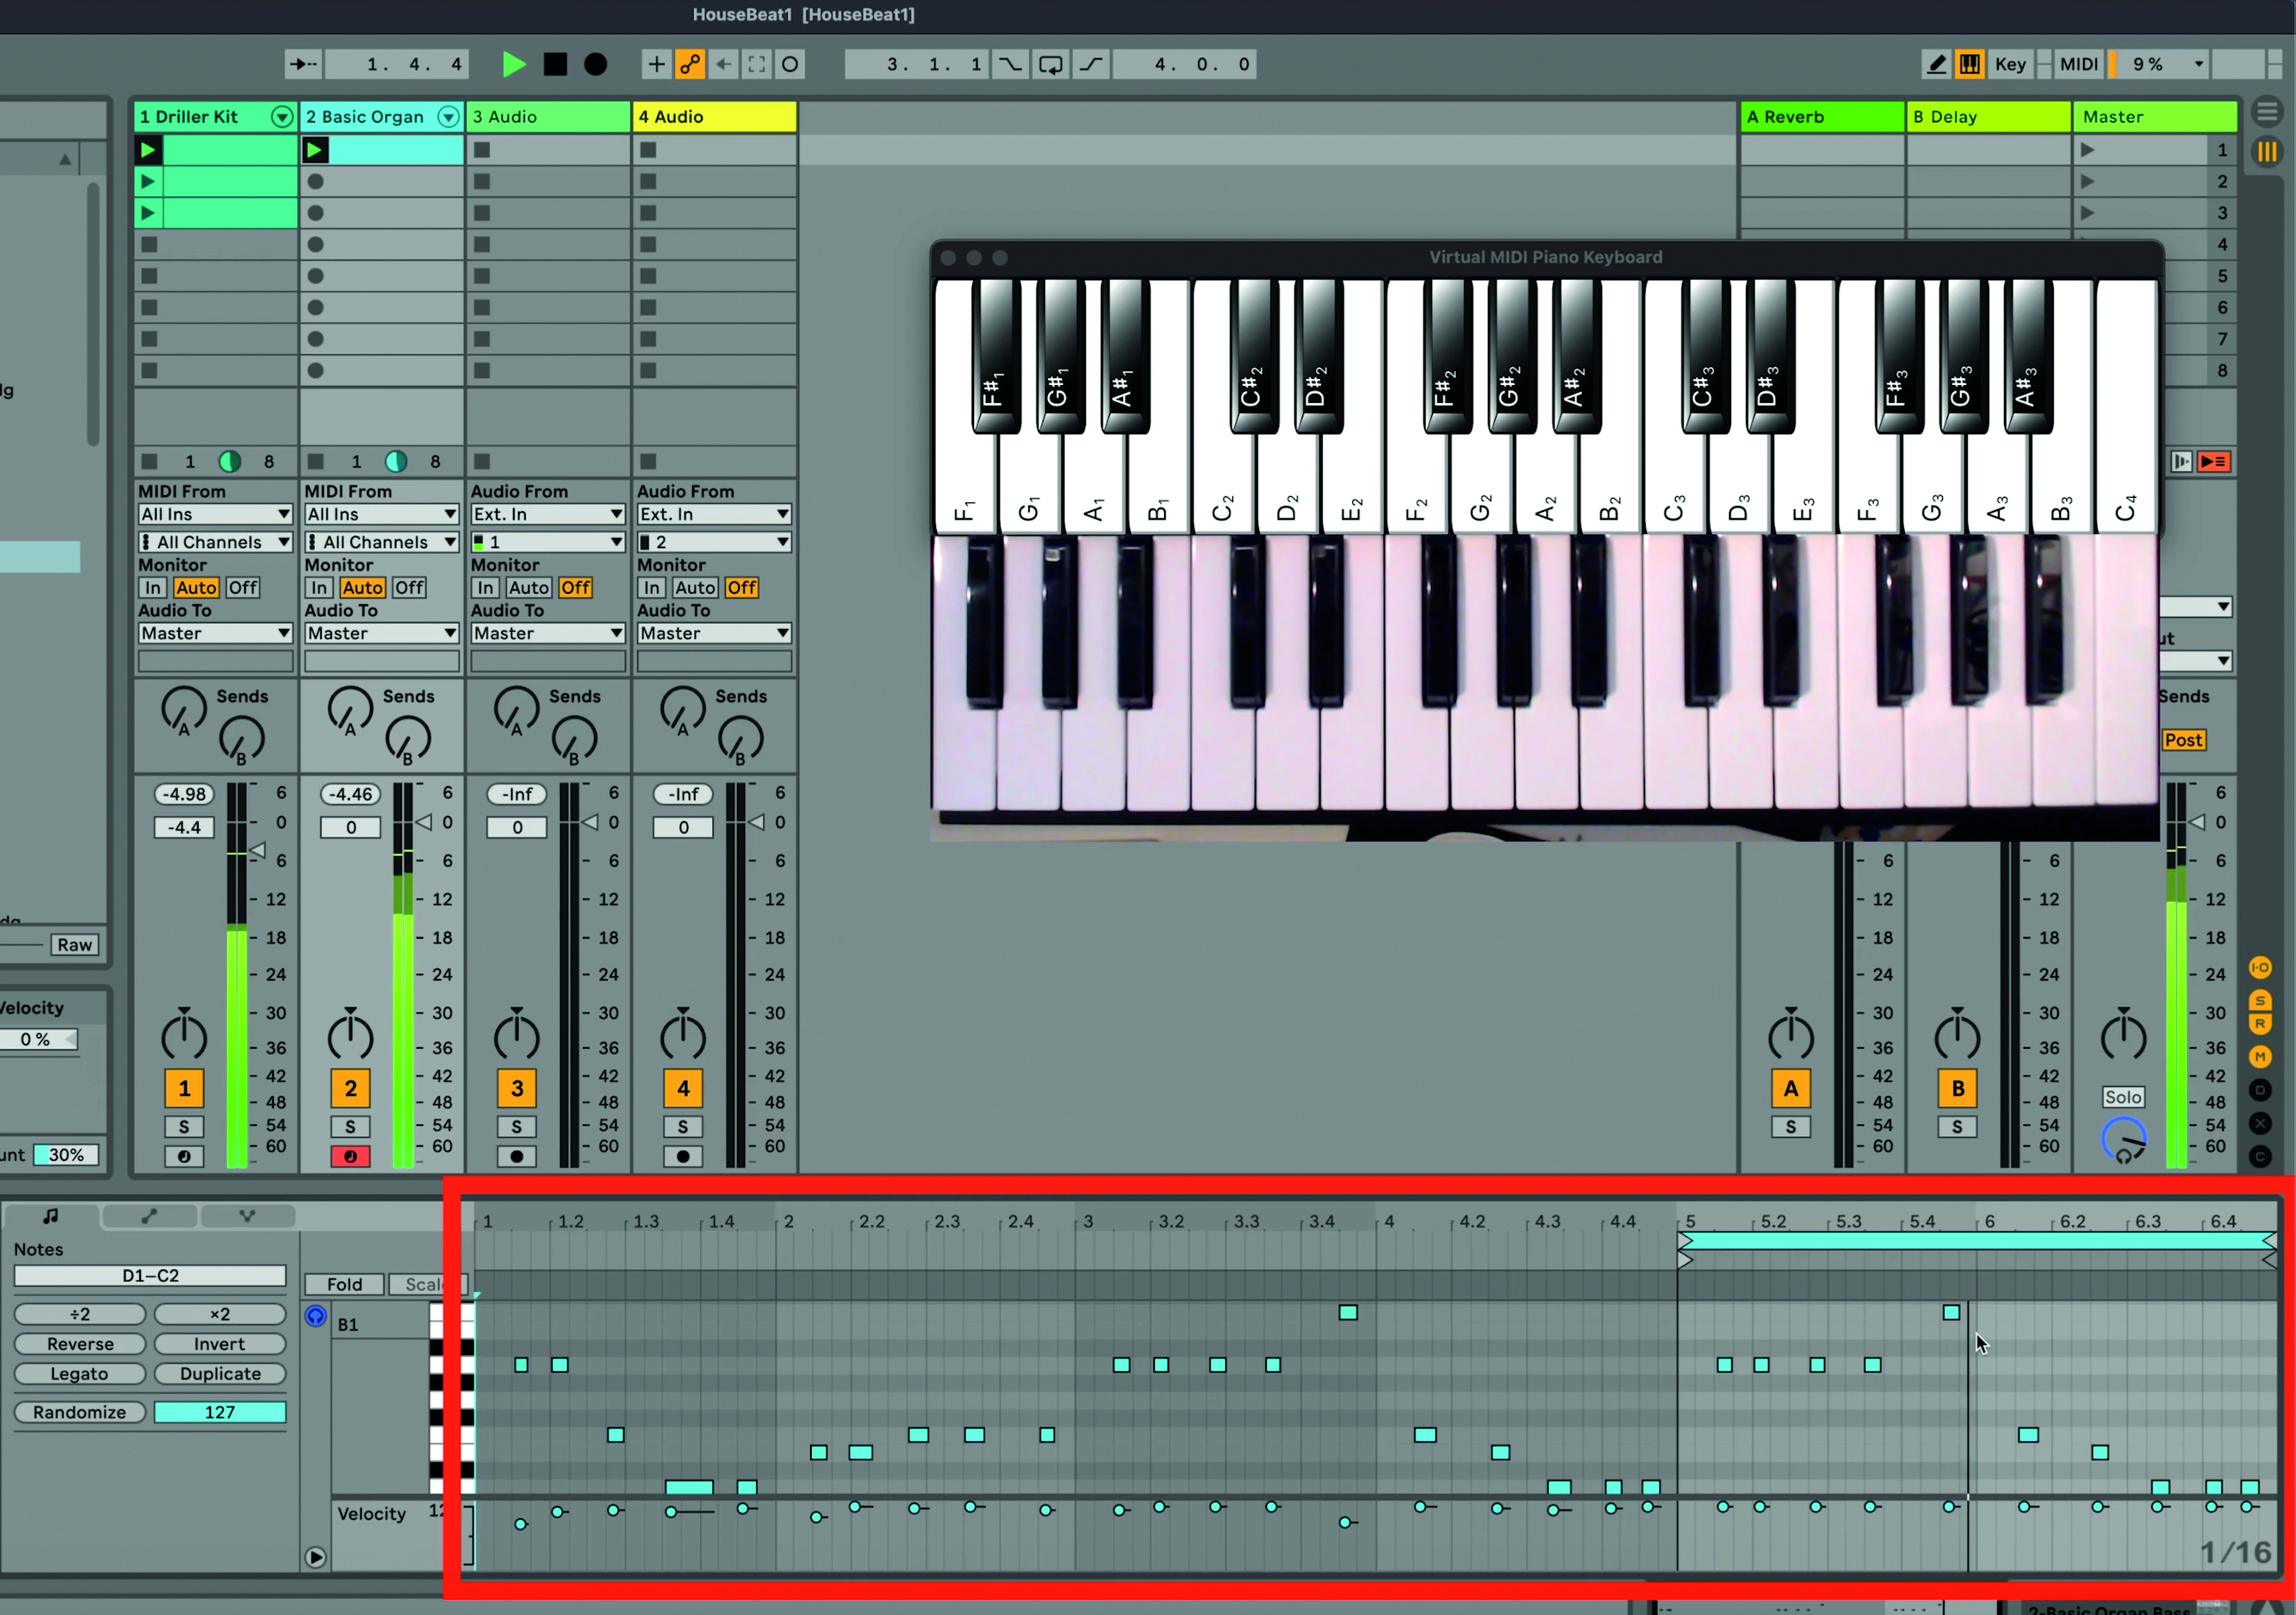
Step 5: The bassline we were auditioning has secretly been recorded! We can quantise the notes – that is put them in time with the grid – by pressing Command>U (Control on a PC).
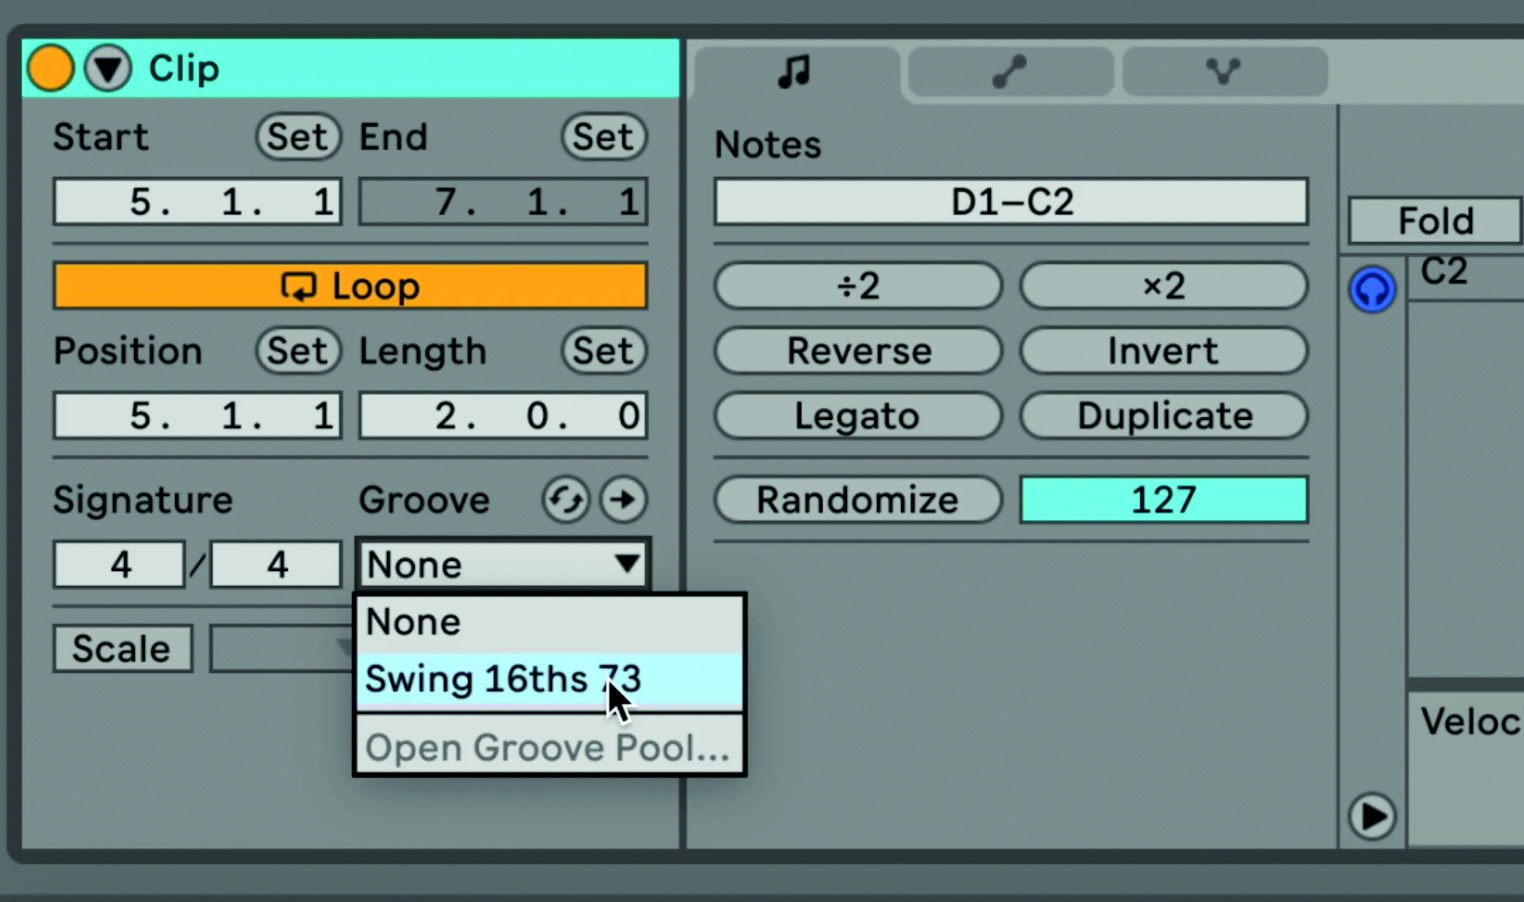
Step 6: Two further quick actions neaten everything up. First up we can apply a groove to our clip, by clicking the Groove drop-down menu in the Clip Edit box. We can also crop the clip we like by highlighting it and Control clicking to get a menu and selecting Crop Clip. Only the highlighted section of notes remains.
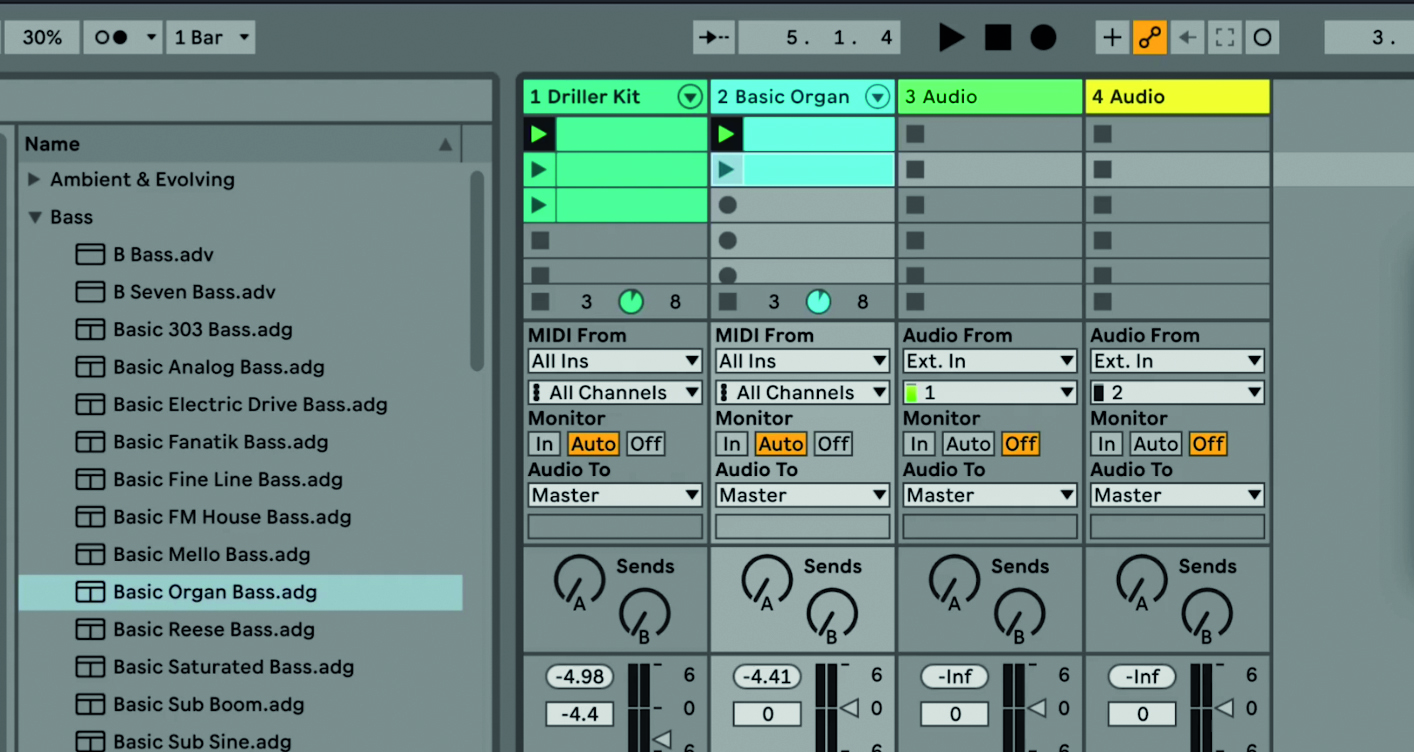
Step 7: We’ll duplicate our recorded bassline to another clip by pressing Command>D (Control on a PC). The first clip is duplicated to the one beneath it, which we can then edit to give us a variation of the bassline.
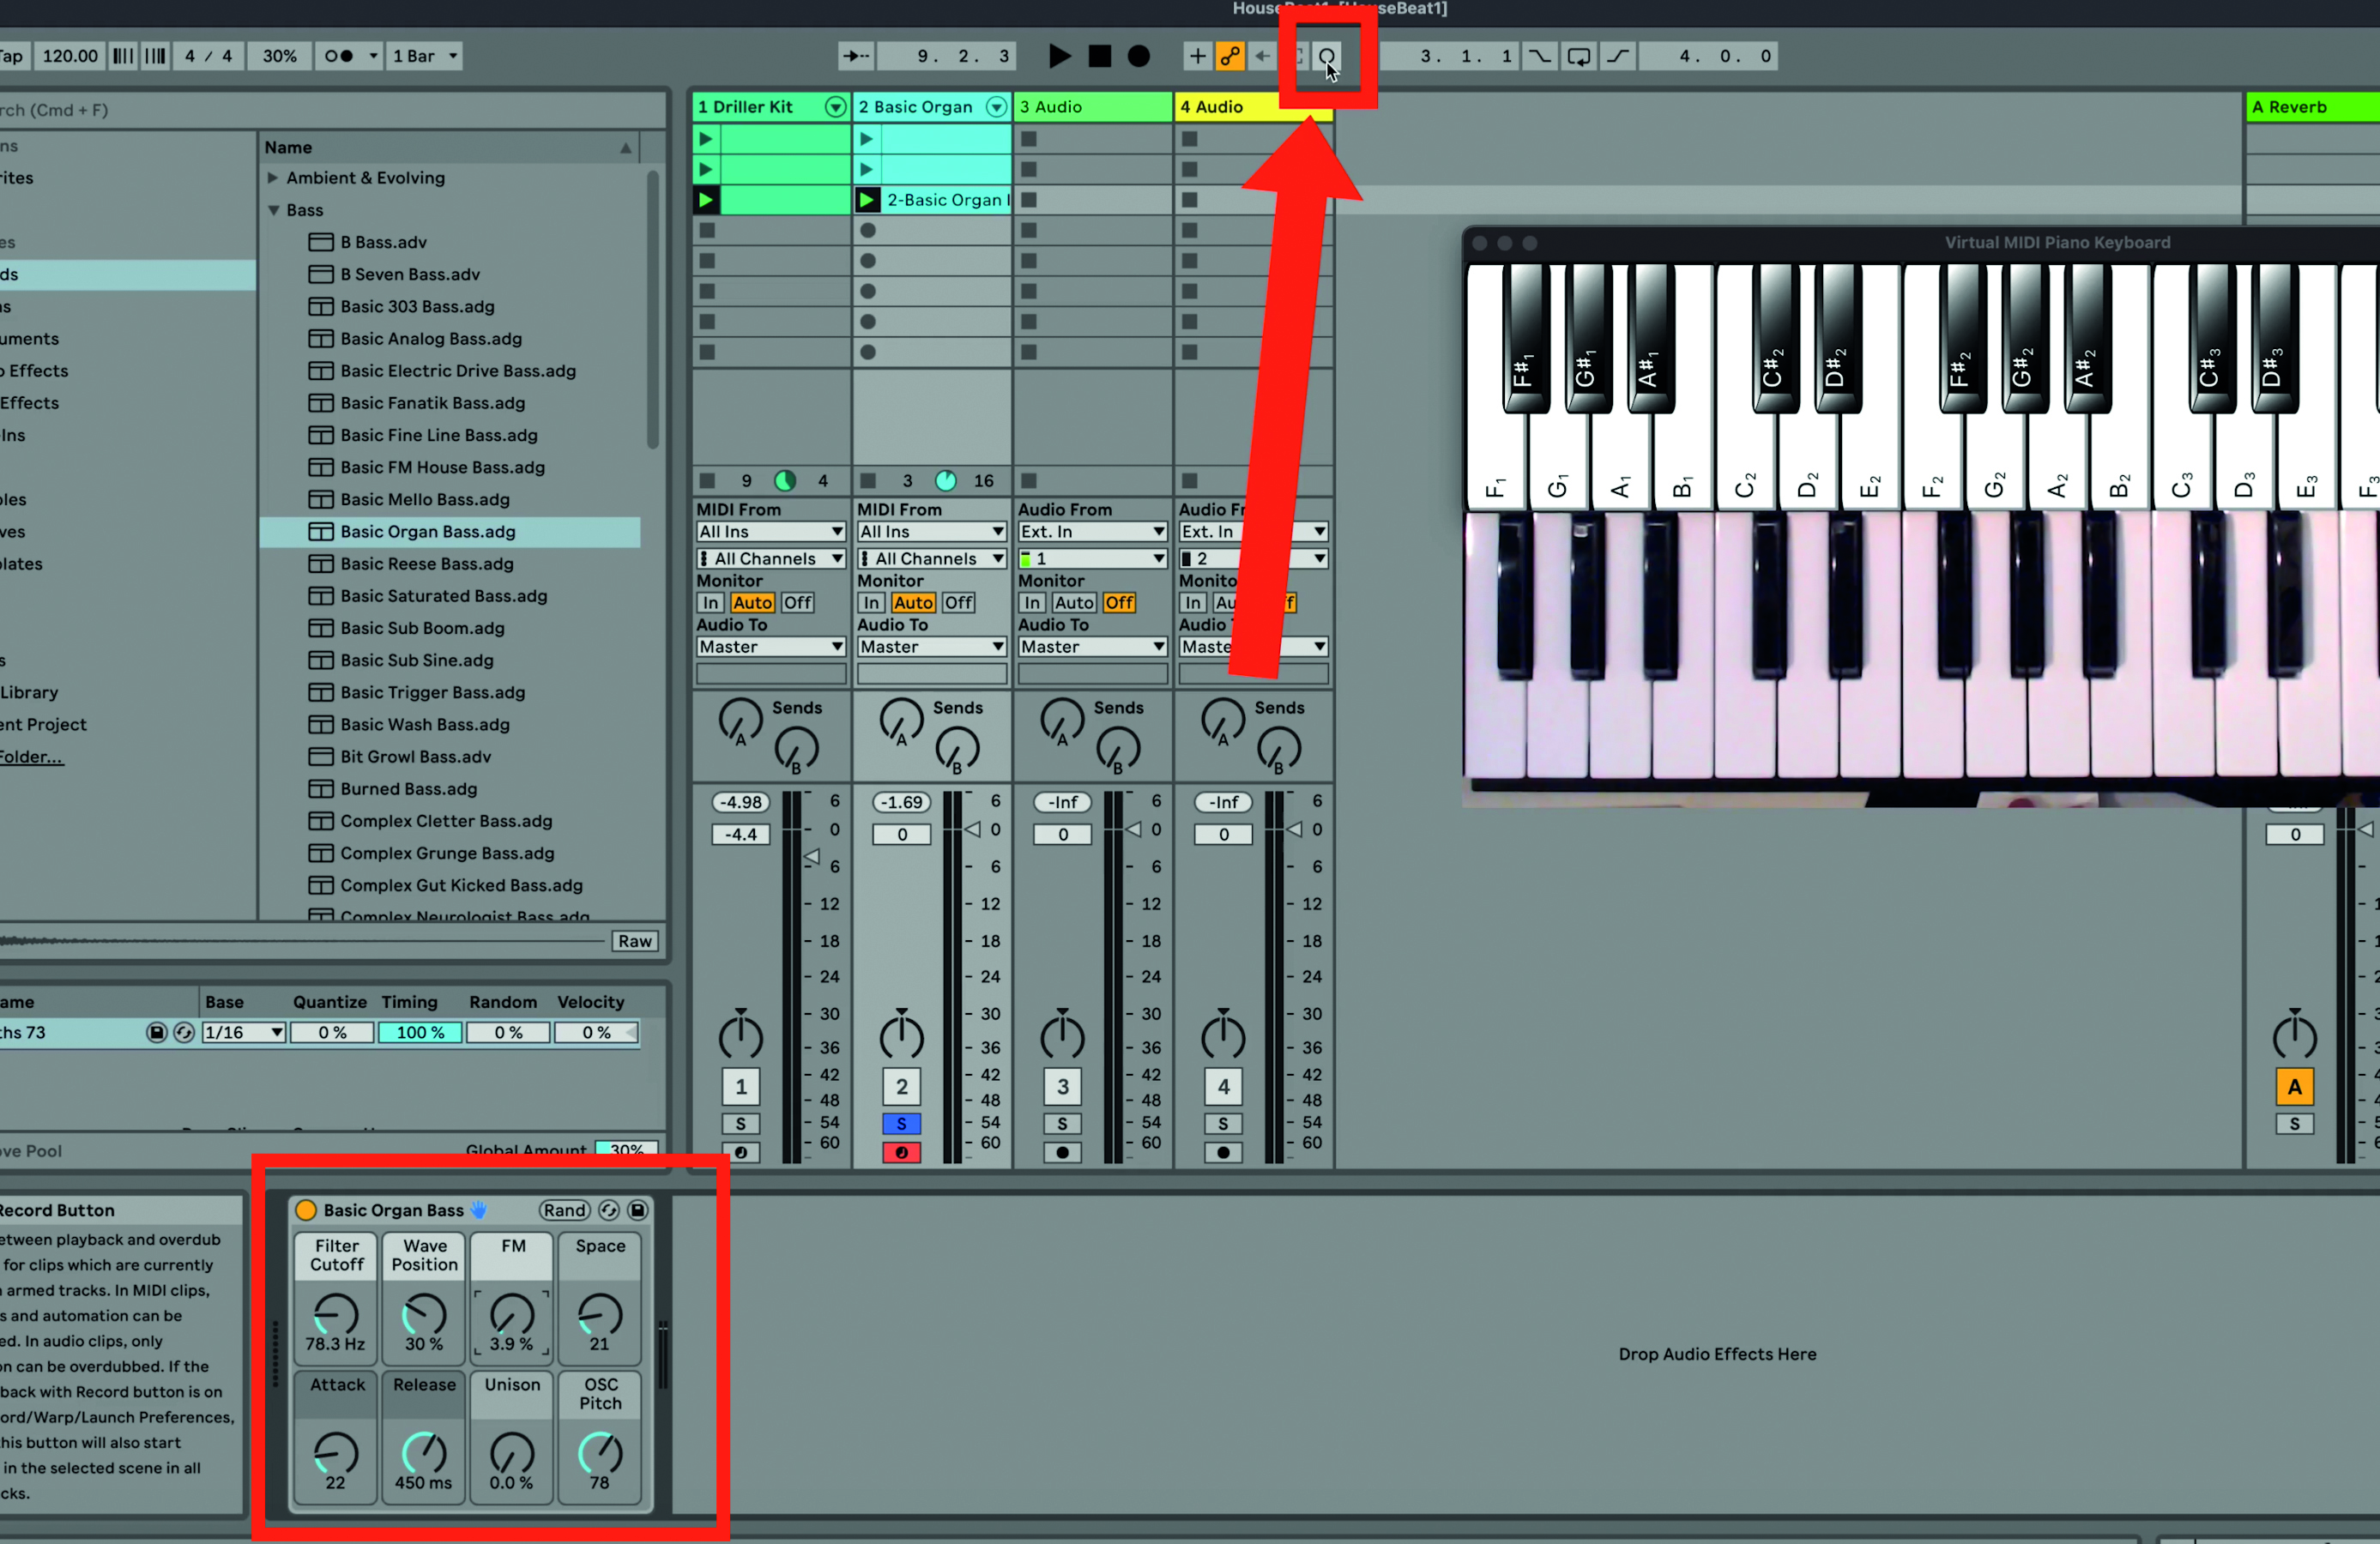
Step 8: Another great way of introducing variation to a clip – on top of editing the actual notes – is to edit the sound as it plays. Look at the bass instrument close up and turn some of its dials – Filter Cutoff and FM in particular – and the sound changes quite dramatically. You can record these changes directly into the clip by pressing the Overdub record button.
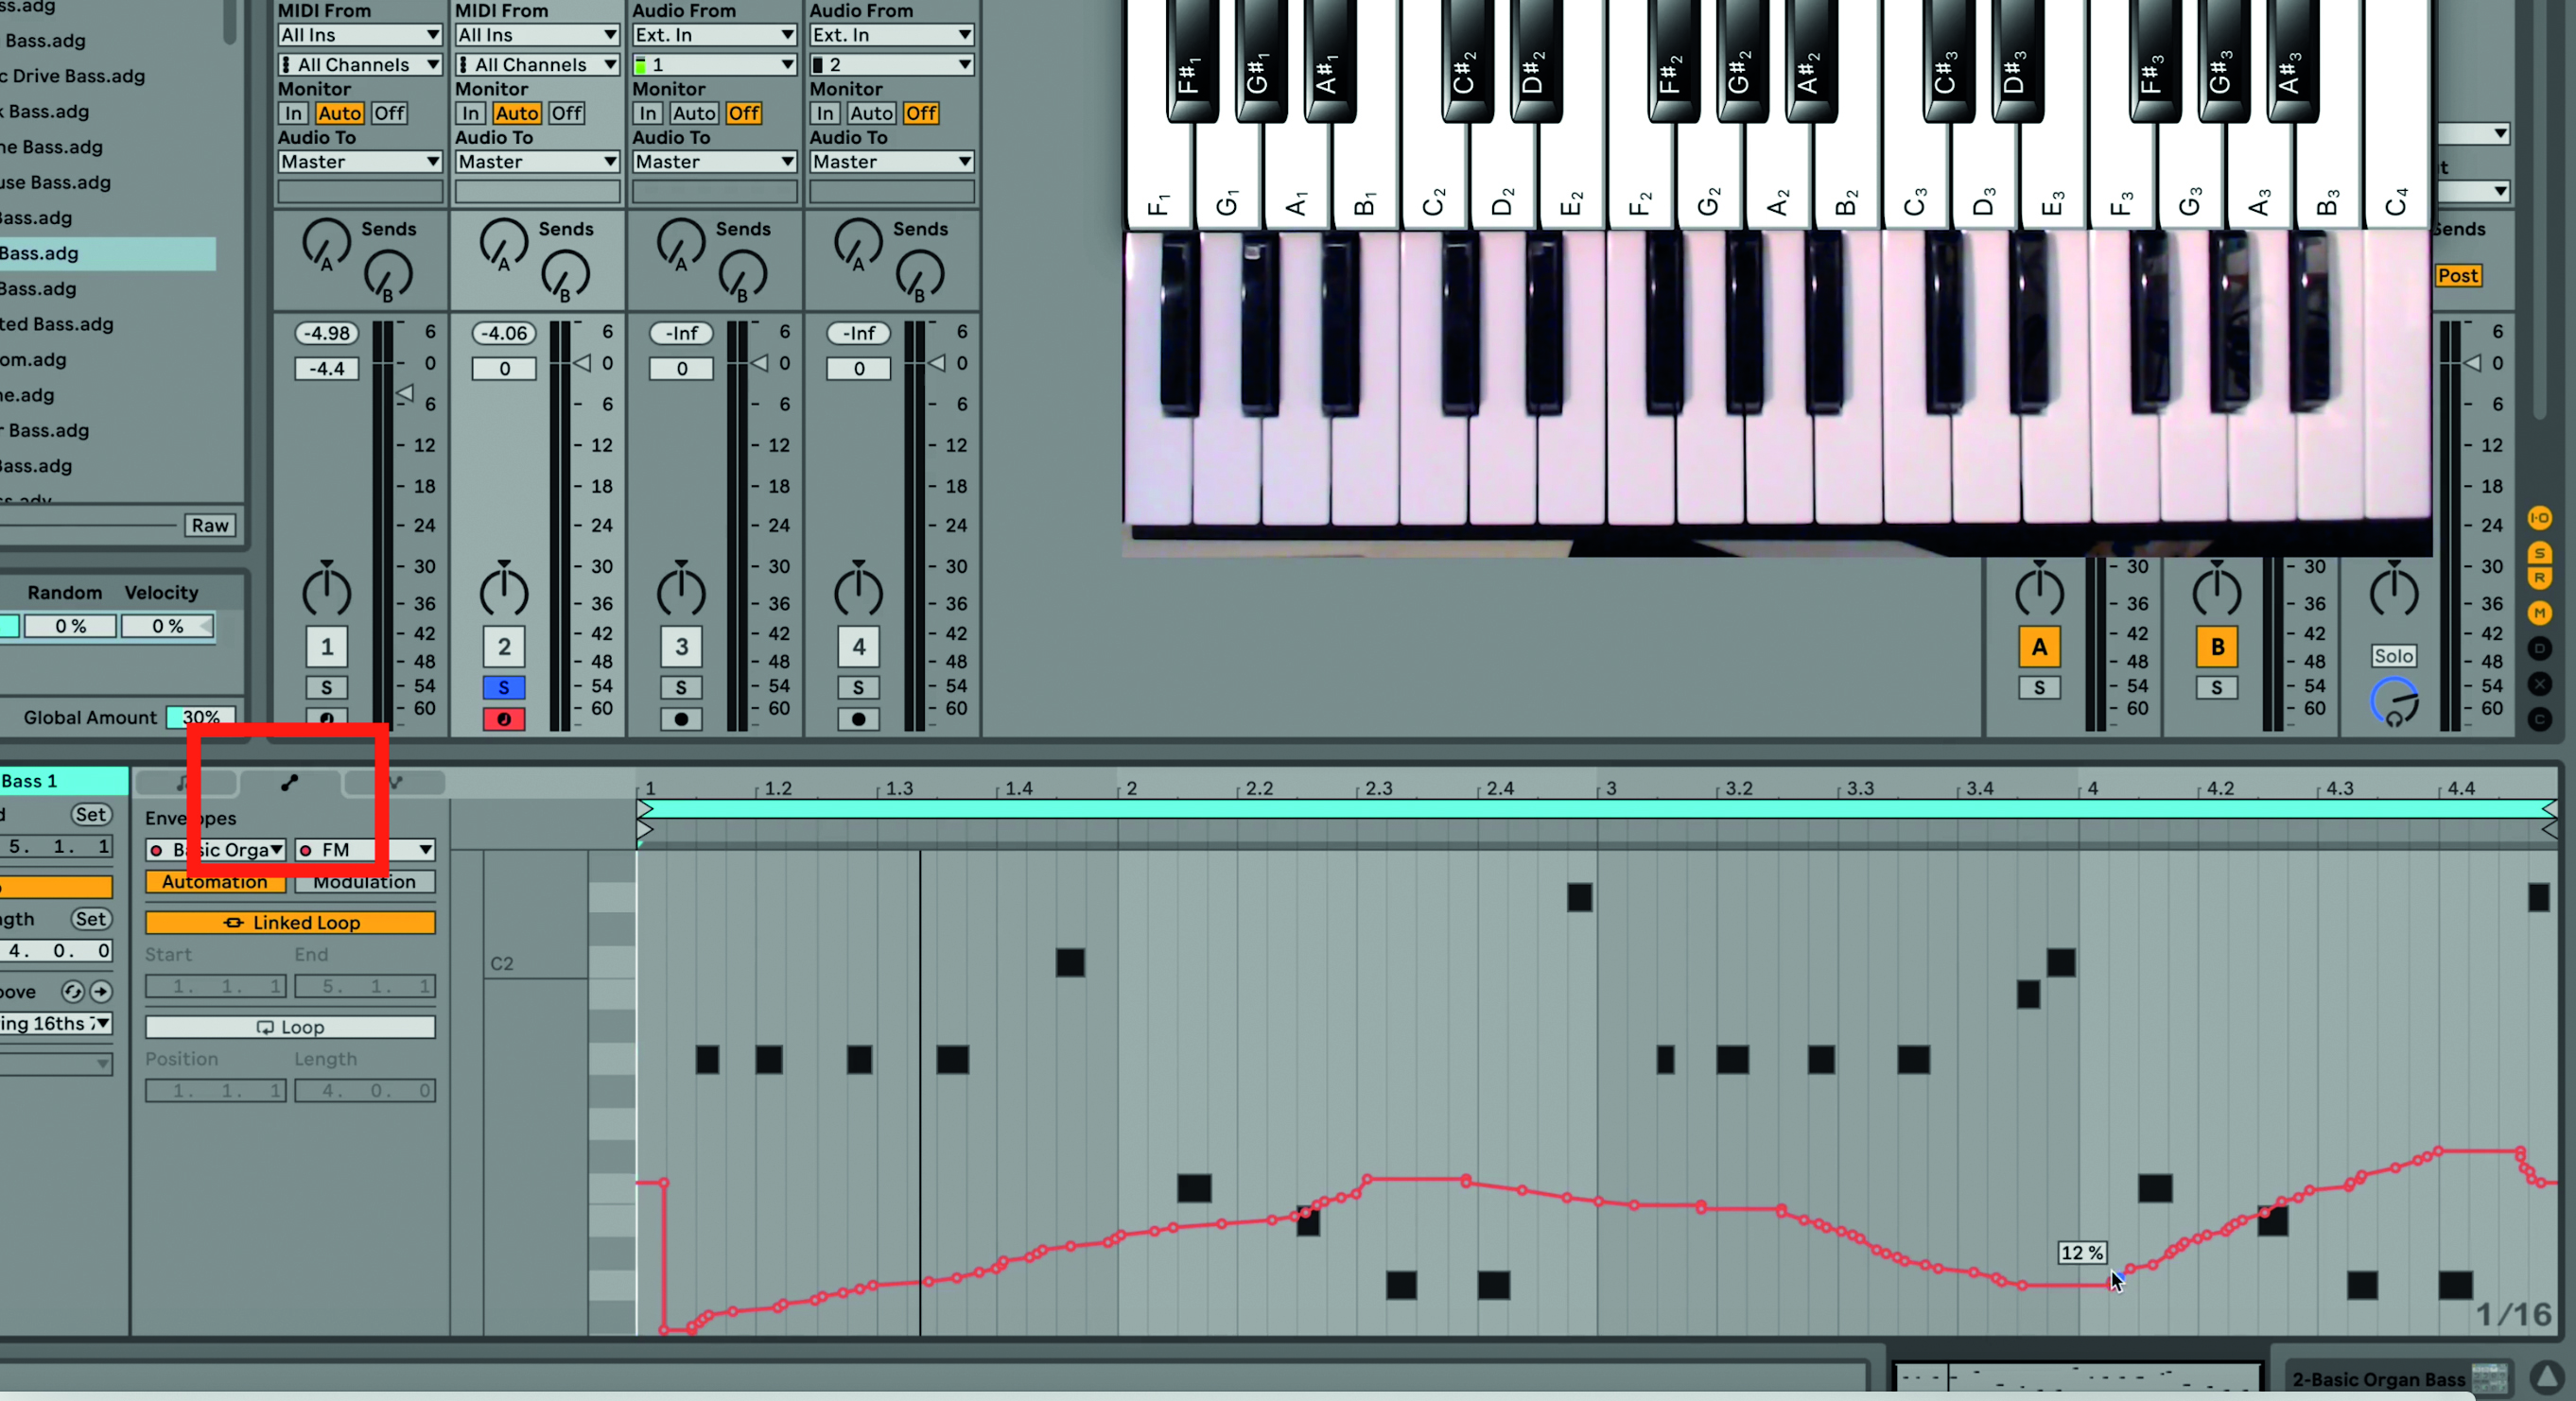
Step 9: A red dot appears next to the dial you have recorded, indicating ‘automation’. You can see a visual representation of this by clicking the Envelope icon in the clip. The red line is the recorded automation of the dial as your turned it and can be edited by clicking each point, so you can now add even more variation to your bass sound.
Computer Music magazine is the world’s best selling publication dedicated solely to making great music with your Mac or PC computer. Each issue it brings its lucky readers the best in cutting-edge tutorials, need-to-know, expert software reviews and even all the tools you actually need to make great music today, courtesy of our legendary CM Plugin Suite.
