How to create your own sample packs
Whether it’s to create your own unique style, share with collaborators or make a little money on the side, there’s a ton of reasons to try creating your own sample packs. Let us show you how…
1. Stay clean
No matter the nature of the sound to be sampled, keeping the initial recording clean will be key in 99% of cases. It is important to be clear as to where the source ends and the capture begins. For example, that vinyl break you want to lift sounds good to you partly because the DJ mixer is slightly overloaded and the bass is pumped, therefore the mixer is part of the source and what follows is where ‘clean’ needs to be the priority.

The single most important component of cleanliness is headroom, making sure that nothing post-source clips or incurs unnecessary distortions, so keep peak input levels below -12dBFS. The low noise floor of most 24-bit A/D converters means there’s still a huge dynamic range available to maximise clarity without creating additional edit/repair work from hefty vinyl pop/scratch spikes and unpredictable field/found sound sources.
Using the highest useful (up to 96kHz) sample rate is also encouraged; 44.1kHz will suffice but higher rates provide more detailed information for later processes, noise reduction in particular, to chew on.
2. Consistency rules
Whether it’s a collection of vinyl samples, an analogue drum machine or an acoustic guitar, keeping the source capture consistent will lead to a well-balanced and usable sample pack. Essentially once the initial recording level has been set (high quality, high headroom) it needs to stay that way.
Gain staging changes increase the need for later cross-referencing and adjustment to prevent background noise or room acoustic levels jumping from sample to sample. A set of like samples, such as acoustic guitar loops, need to drop right into a project without demanding adjustments.
This initial consistency isn’t just restricted to keeping gain staging set or making sure mics stay in place. Multiple recording passes of the same sound may be needed, such as soft hits of a snare drum, so that a consistent level can be identified in later editing stages when your ears are working on the bigger picture. Making notes throughout the audio capture process will pay dividends if additional recording is required or unforeseen problems crop up in the editing/compilation stage.
3. Variety (also) rules
Just as consistency is paramount in the technical realm, variety is a priority in the creative one. In this context this can be as simple as presenting a vinyl drum break in its original form, as slices and as a set of rearranged edits, but it can also take the form of recording acoustic guitar rhythm loops in different tunings, with different mic setups, or with alternate room acoustic balances.
Want all the hottest music and gear news, reviews, deals, features and more, direct to your inbox? Sign up here.
It is important not to get caught up in second-guessing how the sample pack will be used, but providing a few alternate options to some main elements will help create a sample collection you and others can keep coming back to.
4. Admin is for winners
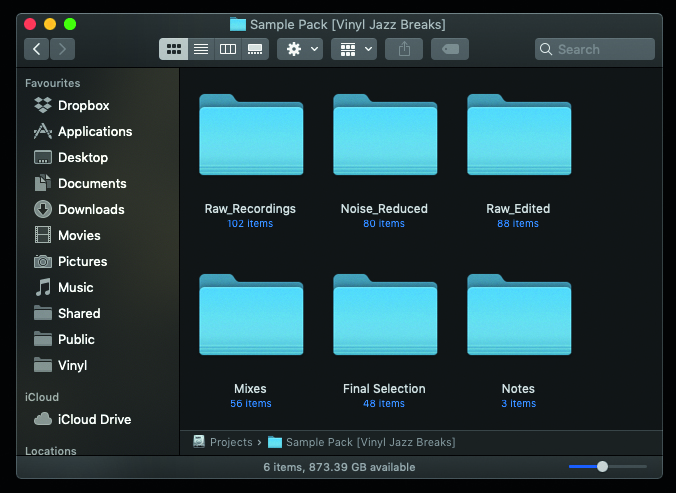
It may seem horribly mundane but admin is the indispensable, if underrated aid to creativity. In addition to the technical note-keeping during recording it is imperative to maintain a strict file management scheme. File naming should include essential information (source, pitch/key, tempo, processing stage, etc), as should folders (eg, Raw_Recordings or Noise_Reduced), which ought to not be buried down a rabbit hole of sub-folders.
Though there are plenty of non-destructive editing options within DAWs and sample editing apps, it does help to keep before/after versions when going through major editing stages to allow a quick reversal when something goes awry, from too low an RMS level across a set of instrument loops to overcooked noise reduction on a vibraphone multisample. Also back up, back up and back up, both within your system and to external drives, at least once a day.

5. Record noise to reduce noise
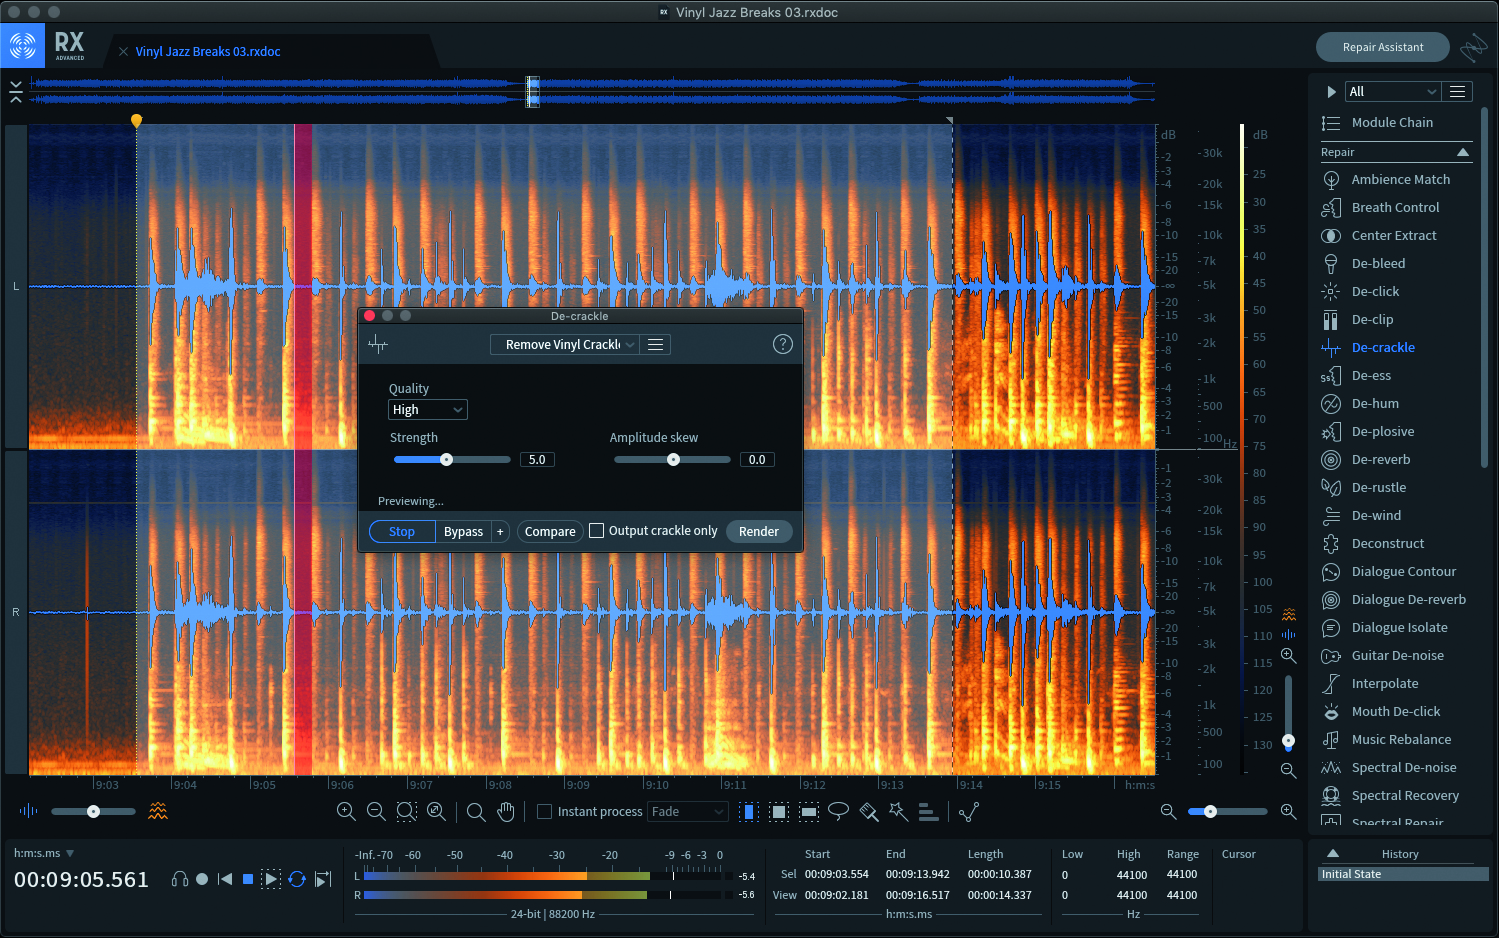
Analogue noise reduction is vital to carry out at source, whether it’s giving your vinyl and needle a pre-recording clean, muffling loose drum kit metalwork or hunting down ground hum. Any remaining noise should be recorded, logged and stored for later use with any de-noiser app/plugin you may have available. Should the signal path change during recording, mark when/where it happened and make an updated noise profile to keep further processing consistent.

Though noise is not a major issue in many samples (eg, drum loops), those that are to be played concurrently, ie, multisamples, require more care with regard to noise. There’s a balancing act here between minimising noise and de-noiser artefacts, and this often requires trial and re-trial, and time.
It’s important to note that not all noise is unwanted; in the case of vinyl samples it is a defining component. It can be prudent to remove the worst parts, such as loud pops, trim back a little surface noise if necessary and let the rest work its dusty magic. Similarly we expect guitar amps to hiss, rattle and hum, so only cut back what you feel is excessive and take care not to rob the source of its mojo.
6. How much room?
Recording instruments with microphones for sample packs demands the most complex approach as these instruments are subject to all manner of irregularities, from temperature/humidity-induced tuning variations to position-based phase shifts in multi mic setups.
Room acoustics are significant in defining the character of acoustic instruments, and to a lesser extent amplified ones, so producing the most useful balance between close and room mics becomes an issue to resolve. This can be left to the end of the process, ie, the final mix from which the loops/multisamples are cut, but it can be left to the end user by producing separate close and room mic samples that can be layered to taste. This is where real discipline is needed in file naming choices as well as cutting the final samples to maintain their phase relationship.
7. Wet or dry
Effects that leave a trail or modulate are best avoided when recording for multisamples as they will appear the same with each repeat, highlighting their sampled nature; applying them during use has the opposite effect. Distortion, EQ and compression can be locked into the recording for the most part, but their effect on the final product ought to be considered.
For tempo-based loops most effects can be left in, so long as reverb/delay tails are wrapped around so the loop’s start doesn’t sound weirdly dry. What needs to be weighed up is how effects that alter background noise and dynamic range are incorporated. Heavy compression can pump background noise as notes recede in multisamples, which becomes unpleasant as notes/hits are layered.
Most distortions have a similar effect with regard to noise levels but tend to pump less. If compression is part of the instrument’s sound (eg, attack behaviour is key, or the compressor imparts the ‘right’ tone) and a multisample is being made for velocity layering, dialling back the gain reduction to a decent compromise level is necessary to optimise the playability of the rendered instrument.


Future Music is the number one magazine for today's producers. Packed with technique and technology we'll help you make great new music. All-access artist interviews, in-depth gear reviews, essential production tutorials and much more. Every marvellous monthly edition features reliable reviews of the latest and greatest hardware and software technology and techniques, unparalleled advice, in-depth interviews, sensational free samples and so much more to improve the experience and outcome of your music-making.
