
Want all the hottest music and gear news, reviews, deals, features and more, direct to your inbox? Sign up here.
You are now subscribed
Your newsletter sign-up was successful
A reaction to the relaxed, understated sound of tropical house was probably inevitable, and it’s emerged over the past few months in the form of Paleo Bounce, a new and visceral electronic music genre that harks back to a simpler, more primitive time of stone tools and hunter-gatherers.
The ultimate old-school sound, this brutal take on minimal house combines low-slow rhythmic grooves with ephemeral leads, full-bodied bass and unique atmospheric effects.
Paleo Bounce looks set to be this summer’s hot sound, and MusicRadar is giving you the chance to get one step ahead of the game with a tutorial showing you how to make your very own track in the genre.
We’ve used Ableton Live for this guide, but any DAW will do, and all the sounds, MIDI parts, patches and synth lines you need to make the track can be downloaded by clicking here. Follow our guide and you’ll be making beats just like DJ Homo Habilis in no time!
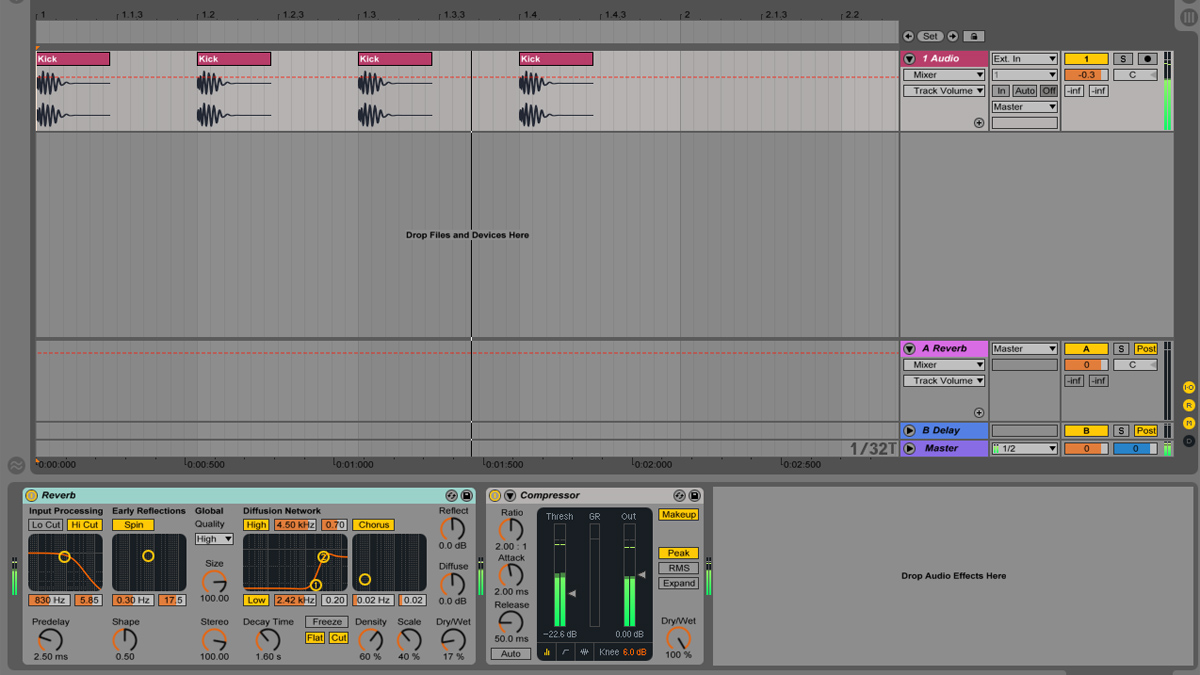
Step 1: Create a new project in Ableton Live and its tempo to a leisurely 111BPM. In the folder you downloaded you’ll find Kick.wav. Drag it onto an audio track, and add a slight touch of high-end reverb as we’ve done with Live’s Reverb, then add a compressor to glue the kick and reverb together.
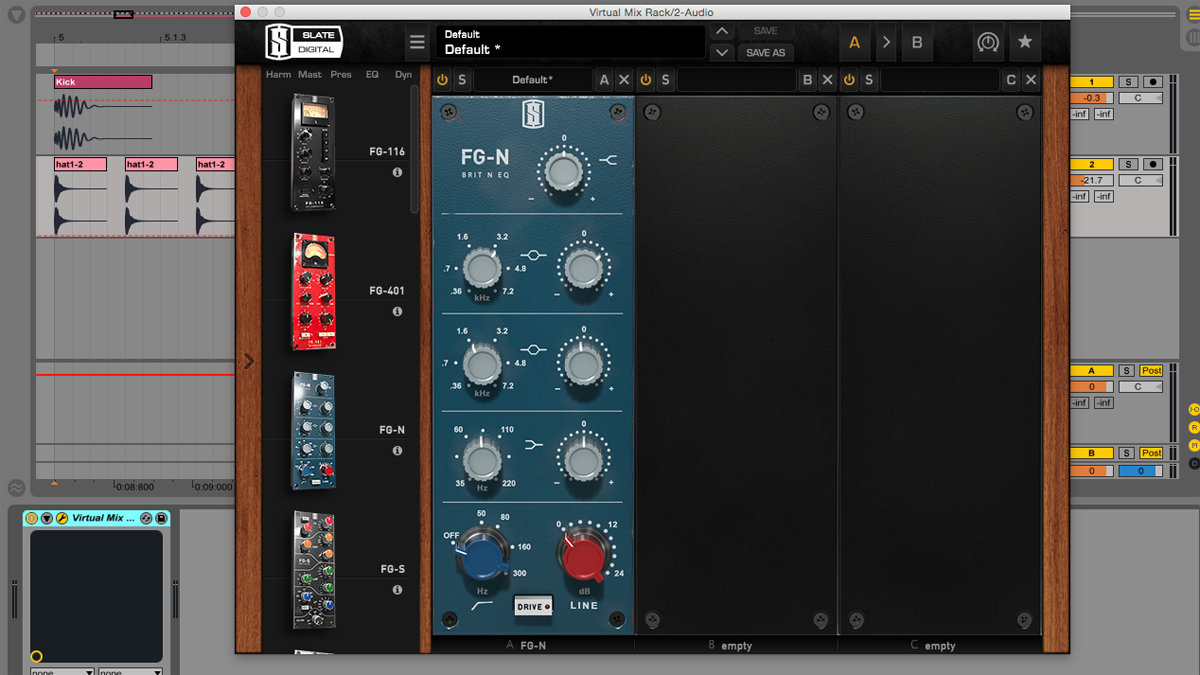
Step 2: Paleo Bounce’s grooves are based around triplets, so set your DAW’s snap mode to triplets and drag Hat.wav onto another audio track, making copies of the hat so that it plays three times during the bar. Here we’ve tweaked the hat with a Neve-style EQ from Slate Digital Virtual Mix Rack to brighten the tops and dull the mids slightly, but you can use whatever EQ you like.
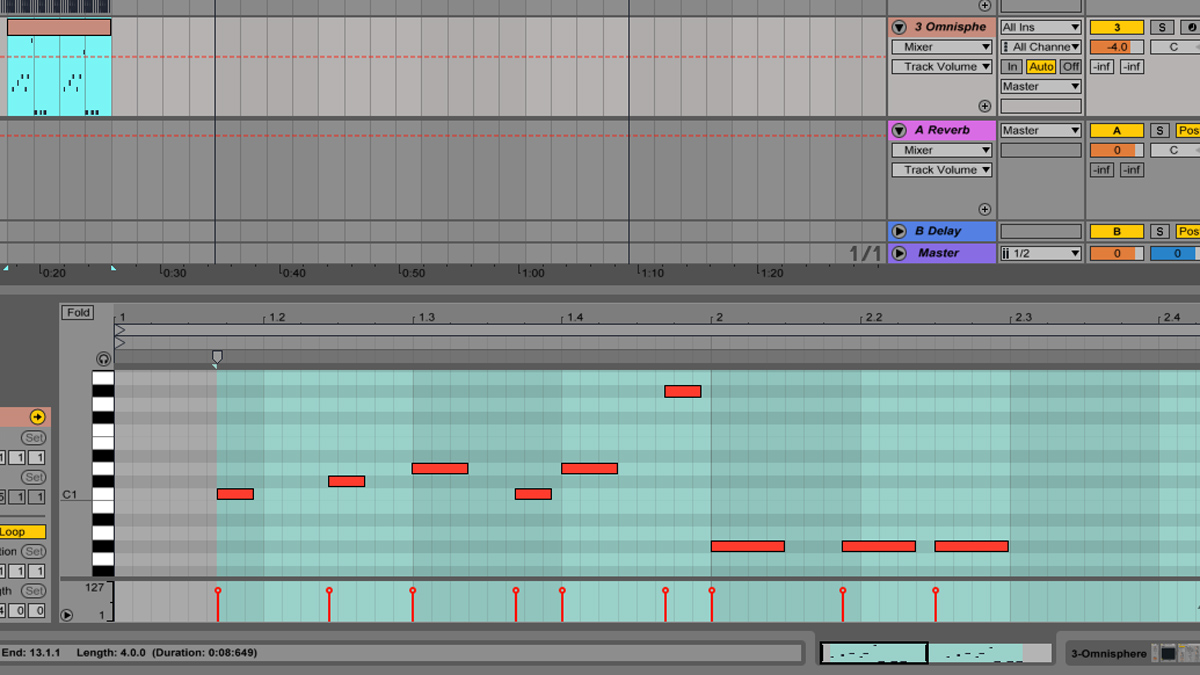
Step 3: Any synth with a pulse oscillator will do the job, but for our synth lead we’ve opted for Spectrasonics Omnisphere’s ARP 2600 Pulse wave, with a long lead time of 1.24 seconds, to create that characteristic Paleo Bounce drawl. Copy the MIDI we’ve used here, or you can find the MIDI clip called Synth1.mid and drag that straight in.
Want all the hottest music and gear news, reviews, deals, features and more, direct to your inbox? Sign up here.
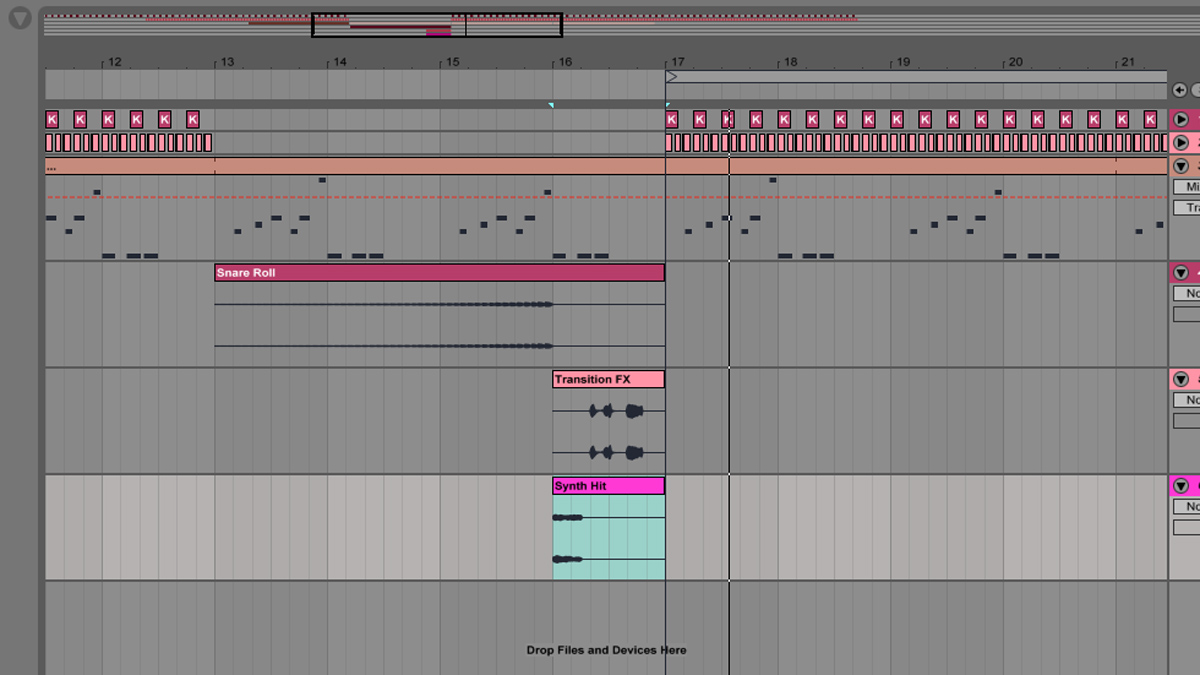
Step 4: Drag drum roll.wav onto a new audio track, and copy the arrangement illustrated above, giving us a simple build-up, breakdown and drop. To add excitement before the drop, place Transition FX.wav and Synth Hit.wav on new audio tracks on bar 16.
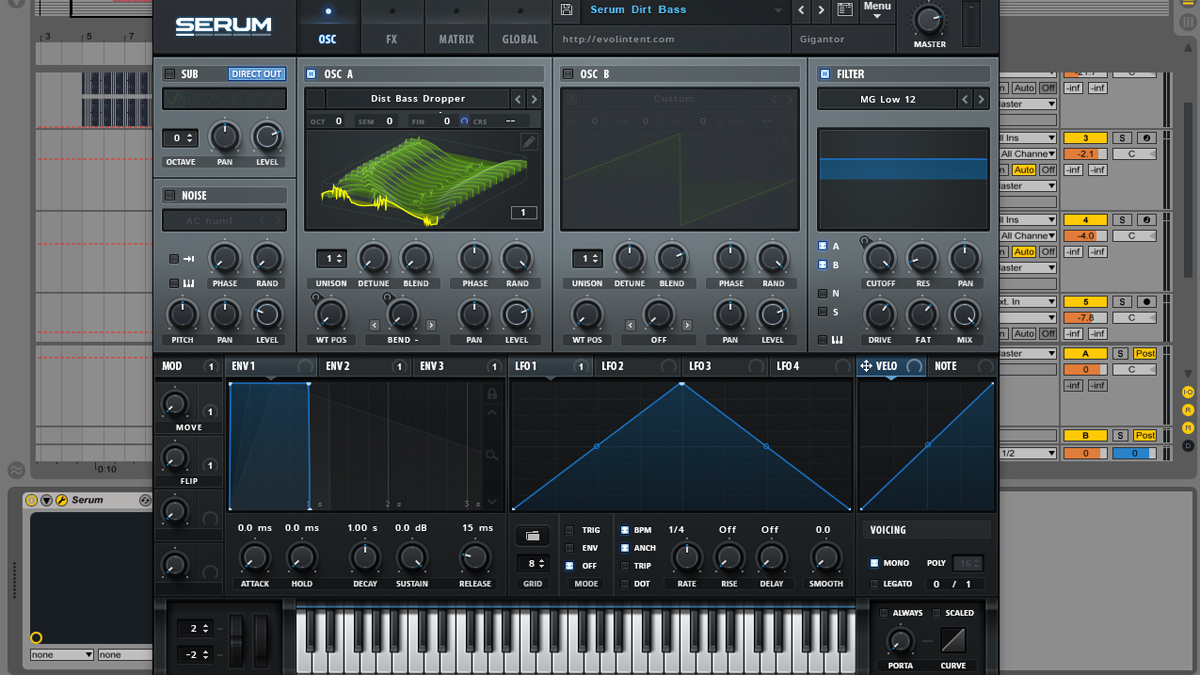
Step 5: Our synth lead plays over the drop, but we need to beef it up with a full-range bass sound. Copy the lead’s MIDI part onto a new instrument track and have it trigger Xfer Records Serum, a demo of which can be found at www.xferrecords.com. We’re using a variation on the Dist Bass Dropper preset, Serum Dirt Bass.fxp.
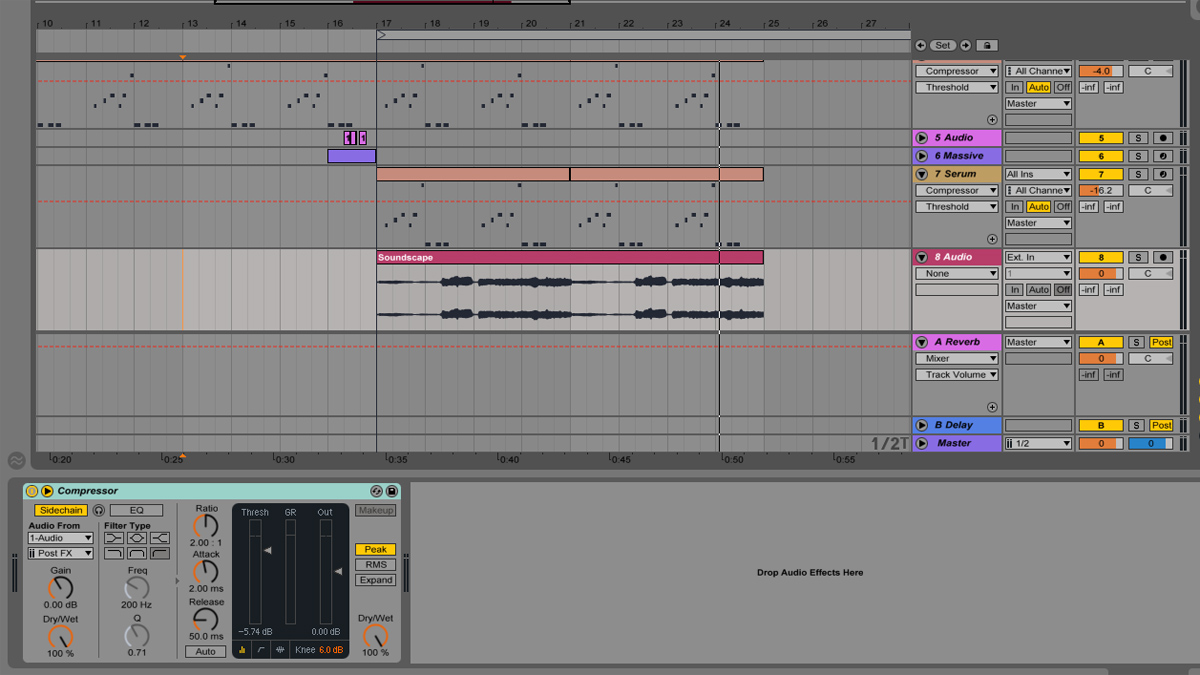
Step 6: We’ve got our beat and synth lines; now it’s time for some authentic Paleo Bounce ambience. Drag Soundscape.wav and put it on a new audio track so that it plays on the drop. We want our beats to punch through the mix, so add a compressor effect with a trigger from the kick track on the hat, synth and soundscape tracks with subtle settings so the effect isn’t too obvious.
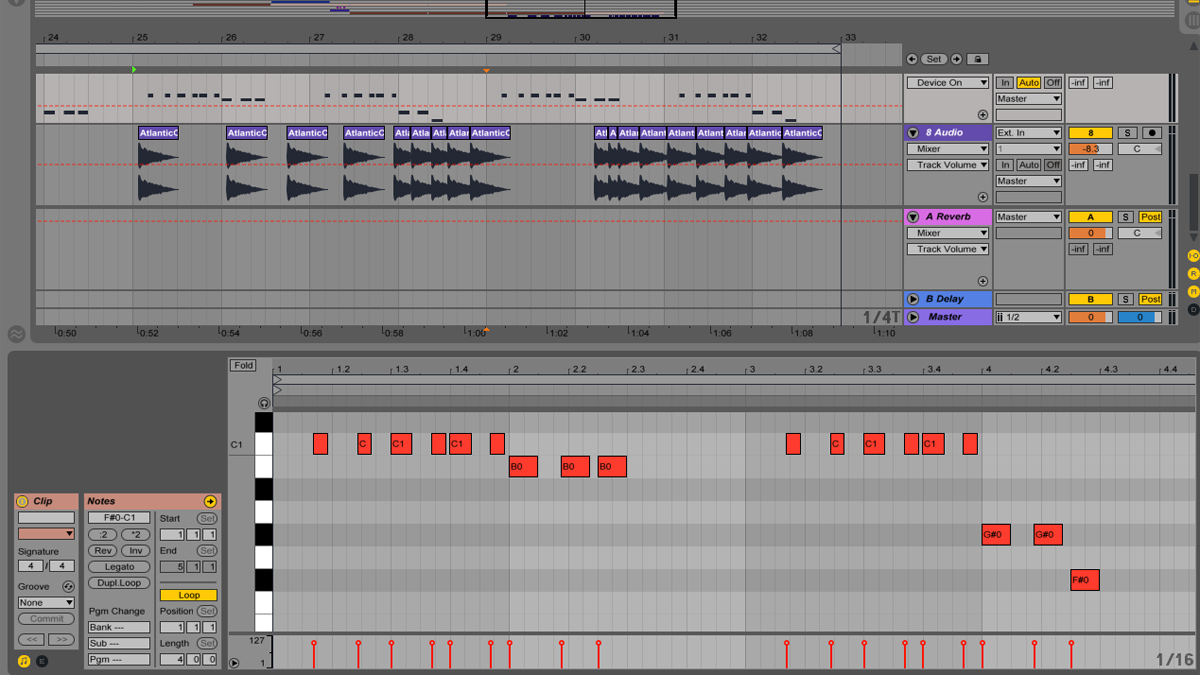
Step 7: Copy out the last eight bars of the arrangement, and delete the MIDI on the lead and bass tracks. Replace the MIDI on the bass track with the pattern we’ve used here, which can be found in the download folder as Synth2.mid. Spice up this section with Crash Cymbal.wav playing regularly to accent the funky groove.
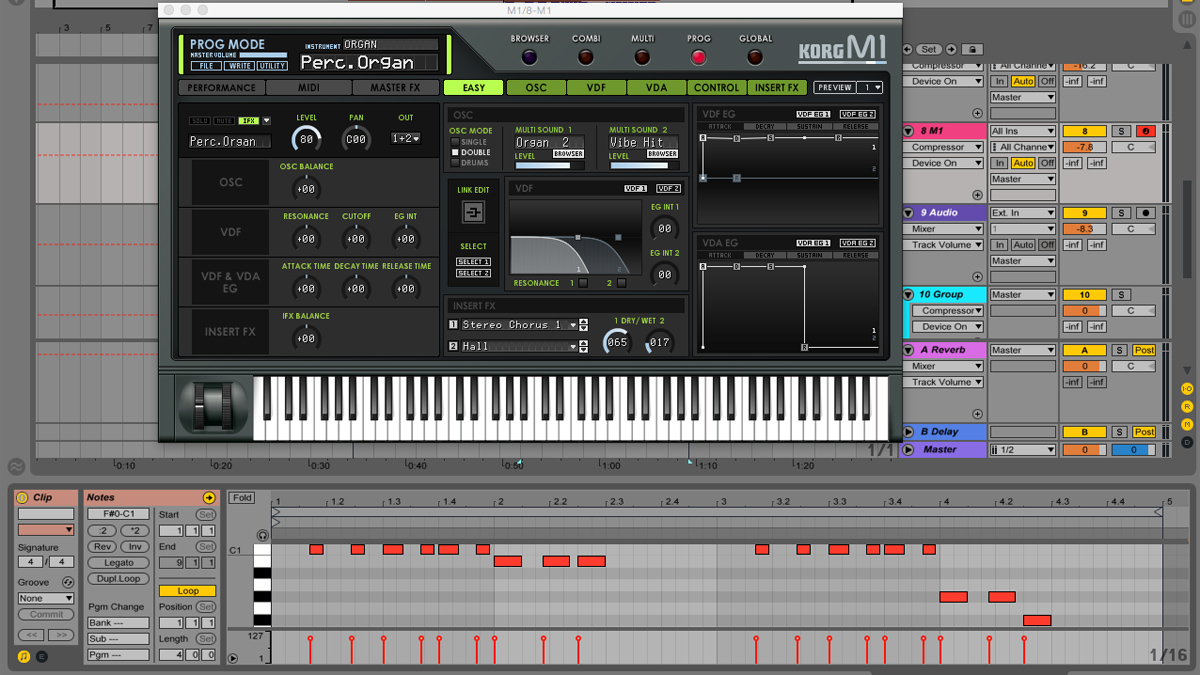
Step 8: For the final touch we need a cutting-edge organ sound, and in this case we’re using Korg’s M1 instrument, specifically the Perc.Organ program from the synth’s organs section. Copy the second MIDI clip from the bassline track and pitch it up two octaves so that it plays in the correct range. Here’s the finished track: Paleo perfection!