Starting life as a primitive loop-triggering environment, Ableton Live has evolved into the most popular digital audio workstation (DAW) in the electronic music community, providing producers and performers of dance music with a streamlined platform to experiment with loop-based arrangements, without the bloat of legacy features found in older DAWs.
However, despite its undeniable power, unleashing Live’s full creative potential requires a certain amount of dedication and practice. Its specific workflow and approach can seem confusing at first glance, and requires a shift in thinking - especially if you’re used to more traditional music-making environments.
Whether you’re a complete newbie to music production, or you’re migrating from another DAW and would like to get up to speed with Live’s unique workflow, we’re going to walk you through the ins and outs of this popular music production software from the ground up via a series of tutorials aimed squarely at the Ableton Live beginner. If you don’t already own Live, go grab the fully-functional 30-day demo from the Ableton website.
In this step-by-step walkthrough, we’re going to take a look at Live’s two main workspaces: the grid-based, non-linear sketchpad that is the Session View, and the more traditional left-to-right Arrangement View. They can be confusing to work with at first, but understanding exactly how they operate - both individually and in tandem - really is the key to mastering music composition in Live.

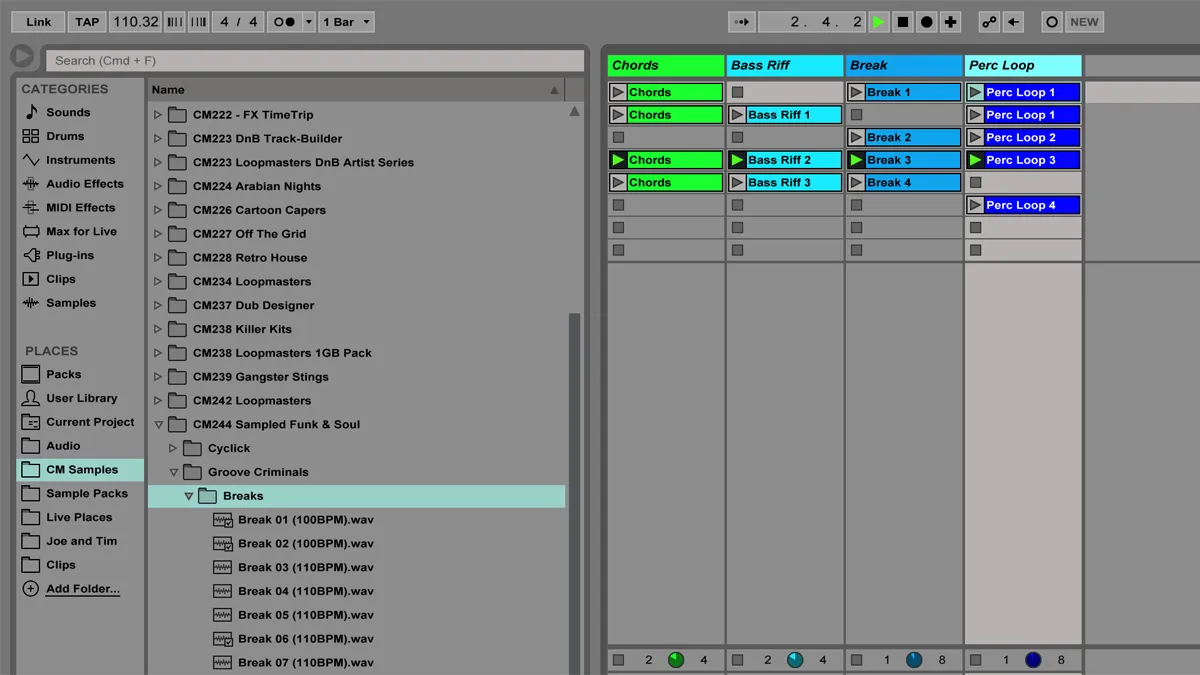
Step 1: When you open Live 9 for the first time, you’re presented with this grid-like interface: the Session View. Audio and MIDI tracks are laid out in here. As each individual track has its own volume fader, pan control, mute and solo buttons, the Session View can be thought of as a ‘mixer’ area. That’s not all it’s for, though…
Step 2: The Session View is best known for its non-linear approach to music creation. Each slot in the main grid can hold a clip (ie, an audio or MIDI loop), and a horizontal row of clips is called a scene. You can trigger different combinations of clips and scenes to build up musical ideas on the fly. Only one clip can play on a track at once.

Step 3: From here, punch the Tab key on your computer keyboard, or click the top-right Session/Arrangement View Selector button, and you’ll flick over to the Arrangement View: a ‘linear’ environment where you can arrange audio and MIDI clips from left to right on the timeline. The exact same tracks from the Session View are mirrored down the right-hand side.

Step 4: To avoid confusion, remember that the exact same tracks are represented in both the Session and Arrangement Views - add a track in one View, and you’ll see it in the other, too. On a very basic level, you can simply drag individual clips from the Session View, head over to Arrangement View, then drop these clips straight onto a track - or vice versa.

Step 5: To further understand the relationship between the Session and Arrangement Views, think of the Session View as a ‘sketchpad’ for jamming and experimenting with combinations of clips and scenes; you can then record these ideas onto the Arrangement View and refine this more fixed structure. Let’s see how it’s done…

Step 6: Here’s a bunch of audio and MIDI clips dotted around the Session View. After toggling Record (the circle icon in the top Transport bar), we’ll fire off different clips and scenes to create a live arrangement. Tab over to the Arrangement View during recording, and you’ll see that we’re recording our clips into their respective tracks here.

Step 7: Although Live captured our recorded combos of clips directly onto the Arrangement View, you’ll notice that they’re all greyed out; and if we trigger playback, Live keeps playing our clips in the Session View. This is because clips playing in the Session View always take priority over Arrangement View playback…

Step 8: So, to instantly play all clips that are laid out on the Arrangement View’s timeline, toggle the small orange Back To Arrangement button, found in both the Session and Arrangement Views. Or, if you want to prioritise Arrangement View playback for only some tracks, click your chosen track’s individual Back To Arrangement button (its grey triangle).

Step 9: Now we can hit the spacebar to play back our arrangement exactly as we performed it. From here, we can further edit our track’s structure on the Arrangement View’s timeline by adding, deleting and moving clips.

Step 10: Remember we said that you can only play one clip per track at a time? Well, this also applies when working back and forth between Session and Arrangement Views. For example, we’ll flip to the Session View and trigger a load of clips again. Back in the Arrangement View, you’ll see that each track with a playing clip is now greyed out, letting us know that we’re listening to a clip playing in Session View. Repeat the process from step 8 to play Arrangement View tracks again.