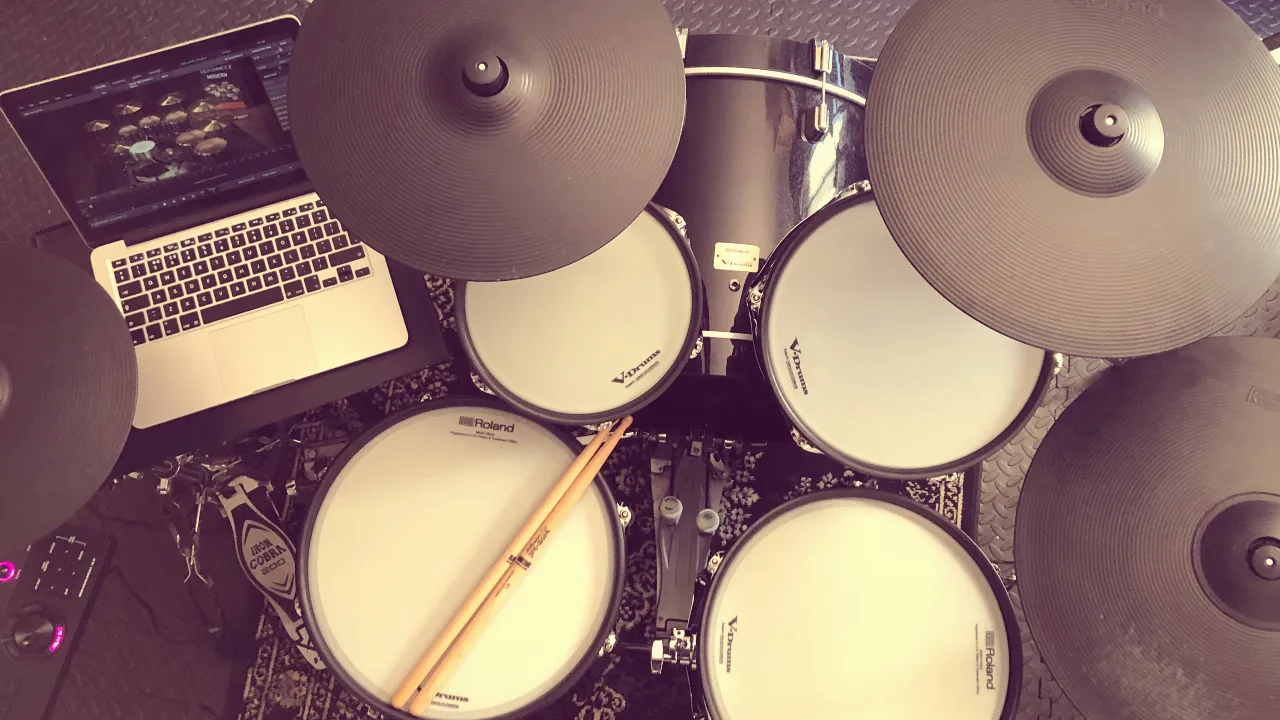
One of the main draws of an electronic drum set is the plug-and-play nature of their design. Fiddling around fitting drum heads and getting drums in tune can be a struggle with an acoustic kit, particularly if you're a new drummer who is setting up for the first time.
Despite the fact that e-drums can never go out of tune and always sound great, there are still plenty of steps that we can take to improve the stock sounds and overall playing experience of our e-kits. In our opinion, the better a kit sounds, the more you’ll want to play it. Plus, the more tweakability you have available to you, the closer you'll be able to get your kit to sound like the gear your hero's play.
This guide demonstrate how to make your electronic drum set sound better by shedding light on some of your module’s key features, as well as introducing you to the idea of triggering samples from an outside source.
Disclaimer: For all the examples here we're using a Roland TD-27 module. The module on your e-kit may not have all the editing functionality covered in this article, but most modern modules will come with a least some basic kit editing options to explore. If not, upgrading headphones or exploring VST instruments are two great places to start.
1. Create user kits
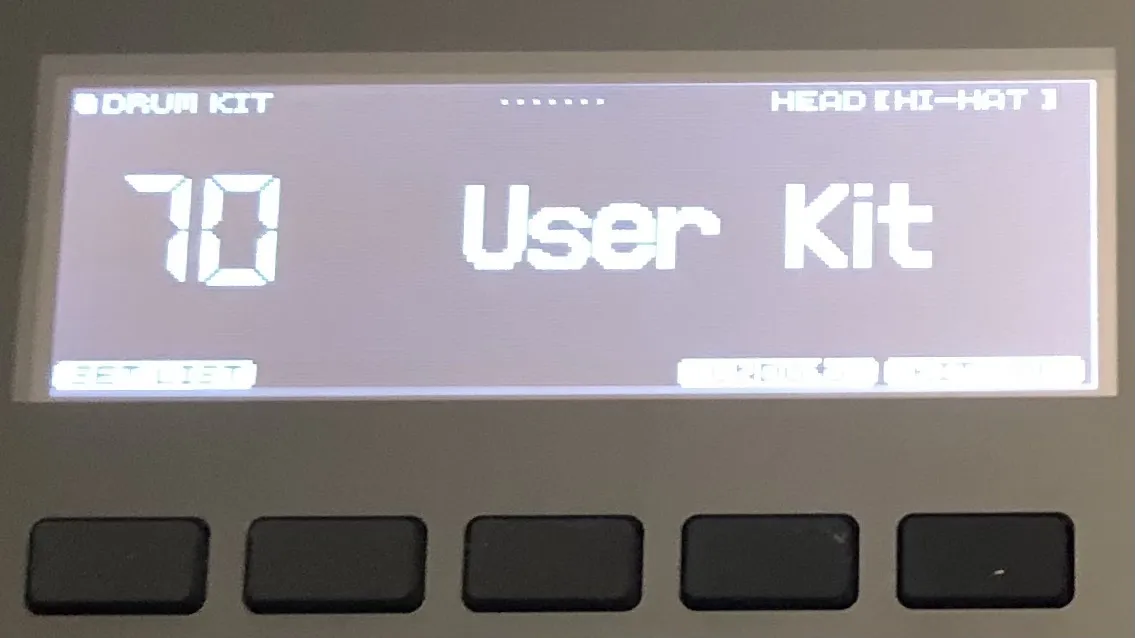
Most modules will have a number of factory programmed kits which generally range from 10 to 50. The individual instruments that make up these kits can be switched out easily which makes things like replacing a snare sound incredibly straightforward. Most modules also come with space for ‘user kits’ which offers a completely blank canvas for you to create totally custom kits.
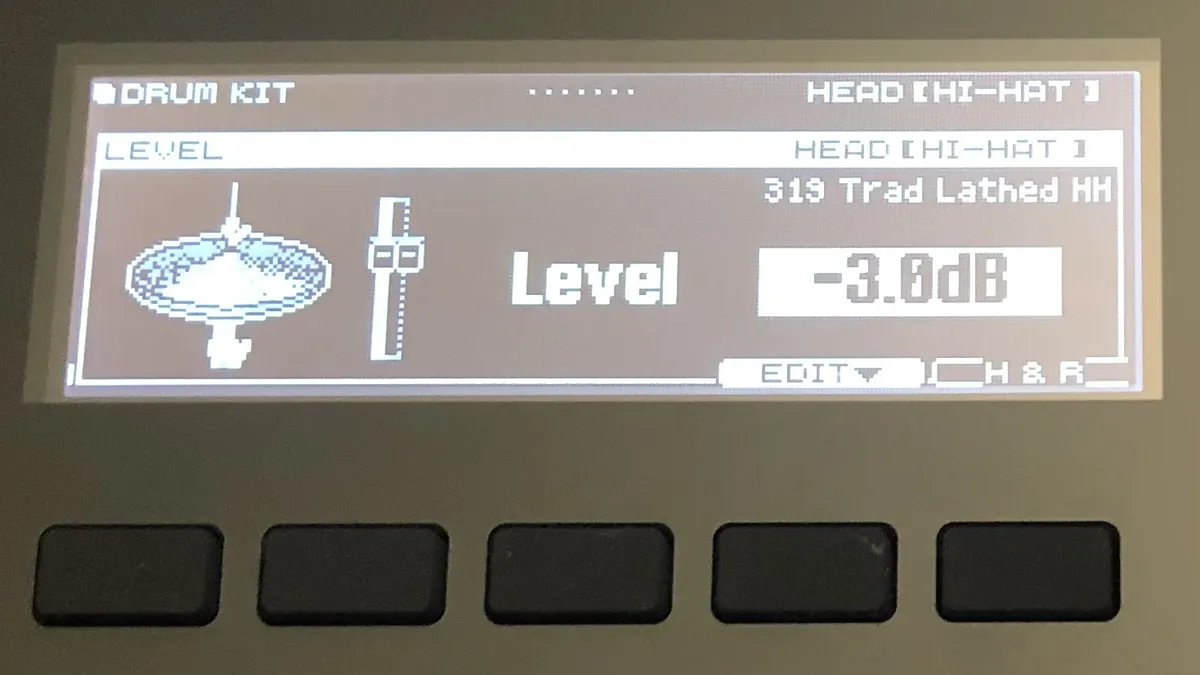
2. Mixing your drums
Some modules make mixing the individual elements of the kit more accessible than others, but it’s a fundamental part of editing a great sounding kit. The top-end modules will usually feature a physical mixer with individual faders for each instrument. For beginner electronic drum sets through to mid-range kits though the mixing will need to be done within the screen menus. The mix of a kit is of course subjective, but bringing the volume of the cymbals down is usually a good place to start.
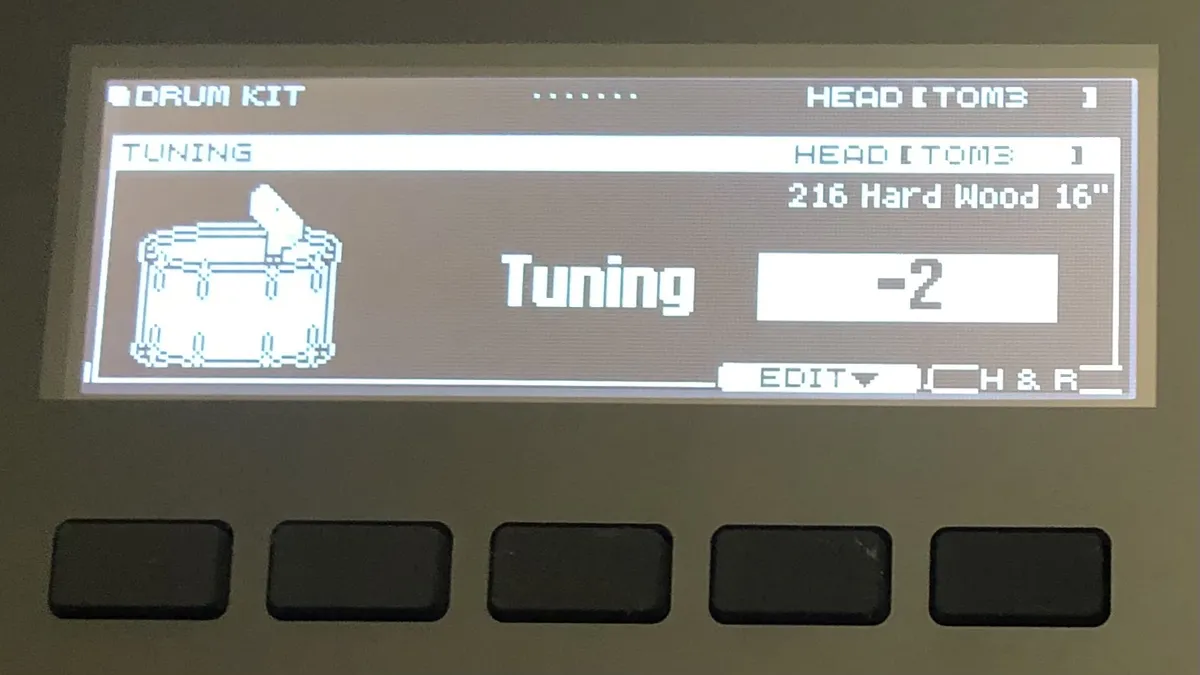
3. Tuning and muffling
These features enable the kind of tweaking that we would normally do with acoustic drums, but of course virtually. Controlling the pitch of our drums is enormous as it completely changes the overall characteristics of the drum sound - it’s like swapping out the drum for something completely different. We like cranking up the snare and tuning down the bass and floor toms a little. Some modules allow heads to be changed from clear to coated, or for the heads to be dampened or ‘muffled’. It is also possible to adjust snare strainer settings and introduce kit resonance (the sound of the toms resonating when you play the bass drum, for example).
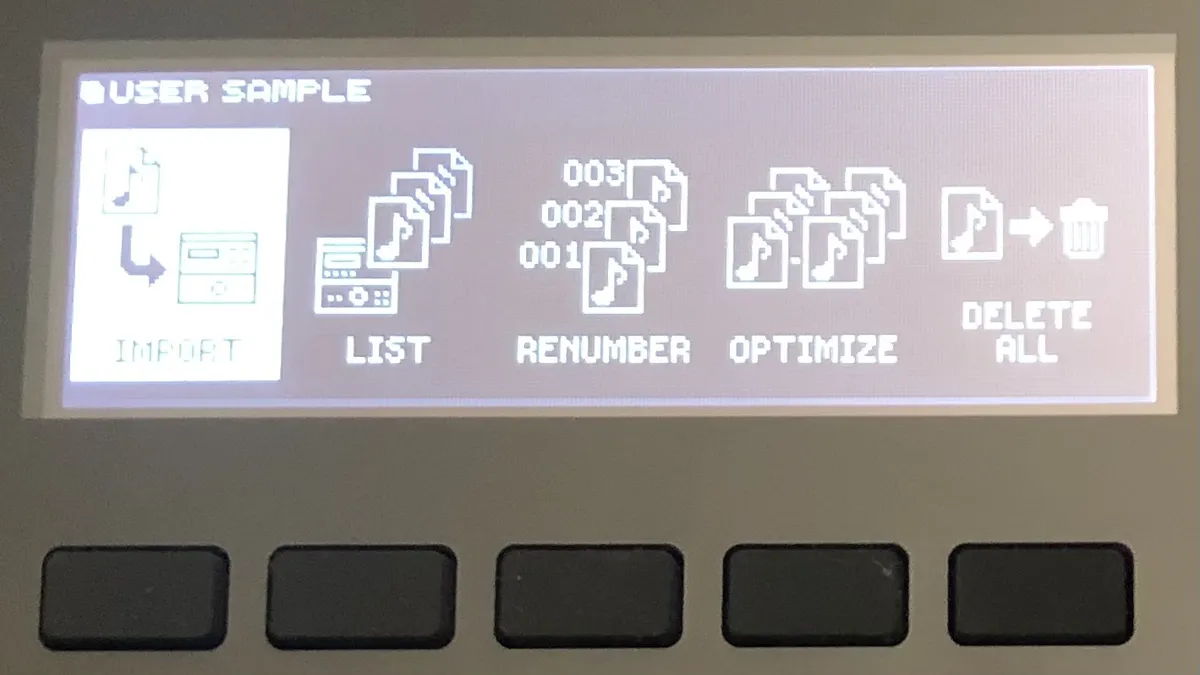
4. Adding user samples
In addition to likely hundreds of in-built sounds on your module, many also enable you to import sounds via SD card or USB memory. This limits the possibilities of kit creation only to your imagination as any sound you can find or create is at your disposal. If you’re unsure of where to start looking for sounds, try our own SampleRadar which has over 90,000 free audio samples available. It is worth noting that aside from the obvious upside of being able to use any drum sound possible, unfortunately importing samples does come with a potential downside - the factory module sounds will actually be split into individual samples for different velocity levels (depending on how hard the pad is struck). A tom-tom for example will trigger one sample when played quietly and another when played loudly (the amount of layers will increase the higher up the market you go) whereas a custom sample is just one layer that gets played back at various volumes.
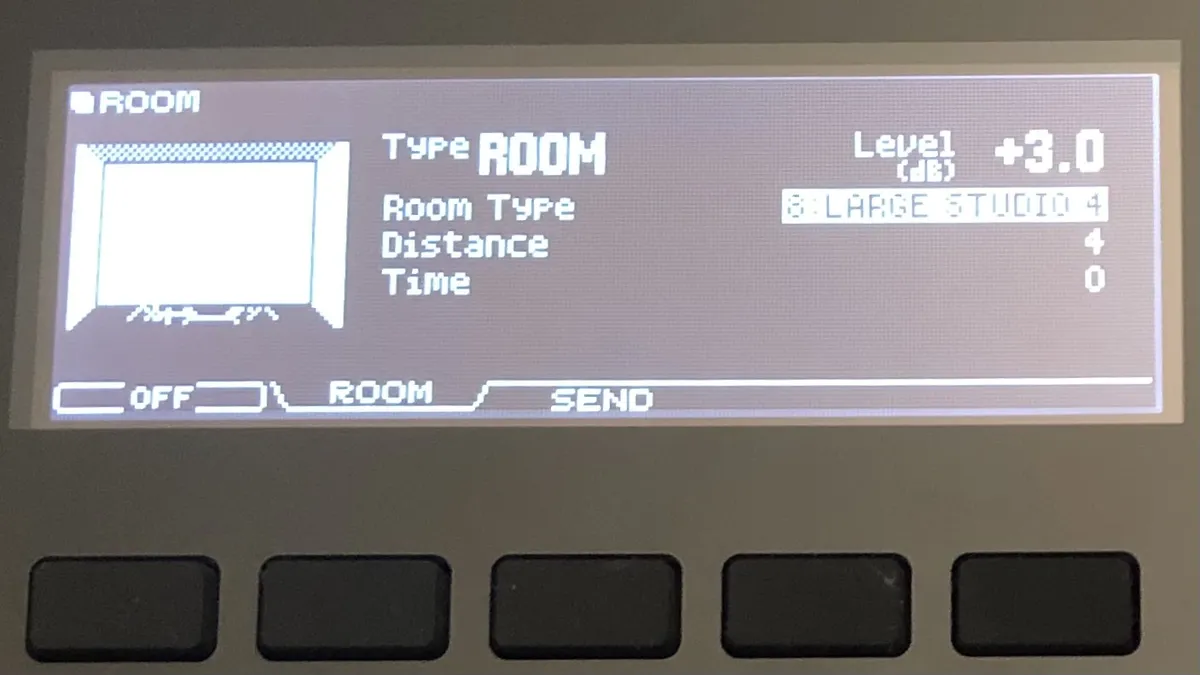
5. Adjusting ambience
In addition to changing the individual sounds that make up our kits, we can also virtually alter the acoustic properties of the room in which we play them. This might mean for instance selecting a small room, large room or hall which could then change to being constructed of brick, wood or glass. This functionality ultimately uses a mixture of effects to create this virtual space but makes for some unique and more interesting sounds. These ambient settings aren’t always switched on out of the box, which will result in a dry drum sound. Some might find this most useful for recording when adding effects in a DAW, but it isn’t necessarily pleasing to the ear when practicing or jamming to tracks.
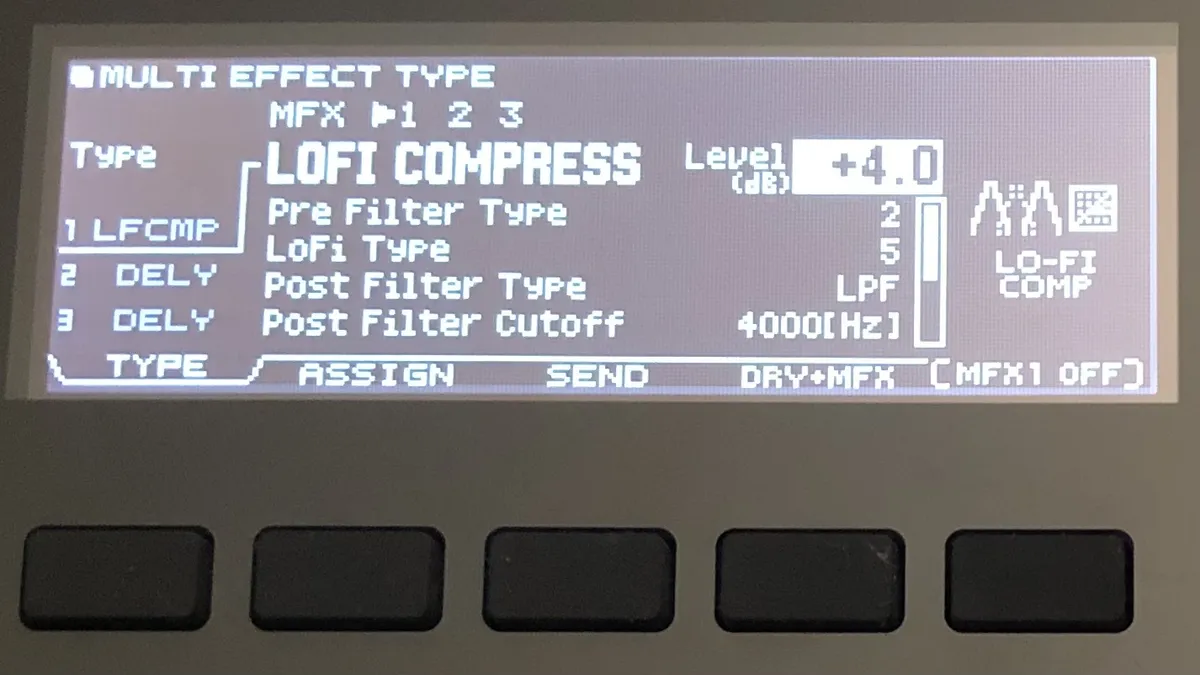
6. Adding effects
Many kit presets will use various effects out of the box, but tweaking these can make a dramatic difference to the overall sound. As drummers, reverb is very much our friend and will usually be the first port of call when dialling in effects. For those with specific ambience settings as discussed above, there shouldn’t be much need for any separate reverbs but it’s always fun to experiment none-the-less. Aside from our beloved reverb we can usually find effects like delay, flanger, distortion, chorus and more.
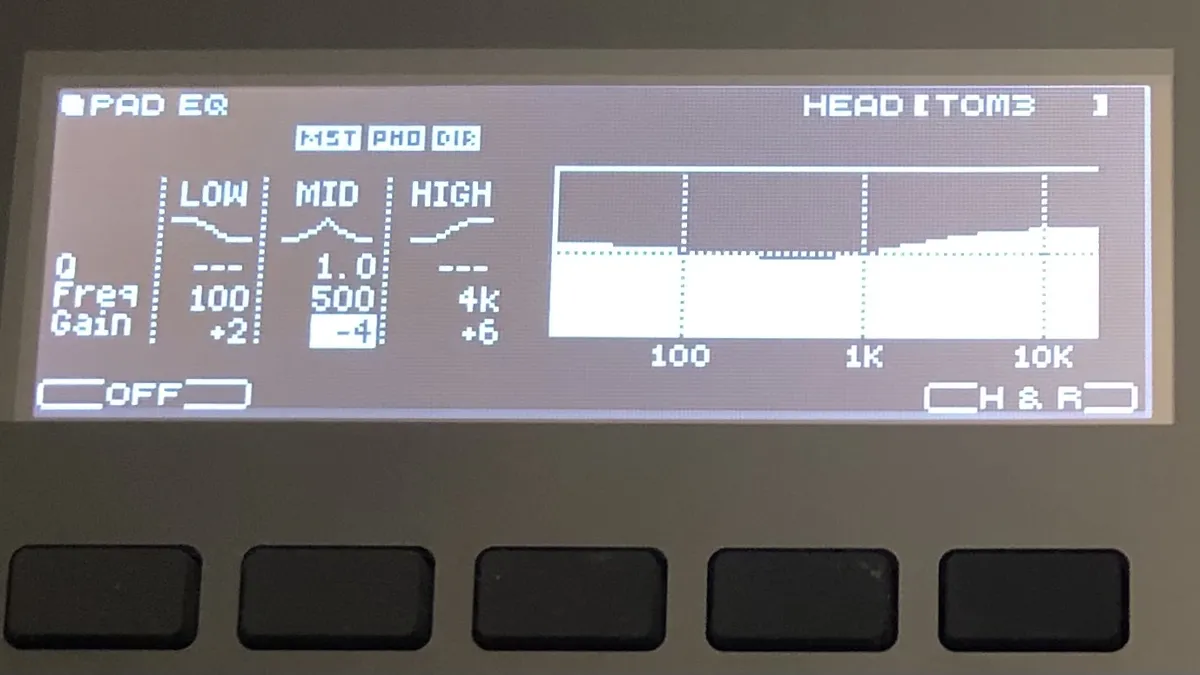
7. Shaping your sound with EQ
Equalisation allows the frequencies of each drum to be shaped. Let’s say you’ve found a bass drum sample that you absolutely love but it just lacks a little punch - all is well with a little boost of the low-end. More basic modules will only allow the entire kit to be equalised but this can still be worth doing to improve the response from your headphones or speakers.
8. Play with mic positioning
Virtual mic positioning is another method of changing a drum sound which is reserved for newer or high-end modules. This replicates the tonal difference that would occur when moving the mics closer or further away from the sound source such as a snare drum. It is also possible to dial in top and bottom mics or room mics. At this point there can be some overlap with the ambience settings discussed above.
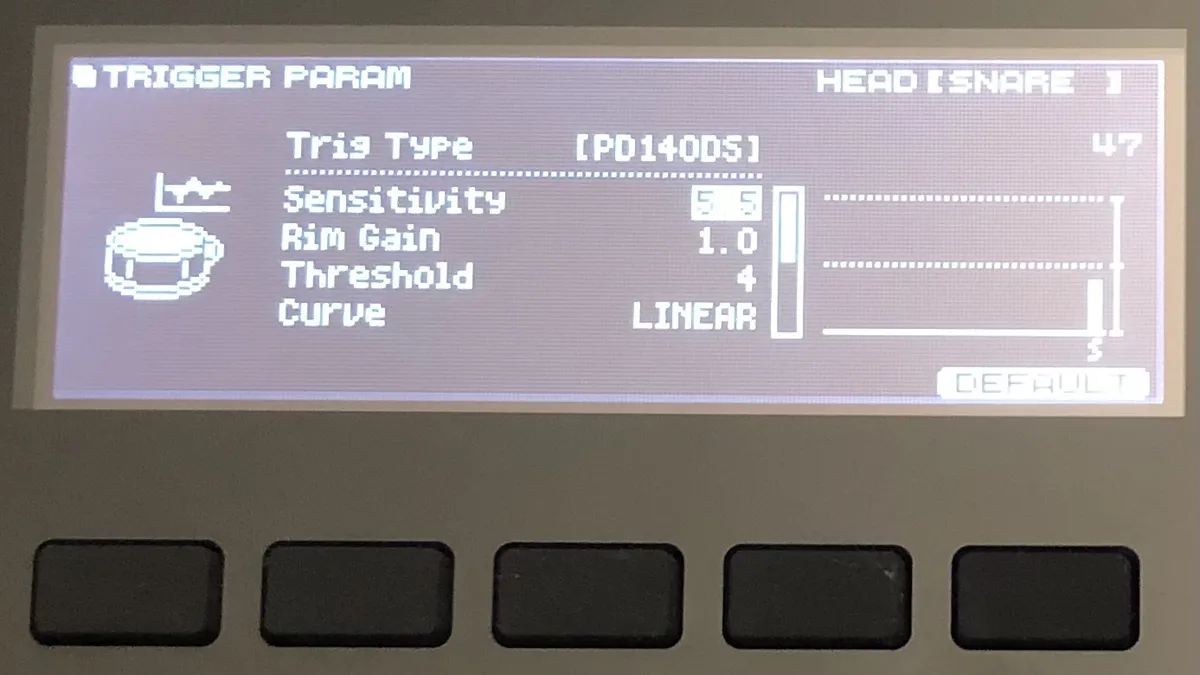
9. Tweaking pad sensitivity
Changing sensitivity settings won’t alter the sound of your kit per se, but it will make an enormous difference to the way an e-kit plays, unlocking its full dynamic capability. Out of the box the kits are often set up for harder hitters which means that a lighter player might never trigger the higher velocity samples. Conversely, if someone lacks the lighter touch then they will only hear those samples and not experience the nuance of the lighter sounds. Dialling in a suitable sensitivity level for each instrument is imperative to balancing the dynamic levels of the kit and making it sound more musical overall.
10. Upgrade your monitoring
Often the most simple solution to improving your e-drum sound is to invest some money into a new pair of drum-specific headphones or an electronic drum amp. This is arguably more important with a speaker system as a poor frequency response can be detrimental to the audio quality. Using something with a decent low-end response is key to replicating the thud of the bass drum or rumble of the toms. Connecting separate speakers for left and right will offer you stereo sound rather than mono from one speaker. Bear in mind when buying new headphones that wireless headphones are not suitable for e-drumming due to the delay caused.
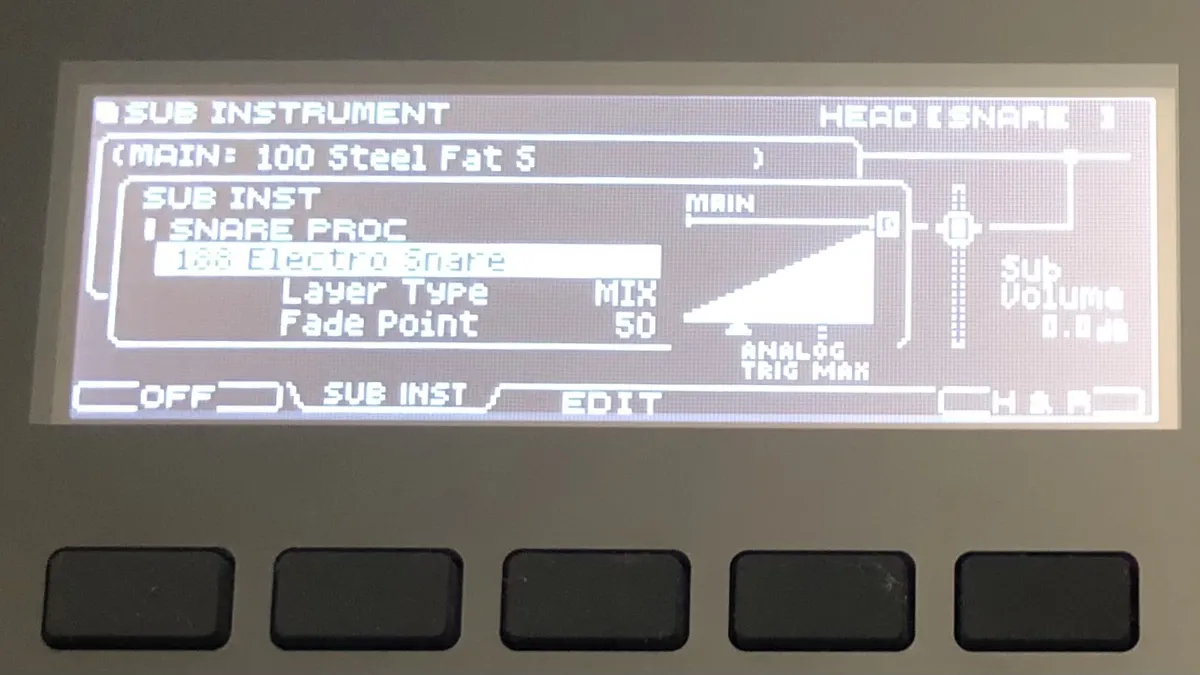
11. Sample layering
Some modules can accommodate a secondary sample or ‘B sample’ which can either be layered on top or set to switch at a certain velocity. This could be used for layering a tambourine over a hi-hat or perhaps blending a sub-drop with a bass drum. Velocity switching would allow a different sample to be played when the drum is struck hard compared with a more gentle stroke.
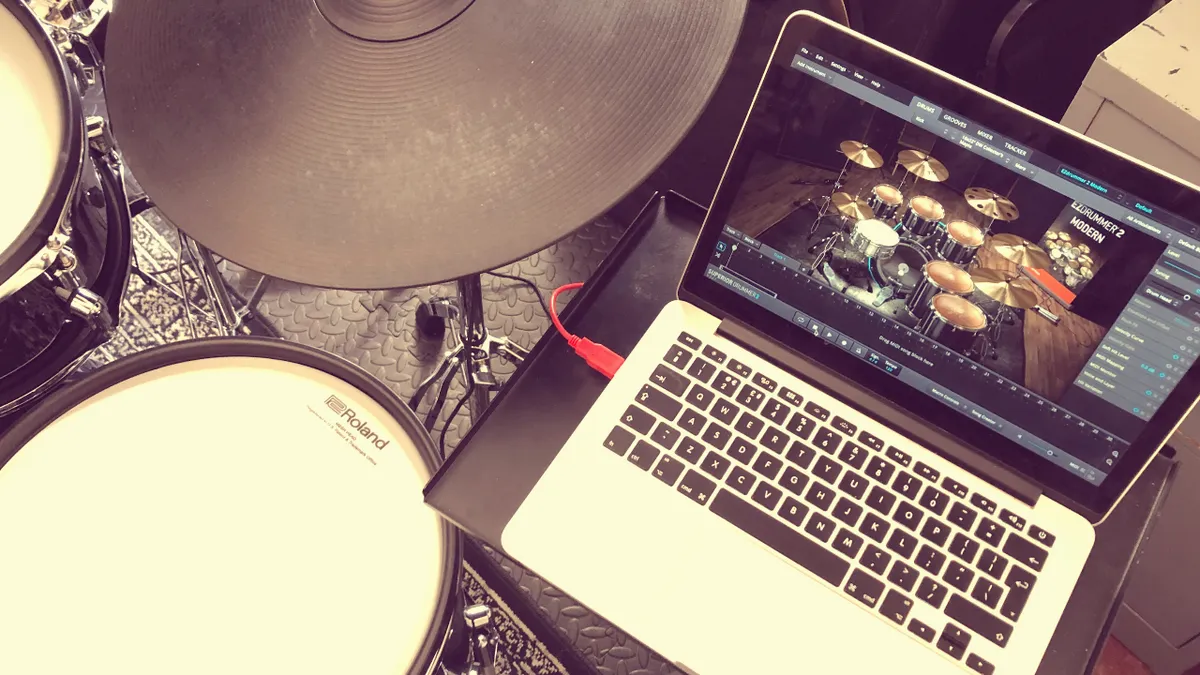
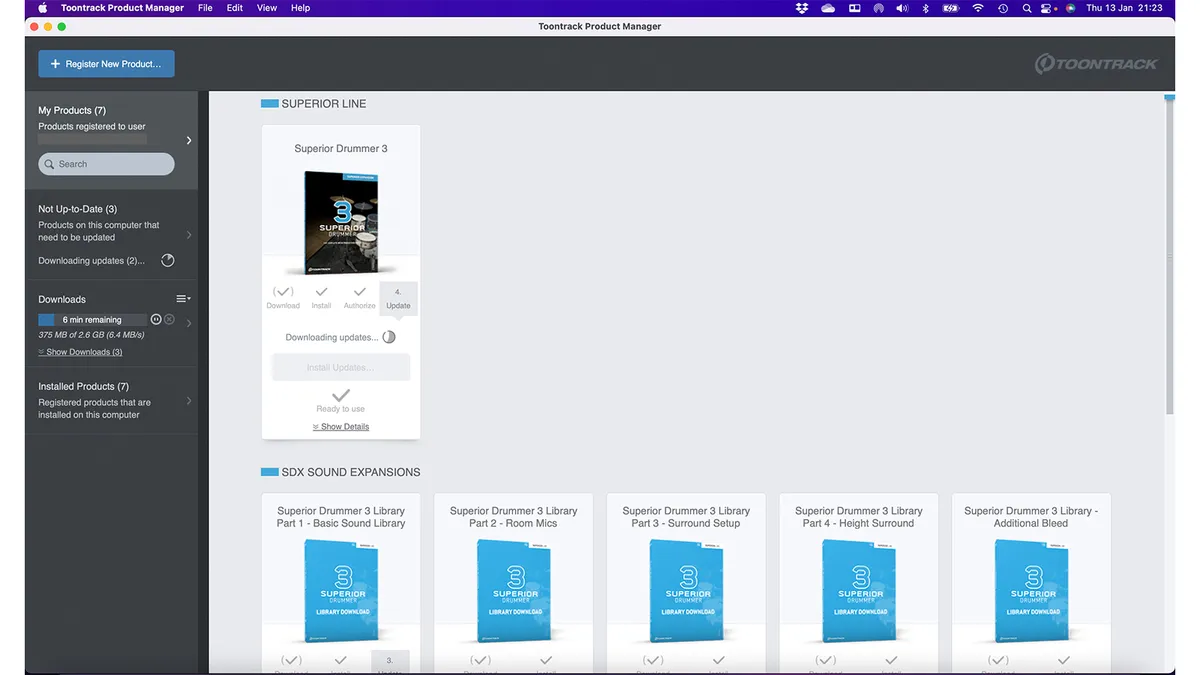
12. VST instruments
To be honest, we could write whole separate article on this subject alone. Virtual Studio Technology (VST) software offers a computer-based alternative to using any module sounds at all. Popular drum specific options include Superior Drummer, EZ Drummer, Steven Slate Drums and GetGood Drums which can each be used to sequence drum parts or perform them live using your kit via MIDI. The major advantage here is that all electronic drum kits have MIDI capabilities which means even the most entry-range kits can be used to trigger top quality, professionally recorded samples.
Here we will look step-by-step at how to achieve this setup:
1. Connect your module to your computer. The module’s USB connection can be used to transmit MIDI data, or alternatively your module may have dedicated MIDI ports. If you’re using the latter then you’ll need a MIDI-USB interface too.
2. Open MIDI settings in your module. This menu will allow you to check that the computer is recognising and communicating with the module via MIDI. You may need to install relevant hardware drivers for this to work.
3. Install your chosen VST along with its sound library packs. Here we’re using Superior Drummer 3 which has 230GB of sample data just in its core library alone.
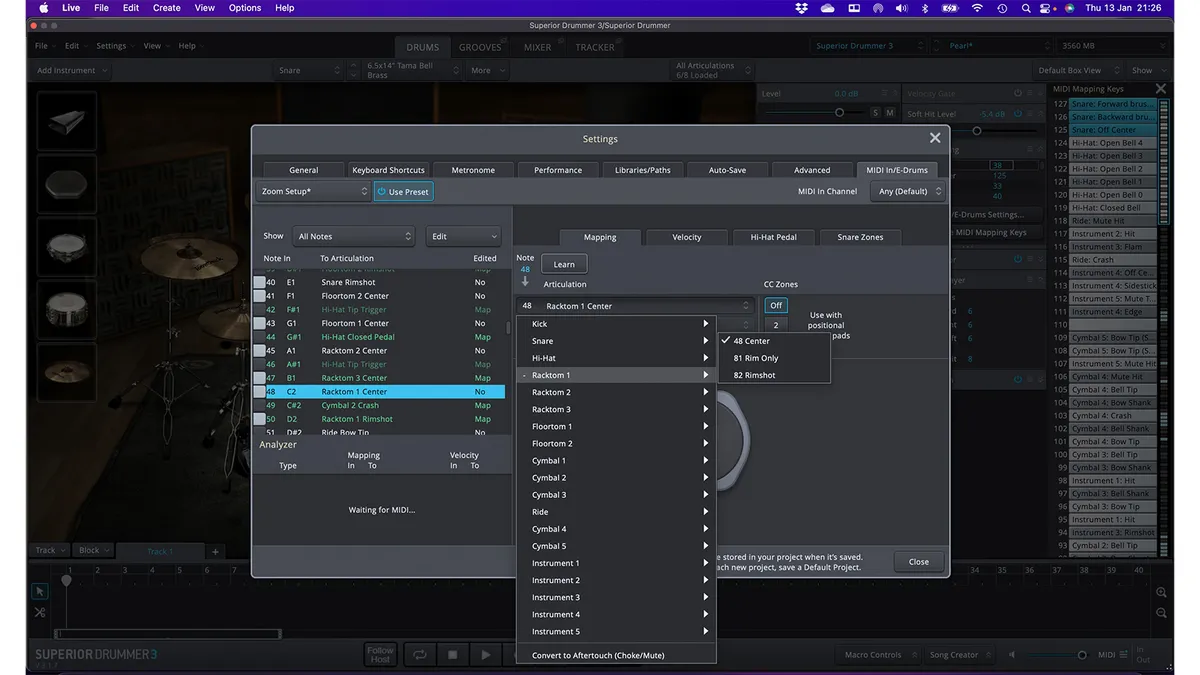
4. Map your MIDI. This part links each pad from your electronic kit to the relevant drum or cymbal on the VST. It looks daunting at first, but is as straight forward as striking a pad and selecting the corresponding instrument and articulation on screen.
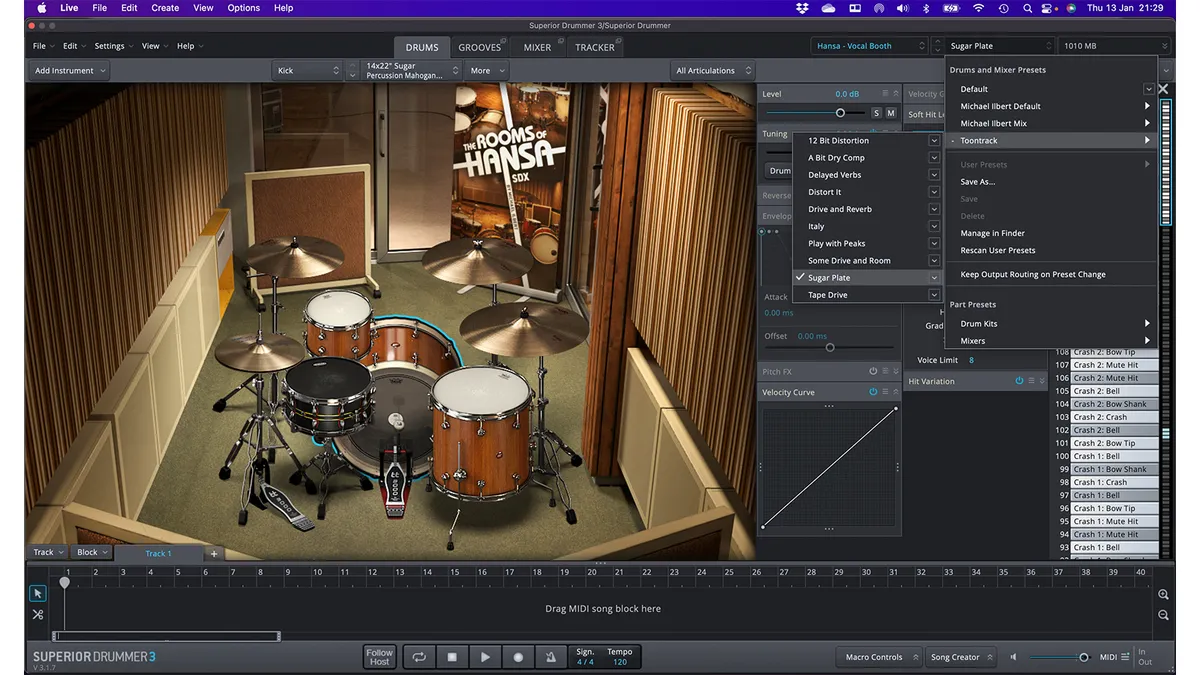
5. Select a drum kit preset. Here we are using the Rooms of Hanza pack for SD3 which ranges from live-sounding reverb-soaked rock kits laden with octobans and roto toms to minimalist four-piece kits recorded in a dry vocal booth.
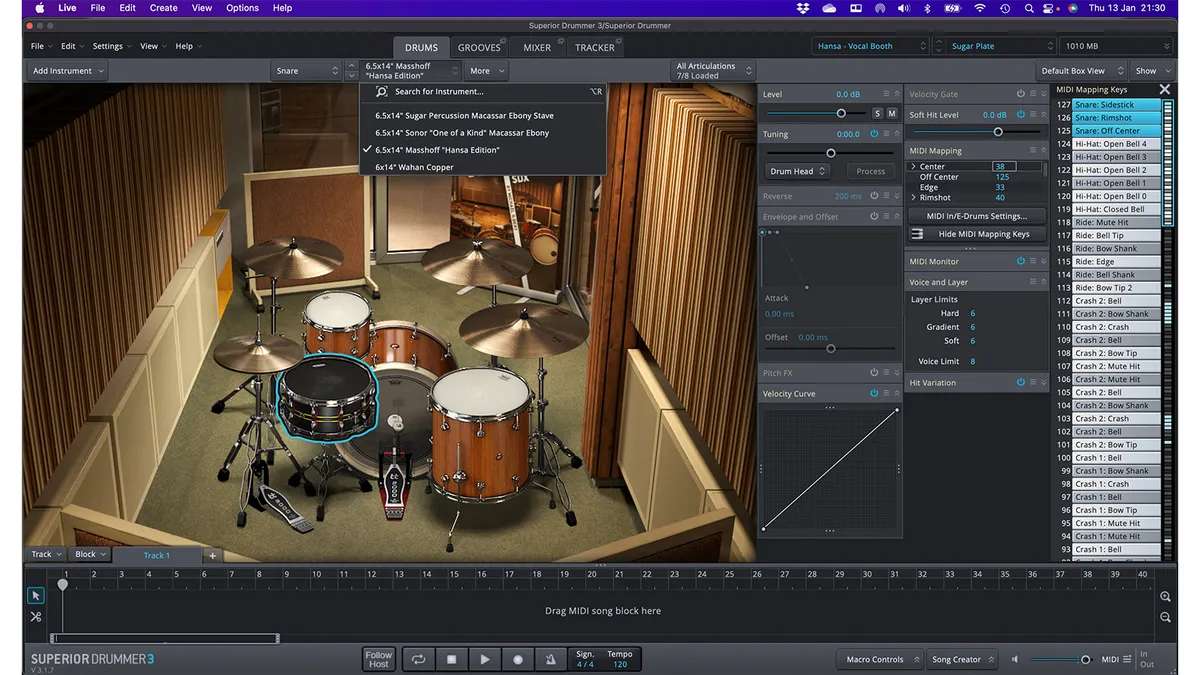
6. Swap out sounds. Much like we spoke about earlier, one of the best ways to build an awesome kit is to find a preset that you like and then start tweaking the sounds. Here, changing the snare is as simple as picking one from the dropdown menu.
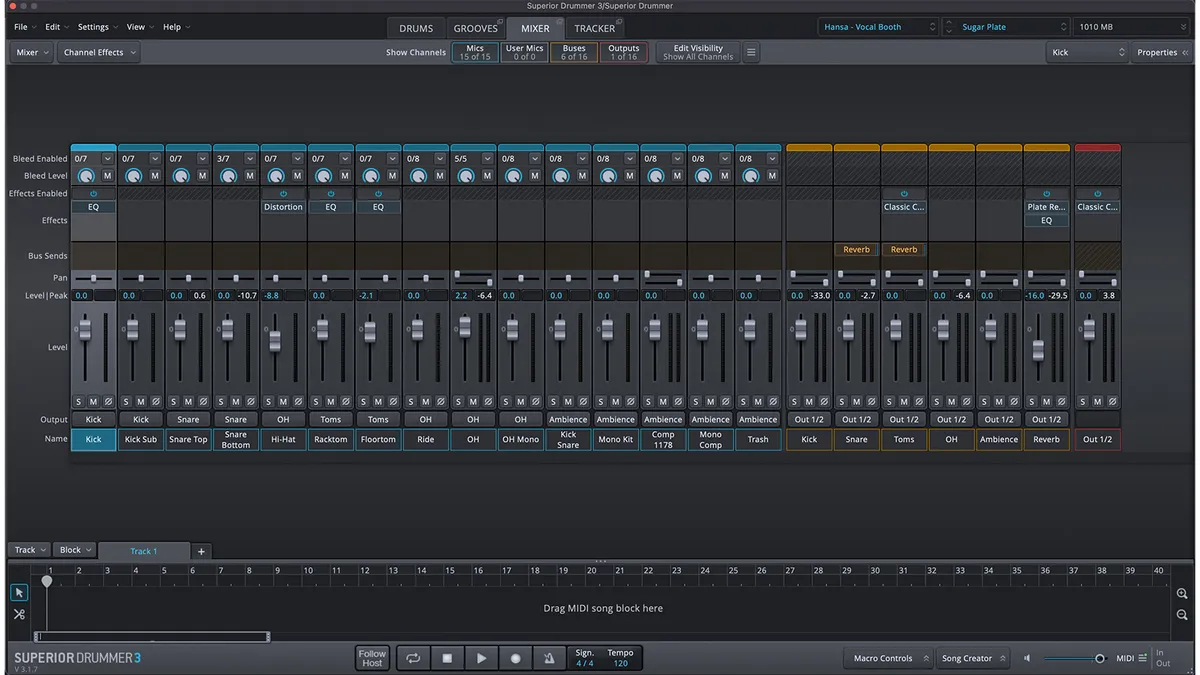
7. The mixer offers a detailed level of control over not only the mix of instruments but also their microphones and effects.