How to make a track in Ableton Live 11 Lite: finishing up your track
The final instalment of our Ableton Live 11 Lite mega-tutorial has landed
Want all the hottest music and gear news, reviews, deals, features and more, direct to your inbox? Sign up here.
You are now subscribed
Your newsletter sign-up was successful
Ableton Live is a DAW that needs no introduction, and its combination of performance and production features mean it’s as popular with performers and DJs as it is with creators.
Live 11 Lite is a cut-down version of Ableton Live, with all of the essential workflows, instruments and effects, but with limited track count, and for many years this has been bundled with apps and hardware products. This month, you can grab a free copy of Ableton Live 11 Lite with the latest issue of Computer Music Magazine.
To mark this momentous occasion and also to get you started using this fabulous software, we’ve put together a series of tutorials that run through everything you need to get acquainted with Ableton Live 11 Lite, so you can learn how to build a track from scratch.
Article continues belowOur tutorials are primarily for new users, but that said, we’ll also flag some of the new features you’ll find in Live 11 Lite, so even if you’ve used Live Lite before, there may be some things for you to learn here.
Finally, although Live 11 Lite is awesome software, there are more fully featured versions of Ableton Live available on Ableton's website. So, let’s get creating in Live 11 Lite!
If you want to start from the beginning of this tutorial, find the previous steps below:
- How to make a track in Ableton Live 11 Lite: set-up and overview
- How to make a track in Ableton Live 11 Lite: programming a beat in no time
- How to make a track in Ableton Live 11 Lite: creating super-fast beat variations and mixes
- How to make a track in Ableton Live 11 Lite: produce a brilliant bass line with automation
- How to make a track in Ableton Live 11 Lite: creating easy chords with MIDI effects
- How to make a track in Ableton Live 11 Lite: recording external audio and using Warp
- How to make a track in Ableton Live 11 Lite: using sampling to get the perfect vocal
- How to make a track in Ableton Live 11 Lite: using audio effects
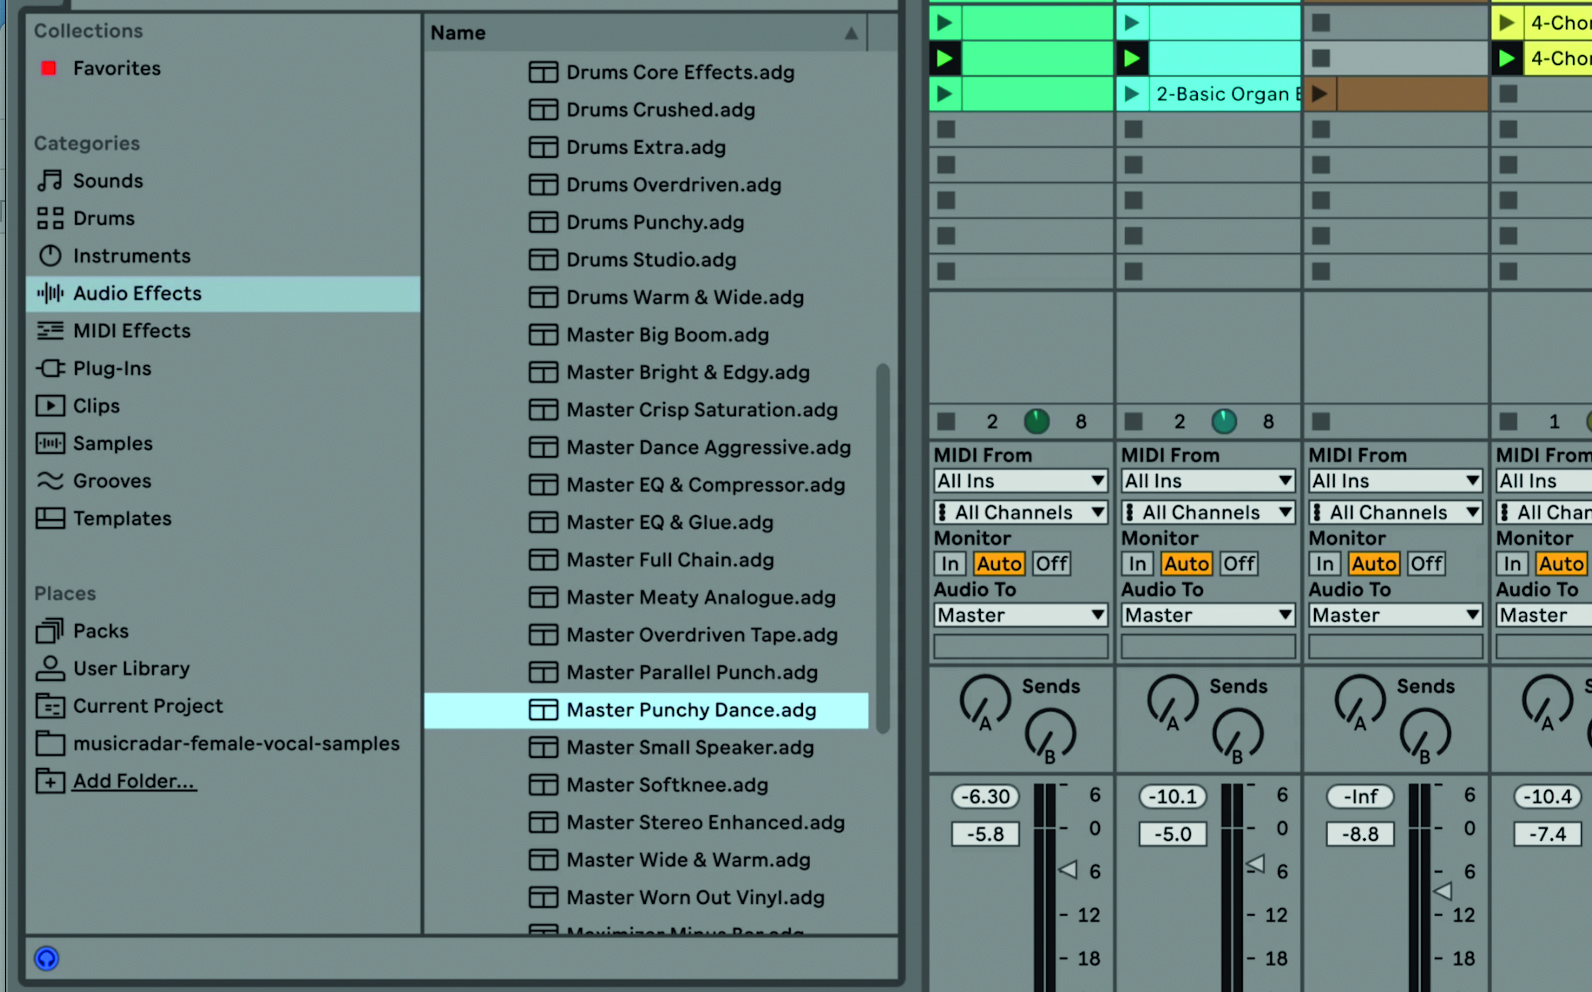
Step 1: At the final stage of our song production process, we can achieve a level of mastering in Ableton Live 11 Lite – where we make the track sound as professional as possible. Select the Mixing and Mastering effects folder.
Want all the hottest music and gear news, reviews, deals, features and more, direct to your inbox? Sign up here.
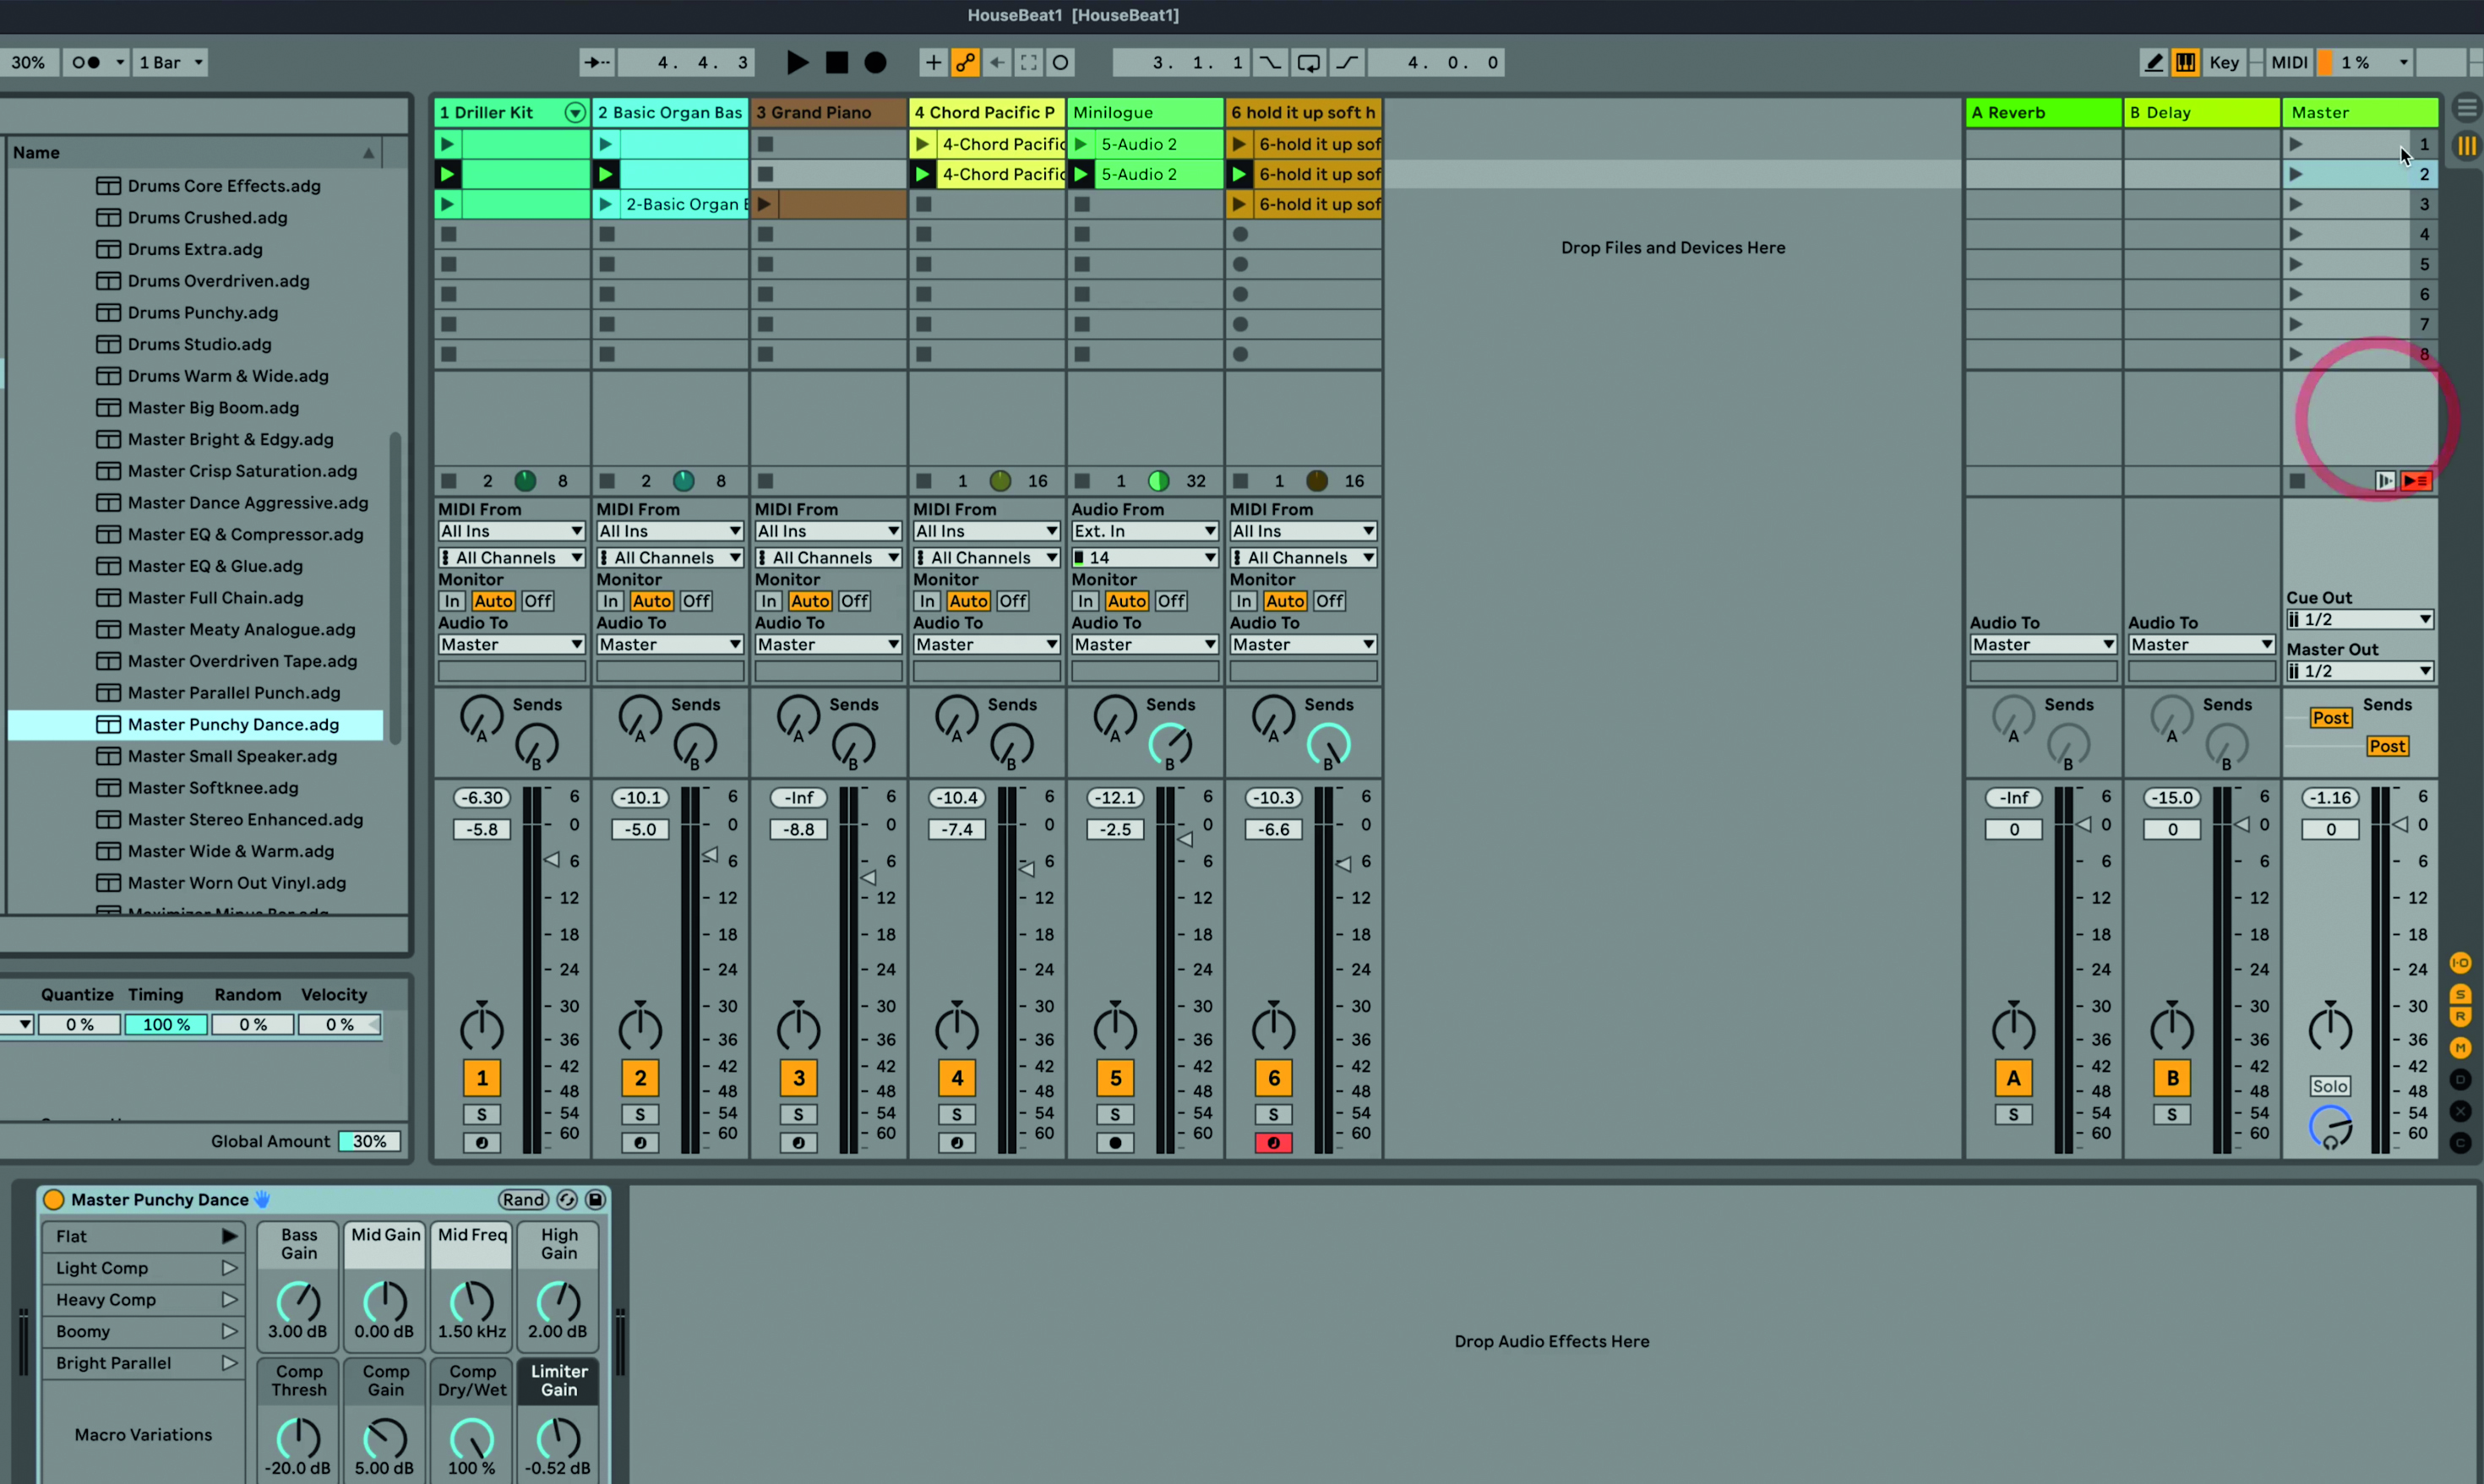
Step 2: As ever, Live 11 Lite does the work for you and there are a number of preset effects here that will do the job. Ours is a dance track so we’ll drag the effect Master Punch Dance onto our Master (output) channel. Turn the effect on and off to hear its impact on the track.
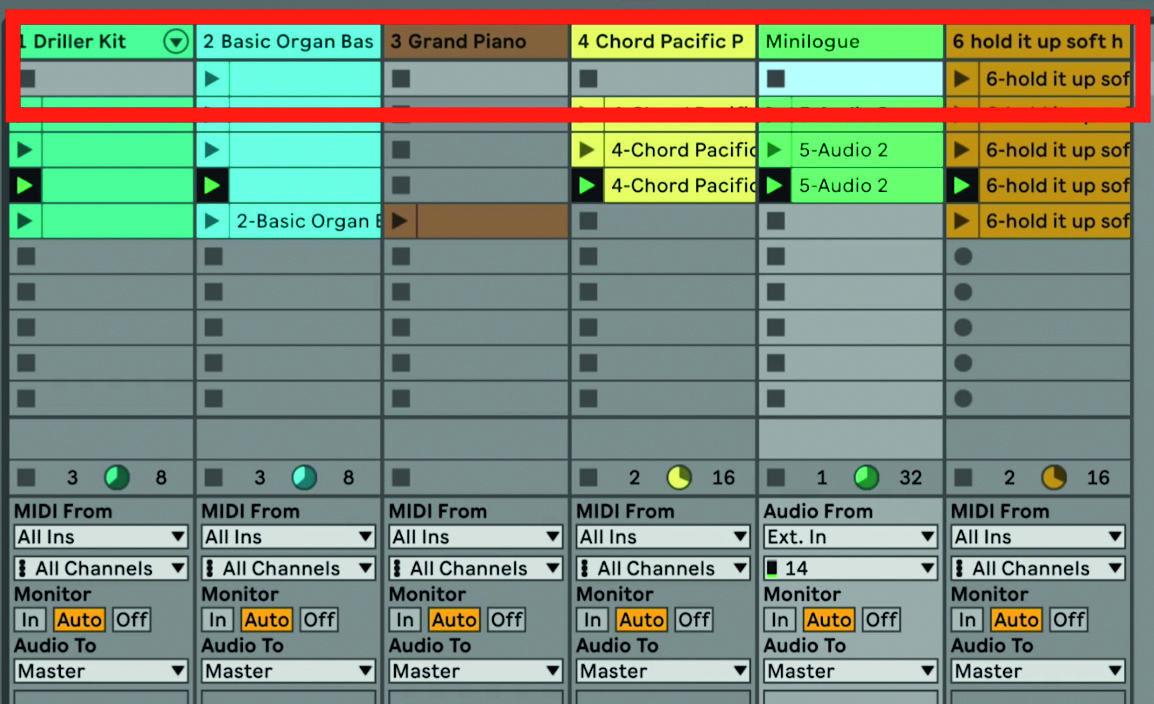
Step 3: Now we can start a basic song arrangement, which in Live is very easy because you simply trigger different scenes to build up a song. We’ll start by duplicating some clips to make bigger scenes and, starting at the top, delete clips so that the top scene only has the vocal clip playing.
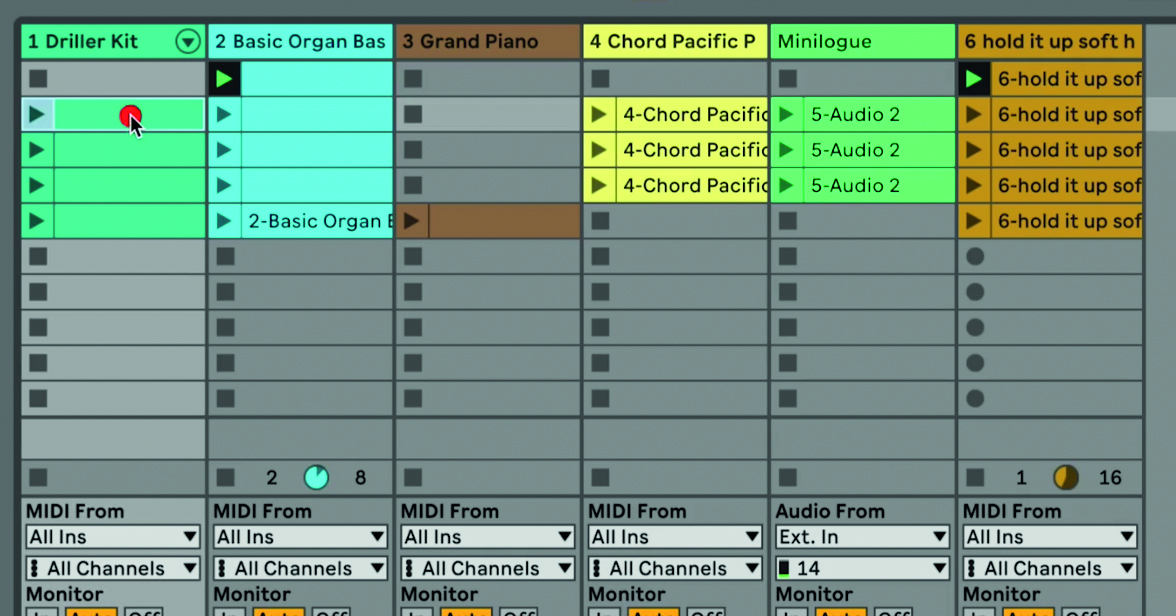
Step 4: As we go down the scenes we can delete or introduce clips, so we have added a bassline to the first scene, but are just about to delete the beats.
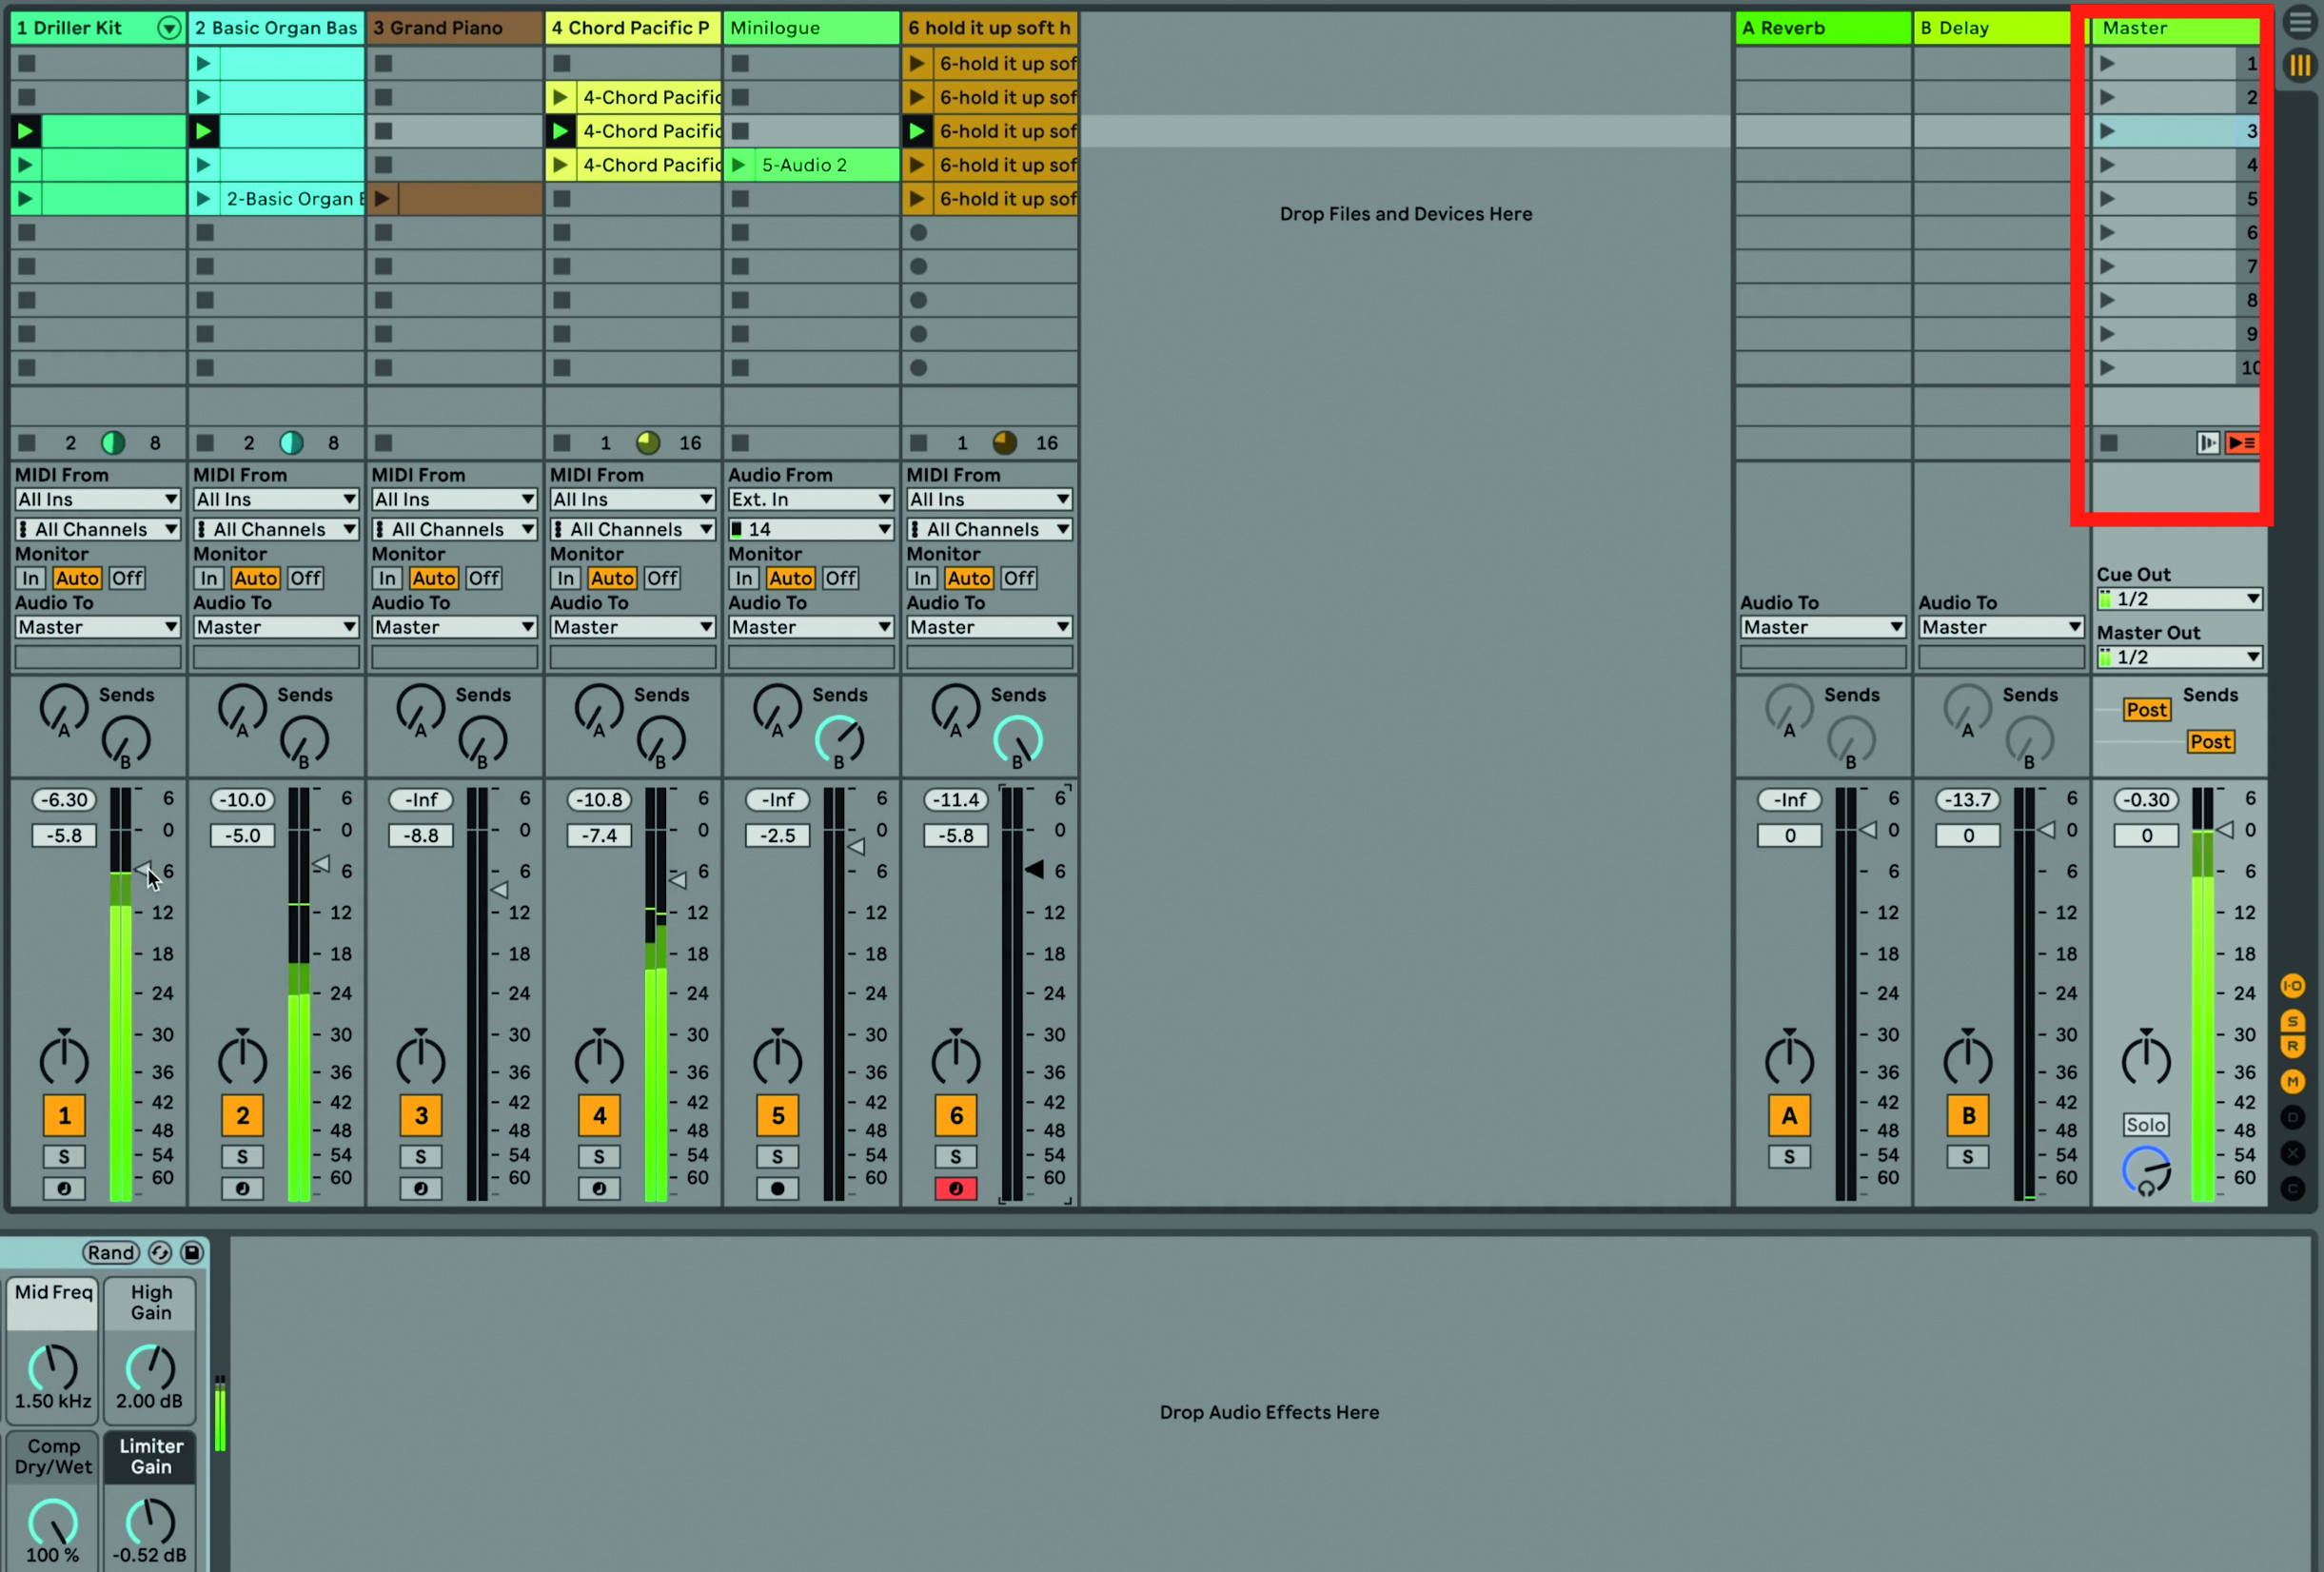
Step 5: Now, triggering the scenes using the Master track (right) from top to bottom, creates a song structure. We can record these and the resulting arrangement will be recorded into the Arrange View.
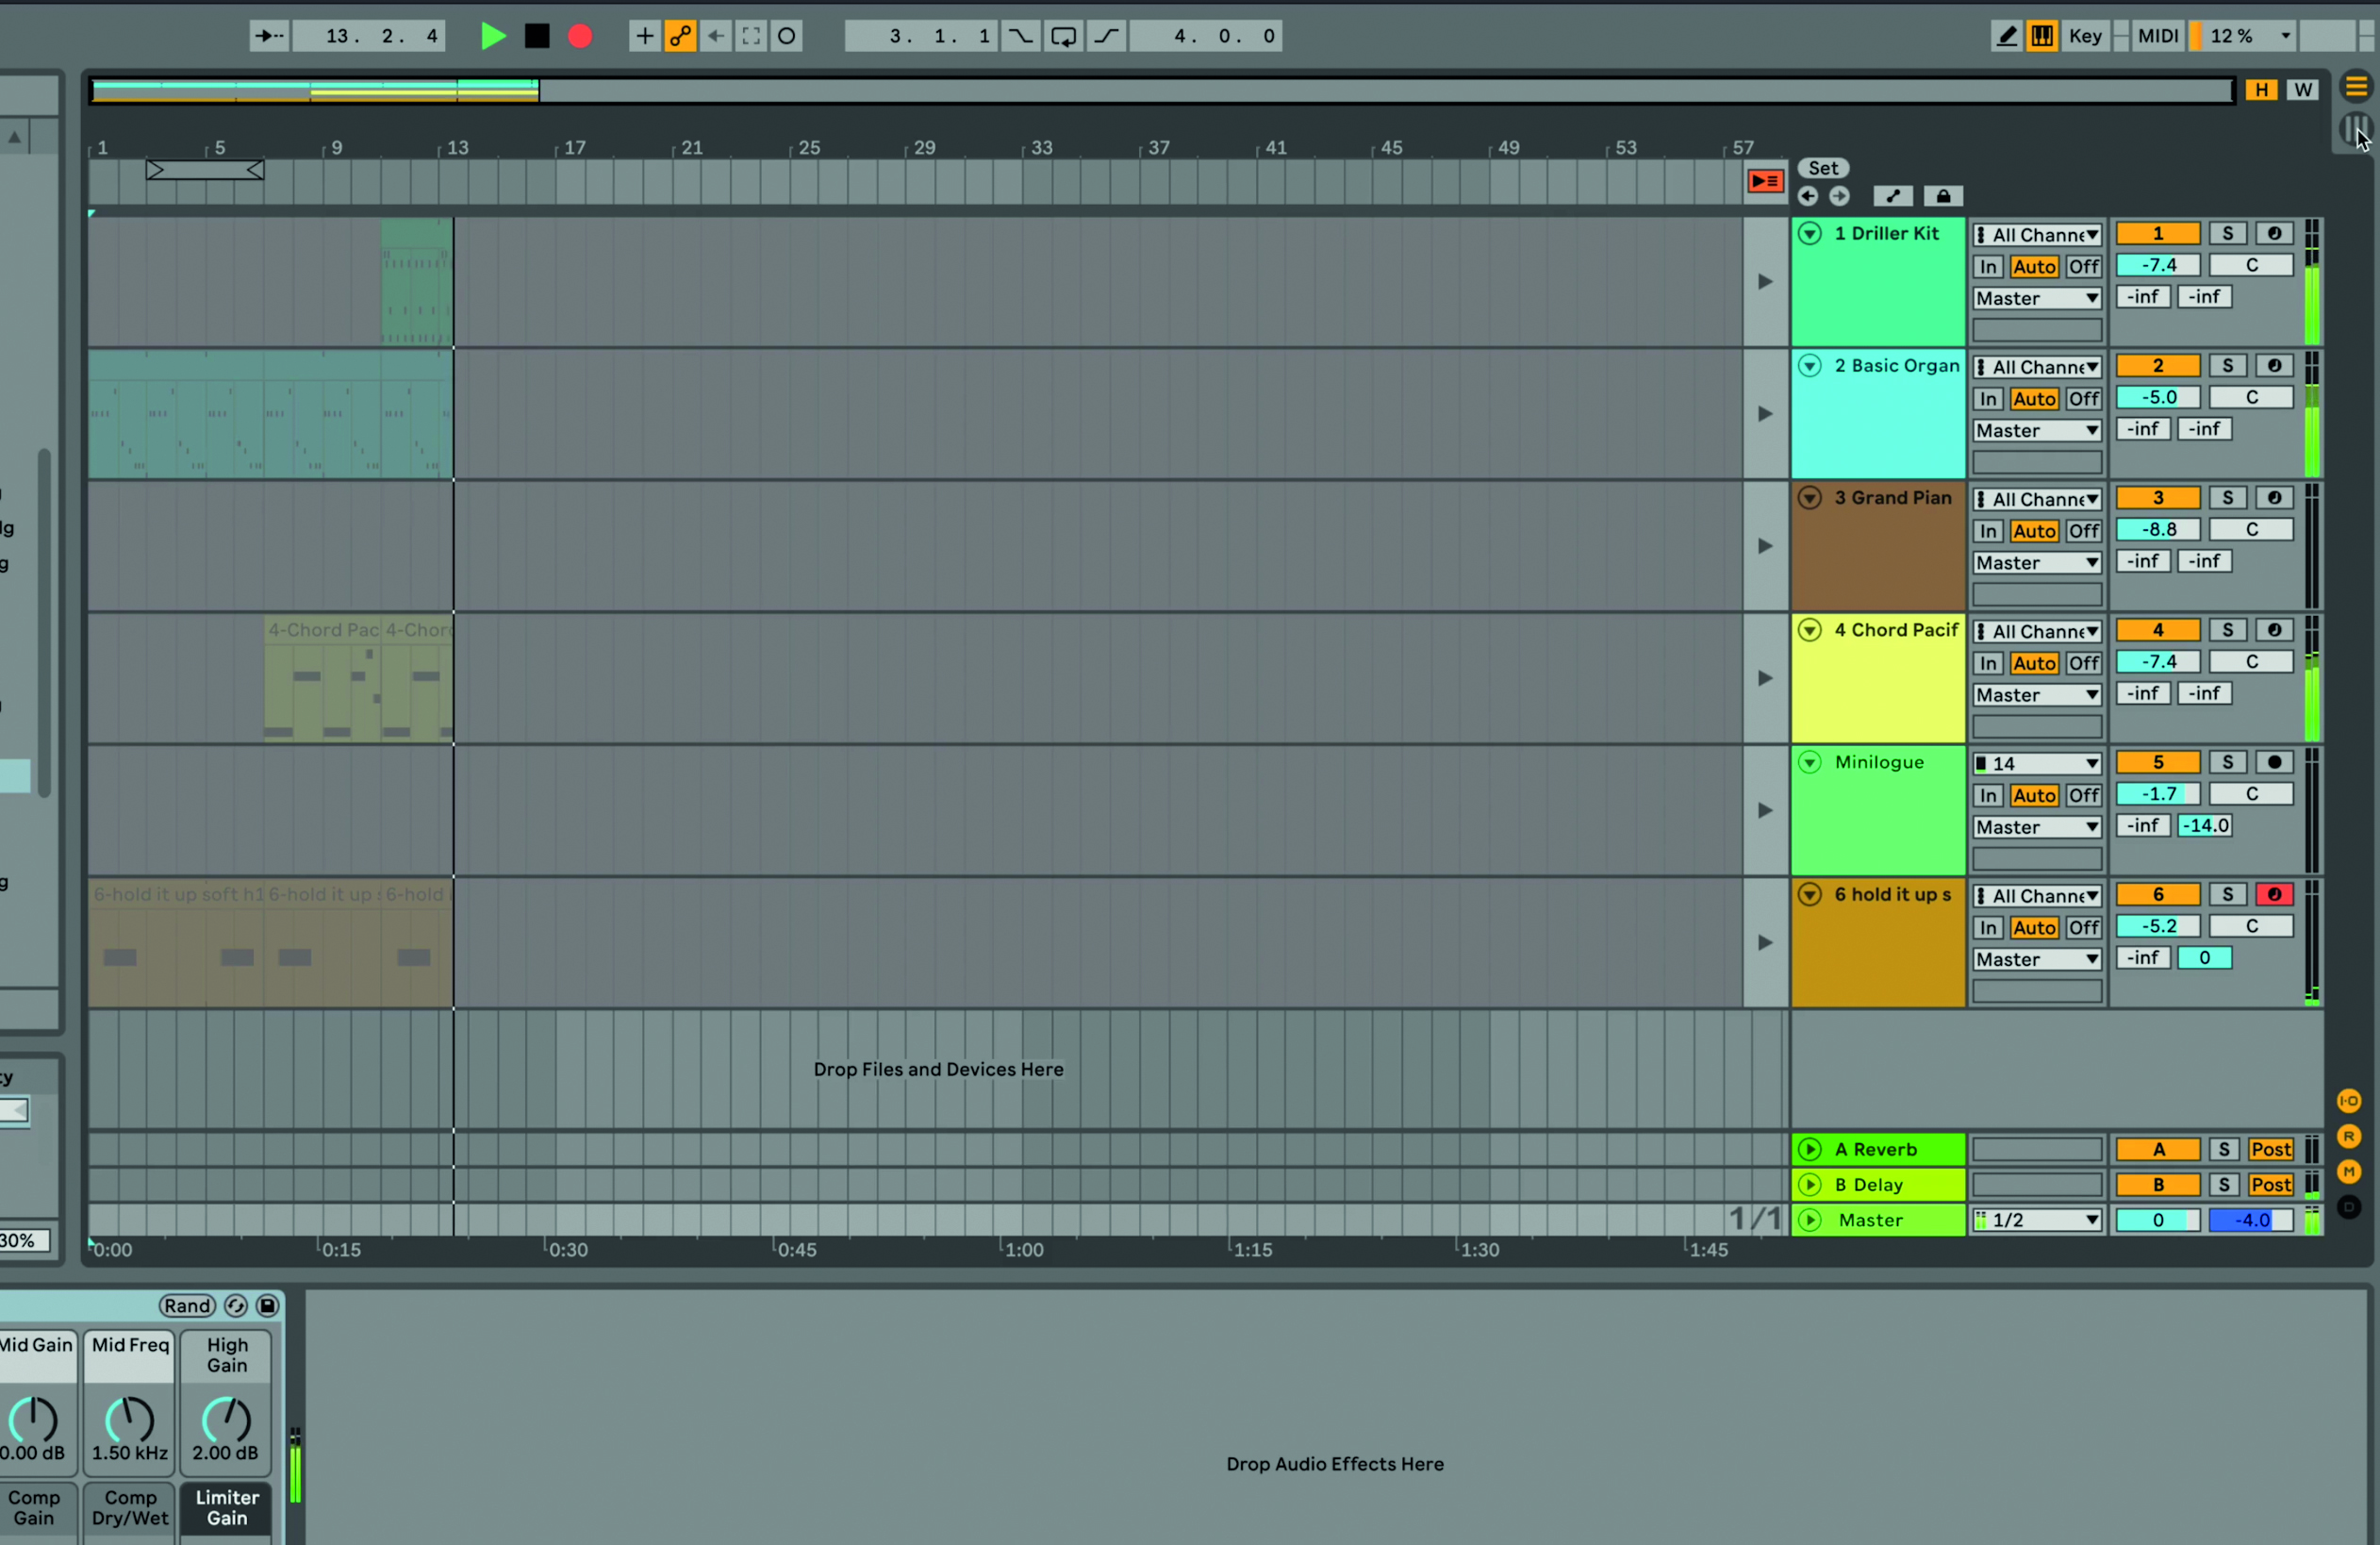
Step 6: You can see the arrangement come together by switching to the Arrange view (using Tab). You’ll see the song tracks start and stop from top to bottom.
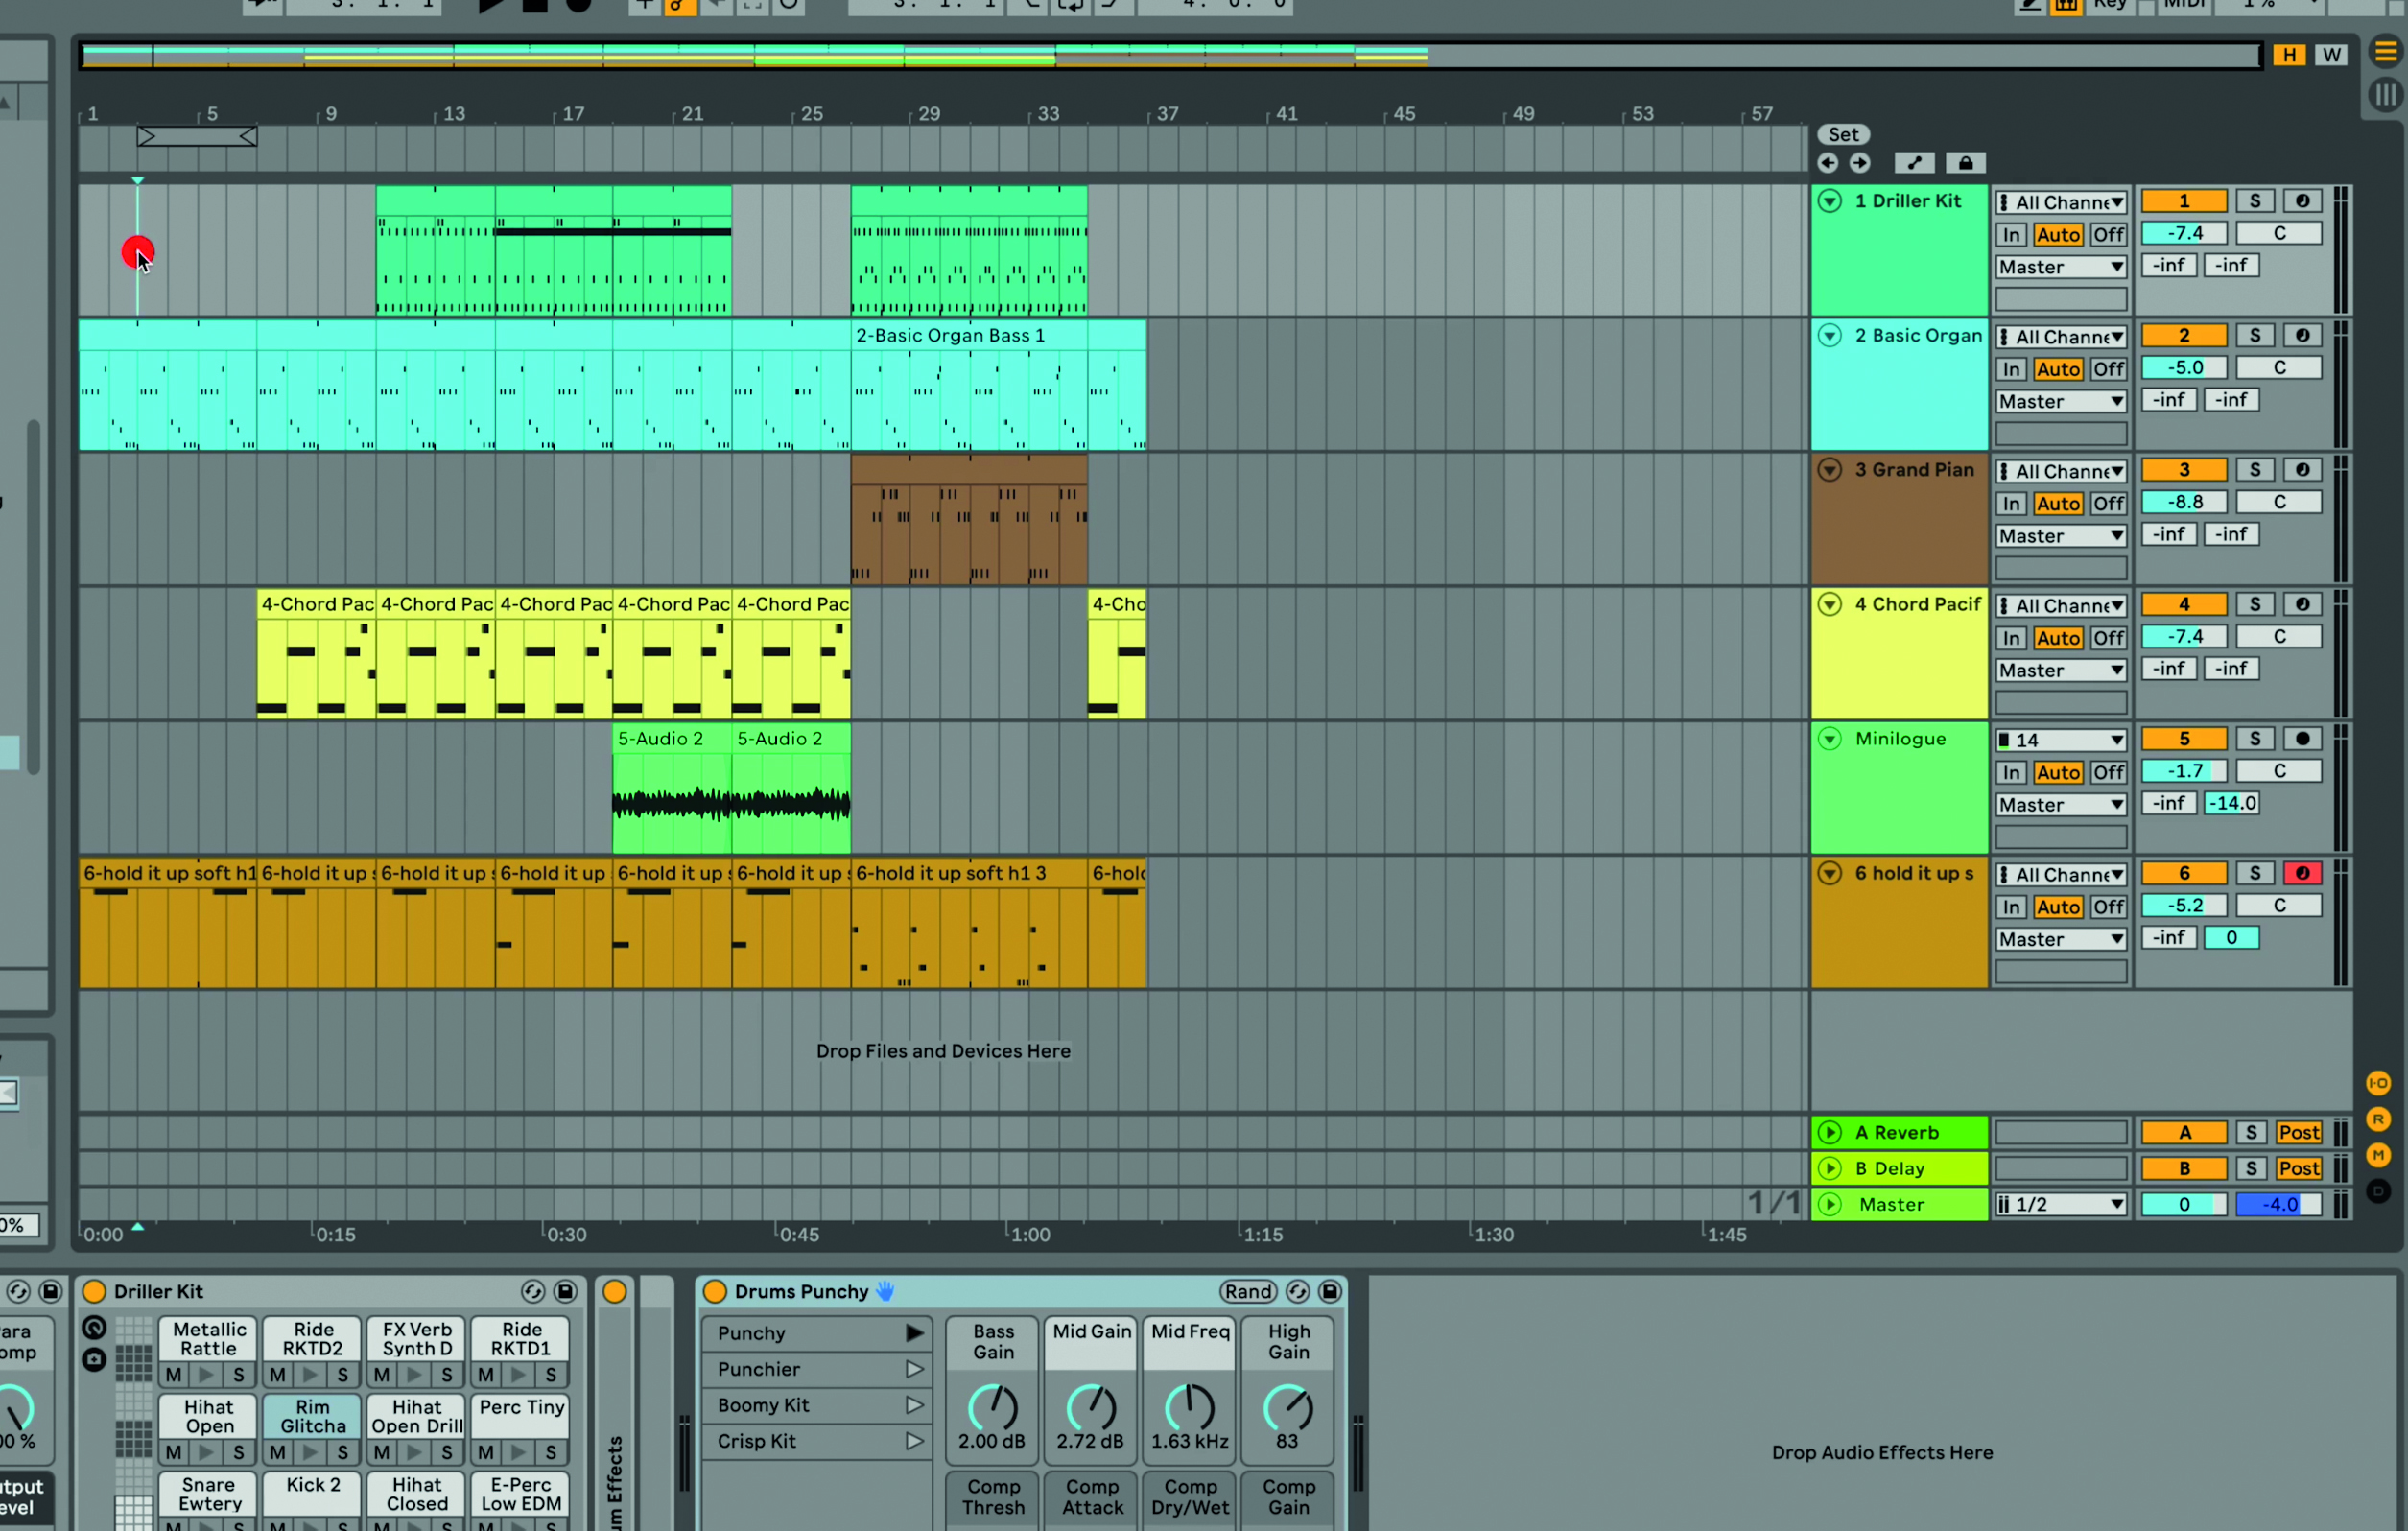
Step 7: Every single action recorded in Session View – the scenes and clips starting and stopping etc – is recorded into the Arrange View and here you can play back the song as well.
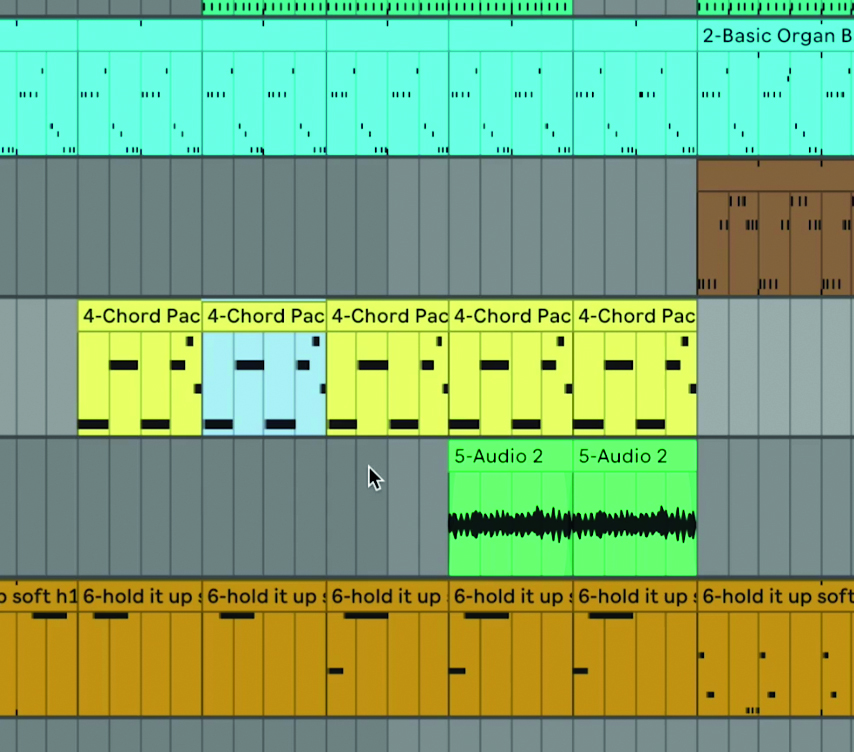
Step 8: You can also make changes – edit notes, part lengths, anything you like – in this view. It’s very much like the standard arrangement view in other DAWs where you can see your song finally come together as a finished track.
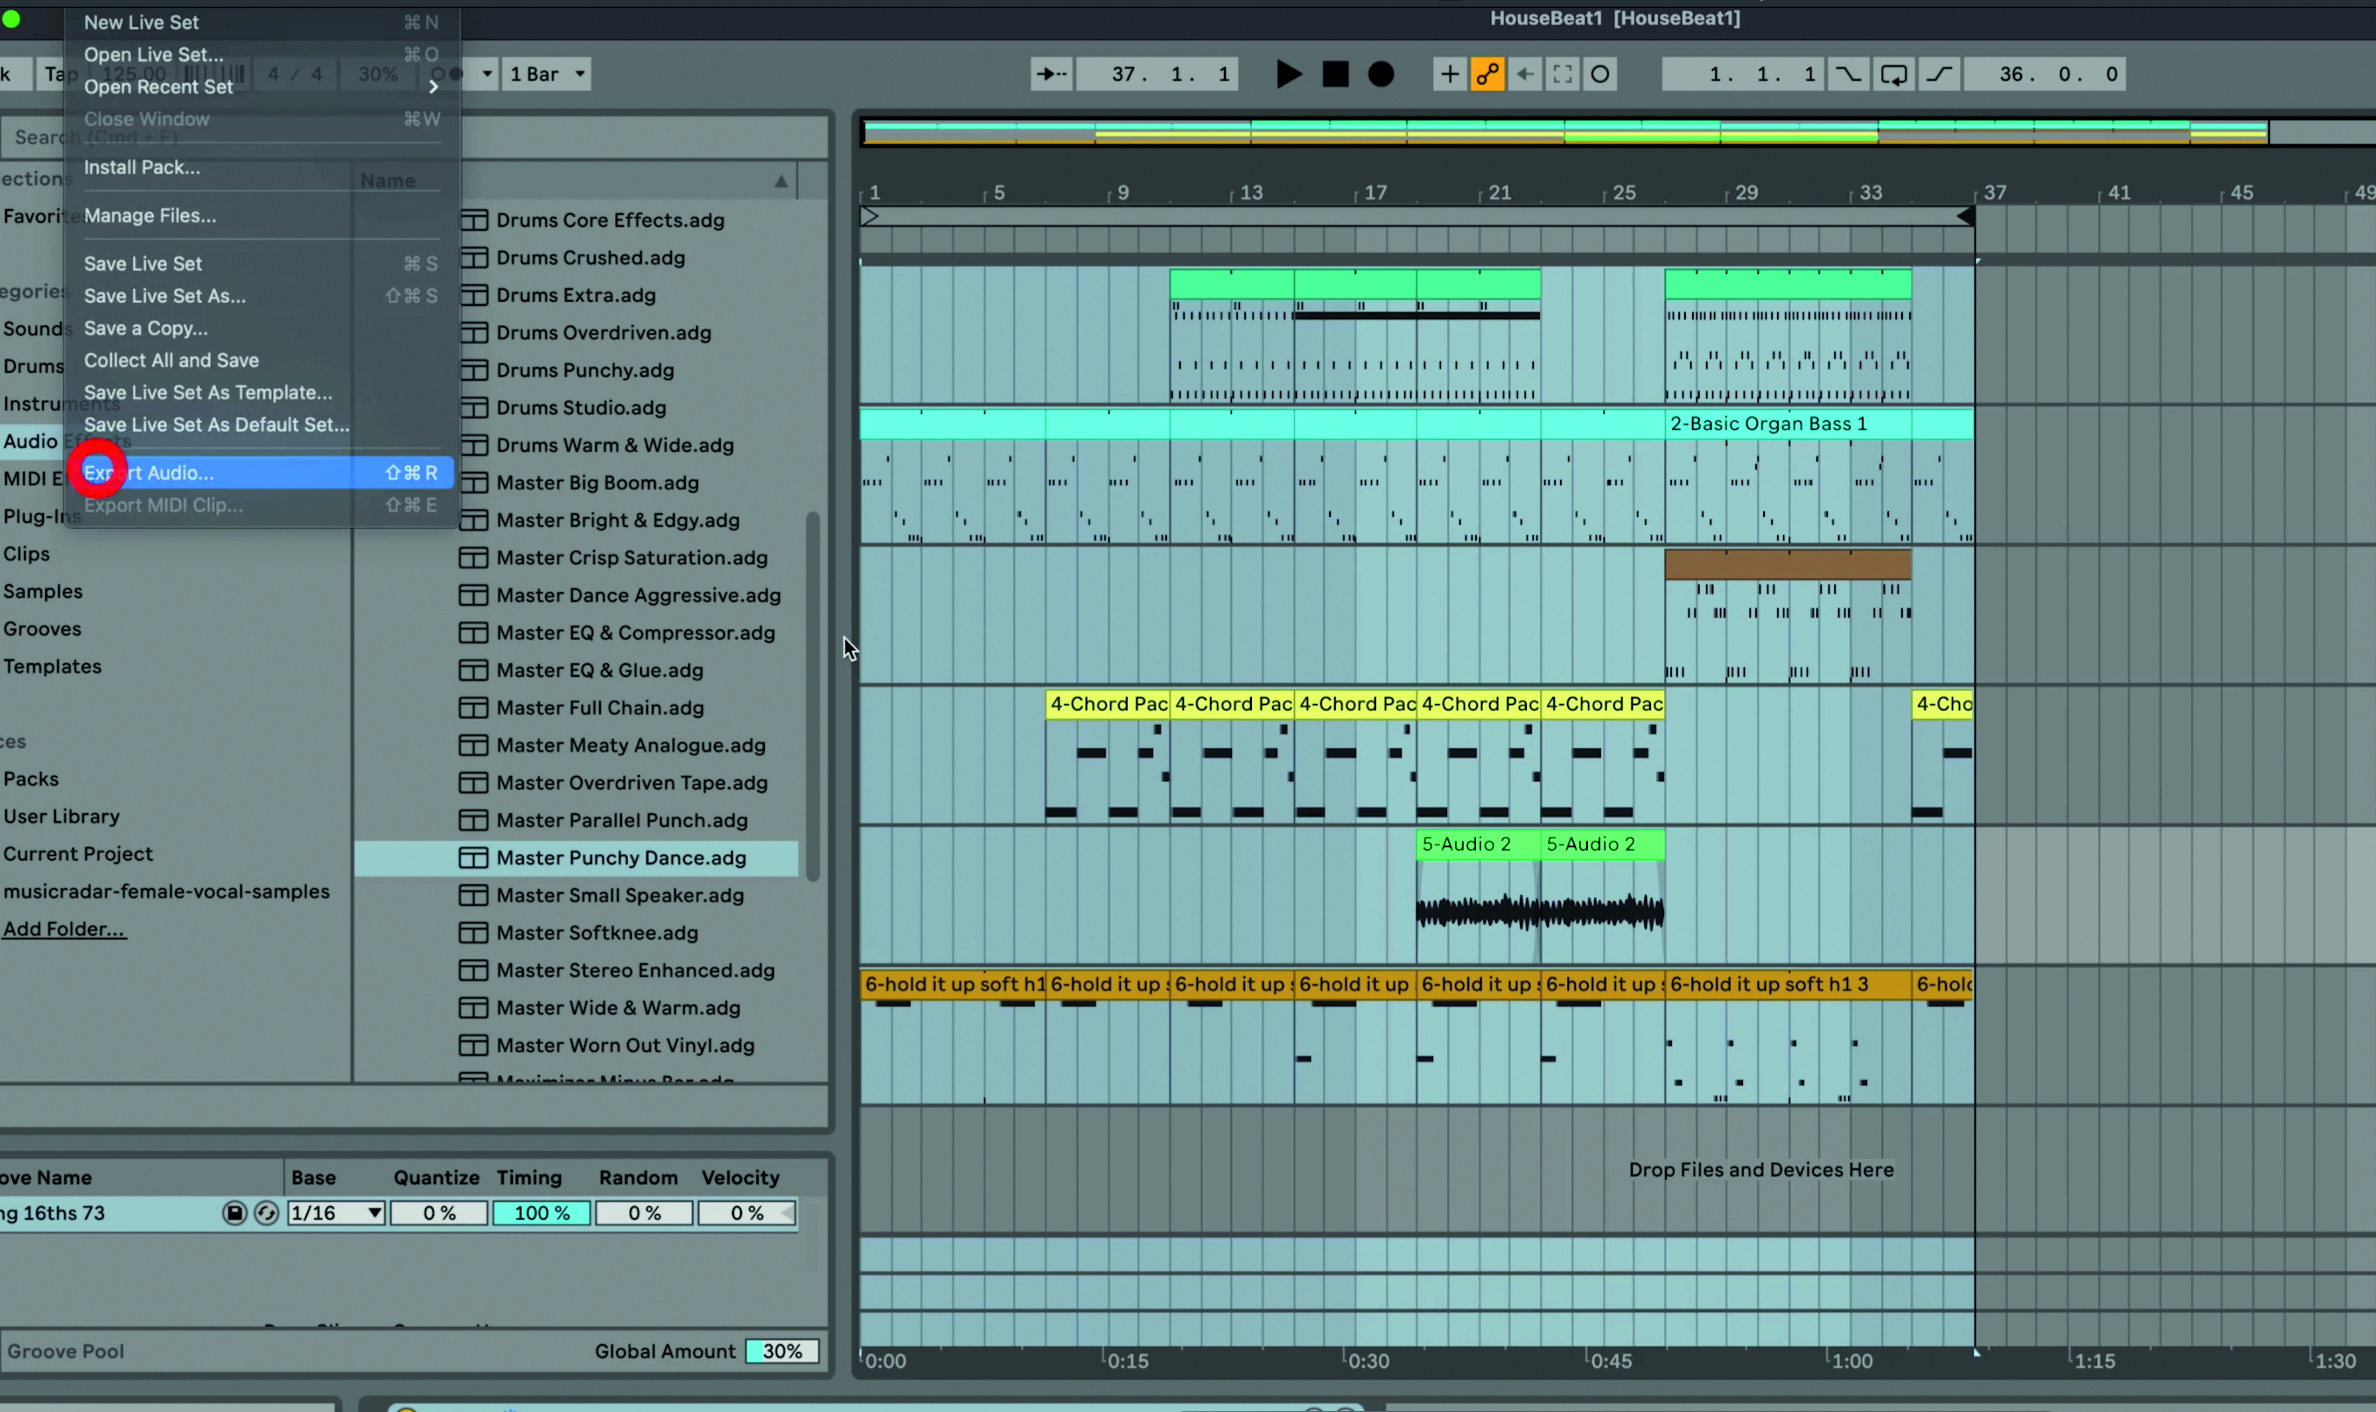
Step 9: To finish up, we’re going to export the song as an audio file. Drag the loop start and end points to cover the entire song and select Export Audio from the File menu. Select Export and the audio will be saved. That’s your song done! Do save your project, and we hope you enjoy Ableton Live 11 Lite!
Computer Music magazine is the world’s best selling publication dedicated solely to making great music with your Mac or PC computer. Each issue it brings its lucky readers the best in cutting-edge tutorials, need-to-know, expert software reviews and even all the tools you actually need to make great music today, courtesy of our legendary CM Plugin Suite.
