How to design a fractal sync tone: "When it comes to lead synth sounds, oscillator sync is about as iconic as it gets"
In part two of our new deep-dive into our Computer Music Plugin Suite’s best software, we take another look at BazilleCM’s oscillators, and harness some fractal resonance!
Want all the hottest music and gear news, reviews, deals, features and more, direct to your inbox? Sign up here.
You are now subscribed
Your newsletter sign-up was successful
When it comes to lead synth sounds of the last 50 years, the patch described as ‘oscillator sync’ is about as iconic as it gets.
Created by synchronising the pitch of one oscillator against another, while also modulating the pitch of the secondary oscillator, this ubiquitous sound has found favour with artists from Rick Wakeman and Jean-Michel Jarre, through to Daft Punk and LCD Soundsystem.
It forms the basis for our patch creation today, but what makes it all the more intriguing is that we won’t be syncing oscillators to create it. In fact, we’ll only be using a single oscillator!
Article continues belowFor this tutorial, we're using BazilleCM, a synth plugin that comes free with every issue of our sister magazine Computer Music, along with a bundle of other plugins called the CM Plugin Suite. BazilleCM is our unique version of u-he's patchable modular synthesiser, sequencer and mapping generator Bazille. It’s a beast!
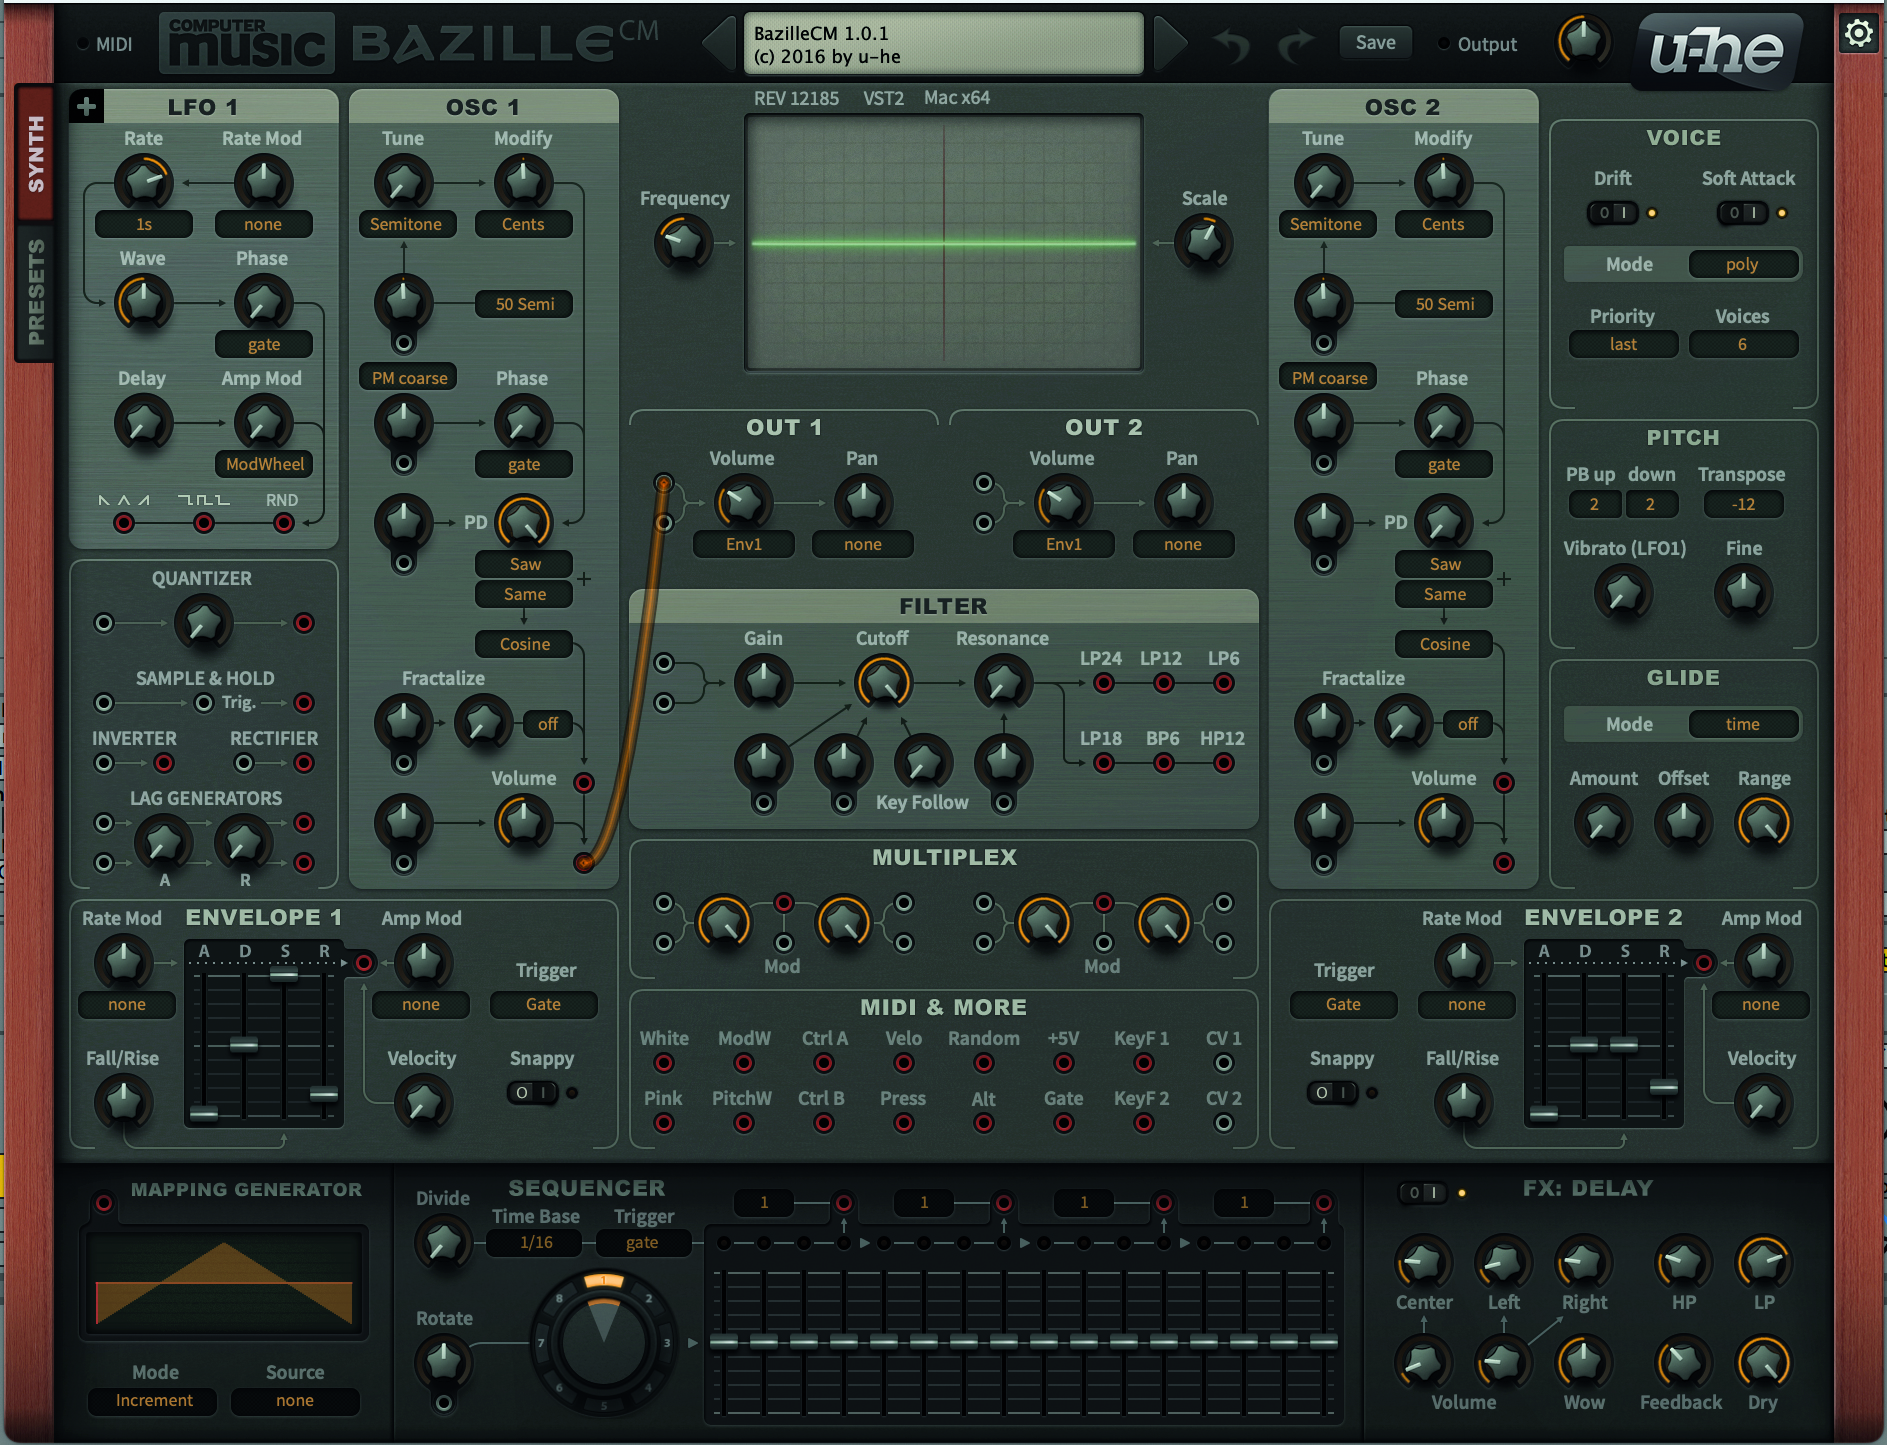
As mentioned in this previous tutorial, the BazilleCM oscillators are proudly digital, using phase distortion to create rich waveforms, without the use of a filter. This month we’ll be adopting a similarly simple approach, using fractal resonance, which acts in pretty much the same way as the resonance control found within the filter section.
We’ll use the Fractalize control element of the BazilleCM, to create multiple cycles of waveform, which are then ‘packed’ into the waveform which we’ll select in the Fractalize section. It’s this ‘packing’ of waveforms that generates the resonance and sync tone, as the waveform is forced to begin its cycle according to the dictated frequency (pitch) which we select from the keyboard.
Create a fractal sync tone with BazilleCM
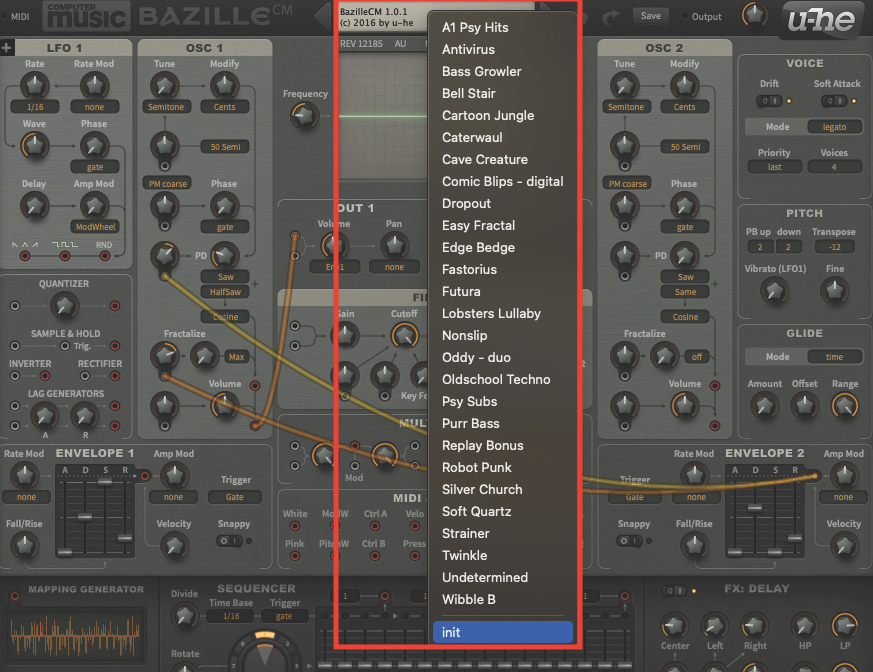
We’ll begin by initialising a patch on BazilleCM. Open up your DAW and load the plugin. Once the plugin window is open, move to the central display at the top, click to reveal the drop-down menu, and select ‘init’ from the bottom. This will initialise the patch.
Want all the hottest music and gear news, reviews, deals, features and more, direct to your inbox? Sign up here.
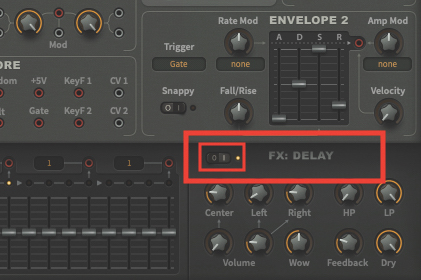
As part of the initialisation, you’ll also hear the FX Delay active in the signal. To make our adjustments clearer at this stage, go to the Delay section (bottom-right) and move the switch to the ‘Off’ position. We’ll be coming back to this at the end of the tutorial, to reactivate it.
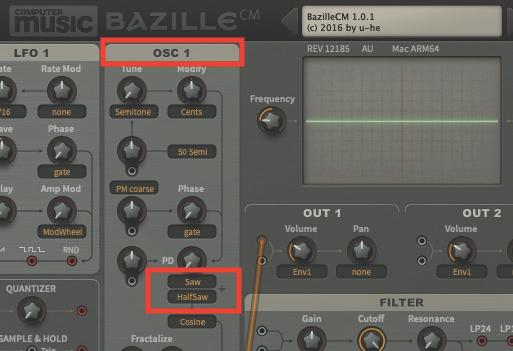
Now we can start to create our patch, starting with the waveform settings within OSC 1; move to the Phase Distortion (PD) section halfway down the OSC 1 section, and leave the primary waveform set to a Saw, changing the secondary waveform to a HalfSaw.
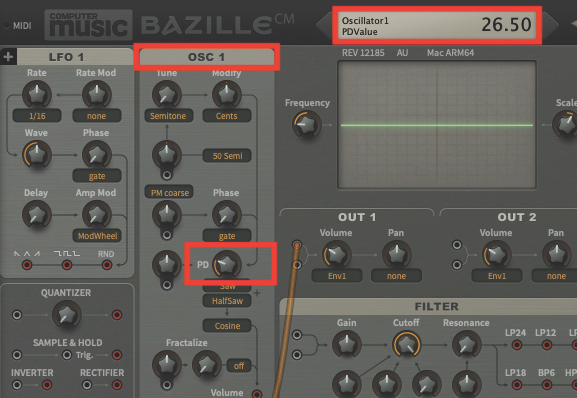
By adjusting the PD pot, you will hear the effect of Phase Distortion, sounding very reminiscent of a low-pass filter opening and closing, but we want to set the PD pot to a value of 26.50. Don’t forget to keep your eye on the display at the top of the plugin, as this will help select accurate values when changing pots in BazilleCM.
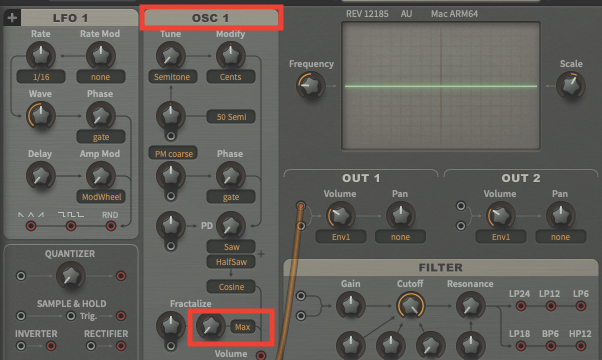
Directly below the PD pots, you will see the Fractalize section; if the Phase Distortion section induces a tone like a filter, the Fractalize section mimics the resonance control, also included within most subtractive filters. Select Max from the drop-down menu, to the right of the pot. Make sure the pot remains at a value of 0.
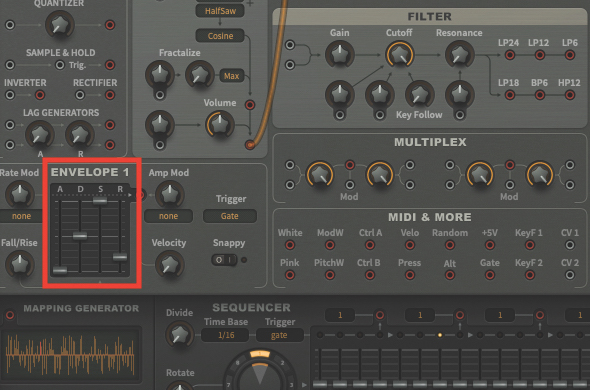
Thanks to the versatile nature of BazilleCM, we have two full ADSR envelopes that we can use in several different ways. By default, Envelope 1 is routed to the amplifier section, which we want to leave in place, but we should just check the default ADSR values; set Attack to 0, Decay to 50, set Sustain to a full 100, and set Release to 20.
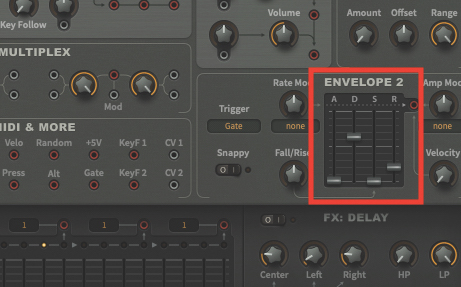
Envelope 2 is going to be employed as a modulatory envelope, but before we make the connections, let’s also set the ADSR values. Set the Attack fader to a value of 0, the Decay fader to 63, the Sustain fader to 0, and finally the Release fader to 20.
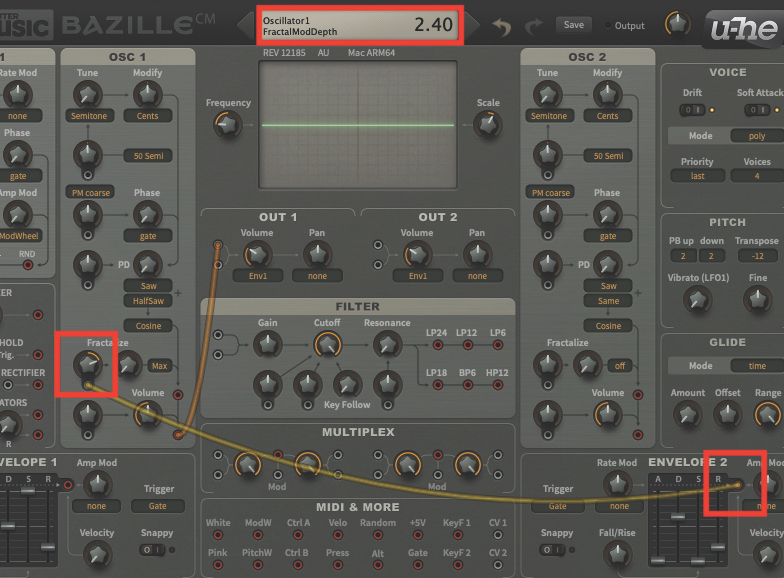
Now we can create a virtual patch cable, running between Envelope 2 and the Fractalize Modulation pot; click and hold on the red patch point, just to the right of the Envelope 2 faders, and drag the attached cable to the input point, located just underneath the Fractalize Modulation pot. Increase the value of the pot to 2.40.
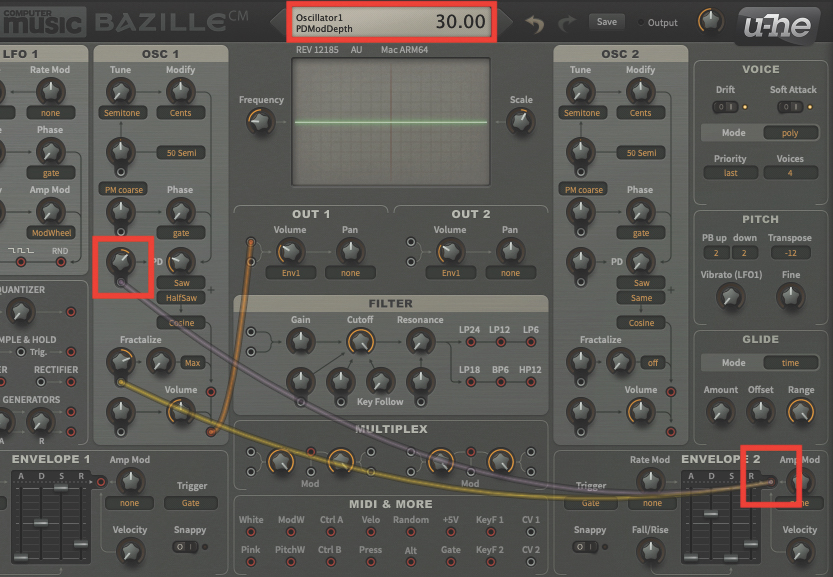
As previously, we’ll create a second virtual patch cable, from Envelope 2 to the Phase Distortion modulation pot; click and hold on the patch point, just to the right of the Envelope 2 faders, and drag a second cable to the input point, located just underneath the PD Modulation pot. Increase the value of the pot to 30.
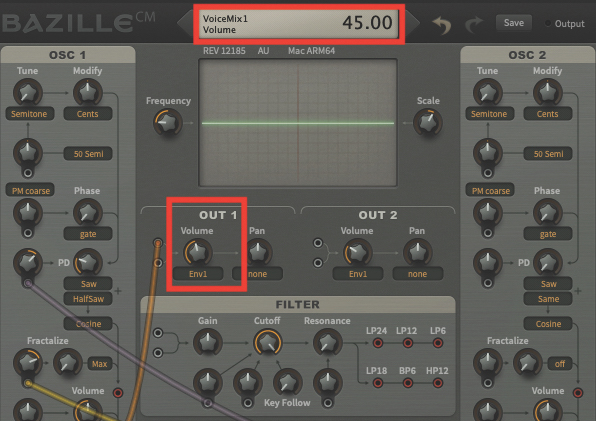
If we move to the central Out 1 section, you will see that Env1 is already set as the default, for controlling the volume of the amplifier’s output as you play. While we want to leave this default in place, we can afford to increase the volume to a value of 45, which will give us a little more signal to play with.
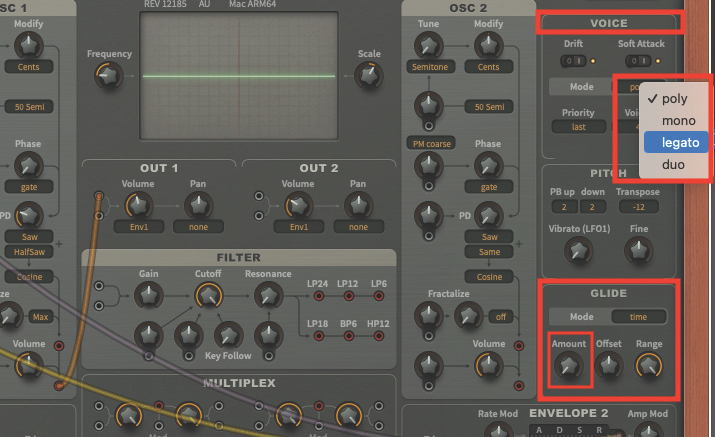
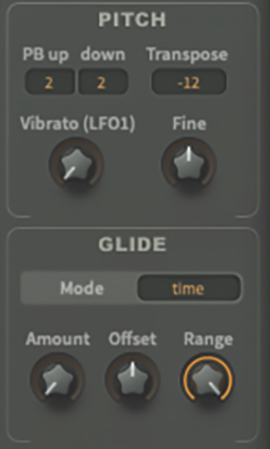
Depending on the way you choose to use this sound, it might be beneficial to set the Voice Mode to Legato. This means that you’ll only be able to play a single note at one time, but also means that you can vary the glide/portamento time to suit your requirements, using the Amount pot located within the Glide box, located below.
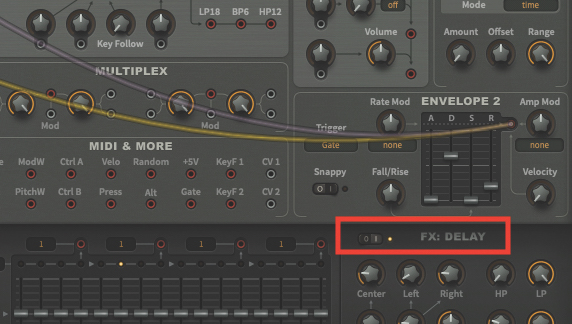
Finally, to use this sound as a lead sound, you may want to switch the FX: Delay back on. This can be useful for thickening the texture, though you may also want to apply some compression from within your DAW, just to keep levels under control. You’ll be compressing the initial signal, as well as the delayed signal, which can amplify the effect.
Pro tip
Creating the perfect sync lead sound can be a tricky business, extending well beyond the creation of the sound itself. With our patch, we’ve attempted to create an ideal lead sound, which performs particularly well in a monophonic setting.
This means that you can only play a single note at one time, although it has to be said that a sound such as this, playing polyphonically in a chord, is likely to be all-consuming for even the largest of mixes.
Creating the perfect sync lead sound can be a tricky business, extending well beyond the creation of the sound itself
By selecting the voice mode Legato, you’re invited to change the Glide time, slowing the movement from one note to the next. However, to activate this effect to its fullest potential, you’ll have to play your line into your DAW incredibly smoothly, and ideally with notes overlapping.
It’s part of the patch’s makeup that every time you re-trigger a note outside of this legato playing, you re-trigger the sound of the descending sync. This may be what you want, but to create that classic effect, go legato and smooth, and your track and lead will sound better as a consequence.
Recommended plugins
1. Korg ARP Odyssey
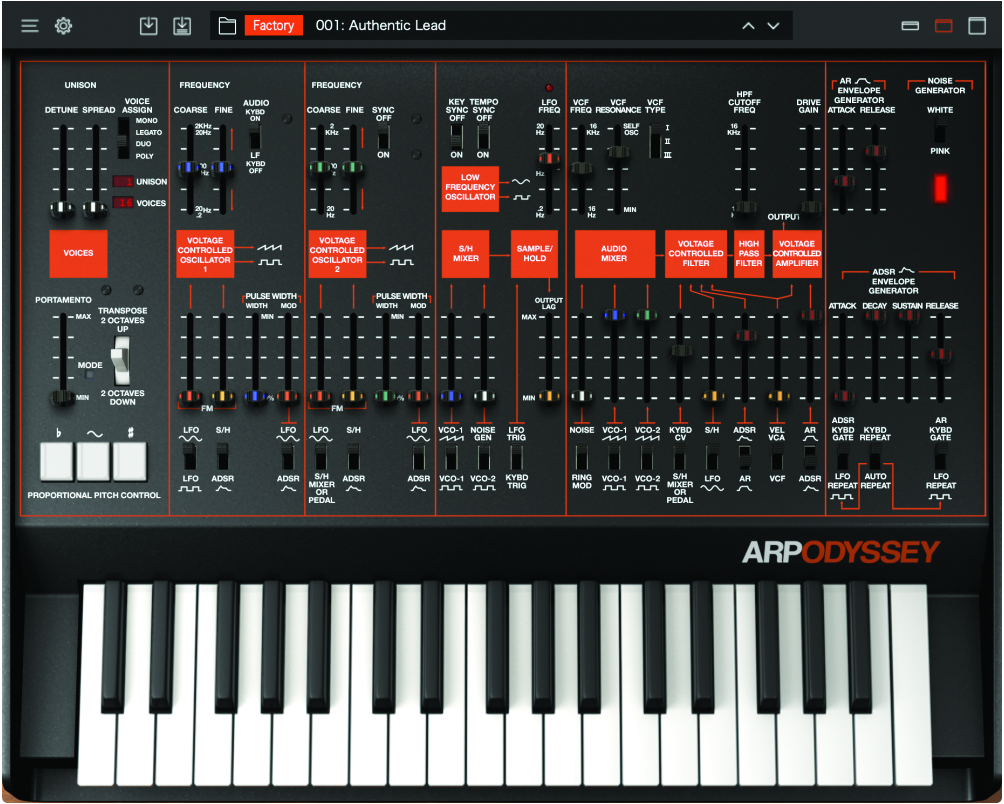
Korg’s recreation of the vintage classic provides a hugely accurate model of one of the most iconic synths, known for its ripping sync-osc tones.
2. GForce Software Oddity 3
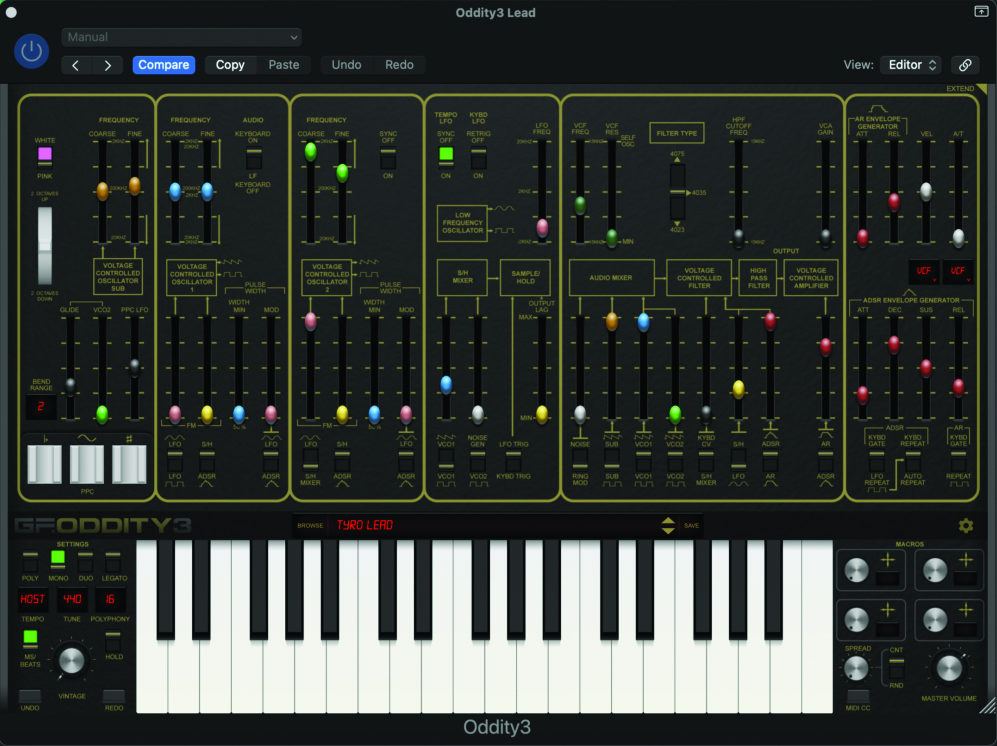
Oddity 3 takes the ARP Odyssey and pumps it full of sonic steroids. It can sound charming or slaughterous, depending on your track’s needs.
Roland Schmidt is a professional programmer, sound designer and producer, who has worked in collaboration with a number of successful production teams over the last 25 years. He can also be found delivering regular and key-note lectures on the use of hardware/software synthesisers and production, at various higher educational institutions throughout the UK

