How to design a bass sound using phase distortion synthesis
In the first of a new series exploring Computer Music's Plugin Suite, we prove that phase distortion synthesis doesn’t have to be perplexing, using the mighty BazilleCM
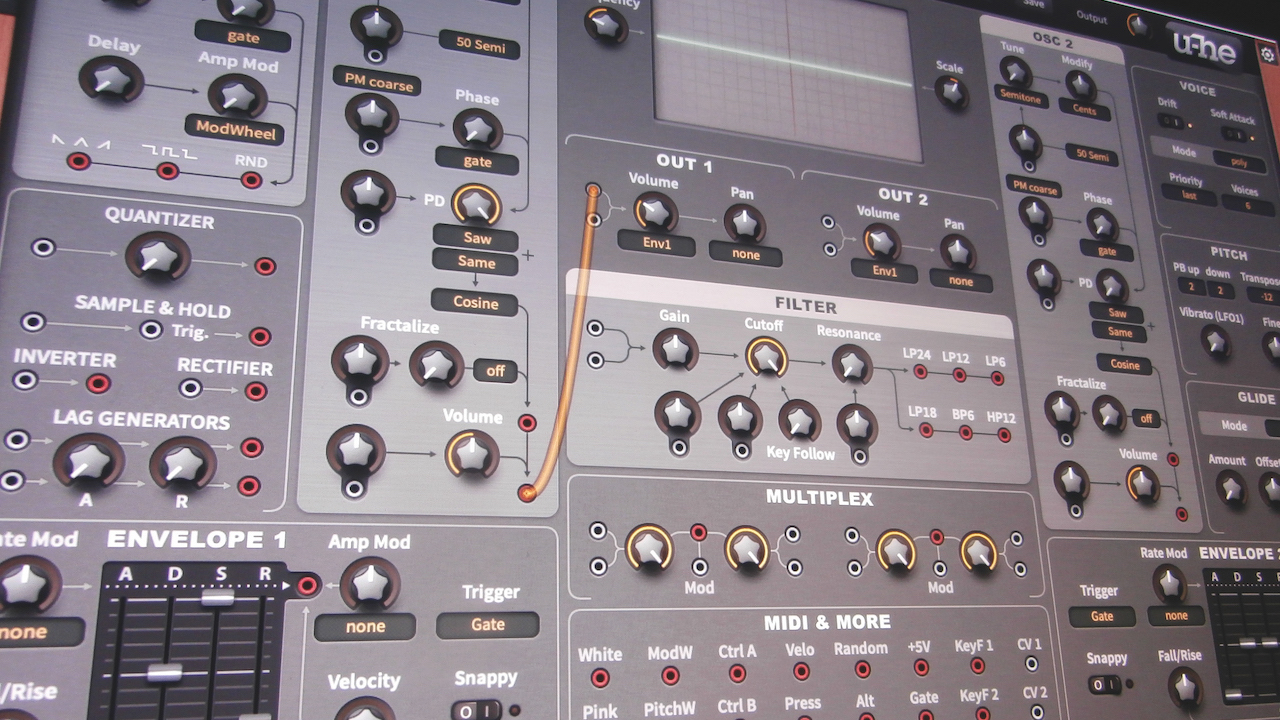
As any synthesis enthusiast will know, we owe an enormous debt of gratitude to Dr. Bob Moog, who distilled the concept of subtractive synthesis into a convenient format which became the benchmark for 99% of all synthesizers that we see today.
But nothing can stand in the way of evolution, with one of the greatest developments in synthesis appearing in the mid-’80s from Casio. Better known for making pocket calculators (cue a song by Kraftwerk!), Casio’s research into phase distortion synthesis, went on to prove a successful breeding ground for innovation, as shown by the Yamaha DX series of synths.
While these are always deemed to be based around FM (frequency modulation) synthesis, they actually had far more in common with the Casio CZ than might have been obvious at first sight.
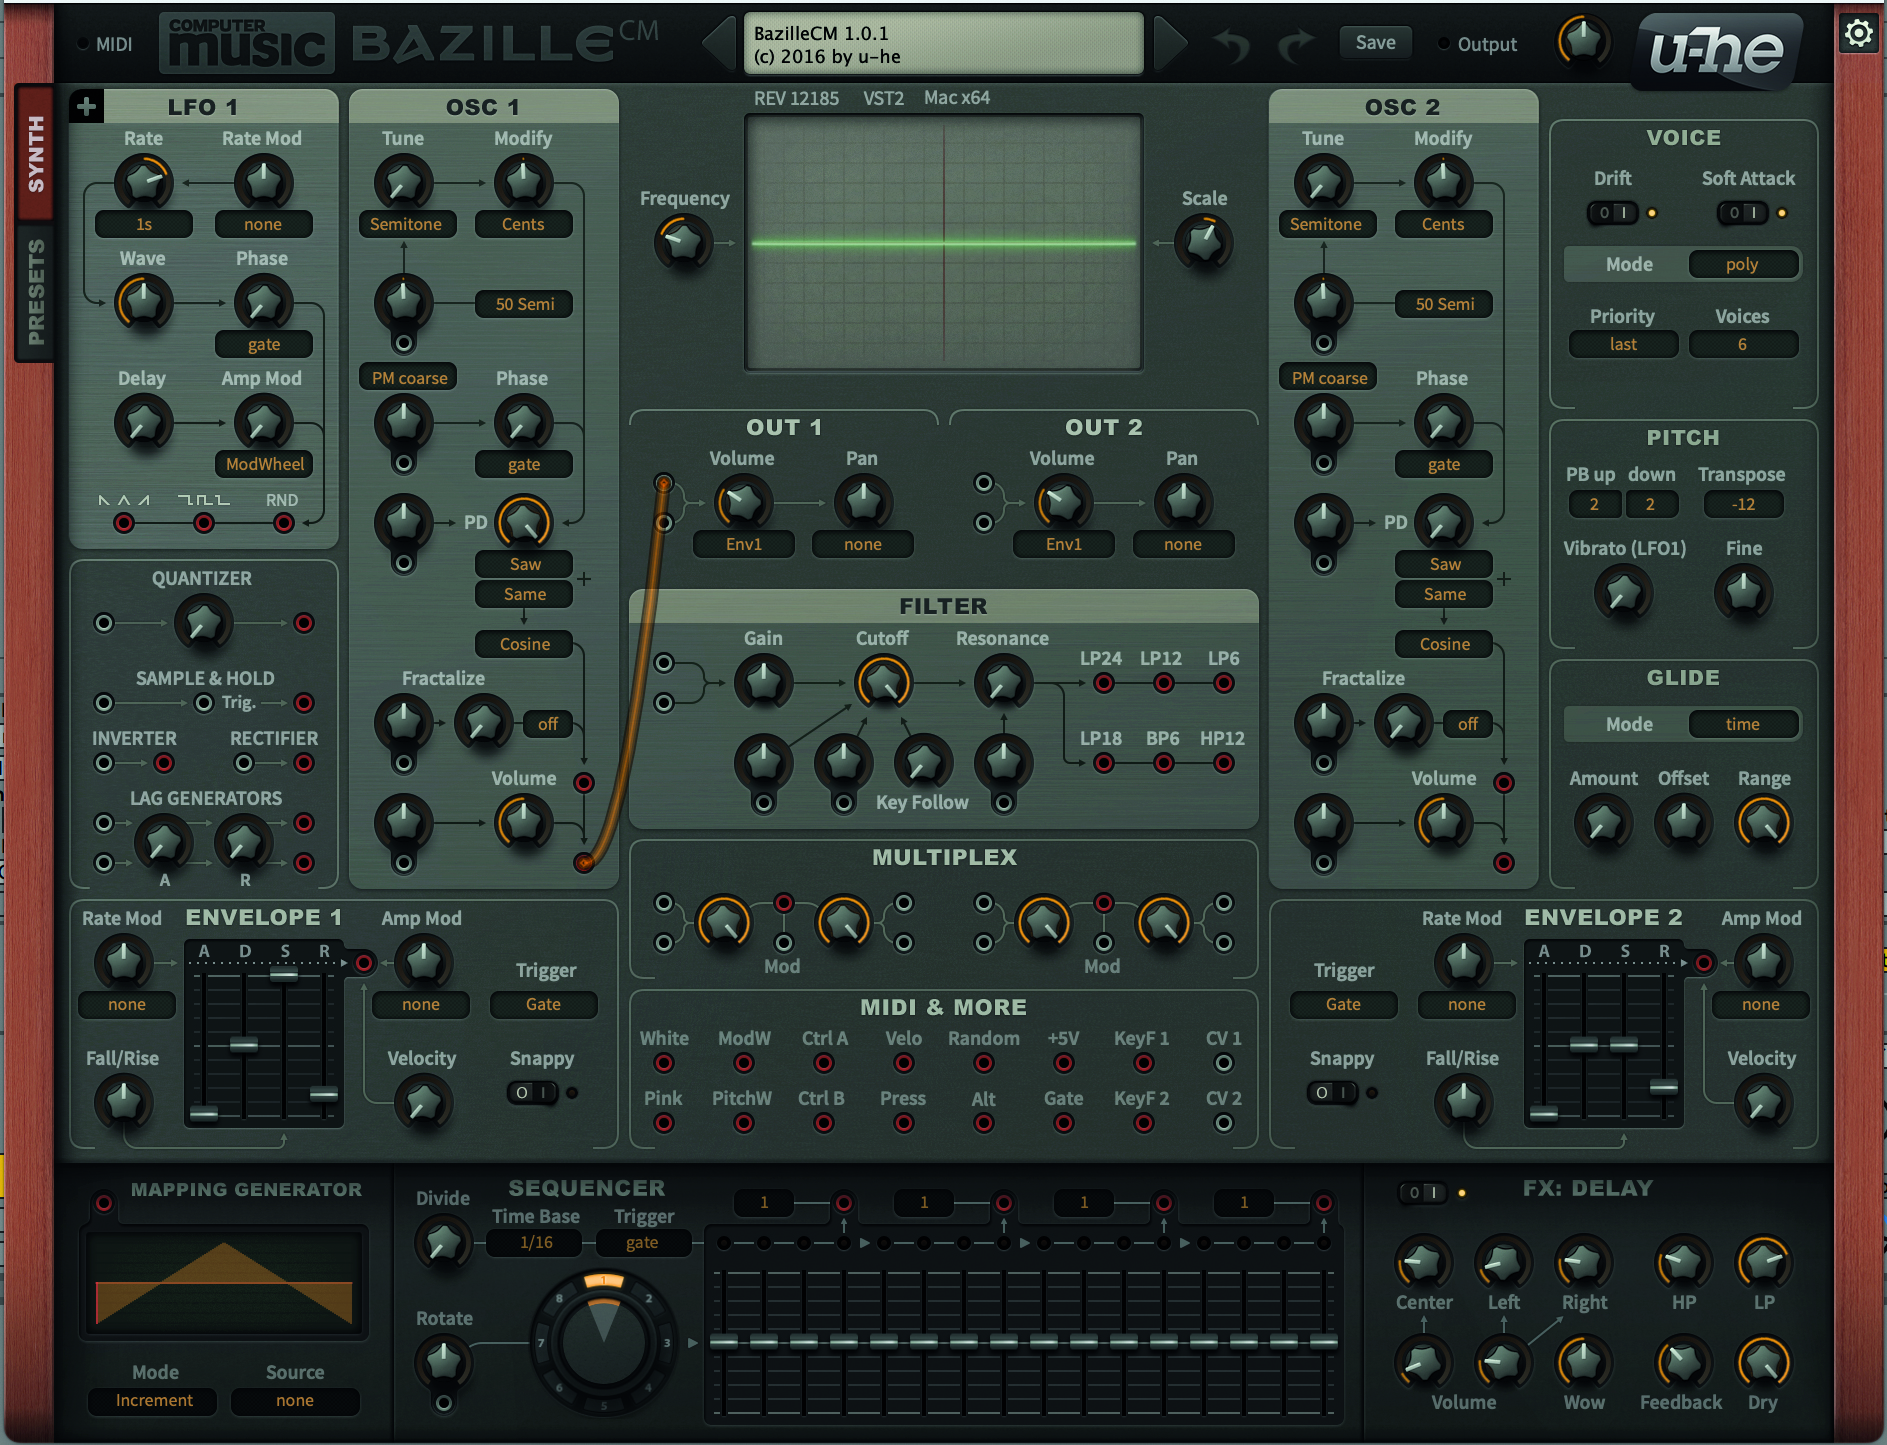
March on a couple of decades, and softsynth pioneers u-he developed the superb BazilleCM synthesizer for our sister magazine, Computer Music. The synth comes free with every issue of the magazine, along with a bundle of other plugins called the CM Plugin Suite.
BazilleCM not only adopts phase distortion as a guiding principle for creating interesting sounds, but introduces a modular element to the software domain. We’re going right back to bass-ics, beginning our delve into the CM Plugin Suite with the BazilleCM’s oscillator section, using phase distortion as the main focus, without the need to use a filter.
Phase distortion synthesis with BazilleCM
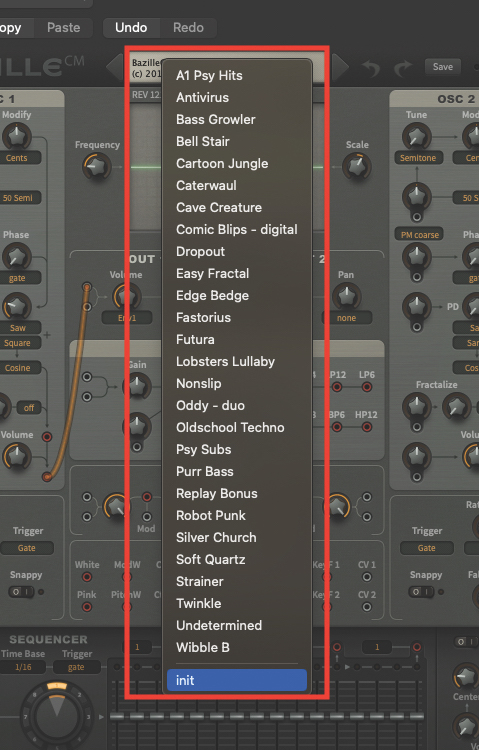
Let’s begin by initialising a patch in BazilleCM. Open your DAW and load up the plugin. Once the plugin window is open, move to the central display at the top of the window, click to reveal the drop-down menu, and select ‘init’ from the bottom. This will initialise the patch.
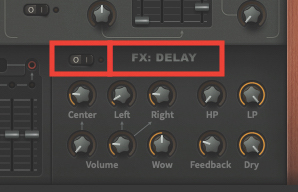
As part of the initialisation, you’ll also hear the FX Delay active in the signal. To make our adjustments clearer at this stage, go to the Delay section (bottom-right) and move the switch to the ‘off’ position. You can always switch it on again later, if so desired.
Want all the hottest music and gear news, reviews, deals, features and more, direct to your inbox? Sign up here.
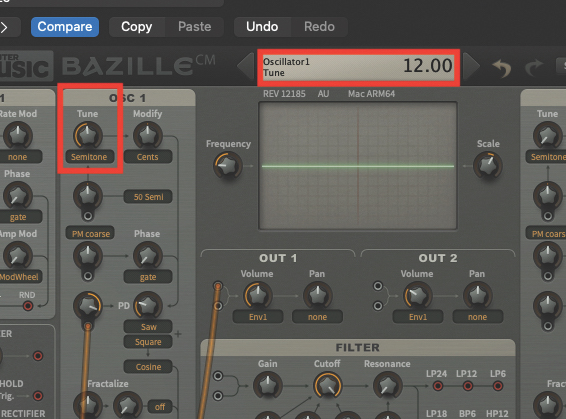
This patch is centred exclusively around OSC 1. It’ll be helpful to raise its pitch from the outset, by a single octave. Locate the Tune pot and adjust its value to 12.00. This translates to 12 semitones, which make up an octave. All values can be identified from the display/drop-down menu at the top of the plugin as you make any adjustments.
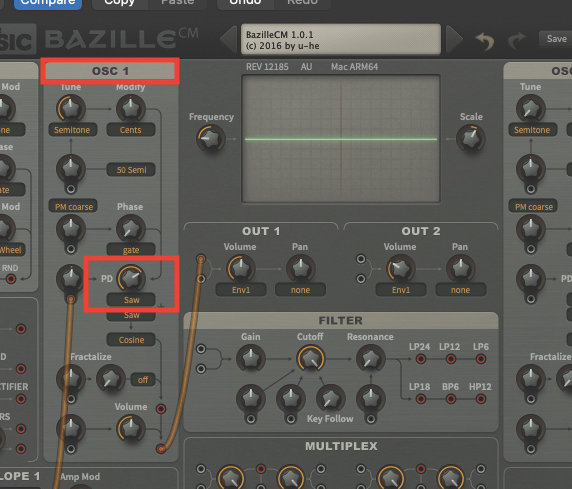
As the BazilleCM is a phase distortion synthesiser, you can get some remarkable sounds directly from the oscillator. One such trick involves opening the PD (Phase Distortion) pot, which you will find acts exactly like a low-pass filter in this scenario. Open and close the pot to hear this in action.
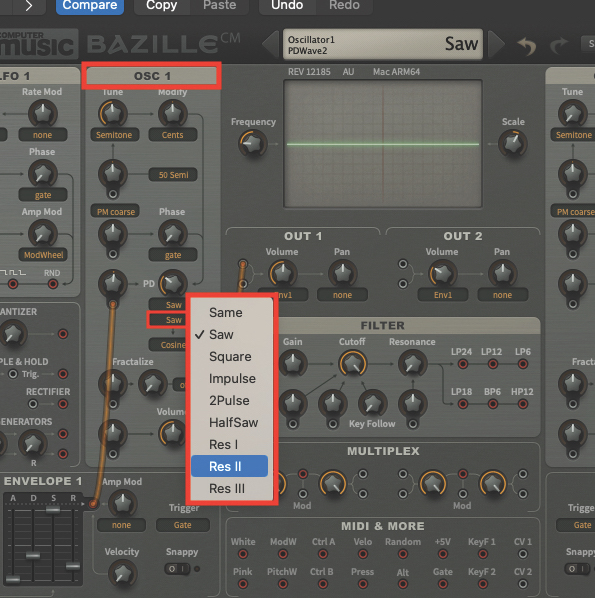
While the previous step is great for full saw wave timbres, you can change the lower Wave type in the PD section, to generate a host of other sonic colours. Try some of the other waveform alternatives. The Res waves can sound particularly harsh and aggressive, underlying the unapologetic digital nature of BazilleCM’s oscillators.
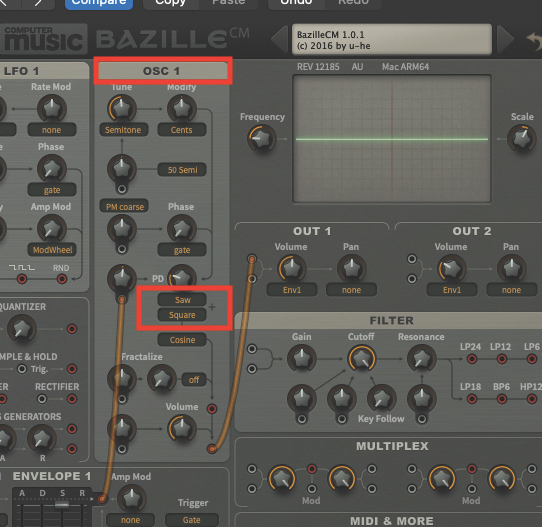
Once you’ve had the opportunity to experiment with the waves, and the modulating effect of the secondary wave on the initial Saw, leave the primary wave set to a saw, and set the secondary wave to a Square. This yields a tone much like a sub-oscillator, against a main oscillator.
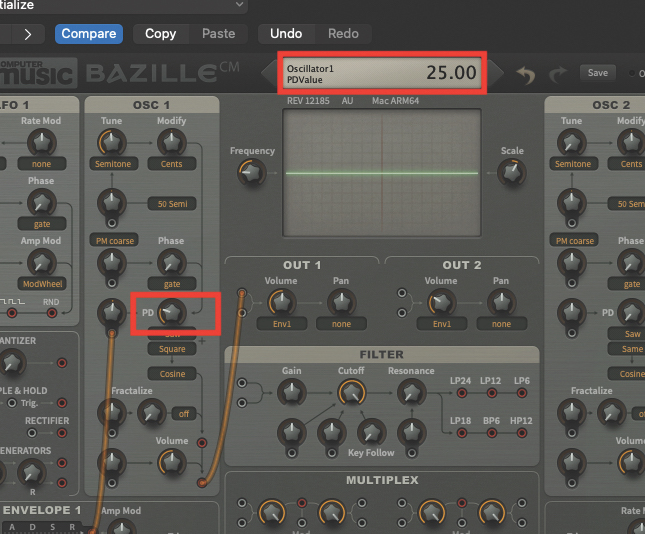
Revisit the Phase Distortion (PD) pot, and set it to a value of 25.00. Don’t forget to keep an eye on the display at the top of the plugin, in order to achieve an accurate value. The tone might feel quite dull at this stage, but we’ll be rectifying this in the next couple of steps.
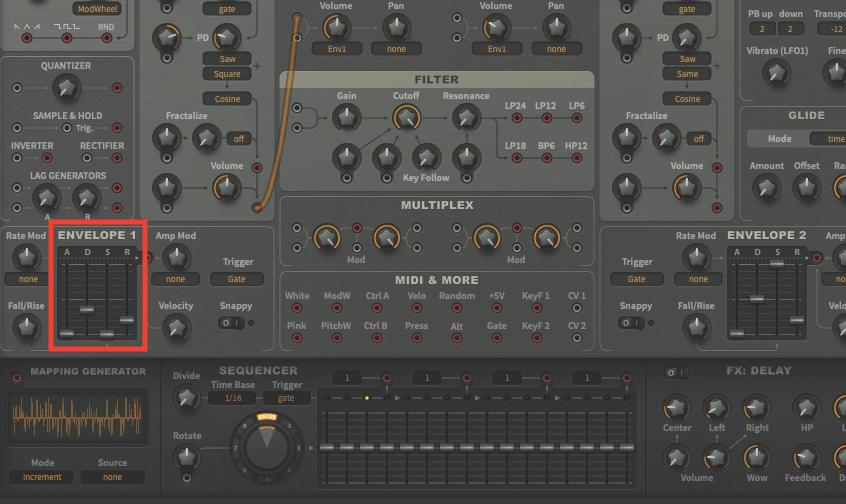
As we’re going to create a really snappy bass sound, we’ll need to make some adjustments to Envelope 1: leave the Attack phase set to a value of 0, then set the Decay phase to 35. Reduce the Sustain phase to a value of 0, and finally set the Release phase to a value of 20.
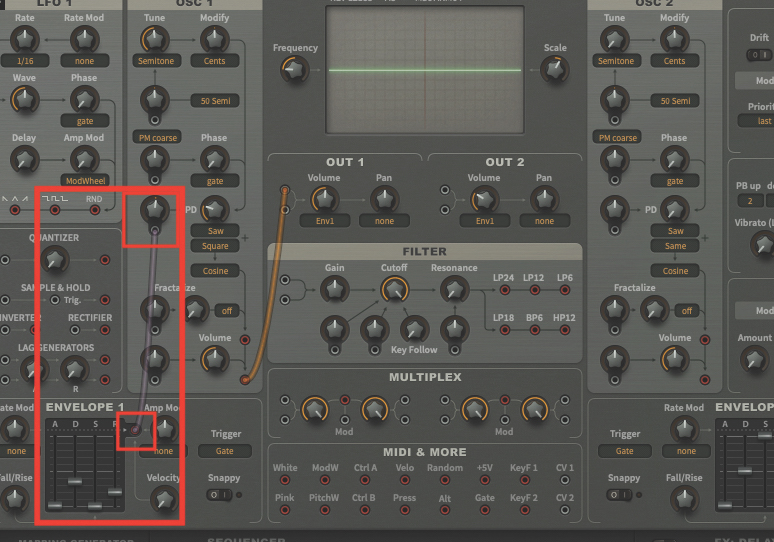
We are also going to use Envelope 1 as a modulating source, for the phase distortion element of our bass sound; locate the red patch point, to the right of Envelope 1, then click and drag a virtual cable up to the PD modulation pot, which is just to the left of the main PD pot. Drop the cable on the socket below the pot.
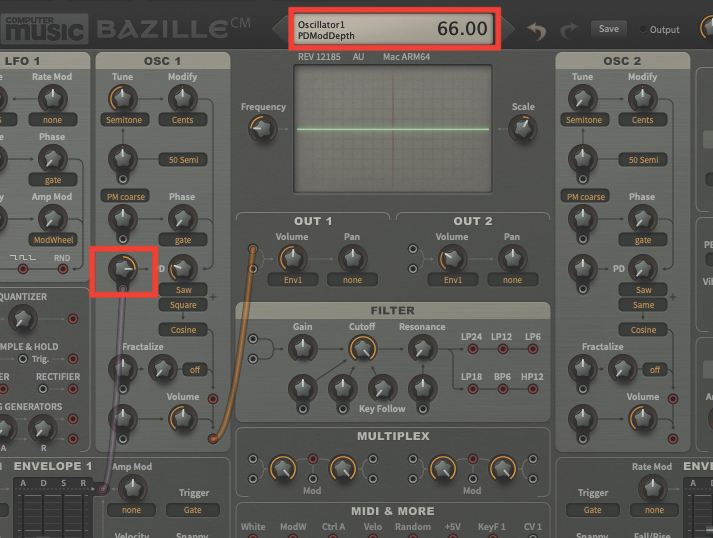
Having assigned your routing, using a virtual patch cable, we need to set a modulation amount. Set the PD modulation pot to a value of 66. Our Envelope is now modulating the phase distortion element, creating an affect much like a modulated low-pass filter.
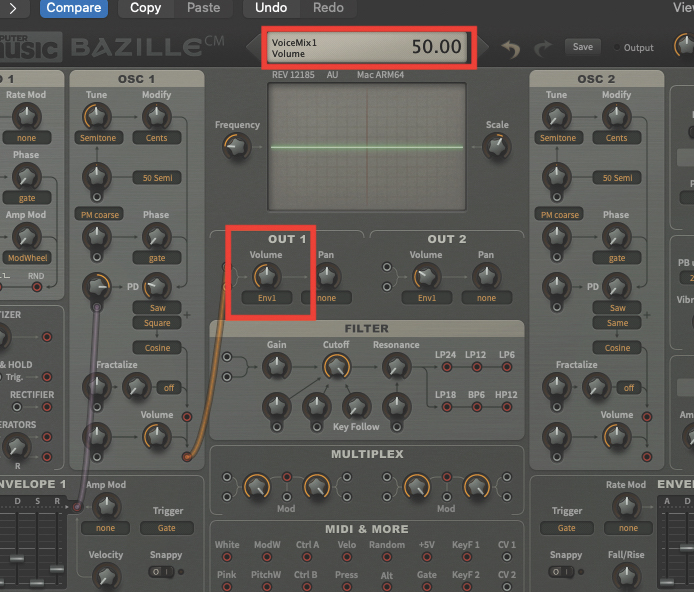
Move to the Out 1 section, which is located in the centre of the BazilleCM plugin. We’re going to change the Volume modulation amount, where Envelope 1 is modulating the amplifier of the synthesizer. Increase the Volume pot to a value of 50. This should increase the volume of each note played.
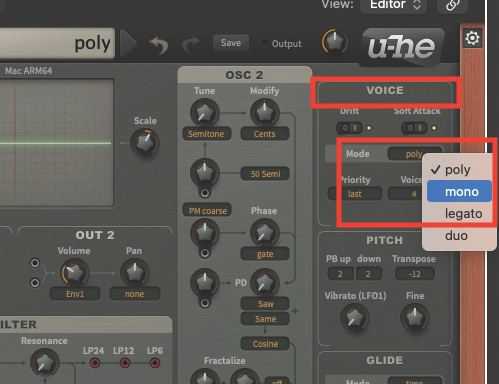
Our patch is currently set to Polyphonic mode. This is absolutely fine, but sometimes placing a bass sound in Monophonic mode can yield better results when being played live or in a DAW. Locate the Voice section, on the right of the plugin window, and change the mode to Mono.
Pro tip
This first patch, as part of this new series of tutorials, has concentrated on getting a single oscillator to do all of the sonic heavy lifting. We have intentionally not used a filter, but we have managed to create a very similar effect, by only using the phase modulation of two waveforms.
A net result of this has also been the presence of something which sounds very akin to a sub-oscillator, which is a very common component of synth bass sounds, being one octave below our main pitch. Like any bass sound, the use of a compressor will really aid its presence in a mix. Additionally, using a specific style of compressor may colour its sound.
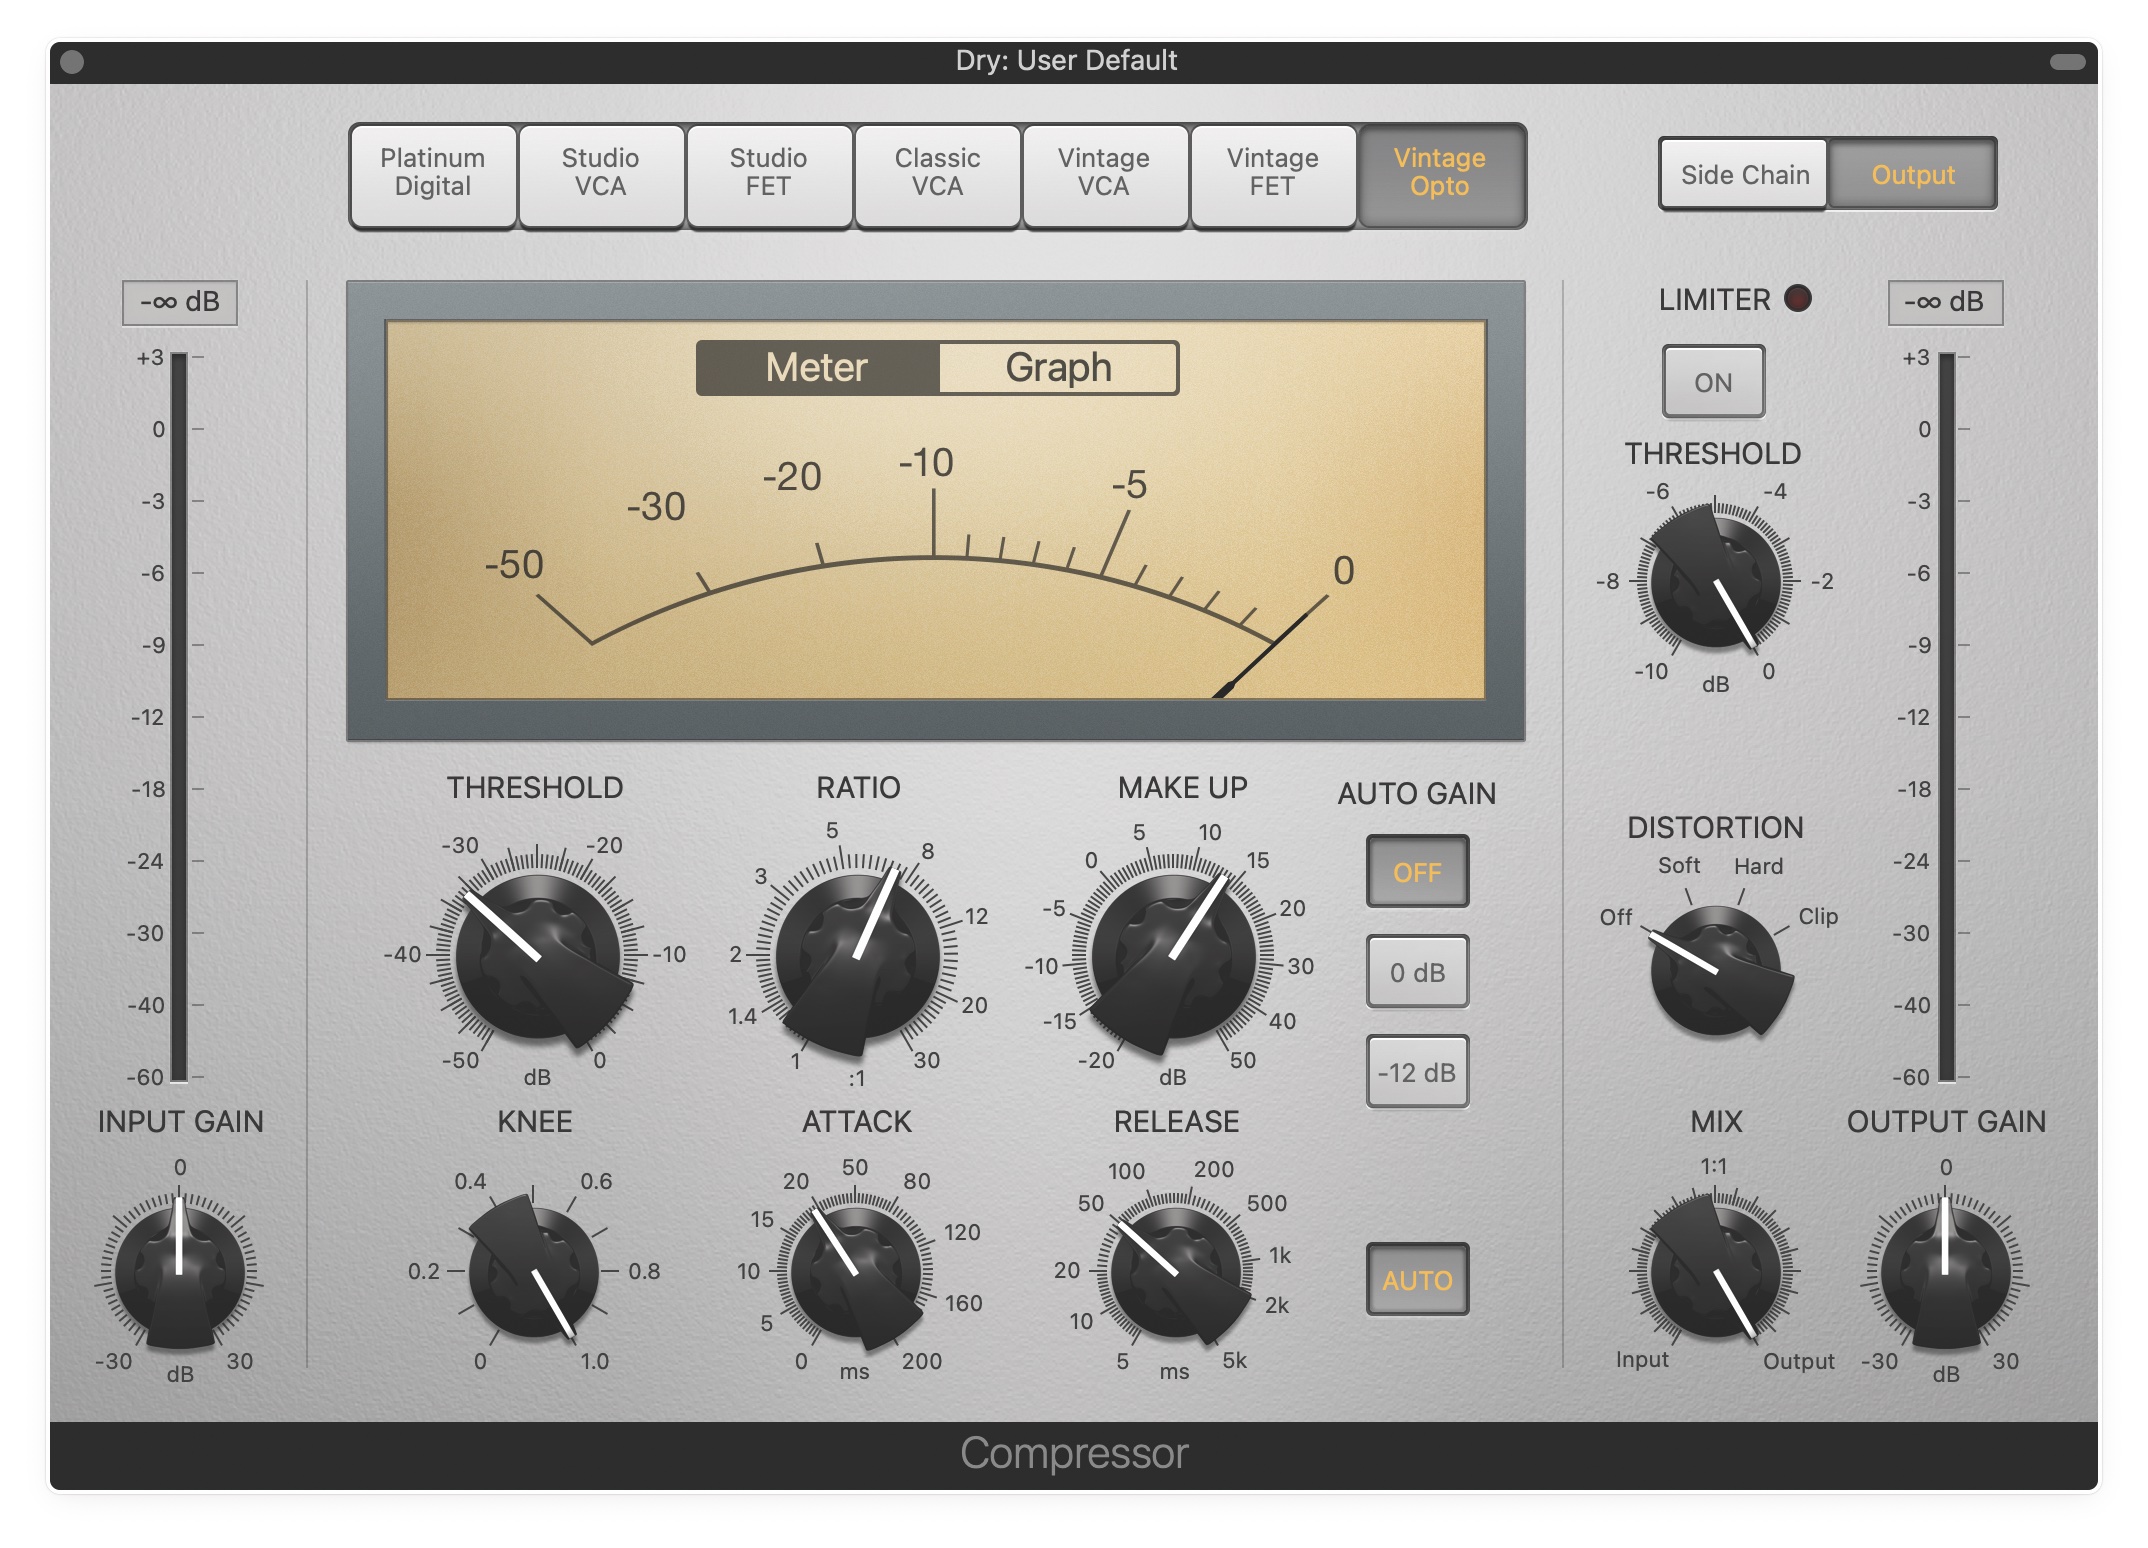
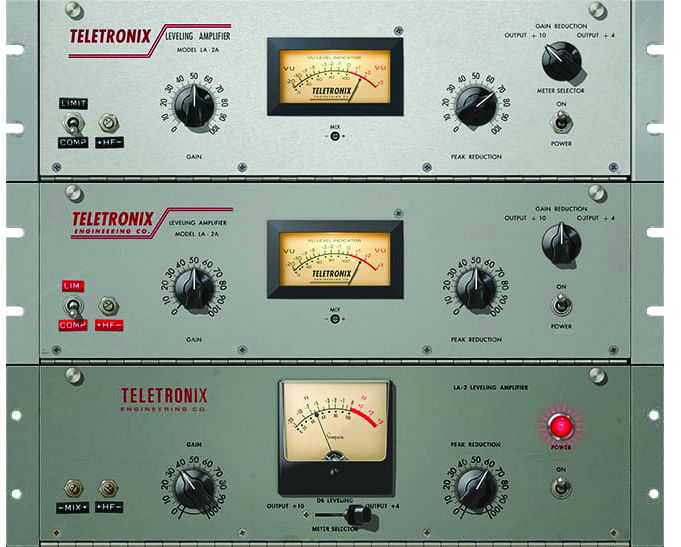
Our patch may sound a little on the digital side, which could be useful in certain scenarios, but the use of a compressor styled on a LA-2 will also excite those colourful lower frequencies, creating an even greater sense of depth, alongside the helpful compression. We especially like the LA-2 from Universal Audio, but it’s quite likely that the compressor within your DAW may have similar options for some form of valve/tube emulation.
Two more plugins to try
1. Arturia CZ V
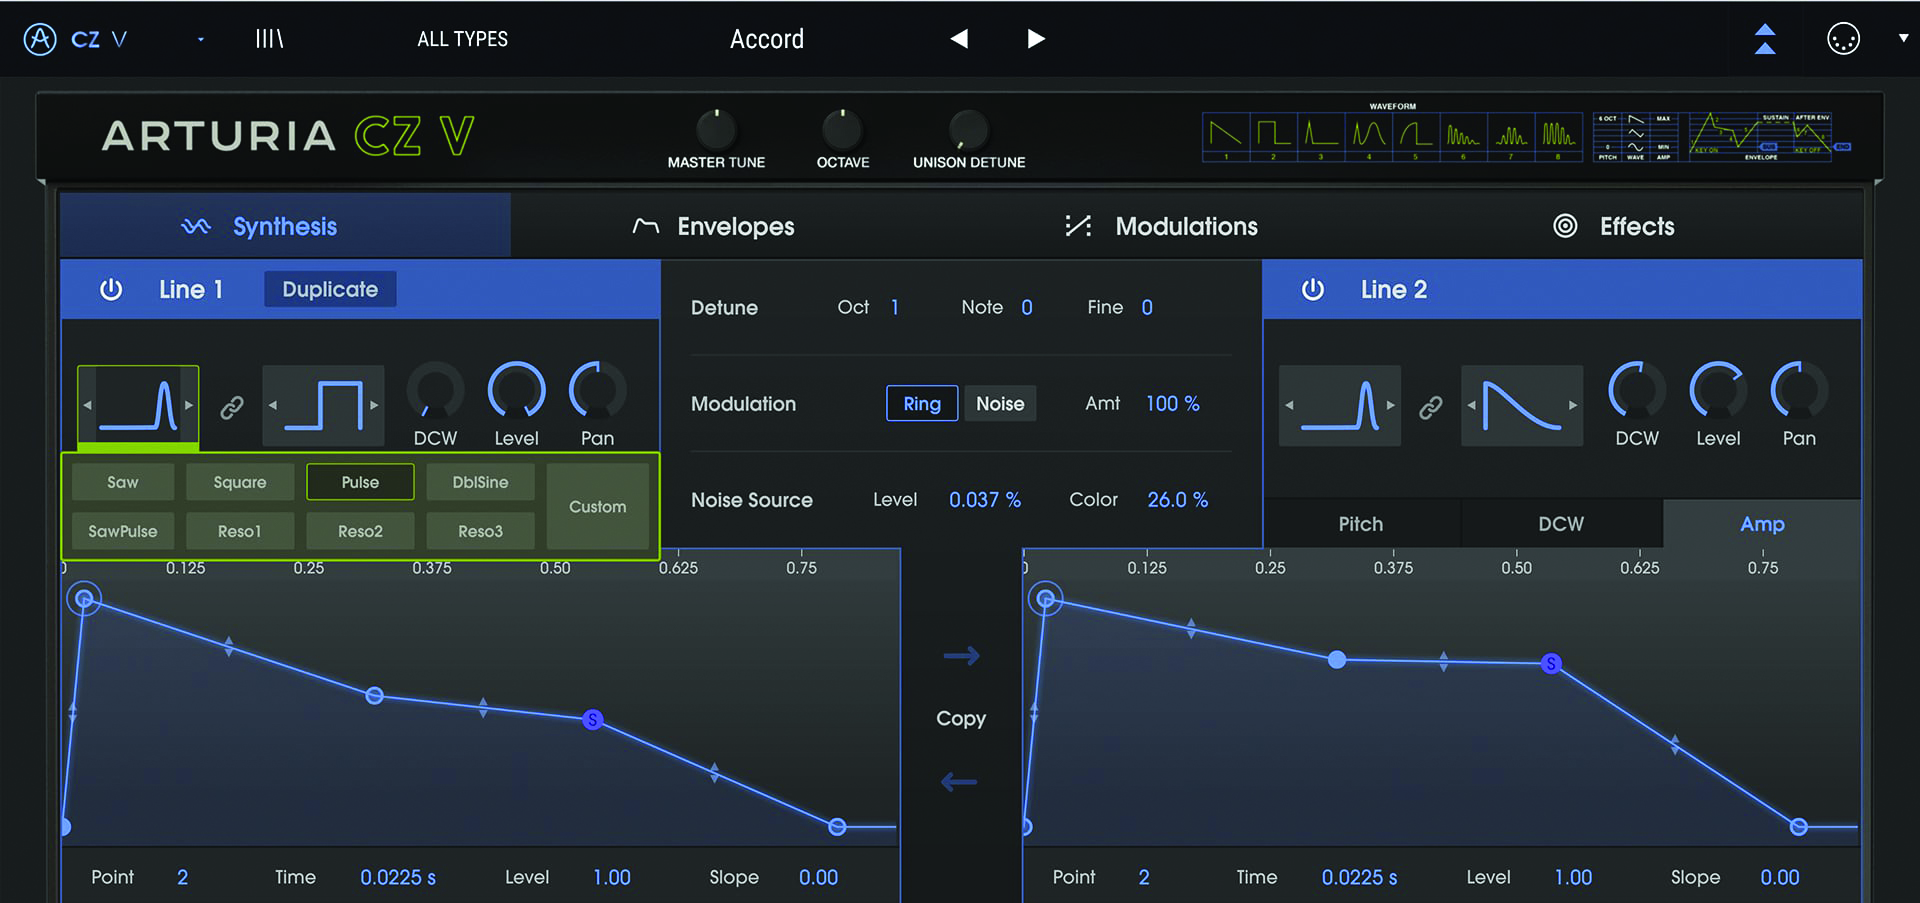
The CZ V draws inspiration from the original phase distortion classics from Casio. Expect sharp and clean sounds from phase distortion oscillators.
2. Native Instruments FM8
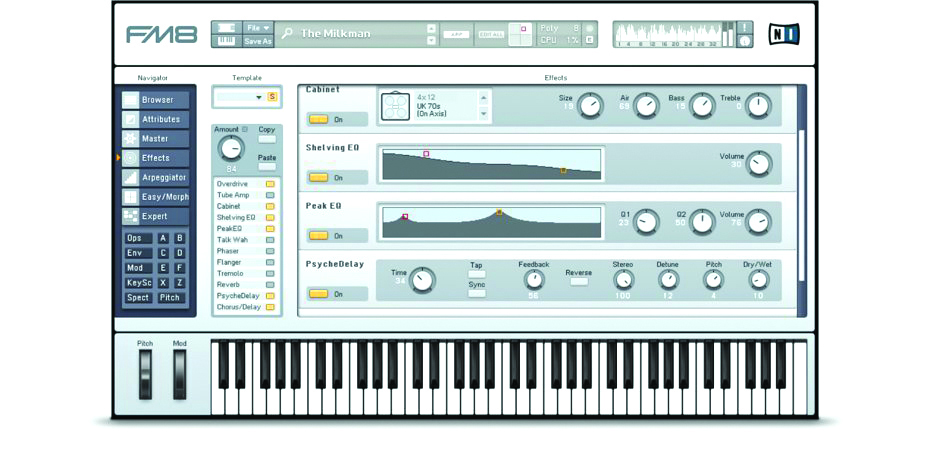
Leading on from the world of phase distortion, the FM8 takes Yamaha’s famed FM synthesis to the next level through software.
Roland Schmidt is a professional programmer, sound designer and producer, who has worked in collaboration with a number of successful production teams over the last 25 years. He can also be found delivering regular and key-note lectures on the use of hardware/software synthesisers and production, at various higher educational institutions throughout the UK
