D16's astonishingly accurate-sounding emulation of the Roland TR-909 drum machine, Drumazon, replicates every element of the real thing - right down to the decidedly old-school workflow of its 16-step sequencer - and adds to it considerably with an expanded control set, Host Trigger mode and general plugin instrument convenience.
In this tutorial, we'll show you how to tweak and manipulate Drumazon's sounds. For more Drumazon tips and techniques, pick up issue 226 of Computer Music magazine, and check out our guide to programming Drumazon patterns.

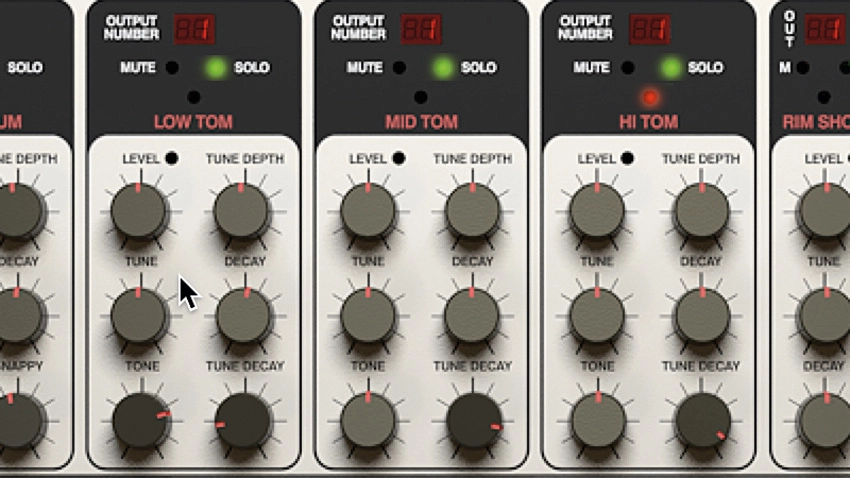
Step 1: The drum and cymbal sounds generated on each of Drumazon's 11 channels are tweaked using the array of knobs above the sequencer controls. From left to right, we have Bass Drum, Snare Drum, Low Tom, Mid Tom, High Tom, Rim Shot, Hand Clap, Closed Hi-hat, Open Hi-hat, Crash cymbal and Ride cymbal.

Step 2: Several controls are common to all 11 sounds, starting with Level, which is primarily a volume control, but also determines the amount of pattern randomisation applied in the sequencer's Randomise mode. The Decay knob is also present for all channels except the Hand Clap, extending or shortening the amplitude envelopes of the sounds.

Step 3: The Tune control adjusts the release time of the Bass and Snare pitch envelopes, and sets the fundamental pitch of all other sounds. The base pitch of the Bass Drum is governed by its Pitch knob, while the Tune Decay controls on the Toms lengthen the release times of their frequency envelopes. The Tune Depth knob sets the range of the pitch envelope for the Bass Drum, Snare and Toms.

Step 4: The Bass Drum's Attack knob accentuates its initial transient more and more as it's raised, while Decay adjusts the decay time of its amplitude envelope - that is, how long the sound takes to fade away to silence. The Snare Drum incorporates a noise generator with a couple of controls: Snappy raises and lowers its volume, and Tone adjusts the release time of its envelope.

Step 5: The three Toms also make use of noise as an attack-boosting layer, but here you get only Tone controls, for adjusting the noise level. The Handclap, as mentioned, doesn't include a Decay parameter, instead incorporating its own reverb, the depth of which is set using the Reverb knob.

Step 6: The two Hi-Hat channels - Open and Closed - are automatically assigned to a choke group, so that the Closed hat will cut the Open hat short, just like the real thing, and if Closed and Open hats are programmed to occur at the same time, only the Open Hat will be heard. Since this choking works even when the Level of the Closed hat is at zero, it can also be useful for shaping a 'solo' Open hat sound.

Step 7: Last but not least, the Rim Shot, Crash cymbal and Ride cymbal sounds don't go beyond the basics in terms of controls, including just the common Level, Tune and Decay knobs. Of course, all of Drumazon's sound-shaping parameters can be MIDI controlled and automated, for real-time manipulation.

Step 8: Rather than muting and soloing the audio outputs, the Mute and Solo buttons at the top of each channel 'block' the triggering of the muted drums, so sounds that are playing when either function is activated will continue to play to completion before muting, rather than stopping dead immediately. Above the Mutes and Solos are the Output channel selectors, for assigning each sound to its own mixer channel in the host DAW.
