Deconstructed: Julio Bashmore's Battle For Middle You
We dissect the bass-driven house hit

Want all the hottest music and gear news, reviews, deals, features and more, direct to your inbox? Sign up here.
You are now subscribed
Your newsletter sign-up was successful
SONGWRITING WEEK: Battle For Middle You, from British producer Julio Bashmore's Everybody Needs A Theme Tune EP, was one of biggest breakthrough house tunes of 2011.
It's the first of four tracks on the EP, all of which are heavily influenced by retro house sounds in one way or another.
Listen to the track on YouTube here
At 126bpm and with a solid four-to-the-floor feel, it's a fairly classic house tune. That said, the track's retro, deep house beats are offset by hypnotic keyboards and a rounded bass that move the feel away from that of a typical floor-filler.
Clever use of long reverbs and swung delays on specific sounds adds to the dubbed-out vibe, and the main vocal sample, borrowed from Mass Production's 1977 tune People Get Up, adds another layer of retro flavour with well-chosen reverb, delay and EQ.
Structurally, the track follows a tried-and-tested formula for a full-length house mix and includes two drop sections, one after the intro section at 1.31 and one around half way through at 3.01.
Both drops use a rising low-pass filter on the main rhythmic synth to help build the tension, but the second drop is twice as long. This double-length section works really well, allowing plenty of time to build to the track's peak at 4.04. This peak section is hammered home with 32 full-on bars that include the main rhythmic synth part used in the build-up.
This rhythmic synth is a key component in the track, creating a hypnotic feel to the build sections and providing a great payoff as a lead through the peak section. Through careful sound design it also has a wonderful pumping feel that's reminiscent of the sidechained compression featured on many club tracks. By tying this in closely with the bass part, it also works really well rhythmically.
Want all the hottest music and gear news, reviews, deals, features and more, direct to your inbox? Sign up here.
The rhythm of the bass part contributes massively to the hypnotic nature of the track, but we shouldn't overlook its sound. This deep, round, bouncy tone is ideal, holding down the sub-frequencies but with a bold attack that becomes part of the rhythmic feel.
Low-end punch
The bass sound and part are, of course, hugely important to the overall feel of the track, so let's look at how they've been executed.
The sound itself is deep and bouncy, almost like a pitched 909 kick. If it were solely this round, subby nature we were seeking, we could go for a sine wave-based sound, but we're also looking for a really solid percussive attack.
We could create this using the right sort of analogue synth and tweaking the amplitude envelope, but here we're going to go down the FM route, as FM-based sounds tend to offer tougher attack characteristics than analogue.
The other parameters of this sound that will need careful tailoring are the decay and release. By using a quick decay, limited sustain and a short but gentle release, we'll get the short, bouncy sound we're after.
The bass part itself has two note patterns: one for the main build (as in section 4) and one for the other sections in which it plays (as in section 3).
The rhythmic pattern remains the same in both cases, and is a 4:3 polyrhythm over two bars. At bar 3 the polyrhythm starts again, breaking the full cycle (which would be three bars).
This is the prevailing rhythm that you'll hear when listening to all sorts of club music, playing either the main riff or the bass part. Often the cycle is used only for one bar, and every now and then four bars, but here it's two bars. So, you get the syncopated feel against the 4/4 kick, as well as against the syncopated feel of the hi-hats.
To program these parts, simply divide two 4/4 bars into 16ths and then, starting with the downbeat of bar 1, play every fourth 16th. At the end of bar 2, this leaves a gap of two 16ths, effectively breaking the polyrhythmic cycle, which starts afresh on bar 3.
Building the bass
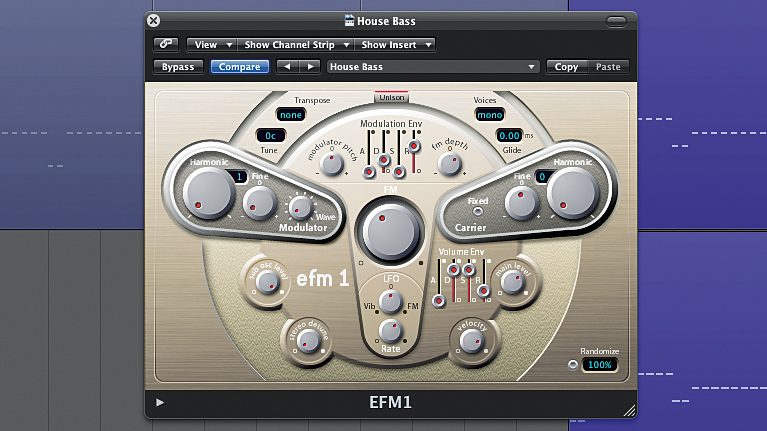
Step 1: For the bass sound, we head straight for an FM-style synth. Here we have a pretty good preset - it has the right kind of knocking attack and solid sound that we're after, although there's some kind of modulation affecting the attack, and the sustain is a little bit too long.
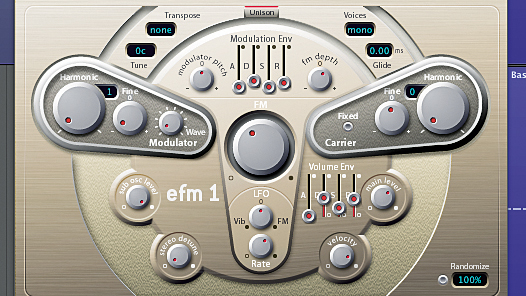
Step 2: To get to the sound we want, first let's look at the Modulation Envelope. We tweak down the Decay and Release to flatten the sound, then we reduce the Volume Envelope Sustain and Decay and carefully adjust the Release time to get the bouncy attack/release sound we're after.
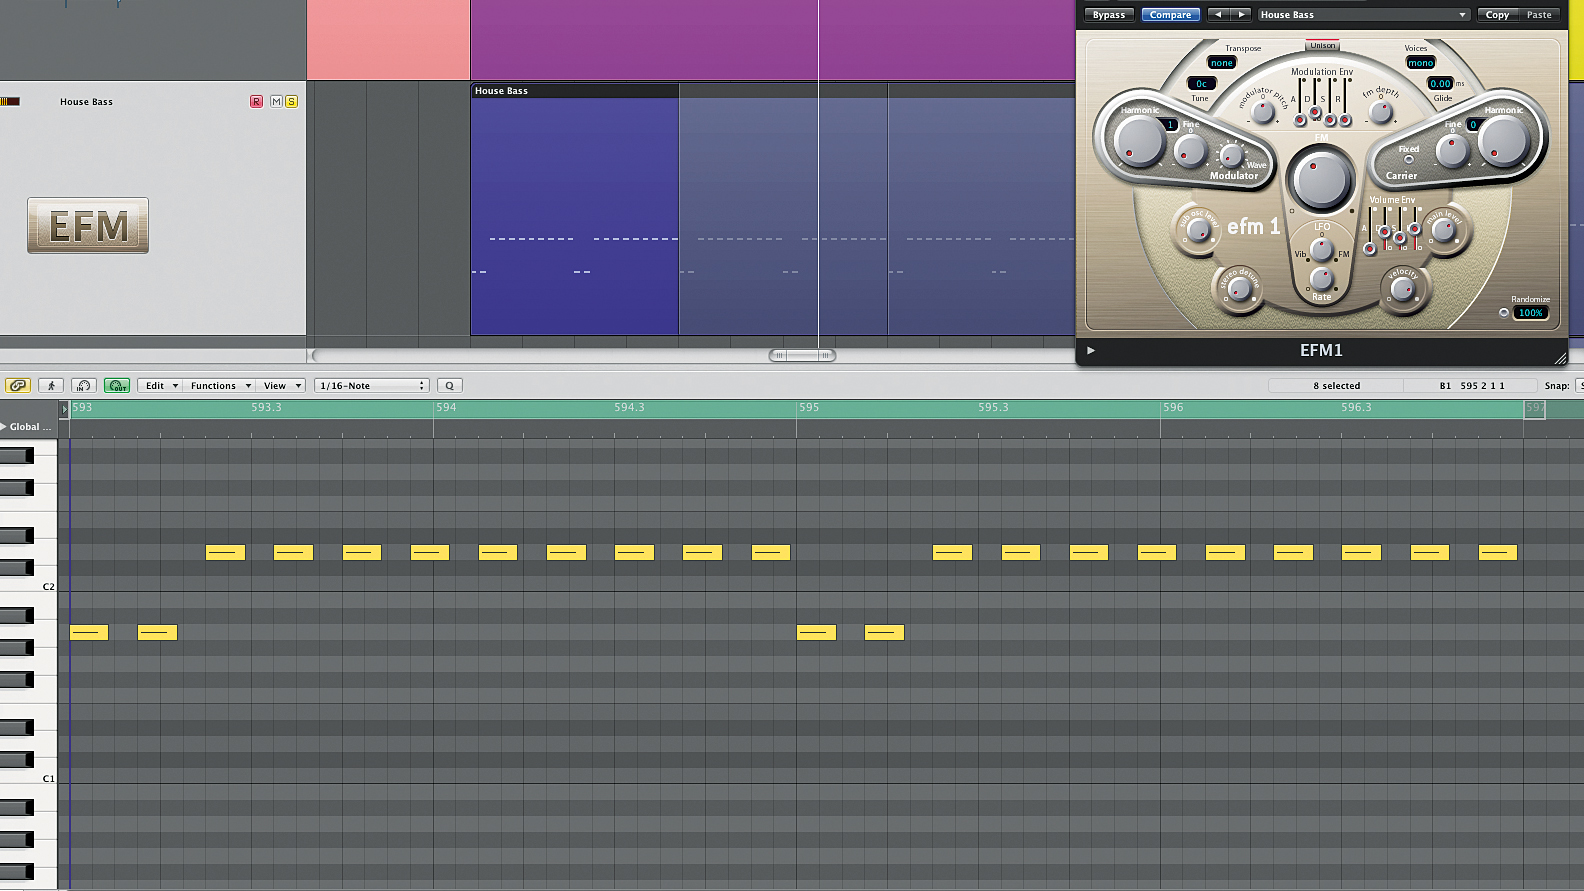
Step 3: The pattern itself is easy to program: it simply plays every fourth 16th-note across two bars, then starts again. We've programmed this straight, without any velocity differences and with consistent lengths for all the notes. In fact, the note lengths aren't that important as the amplitude envelope is responsible for the decay.
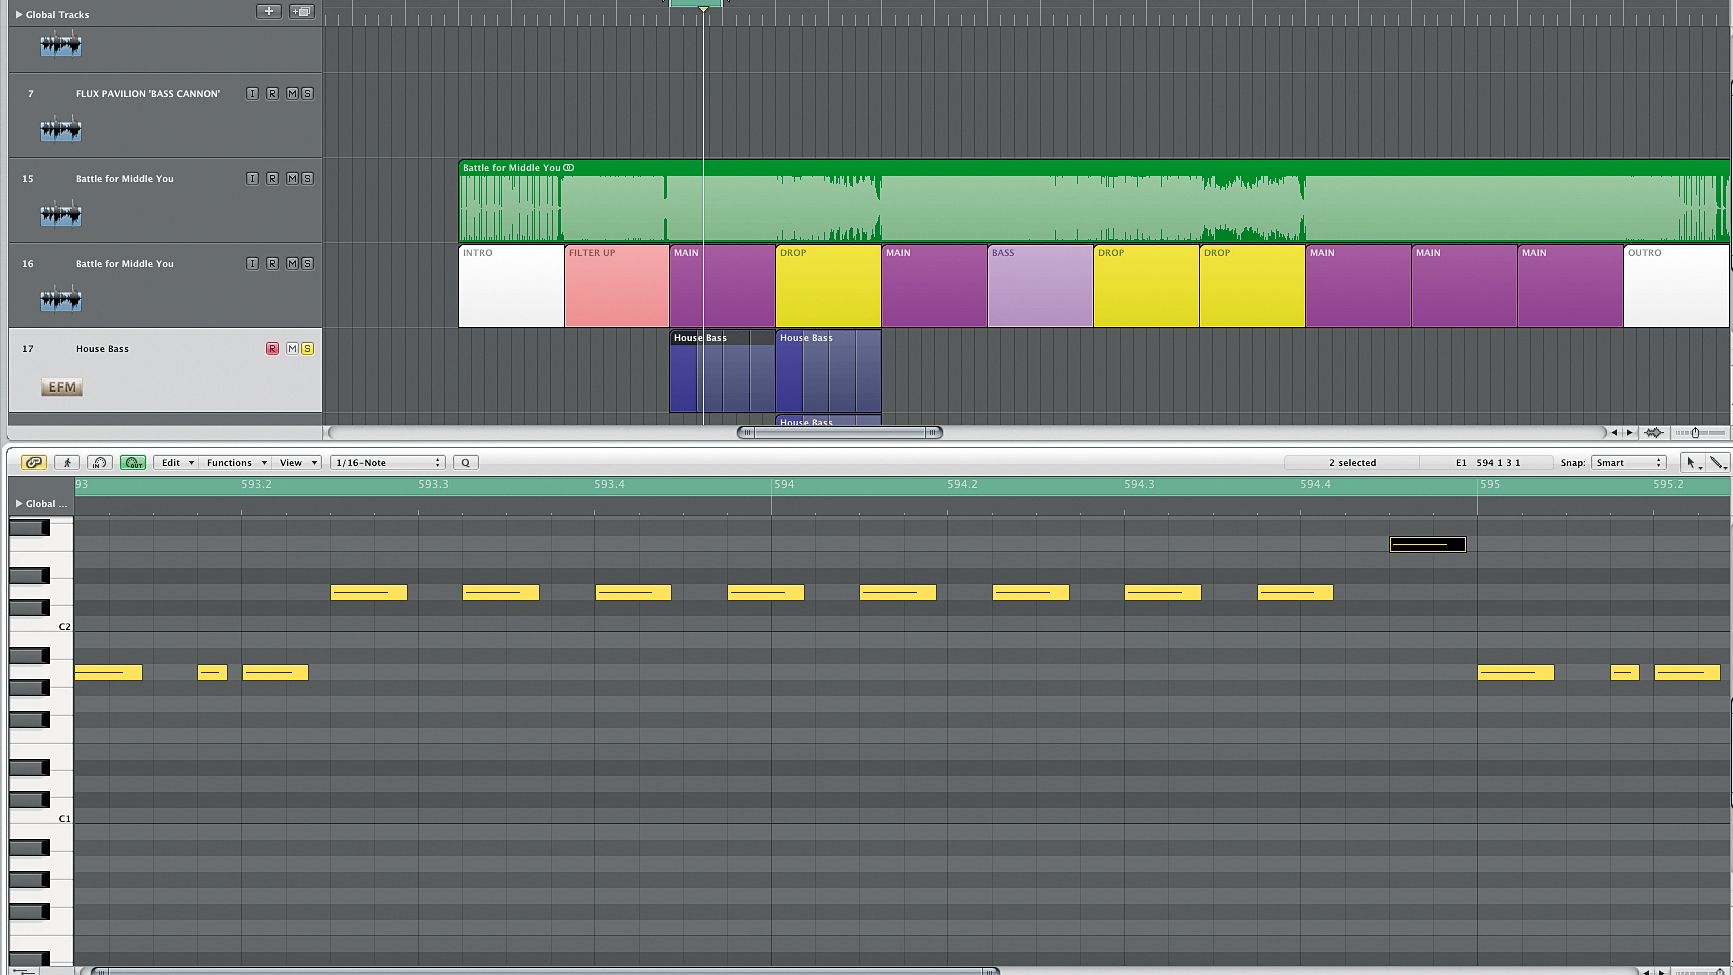
Step 4: Finally, we can throw in some variations just to add a bit of feel. Let's try a little skippy move just on the second beat, so that two consecutive 16th-notes play. Then let's add a note shift to the last note of the two-bar pattern.
Main rhythmic synth
As we've mentioned, the rhythmic synth part is something of a driving force on this track. You'll notice that as the part comes in, it follows the same polyrhythmic pattern we've just discussed for the bass: 4:3 across two bars.
The sound itself includes some kind of harmonic offset - this could simply be chords programmed into the MIDI part, but based on our experience of club music, and given that there's a fixed interval, we're making an educated guess that this is built into the sound itself using some offset oscillators.
Isolating the sound is slightly tricky because it's playing in unison with the bass. Taking the bass notes as the root, we can hear both an octave fifth (19 semitones) and two octaves plus a minor third (27 semitones) tones above the bass. So, by building a three-oscillator sound,
starting with unison with the bass for Oscillator 1, an octave fifth for Oscillator 2 and two octaves plus a minor 3rd for Oscillator 3, we've got the chord spread working.
The basic sound can be achieved with a supersaw waveform. There's something bright and ringy in there, too, however, so it may be worth trying an additive waveform for the highest oscillator.
There's also a pumping nature to the sound that's reminiscent of a sidechained compressor. In fact this is playing in time with the polyrhythmic part (rather than being triggered by the 4/4 pulse of the kick), so again, we suspect it's built into the sound itself.
With closer listening, we can hear that this is influencing not just the attack of the amplitude envelope but also the frequency (meaning that an envelope is influencing the filter cutoff). If it sounds complicated, read on and we'll take you through it step by step.
Programming the synth
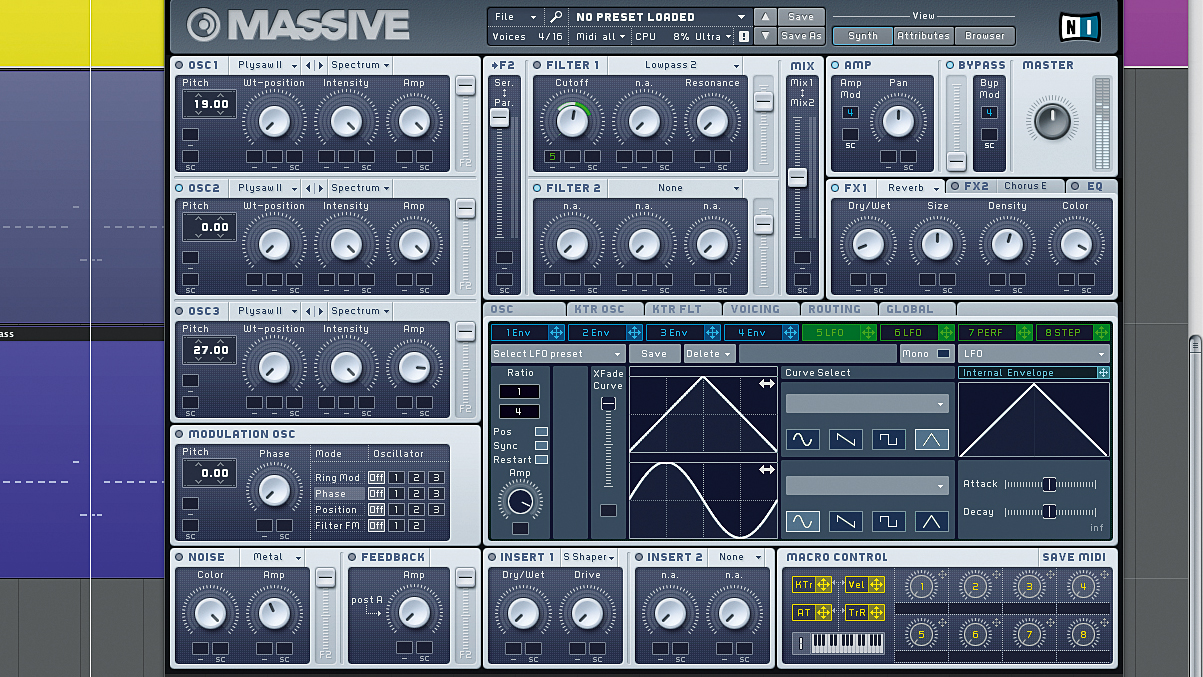
Step 1: Start by copying over the MIDI part from the bass. We're going to use the same single-note pattern and build the chords up within the synth by stacking the oscillators with offsets. We need a synth with flexible and multiple oscillator options; here we're using a supersaw, but you can try other shapes, too.
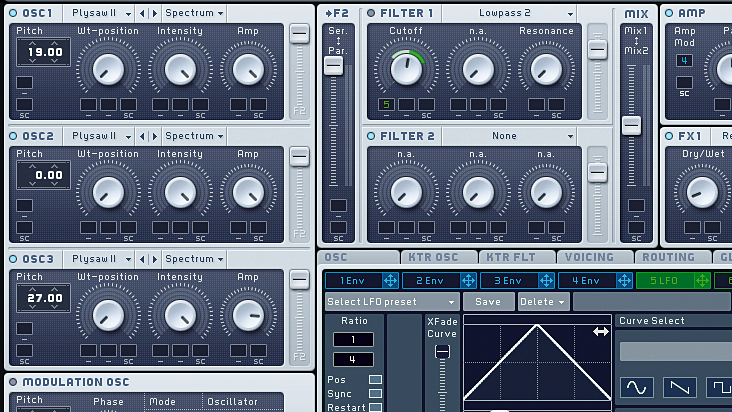
Step 2: We add in our first offset at +19 semitones, so that's an octave and a fifth (A). We're using exactly the same type of oscillator for this sound too, and we can begin to hear the offset chord sound taking shape. Then we add in the second offset at +27 semitones, (B)
A
B
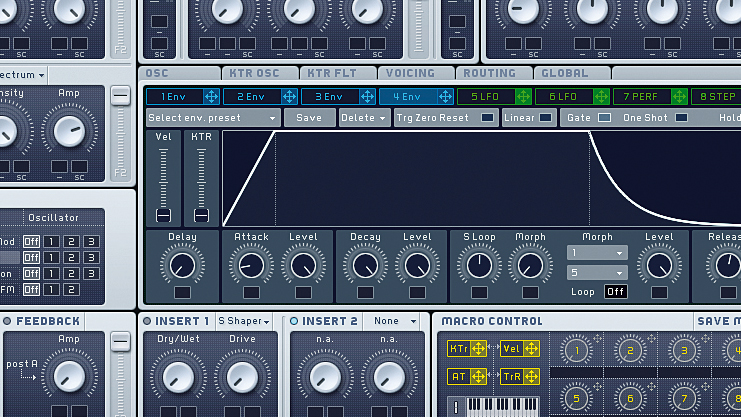
Step 3: Now we need to add a low-pass filter and modulate the attack so that the sound swells in. We can do this by using the attack stage of an envelope that's synced to the track. By adjusting the attack stage of the amplitude envelope (making it slower), we can fine-tune the swell.
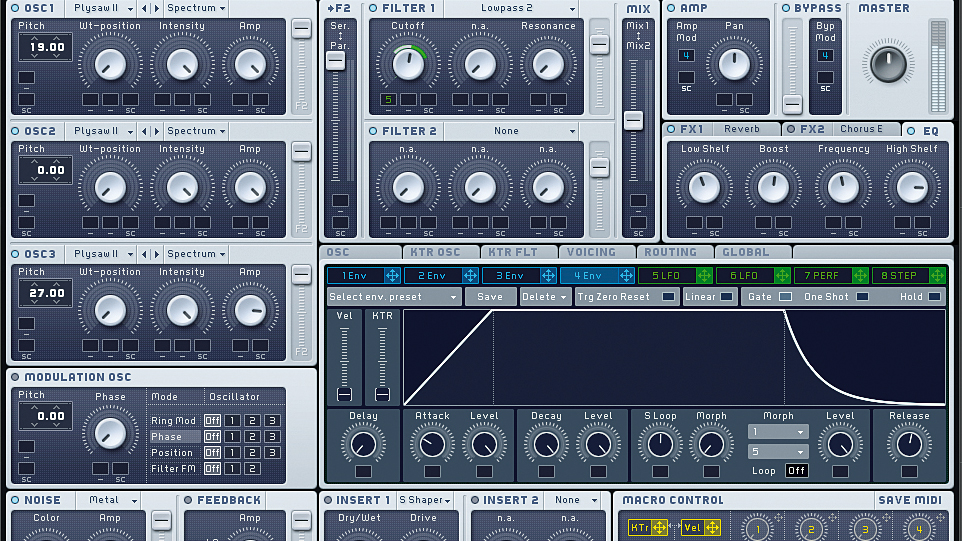
Step 4: We add in some noise generator, reverb and EQ to brighten up the overall sound and reduce some of the low end (A). Going back and adjusting the balance between the oscillator levels can seriously influence the overall feel of the sound - here we've reduced the level of the highest oscillator (B).