The ultimate guide to modern dynamics processors: "Where does this technology go from here? Have we pushed it to its potential, or is there more to come?"
Get to grips with the latest compression, gating and hitherto uncategorisable dynamics processors with our guide

The fidelity of modern music wouldn’t have reached its current heights without the invention, evolution and refinement of dynamic audio processing. This integral component of sound engineering has proven to be one of the key fundamentals that’s allowed us to truly sculpt audio and bend it to our will.
Likely the first true dynamics-processing unit (or compressor) was the Telefunken U3, created in the 1930s to control the dynamics of the PA system at the 1936 Berlin Olympics. Engineers soon realised the widespread potential of this new technology, but it wasn’t until the late 1940s through to the ’60s that we saw real progress in these units for more creative purposes.
When audio is cut to vinyl, dynamic range is more than just a matter of sound quality. Running a needle through a microscopic groove filled with bumps and ridges is a fragile business. The waveform of the music being literally cut into the disc means that its properties in amplitude and frequency determine the width of any given groove, and therefore how close together grooves can be, and therefore the amount of audio that can be written to a single side of a record.
Article continues belowIn the analogue domain, audio decisions have ultimate physical consequences. Early dynamics processors worked with these things in mind, until they were adapted for more and more creative ends!
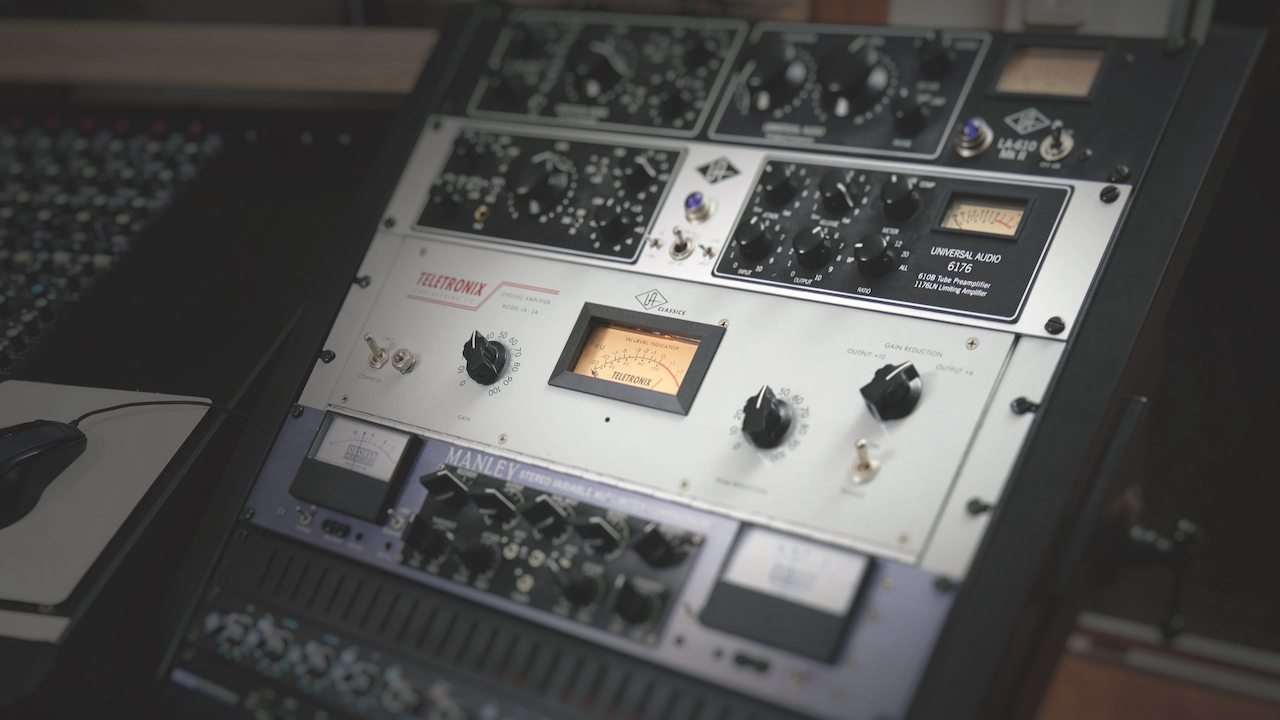
Tube and optical compressor types were among the initial advancements that pushed dynamic creative applications to the market. The Fairchild 660 (tube) and Teletronix LA-2A (optical) compressors emerged as pioneers, earning staple status among music engineers. While these units continued to serve broadcasting purposes for TV and radio, they effectively bridged the gap between creative and utility applications, marking a big stride in the evolution of audio processing technology.
In the 1970s, a young and ambitious Mike Dorrough was set on revolutionising the technology further, and his DAP (Discriminate Audio Processor) was the first compressor to split the dynamics processing effect across separate bands, giving birth to what we know today as multiband compression.
Of course, compression/limiting is not the only type of processing that affects the dynamics of audio signals. Gating the signal through a thresholded noise gate has also played an integral part in sculpting sound and molding its fidelity. We can also include dynamic EQ and sidechaining applications under the dynamic signal processing umbrella.
Want all the hottest music and gear news, reviews, deals, features and more, direct to your inbox? Sign up here.
But where does this technology go from here? Have we pushed it to its potential, or is there more to come? Well, you can be sure that the modern world is filled plentifully with more Mike Dorroughs, aiming to innovate and push the science of dynamic audio processing further. And, what an important role these eccentric minds will continue to play.
Currently, spectral processing is the new key technology, and companies like Sonible are exploring the potential power this new processing type offers. Further refining Dourrough’s vision of manipulating specific frequency bands, spectral processing allows for more high-precision frequency targeting by analysing the audio and only applying the processing to the most prominent areas.
Combining sidechaining with dynamic EQ
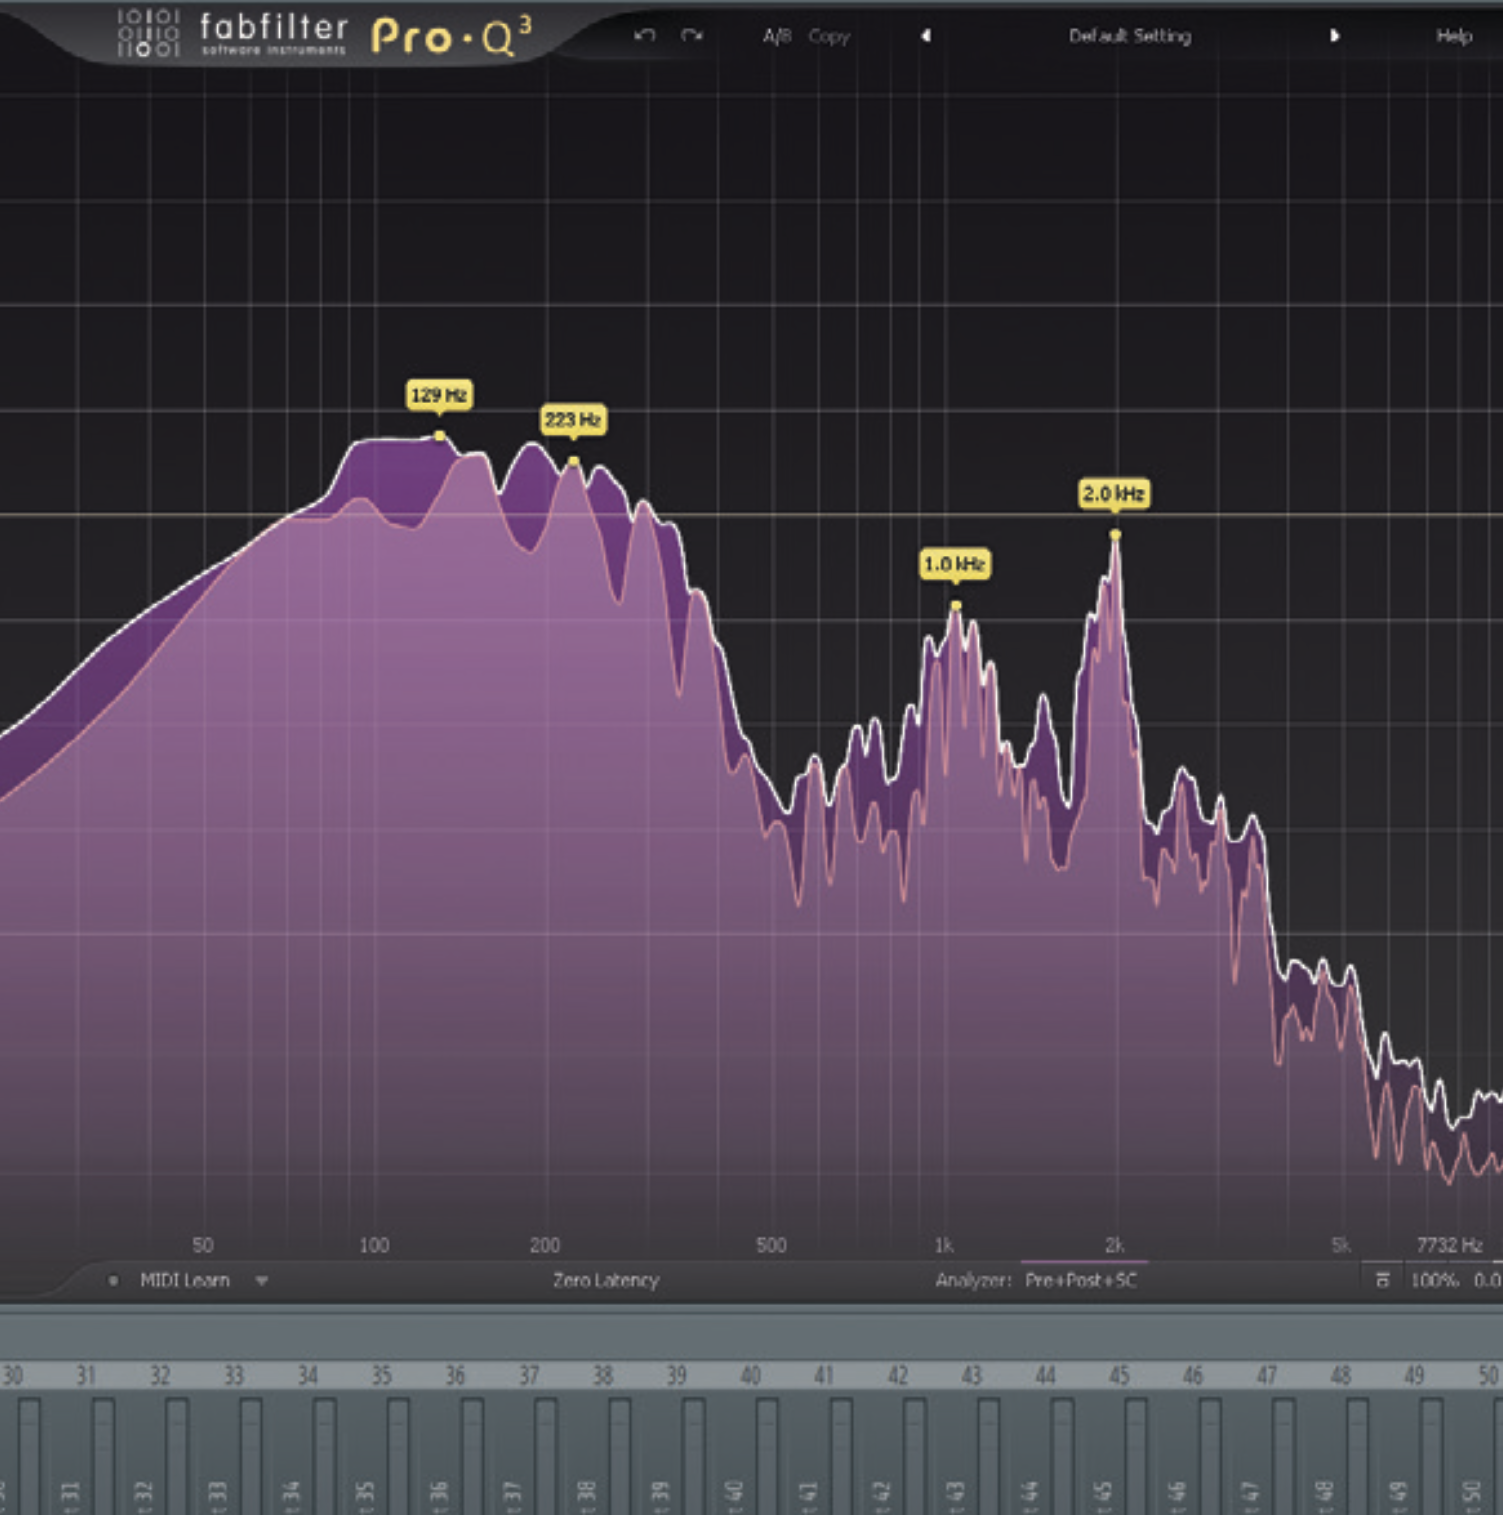
The kick and bass always compete for low-end frequency space, and many are used to sidechaining compression to help make the two elements work. But what about using dynamic EQ to apply the technique only to the low end of both?
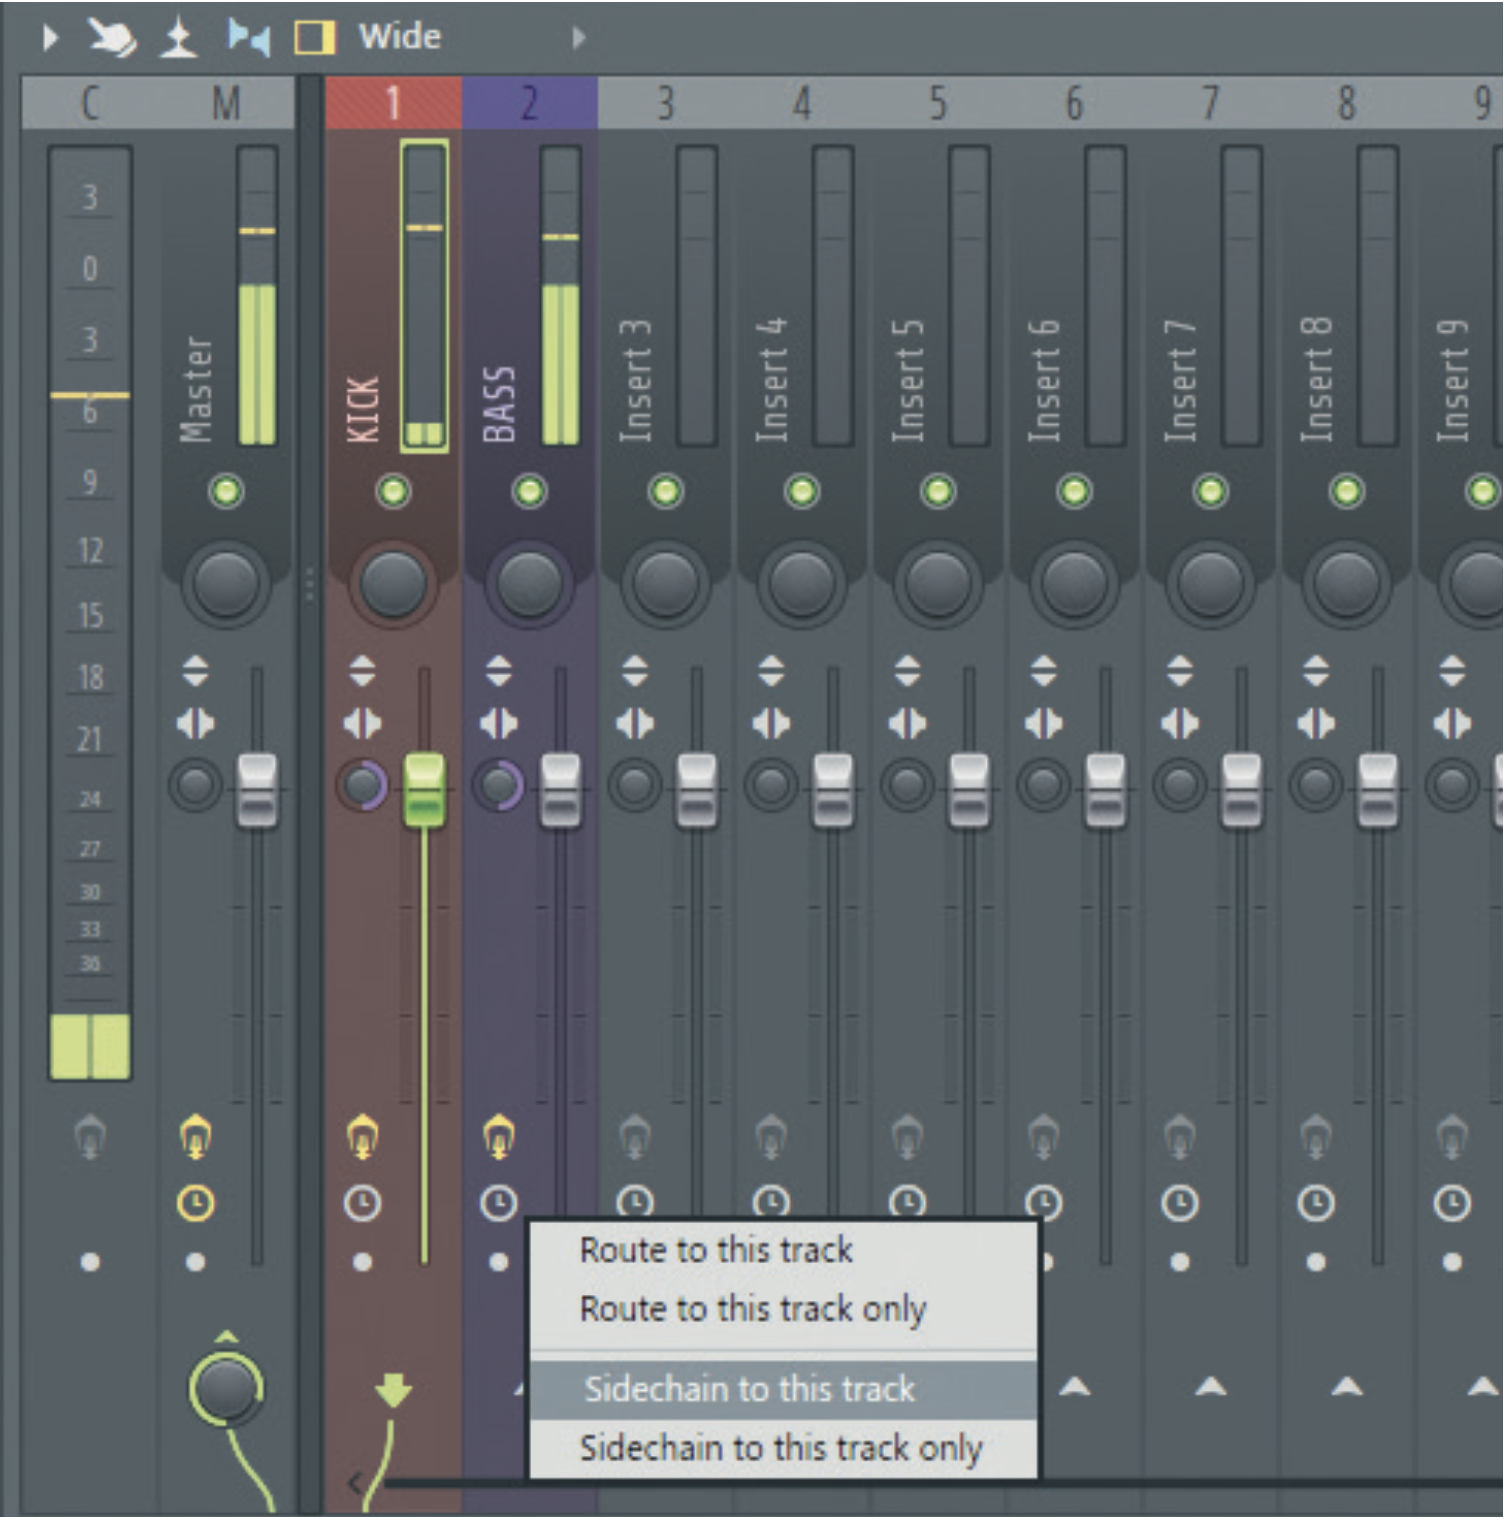
Apply an EQ with dynamic capabilities to the bass track. We’ve also added EQ to the kick to check clashing frequencies. In FL Studio, set up sidechain routing by clicking the kick’s mixer track and the bass’s insert, then Side-chain To This Track.
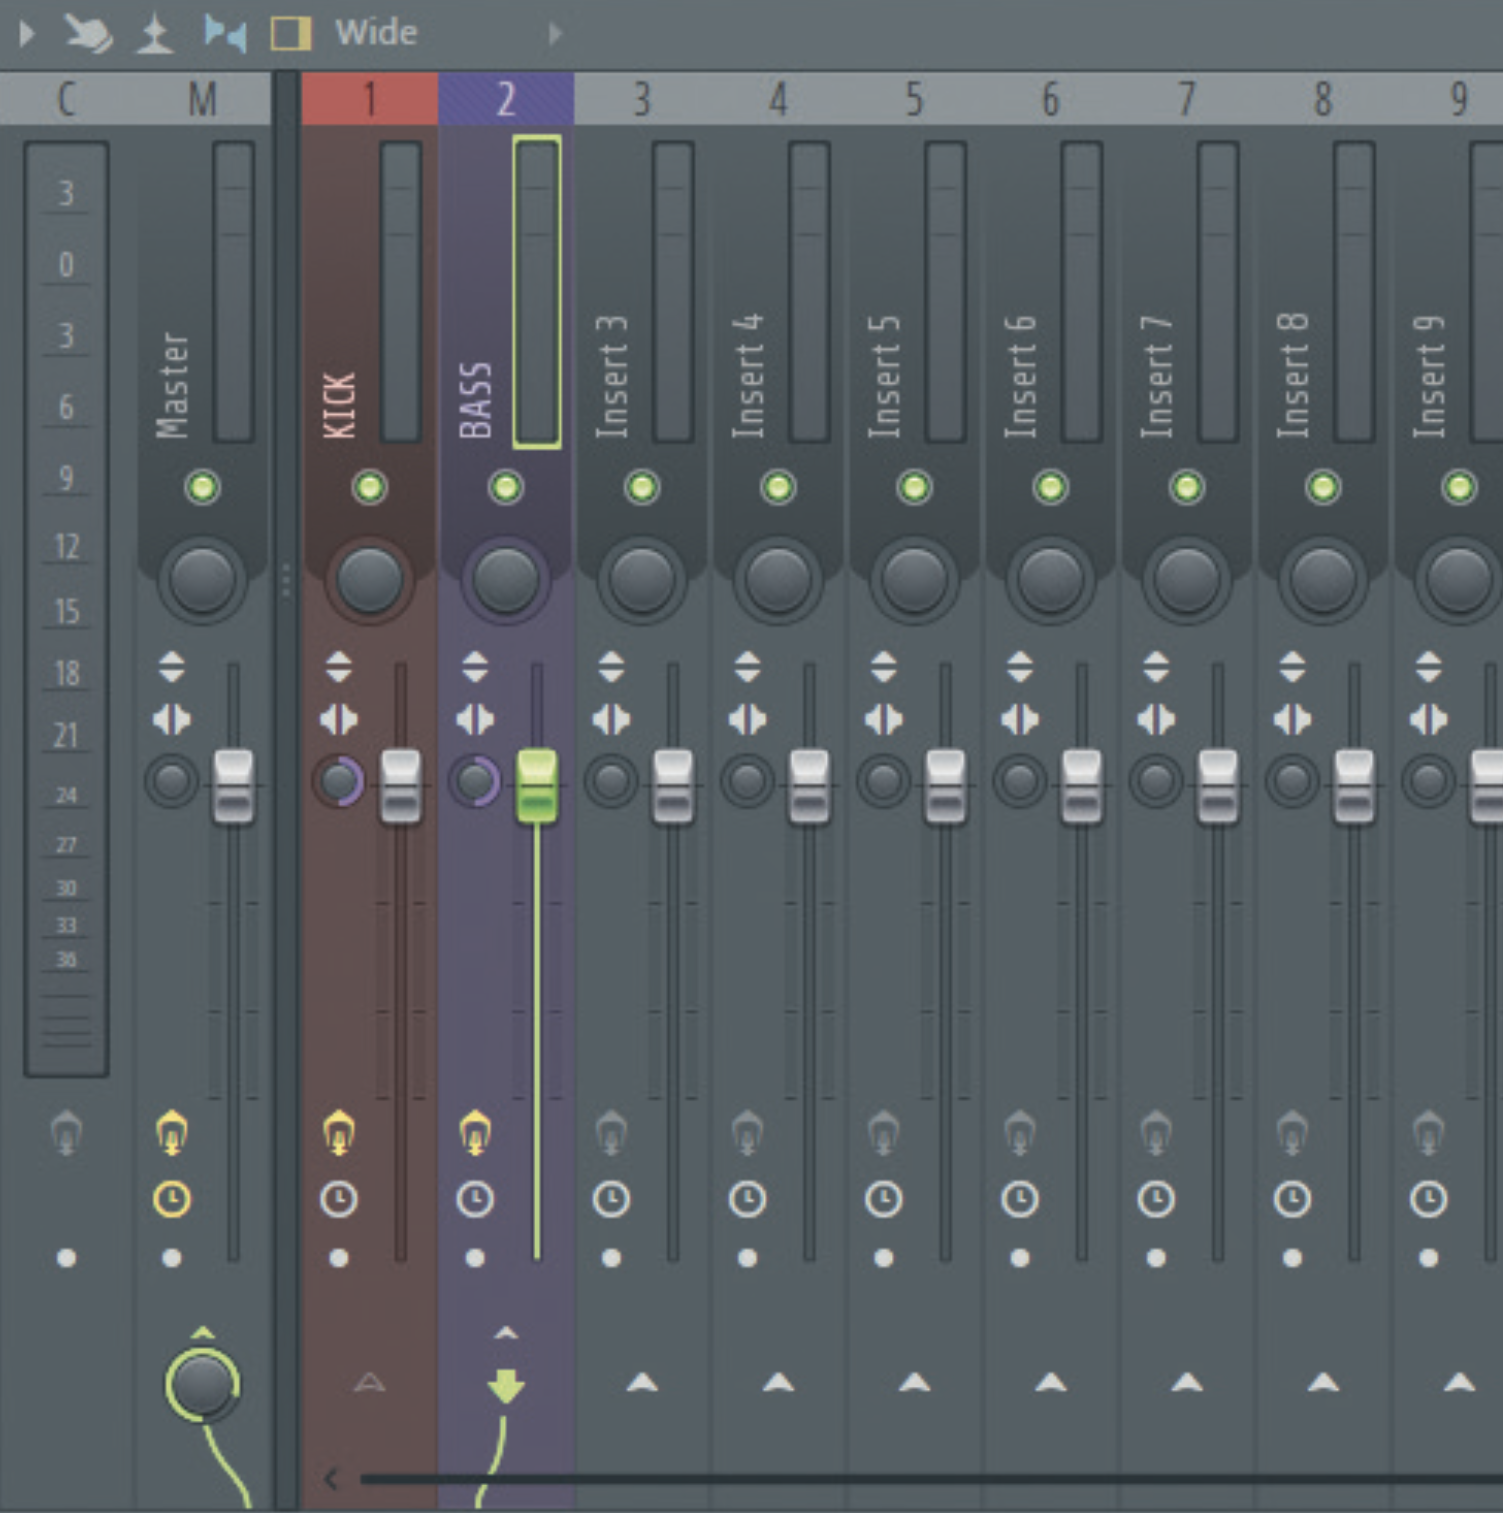
You’ll now have to select the incoming sidechain input from your bass track’s EQ settings. Depending on your DAW, your interface might look somewhat different, but refer to your DAW’s user manual or do a quick web search for further insight.
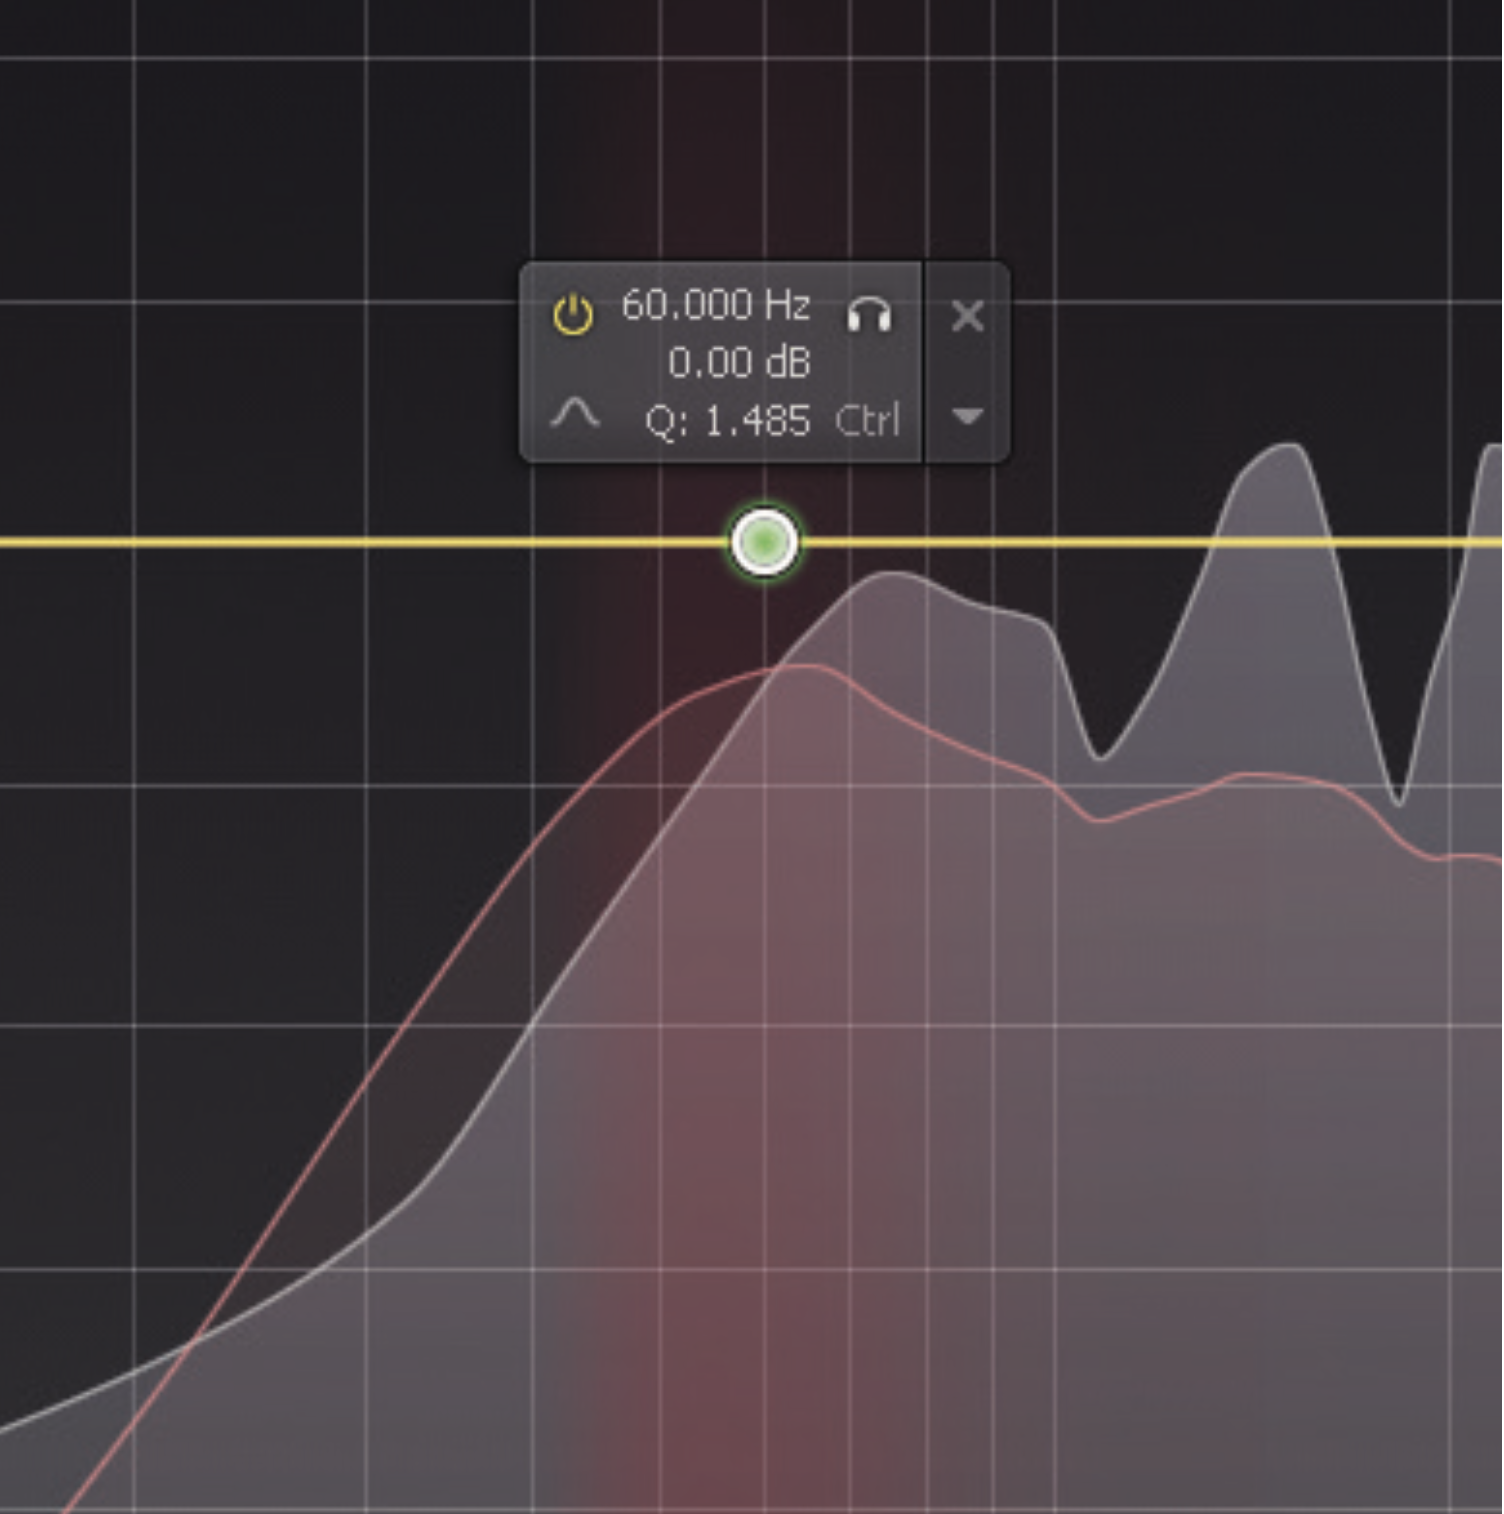
Next, set an EQ band on your bass EQ panel at the chosen targeted frequency (our kick and bass clash at 60Hz) and adjust the bandwidth (Q) to a moderately wide setting. You can change the width again later once the EQ is active.
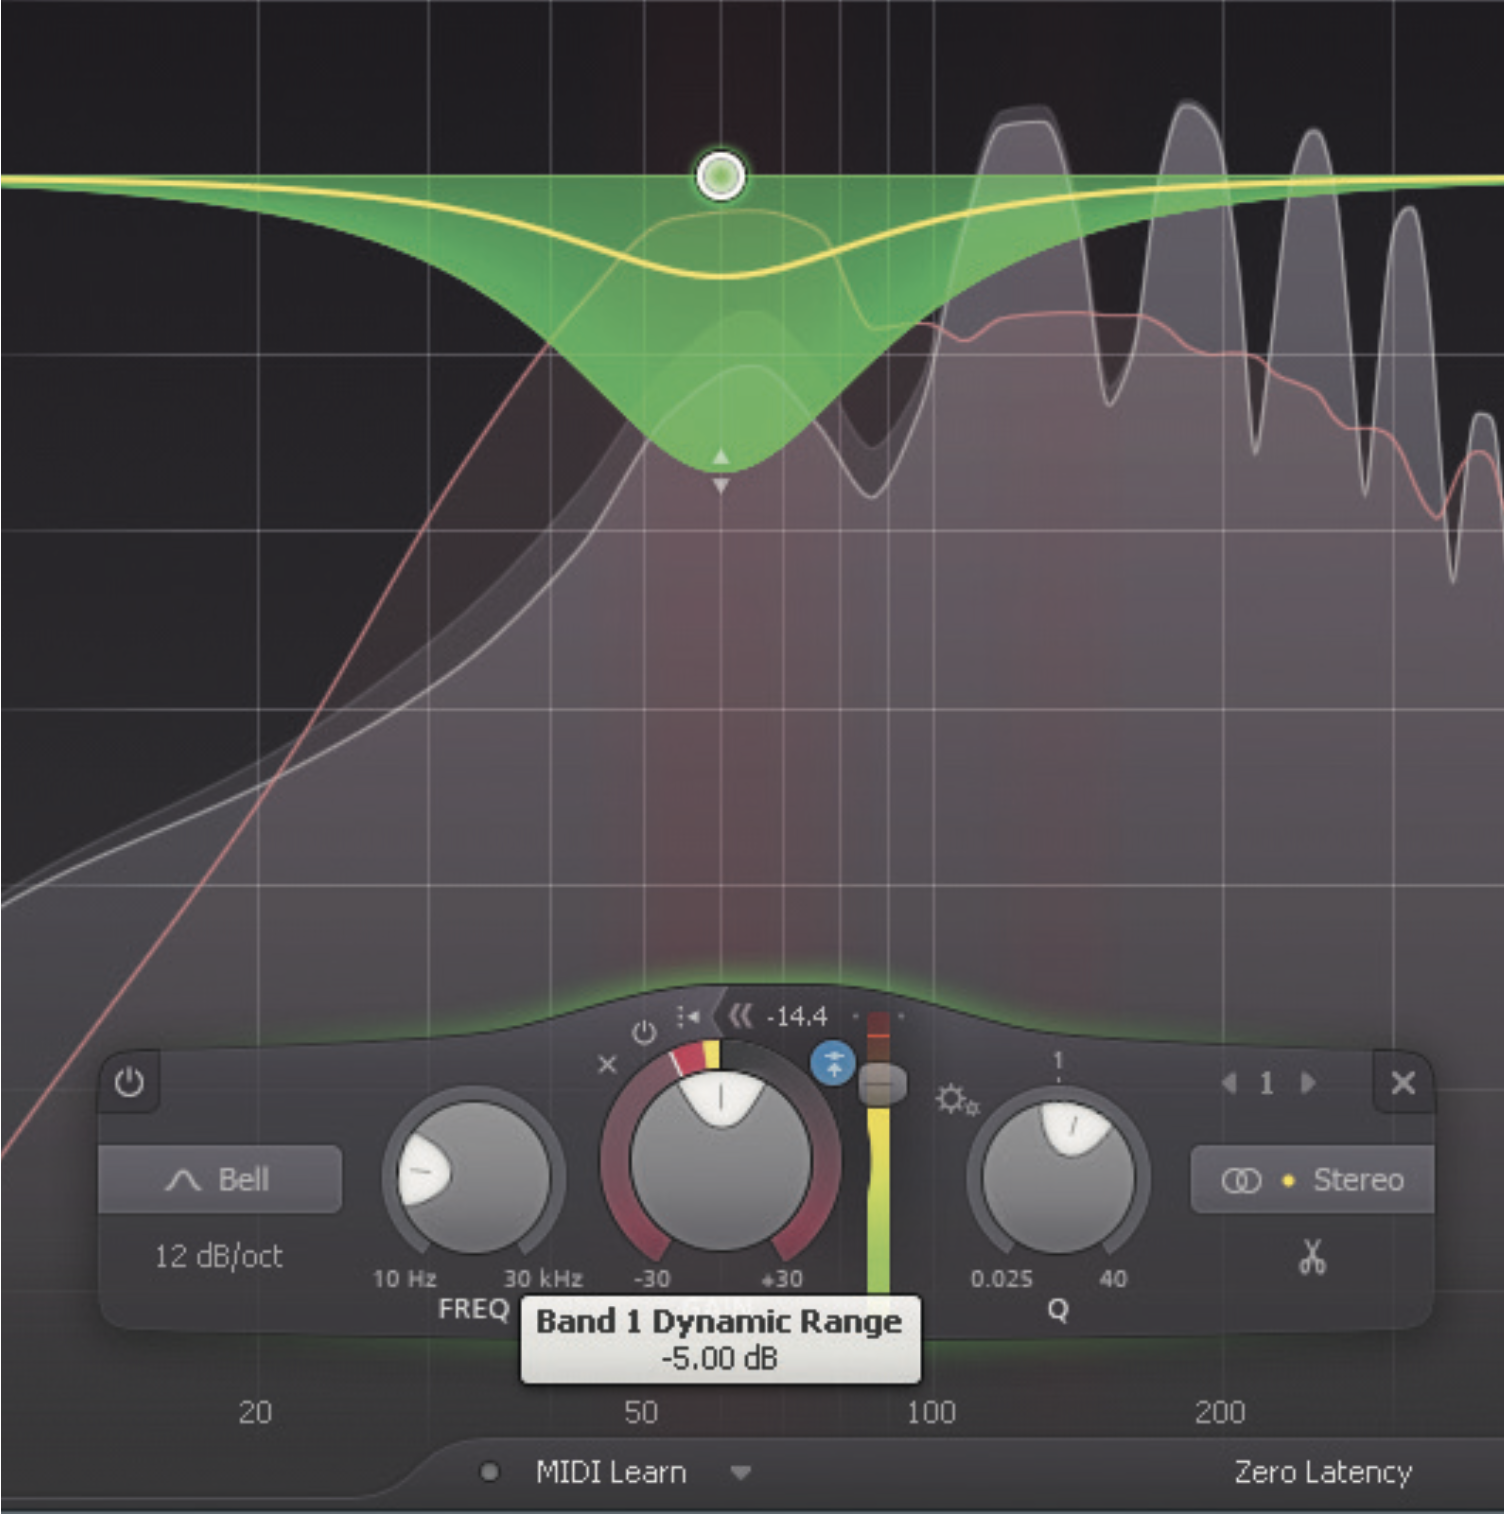
Now, you can set the dynamic range of the band to your chosen preference. We’ve gone with -5dB (which is a good, audible starting point). You can then activate the sidechain input on the band, and alter the threshold accordingly.
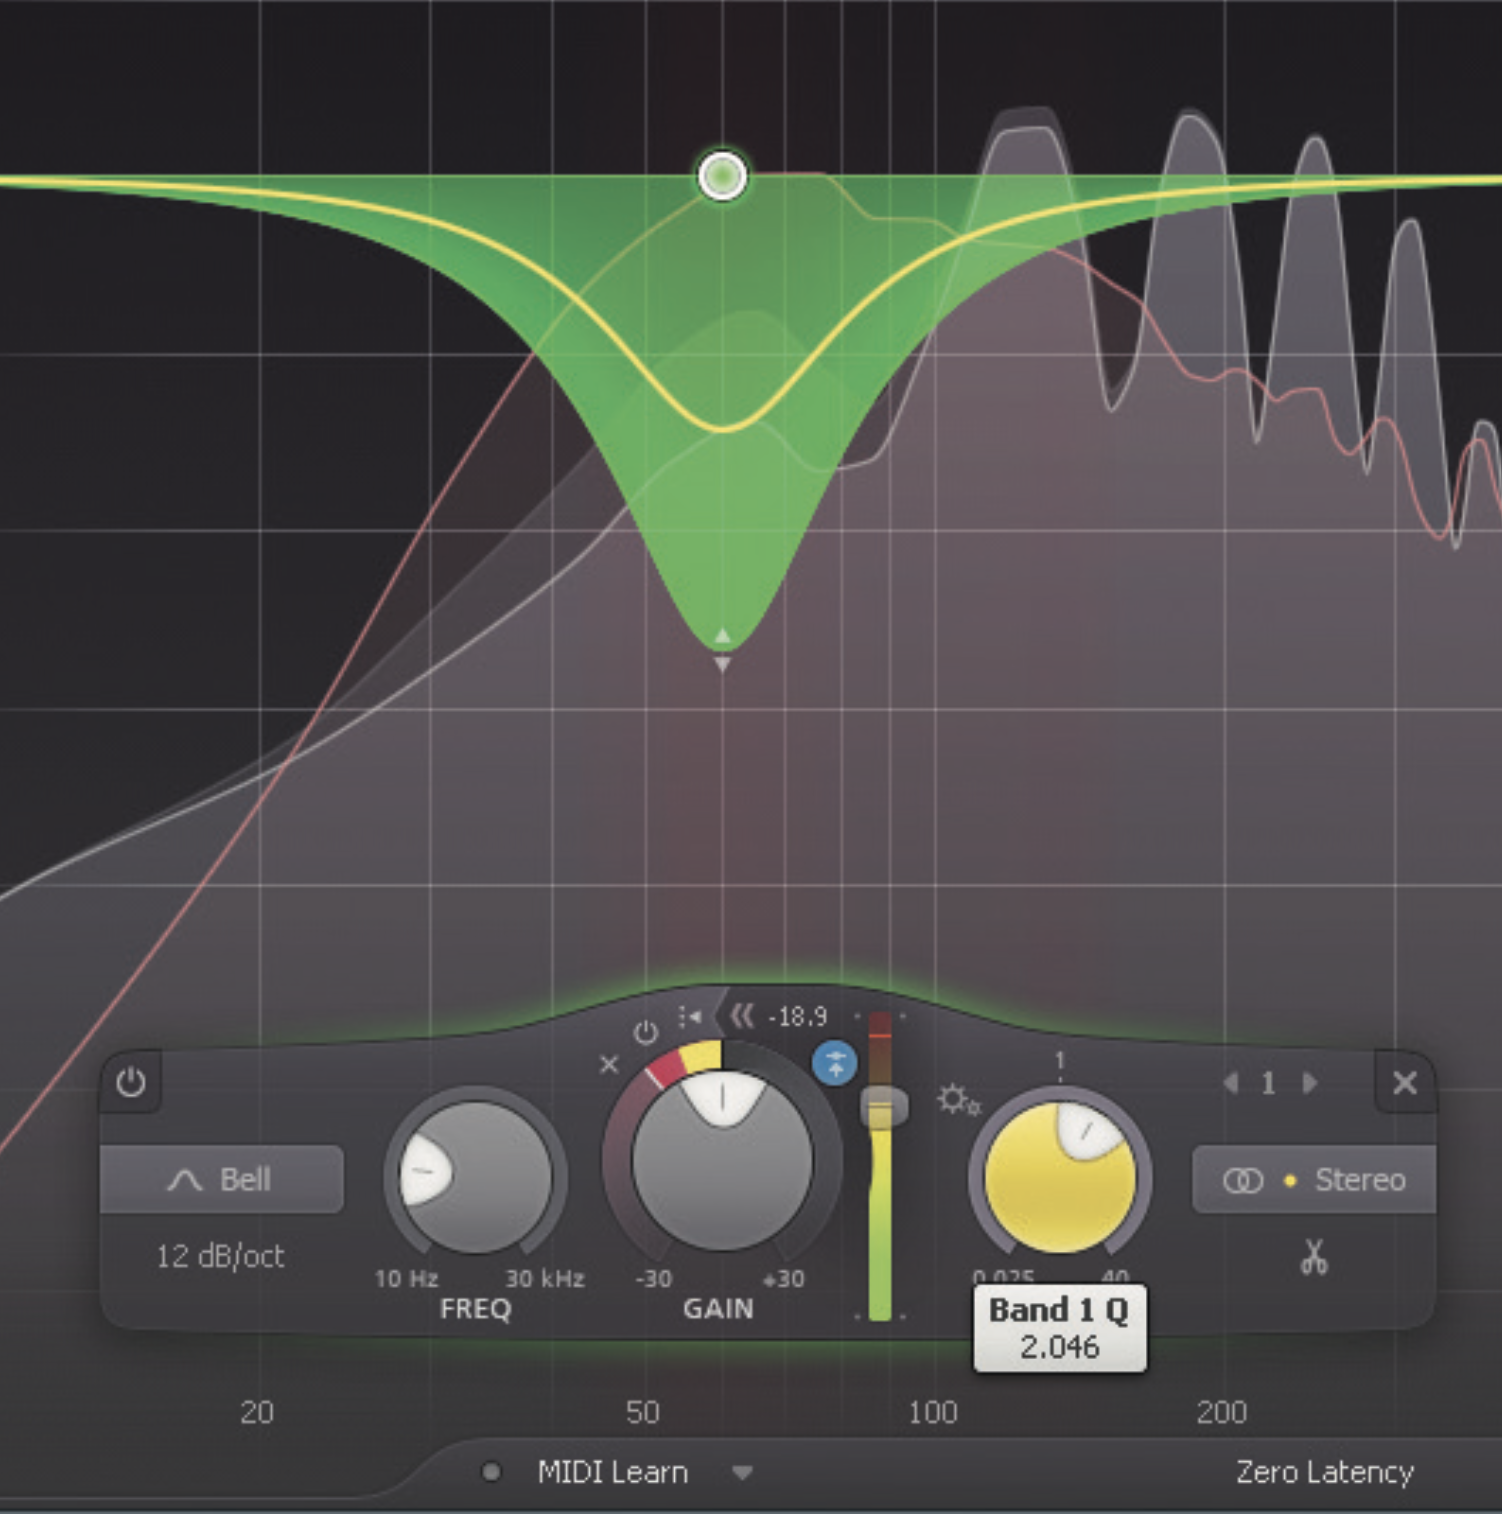
You’ll hear the bass ducking only at the 60Hz sweet spot each time the kick hits. This allows the kick room to breathe, without risking the fullness of the bass. Adjust the Dynamic Range, Q, and Threshold settings until just right.
Removing bleed the smart way using Sonible’s smart:gate
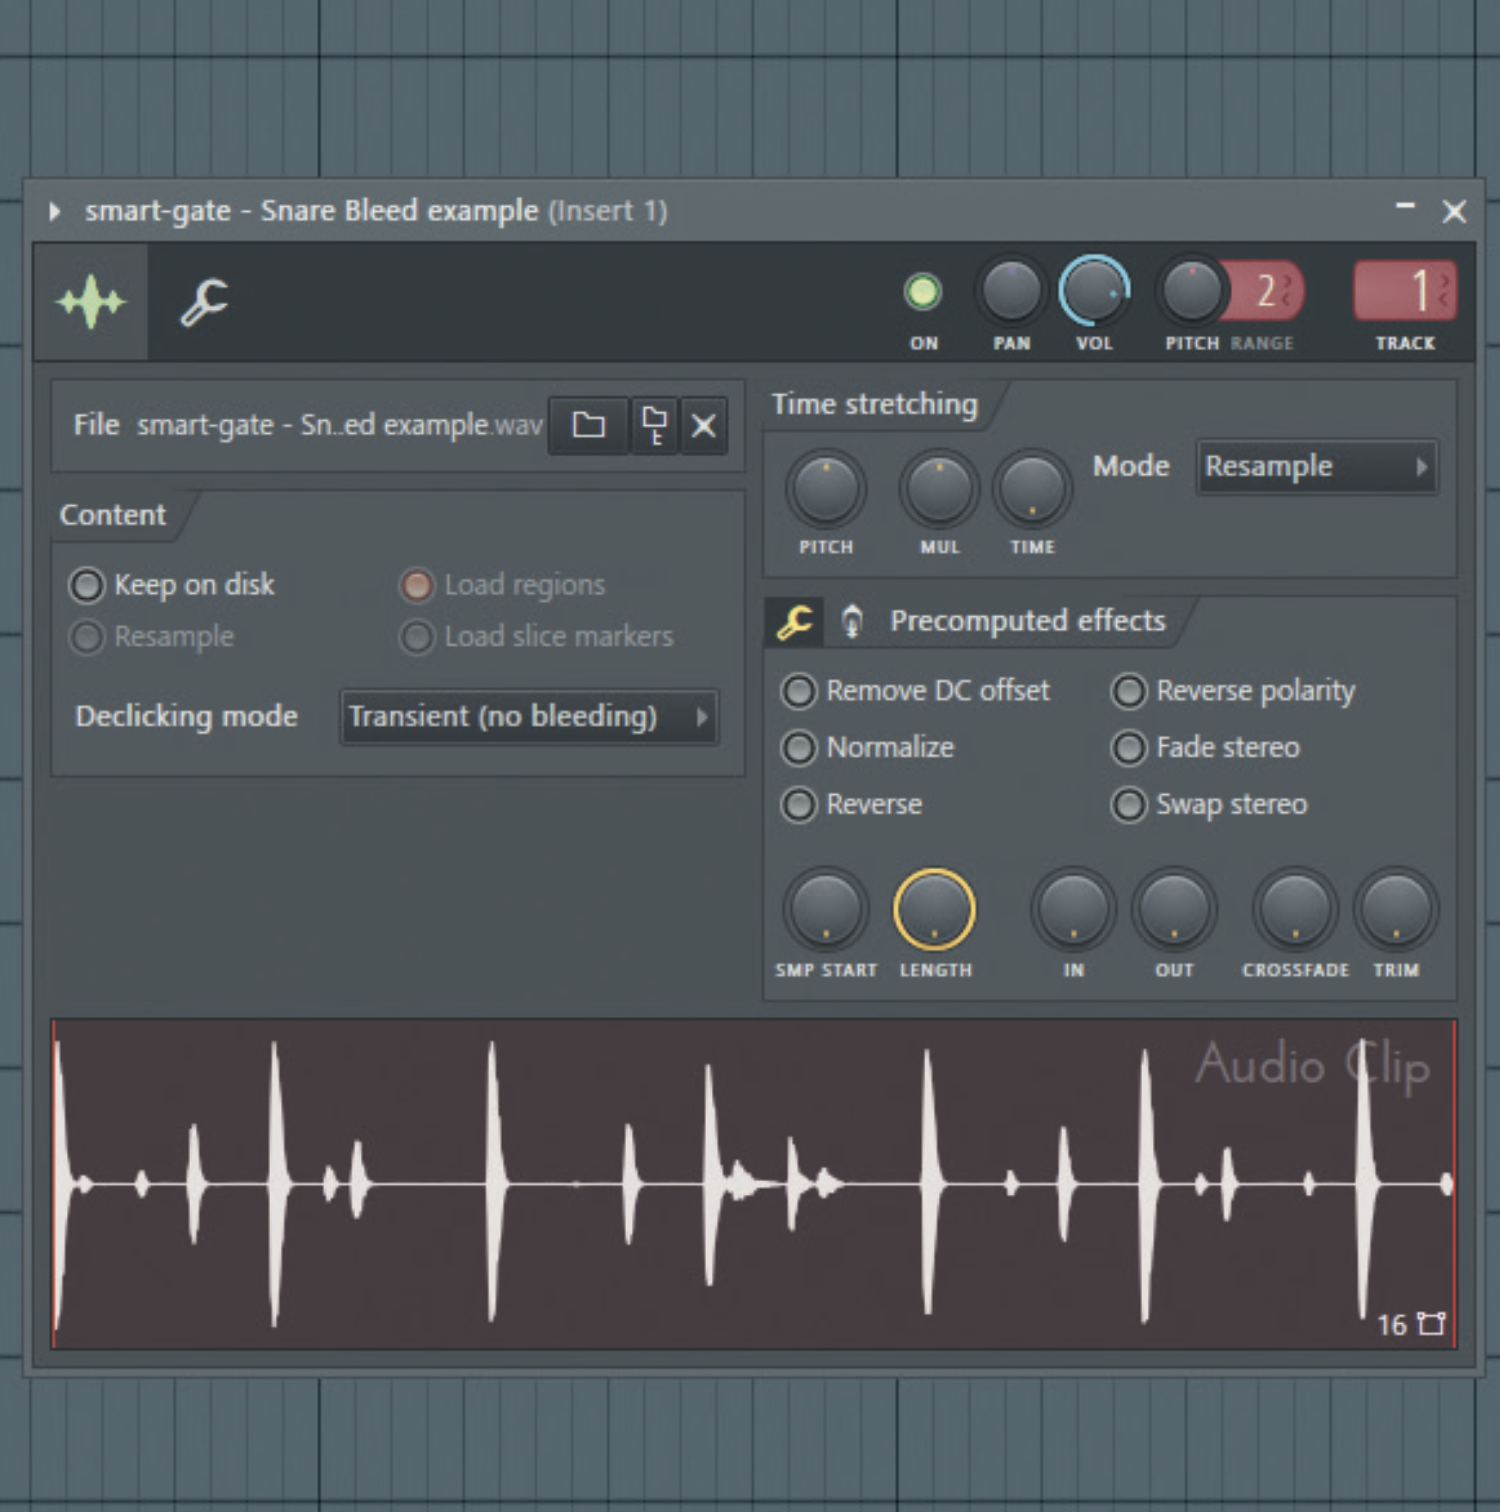
Smart:gate uses AI to effortlessly isolate your targeted incoming sound source from any unwanted background noise present in the sample/recording. Let’s use a recording with unwanted noise to put the AI to the test. We’ve picked a snare loop.
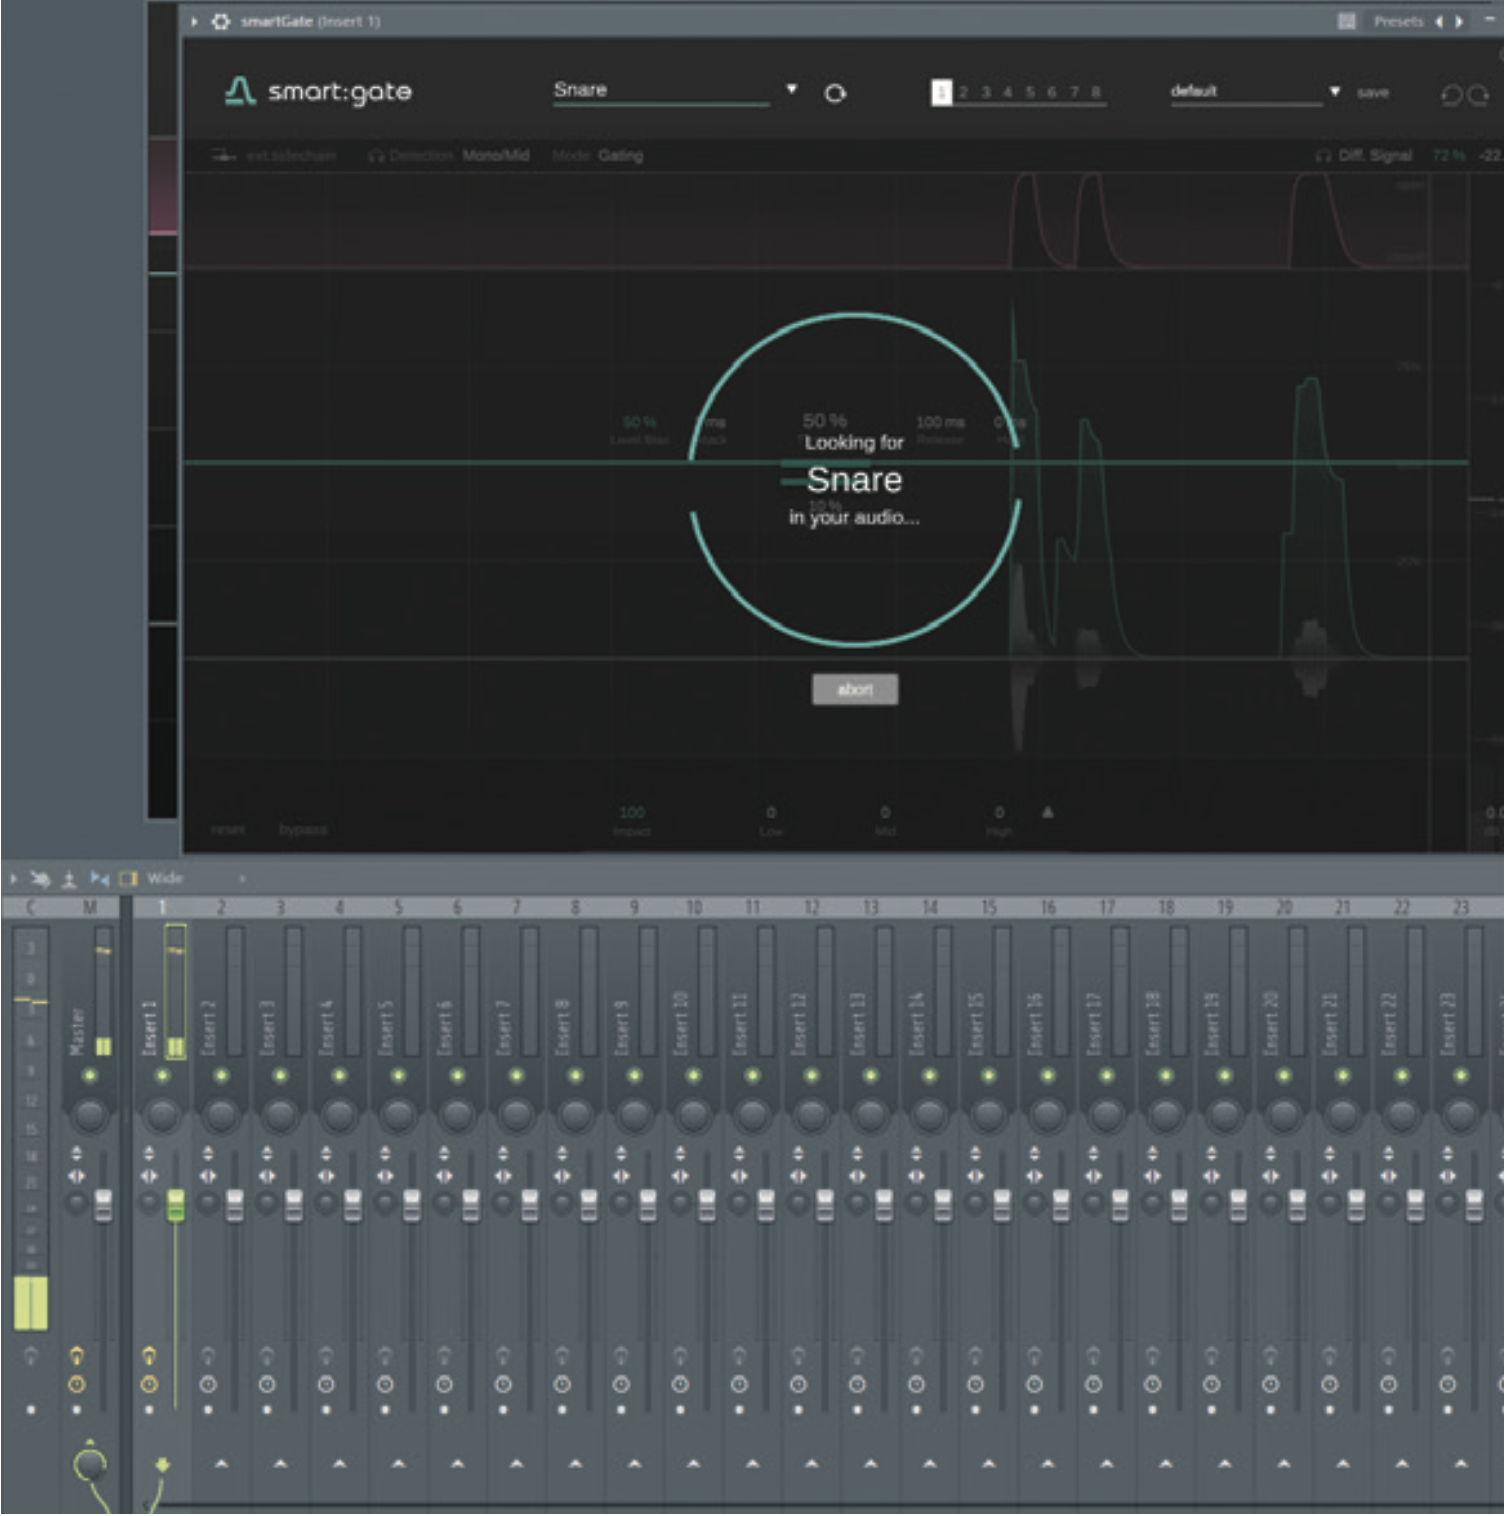
Simply, load an instance of smart:gate onto your sample track and choose the target type from the dropdown menu. Select ‘Snare’. Now let your audio play, and watch the AI search specifically for snare hits within the sample.
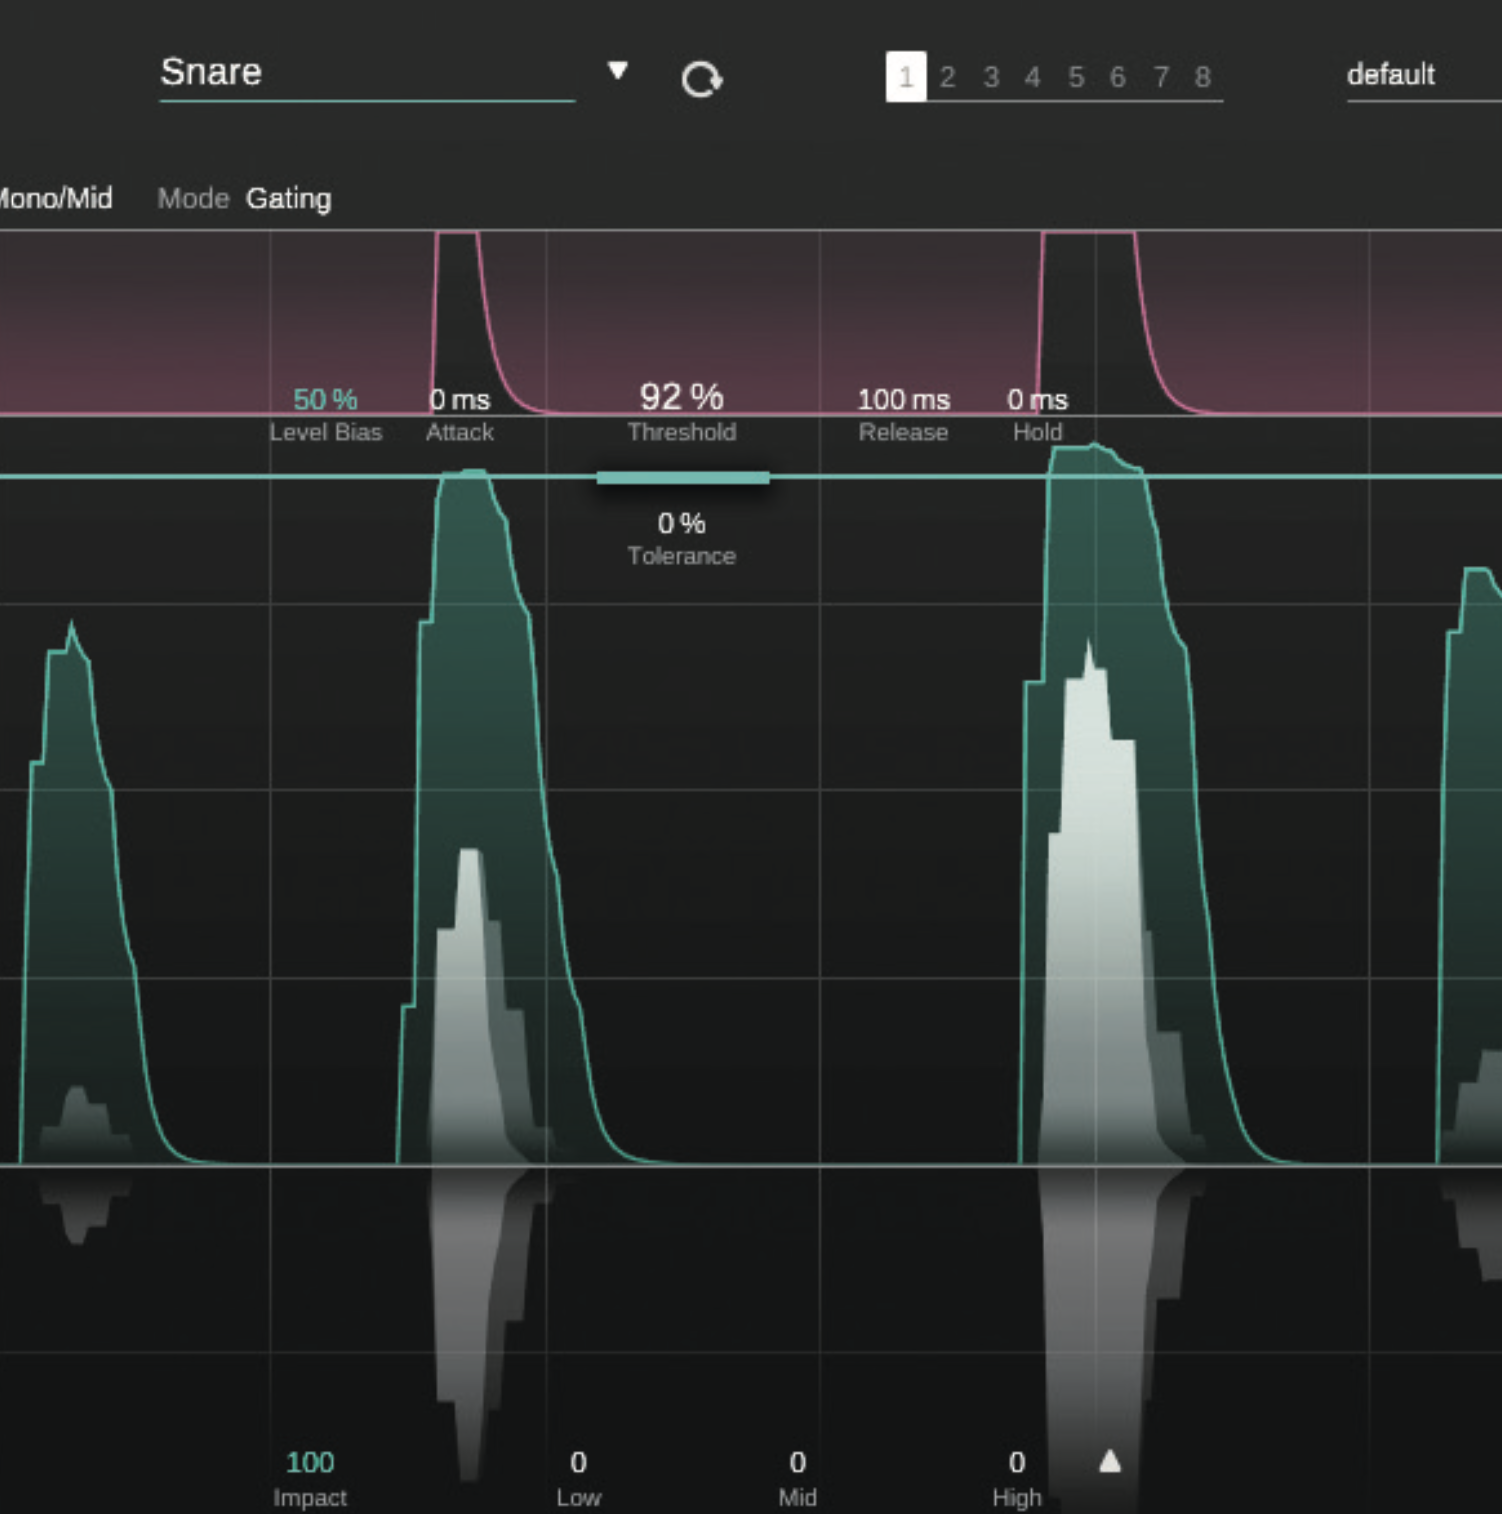
Now, most of the work is done, as the AI will automatically close when the only noise that it didn’t recognise as a snare is playing. However, we can still tune the Attack, Release, Threshold, Tolerance, Hold, and Level Bias for further optimisation.
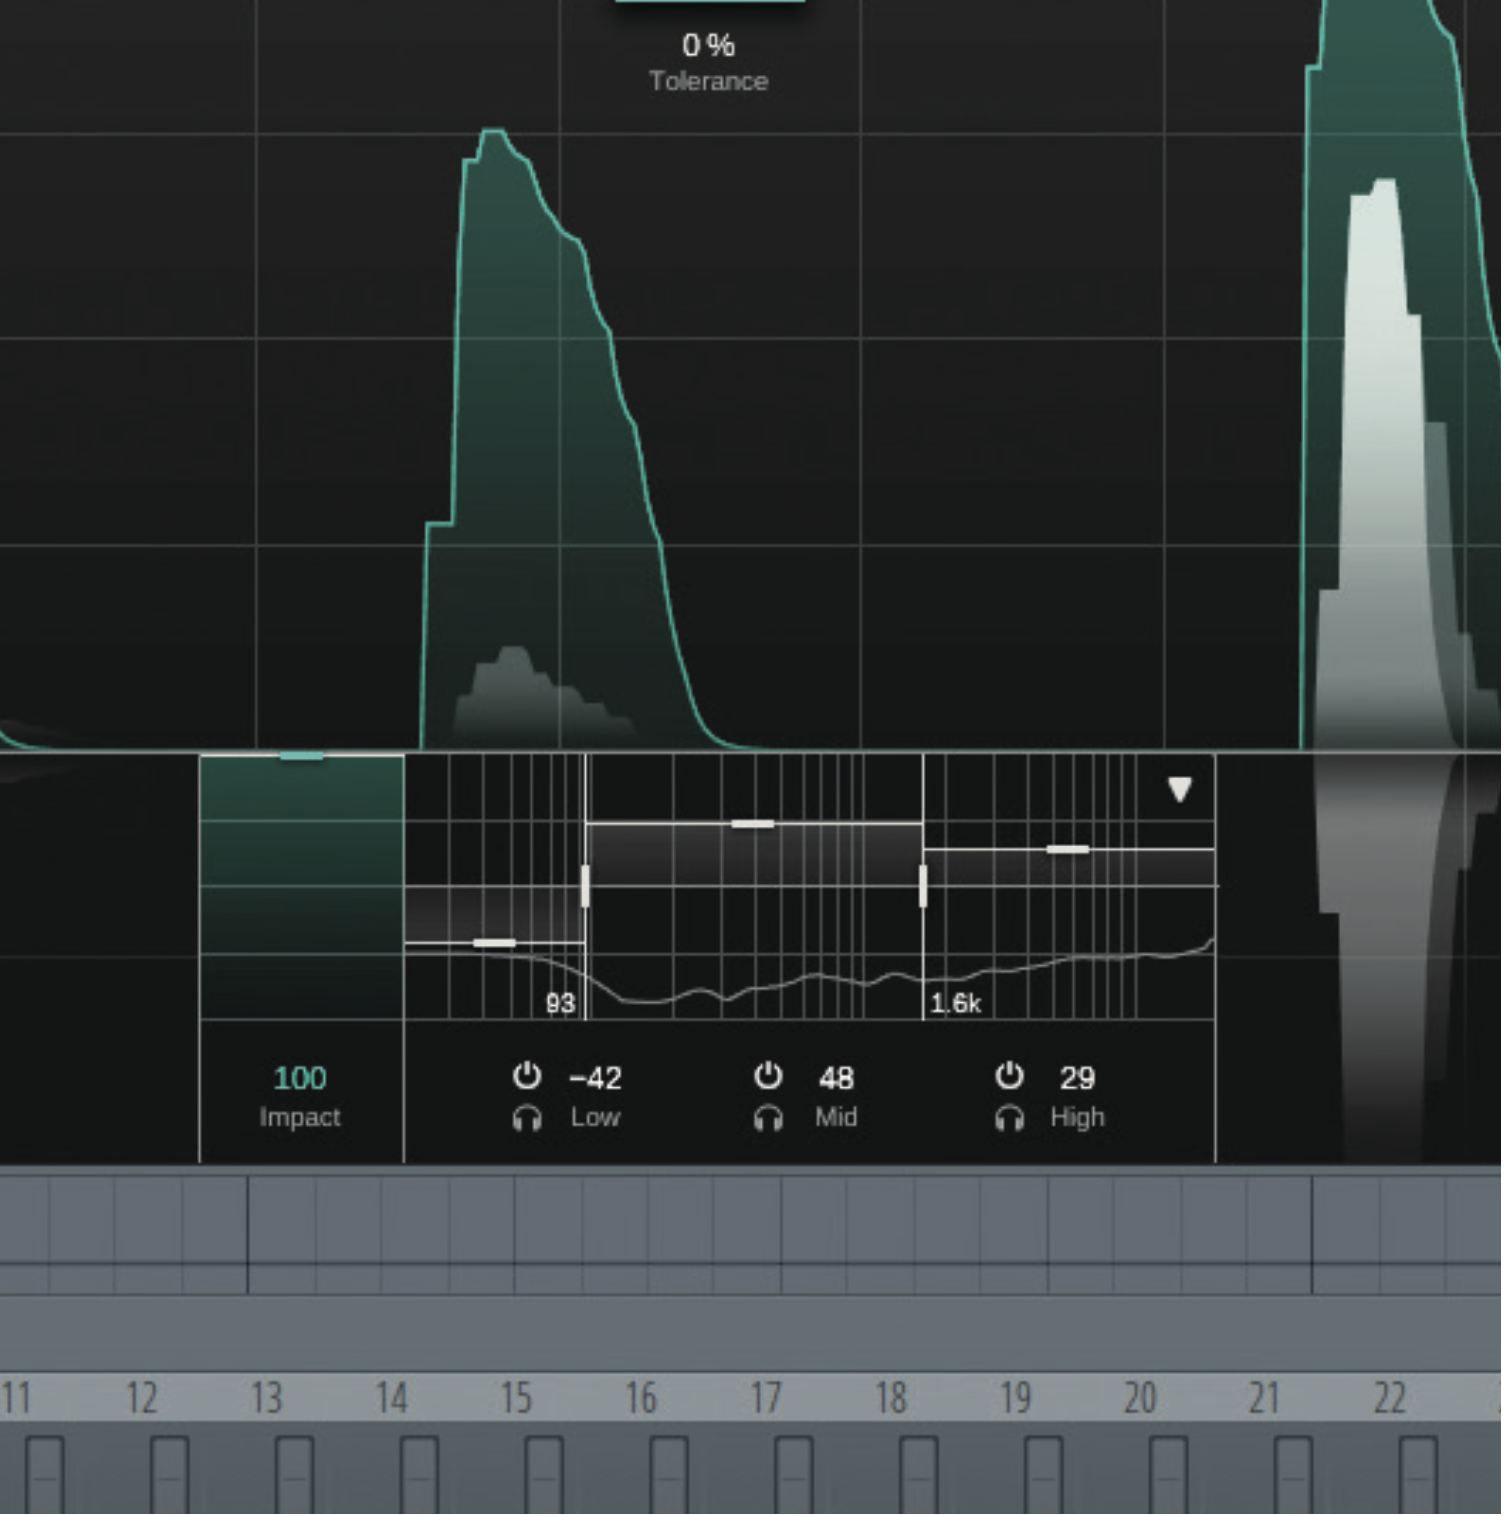
You can also interact with the Impact and Band Suppression controls at the lower interface. Impact will control whether the gate fully closes/opens. The Band Suppression parameters change how the gate behaves in each frequency range.
Dynamic audio processing and AI in action: Sonible’s smart:gate
Smart:gate is just one example of how AI can assist us in processing our audio’s dynamics, and Sonible’s whole ‘smart:’ range gives a hint to other applications of the technology. smart:comp and even smart:deEss are paving the way for a new breed of AI-assisted dynamics processors, usually around detection and analysis.
When it comes to de-essing, for example, having an AI-assisted processor that picks up “Ess” sounds is a huge advantage over ‘dumb’ dynamic EQ or frequency-conscious compressor options. This model can even interpret different types of sibilant syllable, and can turn down only the syllable itself when it shows up.
Anyone expecting a sci-fi “Auto Compressor 9000” when looking ahead to AI might be surprised at the nuance on offer.
Separating drums easily using smart:gate
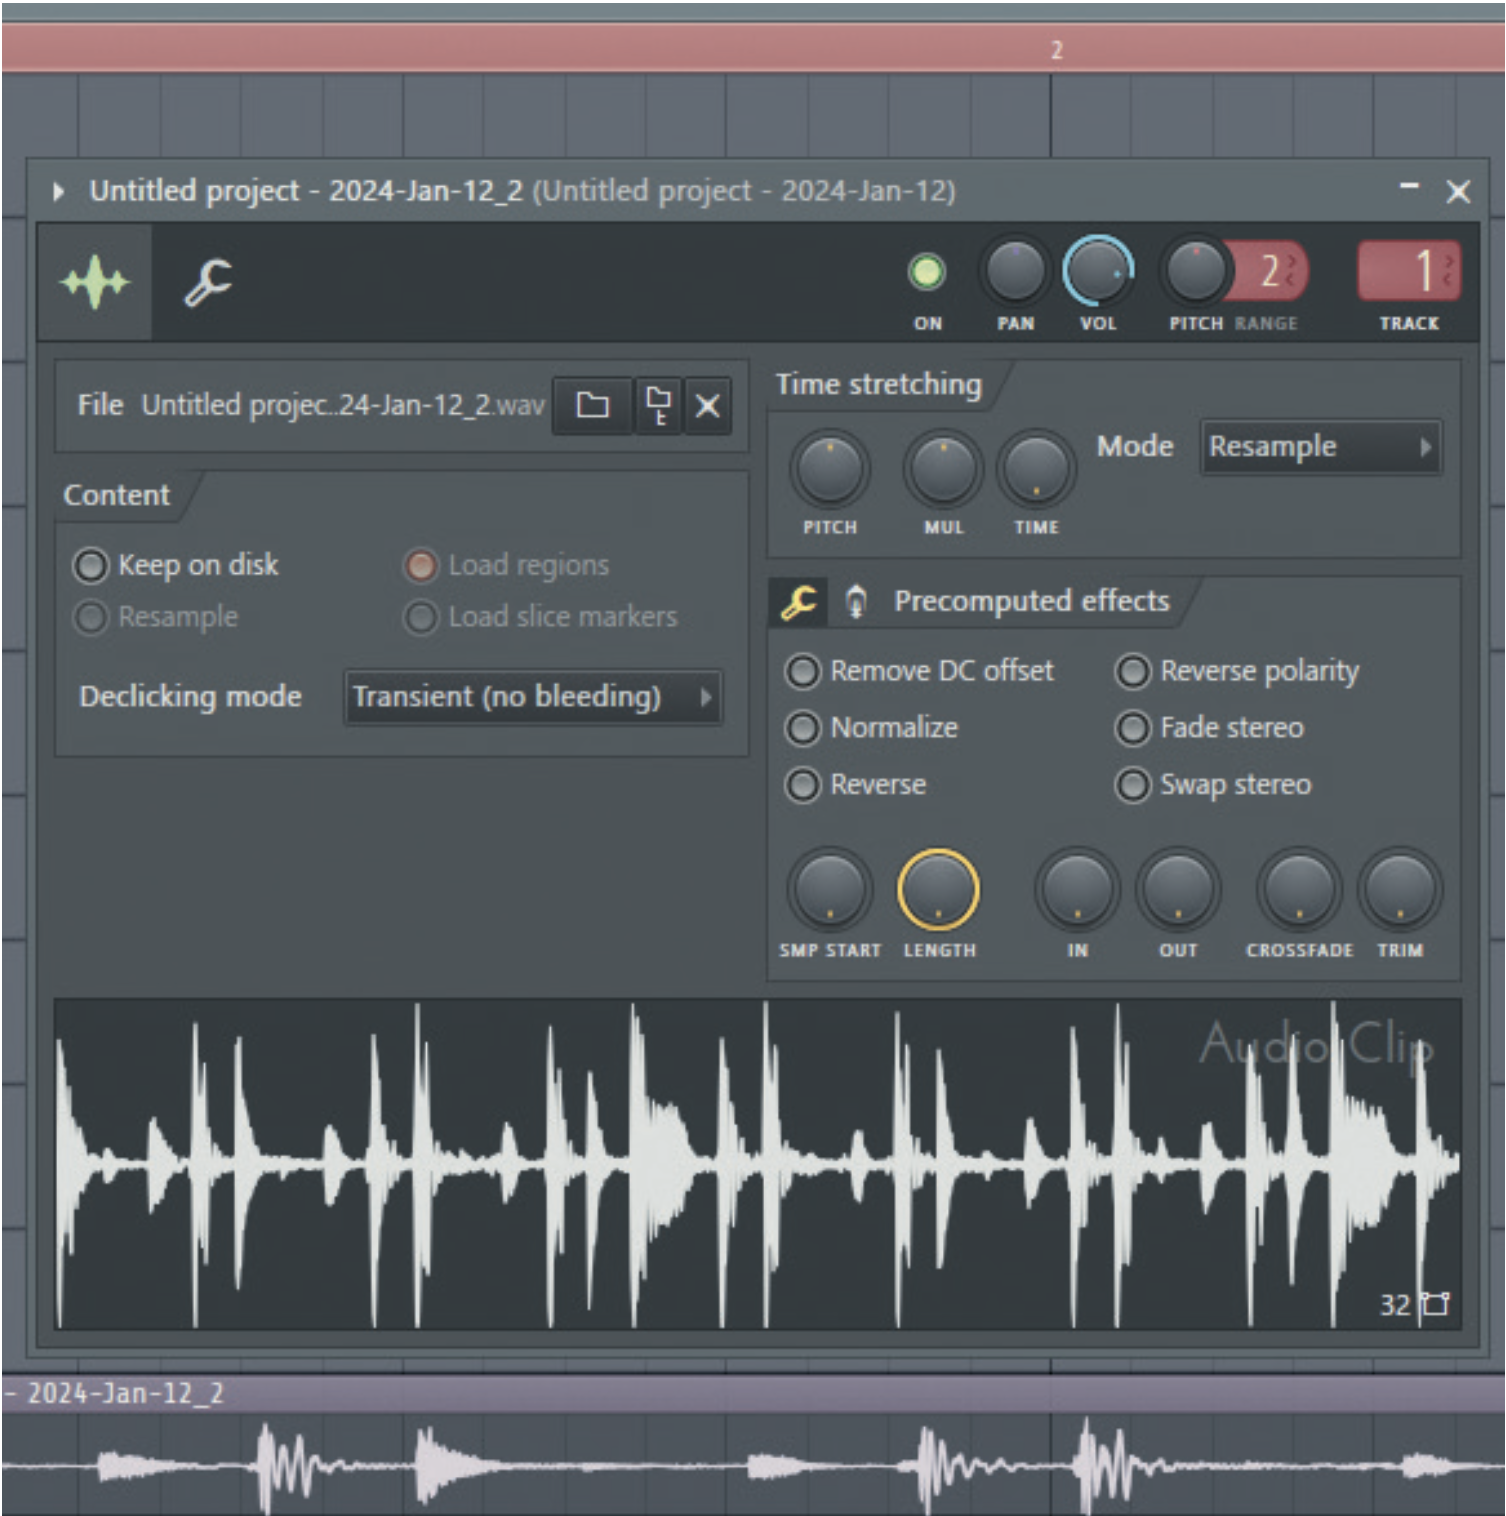
If you have a drum loop containing a hi-hat, snare, and kick, you can isolate each one and then mix them separately. First, select a suitable drum loop, keeping in mind that if you have overlapping drum hits, the AI might struggle to separate them entirely.
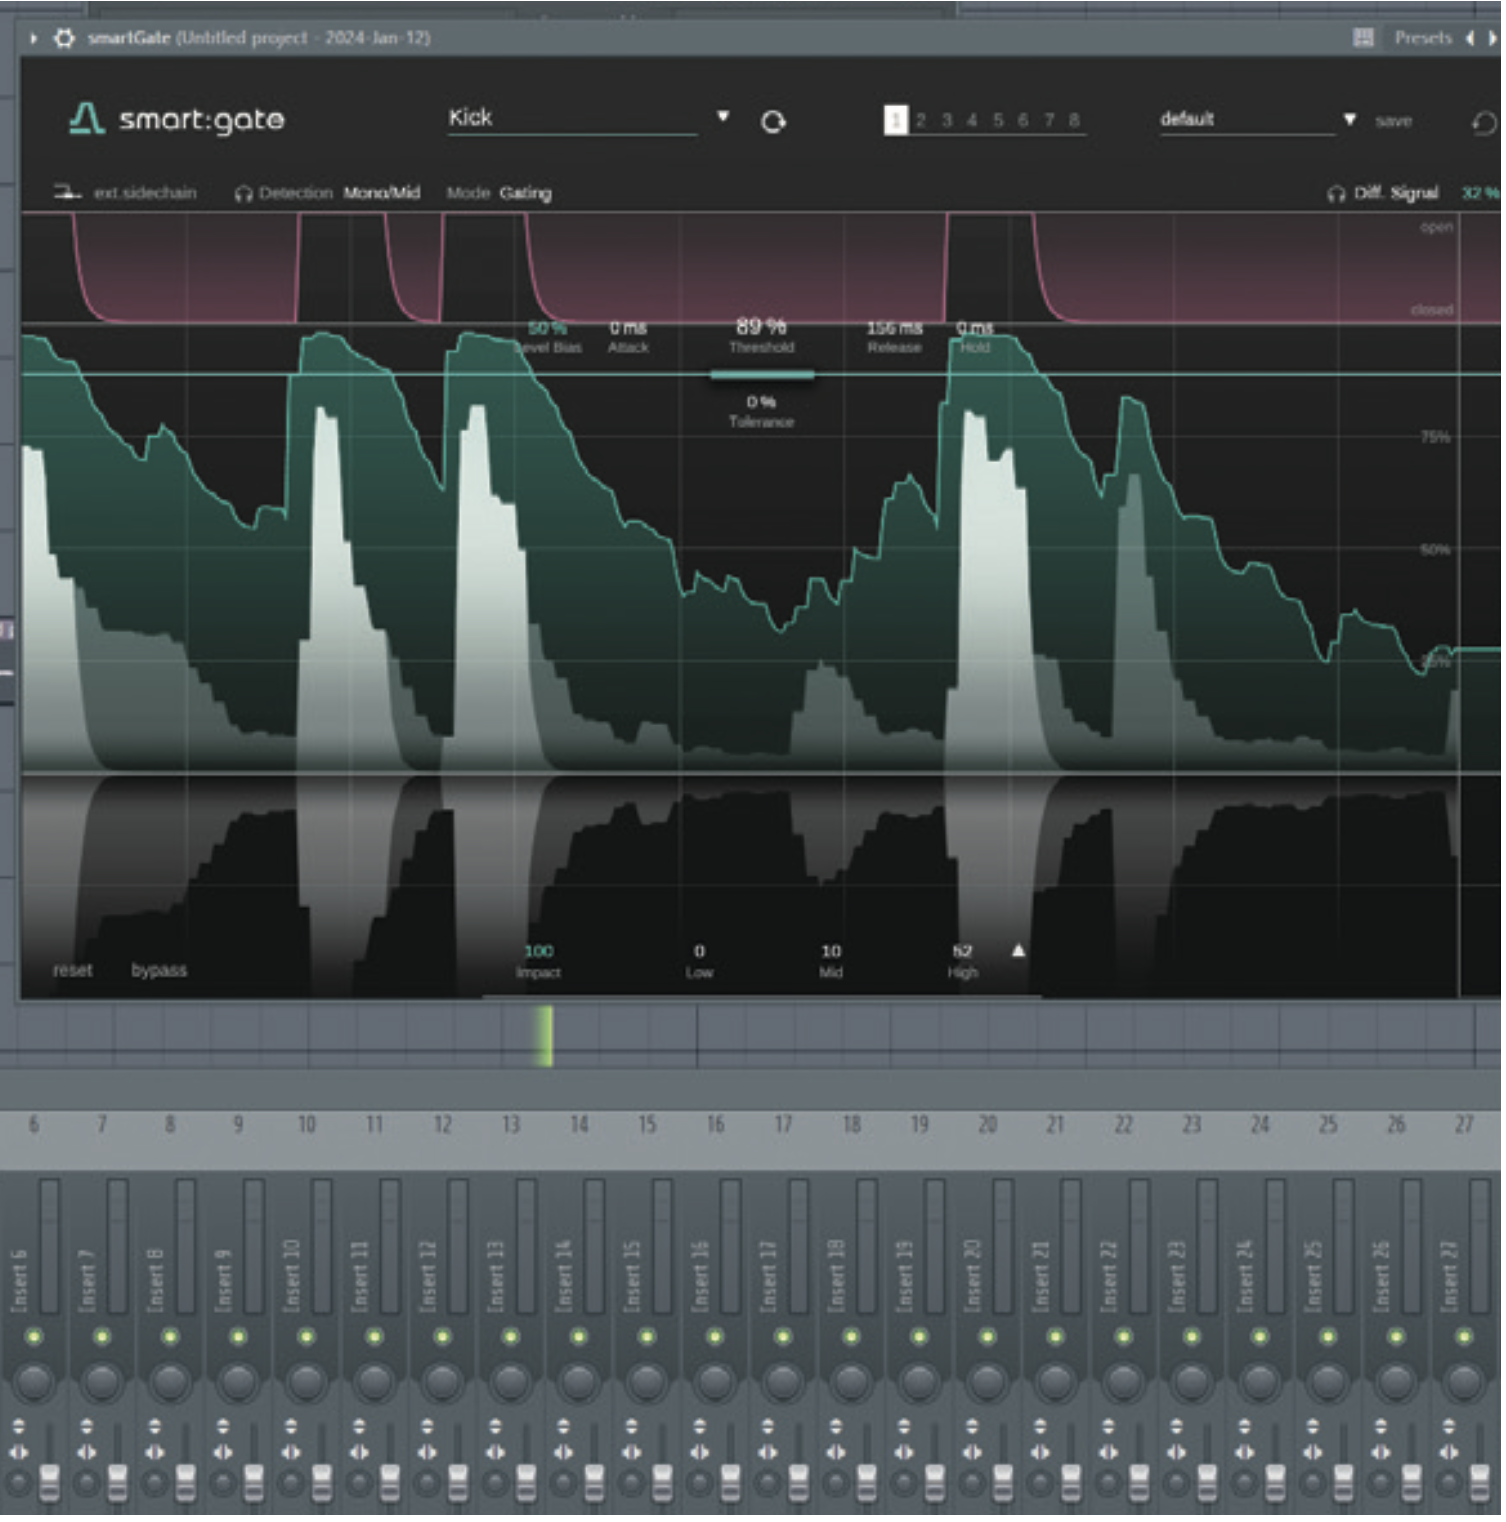
Then, open up an instance of smart:gate onto your drum loop sample and isolate your first targeted sound source. Make any tweaks to the gate’s settings until you’ve optimally isolated the sound to the best of your ability. We started with the kick.
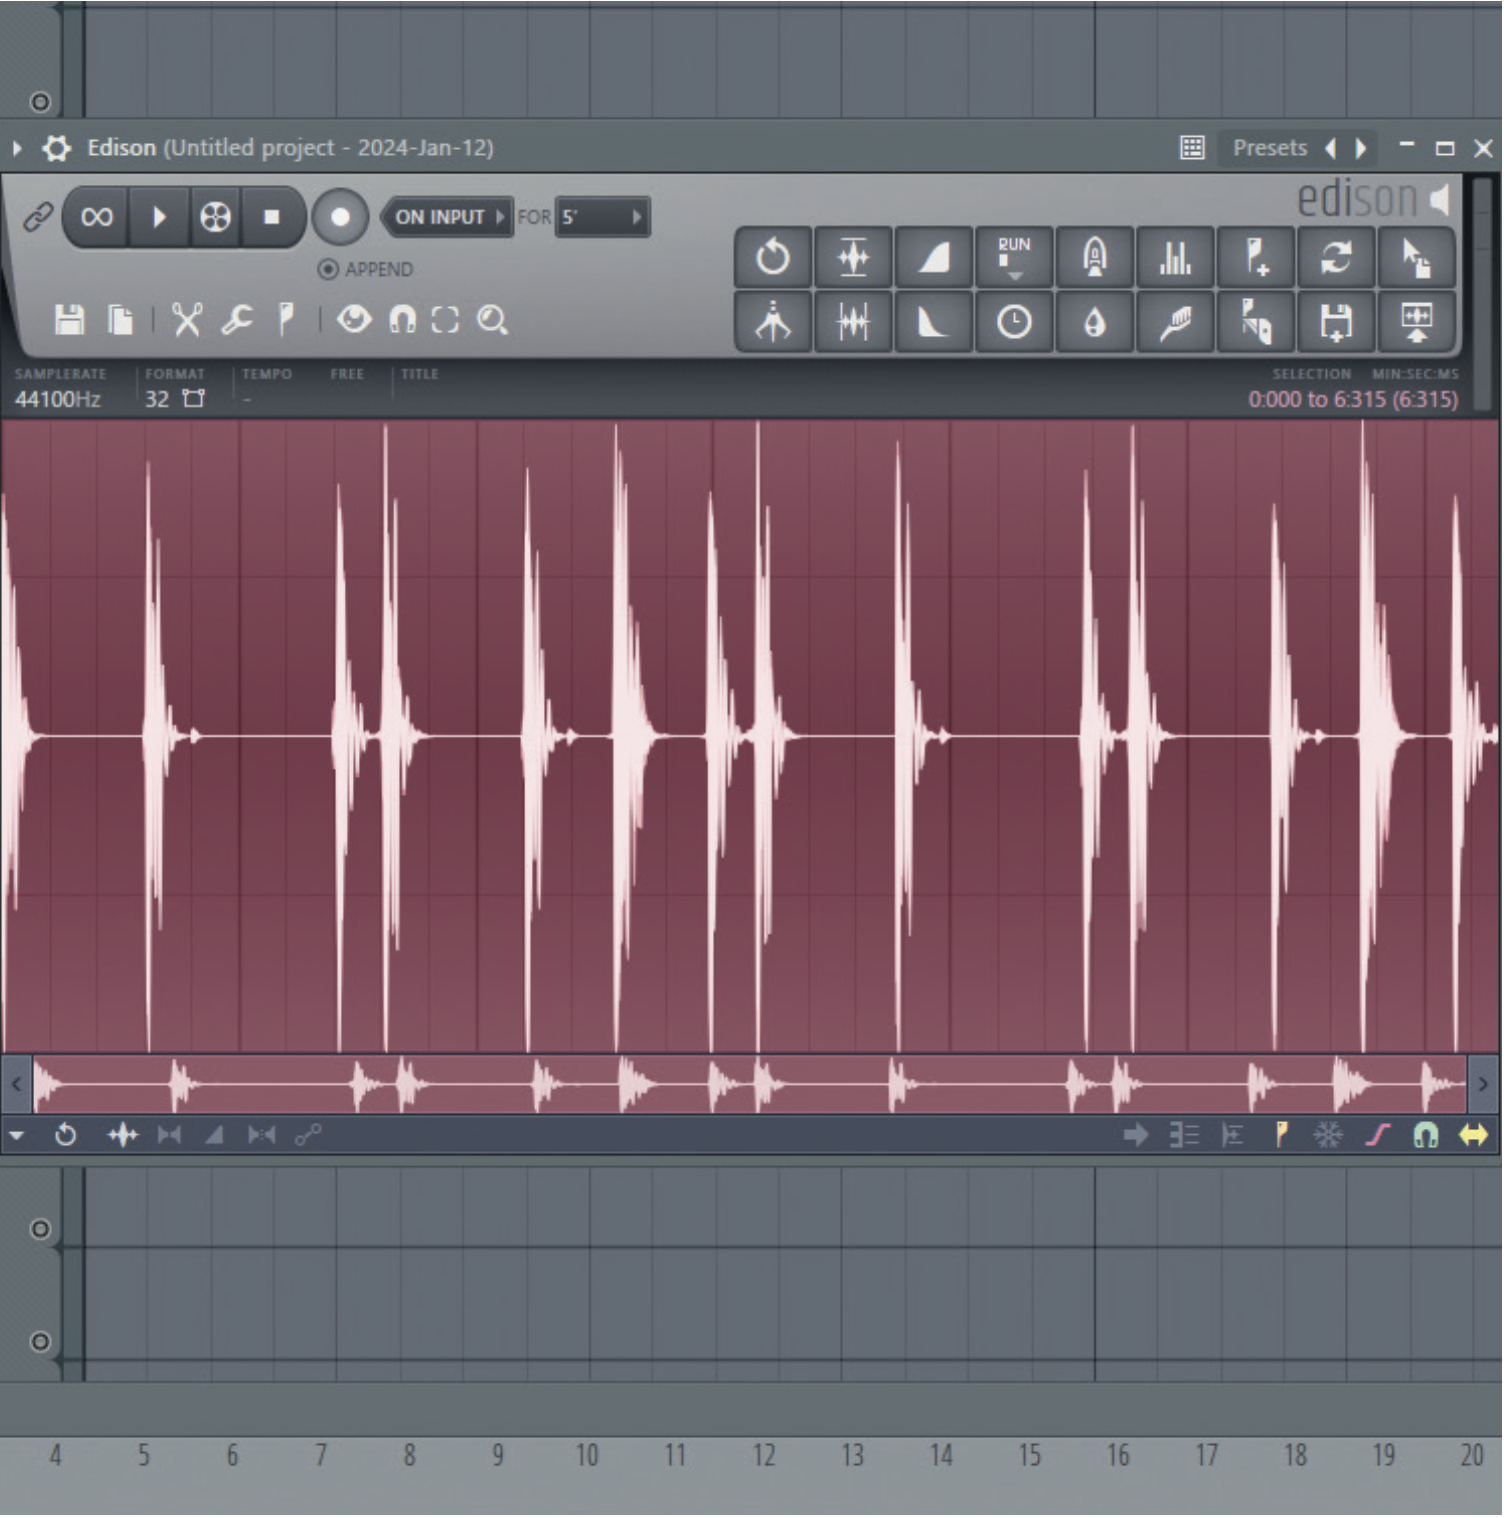
When happy with your newly isolated sound, you can then resample or export it as a new, singular sample for individual processing. Your DAW should have its own sampler. Repeat for the snare and hi-hat respectively.
Auburn Sounds Lens’ spectral processing
Originally designed to be a master bus compressor, Auburn Sounds’ Lens evolved into an all-round 18-64 band spectral dynamics processing unit, with sidechain and output linear-phase EQ functions, a distortion, and an expander (expander features only included in the full, paid version). This neat dynamic controller is effective in a wide range of applications from bringing out the best in your drum bus, to completely reshaping how your bass sounds.
Lens offers a unique approach to mixing dynamics, with intuitive spectral processing
Harnessing the power of spectral processing, Lens comes with six different band “Selectivities” ranging from 18 bands to 64, with separate Attack and Release controls to tame high and low transients. The signal path is intuitive, allowing for the Vintage distortion to be applied at two distinguished points (one at input stage, and one at output) in the chain, with a mix knob for both. You’ll find internal Input, Dry, and Wet faders, that can control parallel signals from within the unit.
The expander is applied across the same band selectivity as the compressor with a singular Attack and Release knob and a Relative Threshold enable/disable button. Both the compressor and expander include an SC Width control and a Link Bands knob to transition between mono-band and multiband signal processing.
Last but not least are the EQ features. Lens has a Comp Sidechain EQ which applies EQ only to the wet compressor signal and an Output EQ for making final tweaks to output.
Exploring Auburn Sounds’ Lens
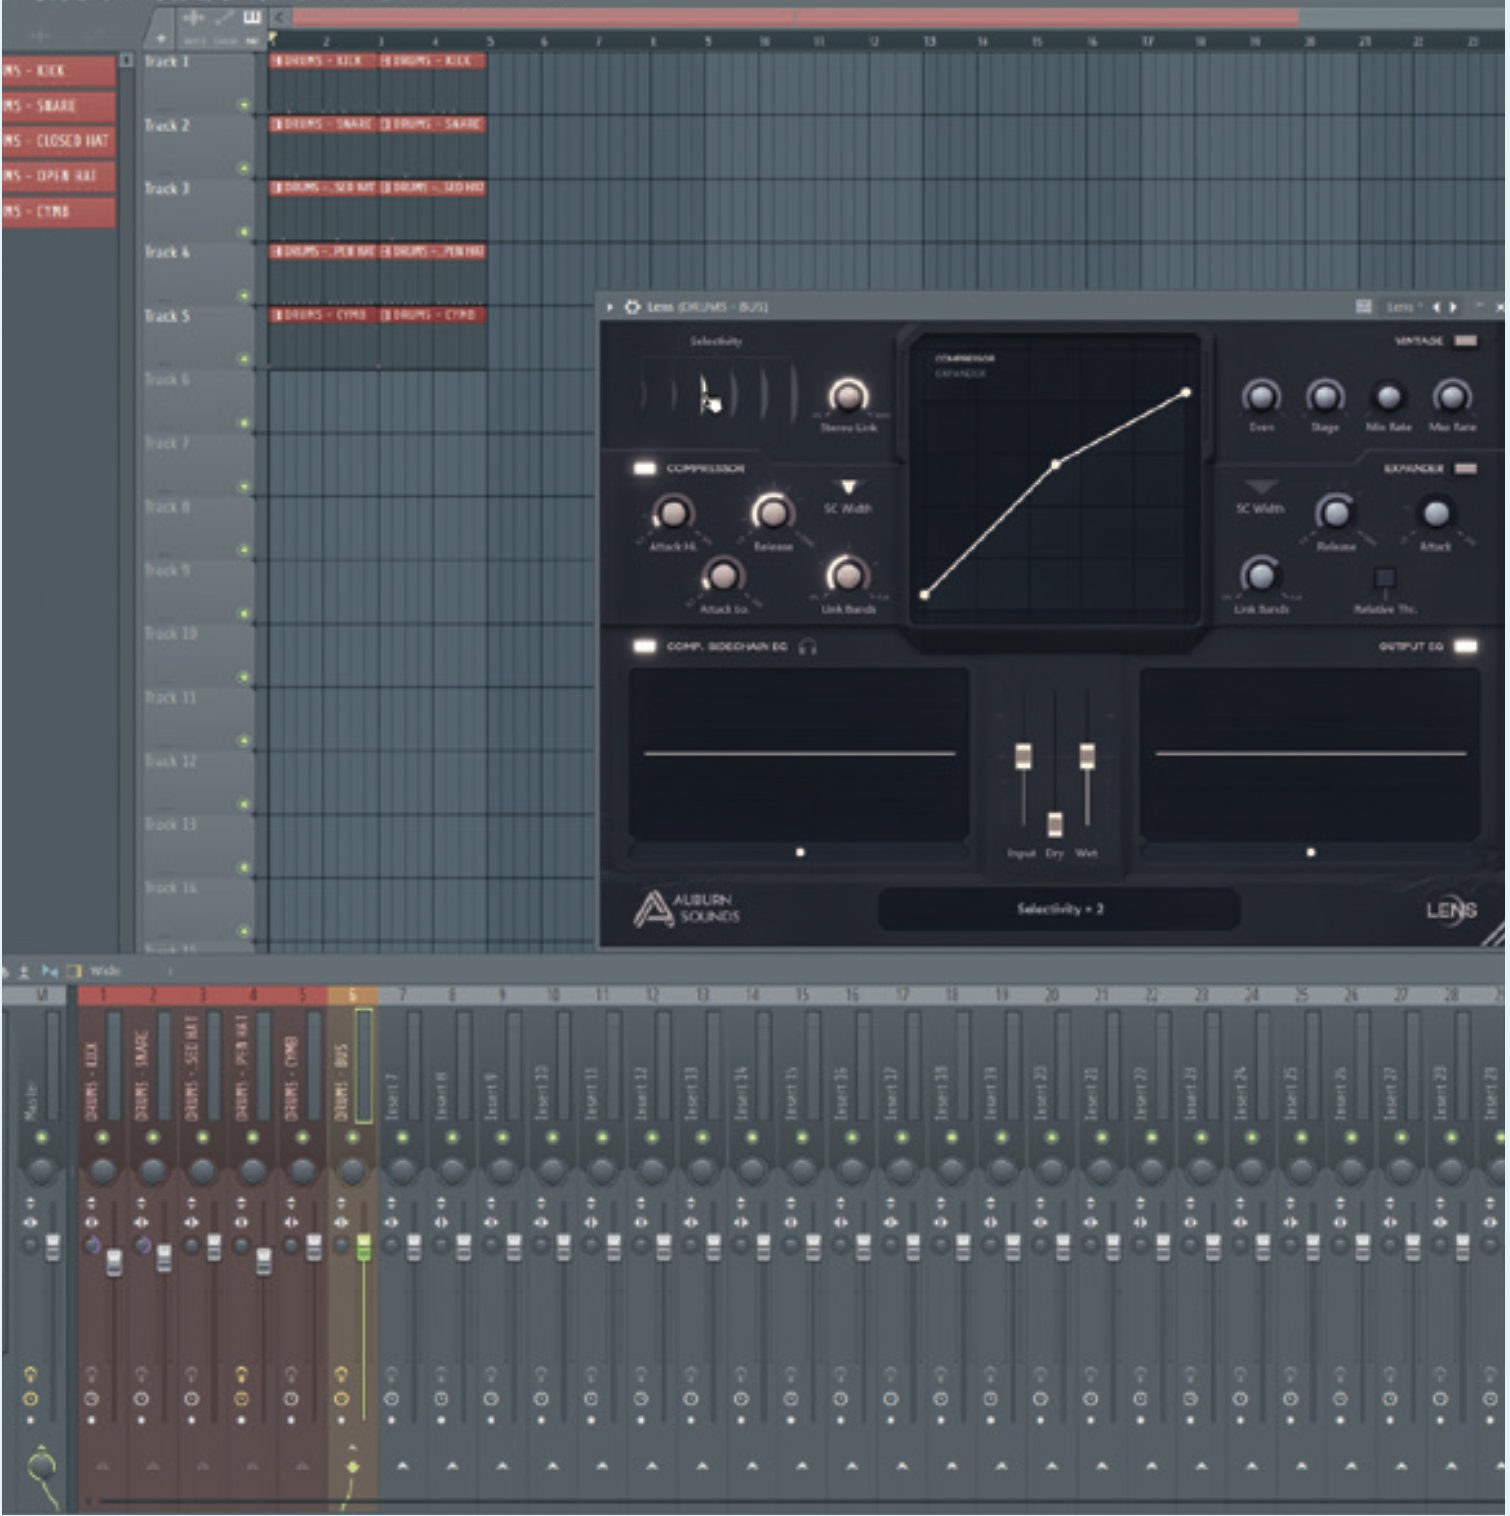
Let’s test Lens on a drum bus and see what extra life the plugin can breathe into our percussion kit. First, route drum channels to a master bus track and open an instance of Lens. Then select one of the six band selectivities. We’ve used Selectivity = 2.
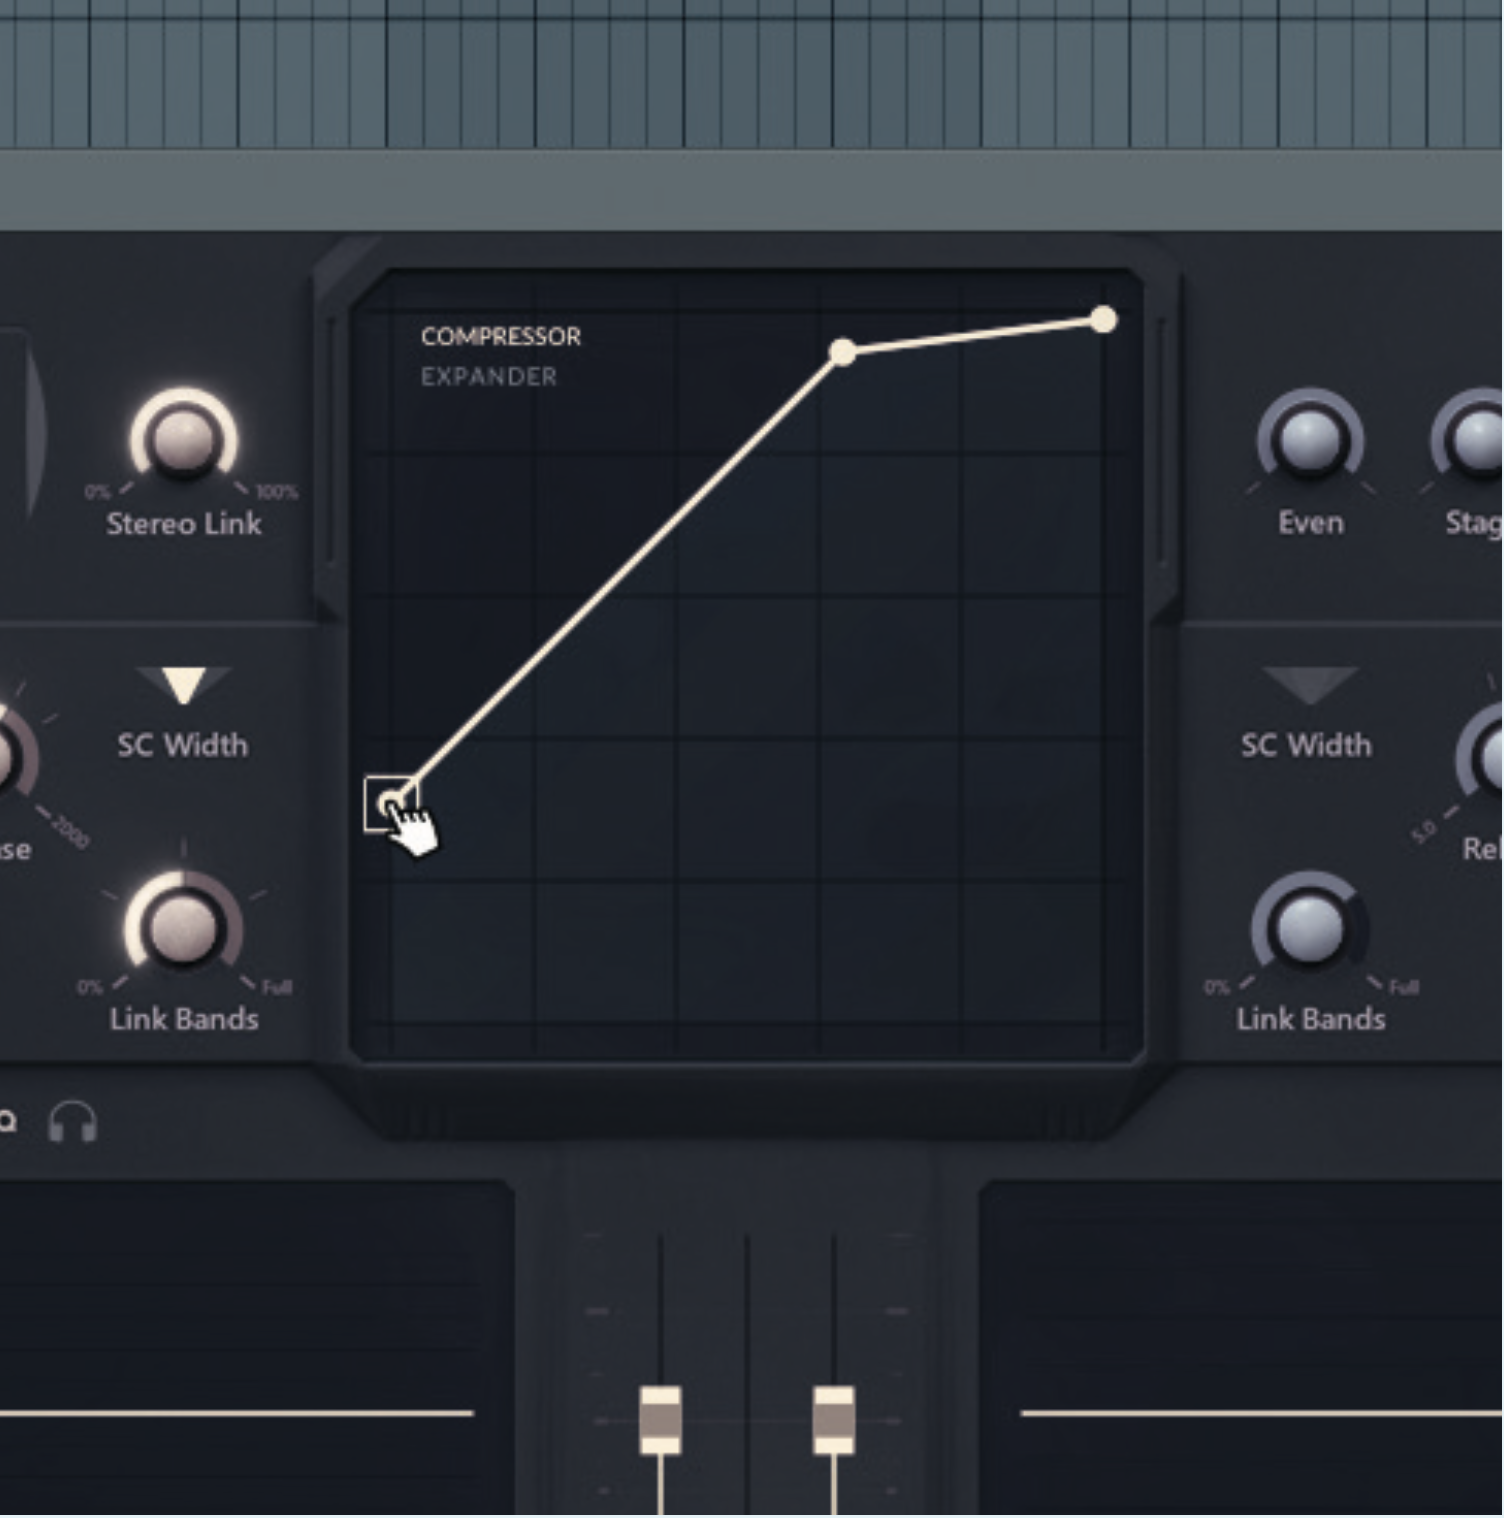
You’ll hear a change as the compressor is applied across the bands. We can now tune our compressor via Threshold, Ratio, and Makeup gain on the visual matrix grid. We’ve used Threshold: -18.29dB, Ratio: 7.99, Makeup: 15.42dB.
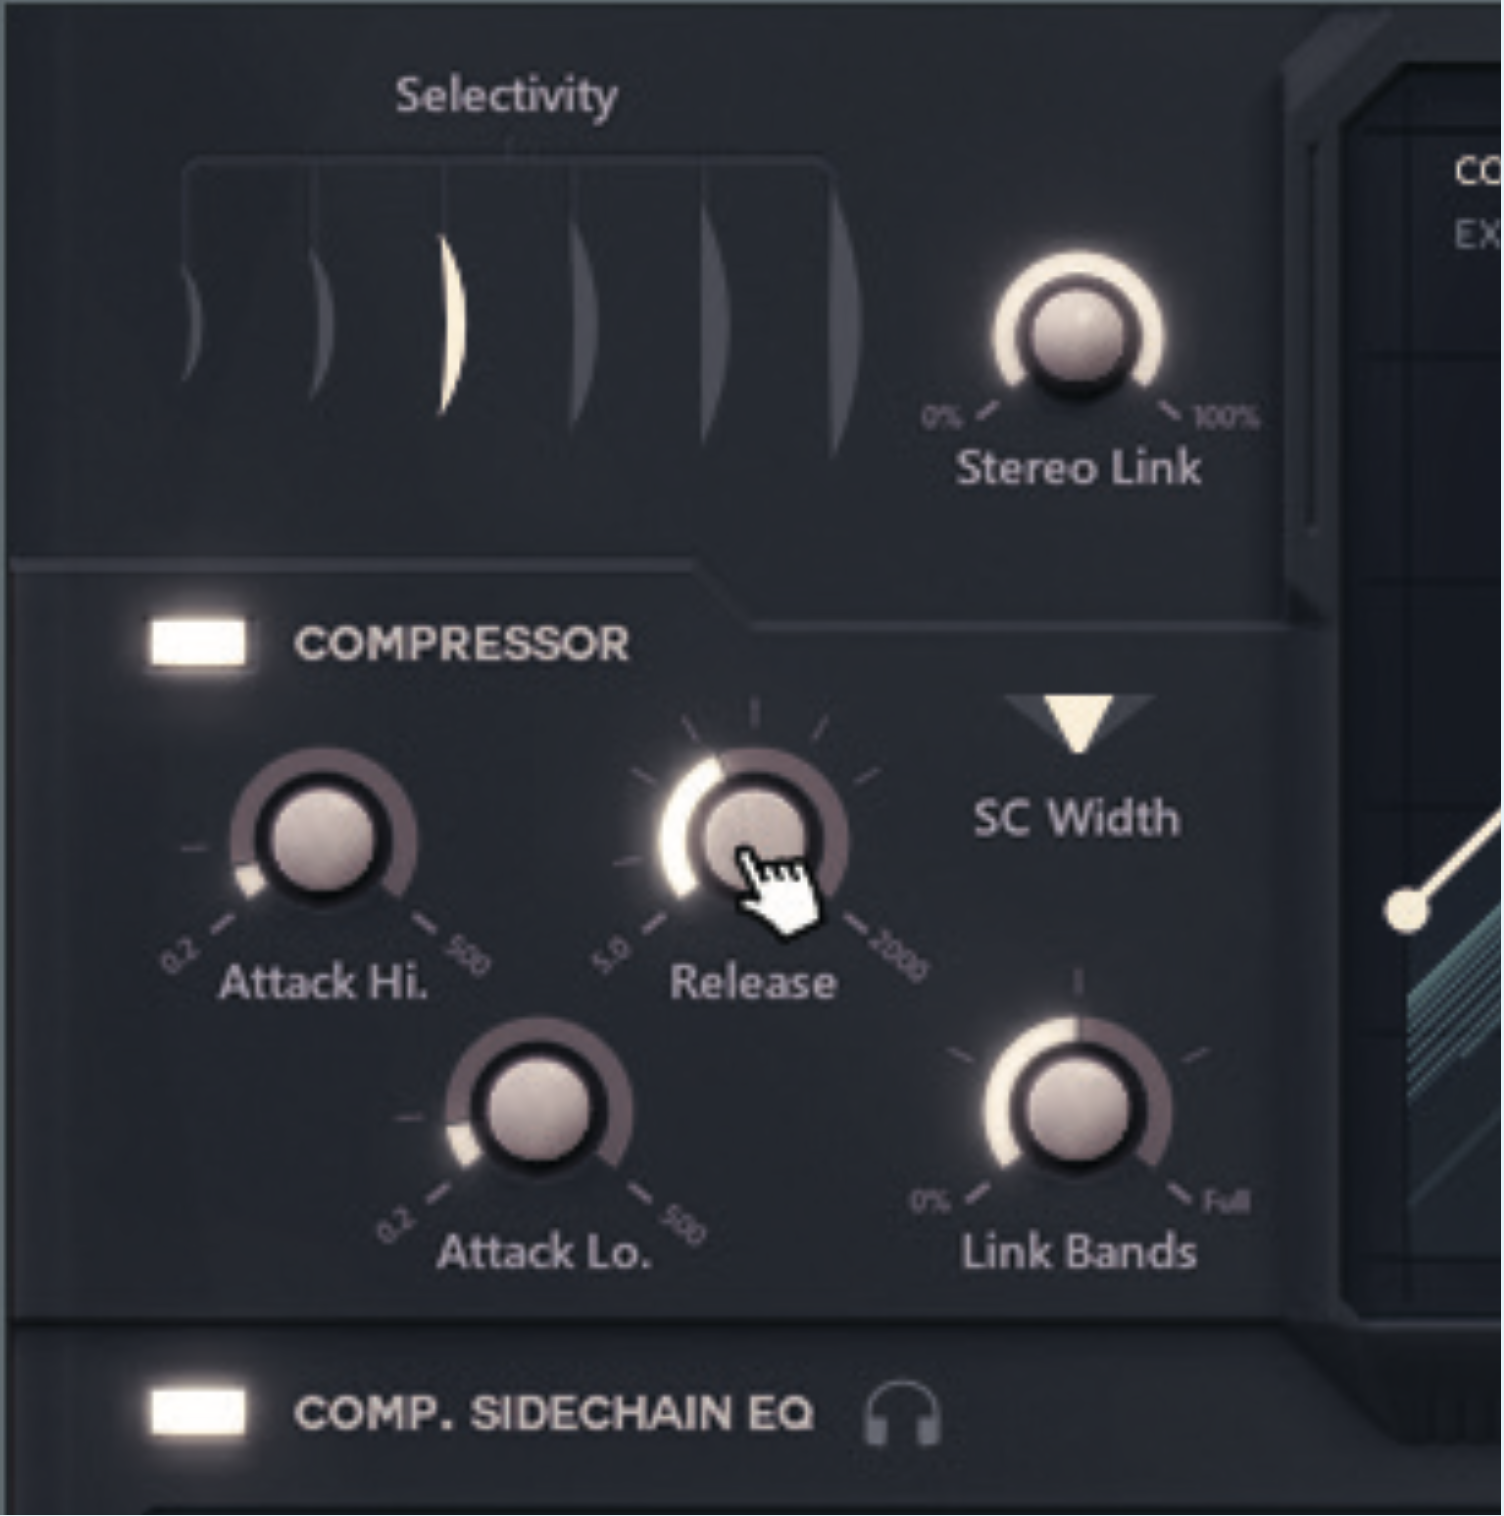
We adjust the compressor’s Attack and Release settings to optimise compression for our drum kit. A fast-acting attack and release target rapid percussion transients. We’ve used Attack Hi: 0.41ms, Attack Lo: 0.52ms, Release: 50.04ms.
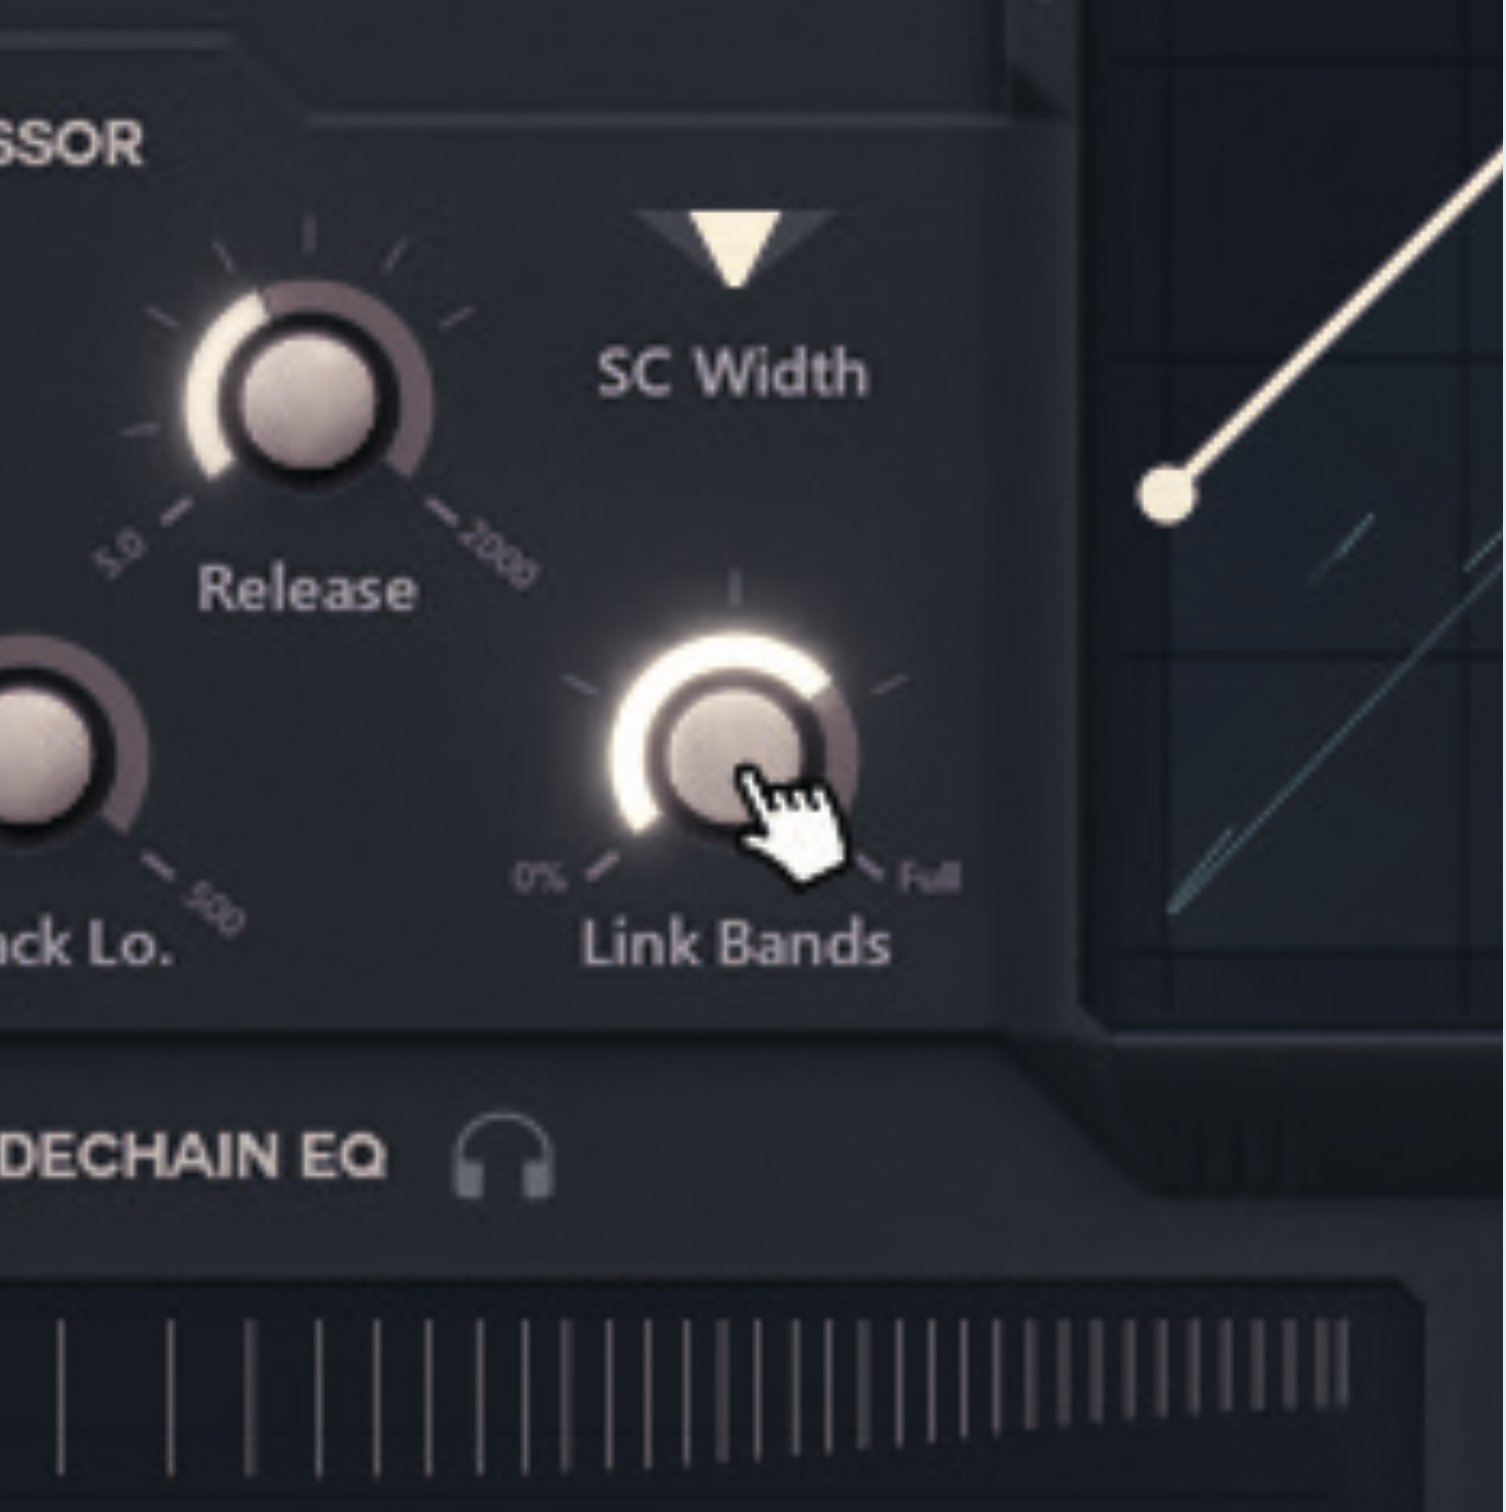
Now, we can turn the Link Bands knob to our preference and alter spectral balance. At 0%, each band reacts only to its own detected volume. We’ve selected 100%, where you get a multiband detection, but a full band gain reduction.
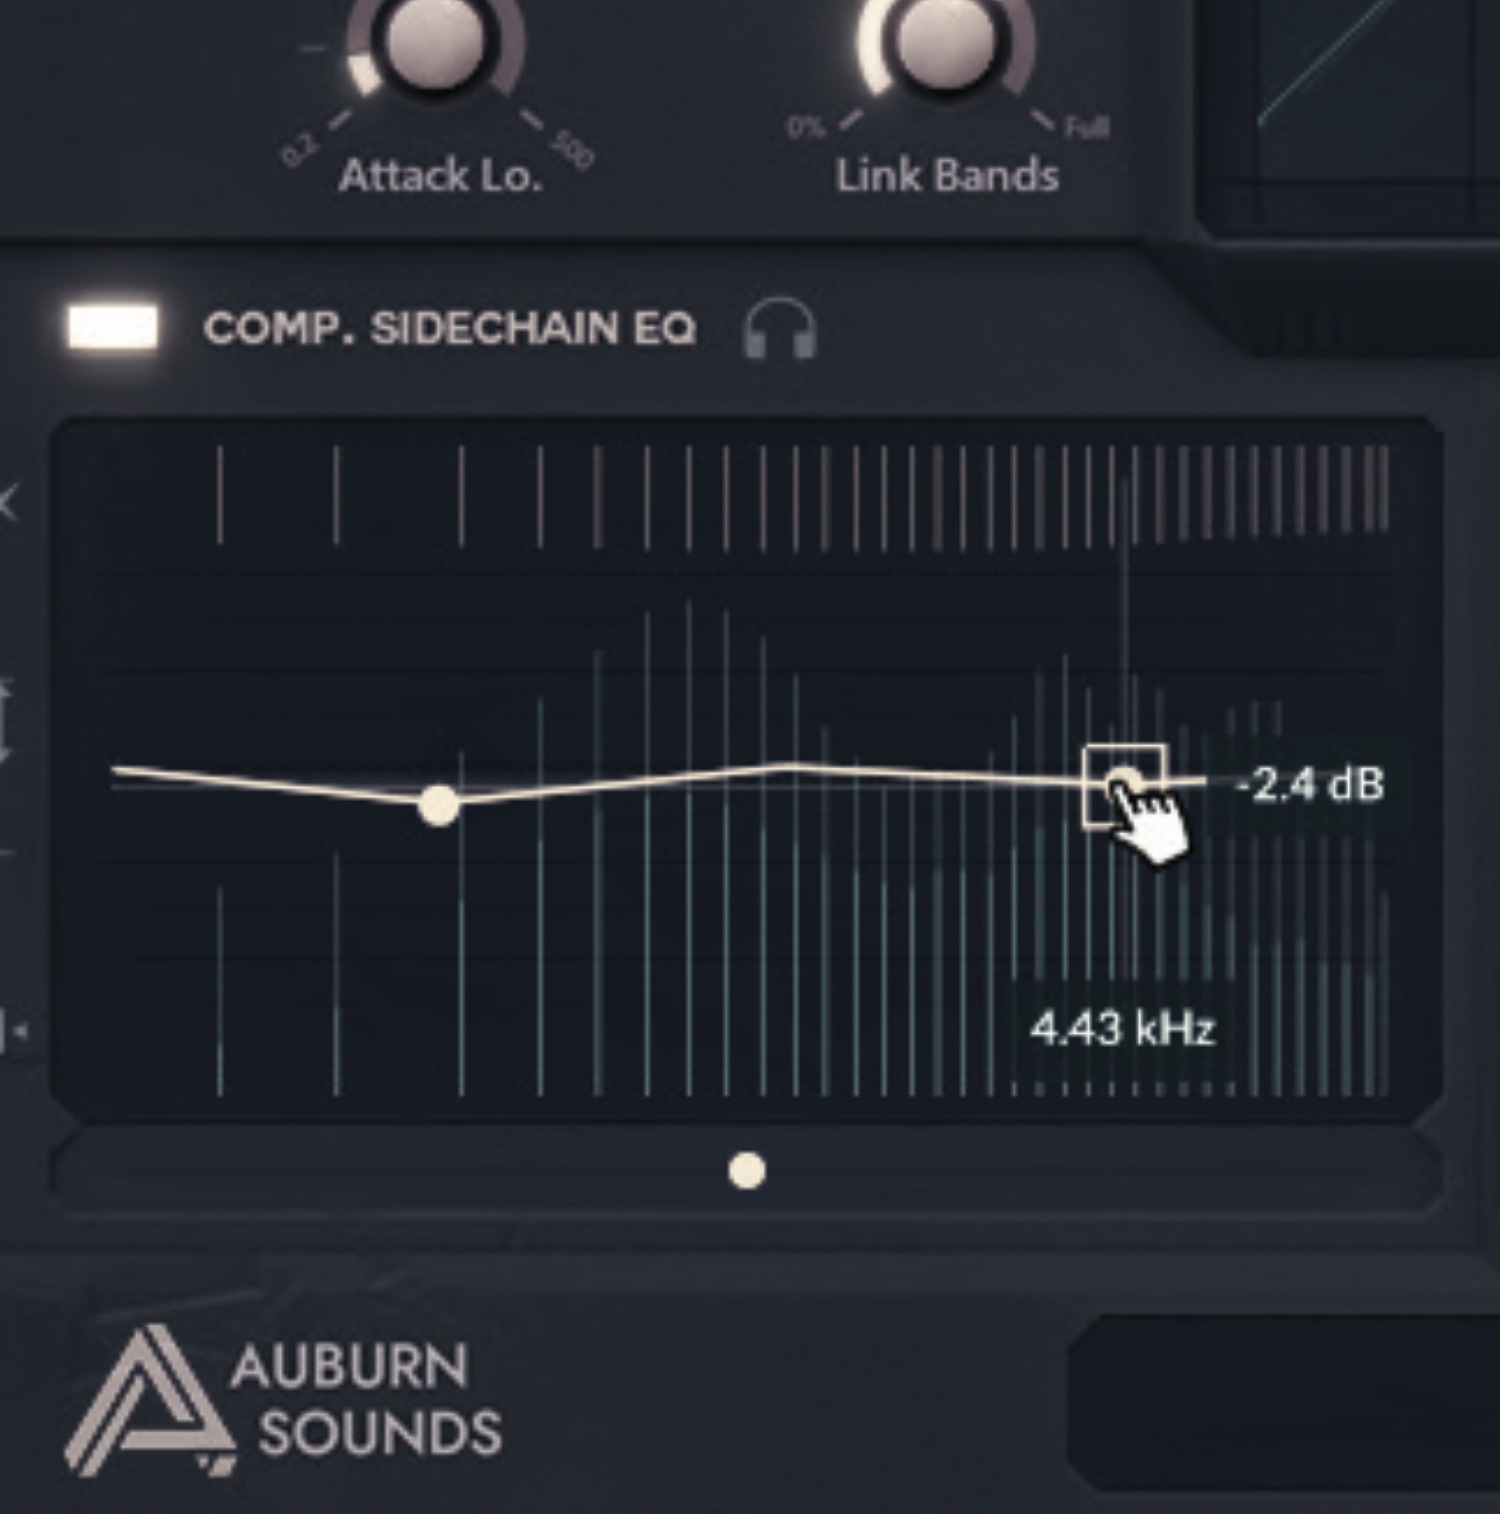
Using Comp. Sidechain EQ, we can attenuate or boost areas of the side-chained compressor signal to adjust intensity in specified areas. We want to let through our kick/snare’s natural punch, attenuating slightly at 60Hz and 4.4kHz.
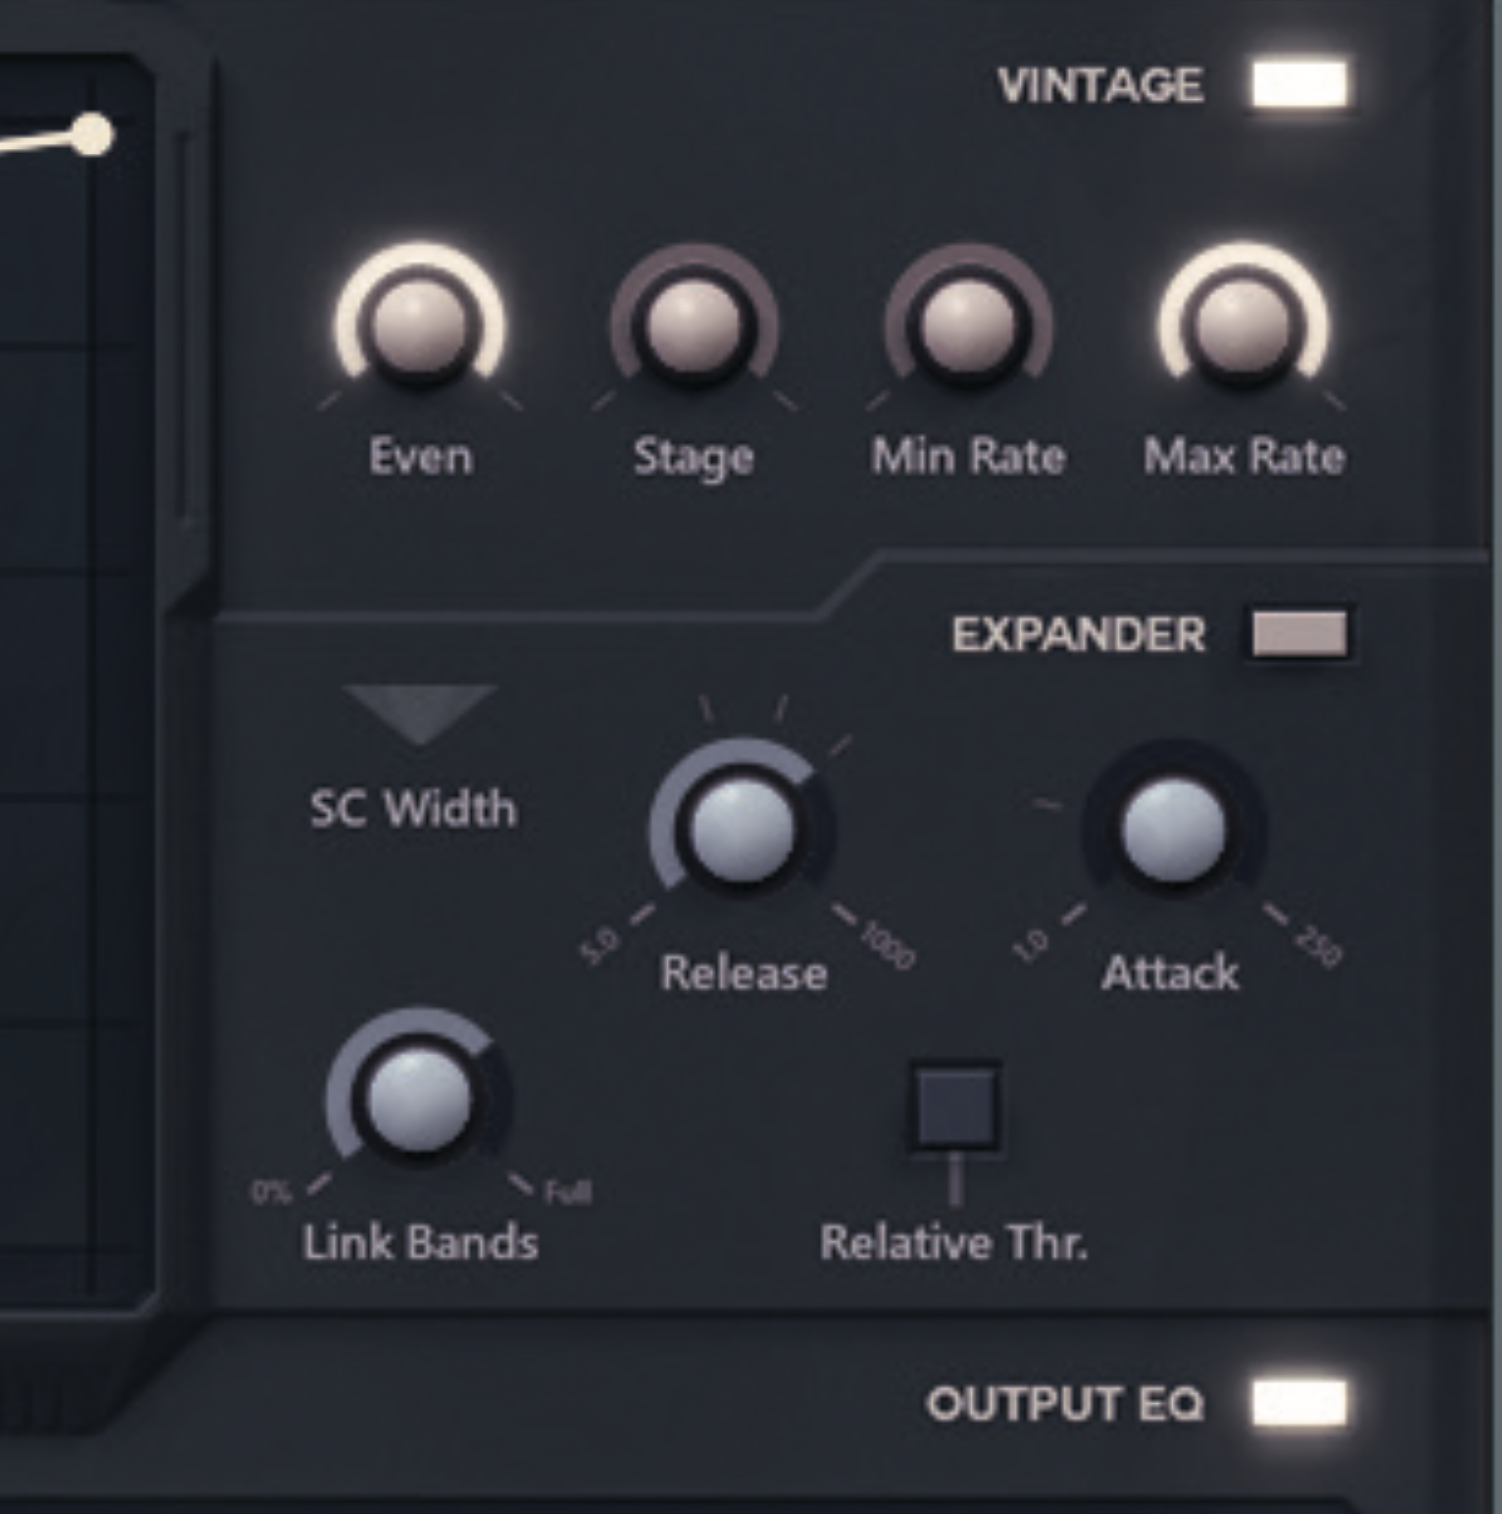
Finally, we apply distortion to our output signal by enabling the distorter and turning the Even knob (output) to max, and Stage (input) to minimum. Adjust the Dry and Wet faders to play with parallel signals. Voilà! A beefed-up drum kit.
A new way to compress with Dynamic Grading
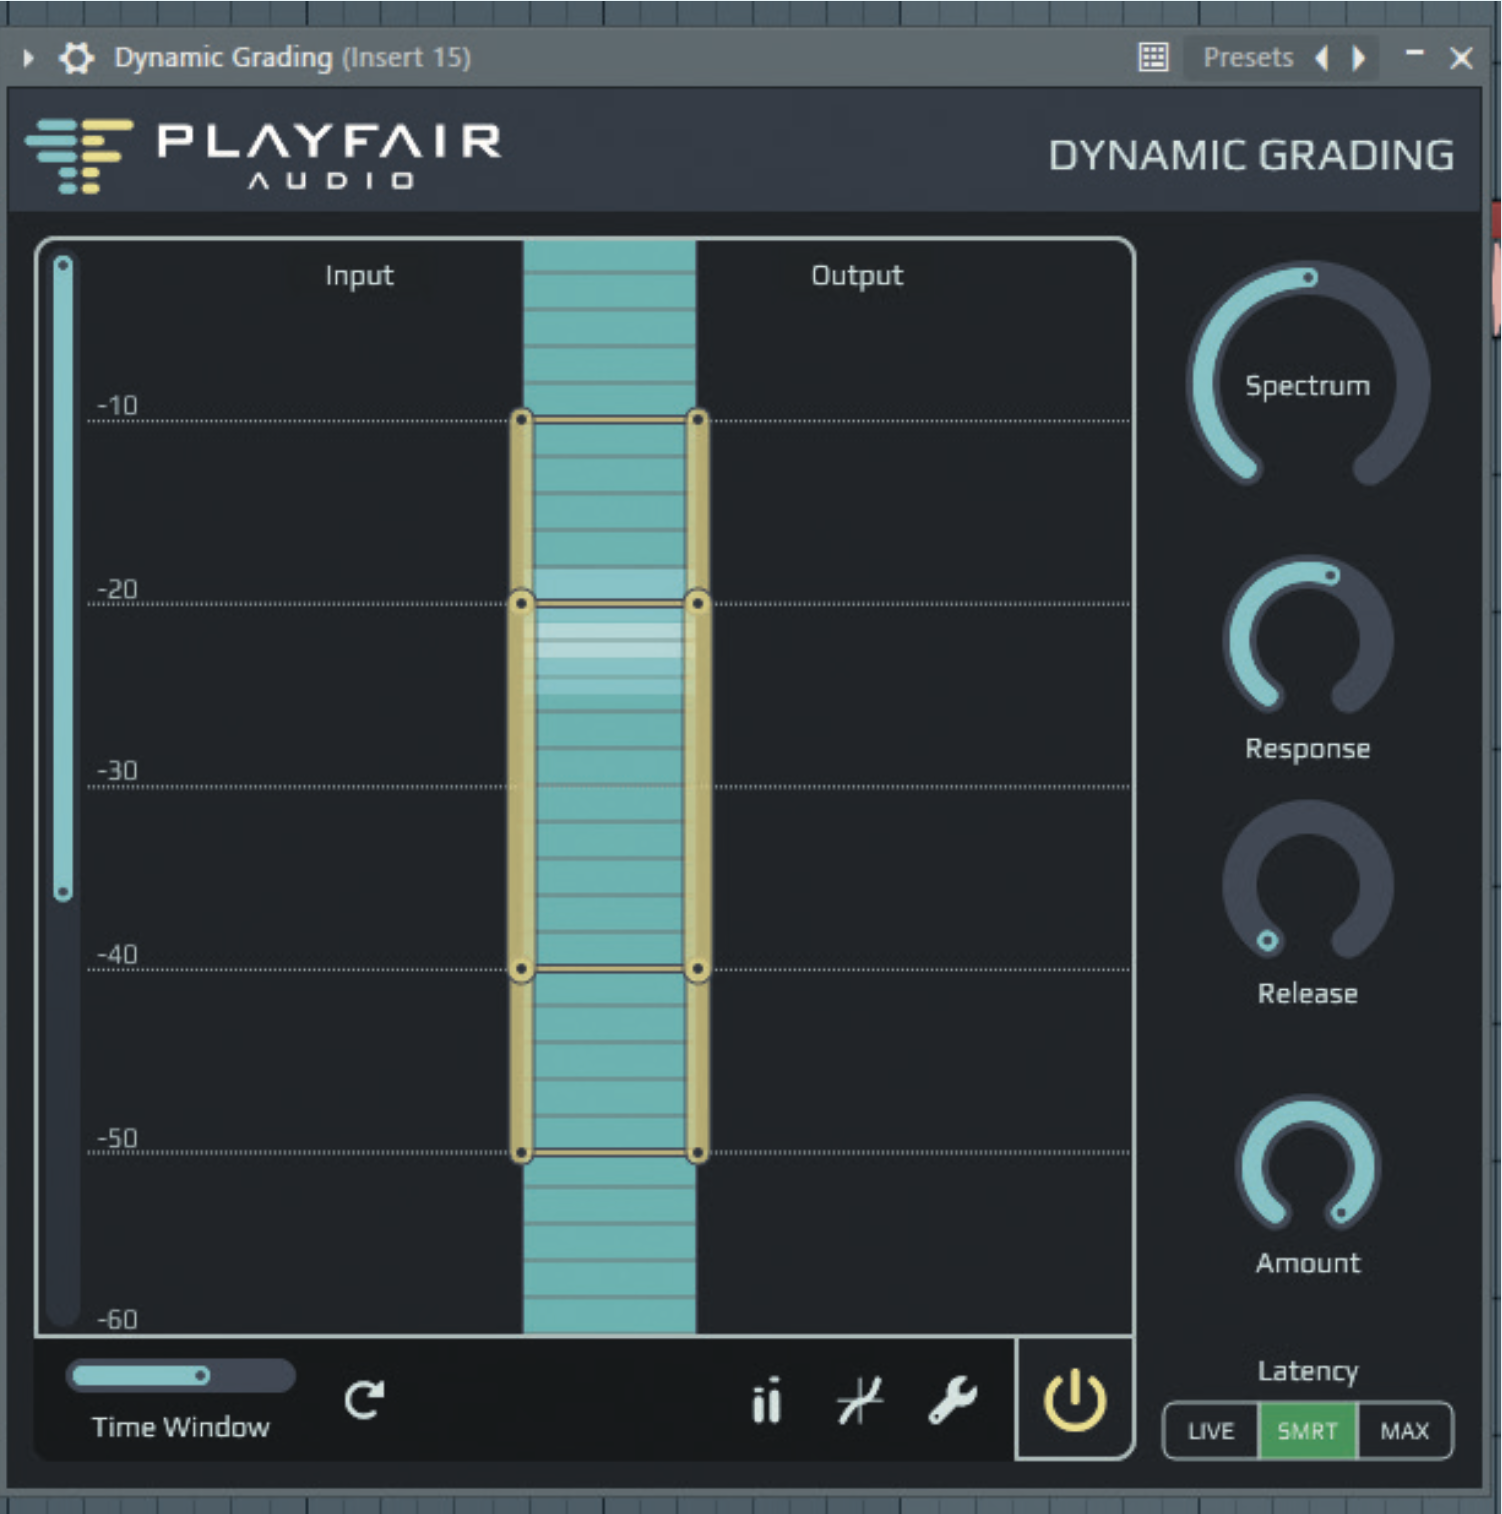
Dynamic Grading allows control over your dynamics in an all-new way. Instead of choosing a single threshold and all audio past this re-levelling relative to it, Dynamic Grading remaps all audio read at a certain level to a certain other level. These are set up with rules based on two sets of ‘handles’.
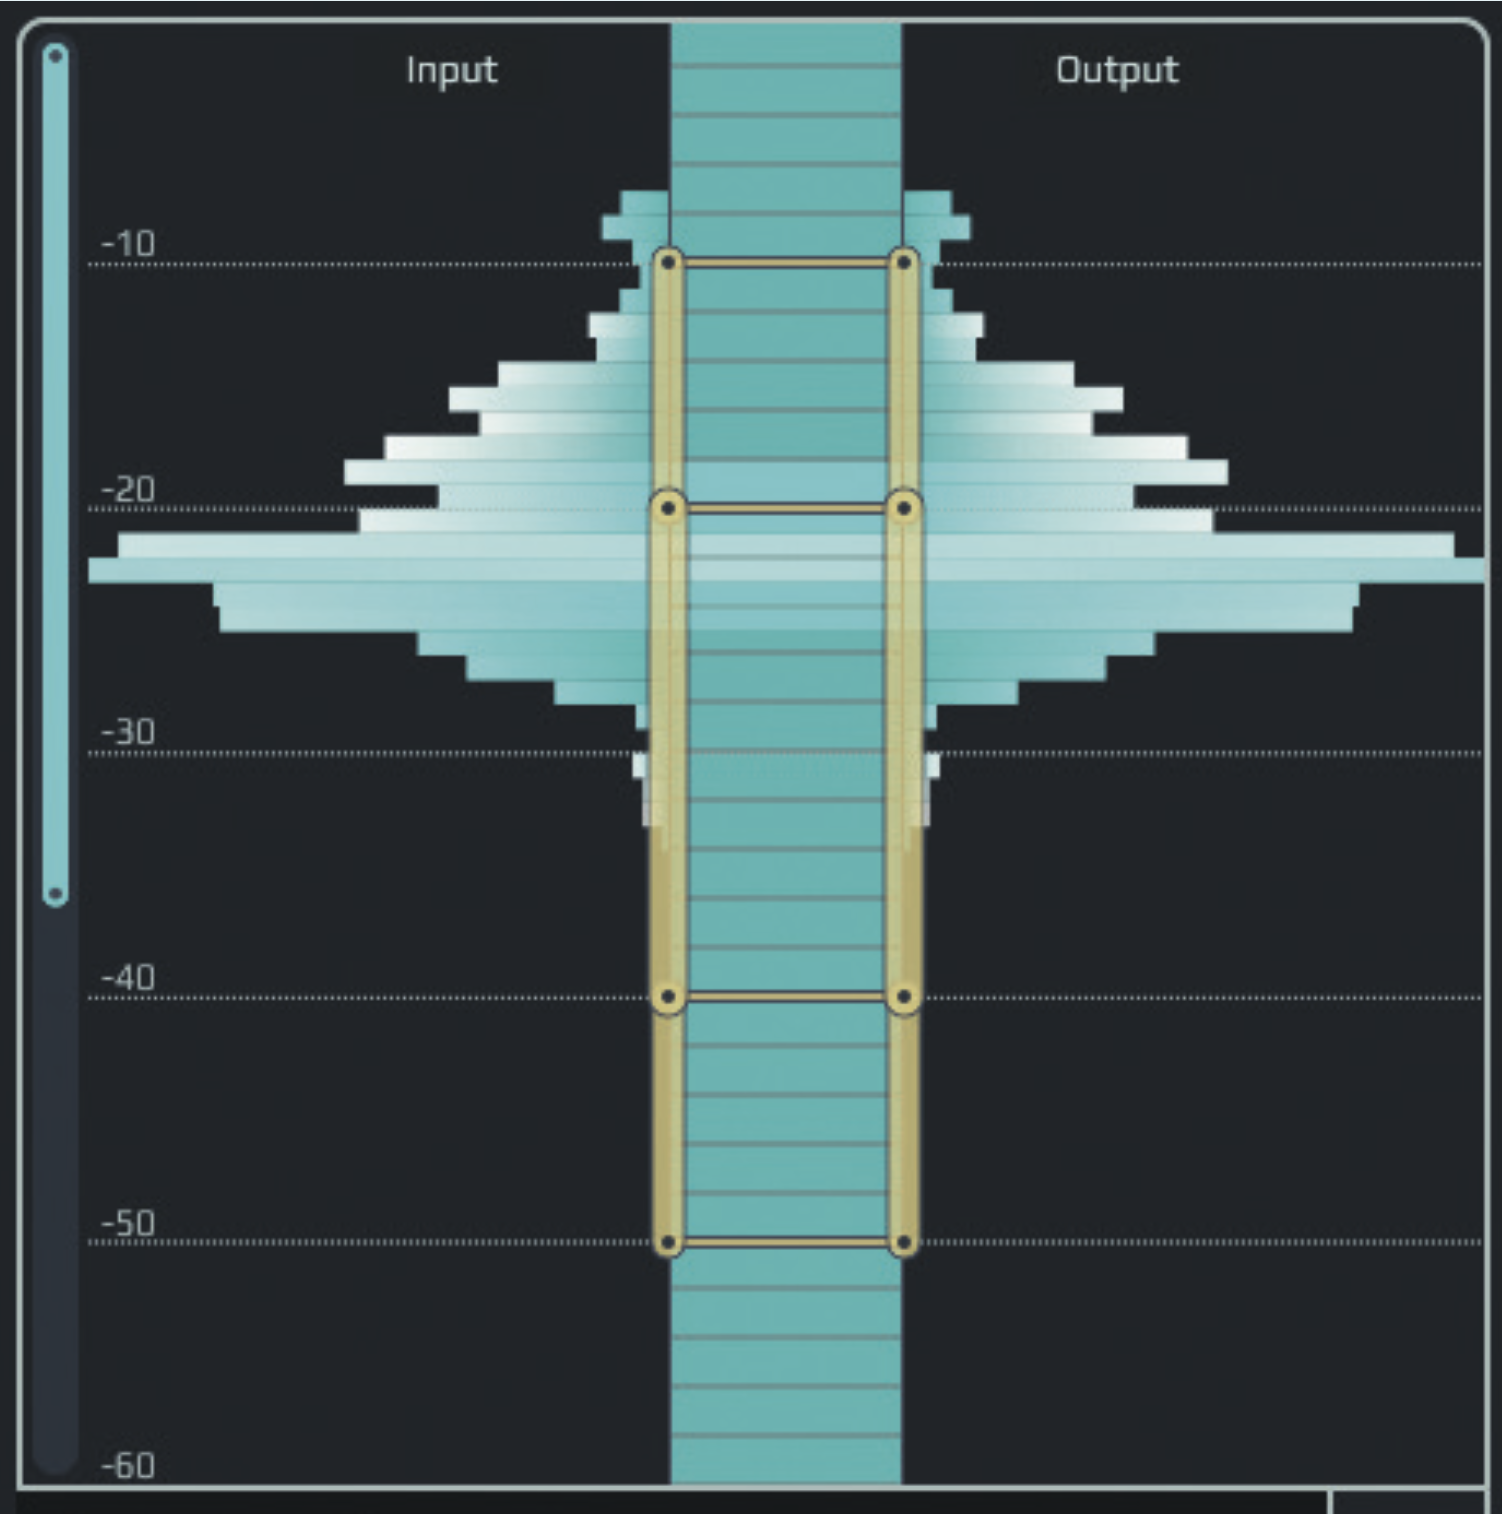
Allow your audio to play and you’ll notice the plugin’s histogram begins to fill with data from the incoming signal. The histogram will appear wider in areas where the signal is more prominent over time. A tall, narrow histogram shows a more dynamic signal; a short, chunky one, vice versa.
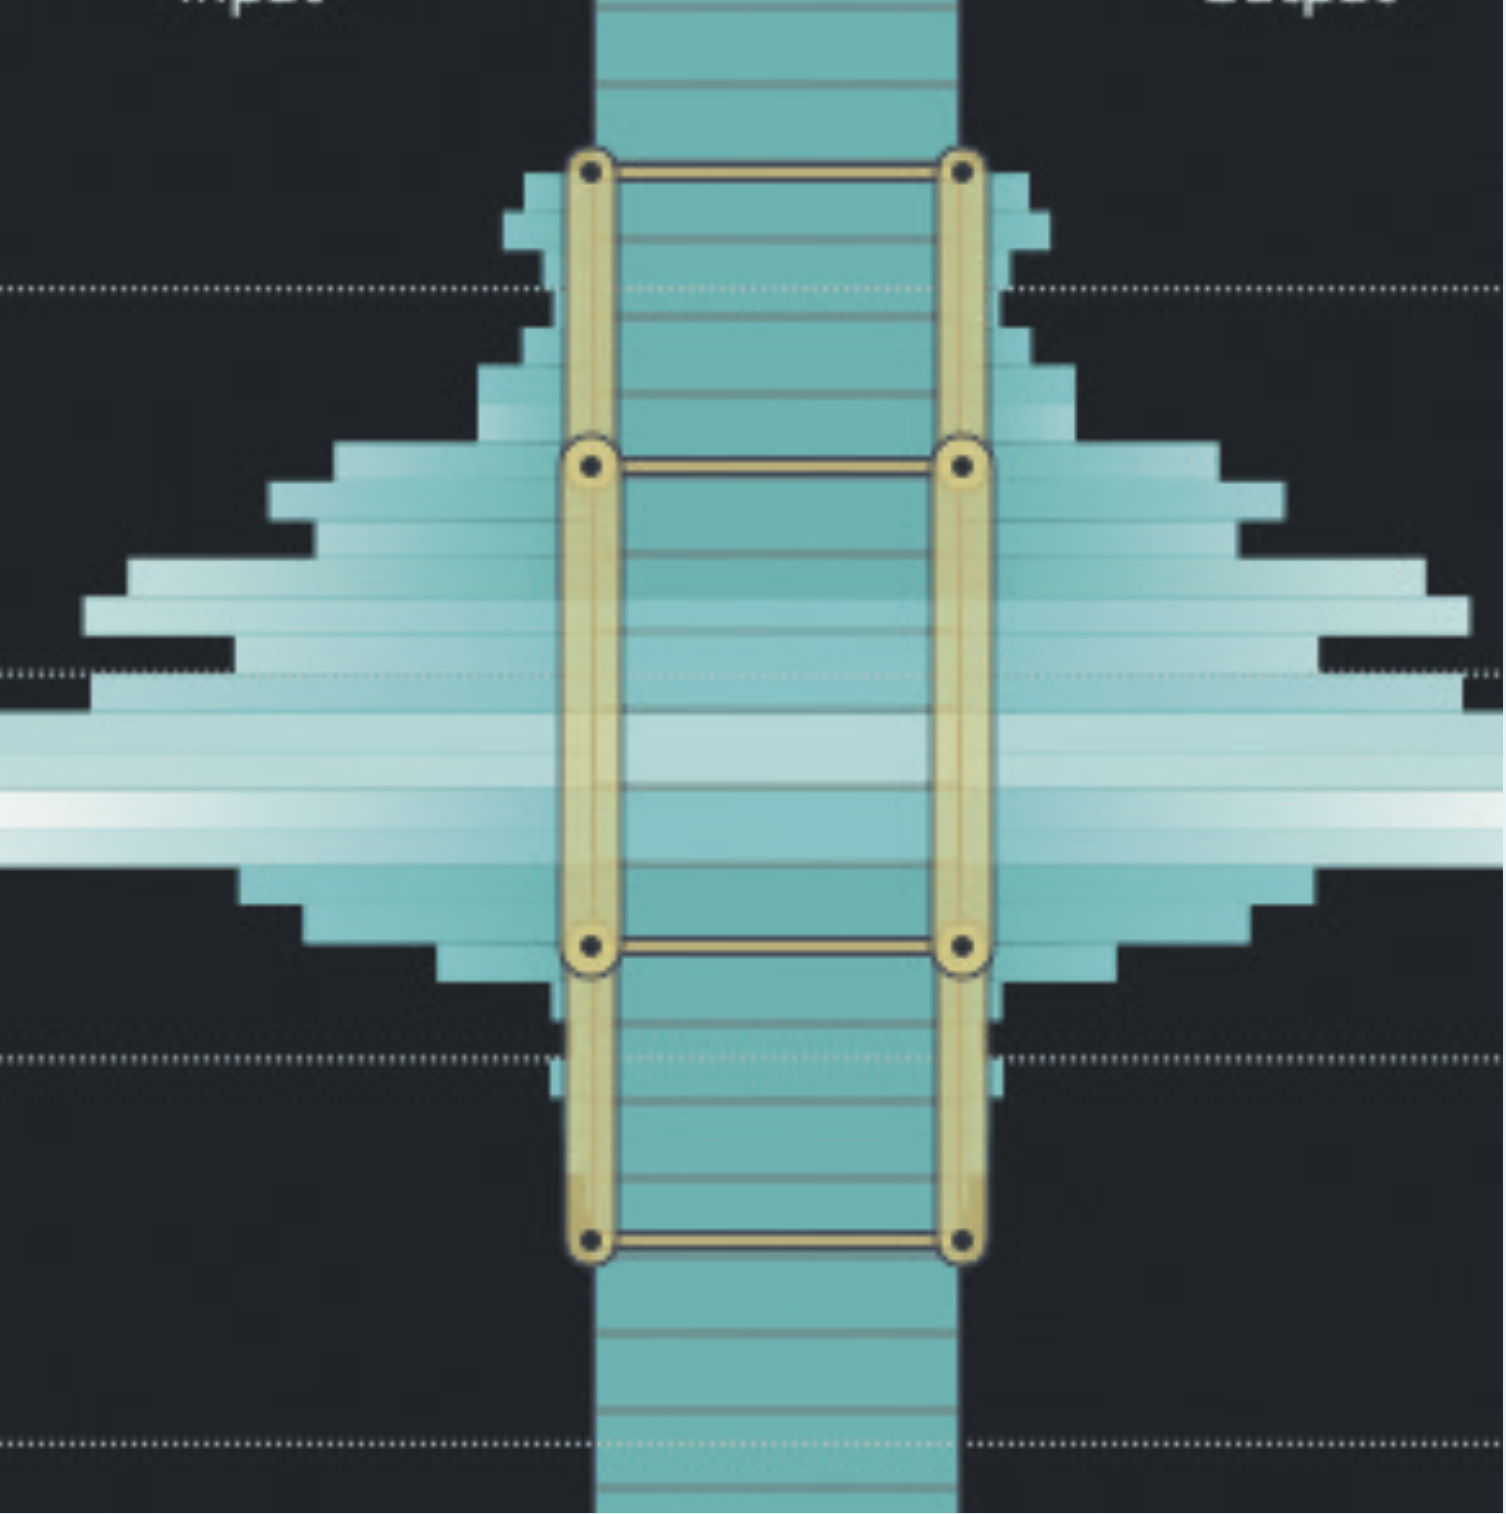
Use the histogram to gauge where to split your dynamic ranges. The topmost section is for the ‘Punch”, middle for the ‘Body’, and bottom for the ‘Floor’. The Body is generally going to be the widest part of the histogram. You can section the punch and floor across the remaining areas.
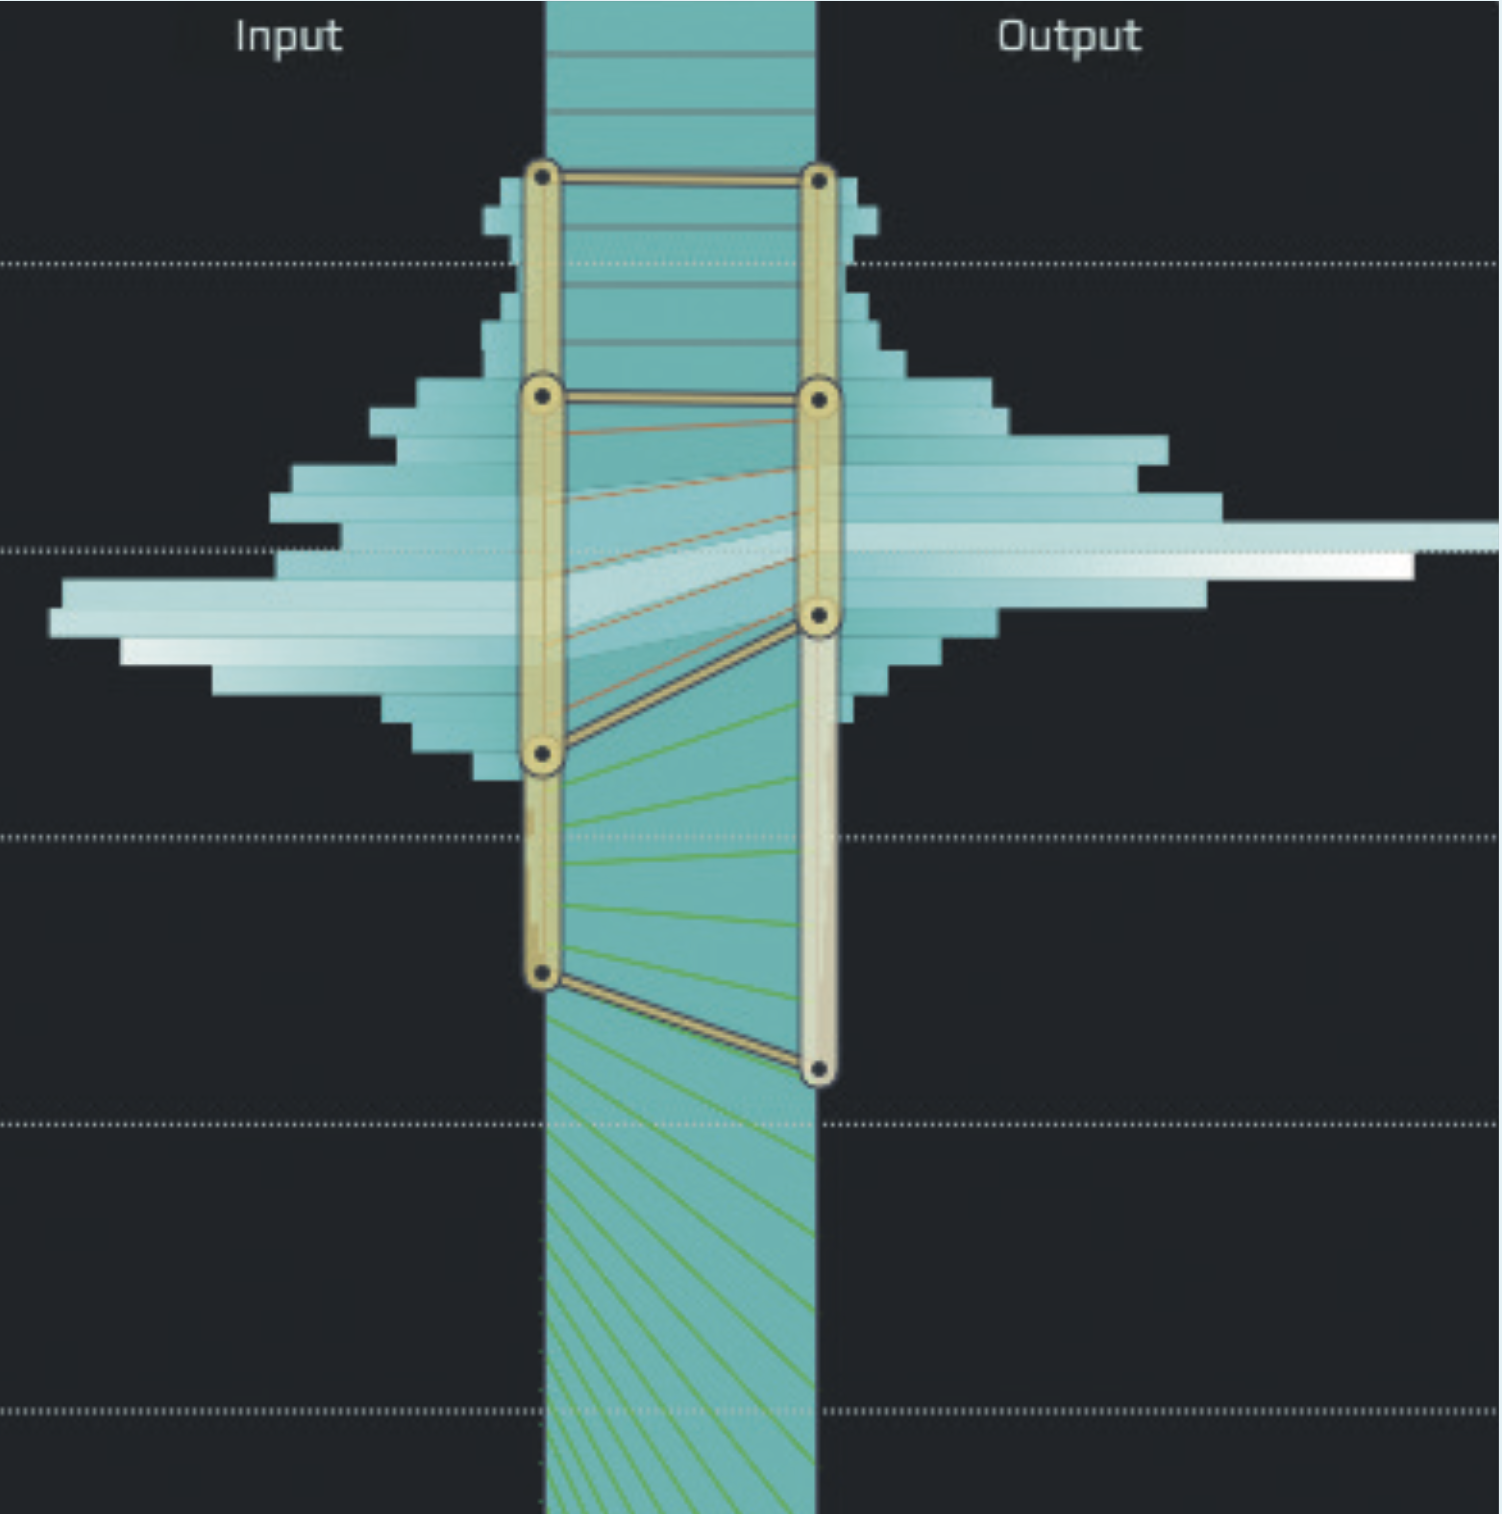
Once you’ve allocated your dynamic ranges, start altering the dynamics by either compressing or expanding each section. On the left, you have the input, and on the right, the output. We’ll compress our middle (body) and expand the more airy floor band. This is a good rule of thumb.
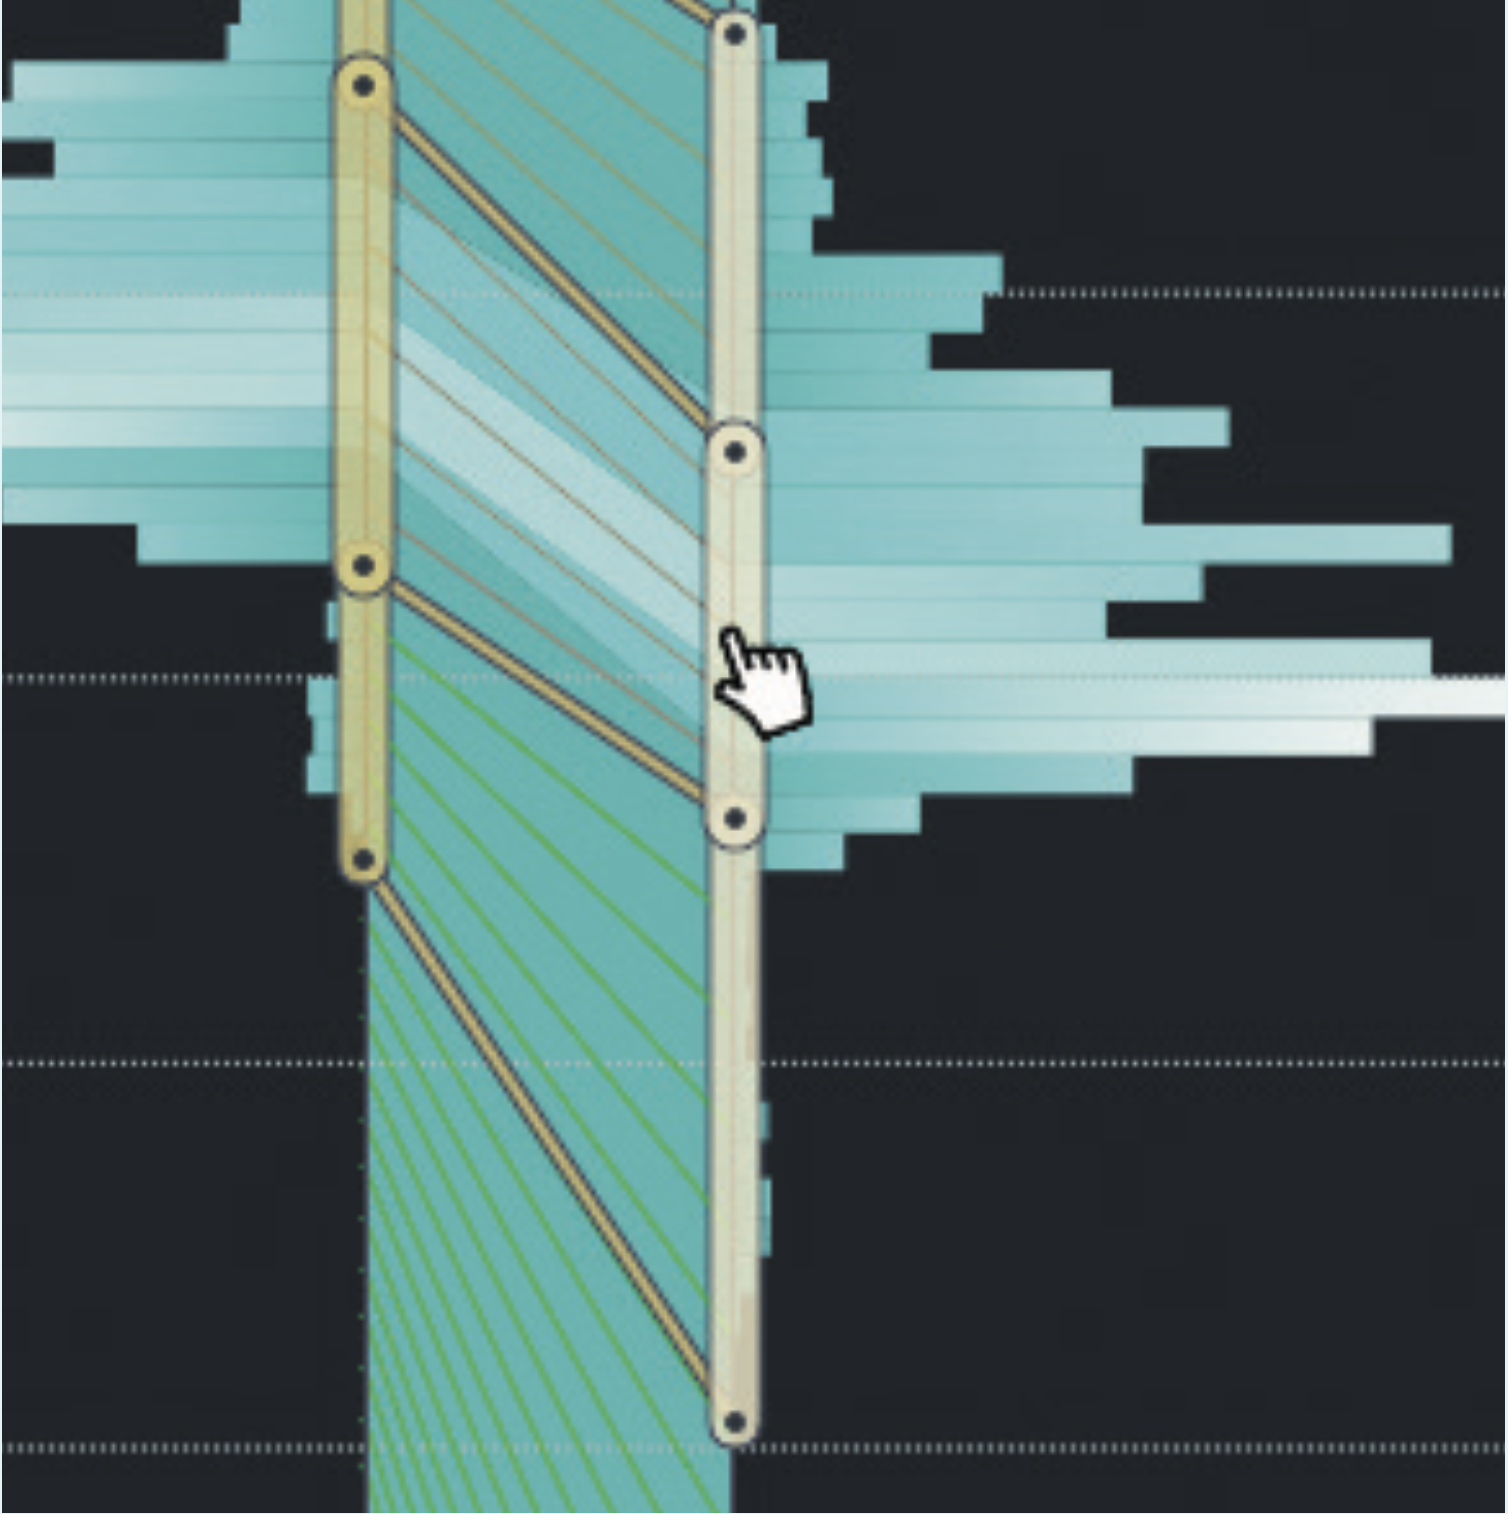
By clicking and dragging any section’s slider, you can change what area of the spectrum is affected. If you click and drag the slider of either the top or bottom range, you’ll simultaneously expand or compress the middle; if you move the middle section’s slider, you’ll alter all at once.
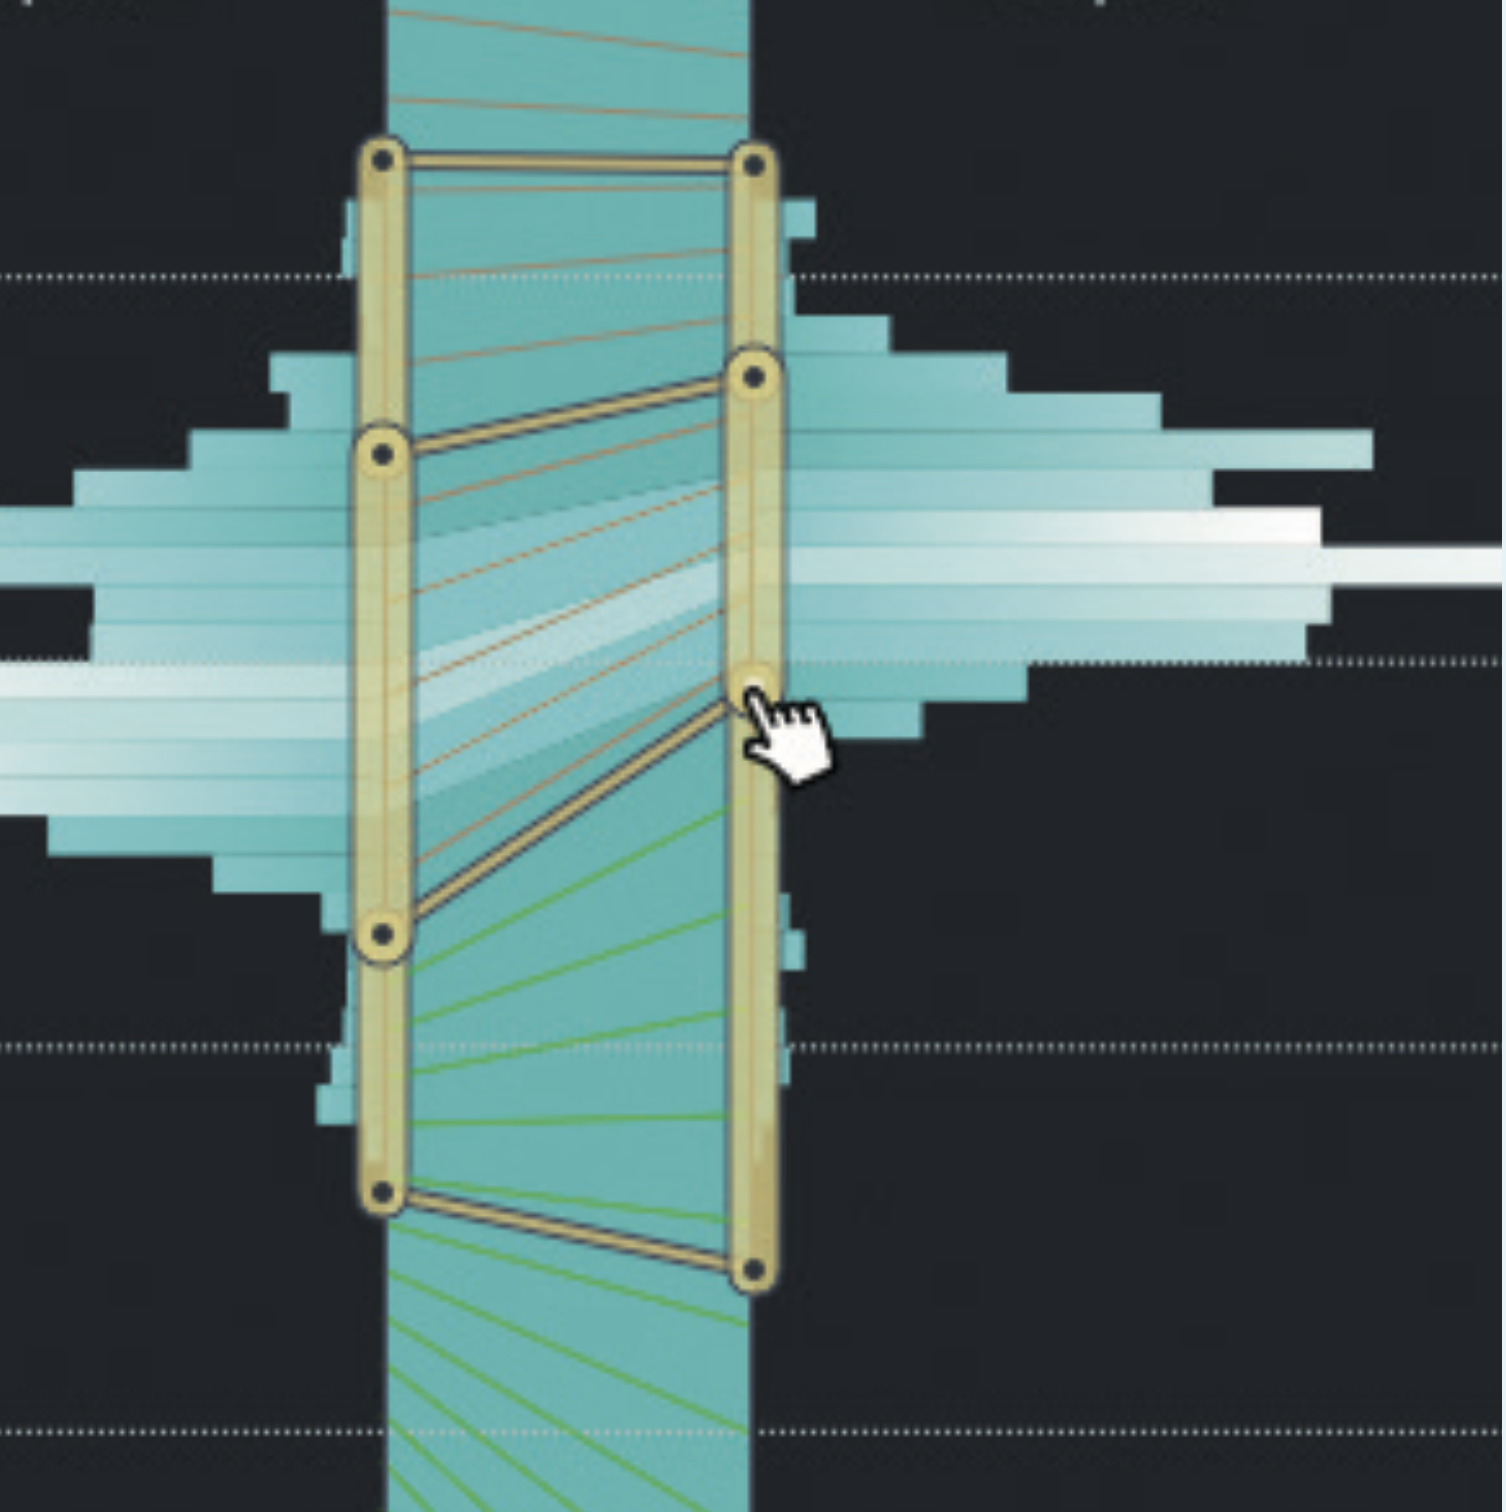
You can also change each section’s start/end points alone, but note, each change also affects the neighboring range. If a range is widened, you’ll hear its audio content expanding (increasing dynamics); narrow it, and you’ll compress its dynamics. This shapes the overall audio colour.
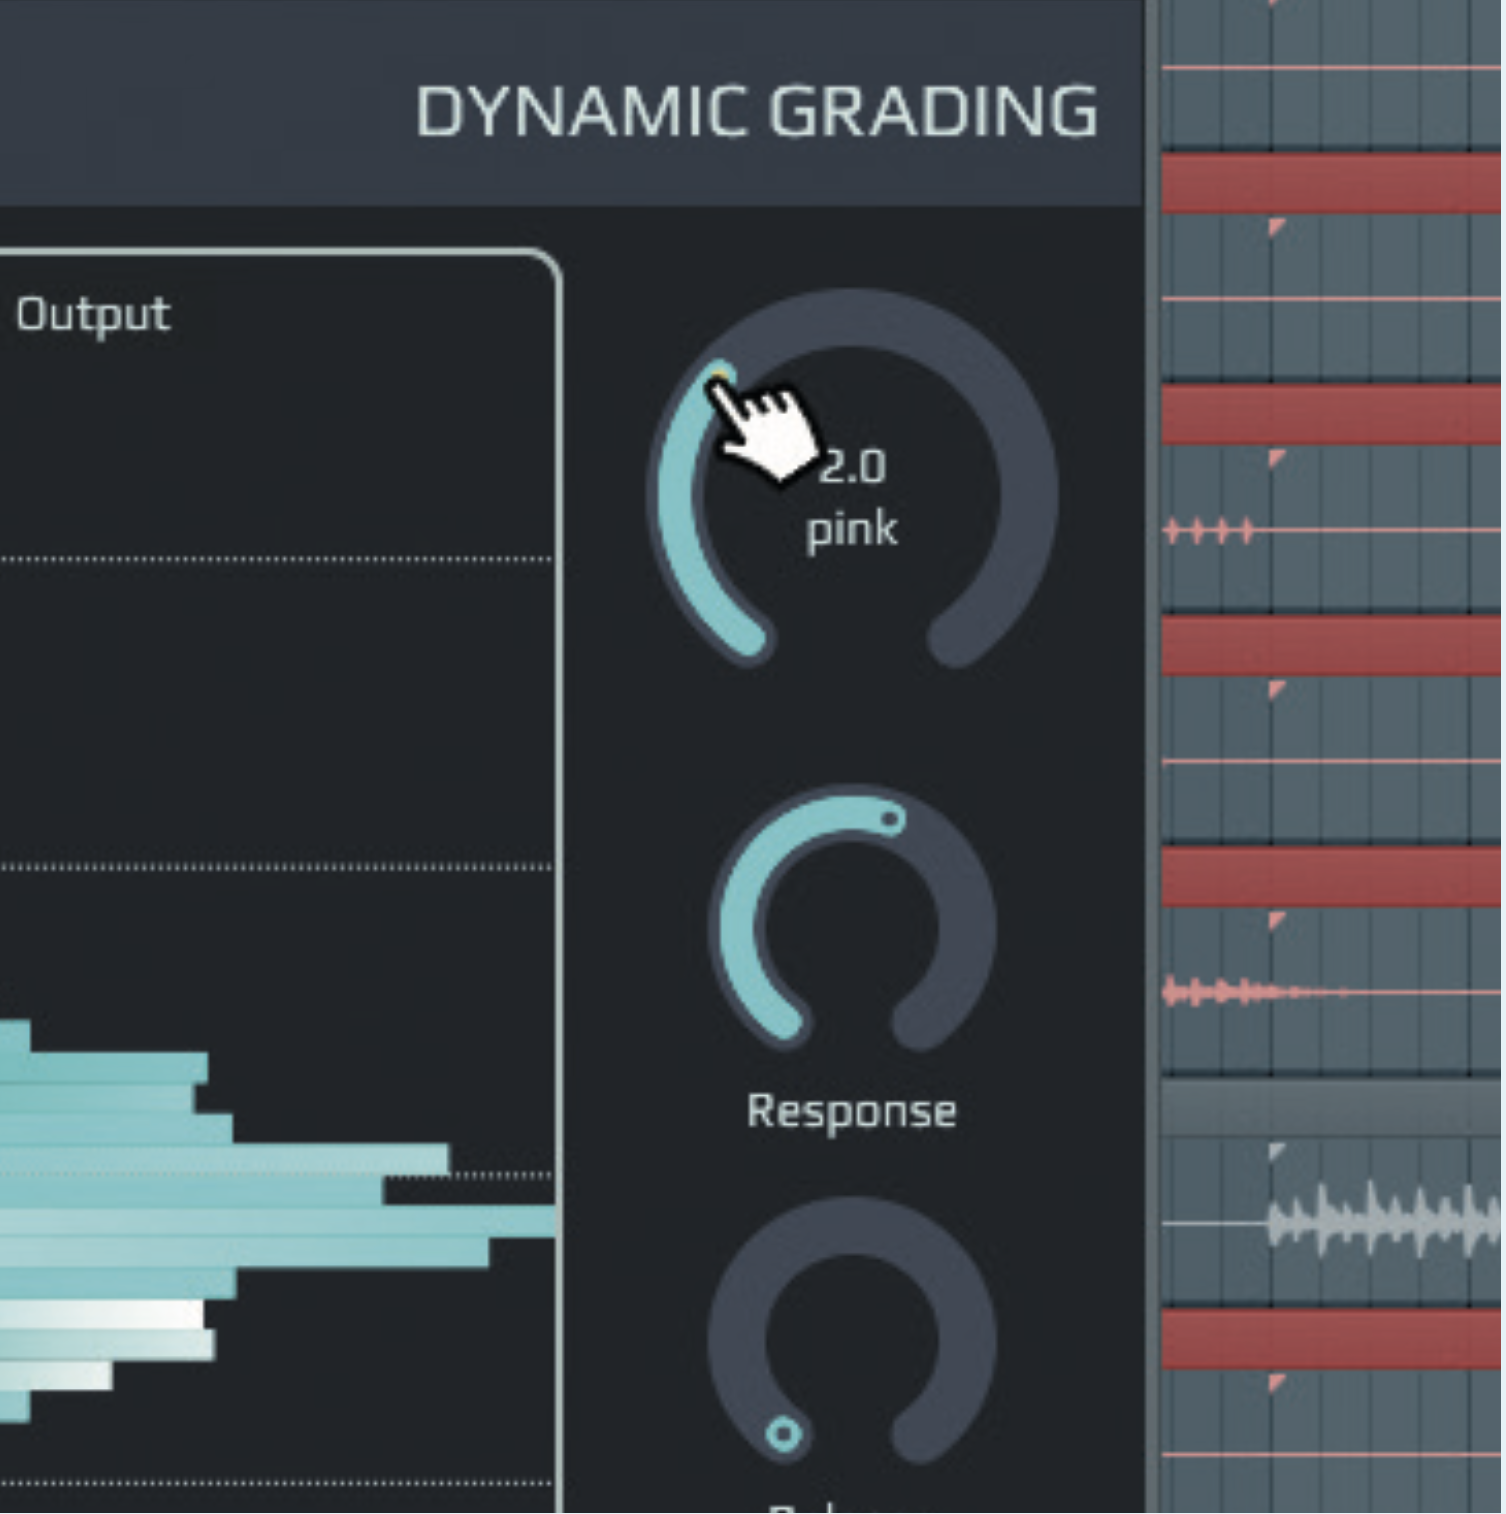
Play with these new controls until familiar. Once perfected, you can varnish your audio with a warm glue, or bright, loose tonal character. You can also change the Spectrum knob to add further brightness or warmth. In this next example, we’ve used Dynamic Grading to shape a hearty viola segment.
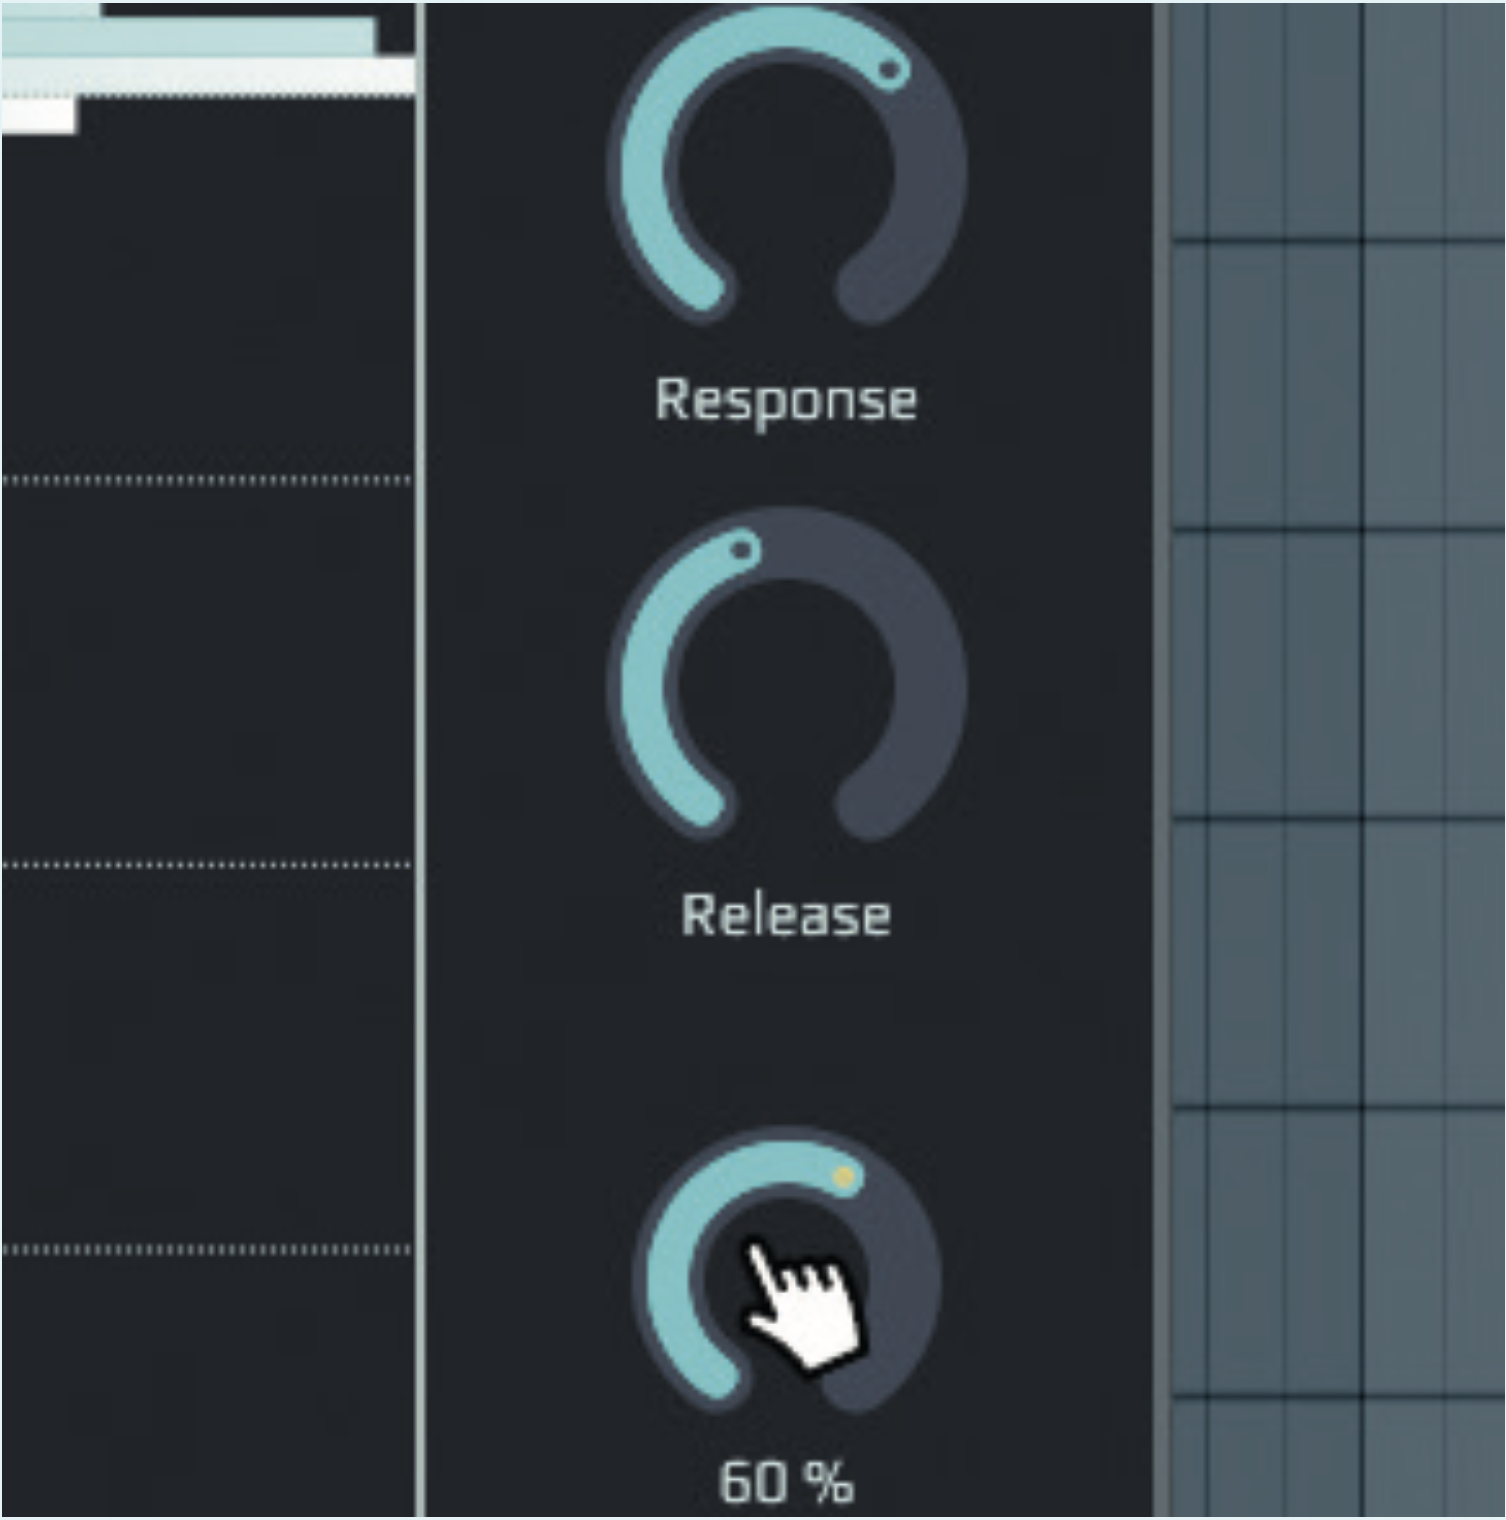
Lastly, Dynamic Grading features a Response (attack), Release, and Amount (mix) control. These act as you’d expect a dynamic processing unit to: shorter attack/release for percussive, fast-hitting transients, longer for smoother signals. Amount works as an internal parallel compression mixer.
Power tip
Dynamic Grading removes comfortable staples like Threshold and Ratio controls from dynamics processors. But think back to when you first learned how these controls worked, and remember how counter-intuitive they felt. Dynamic Grading requires a new way of thinking of dynamics but this can be a good thing for your working practices.
Modern ‘analogue’ compression
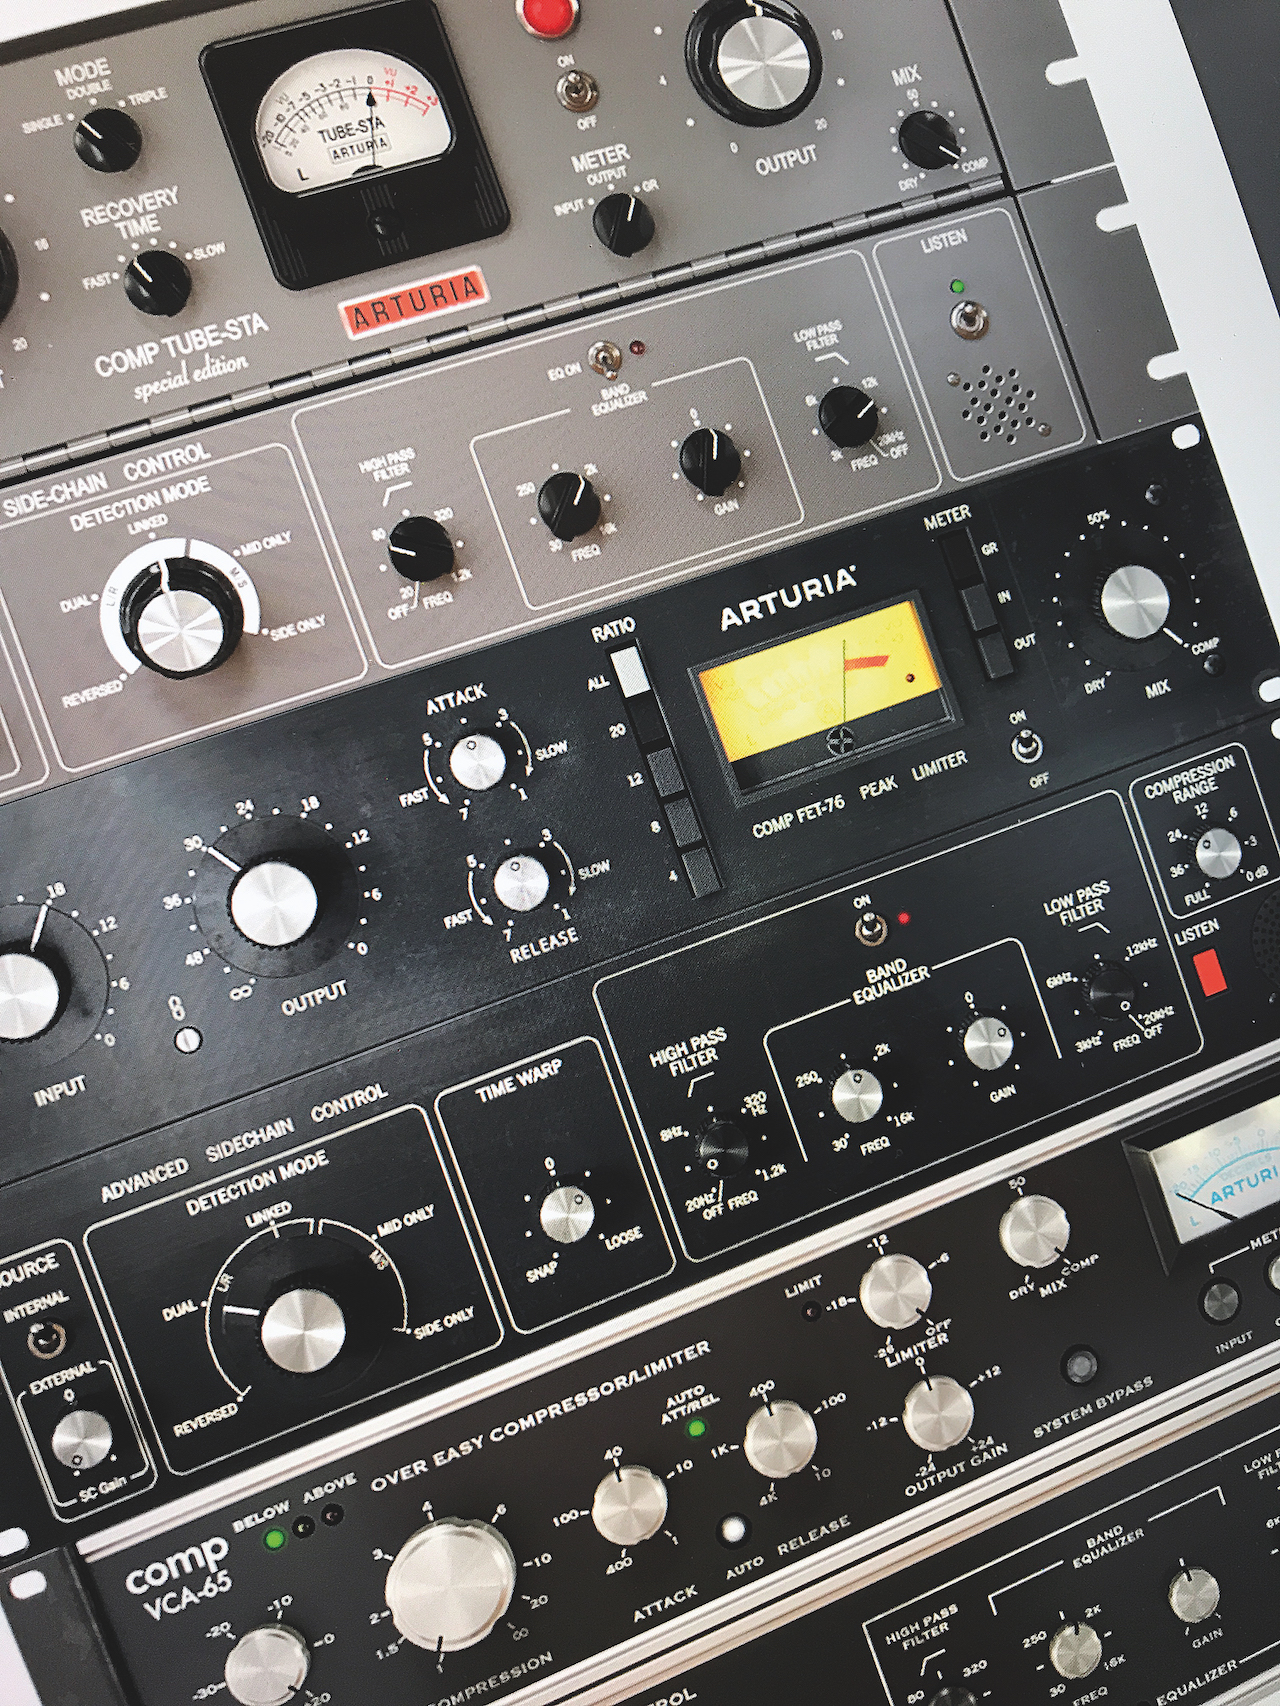
However far technology marches onwards and upwards, one thing is increasingly clear: it seems that analogue emulation is here to stay. When we’re all Neuralinking with our DAWs, we’ll probably still demand an array of vintage ’60s character compressors to do it with. And so, even ‘analogue’ plugins have been getting a touch of modernisation recently. And since touching their classic sound would be heresy, their capabilities have been extended and enriched in other ways.
Even analogue plugins get a touch of modernisation recently
On modern emulation plugins, you’ll find an all-round better user experience, from higher resolution graphics to more options in detented controls, to more comprehensive metering, which deliver up the best of today’s digital analysis to the retro enthusiast too.
Some developers are complete purists, wanting to recreate the authentic experience of the original hardware; others opt to extend those functions, ramping up ranges and capabilities in order to create a ‘what if’ scenario.
What if this hardware went further and allowed more than its relatively limited original version? Who’s to say?
The future of ‘analogue’ dynamics
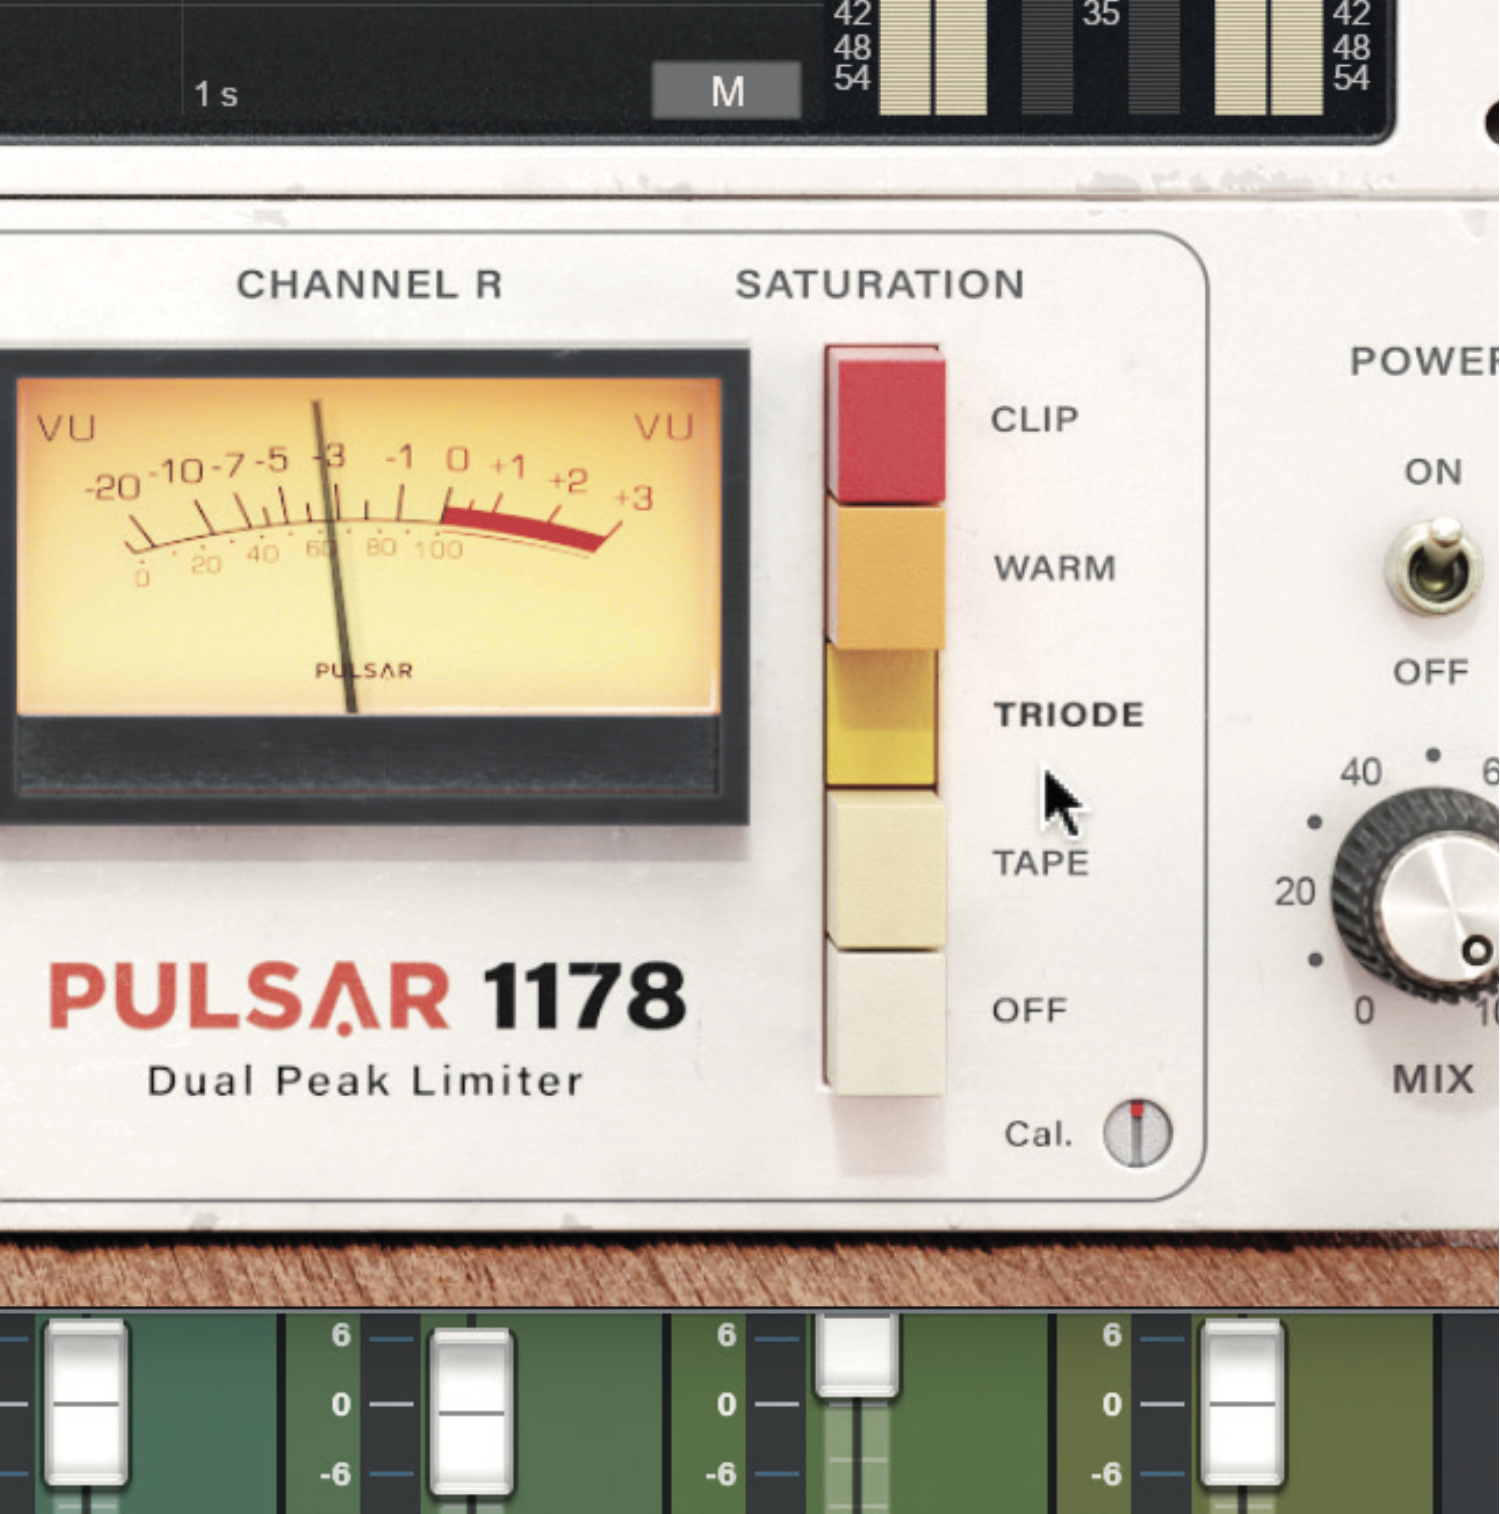
Pulsar’s 1178 plugin is an extended version of the original Urei hardware, the stereo version of the famed 1176. As well as the perks of digital control (preset saving, anyone?) one thing Pulsar have added is a modelled saturation stage after the compressor.
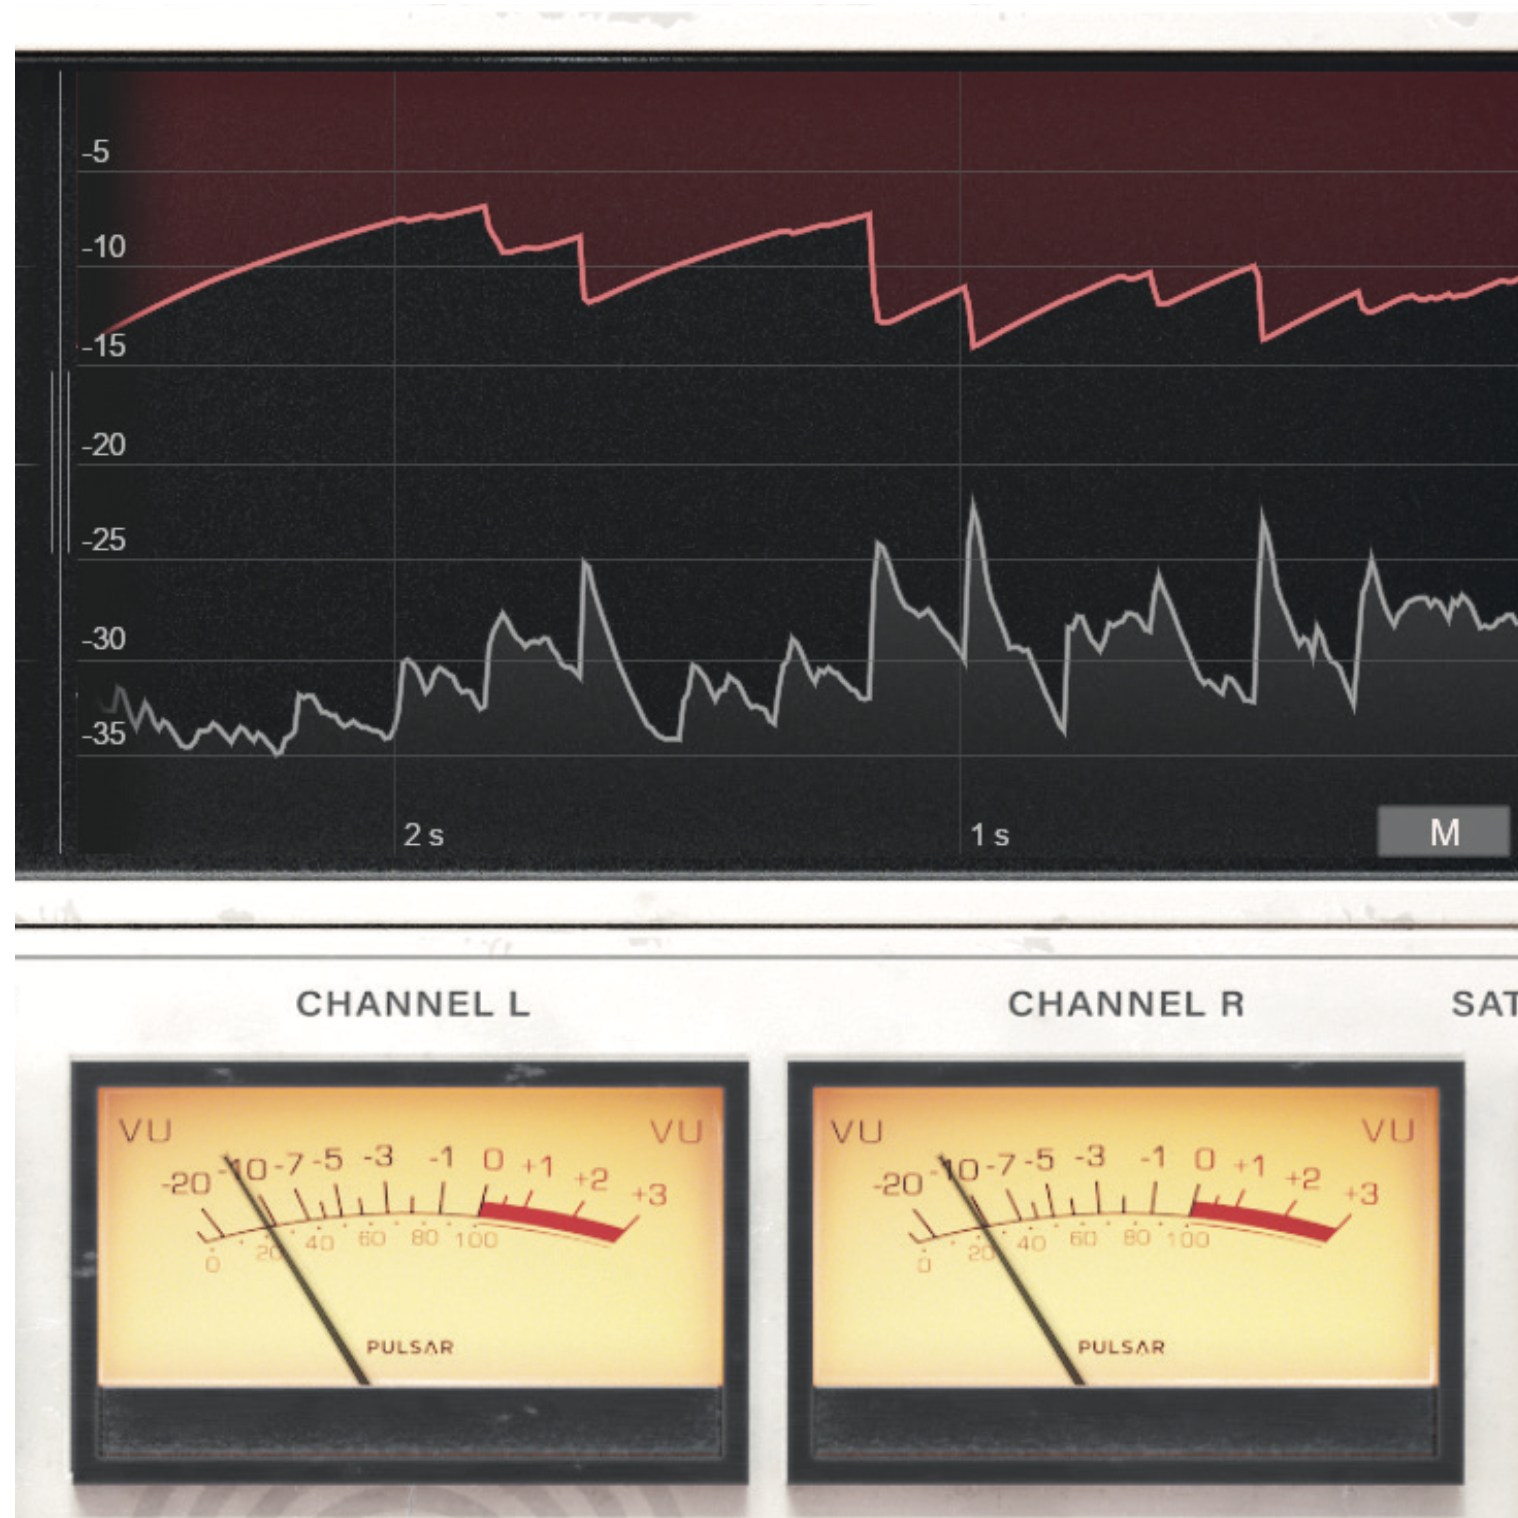
There’s digital metering, too, so you can get your old-school Input and Output compression controls set perfectly while getting full and comprehensive visual feedback from two meters and a gain reduction graph. Truly modern conveniences.
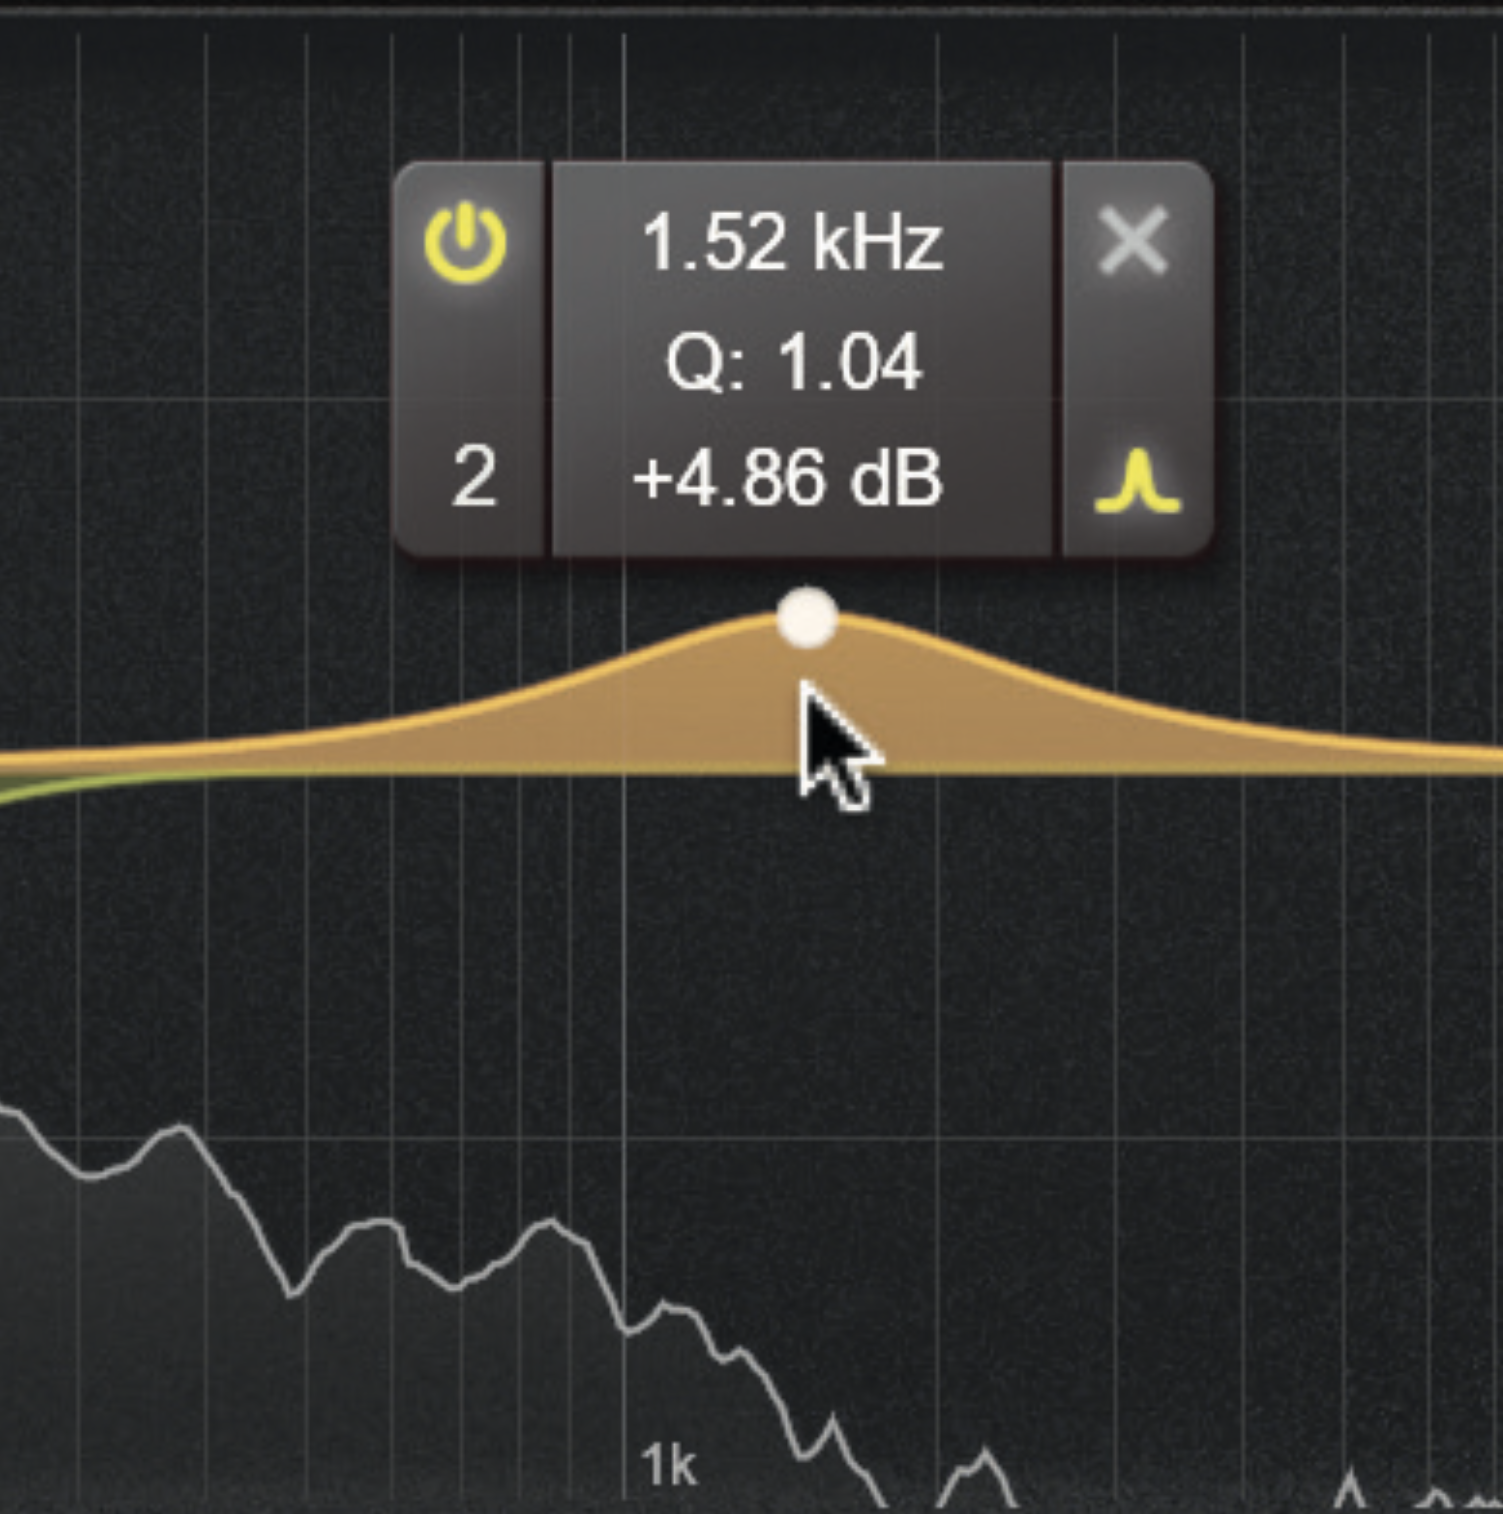
It’s the sidechain EQ where this software compressor outdoes the original. Unlike the sidechain high-pass function on a compressor, you can set up a full EQ on the detected signal, emphasising parts to balance compression response.
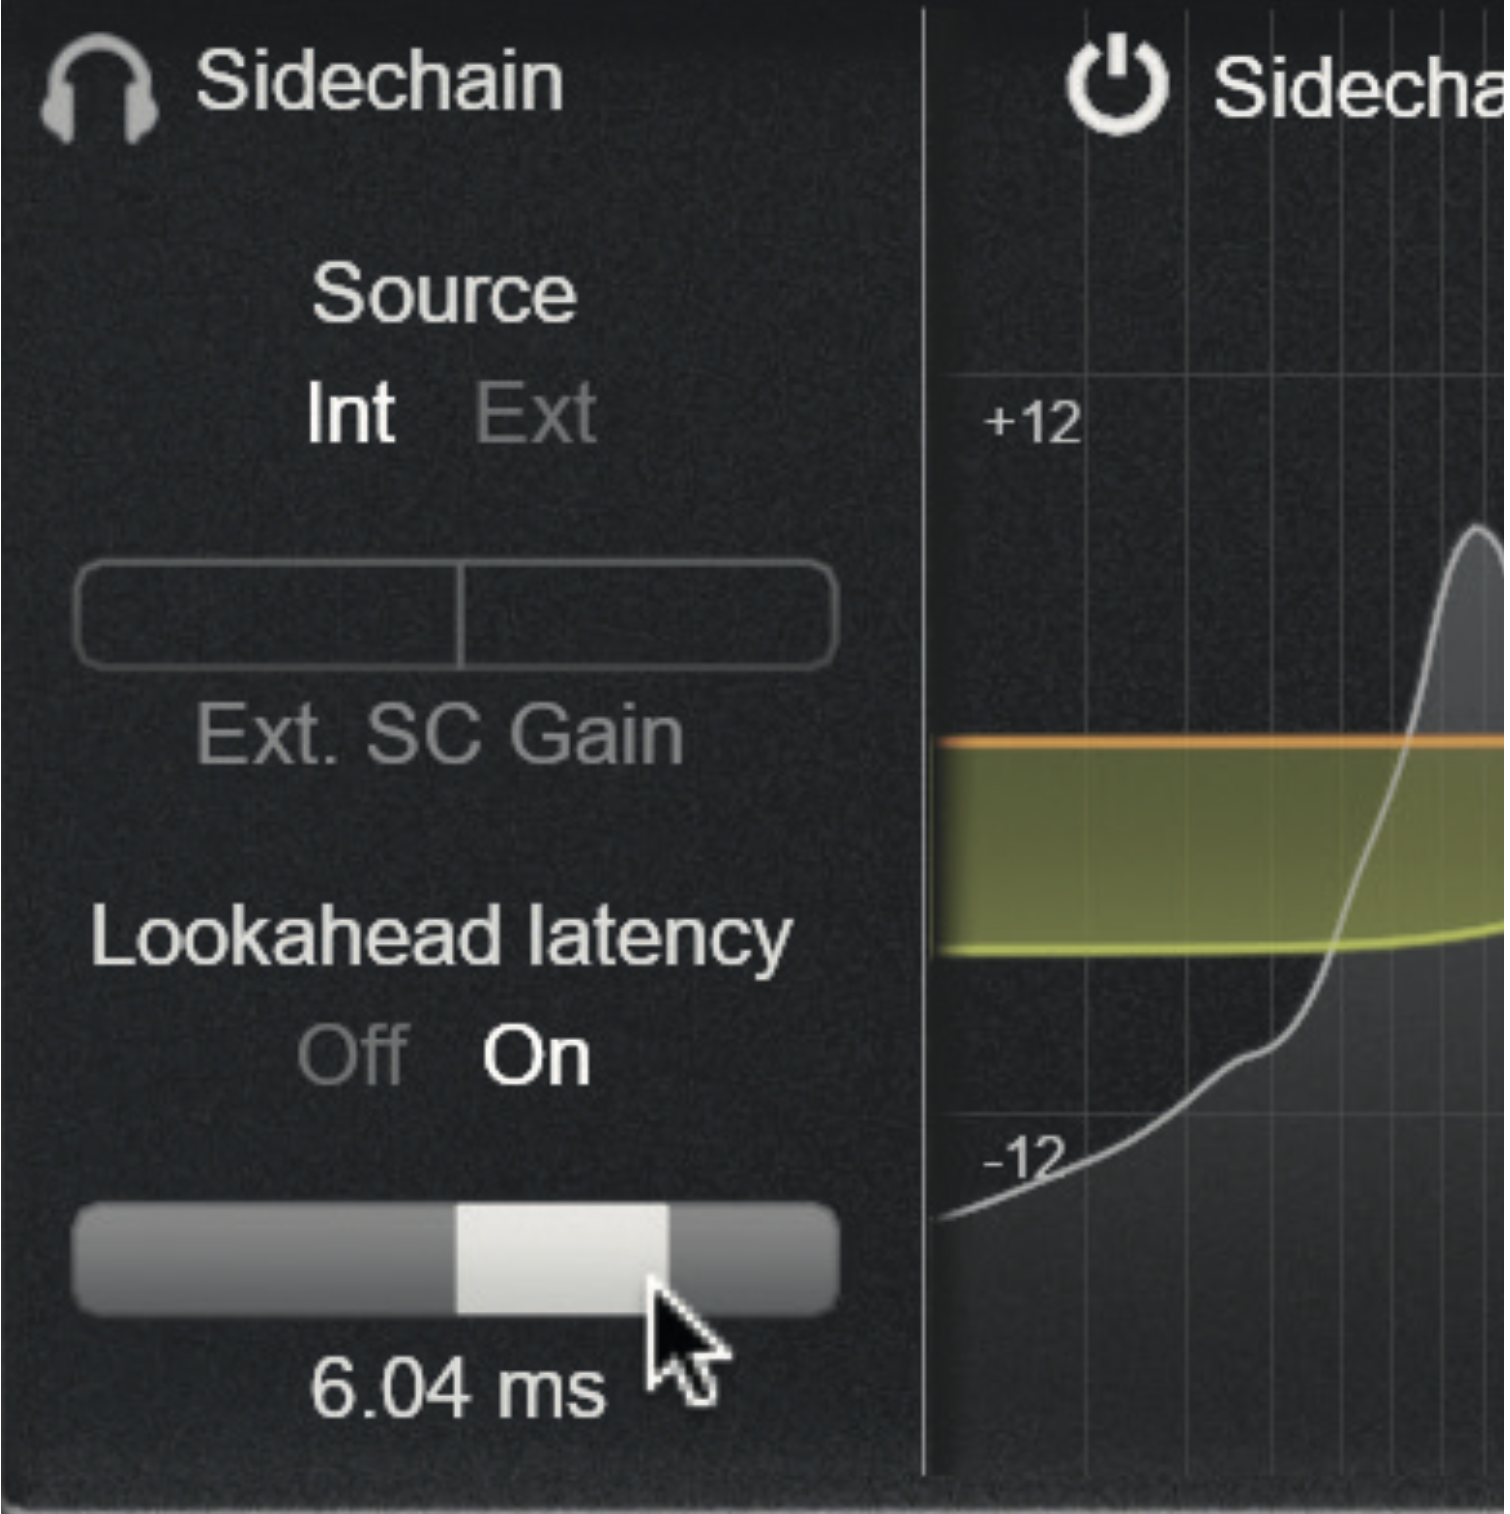
The (purely digital) Lookahead section can be swapped over to Lookbehind; you can delay the compression response. This allows for a delayed response to let a transient through unharmed, while keeping the Attack time quick when it does kick in.
3 of the best
1. Shadow Hills Mastering Compressor
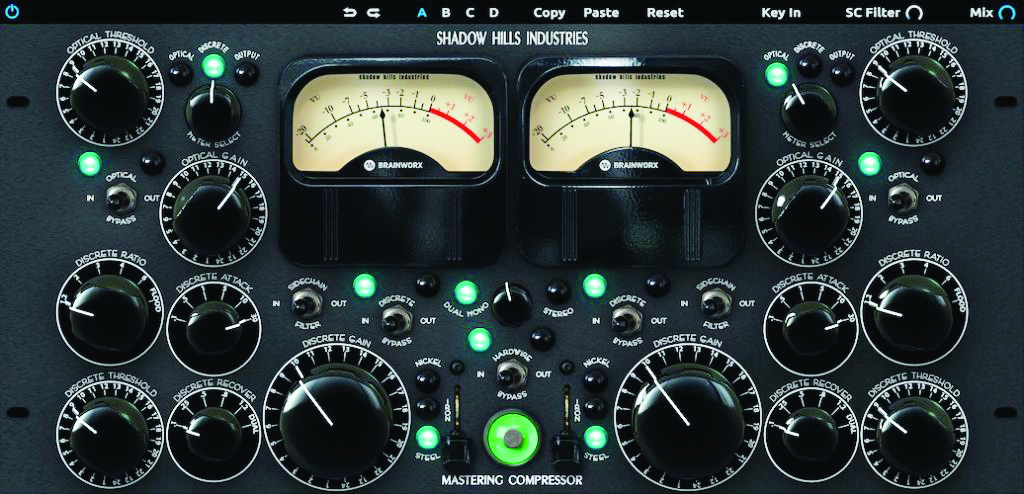
This plugin takes cues from one of the fiercest dynamic processing units in history. The Shadow Hills Mastering Compressor features two separate compressors (one optical, one VCA) that can be engaged independently or simultaneously and act in stereo or dual mono.
2. Sonible pure:limit
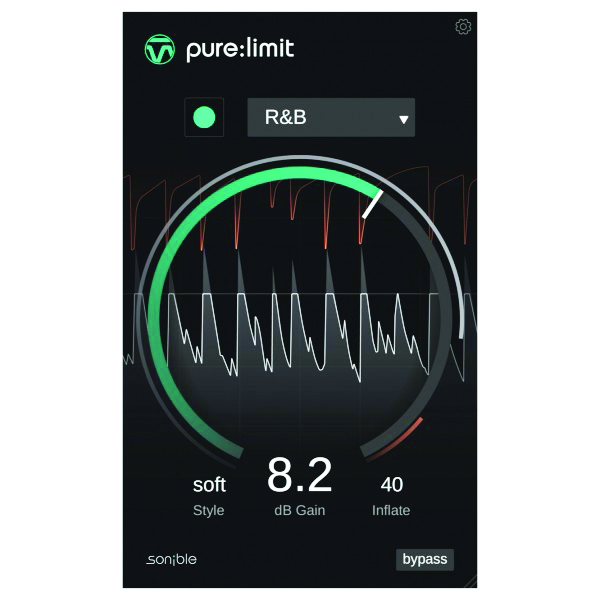
A semi-automatic, AI-driven limiter from Sonible’s Pure range – loaded with a set of highly refined algorithms for various music genres. A concisely packed mastering chain limiter with simple settings.
3. SSL Fusion HF Compressor
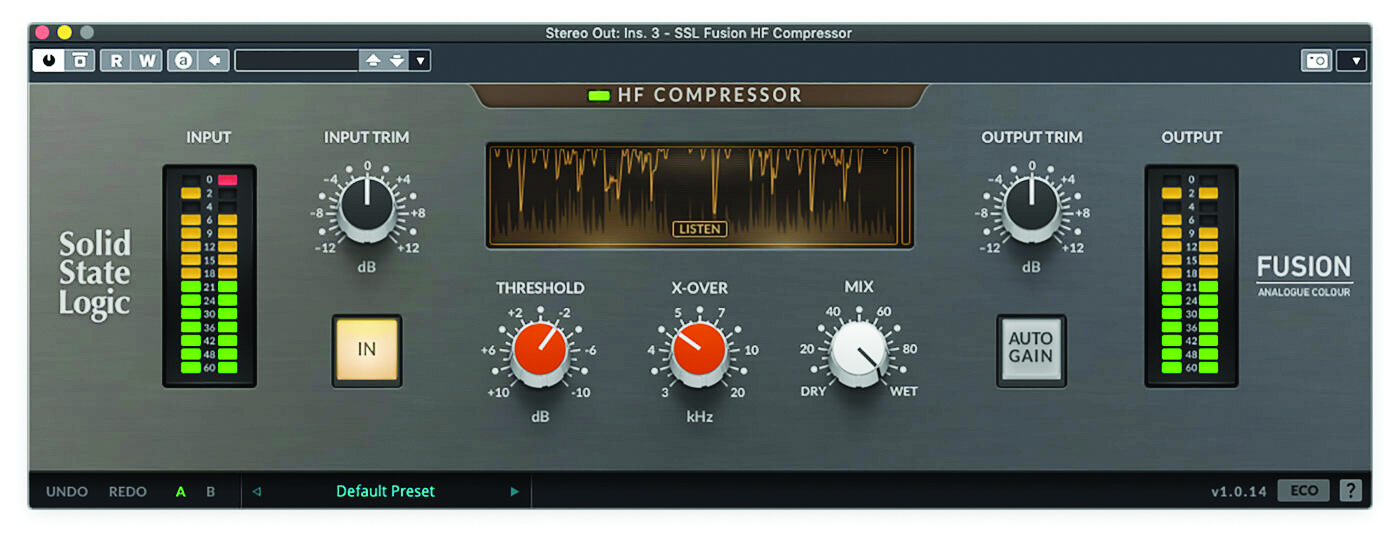
Modelled from the well-regarded analogue SSL Fusion stereo coloration processor, the HF comp gets you one step closer to that sought-after commercial sound.

A former Production Editor of Computer Music and FutureMusic magazines, James has gone on to be a freelance writer and reviewer of music software since 2018, and has also written for many of the biggest brands in music software. His specialties include mixing techniques, DAWs, acoustics and audio analysis, as well as an overall knowledge of the music software industry.
