Remove harshness from a mix using EQ and de-essing
How to deploy EQ and de-essing to cut out that harshness
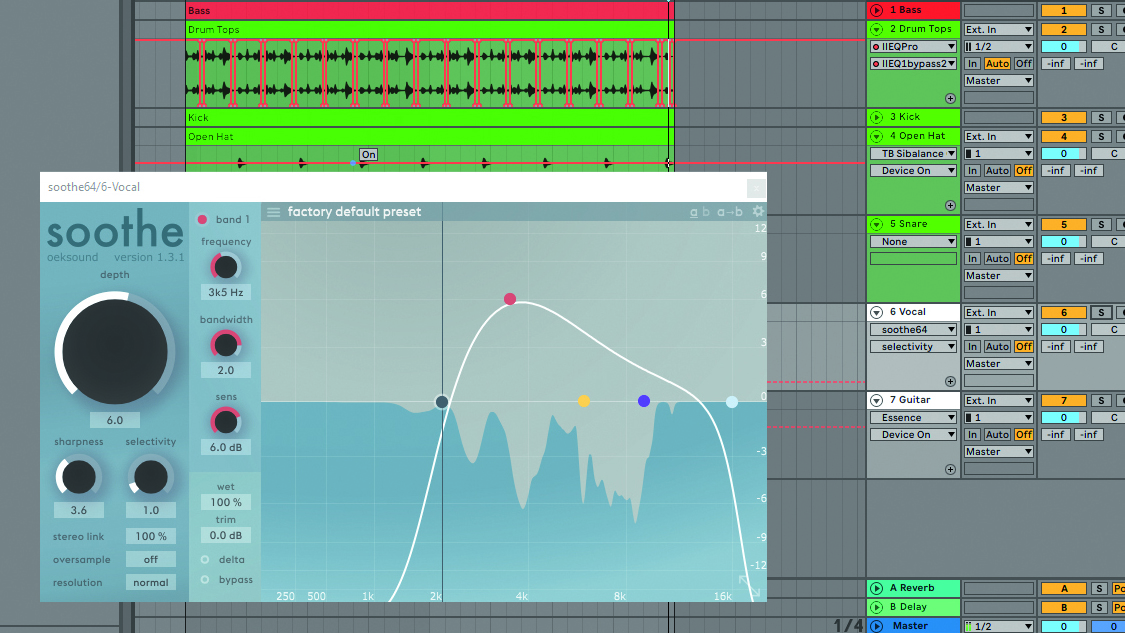
The de-esser is one of the most useful weapons in your de-harshing armoury. While you would normally deploy it to tame excessive sibilance in vocal takes, de-essing is also often handy for anything from dynamically smoothing the high frequencies in drum overheads through to keeping white noise FX bursts under control.
Below, check out how to use a de-esser in tandem with a trusty EQ in order to remove harshness from your mix.
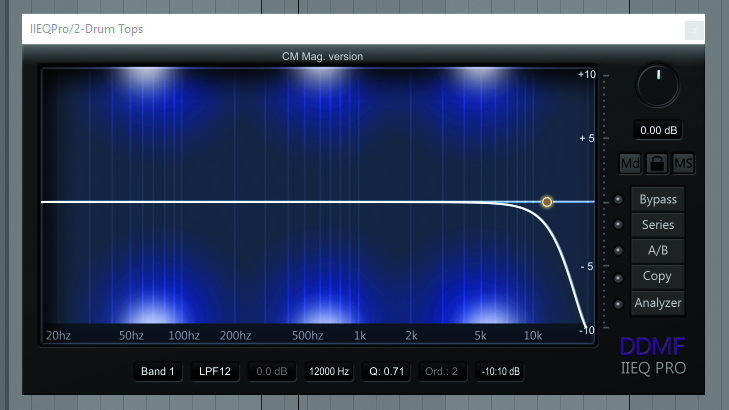
Step 1: Here’s how to turn a harsh, clogged up disco mix into a shiny, polished finished product that won’t shred your ears. Start by importing the Tutorial Files (available with CM 271) into a blank 118bpm DAW project. First, we’ll tidy up the drum tops: load an EQ plugin on the channel, then dial in a 12db/oct LPF (low-pass filter) at 12kHz with a Q of 0.71.
Article continues below 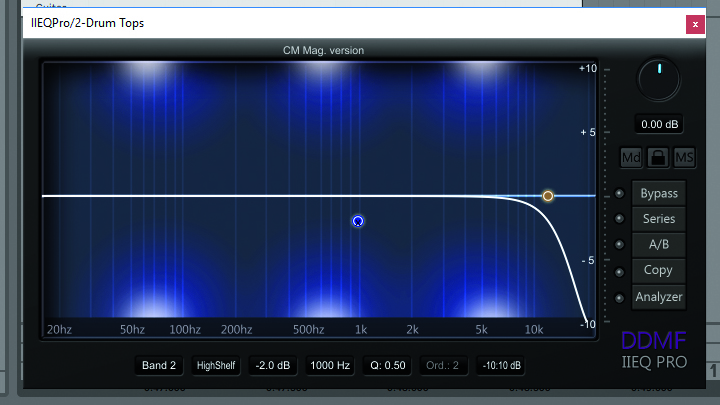
Step 2: You’ll notice that the EQ has taken the sharp edge away from the drum tops, instantly giving us a smoother sound. To make extra room for the snare in the mix, automate a 2dB high-shelf cut above 1kHz, so that it’s only active when the snare is playing. Next, we’ll turn our attention to that brittle open hi-hat.
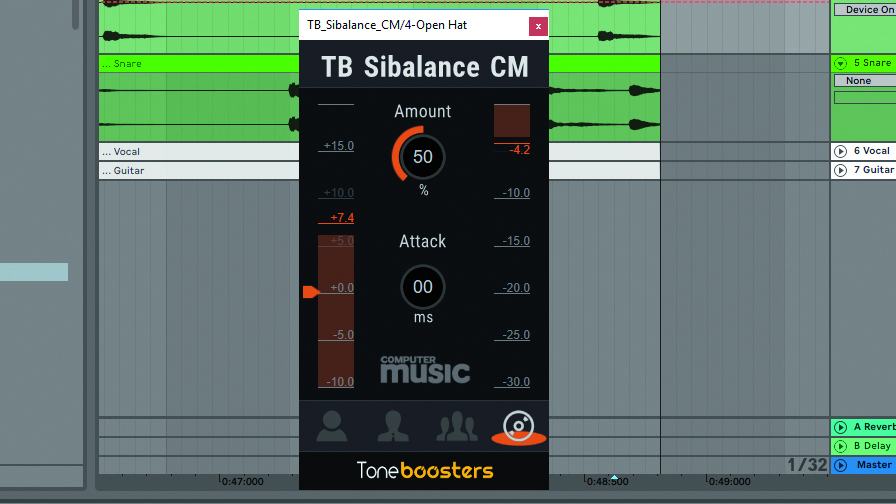
Step 3: Add TB Sibilance CM (free in CM Plugins) to the open hi-hat channel and set the Mode to Full Mix. After adjusting the Attack to 0ms, you’ll notice the processing smooths out the brittleness of the hi-hat, giving the drums a more balanced sound. Now we’ve worked on the drums, let’s move on to the music and vocal elements.
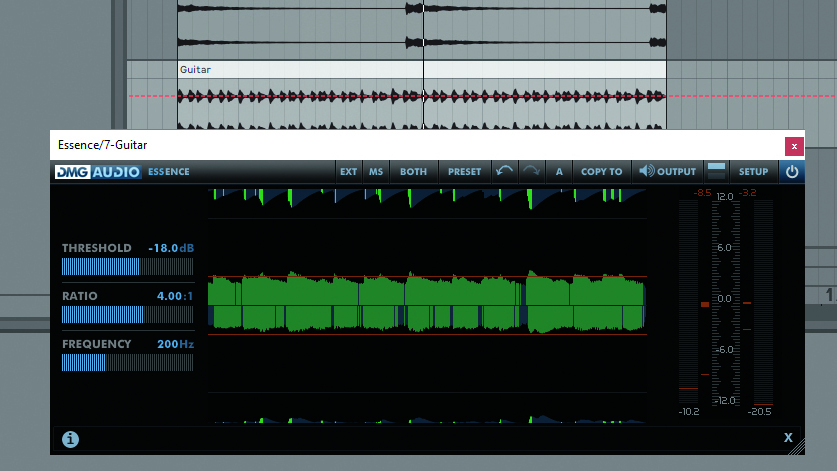
Step 4: The guitar is clogging up the mix at 200Hz, so we use DMG Audio’s Essence to rein it in by setting the Frequency to 200Hz. With the monitoring set to Difference, we hear what the plugin is removing and adjust accordingly. To hammer down those boxy frequencies, we go for a Ratio of 4:1.

Step 5: Oeksound’s Soothe is perfect for smoothing this crispy-sounding vocal. Place Soothe on the vocal channel, then set Frequency to 3.5kHz. Increasing the Depth to 6 smooths the vocal more, while reducing Selectivity to 1 strengthens the effect. Bypass Soothe to hear the difference it makes to the overall sound.
Want all the hottest music and gear news, reviews, deals, features and more, direct to your inbox? Sign up here.
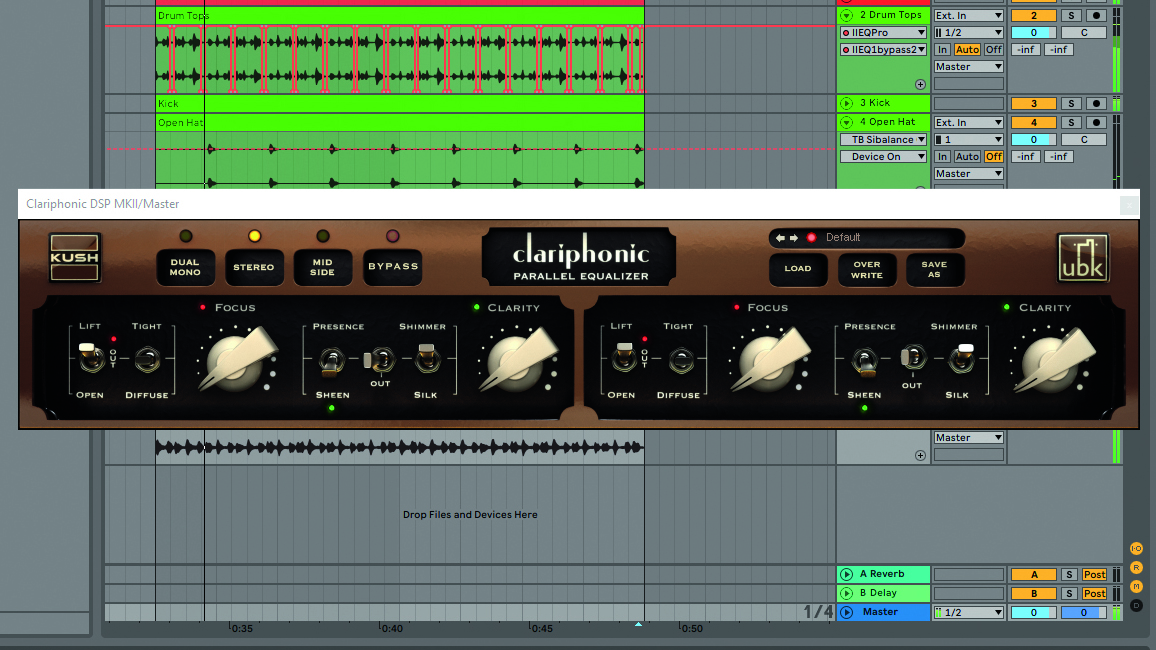
Step 6: EQing the master output will add controlled brightness back into our mix. Call up Kush Audio’s Clariphonic, disable the Focus band, then set the Clarity band to Sheen. Even with no gain boosts, the plugin’s parallel EQ circuit adds brightness and detail to the entire mix without any unwanted sharpness.
Computer Music magazine is the world’s best selling publication dedicated solely to making great music with your Mac or PC computer. Each issue it brings its lucky readers the best in cutting-edge tutorials, need-to-know, expert software reviews and even all the tools you actually need to make great music today, courtesy of our legendary CM Plugin Suite.
