Ableton Live Simpler masterclass
Get the most out of Live's sampling instrument
How to resample hardware synths with Ableton Live's Simpler and Sampler
With Ableton Live, sampling real-world instruments is easy, fun and creatively lucrative. In this walkthrough, we'll show you how to render the output of a hardware synth into Live's Simpler and Sampler devices in order to apply a range of treatments that only software can deliver.
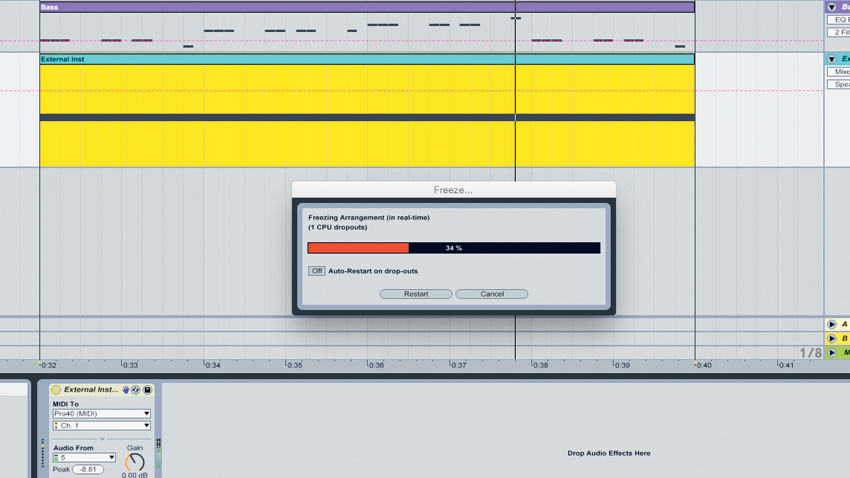
Step 1: After building a basic 120bpm beat-and-bass groove, we use a monophonic hardware synth to create an inspiring arpeggiated lead line. The synth is being triggered using Live's External Instrument - to sample four bars of this riff, we right-click on the lower half of our MIDI clip and select Freeze; right-click again and select Flatten to render the frozen signal to an audio file.
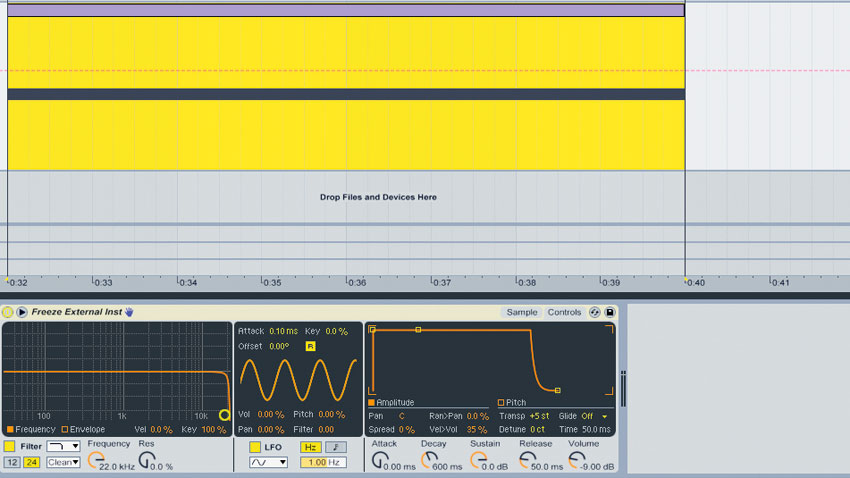
Step 2: Drag the newly-created audio clip into the bottom window of a new MIDI track to load it into an instance of Simpler. As our track is in G, we'll create a new MIDI clip and draw in a G2 note to trigger the audio riff, raising Simpler's Controls>Transpose amount to +5 so the loop plays back at its original pitch. Send the riff to the default Return A for some performance reverb.
Article continues below 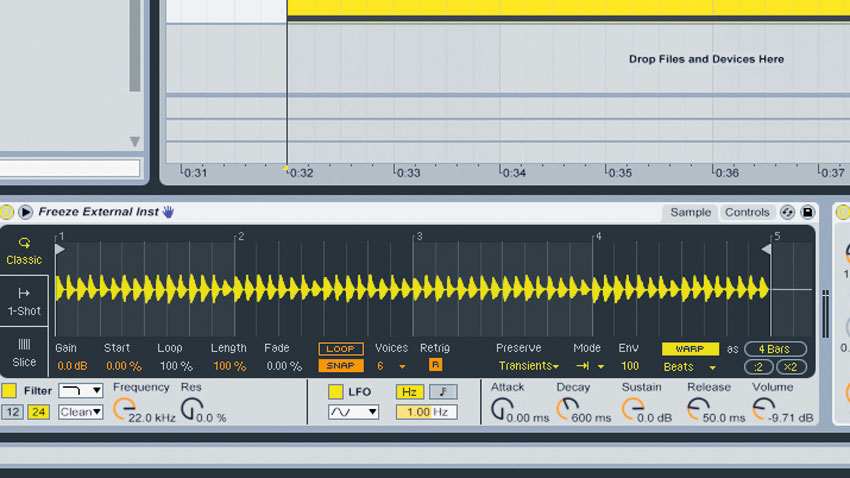
Step 3: Simpler's Sample>Warp button is engaged, meaning our rhythmic loop's timing will stay locked to the track's tempo when played back at different pitches across the keyboard. We duplicate the triggering MIDI note to G1 and G3, adding unison thickness across three octaves. The thicker signal's bass is bloated, so we cut away sub and low-mid frequencies with an EQ.
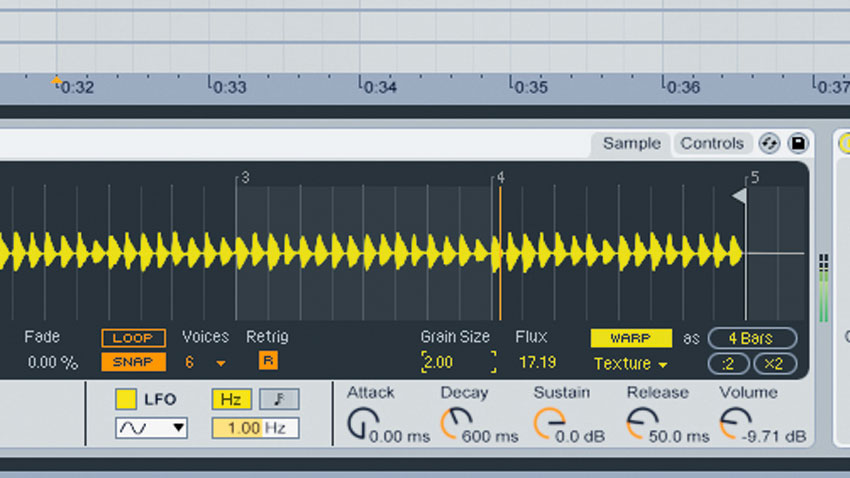
Step 4: Try the various Warp Modes to hear how each can alter the riff's timbre. Textures mode is useful for weirder effects - we rhythmically sweep the Grain Size to generate odd glitches. This Grain Size parameter can't be automated, so we'll route this channel's signal into a new audio track, hit record and print our Grain Size sweeps onto the new channel as audio.
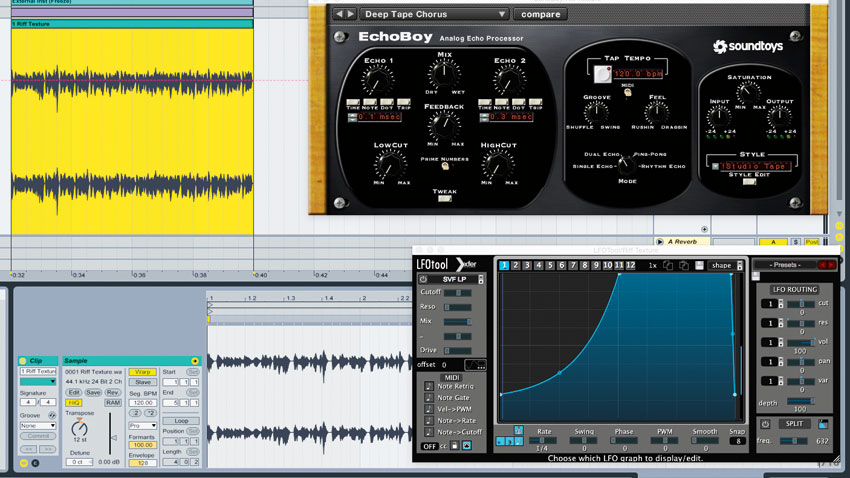
Step 5: Let's mould this glitchy version of our arp loop into a pumping riff element. Push up the audio clip's Transpose amount to +12, then change the clip's Warp Mode to Complex Pro, giving the loop even more grainy texture. A large helping of chorus and sidechain pumping turn the signal into a wide, glitchy riff which can be layered over the original source signal.
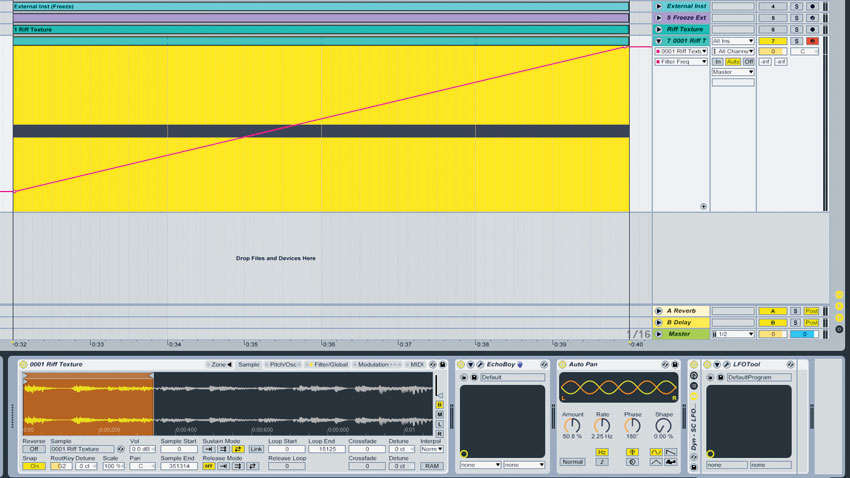
Step 6: Drag the original file created in step 4 into a new instance of Sampler. By engaging the Sustain Loop Mode's Loop Back and Forth option, then setting up the loop range over a small section of the glitch loop, we create an odd pattern that plays forwards and backwards. Giant delay repeats, autopan, sidechaining and filtering transform this into a tonal, cavernous sweep.
Want all the hottest music and gear news, reviews, deals, features and more, direct to your inbox? Sign up here.
For many more Ableton Live guides go to our massive learning hub: Learn Ableton Live and Ableton Push: music production tips and tutorials
Current page: How to resample hardware synths with Simpler
Prev Page How to make a punchy bass with Simpler's filtersMusicRadar is the number 1 website for music makers of all kinds, be they guitarists, drummers, keyboard players, djs or producers...
GEAR: We help musicians find the best gear with top-ranking gear round-ups and high- quality, authoritative reviews by a wide team of highly experienced experts.
TIPS: We also provide tuition, from bite-sized tips to advanced work-outs and guidance from recognised musicians and stars.
STARS: We talk to musicians and stars about their creative processes, and the nuts and bolts of their gear and technique. We give fans an insight into the actual craft of music making that no other music website can.
