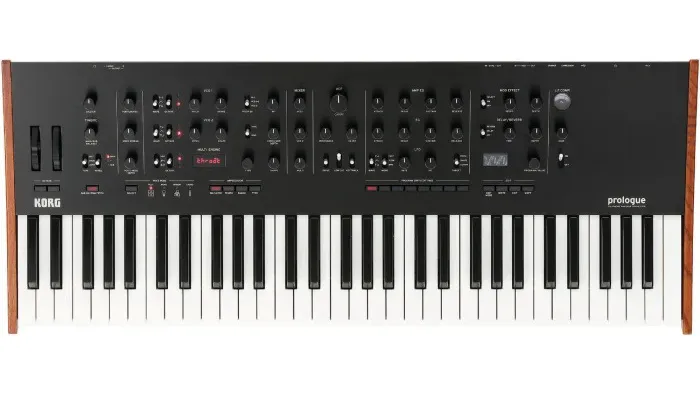
If you’ve read the specs, Korg’s new Prologue polysynth is far more complex than either of its siblings, the Minilogue and Monologue, though it shares their heritage. Consequently, the Prologue’s analogue side is similar, but with a few notable upgrades.
The Prologue’s digital side, however, has some groundbreaking innovations, so this month, we’ll look closely at its synthesis engine and explain how to make the most of it.
Analogue oscillators
Before we get to the Prologue’s innovative multi-oscillator, it’s worth mentioning the updates to the analogue oscillators, as they allow for some new programming tricks. The waveform options are identical to the Minilogue and Monologue, with waveshaping capabilities for the standard triangle, sawtooth, and square waveforms.
New to the Prologue is a wider range of modulation options; for example, the modulation envelope can be assigned to the pitch of all oscillators, to VCO 1 and 2 simultaneously, or just VCO 2. While this may seem subtle, it’s actually a big deal sonically. Modulating VCO 2 is useful for creating old-school hard-sync sweeps or adding a bit of pitch motion to ’80s brass stabs. And having the ability to modulate the pitch of both analogue VCOs lets you vary their pitch against the multi-oscillator. On the other hand, modulating all three oscillators has its own applications, as well as tones that rely solely on the Multi Engine, with the analogue VCOs muted.

The 18 best synthesizers 2020: keyboards, modules and semi-modular synths
Pro tip: Setting the mod envelope to an instant attack, very short decay, zero sustain and release, then applying it to one or more oscillators, lets you add a sharp “tick” transient to a sound. Although this is useful for bell and percussion patches, use it to create massive, 808-style trap basses in conjunction with the Multi Engine’s VPM Sin 1.
Another distinction worth mentioning is that the Hard Sync and Ring Mod options are derived from the Monologue design, so these are either/or options and not available simultaneously. Like the Minilogue (but not the Monologue) Cross Mod is also available for VCO 2. Here are a few tricks you can do with these features.
Ring Mod: The unpredictable nature of ring modulation often relegates it to the special-effects department of sci-fi presets and atonal chime sounds. However, if you set both oscillators to the same octave, turn on Ring Mod, then offset the pitch of VCO 2 by a harmonic fifth (+702 cents), you’ll be greeted with an entirely new set of timbres. Once you hear this fifth locked, you can further vary the timbre by changing octaves, wave-shapes, and the shape knob for each oscillator. The results tend to be hard and aggressive, but you can soften it with a bit of chorusing.
Cross modulation: This feature offers a form of analogue FM for oscillator 2 and generally speaking, it’s quite harsh and atonal on its own or with Ring Mod. But with Hard Sync active, Cross Mod is another useful method for creating bright and unusual textures. To experiment, turn on Hard Sync, set Cross Mod to maximum, then try different octaves and detuning settings. From there, vary the waveform controls.
Multi Engine
This is the feature that sets the Prologue apart from every other analogue-hybrid polysynth, giving it an astonishing level of tonal flexibility out of the box (even before developers start creating their own original oscillator types). The Multi Engine offers three modes, which we’ll discuss separately.
Noise Generator: Four noise types are available, with the shape knob dramatically affecting the sound for each. Low gives you white noise with and an integrated lowpass filter. In this case, Shape controls the filter cutoff. On the other hand, High provides white noise with an integrated highpass filter. This is great for adding a touch of “fizz” or “air” to analogue-based patches.
In Peak, set the Shape knob to its minimum value to get a perfectly tuned “sonar ping.” This effect is usually created with a resonant lowpass or bandpass filter that has been painstakingly tuned with filter keyboard tracking. Here, it is instantly available. Increasing the Shape value expands the “peak.” With the Shape control nearest the maximum setting, you will hear a slightly filtered sound with a character closer to pink noise.
With the Decim noise setting, low Shape values yield a sound that resembles an 8-bit video game explosion. As you increase the Shape parameter, it gets more detailed and familiar, ending in bright white noise.
Variable phrase modulation
Some call it Phase Modulation, while others call it FM; sonically, the result is nearly identical. This mode provides 16 modulator/carrier configurations, with the Shape knob offering two modes in conjunction with the Shift button. On its own, Shape controls modulator amount, but with the Shift key depressed, it controls the ratio offset of the modulator. It’s important to understand the offset nature of the ratios, because many of the 16 VPM types have default ratio settings that are higher than 1:1.
Pro tip: Though it’s easy to adjust Shape while playing notes as you create a patch, holding down Shift for adjusting ratios makes this challenging. The solution is to latch the arpeggiator (or play a sequence on the Prologue from your DAW) and adjust the ratios with both hands.
Sin 1 is the classic sine-wave FM mode that fans of Ableton Operator or Propellerhead Thor will be most familiar with. The default modulator ratio is 1:1, with a maximum of 15:1 in whole-number steps. Leaving the Shape value at zero produces a pure sine wave that is ideal for trap basses and 808 kicks.
Pro tip: The ubiquitous Future House bass sound relies on a 2:1 modulator ratio, so by adjusting the ratio offset parameter accordingly, you can use this mode to program that sound.
Sin 2 is similar to Sin 1, but here the sine-wave carrier has a few high-frequency components. It is not documented in the manual and doesn’t show up on the integrated oscilloscope, but to my ears it is reminiscent of either a low-resolution or slightly triangular sine. As with Sin 1, the modulator ratios range from 1:1 to 15:1.
Sin 3 is identical to Sin 1, but with a default ratio of 3:1. This, incidentally, is the same ratio as the DX7 FM Jazz Guitar preset. The maximum ratio is also 15:1.
Sin 4 has a default ratio of 5:1—the perfect starting point for DX-style mallet-percussion sounds, specifically the classic Marimba patch.
The other 12 VPM modes are more unusual and, overall, much more aggressive and suitable for EDM, Trap, and Dubstep patches.
Saw 1 uses a sawtooth waveform for the carrier, while Saw 2 achieves a similar effect using modulator feedback. Their ratio offset ranges from 1:1 to 15:1. Squ 1 uses a square waveform for the carrier.
Squ 2 is slightly softer in the high frequency range, due to its modulator/feedback configuration. Ratio offset ranges from 1:1 to 15:1 on Squ 1, but starts at 2:1 on Squ 2, which is a nice touch as that ratio emphasizes odd-numbered harmonics.
Fat 1 has a vocal-like carrier, whereas Fat 2 is square-like with a few emphasized lower harmonics. Here the ratio offsets are more exotic, with several types changing the carrier tuning to the second or fourth harmonics.
The Air 1 and Air 2 modes incorporate noise into the VPM algorithms, with Air 1 using a sine carrier with noise added to the modulator and Air 2 adding noise to the carrier. Air 2 offers the familiar 1-15 range of modulator values, while Air 1’s range includes a few alternate carrier tunings.
Decay 1 and 2 integrate offsets in the VPM envelope and include preset modulator decays for animated textures. The decays can be further adjusted using the VPM editing tools discussed below. Decay 1 is based on a default 1:1 ratio with a modulator range of 1-15, while Decay 2 is based on a 9:1 ratio (another common value for DX7 mallet and bell patches) and added feedback, with a maximum modulator tuning of 15.
The final two modes, Creep and Throat, also include integrated envelopes and unusual ratio offsets. Creep has a longer attack for sweep effects, whereas Throat sounds voice-like in the lower octave ranges. As with the Decay modes, the envelope parameters can be customized in the Multi Engine edit page.

User Oscillator: This is where the Prologue really stands out, as there are 16 user slots for developers to code their own oscillator types using C++ programming. Slot 1 includes a wavetable/vector oscillator that is worthy of attention (see Figure 1).
From the front panel, the Shape parameter morphs between the two user-selected waveforms creating crossfaded wavetable textures across that range. Press Shift and Shape simultaneously to set the amount of oscillator drift, which is useful for keeping a more analog vibe when mixing this oscillator with the analog VCOs.
Multi Engine edit page – VPM

For sound designers, Edit page 7 is where the VPM Multi Engine action really happens (see Figure 2). Sure, you can get by with just the various FM configurations and the Shape knob, but many of these modes really come to life when put in motion. Thoughtfully, Korg opted to give the VPM oscillator a dedicated attack-decay envelope as well, which is essential for FM design. Additionally, all of the parameters have both positive and negative values for fine-tuning the behavior of types like Decay 1 and 2, Creep, and Throat, which have preset values for many of these parameters. Here’s what is available
Feedback: This introduces feedback into the modulators and is great for aggressive, harsh effects. It imparts a noise-like character in the maximum ranges.
Noise: Adds noise to the oscillator for either air (low settings) or audio mayhem at maximum.
Shape Mod Intensity: This affects the envelope depth both positively and negatively, which is also useful when working with non-zero Shape settings or fine-tuning the preset VPM modes.
Attack and Decay: These affect the modulator envelope in relationship to the VPM mode. It’s often appropriate to use negative values for the attack parameter for more impact.
Mod Keyboard Tracking: FM veterans know that some modulator settings can become unpleasantly harsh in the higher octave ranges. This parameter allows you to add positive or negative scaling to the modulation depth for tailoring the response over the full keyboard range.
Pro Tip: When working with Sin 3, Sin 4, and Decay 2 VPM types, the shape mod and envelope parameters let you simulate classic DX sounds very quickly.
Multi Engione edit page – Wavetable

The diagram in Figure 3 shows the exact architecture and routing for the Waves mode. Digging into Edit page 7, you’ll find extensive customization options for the wavetable oscillator, including a configurable sub-oscillator.

Wave A: Select from 46 possible waveforms as the base wave for the wavetable, with Shape parameter value 0 (see Figure 4).
Wave B: Offers 44 additional waveforms for the opposite extreme of the wavetable, with Shape parameter set to maximum.
Sub: Sixteen additional waveforms—one octave lower—are available for blending into the main wavetable.
Sub Mix: Adjusts the volume of the sub-oscillator.
Ring Mod: Although the wavetable options can’t be directly tuned, thanks to their distinctive harmonic spectra and inclusion of the sub-oscillator, the ring modulation parameter can radically alter the timbre of the wavetable sweep.
Bit crusher: Very low values impart a vintage PPG-like flavor, while higher values veer into chiptune territory.
Pro tip: The wavetable shape can only be modulated using the LFO, but not the modulation envelope. However, it is possible to replicate simple ramp envelope behaviours by assigning a BPM-synced sawtooth LFO to the shape modulation, then turning on the arpeggiator, which is also tied to BPM. The result will behave like a simple decay envelope on the wavetable sweep.
A new filter and sound
The Prologue’s filter has different options and a slightly different sound from either the Minilogue or Monologue. In addition to Cutoff, Resonance, Envelope, and Keyboard Tracking parameters, there is also an Overdrive parameter with three intensities (off, 50%, 100%) and a Low-cut switch that engages a subtle highpass filter that is useful for designing strings, mallets, and bell tones.
Diving into page 6 of the Edit mode, the second option allows you to route the multi-oscillator either before or after (pre or post) the filter. Setting the VPM oscillator to post filter is a fantastic resource for creating layered analogue/digital textures reminiscent of LA synthesis.
Modulation – Envelopes and LFO
With the LFO and envelope implementation being a big part of the ’Logue sound, the Prologue’s overall implementation is essentially identical to the Minilogue. However, a few thoughtful improvements extend their usefulness for the Prologue’s new synthesis tools via the modulation page, which is accessed by pressing edit button 5.
As with the Minilogue, the amp and modulation envelopes are both ADSRs, with the ability to add velocity control to amp or cutoff intensity in the modulation edit page. Assigning the mod envelope to cutoff and/or pitch is handled by their associated front-panel controls.
The implementation of LFO modulation is a fusion of the Minilogue and Monologue, with options for modulating pitch, shape, and cutoff. The waveform choices are saw, triangle, and square, and you can also invert them by holding the Shift key when you adjust the Intensity knob. There are options for slow (normal) and fast (audio range) LFO rates. In lieu of the Monologue’s 1-shot LFO mode, BPM sync has been moved to the front panel, making it easier to access.
The Modulation edit page offers some very useful new features for routing the LFO to specific configurations of oscillators, with the ability to choose between all oscillators, VCO 1 and 2, VCO 2 only or the Multi Engine only. Moreover, these routings can affect either pitch or waveshape (but not both), allowing for some nifty tricks.
VCO 1+2: By routing a very slow triangle LFO to the pitch of just the VCOs or VCO 2 only (leaving the multi untouched), you can create chorus-like detuning effects when blending them with the Multi Engine, especially in wavetable mode.
VCO 2: Fans of the Polymoog’s famous Vox Humana preset (used extensively by Gary Numan) can approximate its sound by routing the LFO to VCO 2 only and using shape mod to add pulse-width modulation to that oscillator only.
Multi Only: When used with a harder VPM type, such as Fat 2, you can modulate just the shape (modulator depth) with a triangle wave for dubstep “wub” effects, then reinforce the low end by adding a triangle wave an octave lower from one of the VCOs. Alternately, you can use the User wavetable mode with a very slow triangle-shaped sweep for vintage PPG Wave pad sounds.
In addition to the oscillator routing, the Modulation edit page also allows you to reset the LFO with every key strike, or synchronize the LFO phase across voices.
Expanded mod wheel uses

For live performance, the Prologue includes an assortment of useful parameter destinations for the mod wheel, accessed from Edit Mode 4 (Fig. 5). In addition to using it for standard vibrato or filter-cutoff effects, here are the other possibilities.
VCO 2 pitch: In conjunction with hard sync, this allows you to do manual sync sweeps as you play leads.
Cross Mod: Use this either on its own for chaotic nastiness or in conjunction with hard sync for radical timbre sweeps.
Shape: Sweep the waveform of each analog VCO, or increase the amount of FM from the modulator for the Multi Engine VPM. When Shape is assigned to the User Waves type, you can use it to morph between the two selected waves as you play.
Mixing: Because each oscillator’s level can be a destination, here’s a neat trick: Tune one of the oscillators to a fifth—or a waveform that is several octaves higher than the other two—then use the mod wheel to introduce it in real time.
Envelopes: Any segment of either envelope can be assigned to the mod wheel. This is quite handy for filter decay or amp sustain. In the latter case, you can use the wheel to switch from a plucked to a pad sound.
Effects: Any of the effects knobs can be assigned to the mod wheel. That allows you to add reverb or adjust the chorus rate easily.
Voice Mode Depth: This option is sonically impressive and easy to master. Here, the voice mode Depth knob is assigned to the wheel. In Poly or Unison mode, use it to increase detuning for the stacked voices. In Mono mode, use it to add additional octaves on-the-fly. In Chord mode, you can use the wheel to switch between chord types as you play.
Effects
Each of the two effects types, modulation and delay/reverb offers multiple types within each group and the ability to load your own custom-coded effects. Here’s a handy cheat sheet for the various options for each.
Modulation effects
Under Chorus, you can select Stereo, Light, Deep, Triphase, Harmonic, Mono, Feedback and Vibrato effects. Of these, Triphase is a real standout, as it is a modern take on the unique Arp Solina ensemble and perfect for simulating vintage string sounds.
The Ensemble category includes Stereo, Light, and Mono. These are classic Korg ensemble effects, great for emulating old-school string synths. Polysix purists take note: Mono mode really nails the original’s monophonic ensemble.
Under Phaser, you’ll find Stereo, Fast, Orange, Small, Small Reso, Black, Formant, and Twinkle. Many of these phasers are impressive models of vintage pedals, while the Formant mode is handy for talking effects when combined with a low-octave sawtooth. Twinkle is noteworthy for its square-wave modulation.
The Flanger category has Stereo, Light, Mono, High sweep, Mid sweep, Pan sweep, Mono sweep, and Triphase. Again, Triphase mode is the standout with its radical triple-flanger sound that is utterly unique.
Delay and reverb
Delay has five main types (Stereo, Mono, Ping Pong, Hi Pass, Tape, One Tap, and Doubling) followed by BPM-synced versions.
The first six Reverb choices are fairly standard (Hall, Smooth, Arena, Plate, Room, Early Reflection). The remaining four combine other effects with the reverb: Space has a background granular component with subtle auto-panning; Riser embeds an ascending pitch shift in the tail; Submarine has a descending pitch shift, and Horror includes an interval-based pitch shift that is low in its mix.
Pro tip: Using the mod wheel to control reverb time or delay mix/feedback is a great shortcut for quickly automating dance sounds for breakdowns and drops.
