How to mix a track using headphones
Learn how to get a decent mixdown with cans
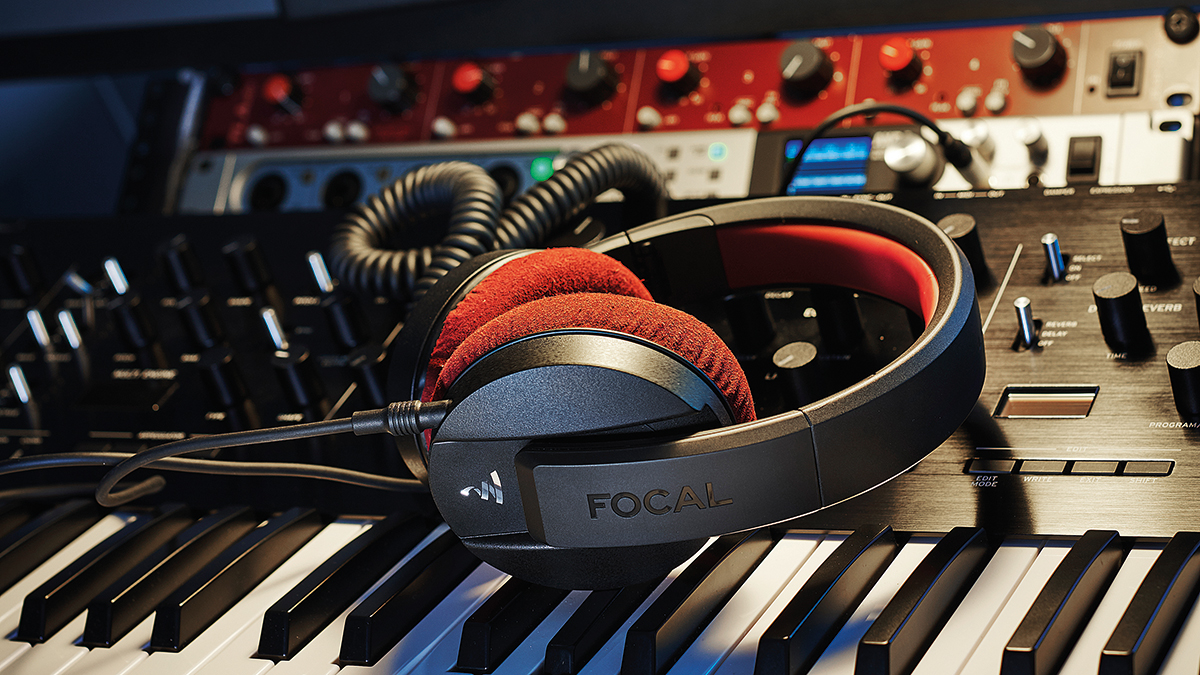
There are many really important differences between hearing a track on speakers and through studio headphones, so if you only ever use headphones for mixing, it’s important to bear some principles in mind to avoid bungled mixes.
Common mistakes include making the stereo field too narrow, and not splashing enough reverb onto vocals and synth parts, leaving them overly dry. Judging how much of any effect to use should be a decision that’s made through listening on both cans and monitors.
A well produced track should sound great on everything from laptop speakers to a high-end hi-fi. Don’t forget: just because you can mix on headphones doesn’t necessarily mean that you should.
That said, there are techniques that can help you mix more accurately when using just a sat of cans. In this walkthrough we’ll guide you step-by-step through the process of mixing a track without using monitors.
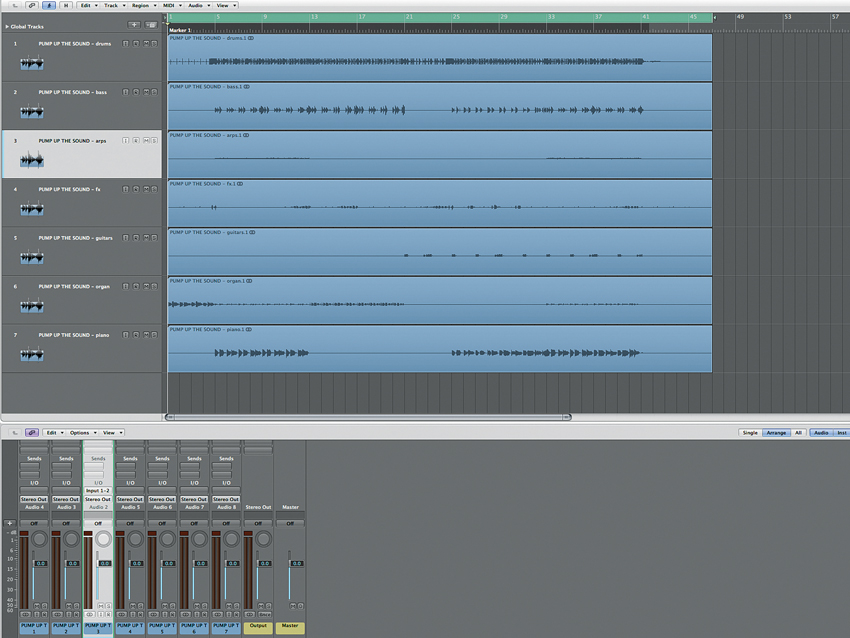
Step 1: We’re using some stems from a piano-led alternative pop track and have dropped them into our DAW. The track sounds pretty good in our headphones but we’ll need to make some adjustments so that it both translates well over a monitor setup and has a bit more depth and detail for those listening on cans.
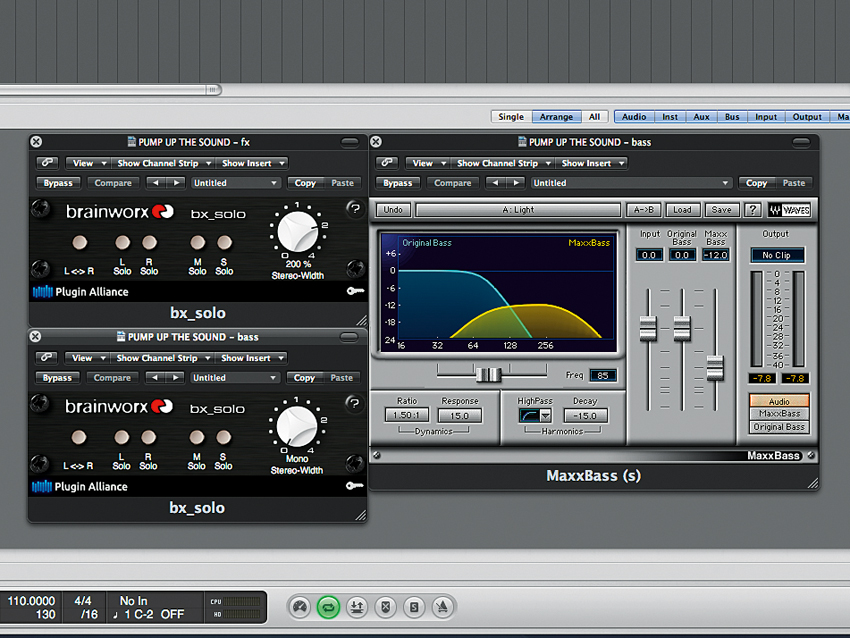
Step 2: To make the FX track stand out more in the mix, we use Brainworx BX Solo to widen the stereo field to 200% and drop the volume by -3dB. We use BX Solo again on the bassline but this time narrow the width to mono. We also add an instance of Waves MaxxBass to generate harmonics of the bassline, giving us an audible impression of the thump of the low end, even though we can’t feel it.
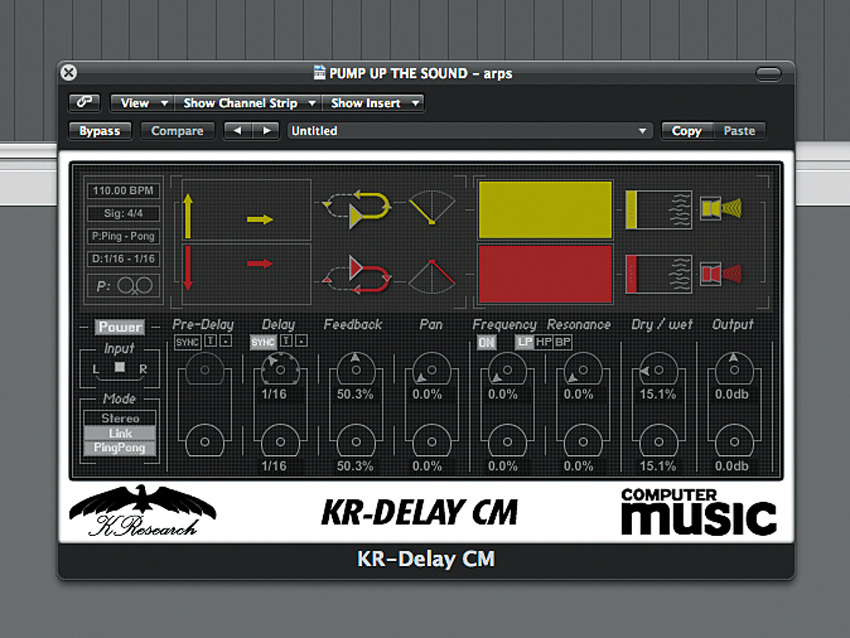
Step 3: The arpeggio track will sound fine over monitors but is a little too sterile in our headphones. We give it some subtle ping-pong delay with KR-Delay CM’s Delay set to 1/16 and the Dry/wet at 15%. Although this effect won’t be noticed much when heard on speakers, it helps to make the whole track sound less dry for those listening on ’phones.
Want all the hottest music and gear news, reviews, deals, features and more, direct to your inbox? Sign up here.
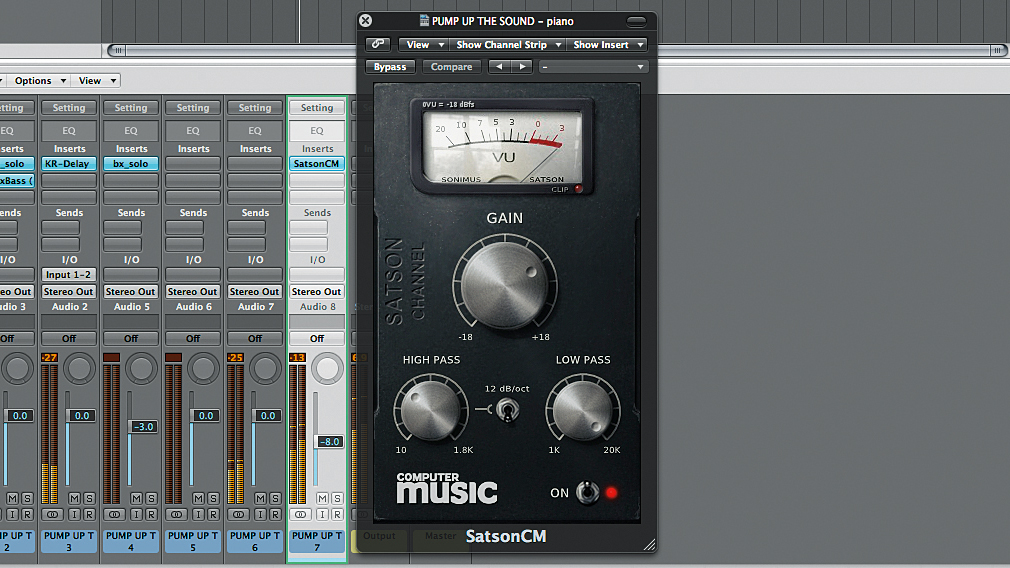
Step 4: The chords and notes of the piano line are easy to pick out using our cans. However, we’ll need to make it sound more in-your-face over speakers. Instead of turning it up, we give it +8dB Gain using console channel emulator Satson CM. We drop the track’s level to -8dB to compensate for this. We also increase Satson CM’s High pass to 200Hz to stop the piano clashing with the bass and kick.
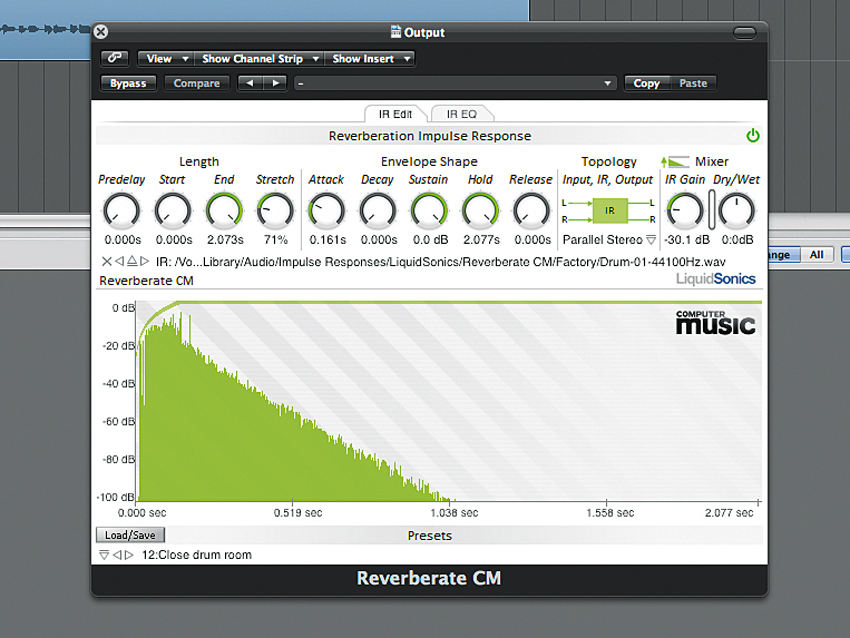
Step 5: For the same reason that we added a little depth to the arpeggio line with some delay, we’re going to give the whole mix some reverb. This will help things gel together over headphones and give some extra depth. We use Reverberate CM’s Close Drum Room preset and turn the IR Gain down to -30dB so that we get just some subtle reverb feedback.
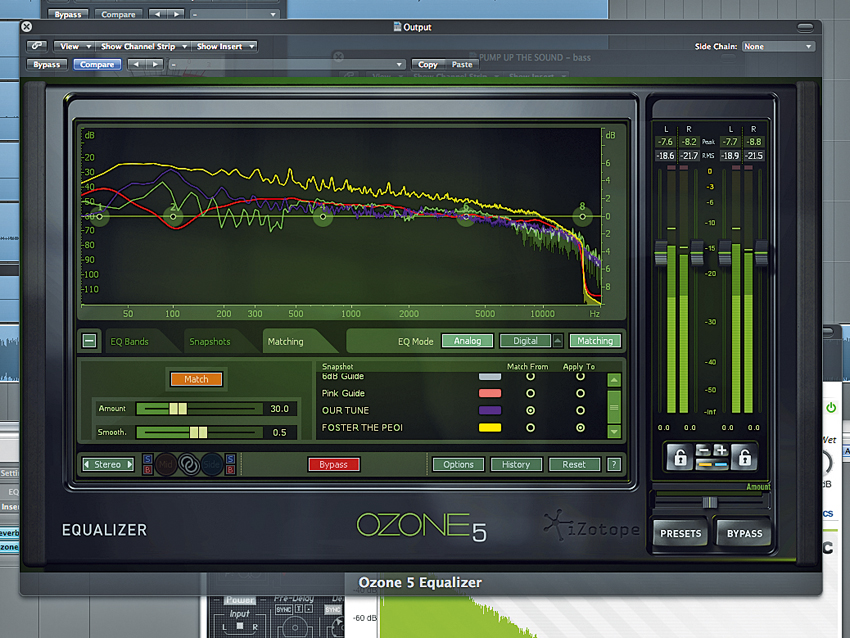
Step 6: It’s hard to tell if our track is EQ’ed well using just headphones, so we’re going to match the EQ from a commercial track. Houdini by Foster The People has a similar kind of vibe, so we’re using that as a reference. Using Ozone 5’s Equalizer, we take ten-second snapshots of our own track and Houdini and hit the Match button. We adjust the Amount and Smooth sliders as pictured.
- Our pick of the best closed-back headphones for music makers
Computer Music magazine is the world’s best selling publication dedicated solely to making great music with your Mac or PC computer. Each issue it brings its lucky readers the best in cutting-edge tutorials, need-to-know, expert software reviews and even all the tools you actually need to make great music today, courtesy of our legendary CM Plugin Suite.

