How to humanise your music in a DAW
It's time to get real
Put a piece of music in front of a world-class session musician, and they'll perform it for you just the way you want it. Want a run of 16th-notes bang on the beat? No problem! Eighth-note chords pumping precisely in time to a click, each as loud as the last? You got it, boss!
Only, you haven't, quite. There's a limit to the accuracy of even the most metronomic of musicians, and there will be minute variations in timing and strength of touch when put under the microscope of a DAW's waveform display.
Your computer, on the other hand, will perform that same piece with infallible synchronisation and consistency, giving us the theoretically perfect result that the real player was aiming for in the first place. Sounds good in theory, but in practice… not so much. It lacks what we might call that human factor: tiny and unintentional random variations in timing, velocity, timbre and pitch that all add up to ensure that even the most repetitive of musical parts have subtle internal movement, rather than sounding stiff, static and 'sampled'. Depending on the nature of the part and the interaction of instruments playing together, the difference this makes can be either sonically profound or simply a subtle improvement that you can't quite put your finger on but that just makes for a more pleasant listen.
The obvious place to start in making your MIDI programmed parts sound more 'human', then, is to add random variation to the timing and velocity of every note. You can do this in seconds using most DAWs' built-in MIDI functions, and while we've been talking about recreating the effect of human playing, the technique can be applied equally to wholly electronic parts - use your judgment as to what's appropriate.
Click here to download the files you need to follow this tutorial
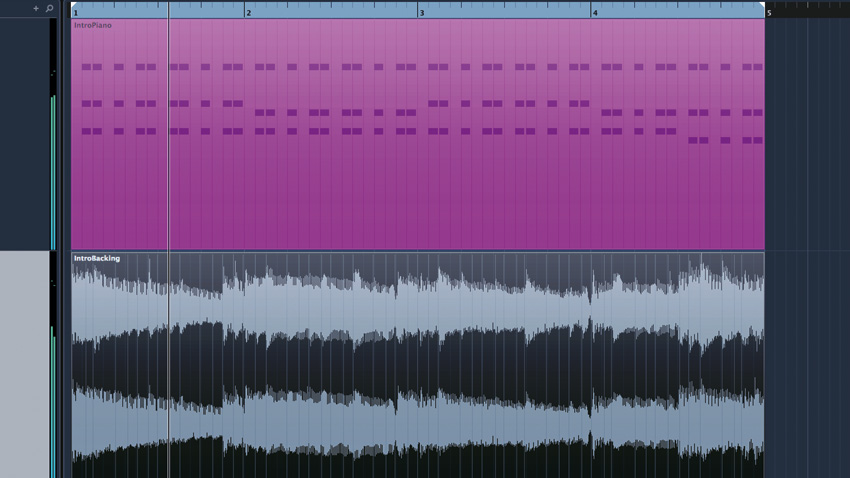
Step 1: Let's use our DAW's built-in features to make a programmed MIDI part sound more organic and true to life by slightly randomising note position. We're using a simple repetitive electric piano part, but the principles apply equally to any situation where you want MIDI to sound more like a real player. In your DAW, import IntroBacking.wav, and add IntroPiano.mid, hooked up to a basic piano or electric piano patch.
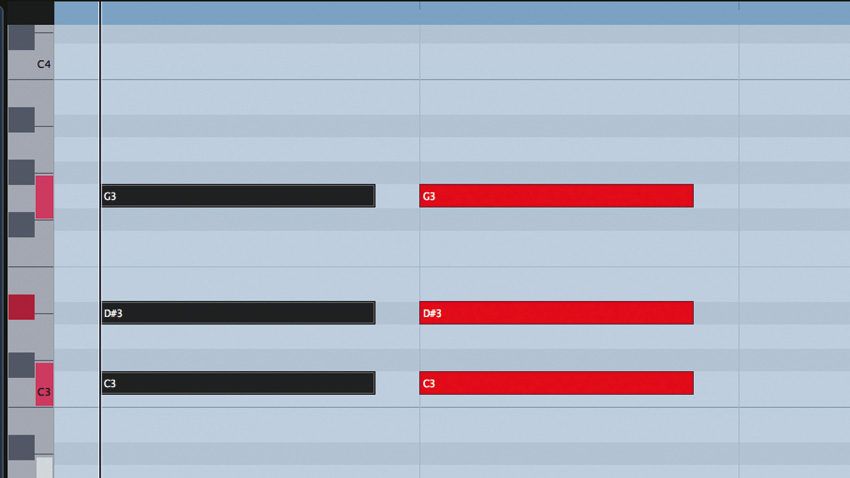
Step 2: This piano part has been quantised, with the notes snapped exactly to the grid. The software instrument plays back the notes with 100% accuracy, just how we programmed it. Even the tightest human player isn't capable of this kind of precision - each of their notes would be at least a tiny bit off the grid, so repetitive hits wouldn't be equally spaced, and when multiple notes occur (ie, chords), they wouldn't do so simultaneously.
Want all the hottest music and gear news, reviews, deals, features and more, direct to your inbox? Sign up here.

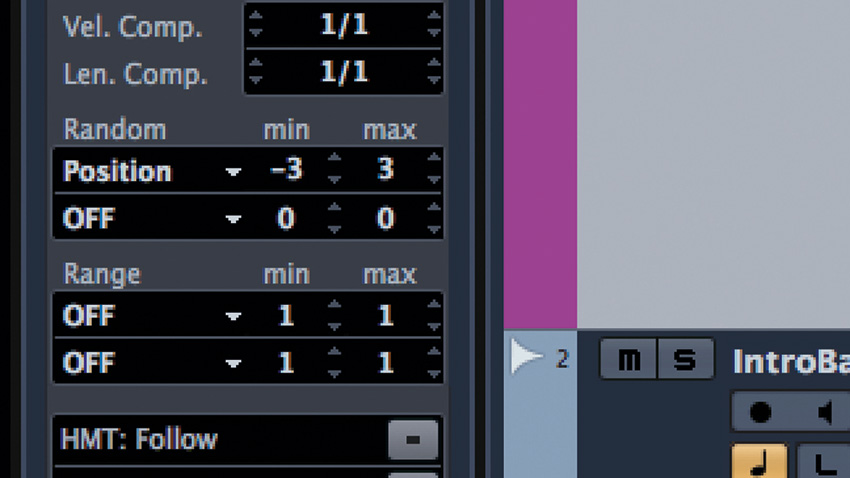
Step 3: There are several ways to achieve this outcome depending on your DAW, but in Cubase, the easiest is to select the track and use the MIDI Modifiers section in the Inspector. Under the Random header, select Position from the first dropdown, then set its Min and Max to, say, -3 and 3 respectively. Now Cubase will adjust the timing of every hit on the fly, pulling some hits forward up to 3 MIDI ticks, and pushing some backward similarly.
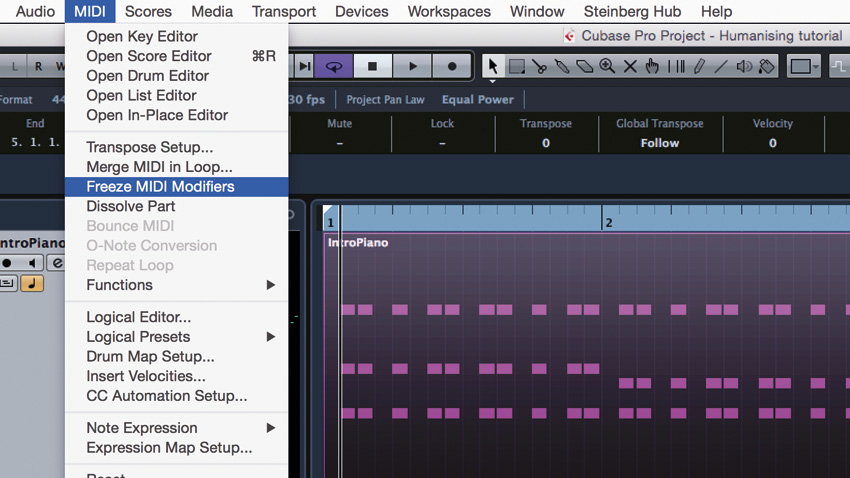
Step 4: We can now toggle the MIDI Modifiers section on and off to assess the difference. Without the randomisation, the piano sounds robotic, insistent and distracting; with, it has pleasing variation from chord to chord. Using the MIDI Modifiers method, the source MIDI file remains neatly snapped to grid; if you want to permanently alter it, select it and choose MIDI > Freeze MIDI Modifiers.

Step 5: Open the clip and zoom in to see how each hit has been moved slightly off the beat. Further methods for randomising timing in Cubase include the Random Quantise option, and using the Logical Editor to apply random offsets to note positions. Check the manual to discover how your DAW does it.
Computer Music magazine is the world’s best selling publication dedicated solely to making great music with your Mac or PC computer. Each issue it brings its lucky readers the best in cutting-edge tutorials, need-to-know, expert software reviews and even all the tools you actually need to make great music today, courtesy of our legendary CM Plugin Suite.
