Although you can go a long way by using your DAW at its most basic level and never getting out of your comfort zone, your music is likely to benefit if you explore some of your software's more advanced features and think about your sequencing in different ways.
Here, MusicRadar suggests 19 ways that you can do precisely that…
1. Steal the feel
Many applications enable you to 'steal' the rhythmic feel from an audio performance and apply it to a MIDI sequence. For instance, you could use a tool such as Propellerhead's ReCycle! to lift the groove of an audio drum loop, export the MIDI data for it to a track in Reason and then reassign that track to another batch of drum sounds.
2. Make your strumming a success
A strummed guitar is among the most difficult performance techniques to imitate. No matter how brilliant the guitar patch in your favourite ROMpler, it'll be very hard to play convincingly. While there are some great dedicated strumming simulators available, you can do a pretty good job on your own using nothing more than your DAW's piano roll.
Study the notes of a guitar chord (all of the notes, not just the fingered ones), and recreate them in your piano roll, carefully staggering them from lowest to highest note (for a downward strum) or vice-versa (for an upward stroke).
3. Easy on the quantise
Don't be afraid to shut off the quantisation for a more natural performance. If you can't play a passage by hand, slow the tempo of the song down, play it slowly and then speed it up again. If you must quantise, try only doing it to some aspects or sections. For instance, you could quantise the timing of a performance, but leave the velocity information intact.
4. Look inside MIDI files
Standard MIDI Files represent an excellent source of useful grooves, licks and riffs for future use. Some sequencers (such as Sonar and Logic) enable you to categorise and search for MIDI clips in their built-in loop browsers. Use this facility to create a database of MIDI clips that can be dropped into any project. From drum beats to arpeggiations to guitar strums, you need never find yourself at a loss for material!
5. Experiment with fills
Fills can play an important role in any song, 'filling' the space left when the vocalist or lead instrumentalist isn't playing, and signalling changes in the arrangement. They create tension and drama and can add considerable interest to a track.
Traditionally, fills are played on drums, though you may also hear a somewhat clichéd reverse cymbal or trailing echo. Shake things up by getting creative with your fills. Try copying a pre-fab drum fill pattern to your bass track and then shuffling the notes around, for example.
6. Think about your instruments
Convincing replications of instrumental passages can be enhanced through thoughtful consideration of the source and careful sequencing. Take woodwinds, for example. If you're going to sequence, say, a flute or oboe solo, be mindful of the fact that your passages should be monophonic and that the notes should not overlap. All of which isn't the easiest thing to do when manually entering your part on a keyboard!
However, if you play it naturally (but only one note at a time), then you can open the sequenced passage in your piano roll editor and remove any overlapping notes. While you're at it, try listening back to the passage and holding your breath for the entire length of any continuous sections. Can't do it? Neither can a woodwind player. Pull some notes out.

7. Take control
Your sequencer will dutifully listen to and record any MIDI information it receives, so don't feel limited to your MIDI keyboard. There are loads of alternative controllers out there, with drum pads being among the most popular.
However, they need not be limited to triggering drum sounds. They're just as useful for playing basses and stabs, or even triggering beat-sliced loops. Set up a bank of pads to trigger a specific set of notes in the key of your current song and let loose with sticks, fingers and hands. By freeing yourself from the shackles of the keyboard, you're bound to come up with exciting new progressions and riffs.
8. Drum quantise - mix and match
Musicians are divided when it comes to quantising drum sounds. For some, only the lock-step tyranny of the four-to-the-floor beat will do, with every hat falling obediently on a 16th note. Other musicians prefer not to quantise at all, believing that it reduces the natural feel and emotional content of the performance.
There is, however, a middle ground. Why not quantise only some of your drums? You could, say, lock down the kick and hats, but play snares, cymbals and percussion live. Conversely, you could shackle the bass drum and snare to the beat, but tap in the hats by hand, playing loosely with the time for a funky feeling that still stays married to the beat/bar lines.
9. Use templates
Most of today's popular sequencers offer some form of project template that can be saved and loaded when you start a new song. These make quick work of setting up the parameters you're likely to use.
Perhaps you invariably turn to a particular ROMpler when sketching out an arrangement, or maybe you like a particular combination of VSTs when you jam out a certain type of tune. You can save that configuration in a sketch pad template and load it up whenever you like.

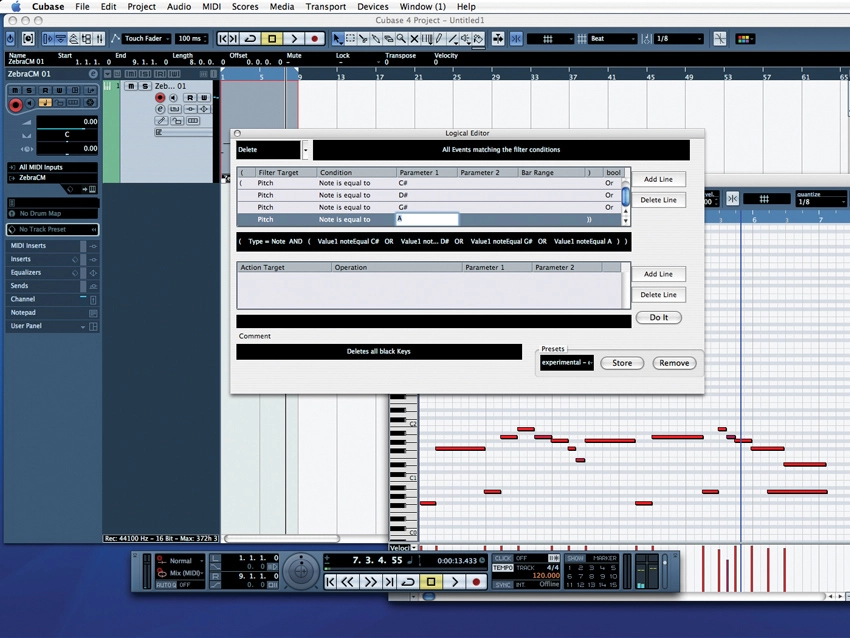
10. Save your CCs
You can also save groove templates, favourite drum patterns and audio loops for later recall. However, why not save clips containing just MIDI CC data? You could, for example, call upon pre-rolled filter sweeps, volume swells or velocity patterns that can be superimposed over existing MIDI tracks. Use something like Cubase's Logical Editor or Logic's Transform functions to reassign your prefab clips to entirely new CCs.
11. Use Key Commands
Just about every app provides a means by which your computer keyboard can be linked to various sequencer functions. Help yourself to this feature by assigning keys to trigger the MIDI sequencing functions that you use most often. Assign key combinations to, say, quantise, transpose and any others to which you'd like easy, rapid access.
12. Use rendering
Yeah, yeah, we know: one of the joys of MIDI is that you needn't commit to the sound of a given track until absolutely necessary. However, this freedom can be problematic if you end up with an overwhelming number of decisions at mix time.
Committing a sound during the recording process is very much 'The English Way', going back to a time when British engineers committed everything from reverb to echoes directly to tape in order to get the most out of a limited selection of equipment. For those guys, there was no going back. However, as a computer musician you have the freedom of rendering your MIDI tracks to audio and then muting the MIDI track itself - the best of both worlds.
13. On the attack
So you're triggering a great sampled bass that's just bursting with attitude, but its attack is a bit flabby - don't toss it out in favour of a less desirable sound with a faster attack. Instead, shift the whole MIDI part forward in time, so that the bass sound peaks right on the beat.
14. Super string theory
The above trick will also help your string patches sound more 'in the pocket'. Strings often have a slow attack time, resulting in progressions that are perceived to be lagging behind the beat. You can rectify this inherent pokiness by shifting the whole track as described above, or you can play your parts ahead of the beat, so that the strings swell into full bloom just as the downbeat occurs.
15. Change the tempo
Many (but not all) sequencers have dedicated tempo tracks. Even if your music is four-to-the-floor, strict-tempo dance music, you can still get a lot of mileage out of subtle tempo changes. A real drummer will often push the tempo ahead by a BPM or two on the choruses, or gradually increase it as the song plays. You can do this too, nudging the tempo up, say, half a BPM at each chorus. It won't be at all obvious, but it will subtly increase the perceived energy of your musical expressions.

16. Transpose
If you ever feel stuck in a compositional rut, try using your sequencer's MIDI transpose function to shift entire passages up and down in pitch. Often, these transposition tools offer the option of keeping the notes relative to the key of the song. While this can be quite useful, you might be missing out on some interesting progressions if you use it, so shut this off and see what happens.
17. Use CCs
If your favourite synth lacks MIDI Learn but responds to MIDI Continuous Controller messages, you've got a great deal of timbral control waiting to be exploited. Add a lot of interest to your sequence by using, say, MIDI CC numbers 72 and 73 to manipulate your instrument's amplitude release and attack times. Use your sequencer's MIDI Transformer to assign these parameters to aftertouch or the mod wheel for some expressive performances. Getting some movement into your tracks is very important.
18. Change your thinking
If you've always composed on a keyboard, you might be surprised at what you can come up with if you 'think like a guitarist'. Guitar players tend to judge things in terms of chord progressions or riffs, while keyboardists often work chromatically, and stick to a given key signature. Grab some guitar sheet music or a MIDI file or two and study the progressions for a new approach. Guitarists take note: this works the other way around, too.
19. MIDI automation
Is your favourite soft synth or sampler short on LFO waveforms? If you're tired of the same old square, saw and triangle, bypass the instrument's built-in LFO in favour of a bit of MIDI automation. You can draw all sorts of interesting automation shapes into a MIDI clip and assign them to MIDI CC 74 (cutoff frequency) or MIDI CC 7 (volume). And, as we've already pointed out, you can save these clips for later use.
