Whether you’re thinking about purchasing a new beginner electronic drum set, you’re in the market for a nearly silent home practice kit to help maintain neighbourly relations, or you have a brand new electronic drum set in a box at home and you're struggling to decipher your kick drum tower from your cable loom, the prospect of setting up an electronic drum kit can feel pretty daunting - but it doesn’t have to be.
The drum experts on the MusicRadar team have built countless e-kits in our time and we know the do’s, don’ts and things to consider from personal experience.
So, with our expert guidance on how to set up an electronic drum set, plus a few handy power user tips to get the best from your kit, you’ll be set up and ready to start playing in no time.
1. Where are you going to put your e-kit?
First of all, it’s important to think about where you’re going to put your electronic drum set. They’re pretty quiet - especially compared to a full on acoustic drum set - but not completely silent, and the sound of drumsticks on rubber or mesh pads, or your bass drum pedal pounding through the floor can turn you into public enemy number one with family and neighbours pretty quickly.
If you live in a terraced or semi-detached house, then try and avoid placing your kit against adjoining walls. It’s one of the most simple and effective forms of keeping the noise down, and you’re much less likely to upset a neighbour or two.
It may be unavoidable, but set up your kit downstairs if possible. Us drummers tend to put a lot of force into a bass drum hit or hi-hat pedal stomp when we’re getting into a song, and that sound will quickly annoy people on the floor below you.
If you live in a flat with neighbours below you, don’t fret. It’s not an ideal situation, but there are ways of reducing your sound levels to a minimum. Gadgets such as Roland’s NE10 ‘Noise Eater’ - a platform with rubber feet - help to dampen the sound of your pedals by raising them off the floor and isolating the sound your pedals create. German retailers Thomann even make a full podium to put your whole e-kit on. A simple rug under your kit can help mitigate some of the vibrations, too; just make sure it's big enough to accommodate the full footprint of your kit.
We’d also suggest biting the bullet and having a word with your neighbours. For drummers, nothing beats good neighbourly relations, and being open about the fact you’ve purchased a drum kit and discussing some mutually agreeable playing windows can keep things smooth.
Now this one sounds obvious, but make sure that wherever you position your e-kit, it’s close to a power output. It’ll need to be plugged in and powered up for you to use it, so ensure that you’re within easy reach of power, and not stretching your power supply as this could damage it. You may need to invest in a quality extension cable if your kit is going to be at a distance from the nearest power source.

2. Make some space for your e-kit
Once you’ve picked a room of the house, consider where in that room you’d like to put your e-kit. They don’t take up as much space as an acoustic kit, but once you’ve added a few extra elements to the equation - like yourself sitting on a drum stool, a book up on a music stand and a stick bag on the floor, you’ll find the room fills up more than you’d think.
Think about how big you are, and about how you might be setting up your kit - do you like your toms and cymbals to be a reasonable distance away from you, for example? We’d advise you to overestimate on space, as it’s always best to have more than you need. If you try to cram your kit into a small space, you’ll sacrifice on the playing experience.
And finally, do you want your kit facing a wall - which will make it easier to sit down at - or facing out to the room - harder to access, but it means you can look your audience (family members, the cat) in the eye.
When you come to the point of actually building your e-kit, clear as much space as you can. Having plenty of room makes things a lot easier so you can spread the parts out and keep things in order. If you’re tight on space, you could even build it in a different room or maybe outside - as long as it stays dry. Electronic drum sets, especially beginner-friendly ones, are designed to be lightweight and foldable and should happily fit through the doorway of your designated drum room.
3. Unboxing your kit
The next step is to unpack everything. One of the main issues with e-kits is that some of the parts look the same, so we’d recommend taking stock of everything and double checking against the instructions. There’s nothing more annoying than spending ages putting something together, only to find out part of it is missing.
Most kits will come with the necessary tools needed for assembly. These will most likely be allen keys, small screwdrivers or a drum key. A drum key is a great tool to have with you at all times as a drummer anyway, so if your e-kit doesn’t come with one, we’d recommend buying two or three. You can never have too many.

4. Build the rack first
When you get round to building your e-kit, we’d always suggest building the rack section first. This is the foundation of your entire kit and without it, you’ll have nothing to attach your cymbals, drum pads or module to. Make sure the rack is even and stable, with all the feet perfectly in contact with the floor. This can be a fiddly job, but it’s worth taking the time to get it right to avoid wobbles once everything else is mounted - you’ll thank us in the long run.
Our biggest tip here is to follow the instructions - you may get lost without them. Many moons ago we learned the hard way when a 45-minute kit build took us 5 hours. It’s easy to put parts in the wrong place, or upside down and setting up your e-kit wrong can make a surprisingly big impact on the overall playability and future adjustability when a wing nut is out of reach. By mounting your drum or cymbal pads the wrong way, you can turn a playable kit into a muscle-straining mess, which will negatively impact your playing and progress.
It’s important to not over-tighten the bolts and wing screws of your new drum set. Most connecting pieces are made from plastic, and are more likely to break or perish if you put too much pressure on them. Make sure they’re tight enough that your kit is sturdy, but don’t go full Hulk on it.
5. Mount the pads, place the pedals
Once your rack is built, you can go ahead and start mounting the drum pads. We like to do a mock-up first, to ensure that the positioning of everything is as we want it. The beauty of electronic drum sets is that you can adjust and move things around whenever you like, but this is a great starting point. Leave the cymbal pads off for now, as it’s much easier to access each screw, lug or wingnut on the drum pads with the cymbals off the kit.
So, how do you know what’s the best position for your drum pads and pedals? Sit down on your drum stool with the snare drum pad between your legs, just like you’d sit at the dinner table. Have a look at where your feet naturally fall, and put your pedals there - bass drum pedal on the right, hi-hat pedal on the left, unless you’re a left-handed player and are setting the kit up in the opposite direction. The glory of setting up your own drum kit is that you can make it fit around you - so don’t compromise on your comfort.
Then you can start thinking about cymbal placement. Repeat that last step with your cymbals - get them into comfortable positions, ensuring you’re not having to reach uncomfortably to strike them - and you’re ready to go. It’s worth noting that on an acoustic drum set, your hi-hat cymbals would be mounted on a stand with the hi-hat pedal directly beneath the cymbal - so if you’re going to be playing both types of kit, it’s worth trying to keep things like that as realistic and consistent as possible.

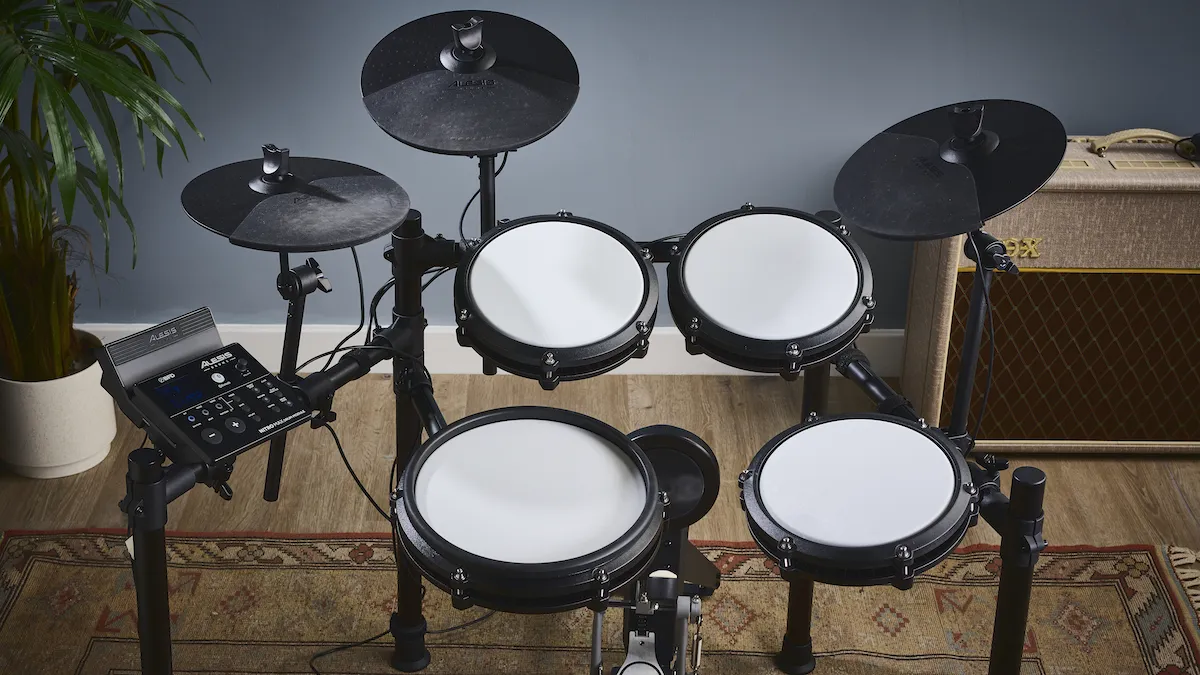
6. Attach the module and connect the pads
Now it’s time to mount your e-kit module to the rack and connect everything up. Take a look at the instructions or pictures of the kit to see where the module should go - usually to the left of the hi-hat, although newer Yamaha kits house the module on the right - and how it should mount. Usually you will get an additional dedicated bracket that enables you to attach the module securely to the rack.
Now, grab the supplied cables. Some beginner and intermediate e-kits will come with a cable ‘loom’ or ‘snake’, where the individual cables for each pad convene at a single DB25 connector that plugs into the back of your module. This is a great way to keep your e-kit cables neat and tidy, and certainly speeds up the setup process. More expensive e-kits will have separate cables for each pad and module connection, which slows down setup, but makes adding new pads and triggers easier.
Start by plugging the main connector straight into the module, and then you’ll be able to start connecting your cymbals and drum pads. The cables will be labeled ‘kick’, ‘snare’, 'crash 1' etc to help you assign the correct cable to the correct pad. It’s worth noting that some pads and cymbals on higher-end e-kits might have multiple inputs, for separate bell, bow and edge triggering on the ride cymbal, for example, so make sure you’re plugging into the right one. It’s not the end of the world, but it can get pretty annoying when the sound you want isn’t the one you’re hearing (or you don’t hear any sound at all!).
You might also want to tidy up the cables on your e-kit at this stage if, like us, you have a thing about tidiness. Some e-kits come with Velcro straps to tie your cables together, but if not, a bit of black tape will do the trick - and you won’t even notice it. Wrapping your cables around the tubing of your rack is also a neat trick - but don’t do it too tightly, or you may damage them. At the higher end select kit even feature internally routed cabling for the ultimate in clean lines.

7. Do you need anything else?
You’re almost ready to go - but here are a few more things you’ll need to consider before you can play:
You need a way of hearing your e-kit
E-kits don’t have built-in speakers, so you’ll need either some headphones for drummers, or a dedicated electronic drum amp. Speaking from experience, acoustic guitar amps can also do a fantastic job of amplifying your electronic drums. The Marshall AS50D and Blackstar Sonnet 120 are both designed to pump out a really full frequency spectrum - usually for acoustic guitar and vocals - but this full sound makes e-kits really pop. They’re cheaper than most PA speakers too, which is a bonus.
Drumsticks
It seems obvious, but a pair of drumsticks is a pretty essential tool for any drummer. Some e-kits come with free sticks in the box, but if you’re serious about playing, then investing in a few more quality pairs is a great idea. If you play acoustic drums as well as electronic, we’d advise that you use the same sticks, or get two pairs that are the same. We want the playing experience on an e-kit to be as similar to an acoustic kit as possible, so the transition between the two is easy.
There are plenty of companies making specific electronic drum set sticks, but we’d honestly avoid them. If it ain’t broke, don’t fix it - and there’s nothing wrong with a regular drumstick.

Bass drum pedal
Bass drum pedals can catch a lot of people out. They all look largely the same and they do the same thing, but the difference in quality can be huge. If your electronic kit doesn’t come with one, we’d recommend spending at least $/£50 on one. It’s much easier to play with a smooth feeling, solid pedal that you can adjust to your liking - and it’ll make learning techniques a lot easier. They are interchangeable too, of course - so whether you’re playing an acoustic kit or a different electronic kit, you can use the same pedal.
Double-bass drum pedals may come up in conversation, and if so, they’re worth a look. If your drumming family member or friend (or yourself) likes a bit of heavy metal, then a double-bass drum pedal is where the party’s at. They can be expensive though, as it’s basically two pedals joined together.
Some e-kits don’t have massive bass drum pads to accommodate two beaters, so be careful when choosing your pedals. The Roland TD-07DMK has a wide bass drum pad built into the rack, so most double pedals should work happily. The Alesis Nitro Max, on the other hand, only has one central sensor in its bass drum pad, so it’s not the most double-bass friendly e-kit.
It’s also worth noting that some e-kits don’t require a bass drum pedal at all, instead coming complete with a bass drum controller pedal rather than the typical bass drum pedal and pad combo.
Drum throne
Honestly, you can’t beat a good drum throne, and it’s a far better option than grabbing a non-adjustable chair or stool from around the house. They’re a truly underrated bit of gear and getting yourself a decent one can save you from years of back and hip issues. Without the correct support for your joints (especially your lower back and pelvis), things can get pretty nasty - so a fairly small investment is worth it in the long run. Again, $/£50 is about what you’d expect to spend on a decent, padded throne.
8. Get playing
So there you have it! Your electronic drum kit is all set up. All there is to do now is pull up your drum throne and get playing. Dive into the different sounds built into your module. Mess around with the metronome and other learning tools. Connect up your smartphone, load up Spotify and just jam! At the end of the day, drumming is all about having fun. It’s been said that staying in time with the band is a good thing, but what use is that if you’re not enjoying yourself?
