
There are many different ways to incorporate the new Logic Pro X Step Sequencer into your workflow, but here’s one of the quickest ways to explore it.

Step 1: Select a preset sound – we’re opting for some of the new electronic drum kits (which, as you can see, we’re still in the middle of downloading). Drag this to a track.

Step 2: Now right-click on the track and select Create Pattern Region from the resulting drop-down menu. This will create a Step Sequencer Pattern within your looped area which defaults to 16 parts. We’re looping over four bars so each one responds to a beat.

Step 3: Now the main Step Sequencer grid will appear with the 16 parts from left to right. Press E to toggle this grid on and off. Audition the sounds by hitting their icons running down the left-hand side of the screen (or anywhere around the name). Now it’s simply a matter of filling in your beats as the pattern cycles around.

Step 4: Don’t want to hear the beat when you hit a step? Hit the green MIDI icon (or Opt>O). We’ve also put some hi-hats in over the first two and a half bars. Press Shift and drag when you click a step and want to fill a row, to ensure that you don’t move the contents over to another track by accident.

Step 5: You can also change the timing of each track by clicking the drop-down menu (here on the 1/16 part of the track) to select different intervals. Select 1/8, for example and just the hats will play half time, although the graphics don’t necessarily show this as you might expect (but you will hear what you expect!)

Step 6: Now explore the menus. Velocity/Value lets you alter parameters including the actual sound (using the Note option, which lets you select a different kits sound on each track). Note Repeat is a great one as it allows you to drag up from the bottom of each cell for repeat effects and you can very quickly get some great stutters going.
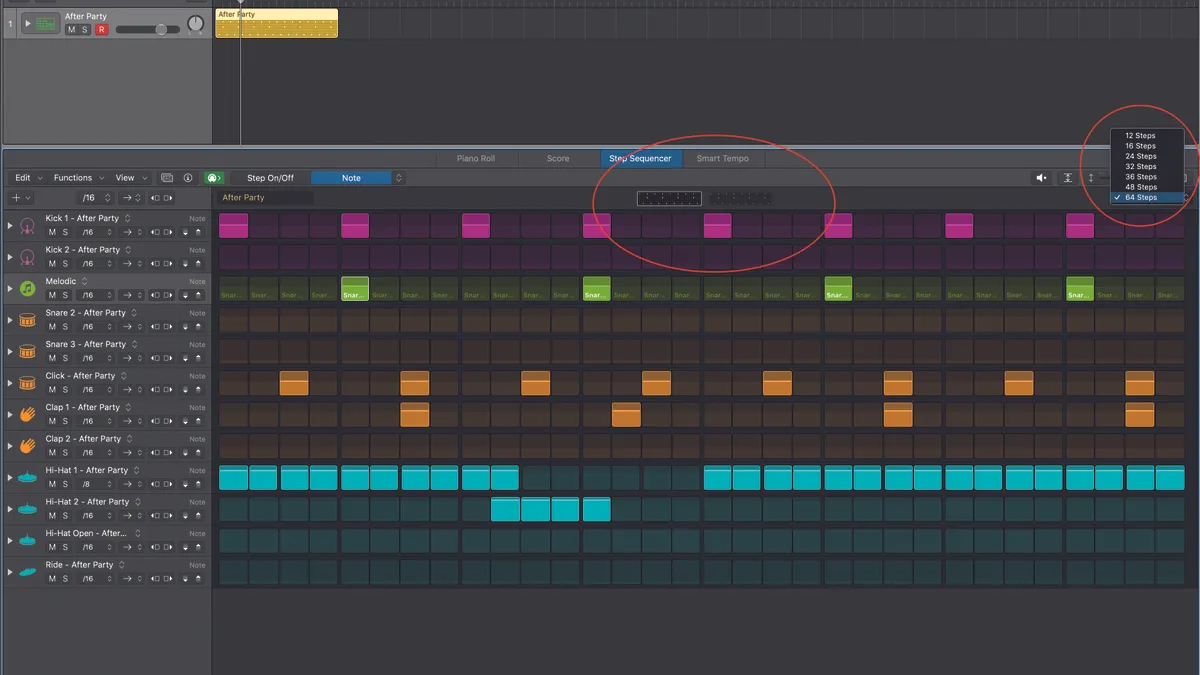
Step 7: Want to increase the number of steps? Easy. Click the drop-down Steps menu to choose up to 64 steps. Go all the way up to the maximum and it splits it into 32 divisions on two tabbed pages so you don’t have to squint. You have this ‘two-tab’ option for other step sizes as well.

Step 8: Of course it’s not just beats you can use Step Sequencer with. Here we’ve repeated the steps above to very quickly add a bass sequencer from Synthmaster to our beats. You get a number of key and melody options and, quite simply, this is one of the quickest ways to get a tune.

Step 9: It doesn’t end there. With Logic 10.5, as Apple told us, everything is compatible so you can very quickly drag your new sequences into Live Loops for all the live performance and arranging fun that will give you. Great stuff.
