How to make a three-element percussion part in Thorn CM - part 2
We order a triple and synthesises a three-part beat using Thorn CM
In part 1 of this two-part tutorial, we showed you how to put together a glitchy three-line percussion track using one instance of the amazing Thorn CM. It required working around the limitations of only having access to two oscillators and a noise generator, and shared effects, envelopes and sequencing, but the results nonetheless sounded more complex than you might have expected from just a single synth working alone.
This time around, the shackles are off as we set about building a drum kit with three Thorn CM instances, comprising kick drum, snare drum and hi-hats. Without having to share architectural elements between all three sounds, we’re free to get a whole lot more involved in their individual details and specifics. Meanwhile, the luxury of being able to call on a separate step sequencer (in the Arpeggiator) for triggering each one makes programming a beat simplicity itself.
As this two-part series has hopefully demonstrated, Thorn CM is a powerful source of drum and percussion sounds - but you can do even more with the full Thorn, which we highly recommend checking out, not just for its percussive abilities, but as a superb synth in every other department, too.
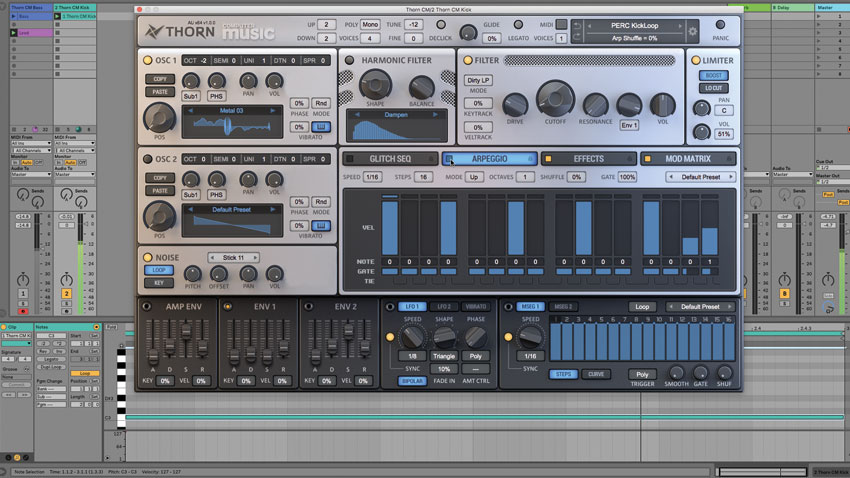
Step 1: Here’s Thorn CM’s PERC KickLoop preset. This uses the Arpeggiator for rhythmic pattern sequencing, so we draw a two-bar C3 note to trigger it. Bypassing the Arp reveals the source to be a Metal 03 oscillator wave-based sustained sub-bass, with a pitch envelope defining the noisy attack transient.
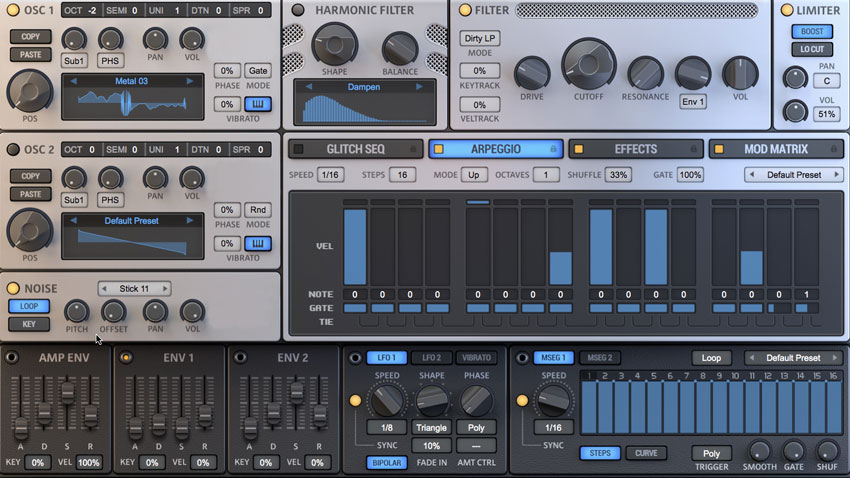
Step 2: We reprogram the Arpeggiator to play a simpler kick pattern, and set Shuffle to 33% to add swing. The oscillator Phase Mode is set to Random, making the attack different for every hit; we use Gate to tighten things. For quieter hits, we lower velocity levels in the Arpeggiator, and set the Amp Envelope to 100% Velocity sensitivity.
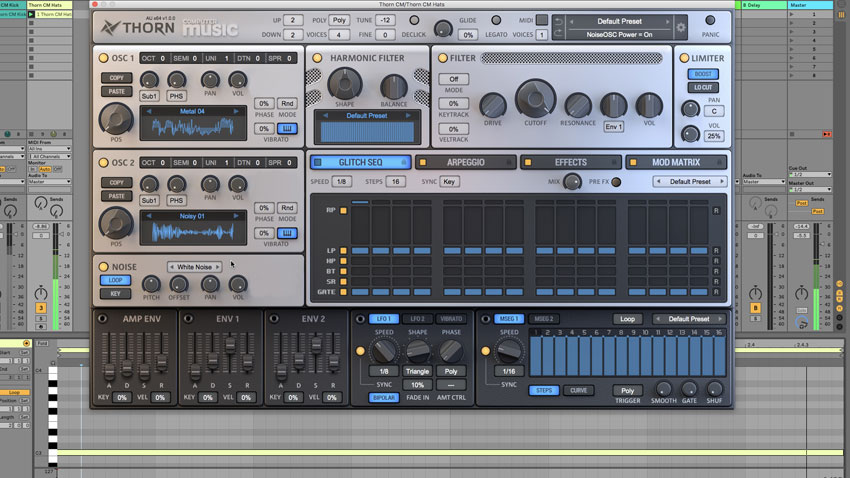
Step 3: Next, hi-hats. We load another Thorn CM and trigger it with a long C3 note. Turning the Arpeggiator on and lowering the Amp Envelope Sustain to 0 and Decay to around 10% creates a 16th-note pattern. We set Oscillator 1 to the Metal 04 waveshape and Oscillator 2 to Noisy 01, then turn on the Noise Oscillator.
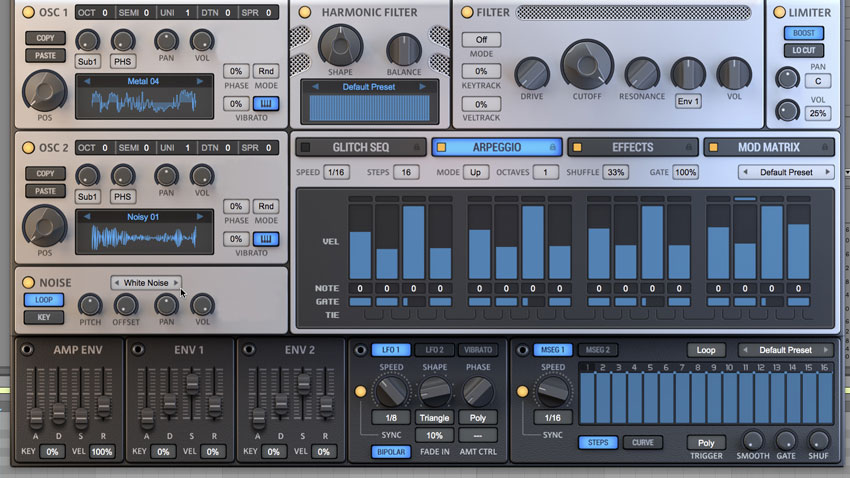
Step 4: It’s lacking high-frequency focus, so we load the Equalizer effect’s Hi Boost preset, then zero the Bass gain knob and attenuate the High band. The hat is too robotic, so we raise the Amp envelope Velocity sensitivity to 100%, edit the Arpeggiator Velocity bars and Gate times, and set the Shuffle to 33% to lock it in with the kick.
Want all the hottest music and gear news, reviews, deals, features and more, direct to your inbox? Sign up here.
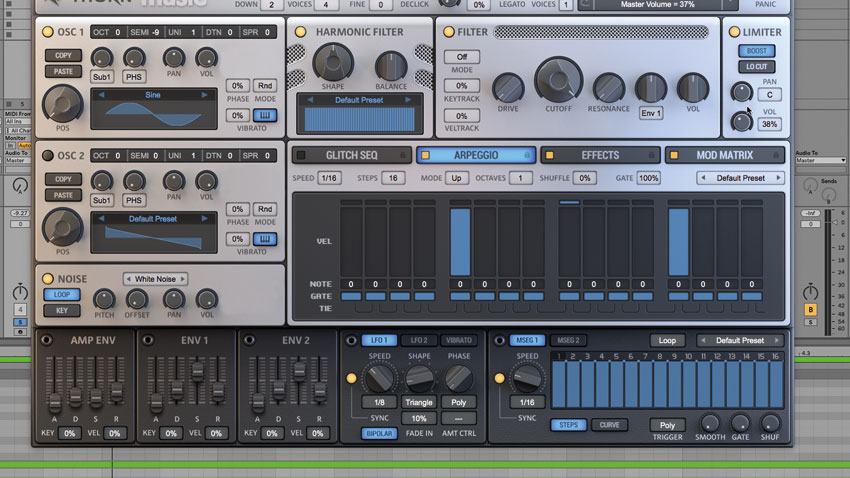
Step 5: For the snare, we take a new Thorn CM, trigger it with a single C3 note, then draw in beats 2 and 4 in the Arpeggiator. A synth snare needs punchy attack, so we balance a pitched-down sine wave (via Osc 1) with the Noise oscillator, set a short Amp envelope and a short downward pitch envelope, then crank the volume.
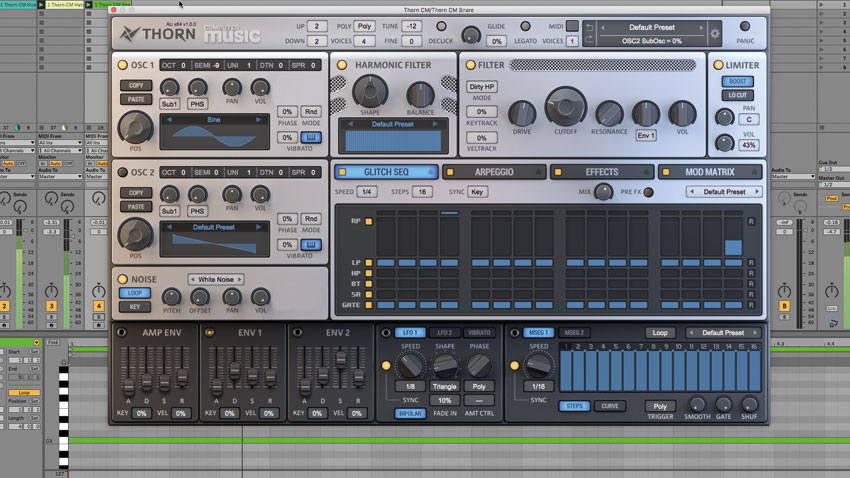
Step 6: A high-pass filter (with lots of Drive) and a short Plate Reverb complete the snare. The four-bar triggering note lets us add a fill at the end of the four-bar phrase using Thorn’s Glitch Sequencer. We set Speed to 1/4 and Mix to 60%, and draw a step in the Repeat lane at the end of the sequence.
Computer Music magazine is the world’s best selling publication dedicated solely to making great music with your Mac or PC computer. Each issue it brings its lucky readers the best in cutting-edge tutorials, need-to-know, expert software reviews and even all the tools you actually need to make great music today, courtesy of our legendary CM Plugin Suite.
