Audio Damage's Quanta is an easy-to-use granular synth with sound design possibilities ranging from the distinctly industrial to the moodily melodious.
If, on the off chance, you’ve not already experienced granular synthesis, some explanation might be in order. A granular synthesizer (or effects processor) takes in a signal and breaks it down into a (usually) user-defined number of audio snippets (or grains). The size of the grains can also often be determined by the user.
Those grains can then be manipulated and played back in real time. Very often, control will be given over the pitch, pan position, and amplitude of the grains.
Here, we've put together a brief guide on how to get started with this wicked sonic subjugator, so fire it up in your DAW and follow along with the walkthrough below.

Step 1: In this tutorial, we’re going to create a simple sound in Quanta, learning the basics of its architecture before diving into the deep end of granular synthesis. Here, we’ve fired it up in our host, and are beginning with the default patch. Playing a few notes reveals a deceptively pedestrian synth sound.

Step 2: By default, we’re on the Sample page, yet there’s no sample loaded. The synthetic sound currently in play is generated by Quanta’s built-in virtual analogue oscillator, and a surprisingly useful and nice-sounding oscillator it is, too! Note the large Shape display/knob in the Oscillator section. Hold a note and play around with it.

Step 3: As you can see, the Oscillator’s Shape can morph smoothly from one waveform to another. This is a rare feature found on some old classics like EMS’ VCS3. We’ve landed on a shape somewhere between a square and a sawtooth wave. Another neat feature: the Pulse Width knob affects any waveform, not just the pulse wave.

Step 4: If we move to the next section, we find the Noise module. This offers Level and Color controls. Bring up the Level to add noise to our oscillator waveform. Rather than forcing a choice between white and pink noise, Quanta’s Color knob allows a gradual sweep from one to the other. Give it a twirl.

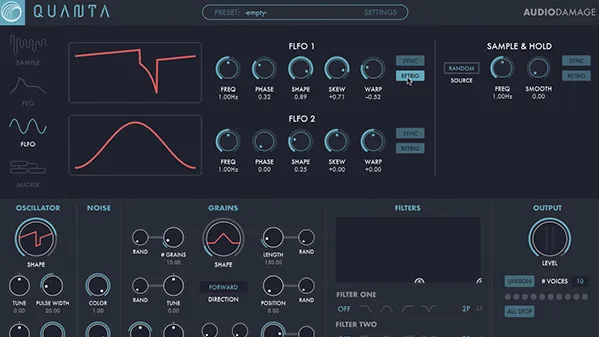
Step 5: Let’s look at a some more familiar features before going on. Click the FEG icon in the top-left. The display switches to reveal a familiar envelope generator. In fact, there are four. Dragging on a line in the graphic can alter the curve of the selected segment, while double-clicking adds nodes.
Step 6: Let’s look at a some more familiar features before going on. Click the FEG icon in the top-left. The display switches to reveal a familiar envelope generator. In fact, there are four. Dragging on a line in the graphic can alter the curve of the selected segment, while double-clicking adds nodes.
