How to build an 8-knob powersynth from scratch in Ableton Live
Create an impossibly powerful Instrument Rack and set it up for total hands-on control with our guide
Want all the hottest music and gear news, reviews, deals, features and more, direct to your inbox? Sign up here.
You are now subscribed
Your newsletter sign-up was successful
One of Live’s most powerful performance-orientated features is the ability to construct elaborate Instrument Racks containing any number of layered synths, samplers and effects, then freely assign controls from all of them to the eight Macro dials at the front of the Rack.
It's a truly inspiring system, enabling anyone to construct the amalgamated instrument of their dreams and take near-instant hands-on control over it with their MIDI hardware. In this walkthrough, we'll do just that, making a triple-chain Rack centring on u-he’s glorious Diva synth and various effects devices, then setting up a full bank of eight Macros with which to manipulate it on the fly.
Get more synth programming advice in the September 2018 edition of Computer Music.
Article continues below 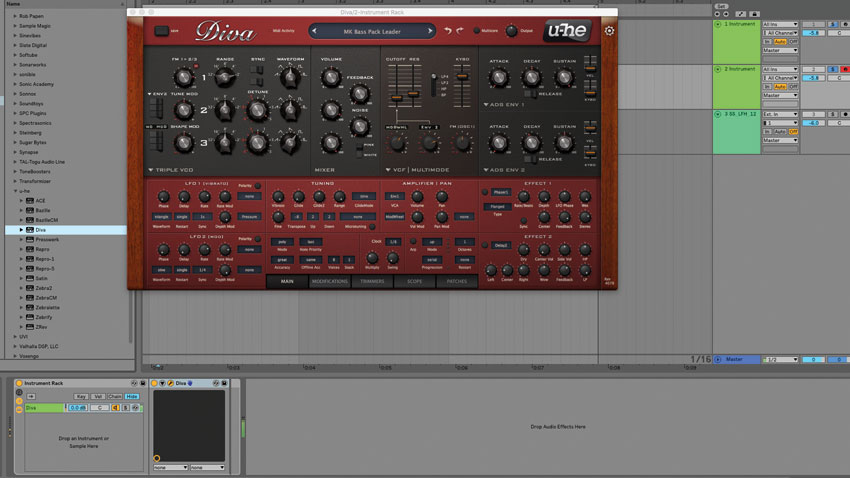
Step 1: Here in Live 10, we kick things off by loading an Instrument Rack on a new MIDI Track, then calling up an instance of u-he Diva inside it. We call up the MK Bass Pack Leader preset and record in a moody synth melody in the key of Amin. This first patch will provide the low end and ‘body’ to our overall sound.
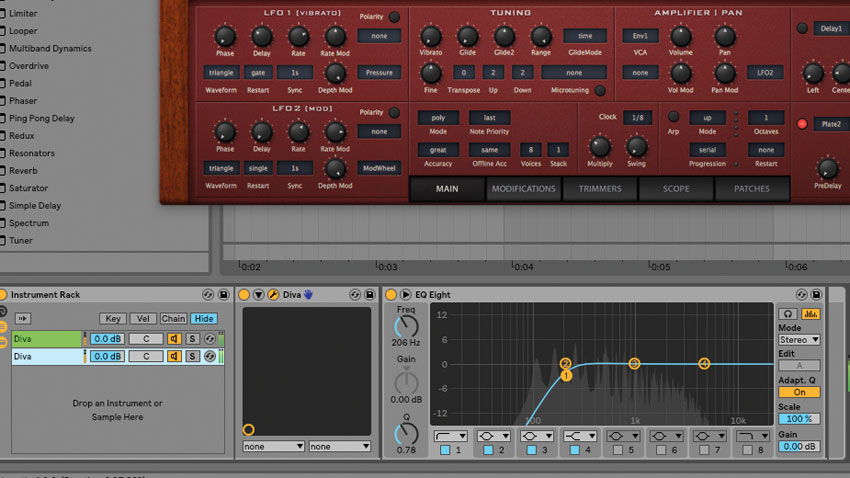
Step 2: In the Instrument Rack’s Chain List, we hold Alt and click and drag down on the first chain to duplicate the Diva instance to a second Chain. In this second Diva, we call up MK 90s Rave Minor patch from the Lead section. We add an EQ Eight in this chain, then sweep away low frequencies below 100Hz.
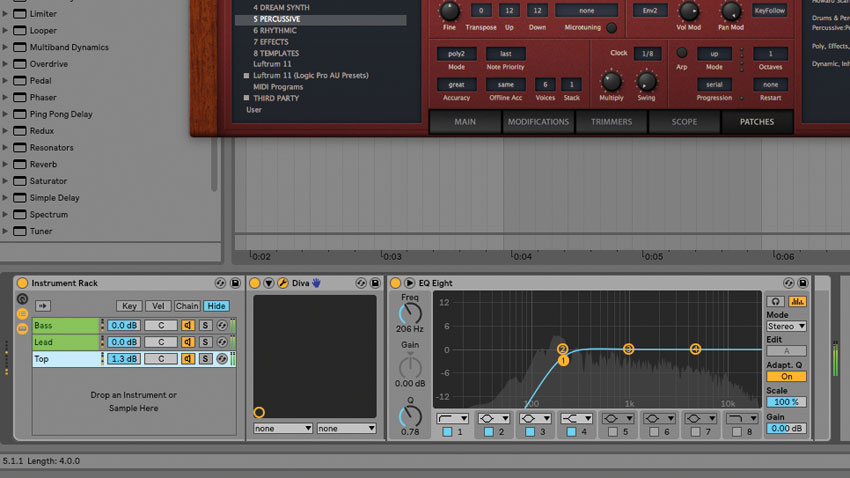
Step 3: Next, duplicate this second lead synth’s Chain along with its EQ Eight. In this third layer, we call up the Percussive > HS Kit 1 preset: a synthetic tom sound that adds a punchy transient and white noise. After naming each Chain 'Bass', 'Lead' and 'Top', we’re ready to assign the Rack’s eight macros.
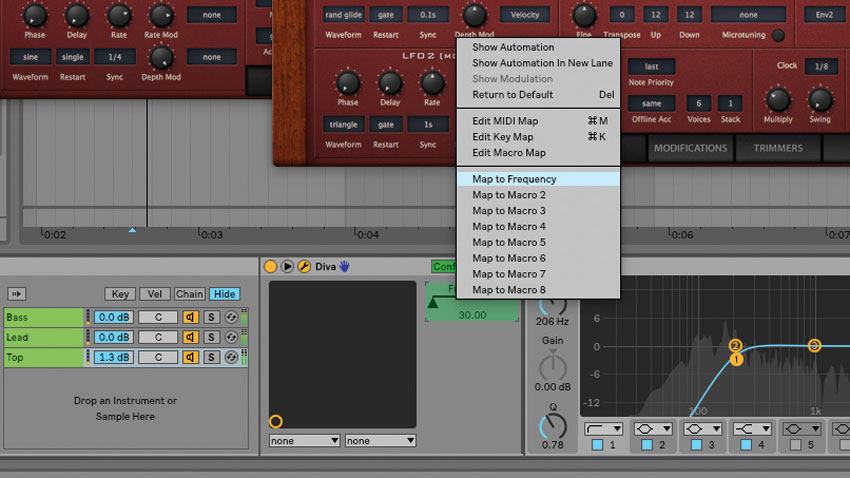
Step 4: On the Bass Chain, click Unfold Device Parameters and toggle Configure. In Diva, click the cutoff Frequency to add it into the Device Parameters list. By right-clicking the Frequency control here, we can Map it to Macro 1. Repeat for the other synth layers, so that the three cutoff frequencies are controlled by Macro 1.
Want all the hottest music and gear news, reviews, deals, features and more, direct to your inbox? Sign up here.
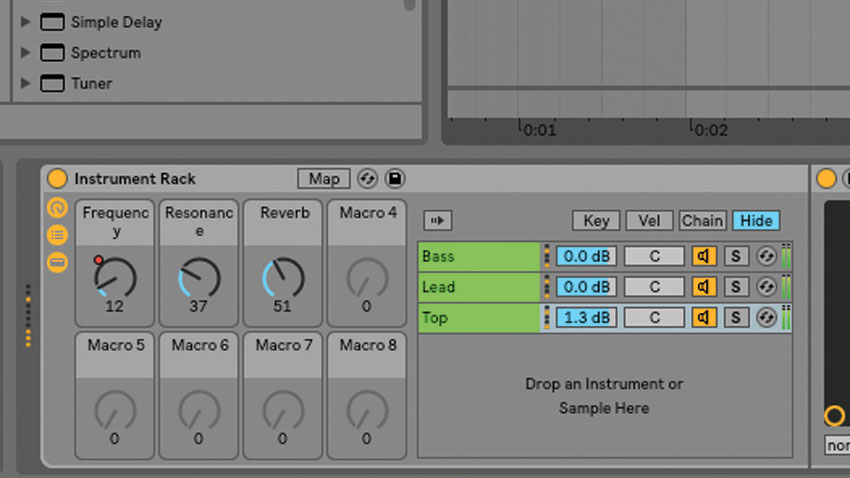
Step 5: Similarly, assign all three Divas’ filter Resonance controls to Macro 2. Within both the Lead and Top Divas, the Plate 1 effect is active: we direct their Wet controls to Macro 3, creating a Reverb macro. Assign the Top synth’s Plate 1 Decay to Macro 3, too, for a longer, more dramatic reverb space when Macro 3 is cranked up.
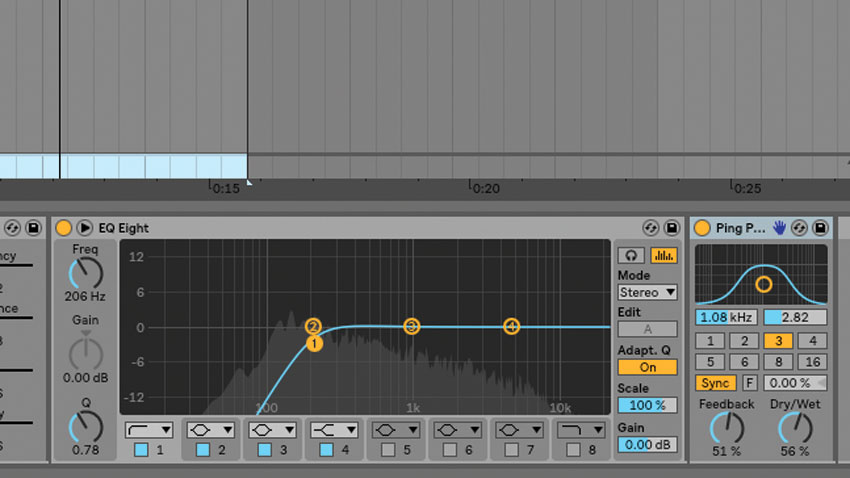
Step 6: Diva does have a delay effect, but we can integrate some of Live’s native devices into our multilayered synth for more control. Add Ping Pong Delay to the Lead layer. After tweaking its settings, we paste the device to the Top synth’s Chain. Leaving the Bass layer delay-free will keep our low end clean and uncluttered.
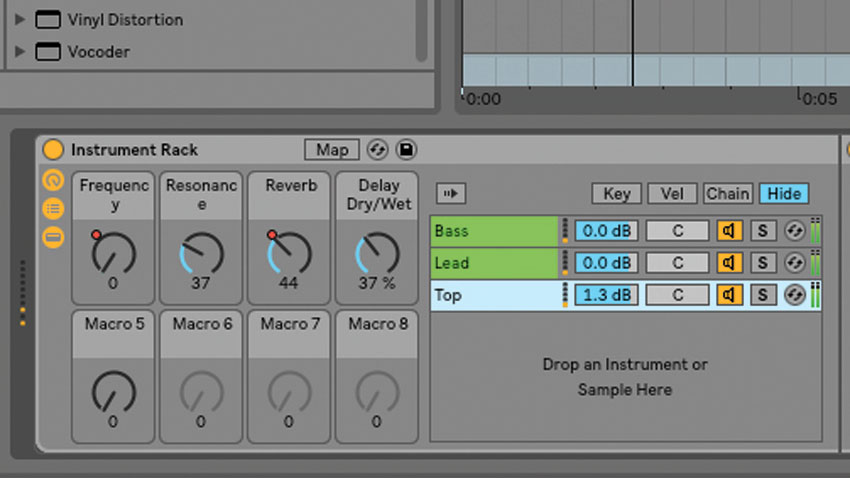
Step 7: We assign the Dry/Wet of both Ping Pong Delays to Macro 4 – as it’s a native device, we can simply right-click the parameter and select Map to Macro 4. From here, it’s a case of deciding which parameters will be useful to access from our eight-knob synth’s Macro panel…
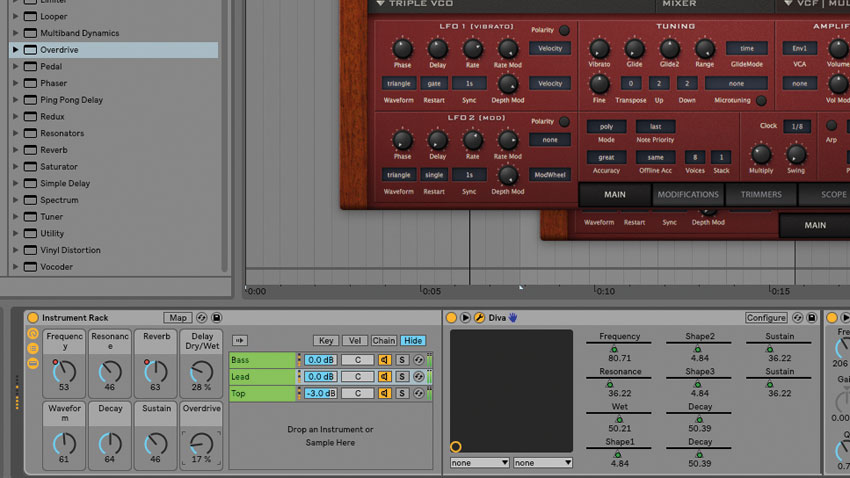
Step 8: Assign the Bass and Lead synths’ Waveform controls to Macro 5 – now we can switch through oscillator waveforms. For hands-on amp envelope tweaking, map the Decays of all three synths to Macro 6, and the Sustains to Macro 7. Drop identical Overdrive devices onto all three layers for crunch, then map their Dry/Wet controls to Macro 8.
Computer Music magazine is the world’s best selling publication dedicated solely to making great music with your Mac or PC computer. Each issue it brings its lucky readers the best in cutting-edge tutorials, need-to-know, expert software reviews and even all the tools you actually need to make great music today, courtesy of our legendary CM Plugin Suite.
