
Last week, we explored the various options available to guitarists looking to get a great tone without using an amp, and listed our pick of the top DAWs for guitarists.
High up on that list was Apple's Logic Pro, an industry-leading DAW that contains a stack of features that are perfect for shaping your guitar tone. Follow the steps below to check out some of the many capabilities available to guitarists using Logic.

Step 1: Before plugging in, you’re going to need to check that your interface has a Hi-Z input as opposed to a standard mic input. The Hi-Z input increases the impedance of the signal; without it, your instrument sound won’t be as pure. Our Scarlett 18i8 accepts both XLR and high impedance signals.
Step 2: Logic is a perfect DAW for guitar recording, and comes preloaded with a mountain of guitar-tone modifying abilities. While it may be tempting to reach for Logic’s preset guitar plugin choices and run with their recommended EQs, it’s better to get to grips with them manually. Select the ‘Guitar or Bass’ option from the initial window.

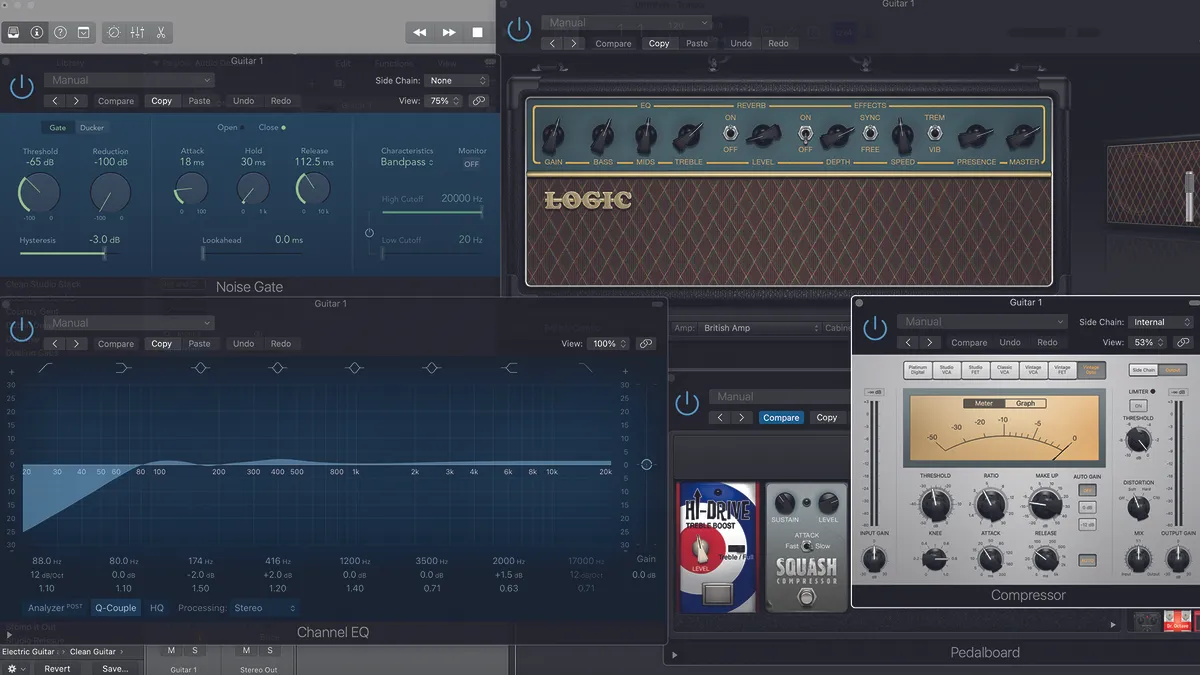
Step 3: You’ll notice that Logic instantly loads up with a tone preset from its Amp Designer, and a range of predetermined Compressor, EQ, and Gate settings, as well as a couple of (initially de-activated) pedals via its virtual pedal board. These elements are the core of getting a great sound with Logic.

Step 4: The Noise Gate is where you can determine the volume levels that are allowed to be captured and set at a determined threshold. With strummed guitar, it’s recommended that you try and remove as many harsh transients as possible; therefore, set your threshold to around -20dB as a starting point, and work down from there.

Step 5: Logic’s Channel EQ is a vital tool when it comes to the mixing stage, as it can help you find your instrument’s frequency space, and chip away at competing frequencies so each track element sits in its own designated frequency area. You’ll generally want to start trimming out bass frequencies under 100Hz

Step 6: The seven analogue modelled compressors within Logic are great for punchy signal boosting, imparting a classic warmth and further taming your frequencies. For chord strums, we set our Attack and Release time to between 10 and 50ms respectively, a 2:1 ratio and reduce input gain to around -5-10dB.

Step 7: Logic’s Amp Designer is where much of the real magic happens. It allows a range of virtual amps and cabs to be selected, with a virtual output picked up by a virtual mic. All amps feature reproductions of control knobs and the main tonal controls are often joined by authentic-sounding modelled effects, such as the Small Tweed Amp’s retro-flavoured tremolo and vibrato, which can make your sound even more sweet.

Step 8: The virtual pedalboard is an absolute treat, and is where you can combine various colourful pedal combinations to concoct a more vibrant signal chain. Each pedal replicates the simple on/off design of real-world hardware, and simple volume and effect-specific parameters.

Step 9: Pedalboard has two discrete effect busses which you can easily switch between, while certain pedal parameters (such as performing Wah Wah sweeps) can be automated via eight macro controls. Combined with everything else it offers, Logic isn’t just another DAW, it stands as tall as a real contender in the world of virtual guitar recording.
