
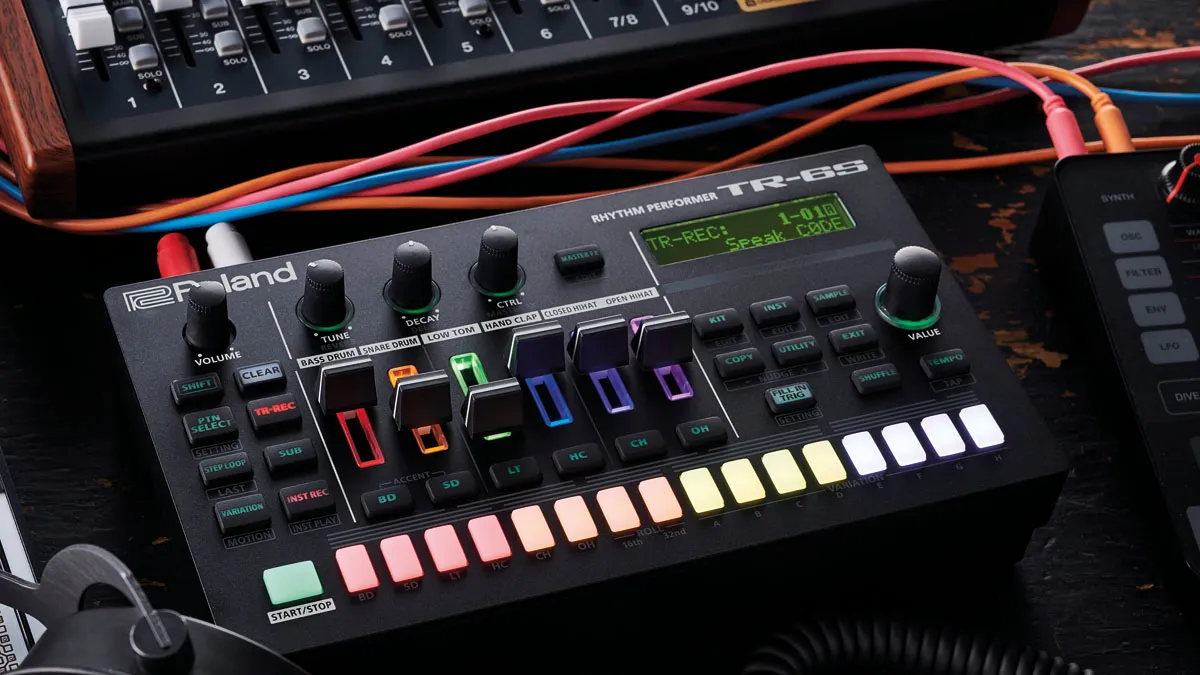
Roland’s TR-6S has now been around for a few years, and while its big brother, the TR-8S, has received a lot of critical acclaim, the 6S has proven no slouch. Blessed with the exact same internal sound engine but boasting six instruments instead of the 8S’s 11, the TR-6S packs a lot of punch in a very small, portable package.
When you take into account that this little drum machine can draw power from either batteries or USB and has full digital audio streaming capabilities over USB as well, it’s quite a powerful package.
Taking a quick glance at the specs of the machine can be a bit misleading, as the 6S features six instruments, each with its own dedicated volume fader. When an instrument is selected, the three knobs adjacent to the Volume knob control Tuning, Decay, and a dedicated control of your choice per instrument, which is set in the Kit Settings.
The options for this handy Control Knob differ if your instrument is making use of one of Roland’s ACB instruments, a Sample, or an FM synth voice. When no instrument is selected, these knobs control Reverb and Delay Levels, as well as a Master Effect control knob that’s also user configurable. More on these later.
The 2.0 update Roland, released for both the 6S and 8S, added a full FM synth engine to the equation, albeit with limited control over parameters. However, some might see this as a blessing, not a curse, as fewer knobs to fiddle with also means that it’s easier to stumble onto that sound that exactly fits the character set you want.
And it’d be fairly easy to dismiss the FM engine in the 6S, given that it’s somewhat locked behind a screen, but with the new editor Roland released in October 2021, that limitation is somewhat lifted. Given that entire kits can be made up of FM instruments, the FM possibilities in the 6S aren’t as limited as first glance foretells.
The TR-6S features the typical Roland step sequencer, where steps are input via the 16 buttons at the bottom of the machine or via live input when the TR-6S is in Inst Rec mode. However the addition of substeps, flams, adjustable velocity (and more) per step mean the 6S is deeper than it looks. Ready to become a Roland master? Let’s go!
1. Colour us hooked

Make use of the TR-6S’s ability to assign a colour per instrument for your custom kits in order to quickly remember what’s saved where. Making all kick drums red, snares blue, hi-hats yellow, samples orange, etc give a quick colour reference that will aid in forming muscle memory when jamming. To assign colours to your instruments, press Shift + Kit to enter Kit Edit mode and scroll all the way to “Kit: Color”. Each instrument can be assigned here. Just make sure to Save your Kit when done.
2. Two for one

The TR-6S has so much power as a drum machine, especially given its small footprint, that it’s easy to forget that it can also function as an audio interface. While it doesn’t have the external inputs and multiple outputs of the TR-8S, using the TR-6S as an audio interface still lessens the load that you need to carry to a gig.
One limitation is that the main volume knob will control both the TR-6S volume and the volume of your digital audio, so you’ll need to have some sort of software control of your DAW with you.
3. Motion sickness

In order to make the most of the TR-6S, it’s essential to use the Motion Recording function, which can add tuning, decay, velocity and other changes to steps in your pattern.
However, you need to make sure Motion is turned on, as it’s turned off by default, for some reason. Press Shift and Variation to access this option, and then use the Value knob to turn Motion to On.
4. Morph for less

One of the best ways to get the most mileage out of the custom mapping ability of the Control knob is to Assign it to Morph when using FM instruments. The Morph knob, named somewhat mysteriously to not give away exactly what it’s doing behind the scenes, gives a lot of timbral control in one knob sweep and can take a sound from soft and neutral to bright and clangy.
To assign Morph, choose one of your FM instruments and then go back to your Kit Edit menu by pressing Shift + Kit. Scroll to Kit:CTRL and you’ll see each individual instrument with Morph being the last option in the list.
5. Master crowd control

If you’re using the TR-6S as part of a live or DAWless setup, you’ll want to be able to make large dynamic moves quickly to control the energy levels of your crowd. One of the best ways to do this is to assign the ‘Noise’ to the master effect slot.
Now, when the Master FX are activated, the Control Knob will act as a frequency control for noise sweeps that add excitement over your beats. Turn the Control Knob all the way to the left to deactivate the noise completely. This can also be an interesting way to add sonic interest to your drum parts while recording as well.
6. Poly thriller

It’s possible to create complex polyrhythmic beats on the TR-6S by setting different Last Step values for each instrument. To do this, press Shift and the Step Loop button to access the Last Step menu. If an Instrument is selected, choosing one of the 16 steps shortens the length of that instrument’s loop.
Use the Value knob to scroll to ‘Edit Variation’ to set the Last Step globally for all instruments in that Variation. In this way, you can create a few different Variations that use the same pattern but each have their own lengths.
7. Copy that

The Copy button works two ways. By pressing and releasing, you go to a Copy/Paste menu to duplicate Patterns, Variations, individual instrument tracks, Instruments, or full Kits.
However, by holding down Copy, you can also access a quick copy/paste command for Tracks and Variations. Press Copy and the Variation you’d like to copy, then the one you’d like to paste. This creates a few versions of your main idea without losing it.
8. Filling good
The TR-6S features the ability to set one of the eight Variations as a Fill Pattern which can be triggered manually or can be set to go off every 2, 4, 8, 16, or 32 measures. However, editing these Fill Patterns can be a bit confusing using the standard technique, and many users seem to think they aren’t editable at all.
In order to access these, you can actually press Shift and Fill In Trig to get to the Fill Menu. Turn the dial around until it says Select on the screen, at which point you can assign a Variation, Fill 1 or 2, or the Scatter effect as your designated Fill setting for that particular pattern.
9. Drive smart

The TR-6S has an effect per instrument as well as a master effect per kit. Given that there are 16 effects total, four of which are different versions of distortion, there are a lot of ways to get dirty. It’s important to understand the differences between the various Drive effects, as each has its own flavour. This is where the kit editor comes in especially handy - check out our walkthrough on that below.

Drive is the least extreme of all the choices, and comes with a two-band EQ that is both pre- and post-gain. This effect works well on nearly all of the instruments. Crusher, as you’d expect is really a bitcrusher and has a built-in filter. This one works great on hi-hats and other high frequency material. Next, Saturator is slightly less extreme than the Drive effect and has even more control.
There’s a Sensitivity threshold setting that’s worth experimenting with, according to what sounds you’re using. And finally, there’s a Comp + Drive setting, which combines compression and overdrive into one effect.
10. Get a Reload of this
Kit, instrument, and pattern reload is now possible with a two-button press, similar to the Reload function on the Elektron kit. Simply press Utility + Kit, Instrument, or Pattern Select to revert to the saved version of the item.
Add extra snare hits and revert back quickly; change the pitch and timbre of your tom and revert back to neutral; the possibilities are endless and this feature gives the TR-6S a lot of live jamming possibility.
Bonus tip: use Roland's new Editor to go deeper with kits

Step 1: The newly released software for both the TR-6S and TR-8S let you control kits, patterns and more. You’ll need to download the new TR Editor from Roland’s Cloud software.
After downloading, the TR Editor should auto-find your TR-6S. However, your machine will need to be updated to the latest 1.03 firmware in order to work with the Editor. Luckily, the TR Editor will do this for you if needed.

Step 2: Upon opening the editor, you’ll see a screen that has the Pattern and Kit name, along with five tabs at the top. The Overall tab is incredibly useful with the TR-6S, in that it shows you all of your kit’s settings at once.

Step 3: Click on the Instrument Name window to change the Instrument type and bring up an additional window. Here you can filter by ACB, FM, Sample, or User to make finding that exact instrument much easier than scrolling on the screen of the 6S.

Step 4: On the Instrument page, it’s possible to further fine-tune your sounds, as you have control over Tune, Decay, Instrument Effect Settings and effect send controls. It’s also possible here to adjust fader colour, mute groups, and LFO settings.

Step 5: The EFX tab has full control over the built-in Reverb and Delay options. Opening up the Tape Echo setting, for example, really shows just how much customisation is possible under the hood of the TR-6S, as there are 11 options to tweak!

Step 6: In order to send the changes you’ve made in the editor to the TR-6S, press the Send button. It’s also possible to write your kit to a location on your computer’s hard drive for recall at a later date. Overall, this TR Editor adds a lot of deep control for a machine with a very small footprint and is going to make a lot of beatmakers very happy.