In our previous groove shadow tutorial, we showed you how to create and process a live ‘groove shadow’ - ie, the reverb signal from one drum or percussion loop placed behind the dry signal of another, making it feel as if the dry loop has been placed in an alien space, and delivering interesting rhythmic and tonal interplay between the two.
This time round, we’re going to render the groove shadow as a discrete audio clip, opening up further creative processing, manipulating and editing possibilities that aren’t on the table when the reverb is generated in real time - obviously at the expense of being able to shape the reverb signal itself.
We’ll be picking up directly from where we left off in the previous tutorial, so work through that one first if you haven't already. You’ll learn how to set up the groove shadow reverb, and shape it with compression and gating. We’ve singled out one of the several groove shadows shown therein as the sole subject this time round, so without further ado, let’s get started. A playlist of audio examples is at the bottom of the page.

Step 1: The first thing to do is render the groove shadow as a self-contained audio file. To maximise flexibility, turn off any EQ in your reverb plugin - we’ll apply a dedicated EQ plugin afterwards instead. Use your DAW’s internal bouncing or rendering system to capture the fully wet reverb as an audio loop. Once done, feel free to delete the original groove shadow track.
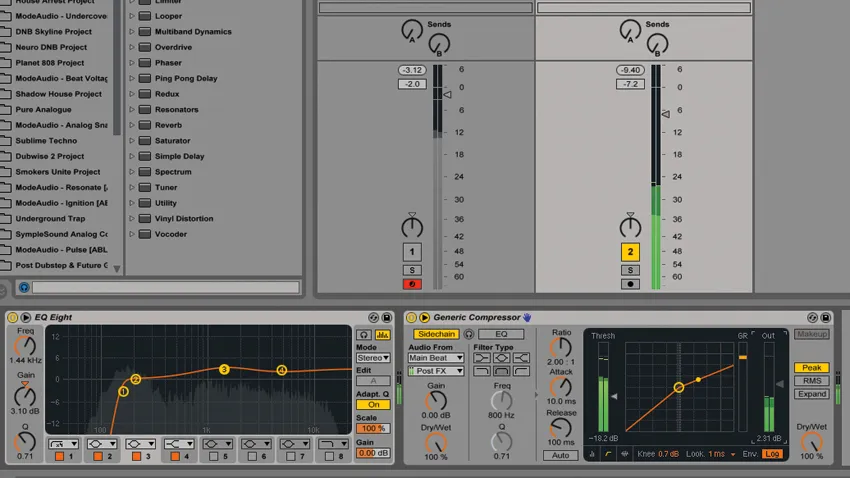
Step 2: Mix the groove shadow in with your drum loop. It might need high-pass filtering to get rid of any overbearing kick drum reverberation, and may well benefit from a touch of general EQ beyond that. You’ll likely want to insert a sidechained compressor or gate plugin, too, to glue the groove shadow to the beat, as discussed in the previous tutorial. We're going for a compressor.

Step 3: Now let’s mess with the pitch and timing of the shadow. By pitching it down a few semitones, the sound becomes darker, taking on a textural, more industrial vibe. Taking the shadow up in pitch, on the other hand, makes it more overtly percussive. Doubling or halving the tempo results in a much more hectic or laid-back feel.

Step 4: In order to preserve the transients in the signal, you’ll probably need to play with your DAW’s timestretching and pitchshifting algorithm. In Live’s Beats warp mode, for example, switching from Transient preservation to a fixed note value can tighten things up considerably. All this radical processing will have a profound effect on the dynamics, so be sure to work that compressor or gate alongside your changes.

Step 5: For instant transformation at the click of a button, reverse the groove shadow loop. Of course, your shadow is also as viable a candidate for effects processing as any other track, so go wild with those plugins. Chorus, phasing, flanging, auto-filtering and distortion are particularly effective, either individually or in combination.

Step 6: With our groove shadow as an audio clip, we’re free to cut it up and rearrange it, enabling completely new rhythms to be designed. Here, we’ve transferred both loops to Live’s Arrangement view, and dragged selected regions of varying length from within the groove shadow loop around on the track. We’ve also reversed a few slices for even more weirdness.
