How to set up and customise groove shadows
Ghostly reverb is the goal of this ambience-enhancing drum mixing technique
Want all the hottest music and gear news, reviews, deals, features and more, direct to your inbox? Sign up here.
You are now subscribed
Your newsletter sign-up was successful
A groove shadow is the 100%-wet output of a reverb sourced from a drum or percussion loop, mixed in underneath a completely different drum or percussion loop, in order to create a more interesting rhythmic ambience than regular reverb processing can deliver.
When done properly, it’s a straightforward and effective production technique that can make all the difference to the spaces in between the hits of any rhythm track, particularly when disparate styles of loop are combined - a dry four-to-the-floor electronic groove coupled with the reverb from a live breakbeat, for example.
Here, in the first of a two-part series, we’ll show you how to make your own real-time groove shadows – as opposed to manipulating rendered reverbs offline, which we’ll get into next month. We’ll start with the most basic of implementations, before showing you how to glue the dry loop and reverb together using dynamics processing, for a much more interesting sound.
Article continues belowNote that the audio examples accompanying this tutorial (there's a playlist at the bottom of the page) all feature the same main beat but six different groove shadows, the latter repeated in each set. So, for example, the shadows in examples 2b, 4b and 6b are all generated by the same drum loop.
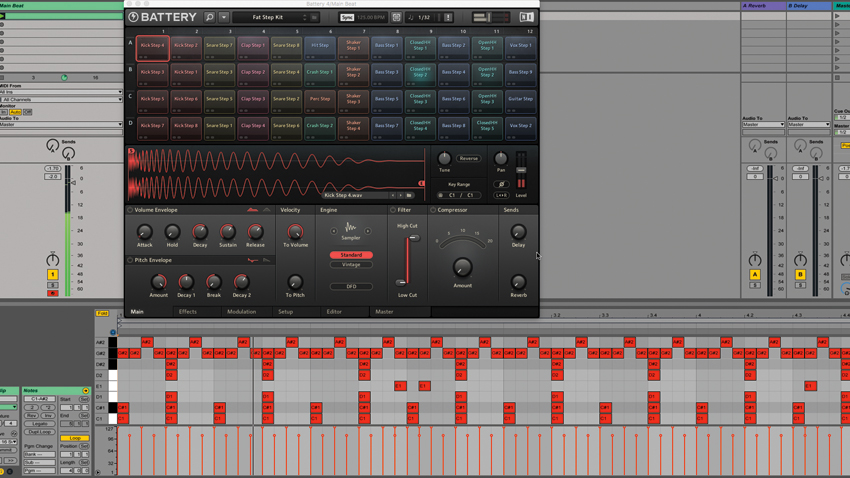
Step 1: The first thing we need is a drum loop under which to place our groove shadow. Given that the shadow will be playing the part of a reverb effect, this main beat needs to be relatively (if not totally) dry. Here’s a straightforward house loop that we’ve put together using Native Instruments’ Battery 4, at 125bpm.
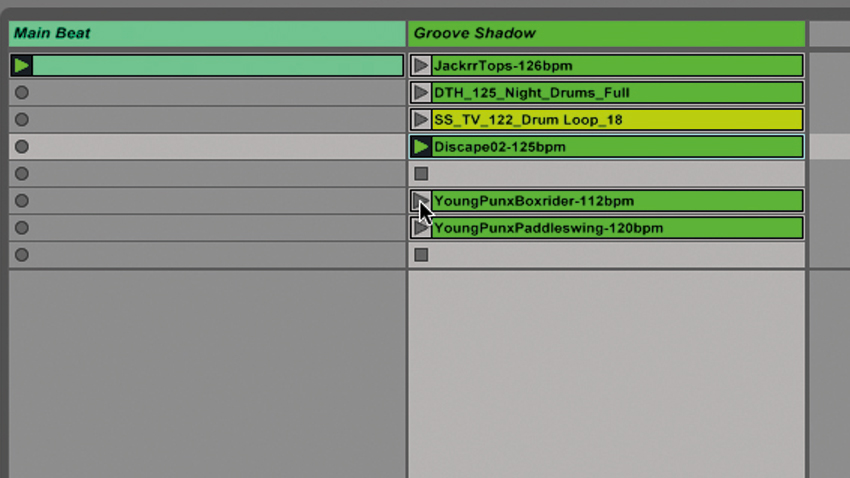
Step 2: At the most basic level, a groove shadow is simply the fully wet reverb signal from a secondary drum or percussion line, balanced underneath the main beat. So, stick a few drum or percussion loops on a new audio track, insert a reverb, set it to 100% wet, and experiment with different loops.

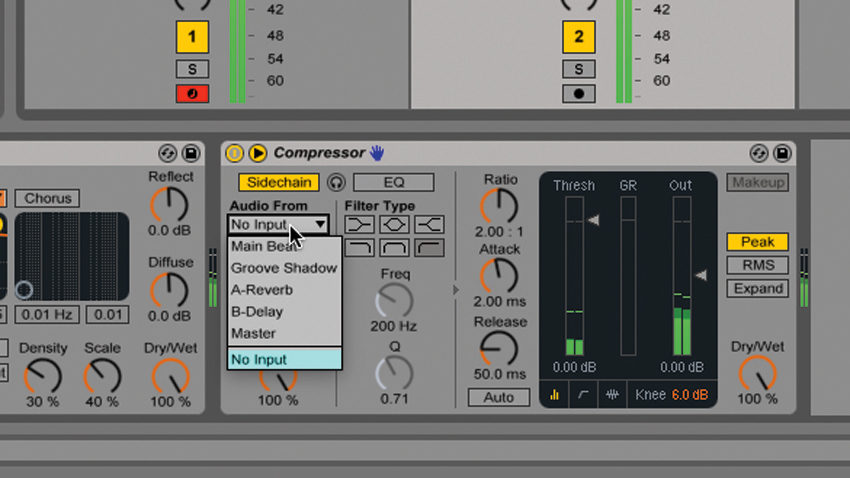
Step 3: With this simple setup, the reverb doesn’t have any connection to the beat. Thanks to the magic of sidechaining, we can easily make it feel as if the beat and its shadow are working together dynamically. Insert a compressor after the reverb on the Shadow channel and set its sidechain input as the Main Beat channel.
Want all the hottest music and gear news, reviews, deals, features and more, direct to your inbox? Sign up here.
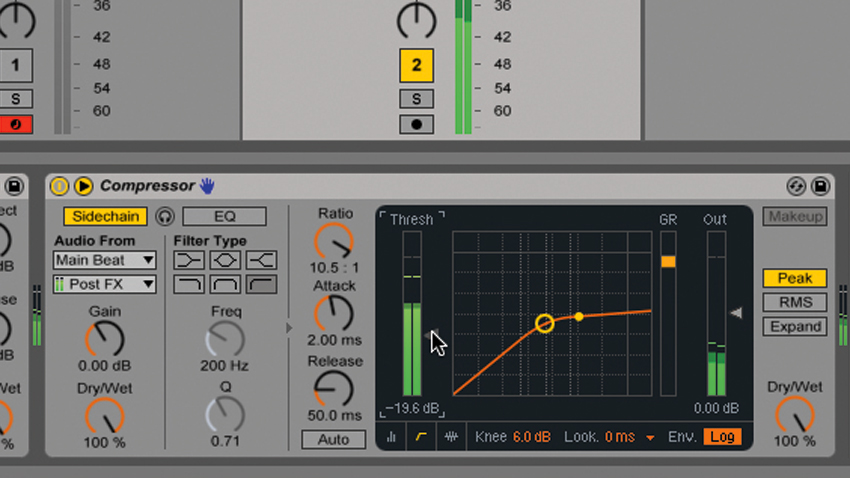
Step 4: We want the sidechain signal to pump the compressor hard, so whack the Ratio up to around 10:1. With the groove shadow playing, lower the Threshold until the main beat triggers enough gain reduction to give the impression that beat and reverb are responding to each other’s dynamics, making a cohesive groove.
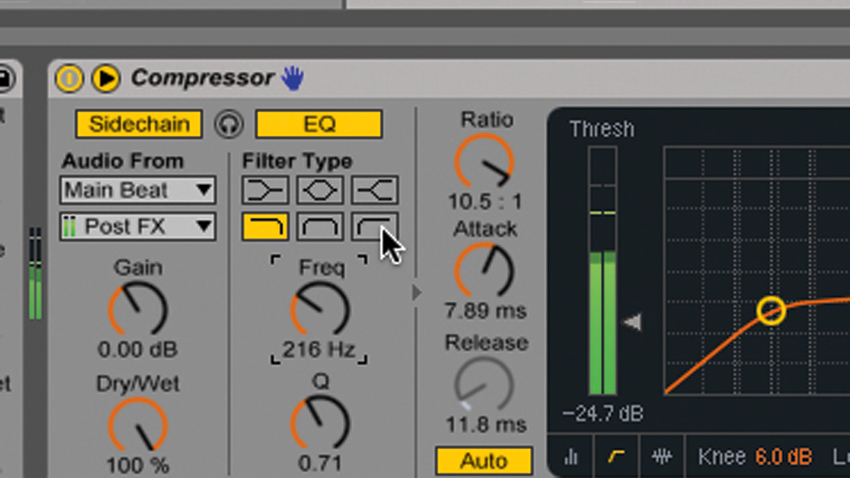
Step 5: You can alter the shape and ‘pump’ of the compressed reverb by playing with the Attack and Release settings, and utilising the sidechain EQ. Set the EQ to low- or high-pass to have the reverb signal ducked by just the kick drum or just the higher-frequency elements of the beat, for example.
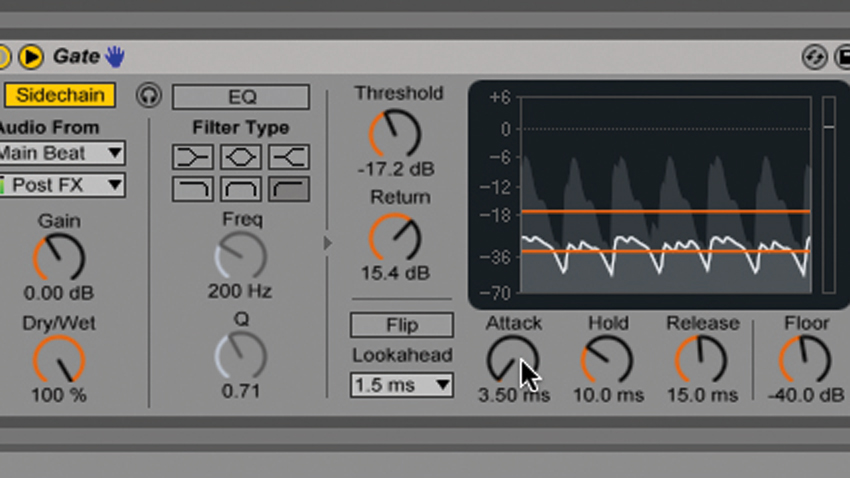
Step 6: For a tighter sound, use a gate instead of a compressor. By adjusting the threshold and hysteresis - called Return in Ableton Live’s plugin - the opening and closing of the gate is keyed to the rhythm of the Main Beat, punching holes in the reverb and allowing the drum hits through cleanly.
Computer Music magazine is the world’s best selling publication dedicated solely to making great music with your Mac or PC computer. Each issue it brings its lucky readers the best in cutting-edge tutorials, need-to-know, expert software reviews and even all the tools you actually need to make great music today, courtesy of our legendary CM Plugin Suite.
