

While a mixing console may initially seem like an impenetrable maze of buttons, sliders and knobs, it’s actually a very simple to understand ‘what you see is what you get’ machine when you get down to it. And we're here to help.
The principles of using a mixing console in real life versus an on-screen in-your-DAW alternative are basically identical. That’s because your DAW essentially copied the tried and tested layout of the classic physical mixing console that’s been the focal point of recording studios for over 90 years.
After all, if it ain’t broke, don’t fix it.
Tracking versus mixing
Getting right back to basics, a mixing desk essentially operates in two different and distinct modes. First of all comes the tracking, where all sounds are incoming and your desk is controlling the levels reaching your DAW (or old skool tape) and the headphones and monitors of the band in the studio.
And if you’re mixing a live performance exactly the same applies. That is, sound comes in, is tweaked to perfection, then heads out again.

Once the performance is over and captured perfectly in your chosen recording method, your mixing desk is then used for its second dual purpose – mixing. Now, rather than recording your band, your mixer is listening to what was recorded. Your band can head home and you can get on with the important business of making them sound great in their absence, with each separate performance appearing on a separate channel of the desk.
Big or small… They’re all the same
The trick to viewing and understanding a mixing desk is to see it as a set of individual channels all lined up side by side. Commonly mixing consoles (and let's just call them ‘mixers’ or ‘desks’ for short) will feature eight or 12 such channels. Larger home studio mixers will go to 16 or even 24. While in a professional studio it’s not uncommon to see up to 96 channels side by side.
But no matter what the size, if you look closely you’ll see each separate channel strip, running vertically from the fader at the front surface of the console, all the way through to the outputs on the back, all identical, all lined up, side by side across the desk.

Each of these channels is available for use by an instrument, be that a vocalist, guitarist, snare drum and so on. And each channel has an input, a volume slider, some controls to tweak the sound and an output. And that’s it.
Each channel’s output is combined into the ‘master output’ and that heads out to your amplifier and speakers with a final volume slider setting the listening level.
In short, the aim is that all the elements of your track, appear on the mixing console and the engineer or producer at the controls can tweak each channel to make the combined output sound perfect.
And, if you understand the workings of a single channel then you’ve got the basics of the entire desk.
What’s in a channel strip?
Starting from the front edge of the console and working through to the back here’s what you’ll most likely see:
First of all there’s a fader – a long, smooth-sliding slider – that’s used for adjusting the volume level of the instrument that’s plugged into it. You’ll use this to set the level of the instrument coming in. Be that while you’re recording – making sure the level is loud but not too loud – and then how much you can hear when you listen back – be that for mixing down a multi-track recording session for a finished mix, or getting the sound right for a live performance.
When recording you want all the sounds recorded at clear, workable volume levels and the mixing console is essential for bringing unruly loud instruments (such as drums) into line with softly spoken vocals or percussion, for example.
Smaller desks (and some classic older units) will feature a knob instead of a fader.

Above this fader usually comes the pan knob. This adjusts the balance between the left and right speakers for that particular sound. Thus you can position a sound within the stereo spread all the way from hard left, to hard right, with dead centre on the knob being an exact 50/50 split between the two speakers.
This allows you to place sounds in space and stop ‘rival’ instruments (say hi-hats versus shakers) from clashing in the frequency spectrum. Placing one to the left and one to the right gives each room to breathe and allows the listener to hear each clearly and enjoy both.
Usually near the pan you’ll find mute and solo buttons. Hitting mute will turn that channel off, allowing you to silence the instrument on it without having to zero the (expertly positioned) level of the fader. Alternatively, hitting solo mutes all the other channels, allowing you to hear that particular channel on its own. Essential for zooming your ear in, to make sure each instrument is perfect.
Next – and occupying a large centre section of each strip – comes the EQ which lets you adjust the bass and treble (and on bigger consoles, everything in between) for each sound.

Smaller consoles will have a basic low and high EQ. A ‘low’ knob will allow you to cut or boost the bass frequencies of the sound on that channel, while a ‘high’ knob will allow you to do the same for the treble.
On larger consoles you’ll find – in addition to the low and high knobs – a third ‘mid’ frequency range, often with an adjustable ‘sweep’ knob to allow you to more precisely pick out which of the mid frequencies you’re cutting or boosting.
A ‘sweepable mid’ is perfect for adding detail to important sounds such as a lead vocal or lead guitar line, ensuring that they ‘cut through’ in between the bass sounds of the kick drum and bass guitar and high frequency fizz of the hi-hats and percussion.
The bigger (and more expensive) the console the more EQ controls you’ll get. Top end desks will feature multiple sweepable bands (in addition to those low and high frequency filter controls) allowing more precise cutting and boosting of the sound on each channel at multiple frequencies simultaneously.
Certain mixing desks are famous for the nature of their EQs, injecting distinctive warmth to the sound or highly regarded for their ability to pull disparate instruments together as a solid, digital ‘block’.
Meanwhile, round the back…
By now we’re getting towards the back of the channel strip where you’ll find a few of the more technical, workman-like controls that, once set for the instrument, are most likely never touched again during your recording session and mix.
Right at the back edge of the console you’ll find each channel’s inputs – most usually in a variety of sizes and shapes – allowing you to plug in whatever you need to add. There’s controls for the channel's input level or gain, allowing you to control how ‘hot’ the incoming signal is, so that that particular sound can sit well on the desk and alongside the other instruments in your mix.

And – as with the EQ – on famous and classic desks, it’s often this input pre-amp that’s responsible for a certain desk’s character or warmth, meaning that certain desks (and their virtual plugin emulations) are highly sought after thanks to their unique pre-amps on each channel.
Adjusting this gain control allows the quietest sound (a simple shaker, for example) to sit alongside the loudest (a blistering solo from a Marshall stack) and for all your track’s elements to then be mixed together as equals.
Watch out for a Pad knob too, which will reduce a signal level to prevent unpleasant clipping (aka distortion).
High end extras…
We’ve already covered most of the basics that you’ll find on every desk, which just leaves the ‘special’ controls that you’ll find on high end consoles (and their virtual DAW equivalents).
Some desks will have built-in de-essers or noise gates, allowing you to fine tune spikes in the levels of the recorded performance, and while separate ‘outboard’ boxes will, of course, do the same job it’s clearly more convenient to have such features built into the channel strip of the desk.
And such per-channel compressors and desks from the likes of Solid State Logic (SSL) made a great play of the quality of their per-channel, built-in compressors (in addition to their ease of use and simply having them ‘there’ for any sound that you have on a fader) with their sound becoming part of their desk’s mystique and going some way to justify their impressive price tag.

Likewise the SSL’s (and other brands’) master bus compressor. Large desks will have a further final mastering compressor on the desks final stereo output, allowing you to give the combined might of your finished mix just one final cohesive polish on its way out to your amplifier and monitors.
Watch out for high-pass filters per channel too. These can be used to quickly remove low end rumble from mics on a hard studio floor for example, or unwanted ‘ghost’ bottom end sounding from badly positioned kick drums and bass amps.
More professional desks will also feature buttons such as Phase Reverse, allowing you to flip left and right channels – ideal if you’re working with multiple sets of stereo left and right mics (such as over a drumkit). Overlaying a pair (or group) of mics listening to the same sound can produce strange phasing effects that can sap their power and clarity. A quick press of Phase Reverse will pop everything back to ‘normal’ again.
You’ll find dedicated sliders for separate monitor mixes too, allowing you to deliver bespoke mixes to each band member’s headphones. The vocalist will always want themselves nice and loud with plenty of effects already added, while your drummer would much rather be listening to your bass player.

And, what was once a luxury on only the most expensive desks, is now a feature you’ll find in any DAW – the ability to record and replay fader and knob movements. This ‘automation’ transformed music in the late 80’s, allowing producers to really perform at the mixing desk and for music to become more complex with chops and changes and sounds and effects suddenly appearing and disappearing.
Today, while only larger professional physical mixing desks feature such ‘flying fader’ automation, every computer-based DAW will let you record knob tweaks and level changes as you mix, freeing up your hands and mind for further experimentation elsewhere.
Finally, special mention to that hardware studio stalwart, the Talkback button – a luxury of only the largest desks. Pressing Talkback enables the desk’s microphone, allowing the producer to be heard over the band’s headphones and monitors. Perfect for delivering a little ‘can we try that one again?’ encouragement to the band…
Take the bus…
So now we’ve got all our instruments – be they coming live from your band or being fed from your recording – lined up on your desk and – thanks to the gain controls on the inputs, EQ, and volume level fader – sounding at least ‘something’ like you want.
Next comes a little bit of mixing desk magic.
On larger home consoles (and on every professional desk) you’ll find mix buses. These allow you to route groups of instruments together and mix them as one. So rather than sending each of your drum channels out to your left and right speakers as usual, you could instead send them to ‘Auxiliary Channel 1’ or ‘Mix Bus 1’.
Give this ‘Mix Bus 1’ its own channel – often labelled as a Sub Group on larger desks – and you can then control multiple instruments on a single fader.
Doing so not only simplifies your mix – want to turn down ALL the guitars? Simple, they’re all on a single fader now – but by grouping tracks together you can process them as one. Also – via a little mixing desk magic – grouping together ‘likeminded’ instruments on a bus allows them to stew a little in each other’s juice and often leads to a pleasing, more cohesive sound.
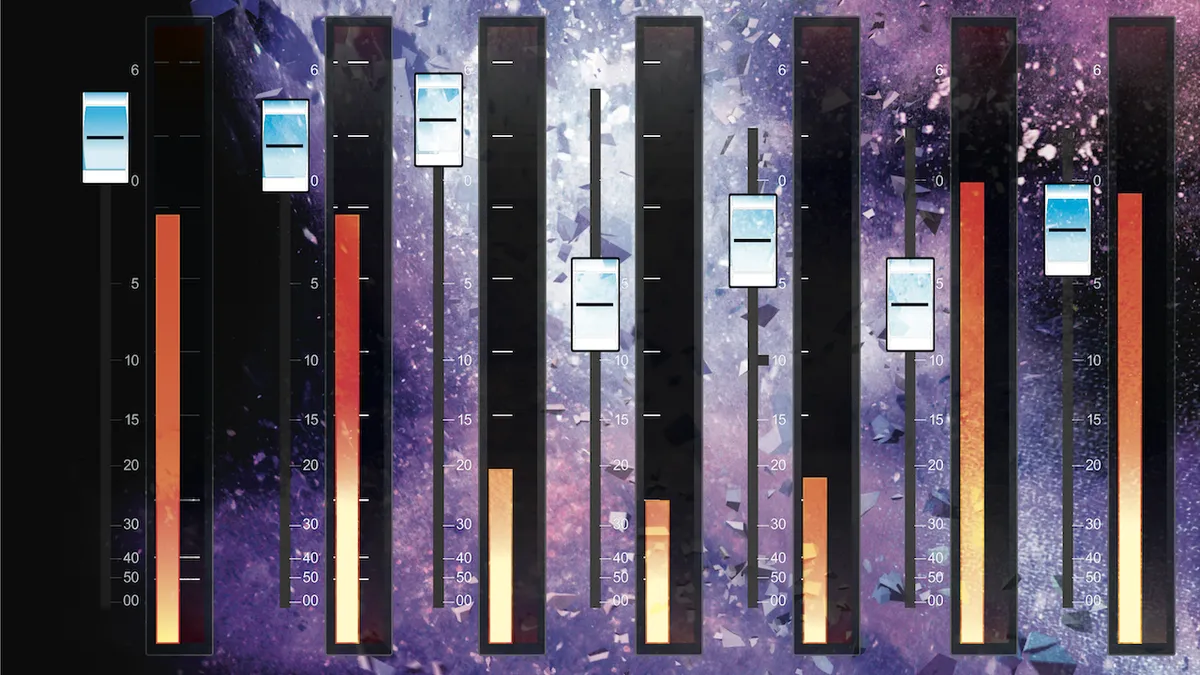
It’s a quality of classic mixing desks (and one expertly recreated in their software emulations) that sending all your drums to a ‘Drum Bus’ and then perhaps using a compressor on this single, multi-element, channel somehow ‘glues together’ their sound.
Why not send your bass to the same bus too, to share a little bit of that compression magic?
Suddenly, rather than your track sounding like disparate elements all fighting for air, you’ll have a tight, locked down rhythm section all working together and all on a single fader.
Effective effects
As mentioned earlier, some larger desks will have compressors and de-essers built in (and owners pay handsomely for such features) but you don’t have to simply use what the desk has to offer.
Each channel – even on small mixers – will feature at least one Send control. Often two or three. These knobs will send a set amount of that channel’s output out to an Auxiliary mix bus (a dedicated bus set aside for such things). Thus, place a reverb effect on Effects Send 1 and you’ve got a reverb that can be used by every channel on the desk.
Turn up the send on your vocal channel to swamp it in luscious reverb. Add a little reverb to your snare channel. Get your synth pads sounding ‘big’ by nudging up their reverb send too.
And why not place a chorus effect on Effects Send 2? Send most of your acoustic guitars there… And maybe some of your backing vocals too.
Such effects buses are a great way to quickly inject some sparkle and magic into your mix. And they let your effects boxes go a long way – no need for an effects box for every channel when they can all share one.

Of course, this means that you’r using the same reverb setting or delay time for your entire mix, so it’s always advantageous to have three, four or more effects to choose from, each on a different Send. And – thanks to the modern DAW – if your computer can handle the processing (and these days they always can) you can have separate instances of your favourite effects on every channel. EACH with their own settings and levels.
Thus, the simple shared ‘Effects Bus’ and ‘Send’ is becoming something of a has-been… But it’s a good principle to learn and understand, as limiting yourself to ‘one reverb and one delay’ old-skool style is a great way to learn mixing, avoid getting confused by hundreds of options, and allow your mix to ‘sound great’ fast.
Perhaps use a simple ‘effects send’ mix set-up to get your track into basic shape – a shared reverb, a delay and a chorus. Then create more bespoke per-channel effects chains later when you’re ready for the finishing touches?
The sum of its parts
Hopefully by now you’ve got the measure of the desk in front of you. Just remember that all desks, small to big, from four channels up to 96 are essentially the same. Don’t get blinded by science.
Focus on the parts you need – level, pan, EQ – to begin with. Then add compression, use effects, group buses, as and when you need.
Keep it simple… Then keep experimenting.
