How to make a Pink Floyd-style lead synth sound
Pink Floyd's Welcome To The Machine is actually built on a pulsing sound from an EMS VCS 3, but it's the track's soaring lead synth that we're going to emulate here. We're using Logic's ES2 for programming purposes, but the techniques can be applied to other instruments.
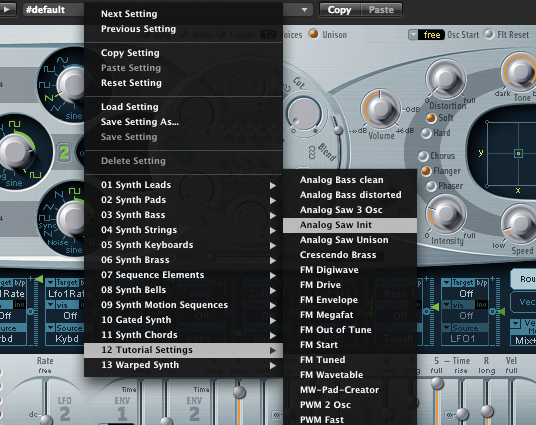
Step 1: The synth lead sound in Pink Floyd's Welcome to the Machine may sound complicated, but it actually uses some pretty standard techniques in a clever way. To recreate it, we'll need an analogue modelling synth - in this case, Logic's ES2. We've opened the Patch menu and selected 12 Tutorial Settings»Analog Saw Init.
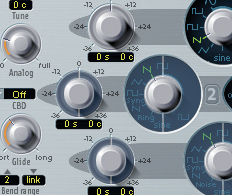
Step 2: This gives us an extremely simple single-oscillator patch to play with. The key to this sound is the copious use of glide, so start by putting the synth into Legato mode. Turn up the Glide to about 240ms to produce a lazy portamento effect.
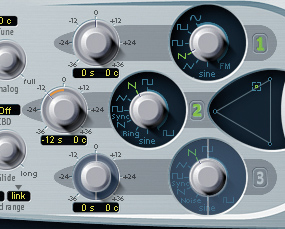
Step 3: This single-oscillator sound is a bit thin, so we'll turn on Oscillator 2. By default, this is set to the same tuning as the first oscillator. Tune Oscillator 1 down by 12 semitones, and use the 'mix triangle' to bring in Oscillator 2 - set it to 75% Oscillator 1, 25% Oscillator 2.
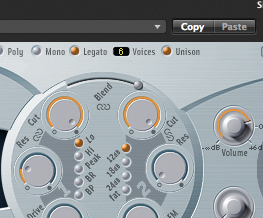
Step 4: If you want a fuller sound you could add the third oscillator and tune it down by 24 semitones, but two will suffice for now. To beef up the sound, activate the Unison mode, which by default is set to six voices. This gives the patch a more 'analogue' feel.
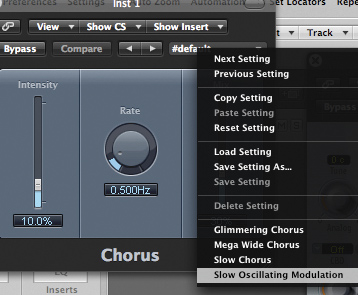
Step 5: For an even more organic tone, let's add a chorus effect. The ES2 has its own built in, but it doesn't sound as good as Logic's, so let's use that. Click an insert slot and select Modulation»Chorus»Stereo. Here, we've used the Slow Oscillating Modulation preset.
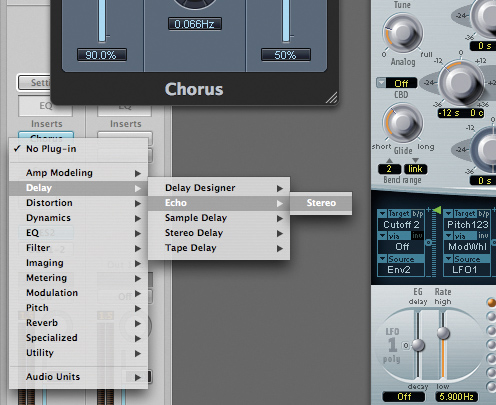
Step 6: The other distinctive element of this sound is the use of delay, which creates an unusual reverse-style effect. Click the next insert slot under the chorus and select Delay»Echo»Stereo. This is a simple delay plug-in, but it's got enough features for our needs.
Want all the hottest music and gear news, reviews, deals, features and more, direct to your inbox? Sign up here.
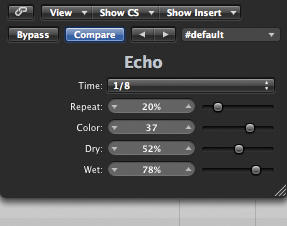
Step 7: By default, the Dry level is set to 96%, and the Wet to 78%. To create the bizarre backward effect, turn the Dry parameter down so that the delayed signal is louder - here we've used a setting of just 52% to really emphasise the wet signal. We don't need much feedback, so turn the Repeat control down to 20%.
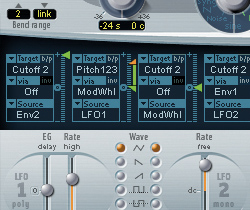
Step 8: We need some pitch modulation to get that authentic Floyd vibe. If you're using a MIDI keyboard, you can use its mod wheel to control this; if not, turn up the amount in the second modulation slot, as we have here. We've also turned up the rate for a faster effect.
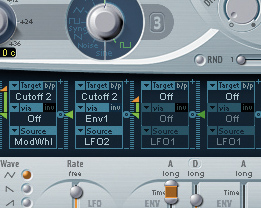
Step 9: Finally, let's use a bit of LFO modulation on the filter cutoff. We've set the fourth modulation slot to modulate Cutoff 2 with LFO2 via Envelope 1. With the settings we've used, this creates quite a subtle effect, so if you want something a bit more drastic you can automate the filter cutoff yourself.
Computer Music magazine is the world’s best selling publication dedicated solely to making great music with your Mac or PC computer. Each issue it brings its lucky readers the best in cutting-edge tutorials, need-to-know, expert software reviews and even all the tools you actually need to make great music today, courtesy of our legendary CM Plugin Suite.
