How to prepare a track for DJing with Ableton Live
Warp and prep your tracks ready for DJ mixing
Want all the hottest music and gear news, reviews, deals, features and more, direct to your inbox? Sign up here.
You are now subscribed
Your newsletter sign-up was successful
Although it was originally designed as a tool for arranging samples, Ableton Live has long been a favourite in the DJ booth. Its clip view means is adept at launching tracks, loops and samples, and the arrangement view is great for 'offline' mixing - i.e. building DJ mixes at your own pace, away from the dancefloor.
To mix with Live though, you'll need to prepare your music. Live automatically warps songs to fit the current tempo, but the results can often be a little off. In the tutorial on this page (see the step-by-step below, and videos above and below), we'll show you how to get a track warped correctly, and how to fix minor warping issues.
• For many more Ableton Live guides go to our massive learning hub: Learn Ableton Live and Ableton Push: music production tips and tutorials
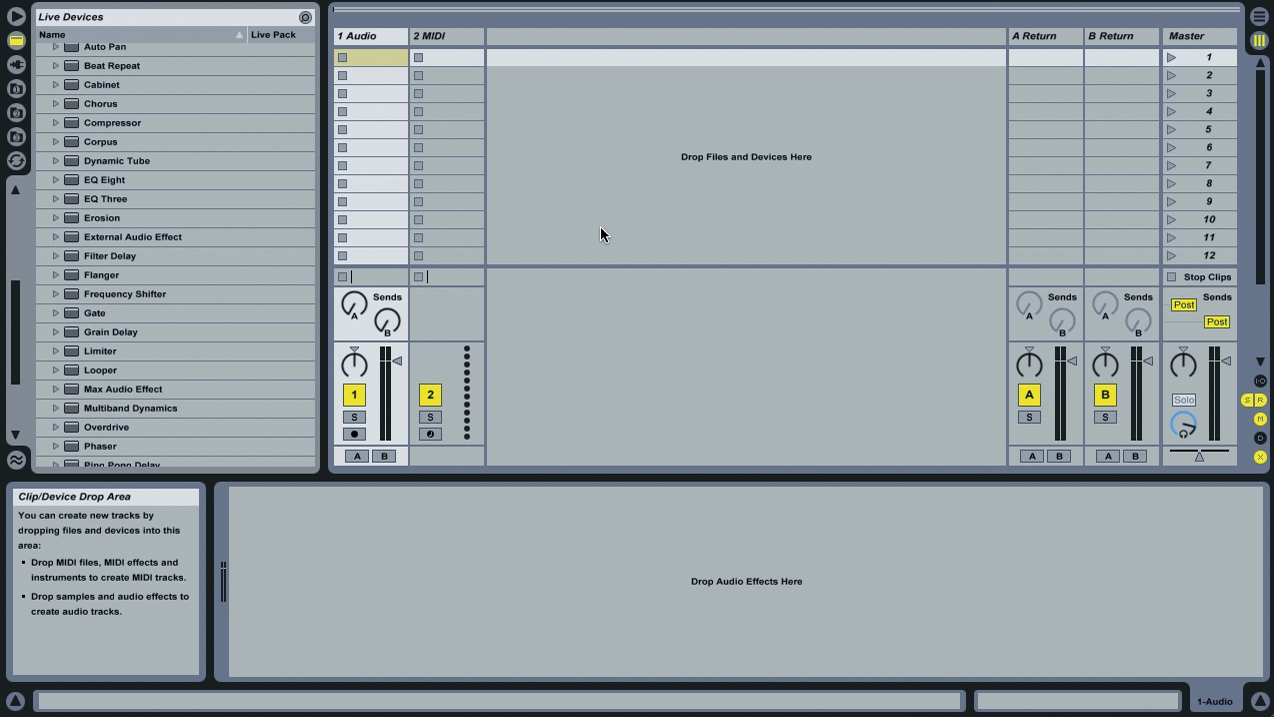
Step 1: Before we can make a mix in Live, we need some music. Download Push_It_Higher.mp3 (right click and Save As). Load up Ableton Live - if you don't have it, the save-disabled (but otherwise fully functional) demo version can be had at the official Ableton site.
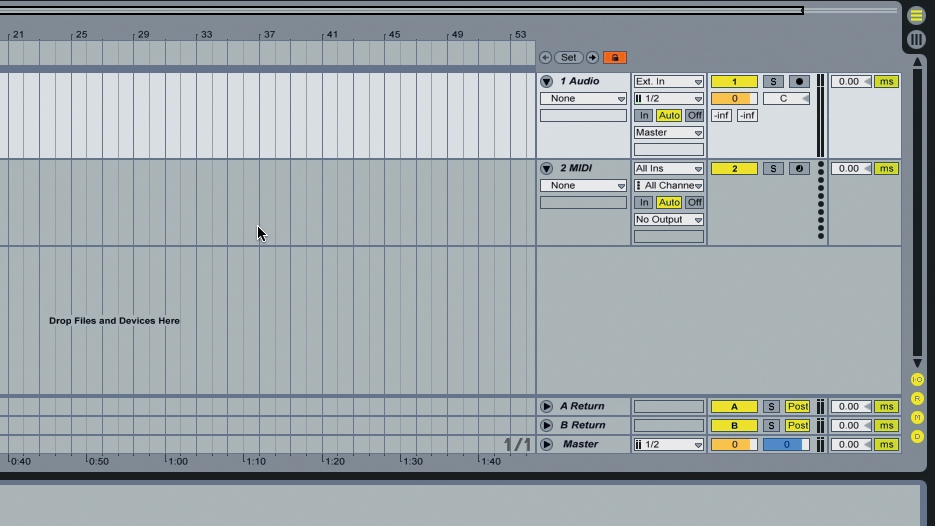
Step 2: Live's Session view is great for DJing live, but for preparing and making mixes offline, the Arrangement view is the place to be. To switch to the Arrangement view, press Tab or click the button in the top right hand corner.
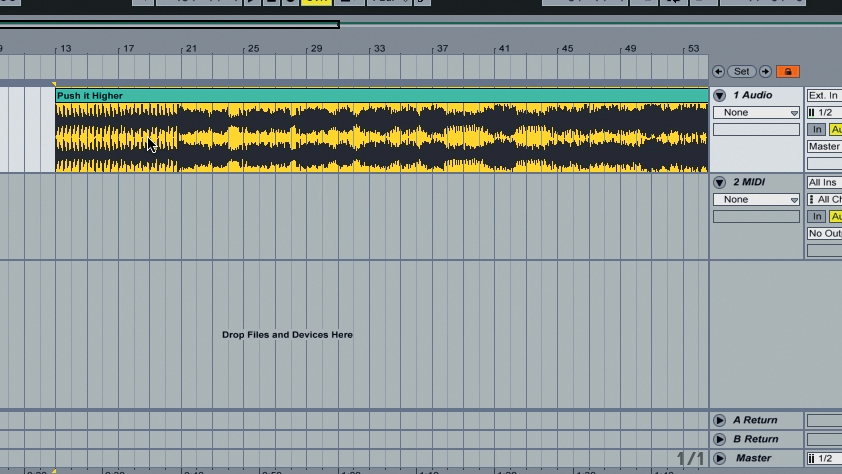
Step 3: The Arrangement view will be familiar if you've used just about any DAW: tracks are stacked vertically and the playhead moves from left to right as the tracks play back. Drag Push_It_Higher.mp3 into the Arrangement view.
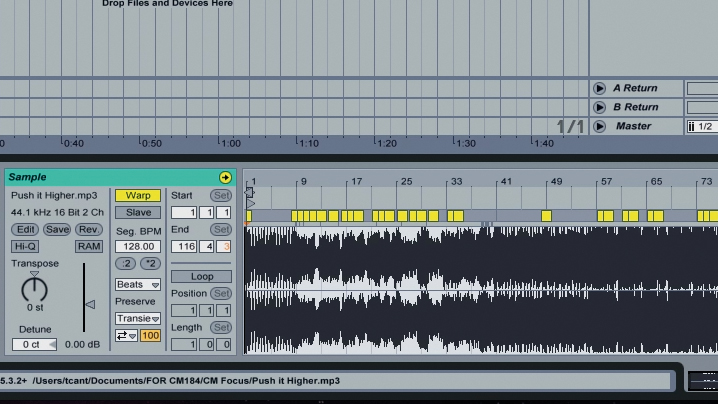
Step 4: By default, Live automatically warps longer tracks, although it often doesn't get the warping exactly right. Select the clip and its settings will appear in the panel at the bottom of the interface. There are warp markers all over the waveform and the Warp button is illuminated - Live has indeed warped the track already.
Want all the hottest music and gear news, reviews, deals, features and more, direct to your inbox? Sign up here.
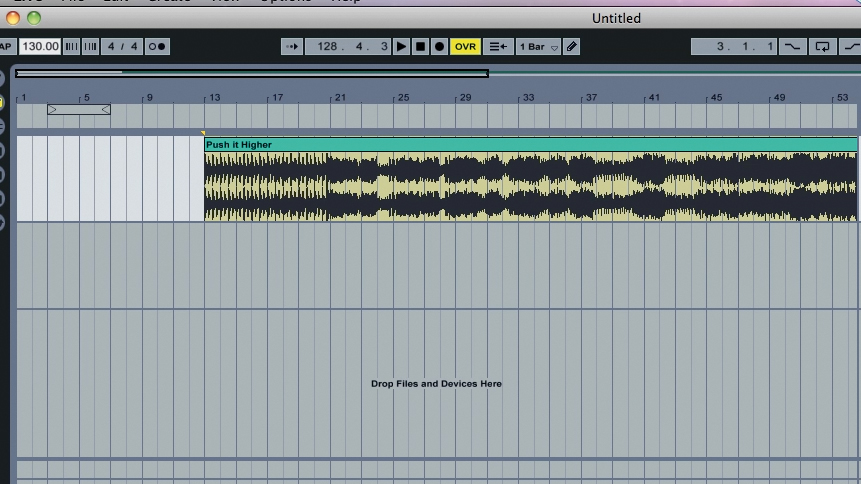
Step 5: Live will automatically timestretch clips to fit the project tempo. Turn the tempo up to 130bpm, so that's it's closer to the original tempo of the music we're using, by dragging the Tempo parameter in the top left hand corner of the display.
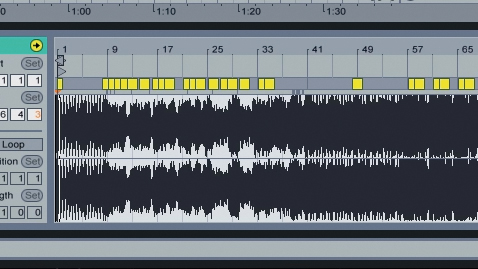
Step 6: Click the Metronome button to the right of the Tempo, so that it illuminates. This will help us work out whether or not Live has warped the track correctly or not. Play the project back by hitting the Spacebar or clicking the Play button. We can hear that the track is playing at the correct speed, but Live hasn't placed the first downbeat correctly.
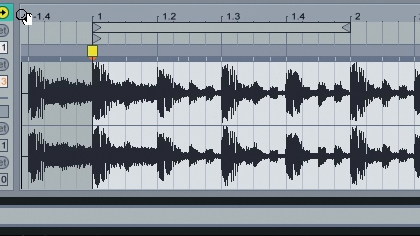
Step 7: Consequently, the higher metronome note that indicates the first beat of the bar is out of the sync with the track. Let's fix this. Drag above the waveform display in the sample editor to zoom in on the start of the track. You'll see that beat 1 on the timeline is aligned with the second beat of the track.
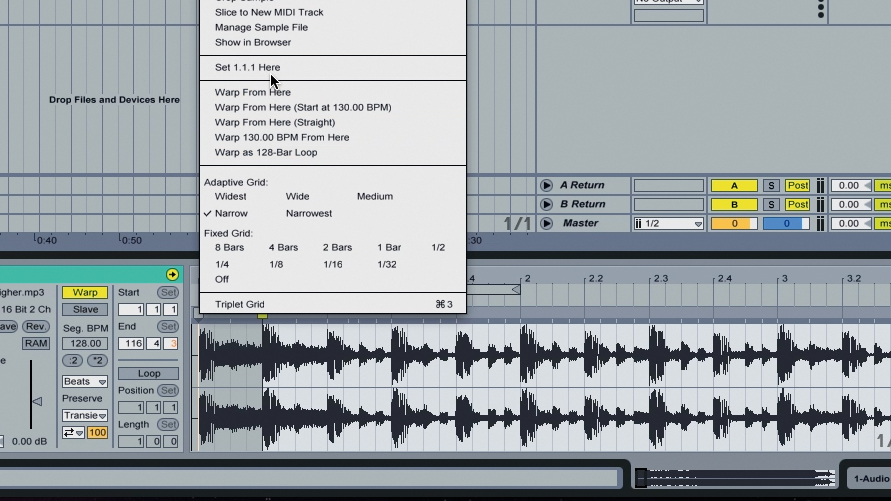
Step 8: Right-click the small grey triangle (a transient marker) above the first beat (at the extreme left of the waveform) and select Set 1.1.1 Here. Drag the transient marker above beat 1.2 to beat 1. The beats and the metronome should now be perfectly in sync.
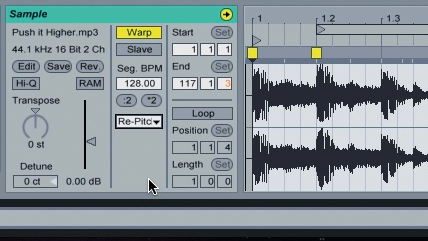
Step 9: Turn the metronome off. You might notice that the quality of the audio is a bit off. This is due to the timestretching being applied the track. We can remedy this by changing the Warp mode (currently set to Beats) to Re-pitch. This has the side effect of increasing the pitch of the track, which is now being resampled rather than timestretched.
Fixing warping problems
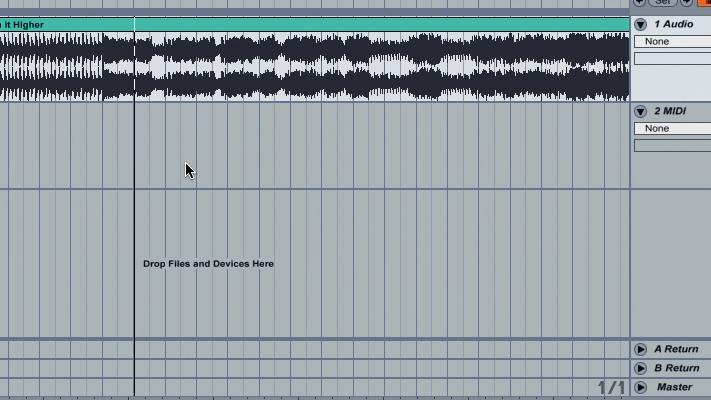
Step 10: We've warped the track, but if you listen to the breakdown section that starts at bar 9, you'll hear that the slight timing fluctuations caused by the warp markers make the pitch of the track inconsistent, resulting in a less than perfect-sounding vocal performance!
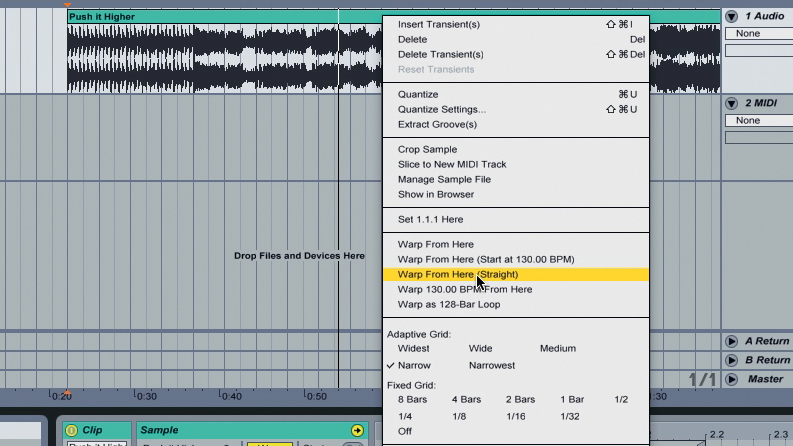
Step 11: That won't do at all, so we need to tighten up the warping manually. Right-click beat 1's warp marker and select Warp from Here (Straight). This warps the track from just a single warp marker, maintaining a fixed tempo throughout, which eliminates the pitch fluctuations. This only works with sequenced material that doesn't vary in tempo at all (which is fine for most modern dance tunes).
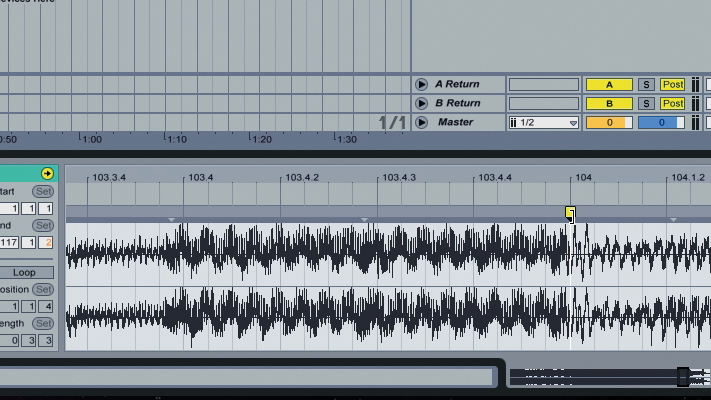
Step 12: To ensure the timing of the warp is correct and does not drift towards the end of the song, zoom in on bar 104, which is the last bar of the beat section, and drag the transient marker so that it sits exactly on beat 104. Turn on the metronome and play the track back. It's perfectly in time, with no dodgy-sounding tempo changes!
Computer Music magazine is the world’s best selling publication dedicated solely to making great music with your Mac or PC computer. Each issue it brings its lucky readers the best in cutting-edge tutorials, need-to-know, expert software reviews and even all the tools you actually need to make great music today, courtesy of our legendary CM Plugin Suite.
