How to EQ your mix bus: "Much like mix bus compression, it’s important to apply only the EQ that’s needed, rather than use it out of habit"
The mix bus provides the final stage to tweak your mix, and this month we look at how to EQ it effectively
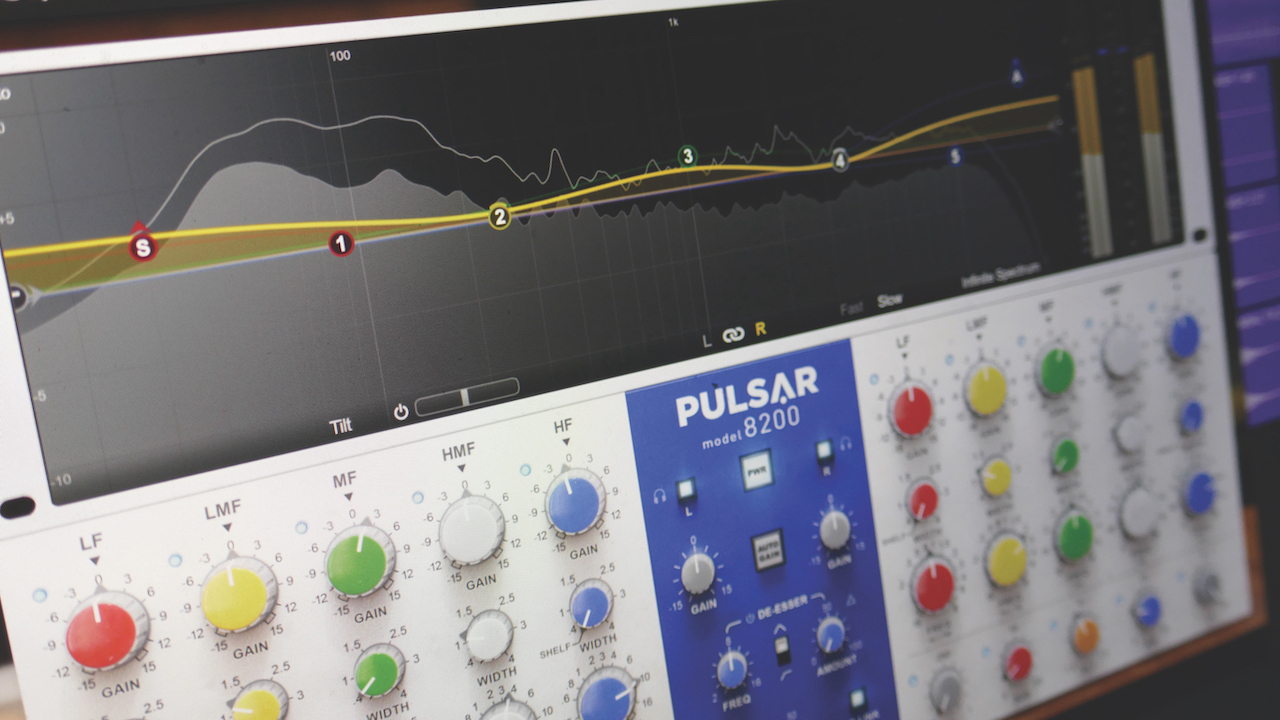
Processing the mix bus can form an important part of your mix, and using EQ is probably the most common treatment. That said, much like mix bus compression, it’s important to apply the EQ that’s needed, rather than use it out of habit.
When you’re mixing a track, you always have the option to adjust component tracks. This should always be your first approach, and is often more fruitful than applying excessive shaping to the overall stereo blend. Nevertheless, there’s something quite satisfying about sweetening your overall mix with some EQ, and that’s what we’ll tackle here.
Much like mix bus compression, mix bus EQ can be quite subtle, and although plugin choice may be less critical than compression, it certainly helps to be aware of the EQ curve shapes you’re applying. Analogue emulations can also play a part as they often add their own mojo to the mix in the form of subtle harmonic distortions. To that end, knowing how your different EQs behave can be important, and we discuss this in the Pro Tip below.
In this tutorial, we’ll look at how to set up your mix bus, showing you where to place the EQ, and then move onto various EQ treatments and how to use them.
How to EQ the mix bus
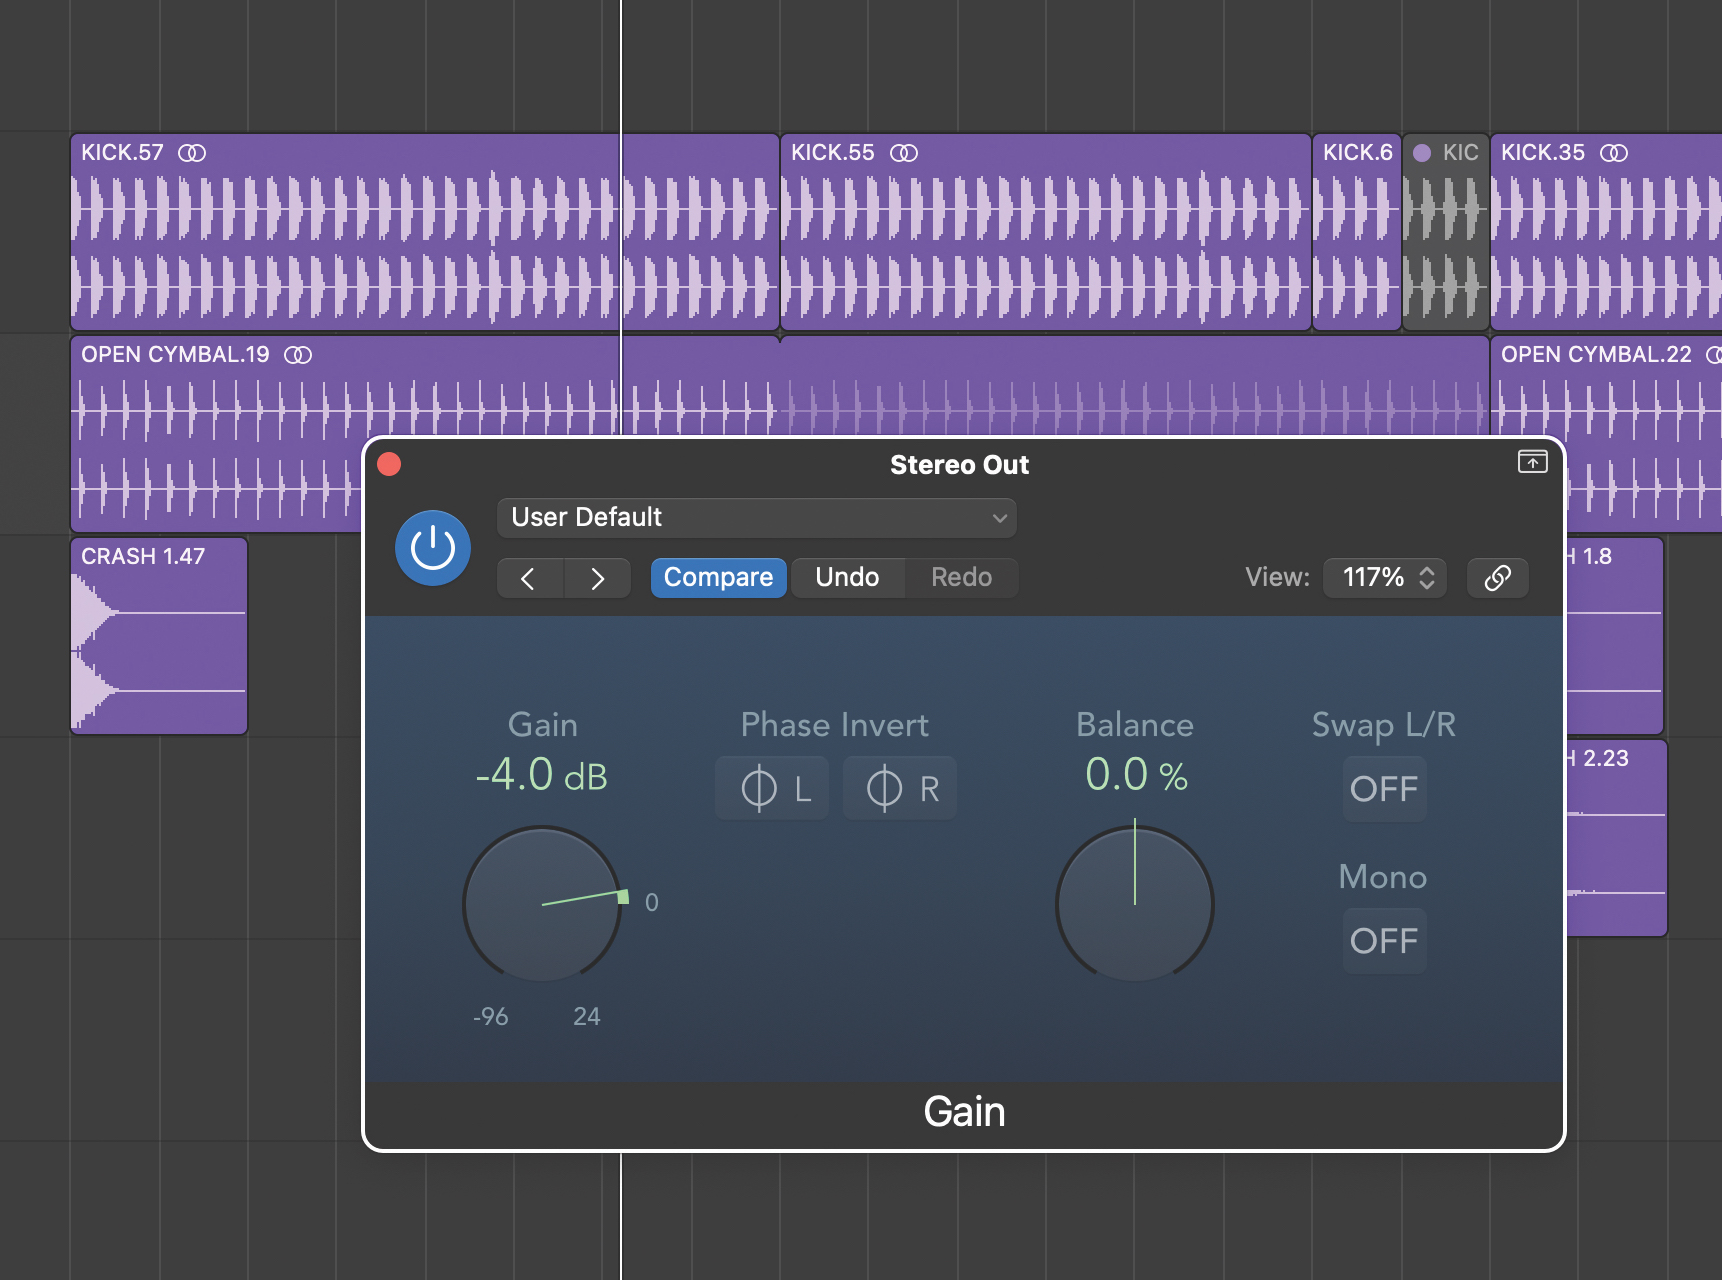
Managing levels is important in the mix bus so you can leave some margin for mastering but also accommodate hardware emulation plugins that may well have subtle level-dependent behaviours. To cover these eventualities, whenever you’re setting up mix bus processing, we suggest you place a gain plugin at the start of your chain.
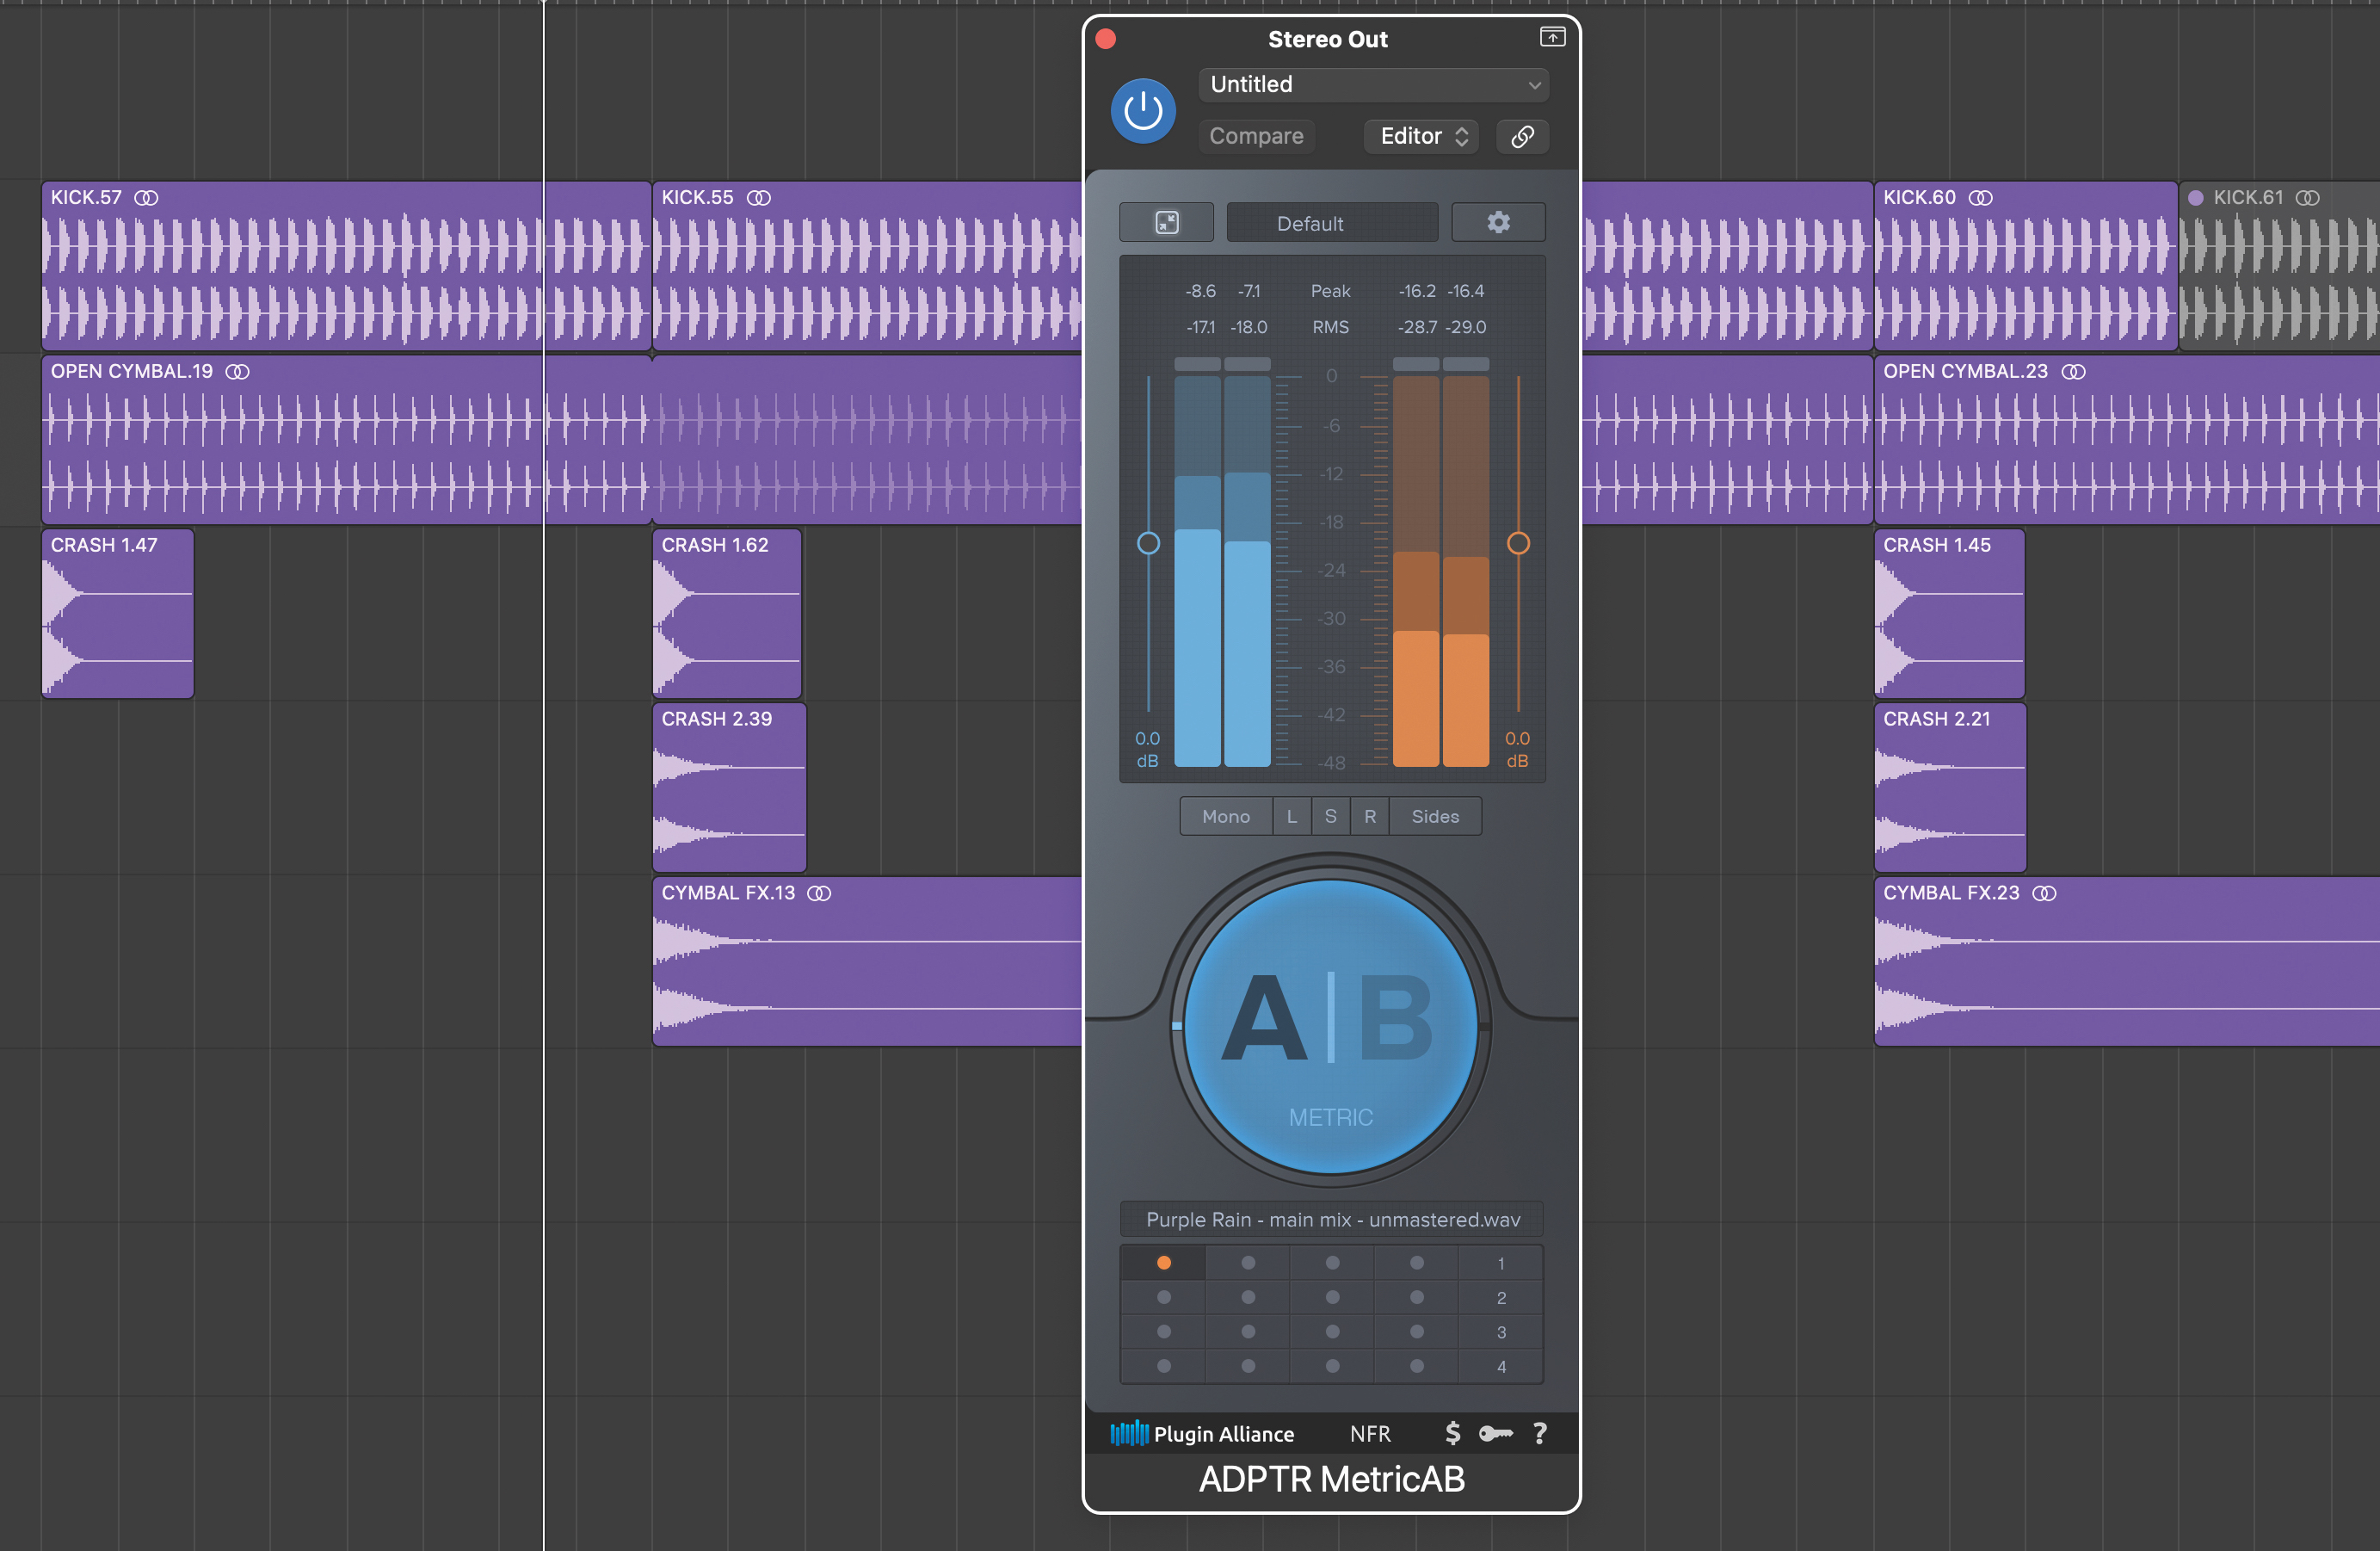
Mixing often involves some element of comparison, either with other tracks you’ve mixed or with finished masters. Using some kind of A/Bing plugin can be particularly helpful with overall EQ and helps compare mixes at comparable levels. We’ve placed our plugin right at the end, leaving some free slots for other processors.
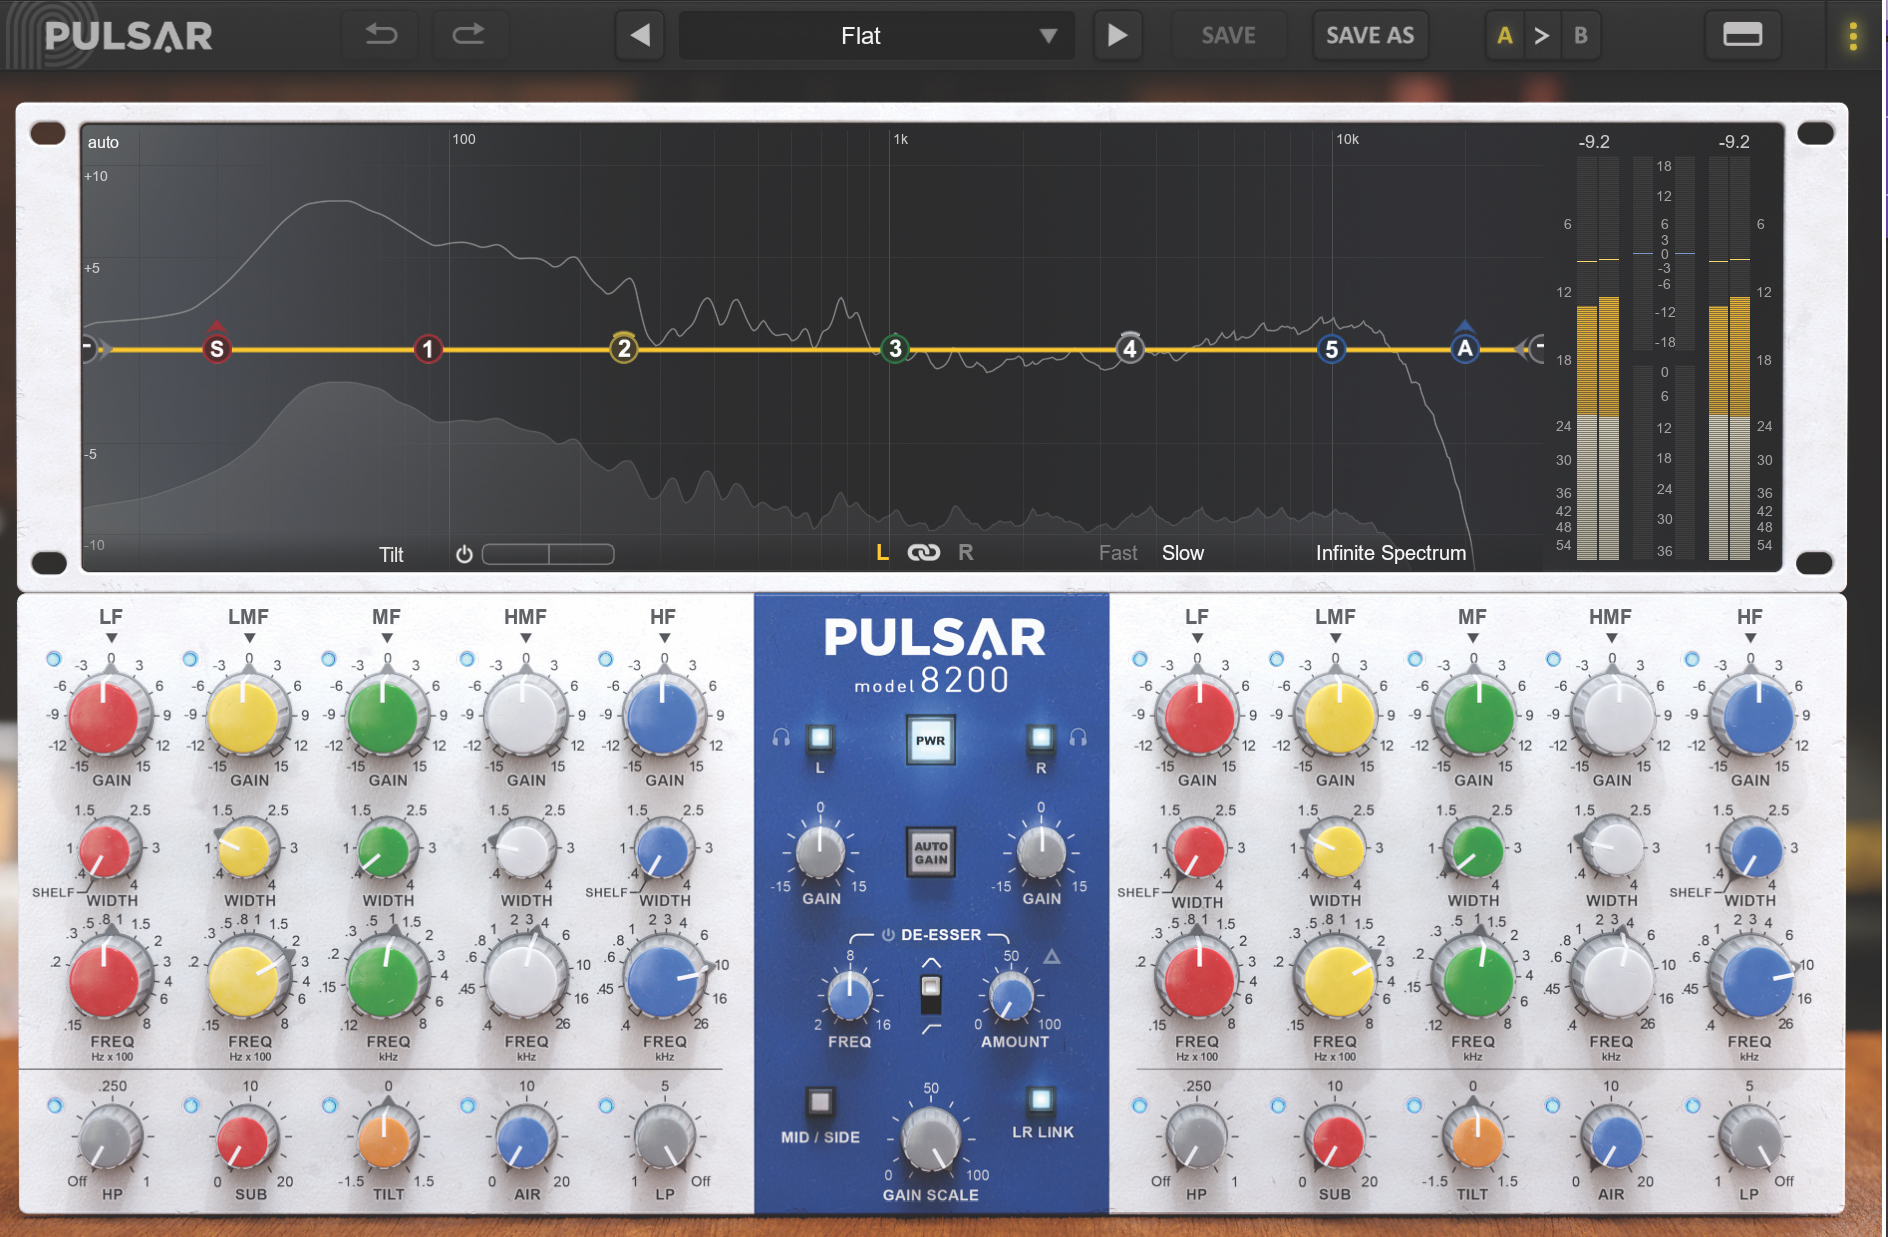
Adding mix bus EQ too early in your mix process can be confusing. Unlike compression, where mixing into the compressor can be beneficial from an early stage, EQ is best added from the mid stage onwards, and certainly after major EQ changes have been made to individual sounds.
Want all the hottest music and gear news, reviews, deals, features and more, direct to your inbox? Sign up here.
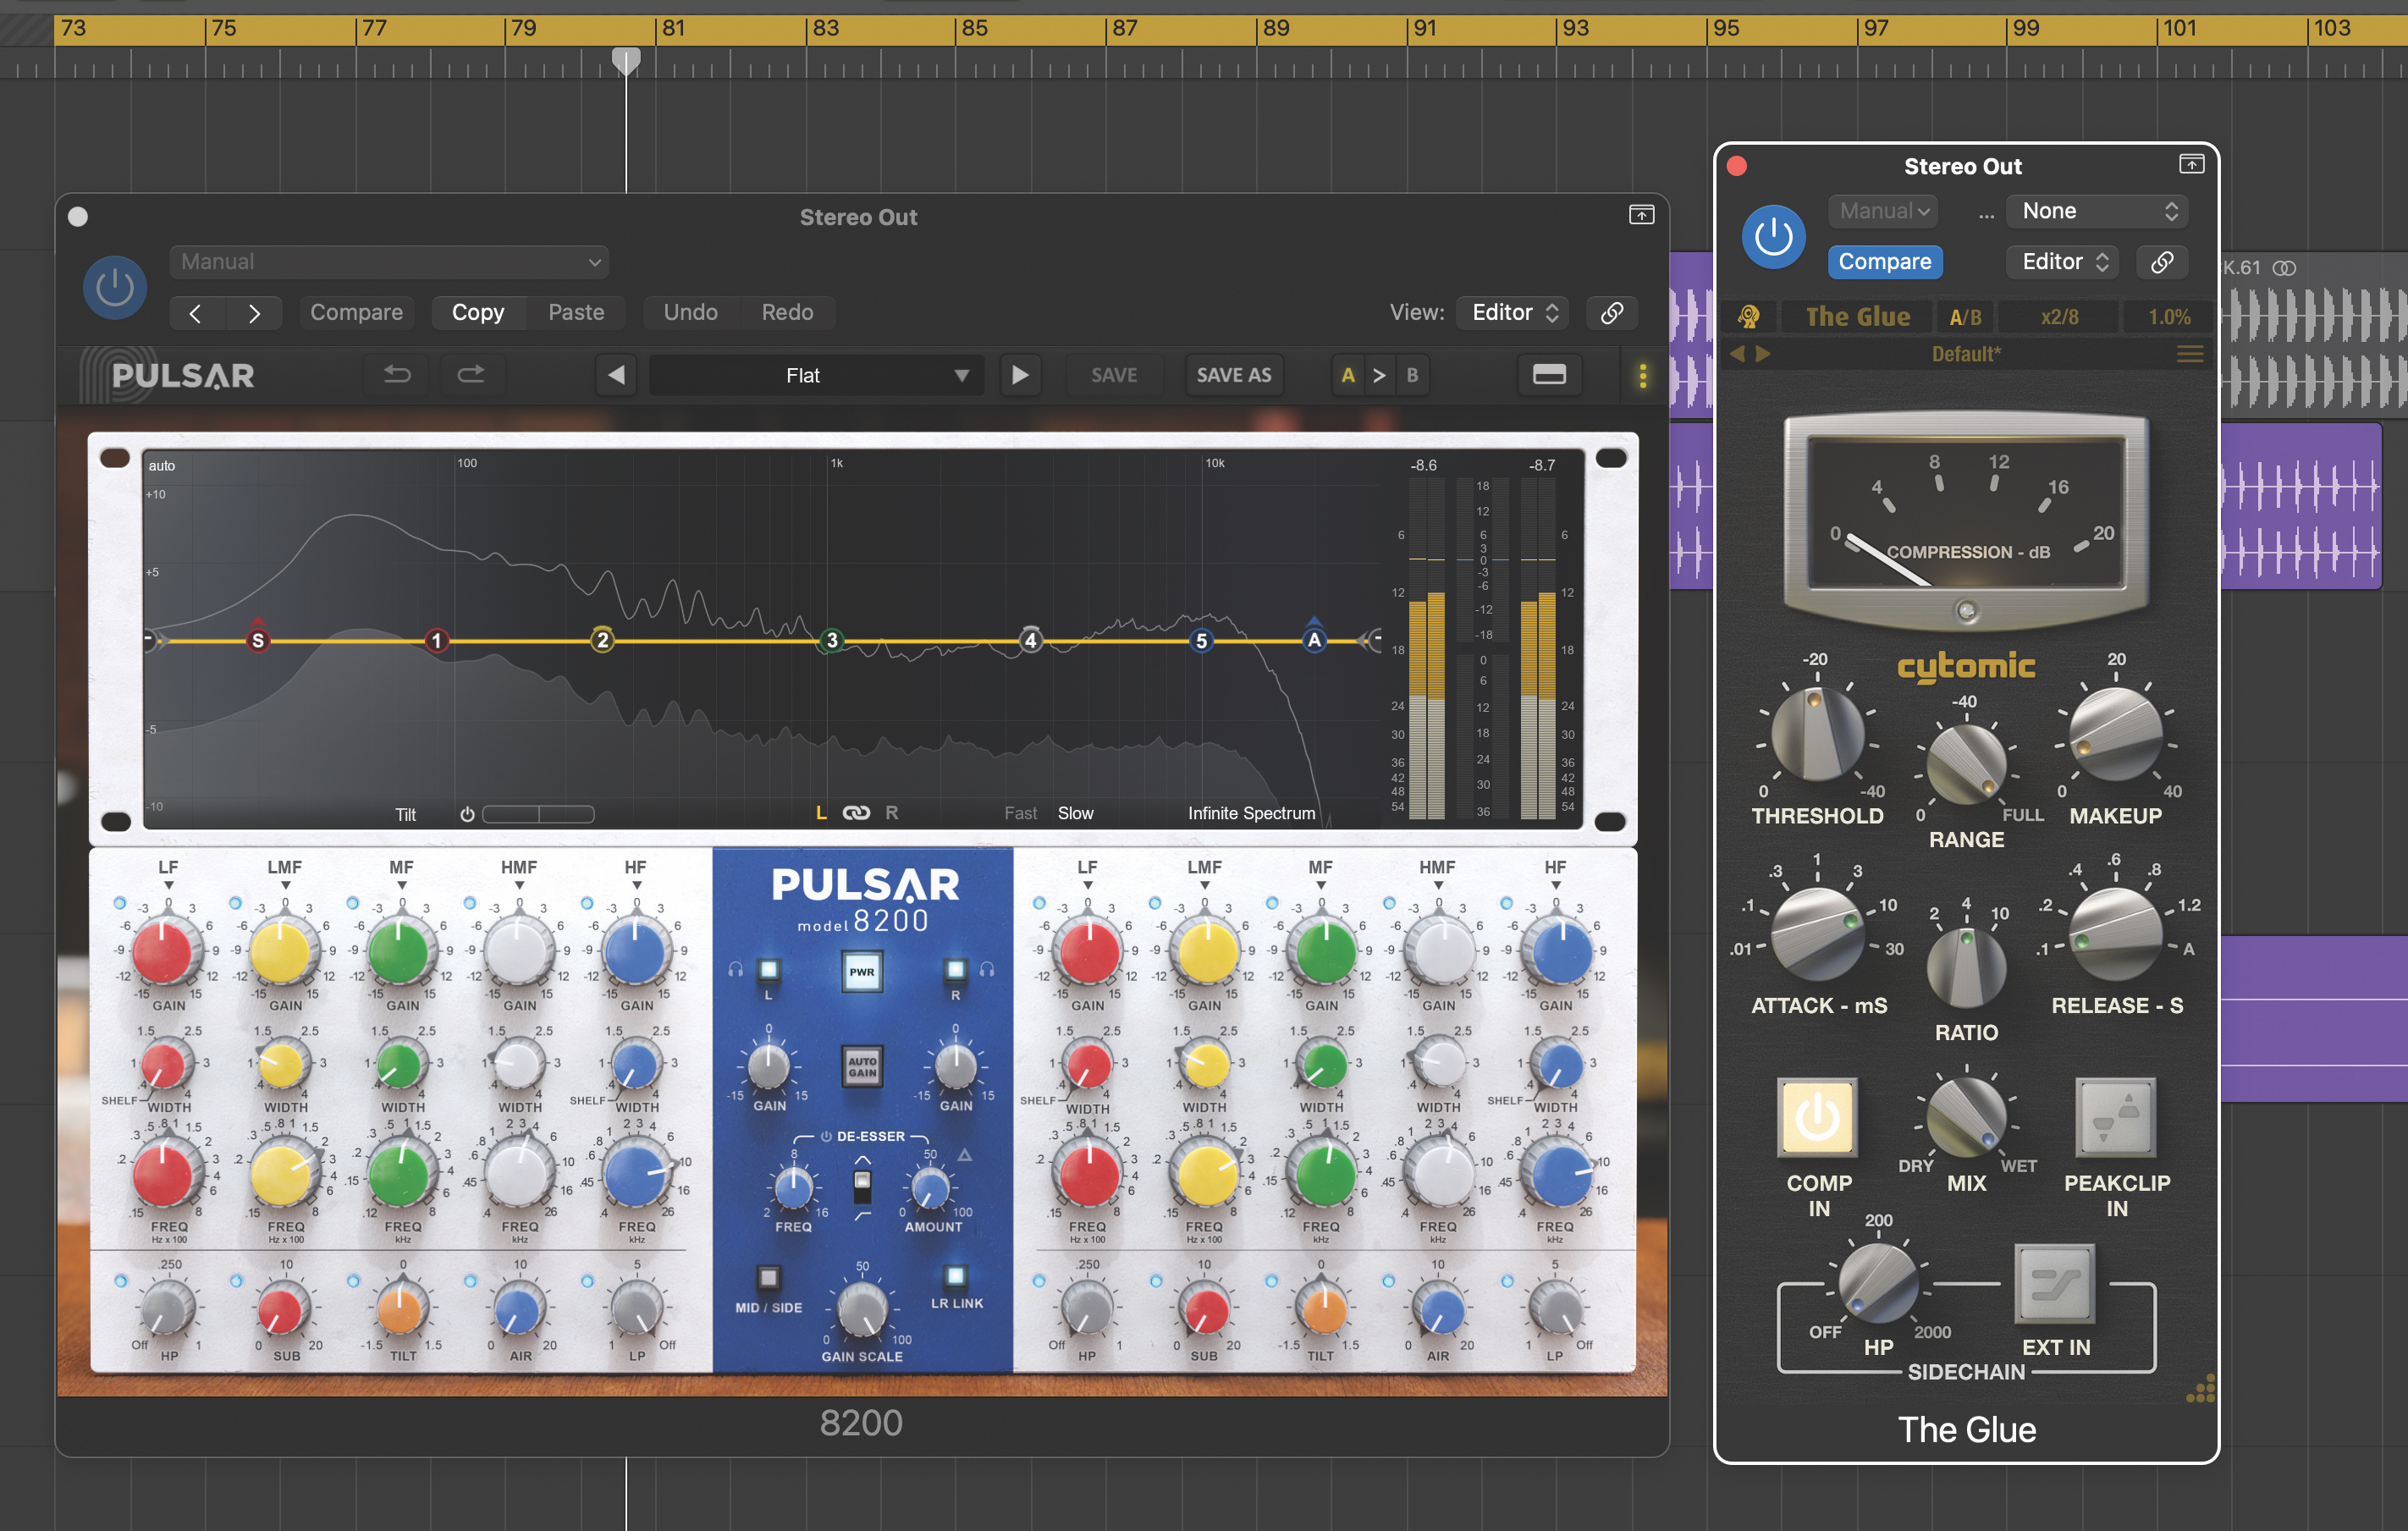
The next decision we need to make is where to place the EQ in the mix bus chain. There is no single answer to this and it’s always worth remembering that anything placed after the EQ, such as a compressor, could be affected by it. That said, EQ before the compressor is commonplace, and that’s what we’re doing here.
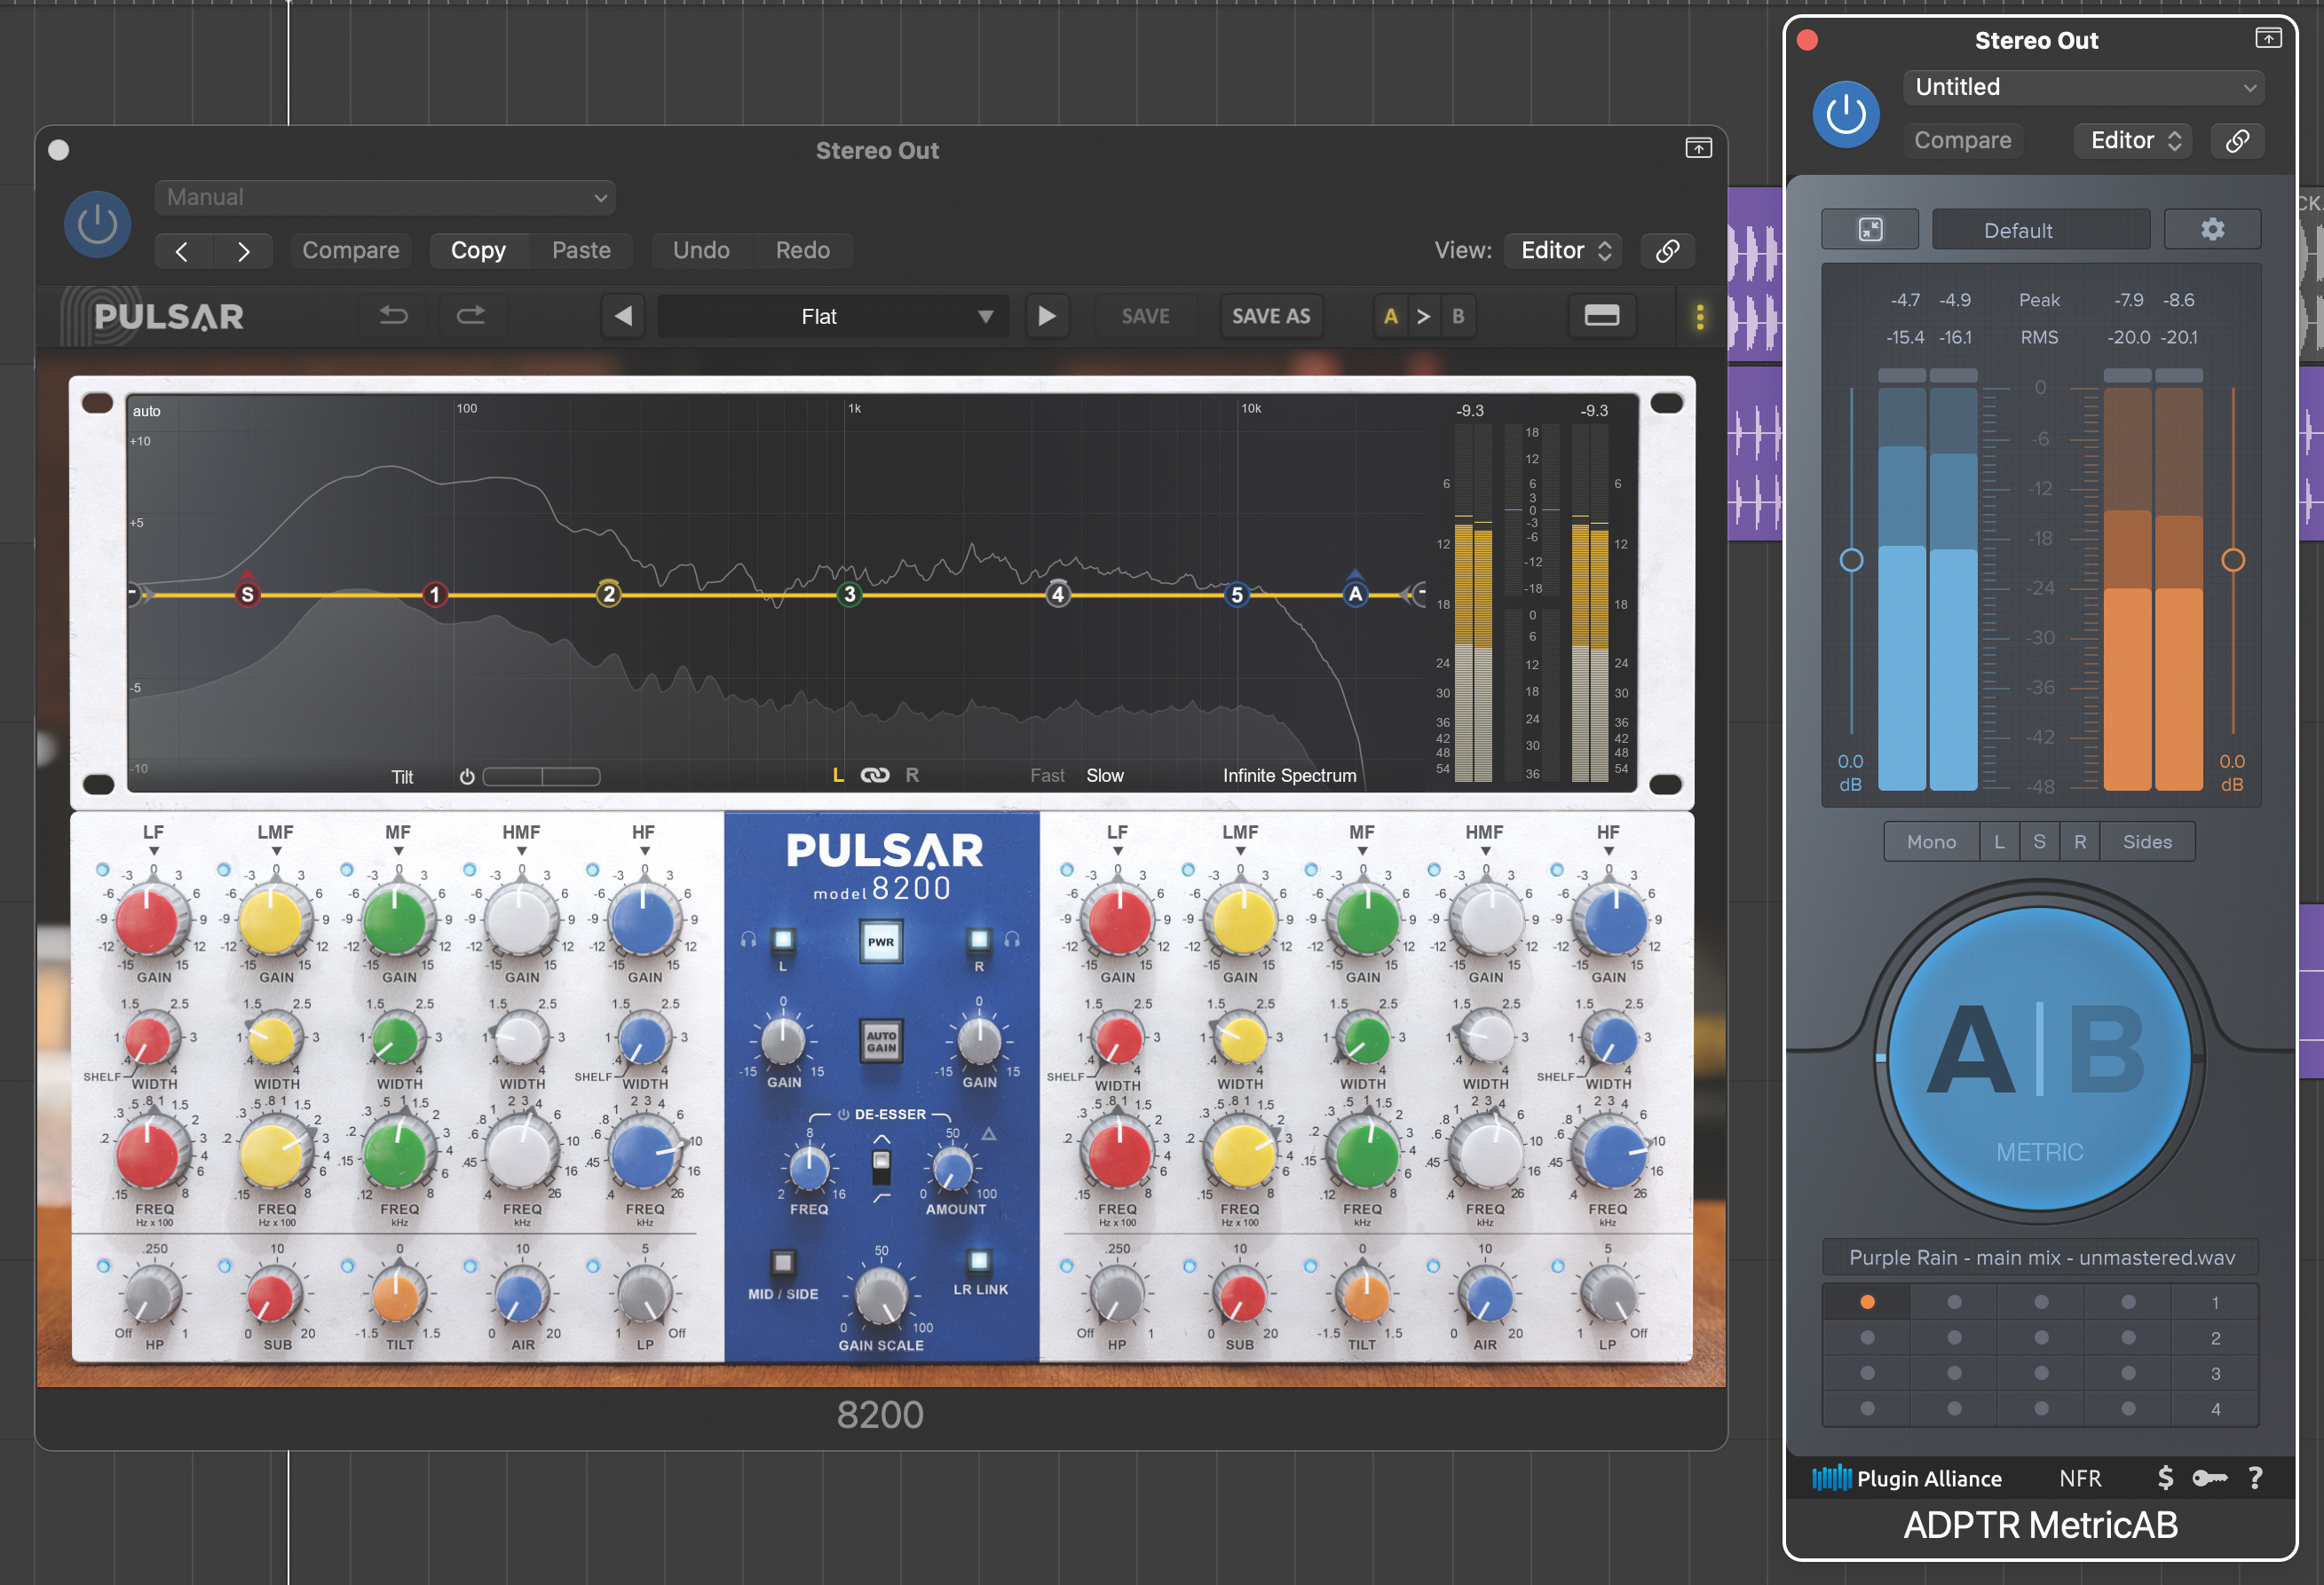
One of the hardest aspects to judge when you’re deep in a mix is the overall brightness and weight. Looking at the top end first, it’s common to add some overall air and sheen across the whole mix, as a pre-mastering process. Nevertheless, this needs to be approached with some care, A/Bing as suggested in step 2.
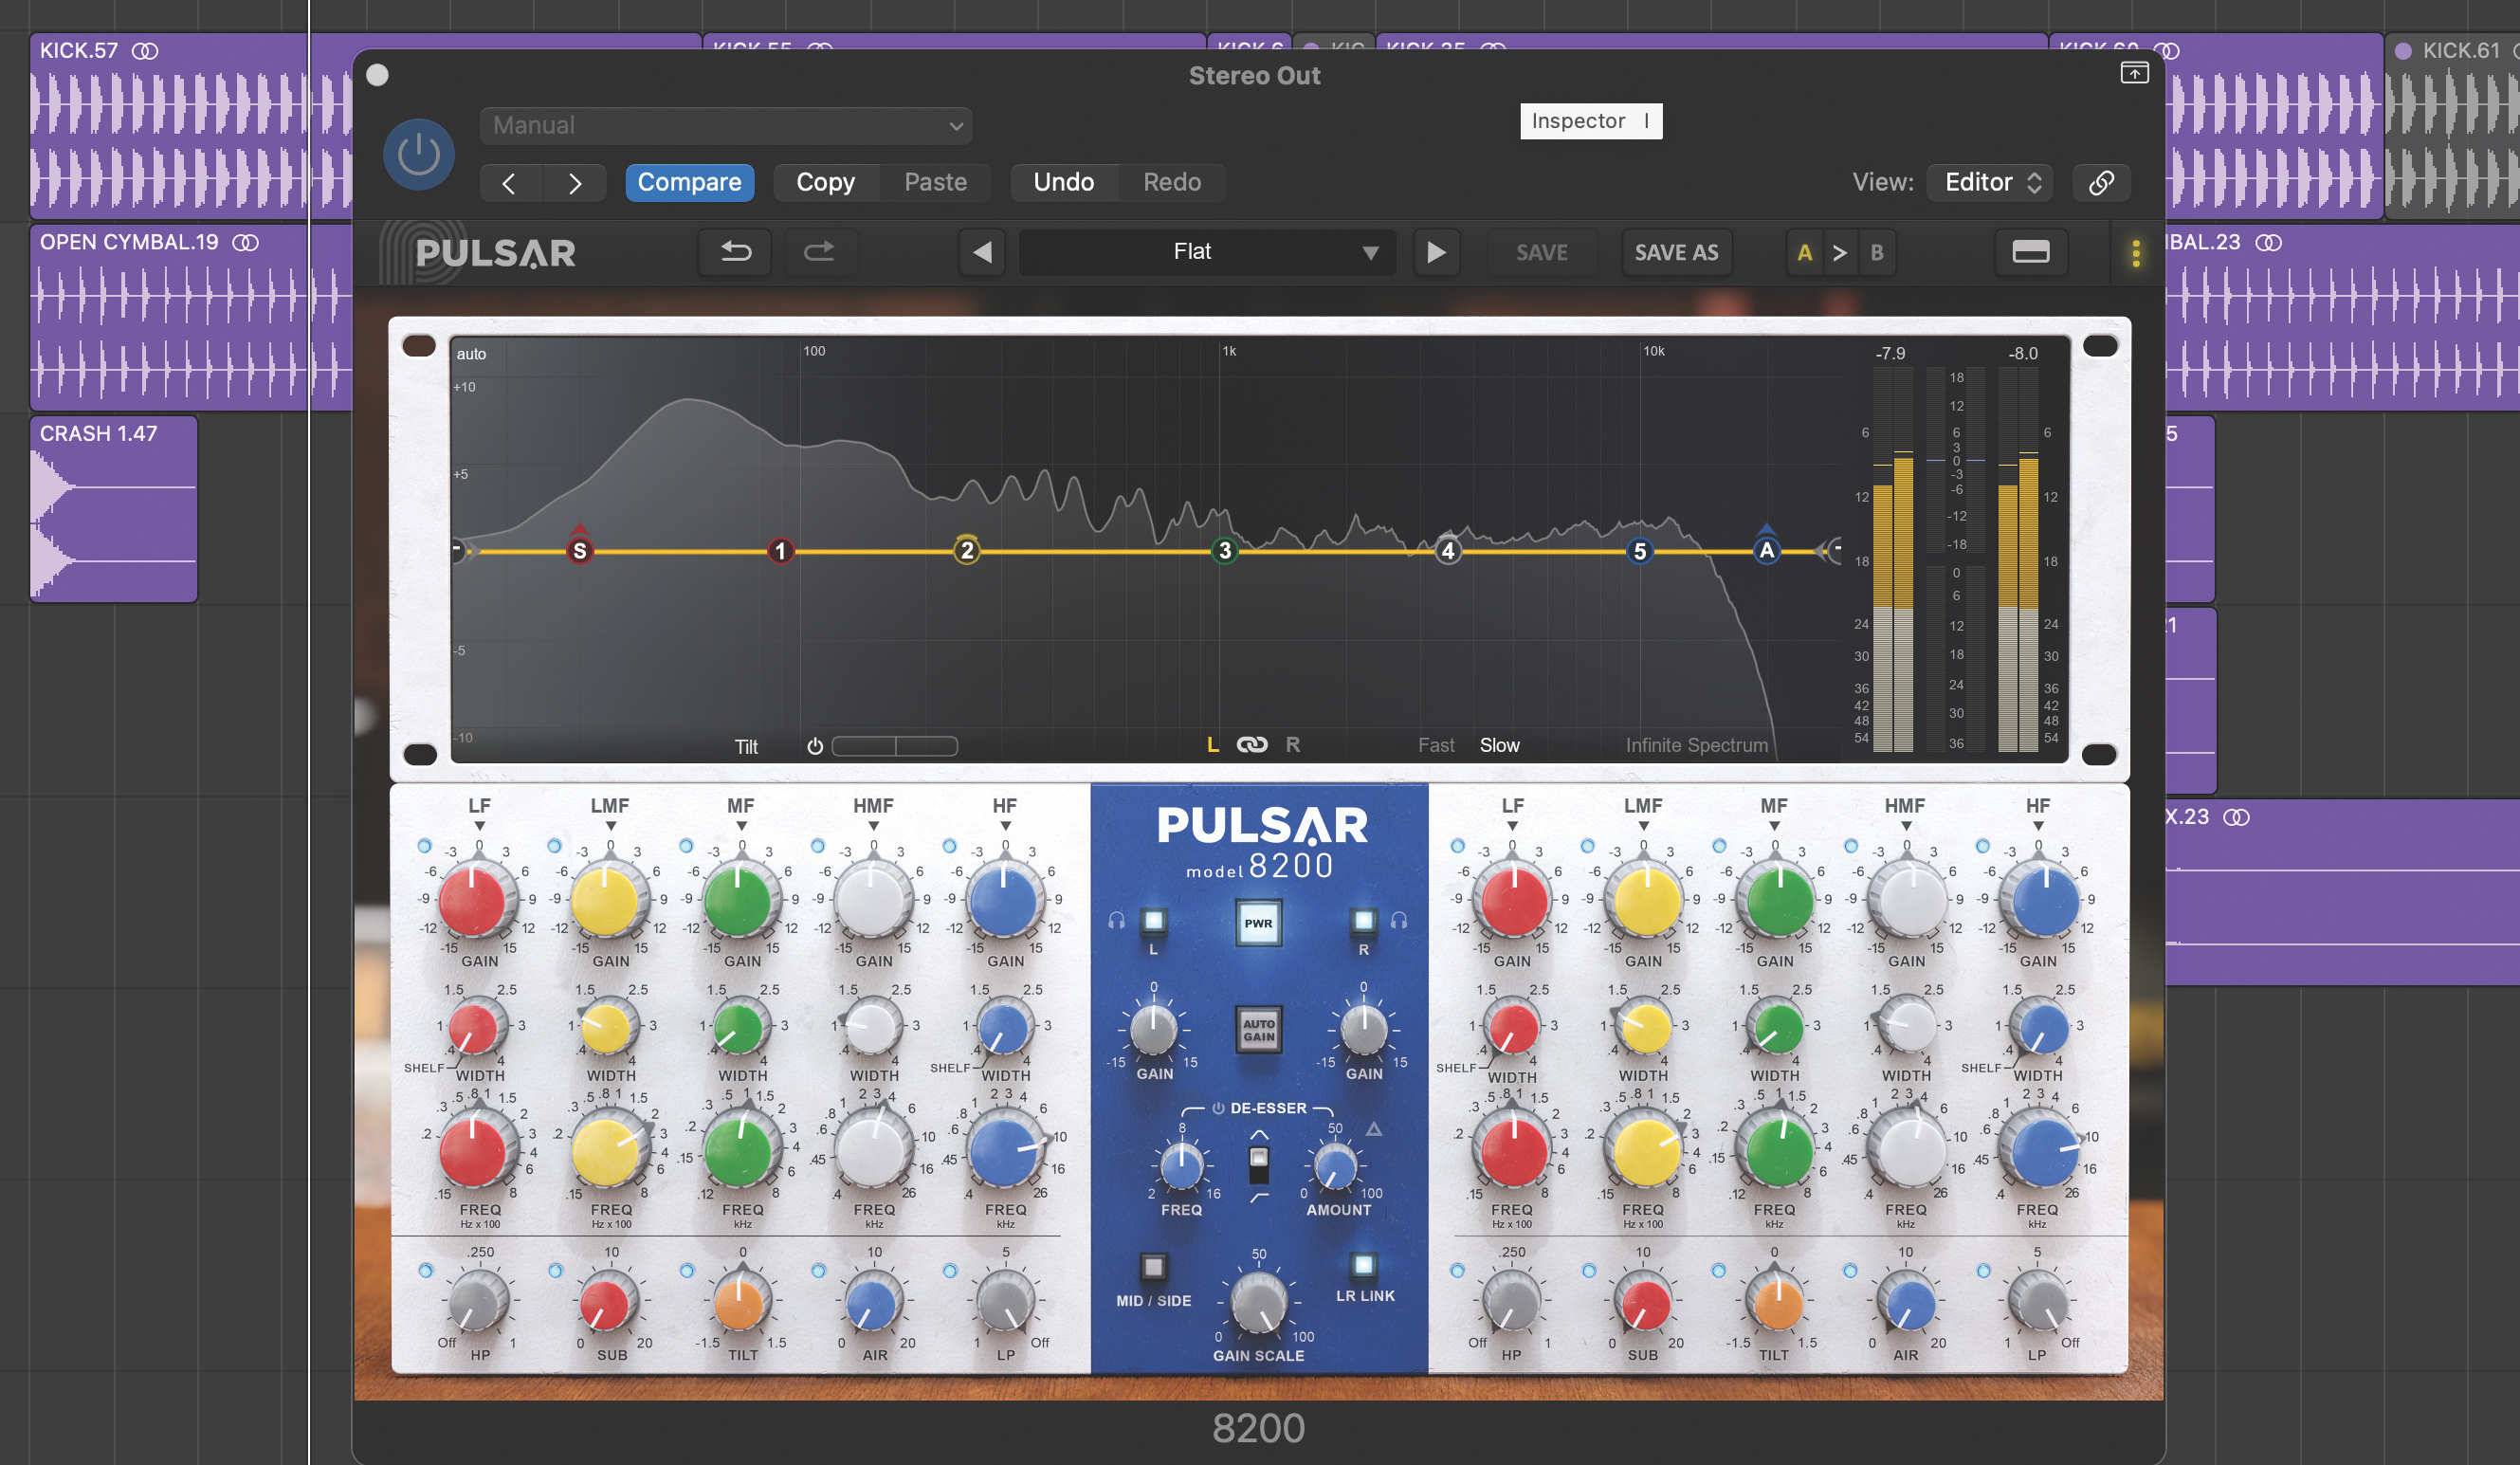
When it comes to EQ choice, if you have a mastering style processor or classic emulation (such as Pulsar’s 8200), then that’s great. That said, many stock DAW EQs have enough options. The most important thing is understanding what your particular mix needs and what shape EQ will deliver this.
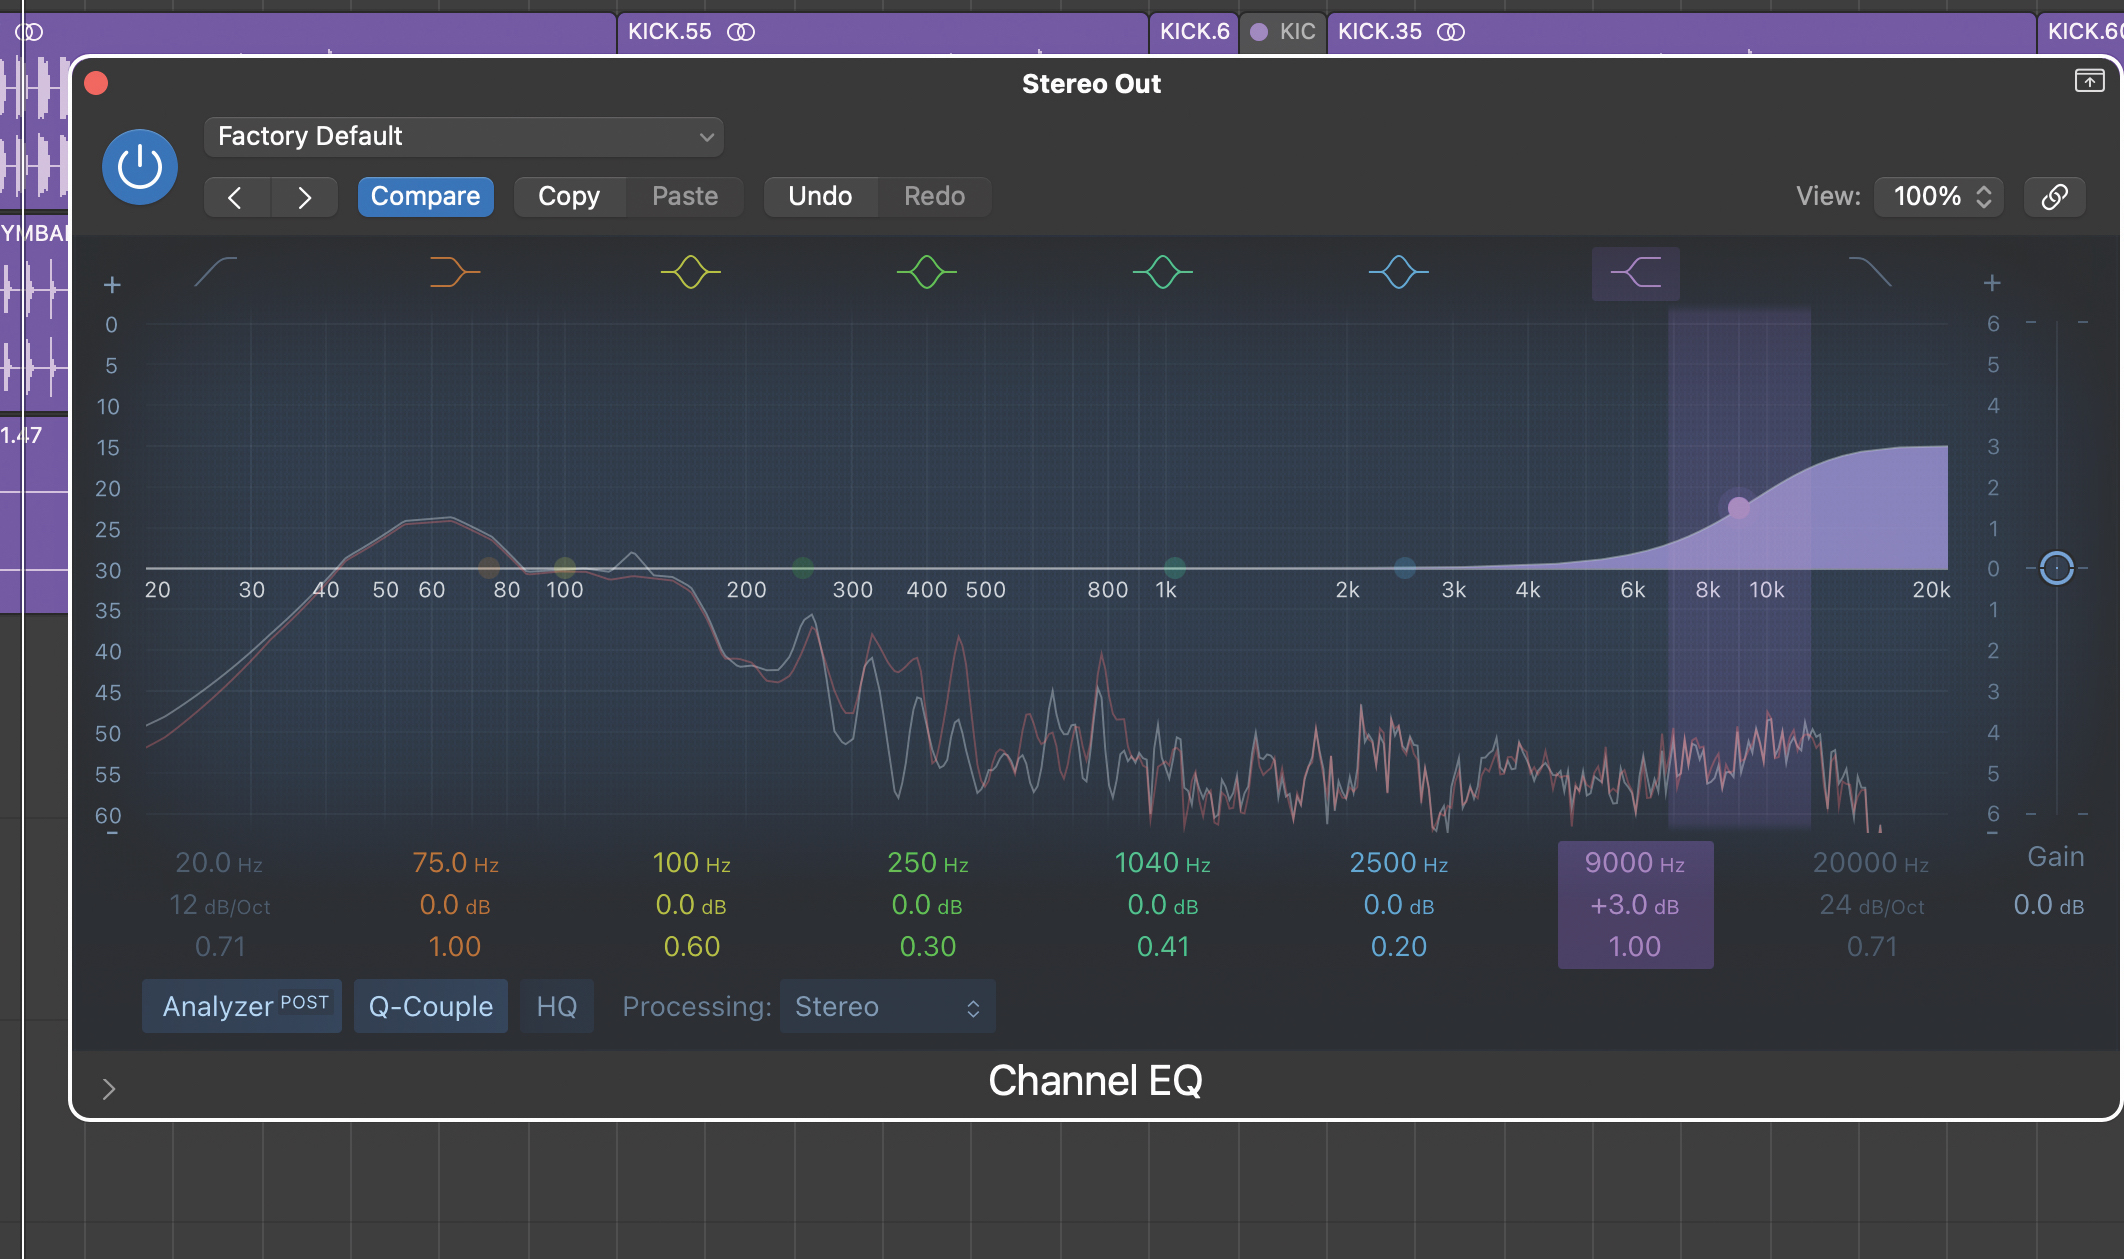
For gentle sweetening, the most obvious choice is a shelving design, as this will boost the top end and continue to add air into the higher frequencies. We’re using a stock EQ and have set the frequency to about 9 kHz. Boosting a few dB achieves the aim, and you’ll see with the default Q settings the shape is pretty gentle and sounds natural.
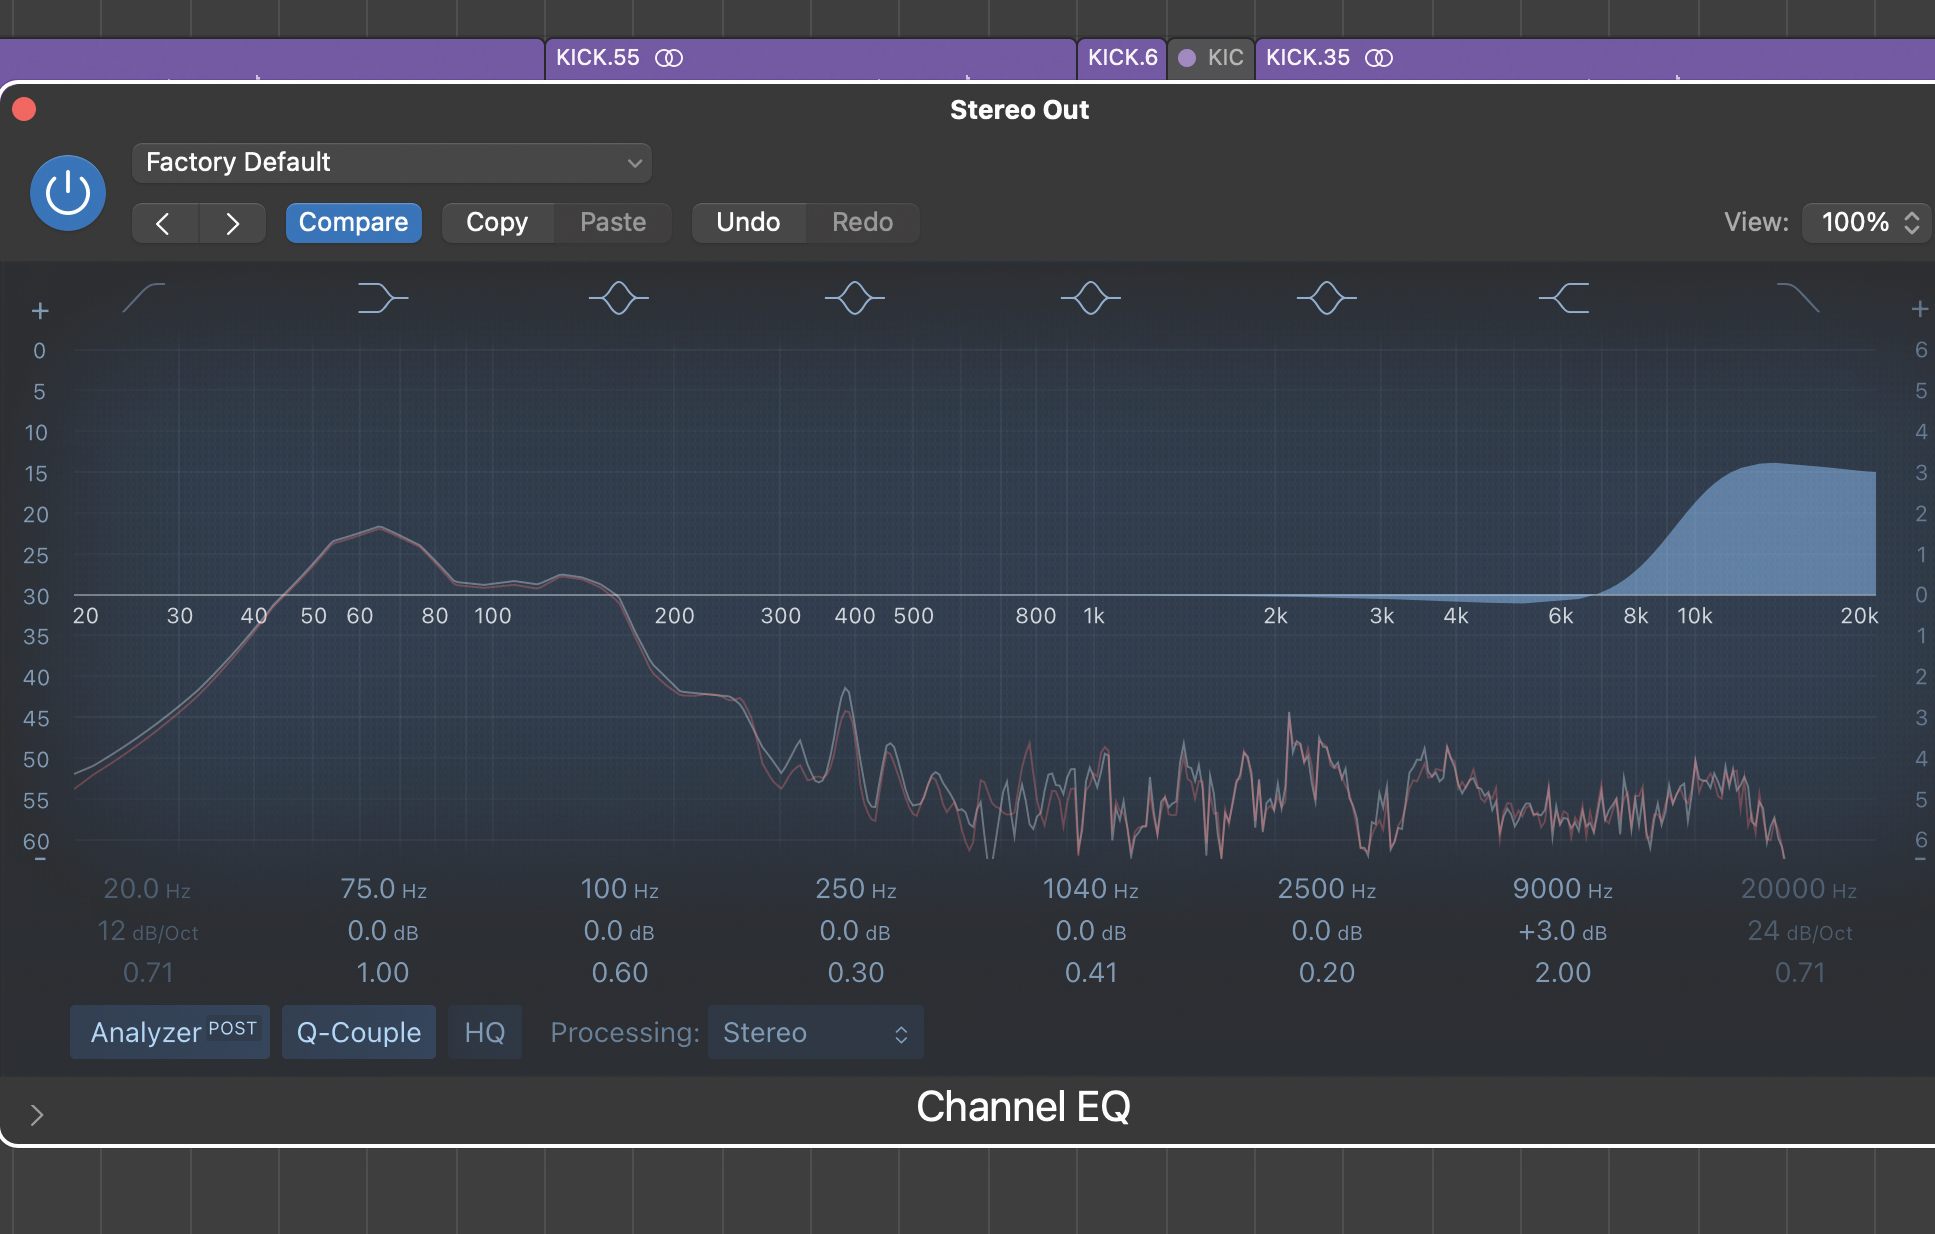
This shape boosts from about 5 kHz upwards, and if the upper mid range is already busy then this may not be desirable. Try a different shape by increasing the Q to create a steeper onset. At the highest Q settings we can even introduce a small dip or ‘undershoot’ before the boost, softening the high mids and adding air.
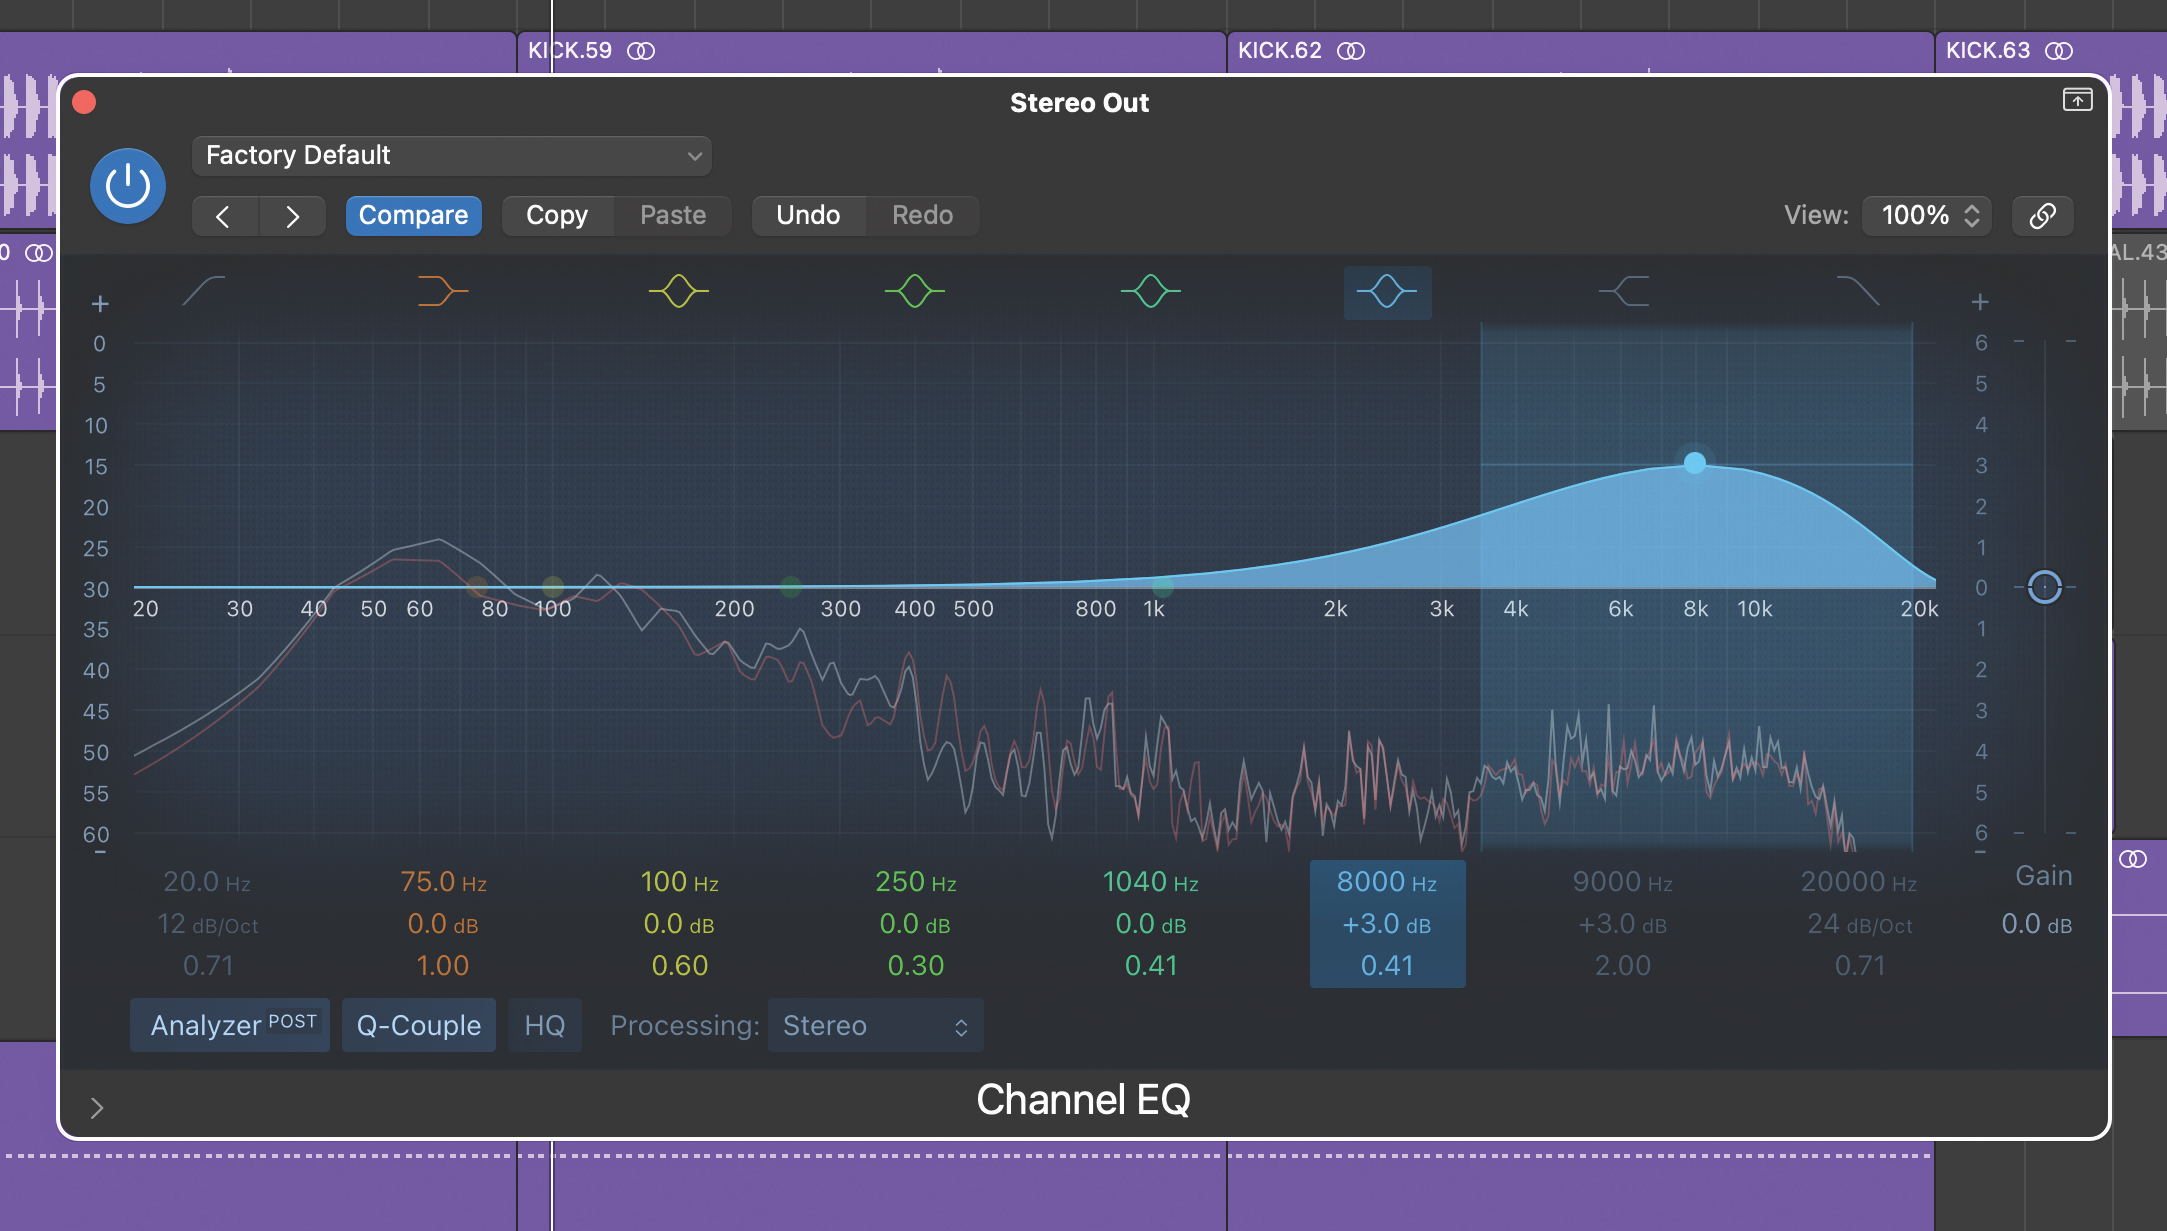
Alternatively, we don’t have to use a shelf at all. If the upper mids and highs all need something extra, a broad bell shape works very well, allowing us to add quite a lot of lift (we’re adding 3dB here at 8 kHz), without unnecessarily boosting the very high frequencies.
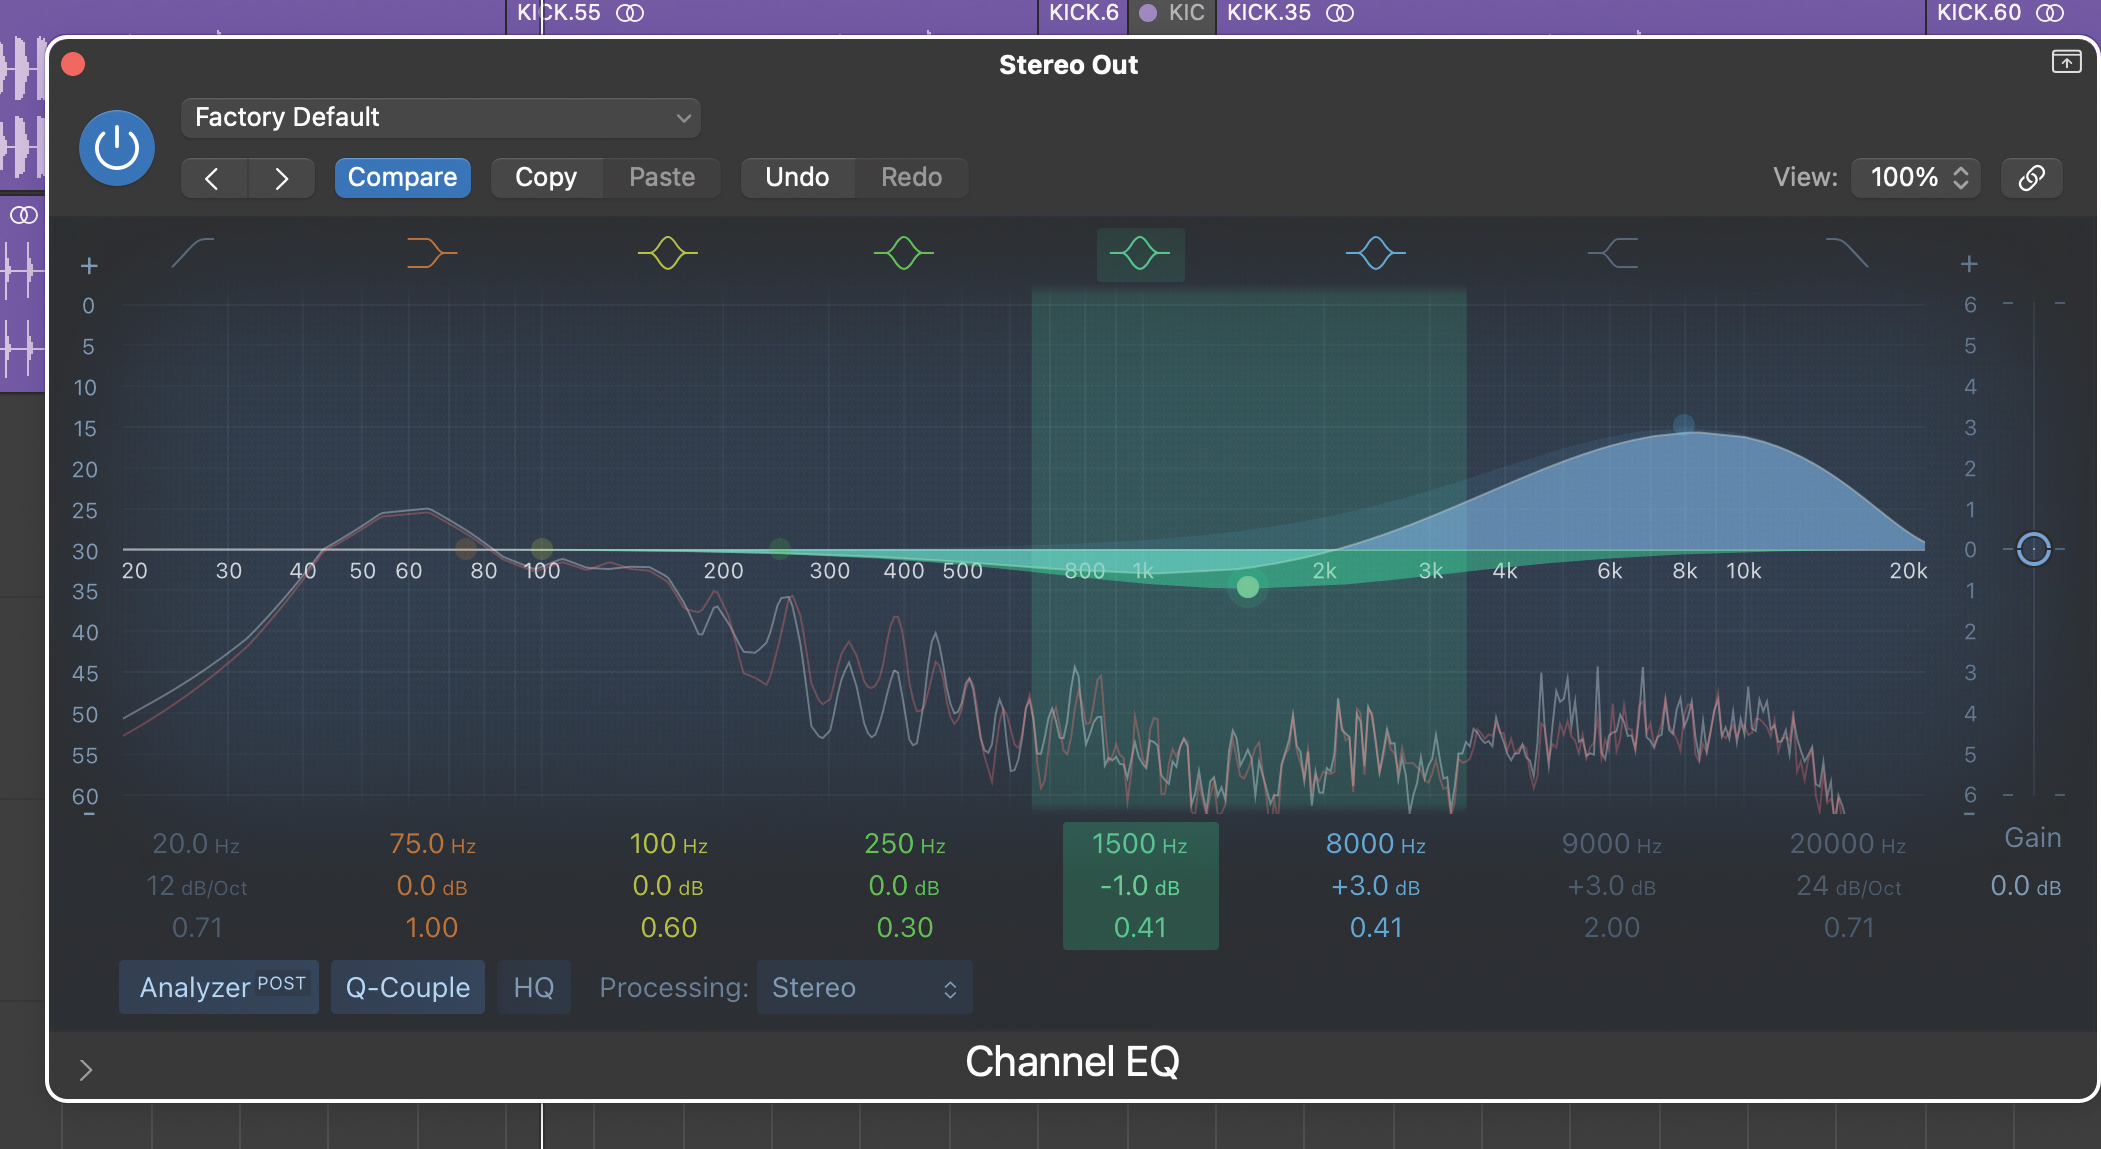
The mid range of a mix is all important and it’s always wise to work on individual components first. That said, if the overall mix is lacking presence or is too aggressive in the mid range, then a 1-to-2dB boost or cut can sort things. Start by trying a peak shape with broad Q around 1 to 3 kHz.
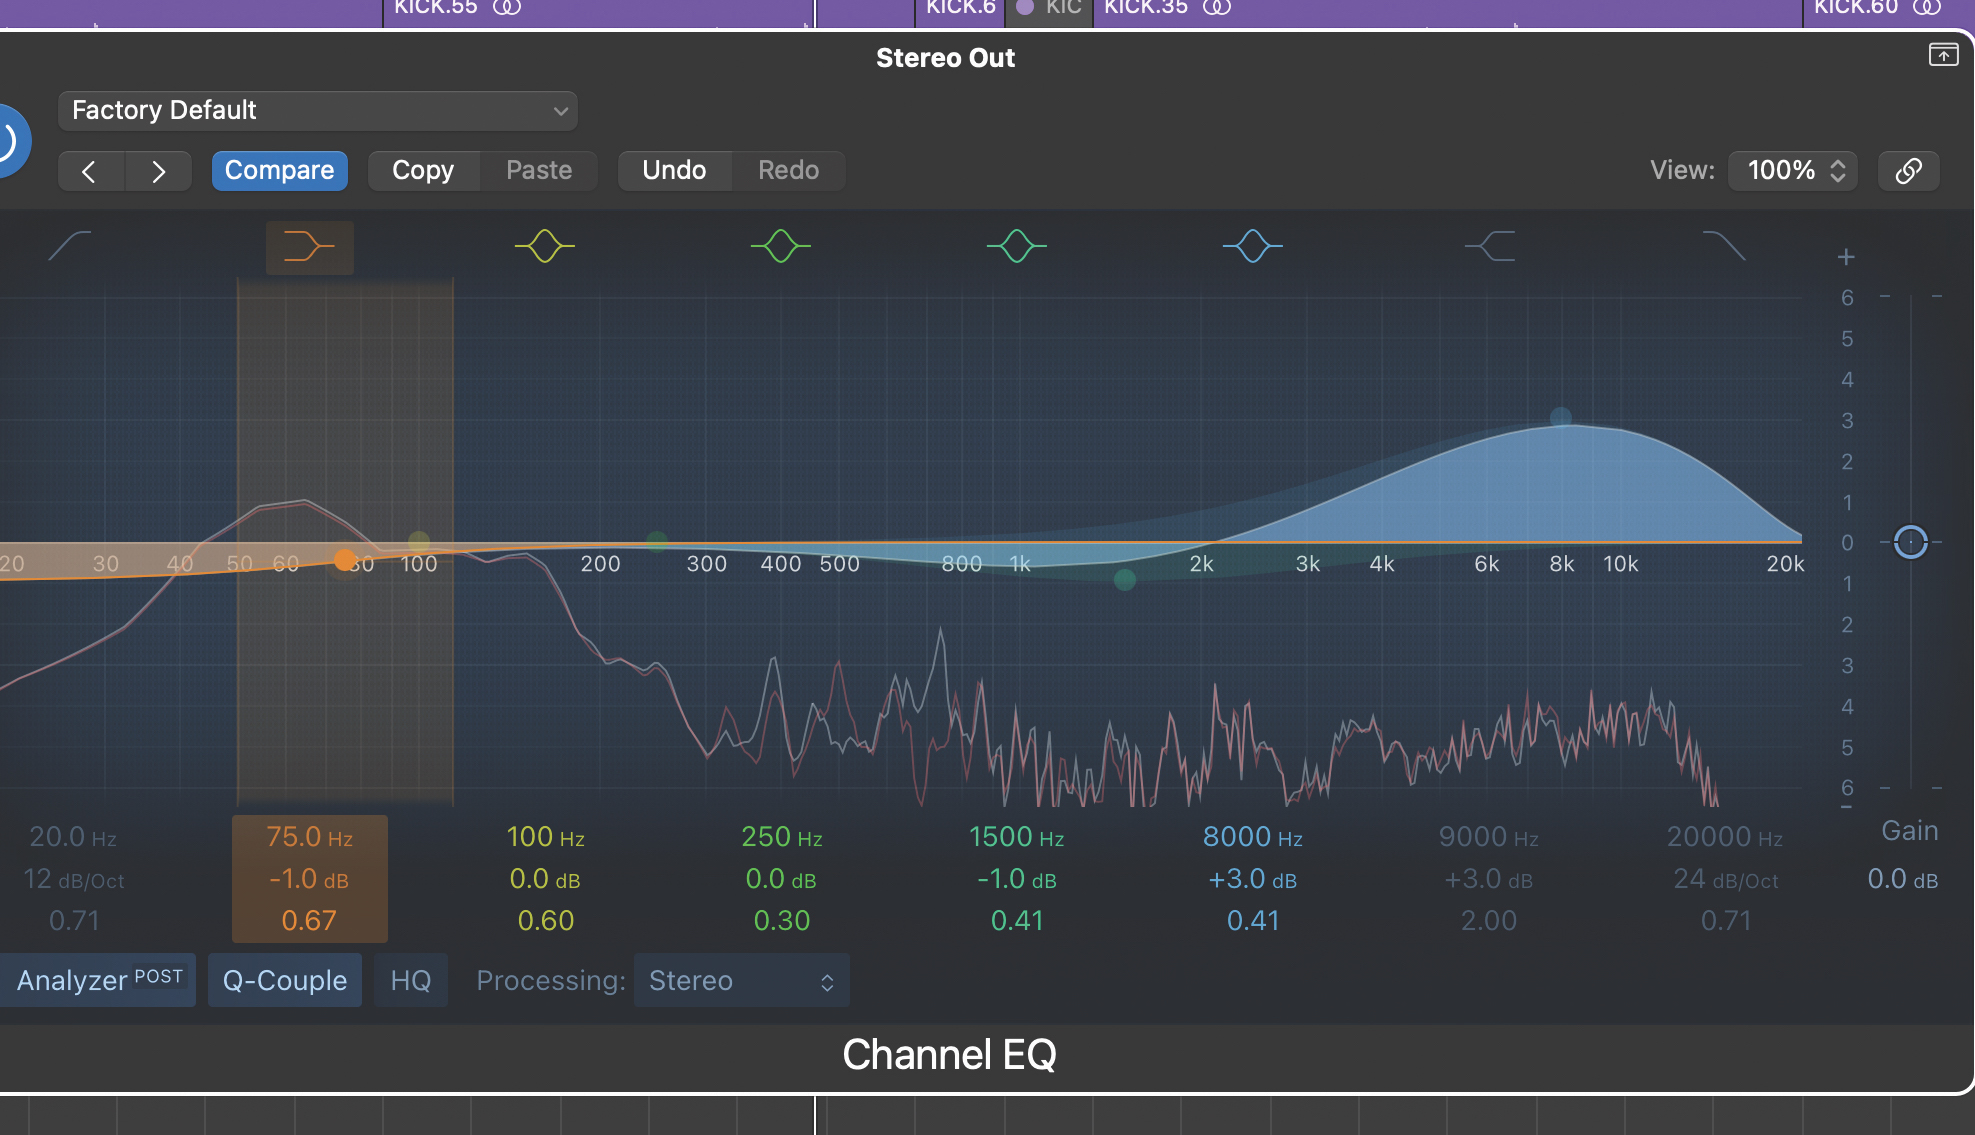
Any major low frequency issues should be addressed at source, and mix bus EQ simply used to gently lift or reduce the low end. Much like the high frequency process, choose a shape that works by adjusting the shelf slope or peak width to influence how much the surrounding frequencies are affected.
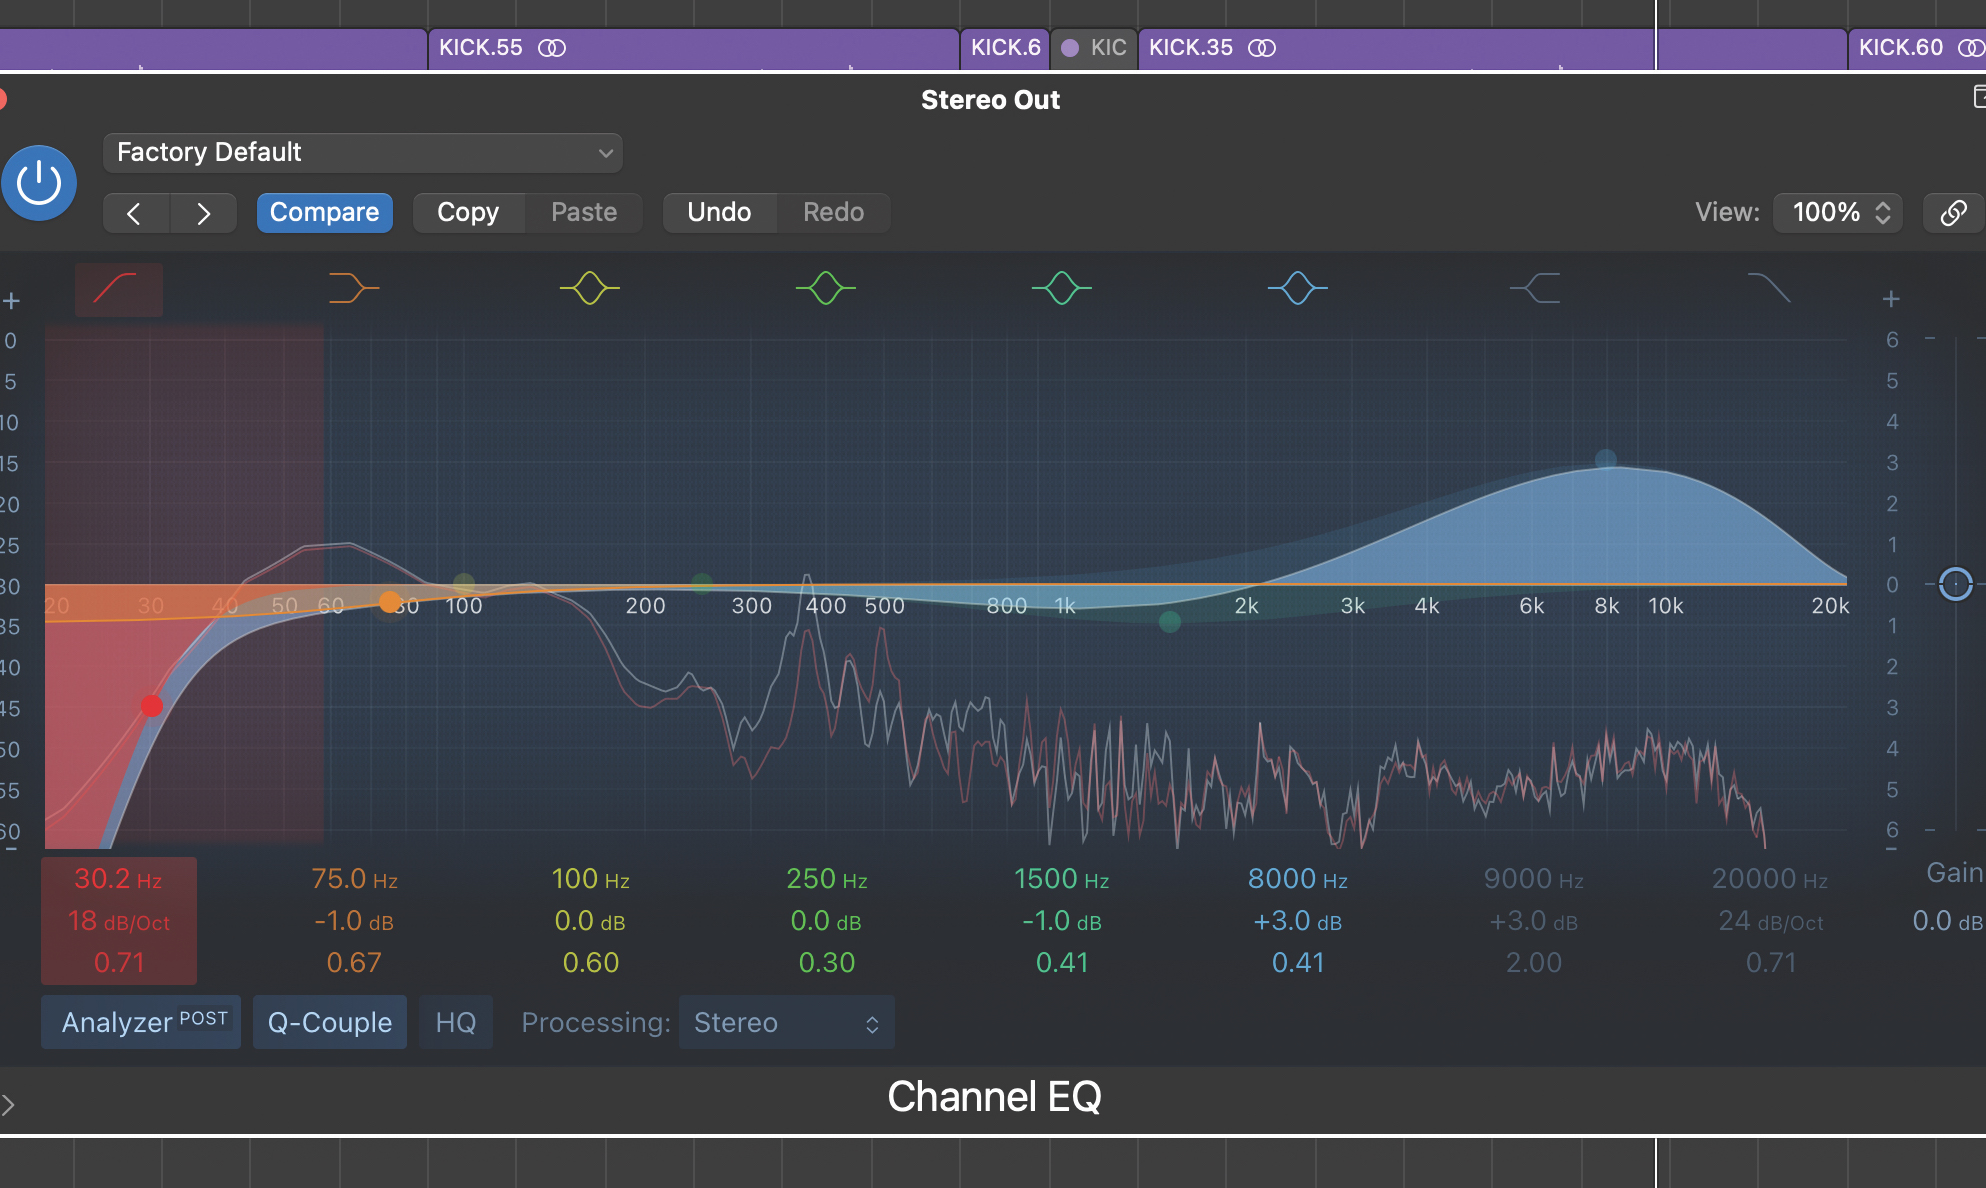
Finally, we can use the mix bus EQ to filter off any excess sub frequencies and this should help with any following mix bus processing such as compression. In order to do this you’ll need reliable monitoring such as a subwoofer, or be able to interpret a frequency analyser. We’ve used a 12dB/octave high pass filter at about 30 Hz.
Pro tip
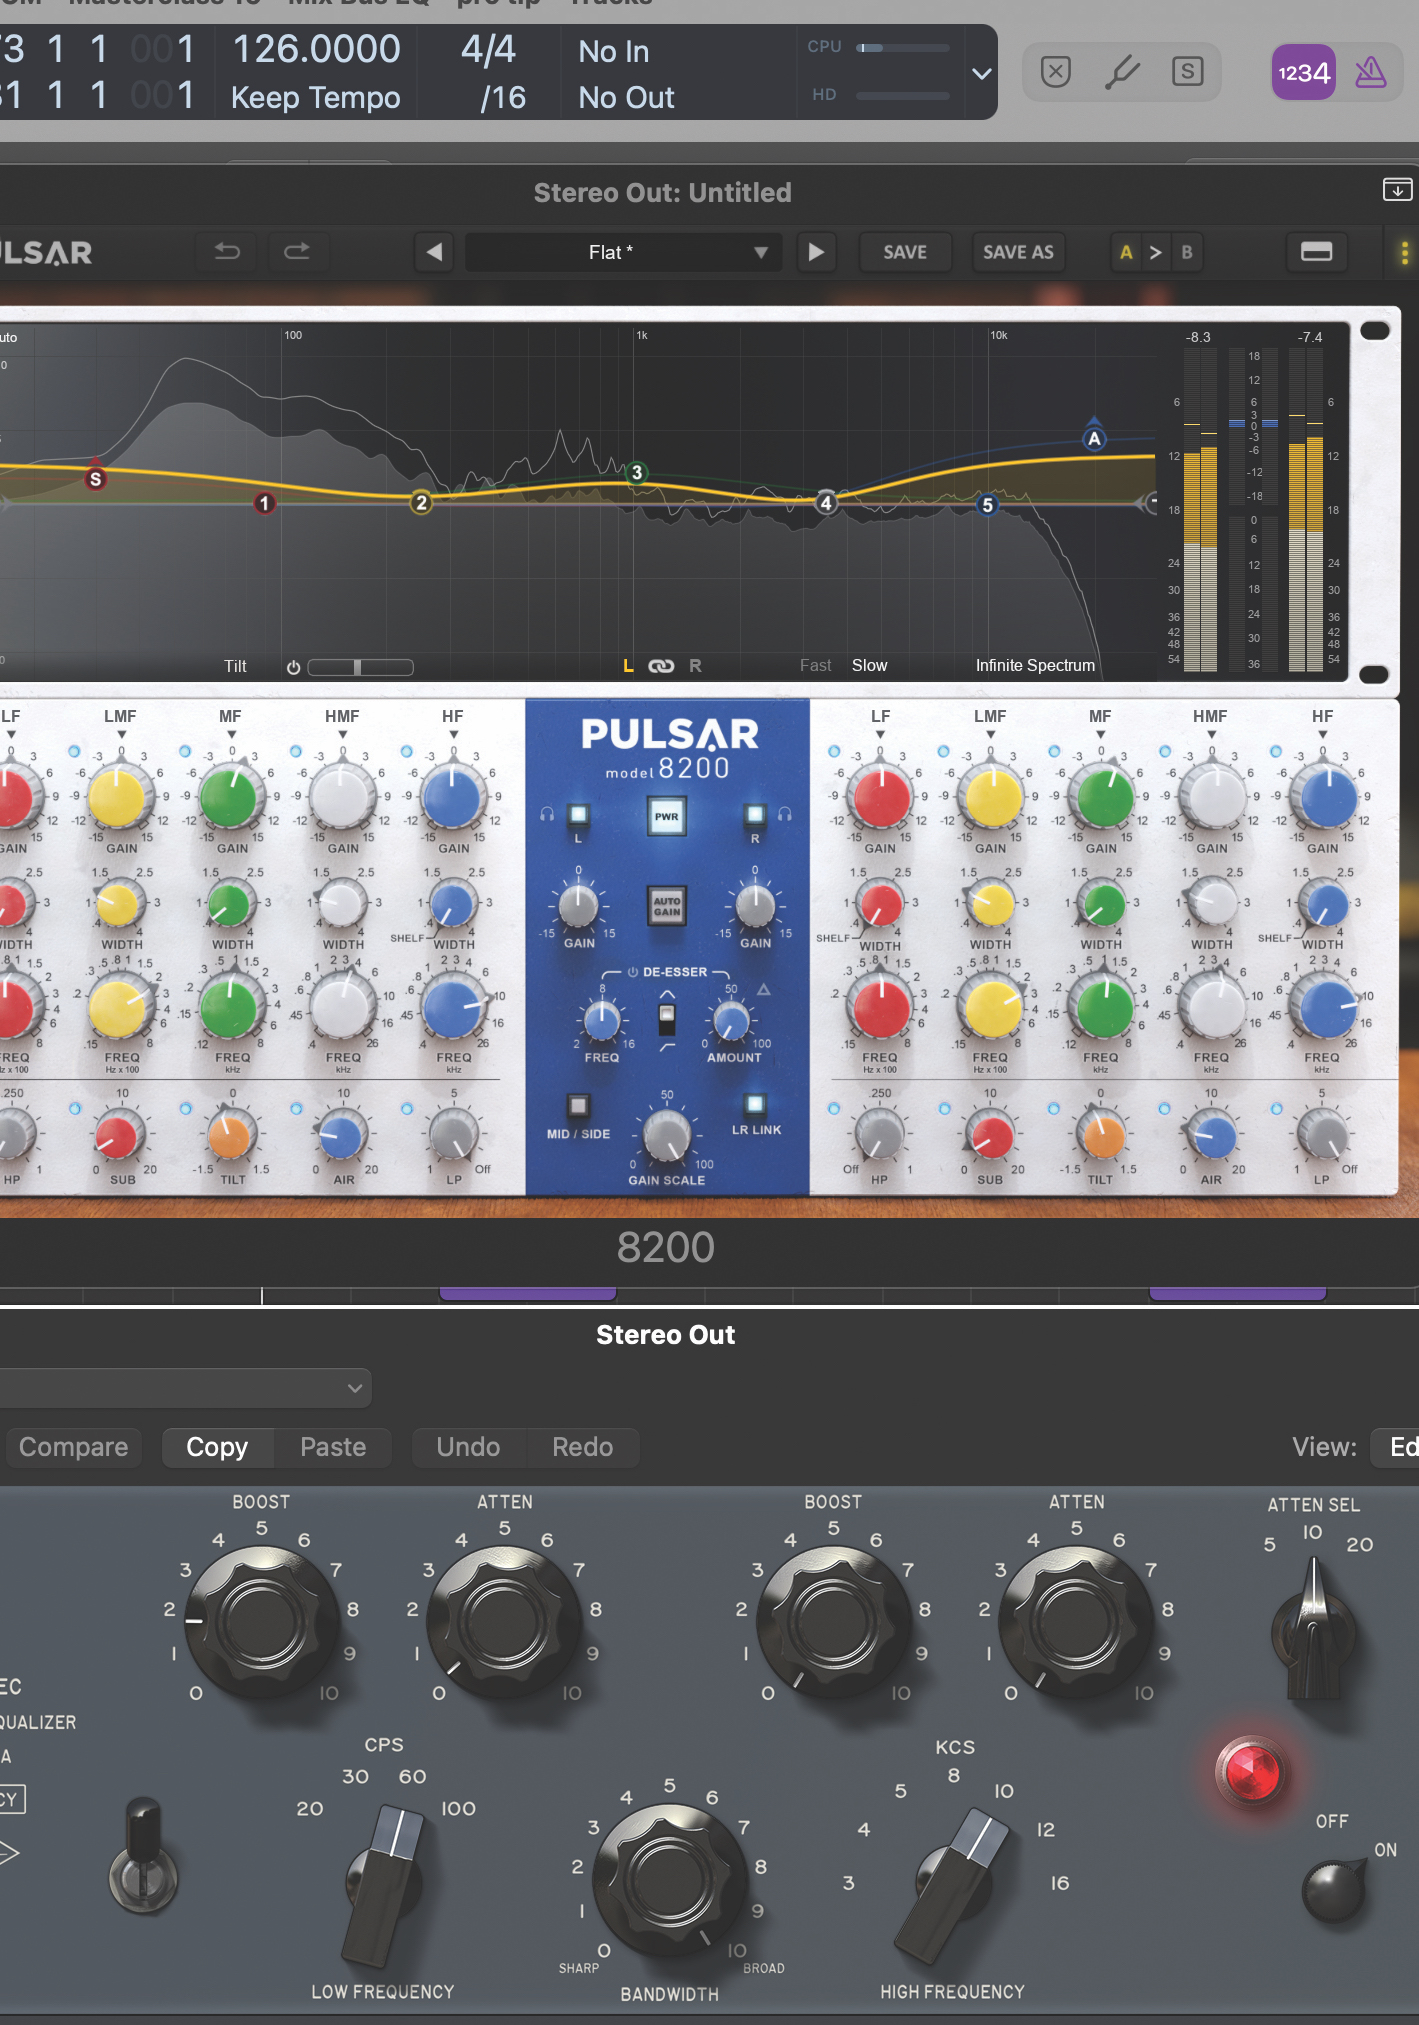
When it comes to mix bus EQ – much like mix bus compression – knowing your processors can be very handy, and this is particularly true if you’re using analogue emulations that don’t have clearly indicated curve shapes.
One such example is the Pultec EQP-1A. This classic passive EQ works really well as a mix bus processor, and the multitude of plugin emulations provide choices for every budget. That said, its valve-based amplification typically influences the sound slightly even when zeroed, and its two control LF section allows simultaneous boost and cut for quite interesting outcomes.
For me, the HF band, which is a peak shape with adjustable Q width, is great for adding natural sheen to a track. However, this isn’t the traditional shelving design we’d use for sweetening, so be aware it may create a different outcome. Another aspect that influences EQ behaviour is the signal routing topology. A good example is GML’s classic 8200 (excellently modelled in Pulsar’s 8200 plugin). The parallel topology coupled with flexible Q settings delivers both flexible and transparent sweetening.
Recommended listening
1. Calvin Harris & Sam Smith - Desire
To achieve a crisp contemporary sound, a little mix bus EQ is often the best solution.
2. Royal Blood - Lights Out
Mix bus EQ can help add overall air to compressed mid-range-heavy tracks like this.
Jon is a London based platinum award winning mixer, producer, composer and club remixer with a diverse CV that spans dance, pop, rock and music for media. He’s also a long term contributor to MusicRadar's music technology tutorials and reviews. Whether working alone or collaborating he usually handles final mixdowns, so you’ll also find MusicRadar peppered with his handy mixing tips.


