How to use PreSonus Studio One 4's Chord Track
Bend the harmonic structure of your Studio One projects to your will with this powerful tool
Want all the hottest music and gear news, reviews, deals, features and more, direct to your inbox? Sign up here.
You are now subscribed
Your newsletter sign-up was successful
One of the flagship new features in the latest version of Presonus’ innovative Studio One DAW, the Chord Track helps you detect and manipulate the chords used in a project. It works on individually specified tracks, and both MIDI and audio clips are fair game. In this walkthrough, we’ll show you how to use it.
For more Studio One 4 tutorials, pick up the October 2018 edition of Computer Music.
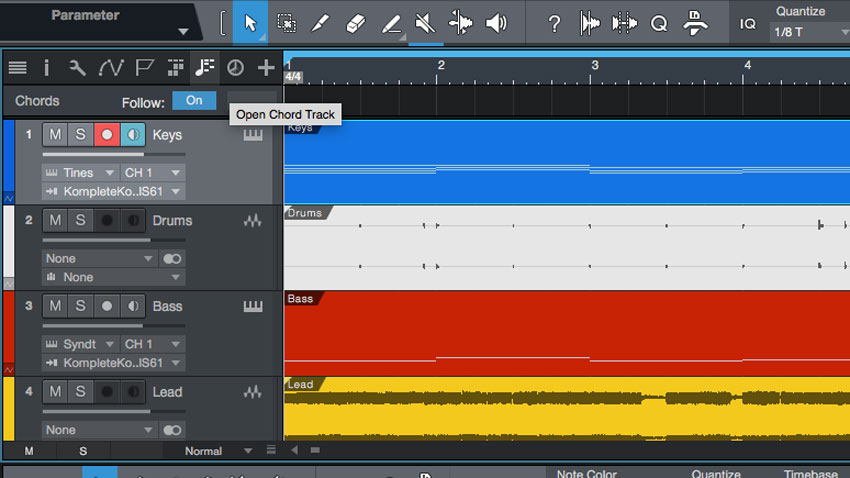
Step 1: Import the MIDI and audio files into a 107bpm project. Open up the Chord Track lane with the icon next to the other track lane icons.
Article continues below 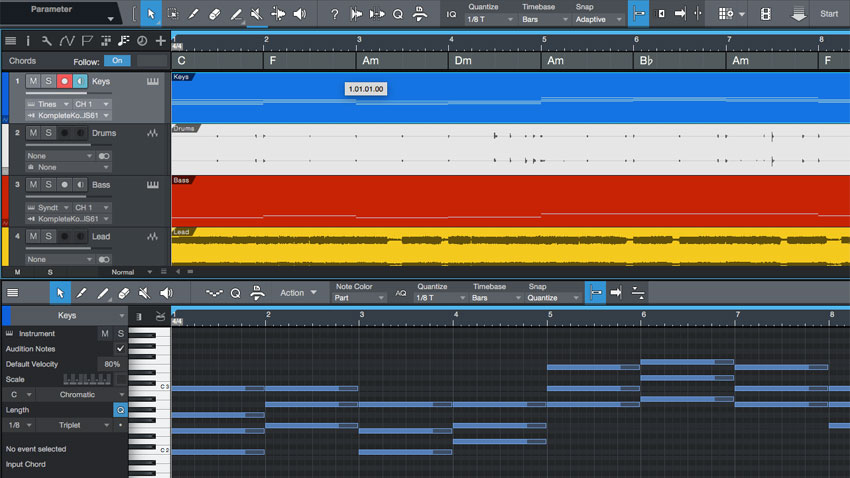
Step 2: The Keys track is probably the best one to use to detect what chords are playing. All you need to do is drag the Keys clip to the Chord Track, and Studio One will detect the content correctly. You can also draw chords into the Chord Track by hand using the pencil tool, as you would anything else in Studio One.
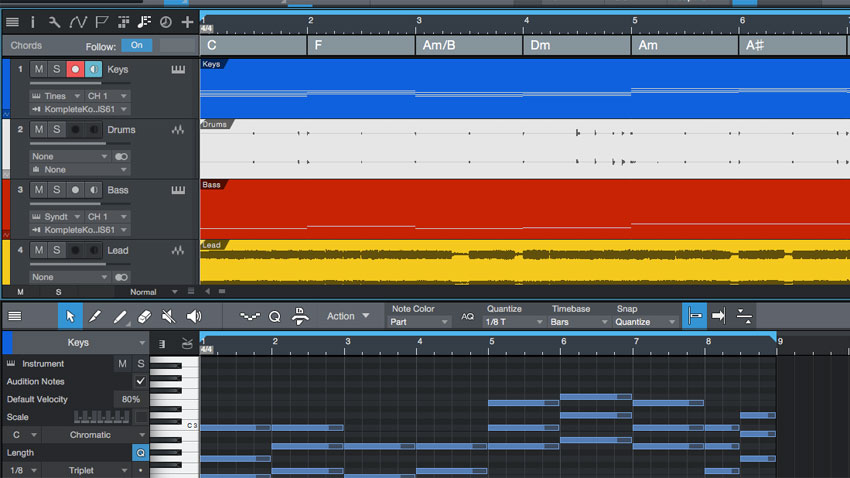
Step 3: You can Shift-select multiple MIDI clips and have the Chord Track detect the harmonic information of all those clips combined. Select the Keys and Bass clips, drag them into the Chord Track, and the first Am chord is detected as Am/B.
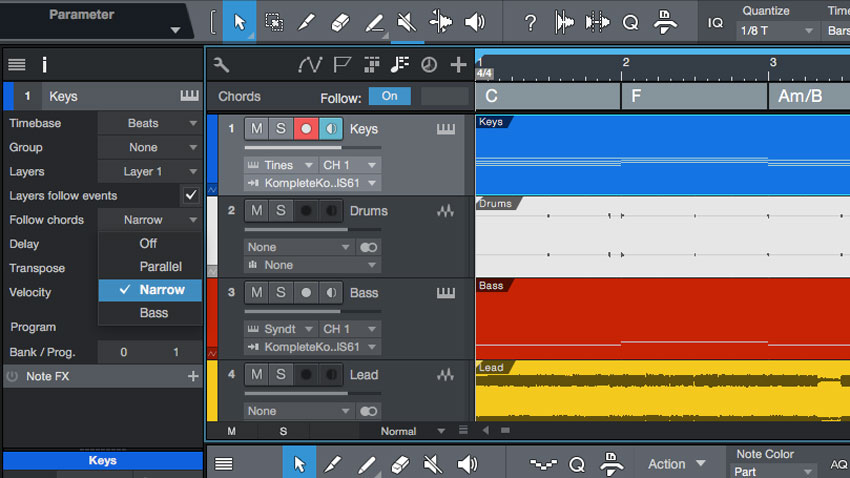
Step 4: Let’s solo that Keys track and open the Inspector on its left. In the Follow Chords selector, change Off to Narrow. Play the track, and things shouldn’t sound any different. But now, double-click the first item in the Chord Track (the C) to open up the Chord Selector. Open up the MIDI clip for editing, too, so we can get a better look at the notes as they change…
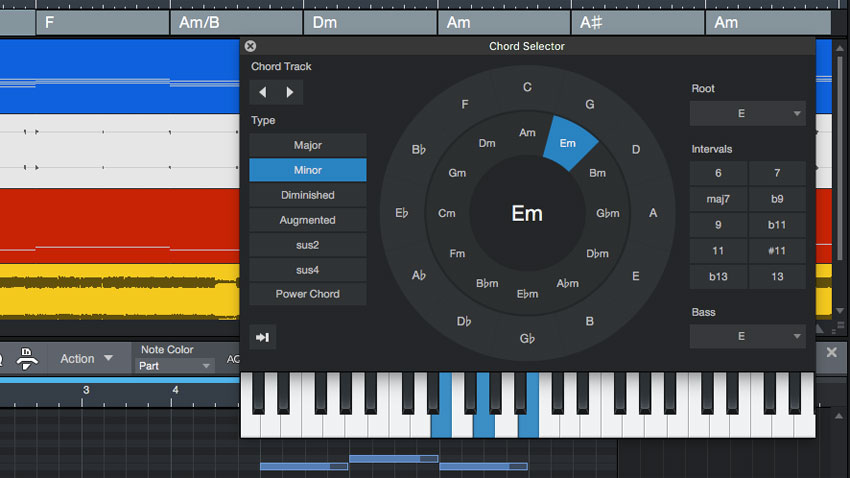
Step 5: In the Chord Selector’s main circle, click another major or minor chord, and the chord in the MIDI region changes with it, to the chord you’ve picked. As well as selecting different root notes for a chord, you can choose the chord type such as minor, diminished, and sustained. Select E in the main circle and choose Minor from the left-hand menu to change the C chord into an E minor chord.
Want all the hottest music and gear news, reviews, deals, features and more, direct to your inbox? Sign up here.
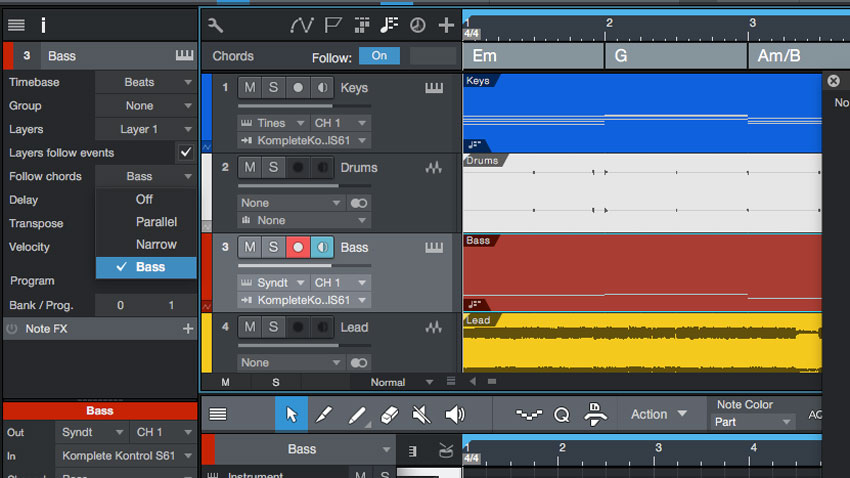
Step 6: In the same way, change the second chord to a G major. When we unsolo the Keys, the other instruments are still in their original forms. We have to make them follow the Chord Track as well. In the Inspector for the Bass part, set Follow Chords to Bass, and its notes will snap to match the Chord Track.
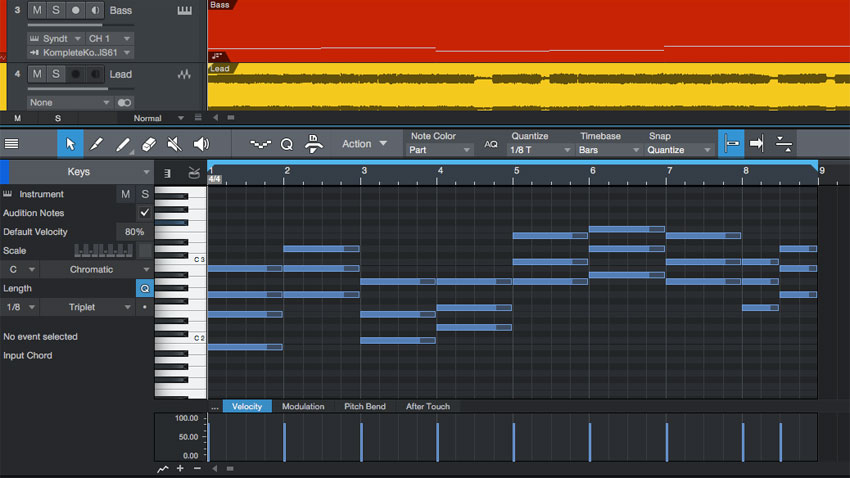
Step 7: Each Follow type interprets the target chord differently. Narrow maps the original notes to the closest notes from the target chord. Parallel transposes notes first, then creates the new chord in a similar structure to the original, keeping inversions and the same chord shape. Bass makes the lowest note the root note, rebuilding the chord in uninverted form.
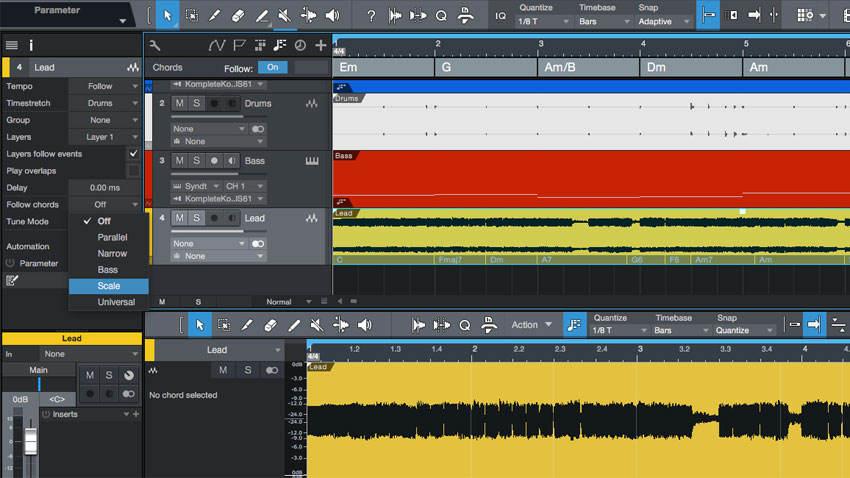
Step 8: The chord track treats audio material the same, and can change notes polyphonically, too. To use the whole range of Follow modes, audio clips need their chords detected (right-click menu). Test how different follow types work on audio melodies rather than chords - audio parts have one extra Follow type: Scale, which is good for messing with melodies.
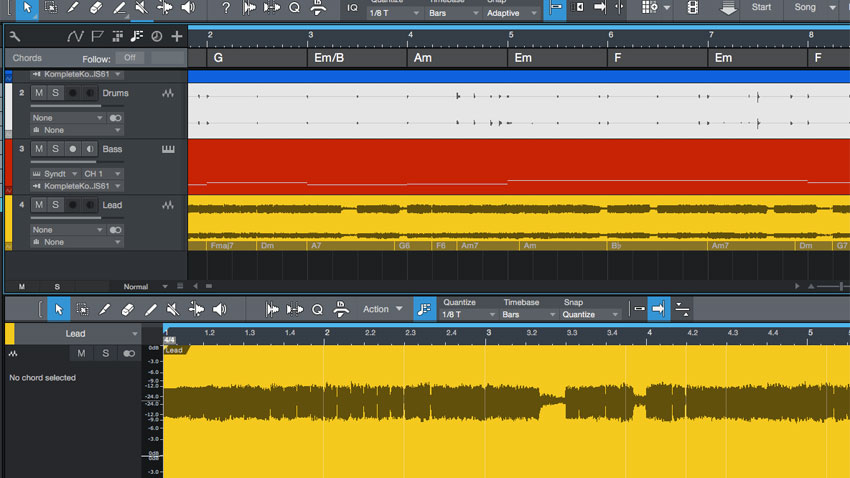
Step 9: Let’s transpose the rest of the progression up by a fifth, which is the next slot clockwise in the circle, to compare things with and without the chord track. No detection mode is perfect here, but it’s a good acid test for how our audio sounds in other progressions. To revert to the original, to the left of the Chord Track set Follow to Off.
Computer Music magazine is the world’s best selling publication dedicated solely to making great music with your Mac or PC computer. Each issue it brings its lucky readers the best in cutting-edge tutorials, need-to-know, expert software reviews and even all the tools you actually need to make great music today, courtesy of our legendary CM Plugin Suite.
