How to use iZotope's RX7 as a creative sound design tool
This out-there audio editor is capable of much more than just restoration and repair
As well as its intended role as an audio editor and repair tool, iZotope’s RX7 makes for an incredibly powerful sound design tool. While regular audio editors only let you edit your samples in the time and amplitude domains, RX7 also enables manipulation of frequency content within its spectrogram display, loosely analogous to messing about with images in Photoshop.
The idea of altering or exploiting a visual representation of a sound can be inspiring, and in this walkthrough we'll show you how it's done with iZotope’s amazing application.
For the full cm guide to spectral synthesis, pick up the December 2018 edition of Computer Music.
Step 1: RX 7 is meant to be a comprehensive solution for audio repair. It offers some of the best noise reduction and correction tools available. As it happens, it makes use of spectral analysis to perform many functions, and we can exploit its features to creatively alter our sounds.
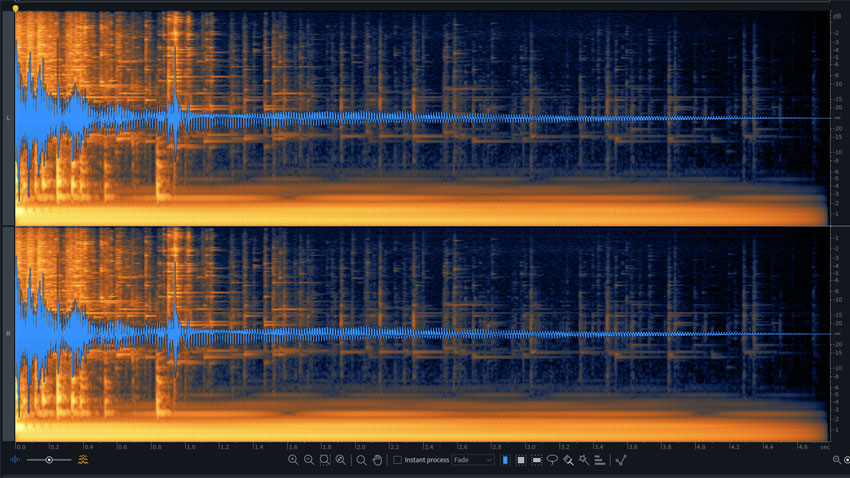
Step 2: Let’s drag an audio file in - StackedTrack.wav - and see what we can do with it. Audition it using the Spacebar on your keyboard, or by pressing the leftmost Play button in the transport below the display.
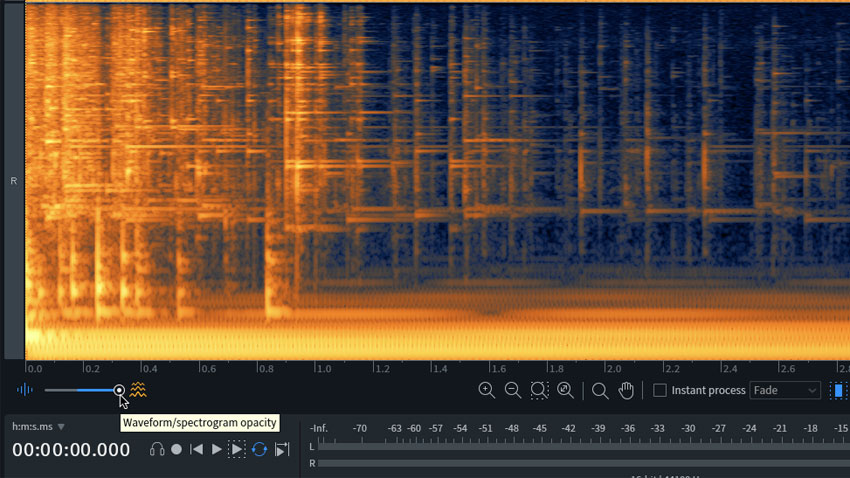
Step 3: Our display shows both a spectrogram and a more traditional waveform graphic. There’s a horizontal slider in the lower-left to balance the two. Slide it all the way right so we only see the spectrogram. The horizontal axis is time and vertical is frequency. Brightness indicates amplitude.
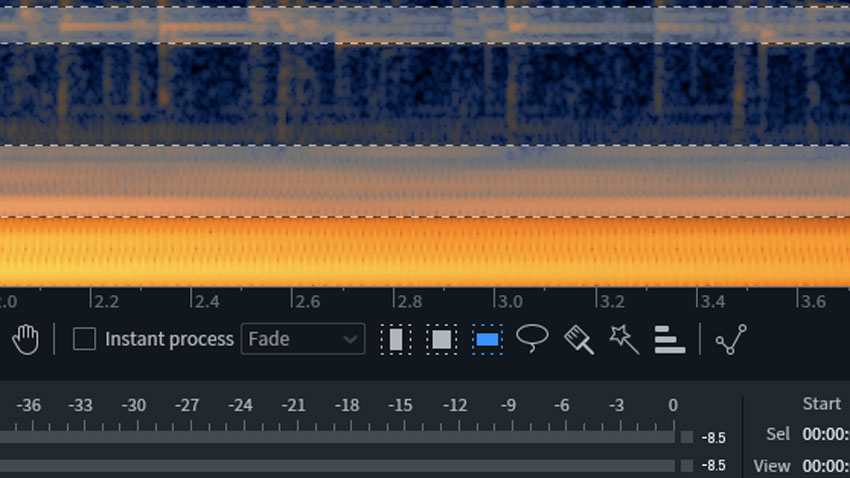
Step 4: Just to the right of centre below the display is a set of selection tools. Choose the Frequency Selection tool. This enables us to grab a given frequency across the entire timeline. Hold the Shift key to select multiple areas. Try grabbing three narrow ranges.
Want all the hottest music and gear news, reviews, deals, features and more, direct to your inbox? Sign up here.
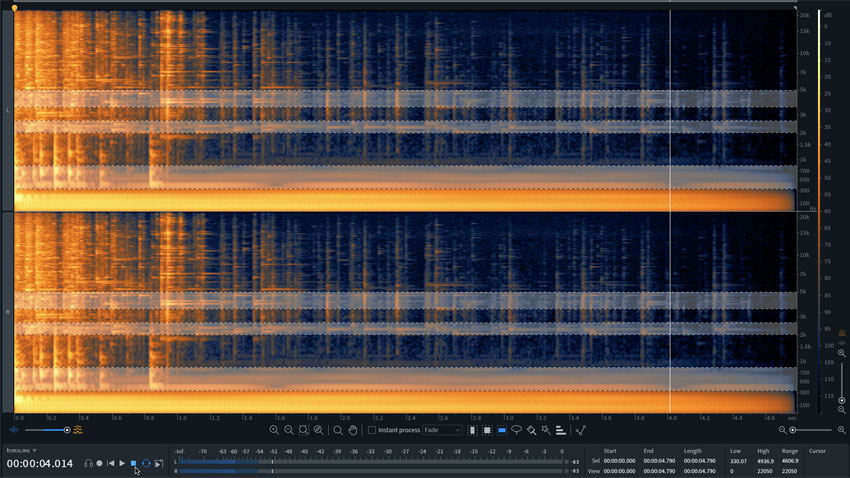
Step 5: We want to hear only our selections. To do this, click the ‘play’ button with the segmented box around it in the transport. That’s a very different sound - the sustained bass drone (represented by the bright yellow band along the bottom) is now excluded from the signal.
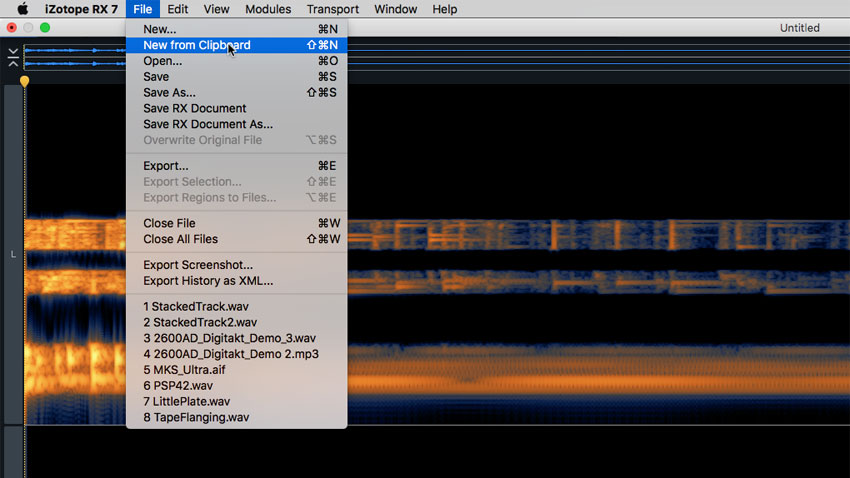
Step 6: Let’s create a new file from our selections. We can do this using the Copy function from the Edit menu, or by pressing Cmd/Ctrl-C. Having done that, we can then go to the File menu and choose New From Clipboard. Now we’ve got a new file, and our original is left intact.
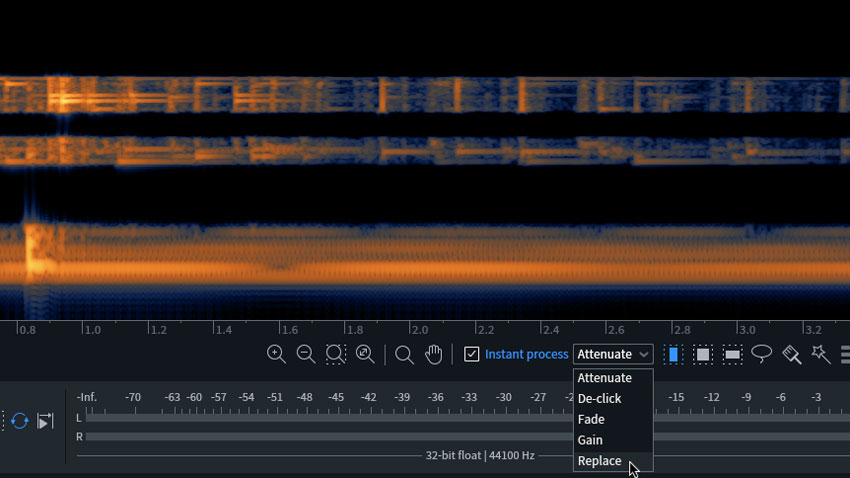
Step 7: Let’s have some fun with our new file. In the centre area below the display, check the Instant Process checkbox. This allows us to automatically apply one of five processes to any area we select. The process in play is chosen from the drop-down menu just to the right of the checkbox. Choose Replace.
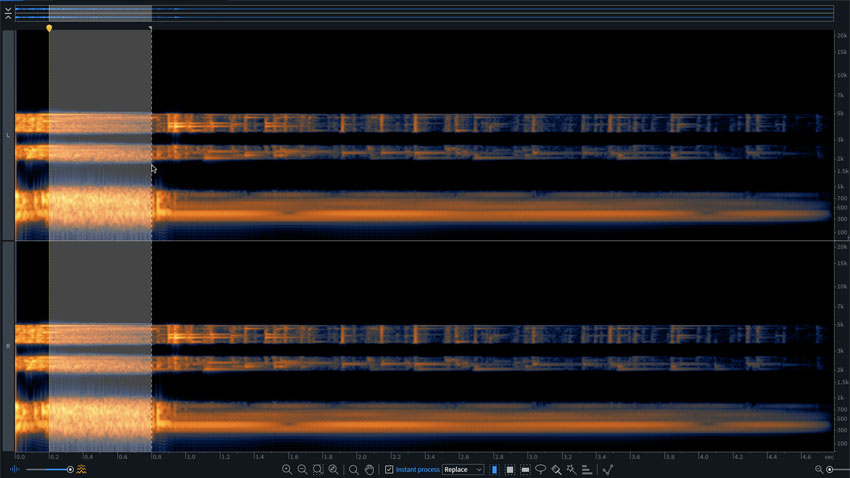
Step 8: Let’s use the Time Selection tool to select a large section, from around 0.2 through 0.8. The processing will be applied when we let go of the mouse button. The Replace function replaces the selected area with material from adjacent areas. In the case of our file, it's created a sustained scraping sound in the area we’ve selected.
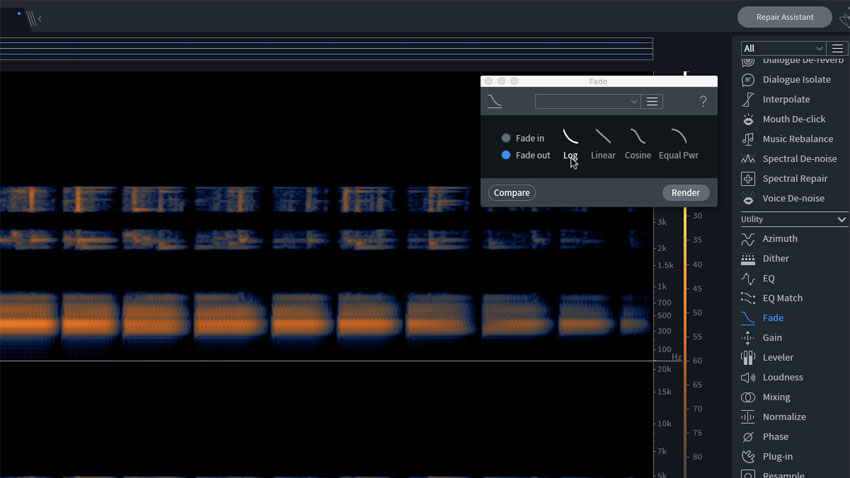
Step 9: Now choose Fade from the Instant Process dropdown menu. Before we use it, find Fade in the list of modules in the right column, under the Utility category. We can use the module to change the Fade properties: choose logarithmic Fade Out and apply it to roughly evenly spaced sections for a rhythmic effect.
Computer Music magazine is the world’s best selling publication dedicated solely to making great music with your Mac or PC computer. Each issue it brings its lucky readers the best in cutting-edge tutorials, need-to-know, expert software reviews and even all the tools you actually need to make great music today, courtesy of our legendary CM Plugin Suite.
