If you only ever use noise in your productions to artificially age clean new sounds and add bite to synth patches, you're missing a number of tricks. Noise as a musical element in its own right has been an electronica staple for decades now, and the modern DAW makes it easier than ever to generate, process and sequence it.
In this tutorial, we'll use iZotope’s excellent Vinyl plugin to build a rhythmic loop based on the groove of a drum pattern. For more sound design tips and walkthroughs, get your hands on the Autumn 2017 edition of Computer Music.

Step 1: Instead of using iZotope’s free Vinyl plugin to virtually age and degrade a pristine signal, we’re going to abuse its noise-outputting abilities to design a choppy, gated percussion loop from scratch. Insert the plugin on an empty audio track in your DAW, then set Year to 1950 for a crunchy, thin noise timbre.

Step 2: To help us design a rhythmic loop that works well under a beat, we import a basic multipart drum groove - comprised of a 4/4 kick, clap on beats 2 and 4, and offbeat hi-hats - onto new channels in our 126bpm project. This will help influence the way we shape our loop’s rhythm and groove.

Step 3: The Mechanical Noise slider sets the level of the noise generated by Vinyl. To rhythmically sequence our vinyl noise ‘oscillator’ level, we’ll automate this parameter in regimented lines, creating a gated 16th-note groove. We’ve gone for the choppy, jagged pattern above. We’ve only broadly joined the dots for now, in preparation for our next move…

Step 4: By bending and shaping our jagged 16th-note shapes, we create swing-like rhythms and interesting timings that interplay nicely with the straight drum hits. Most DAWs offer a method of bending automation curves into logarithmic or exponential shapes - in Ableton Live 9, we simply hold Alt while dragging an automation line up or down.

Step 5: Next, for even more rhythmic interest, we automate the Scratch slider to hit an amount of 10 on the first and third offbeats of the bar. This injects stuttering bursts of crackles into the groove for triplet-like flourishes, ghost pops and pre-beat stutters that lead into each clap.

Step 6: Our vinyl scratches from the previous step are annoyingly random, giving an inconsistent effect. To capture a more predictable groove, we render several bars of our noise to a new audio file and splice together pieces of the new audio to collate a bar-long loop that works better with the overall groove.

Step 7: Our rhythmic noise groove is now a canvas for all manner of processing. Before we reach for anything creative, we’ll address a nasty resonant peak in the low-mid frequencies - a targeted -7.5dB EQ scoop at 500Hz, courtesy of OverTone DSP’s AF2-10-CM, pulls down the offending bloat, giving us a cleaner mix and more room for other track elements.
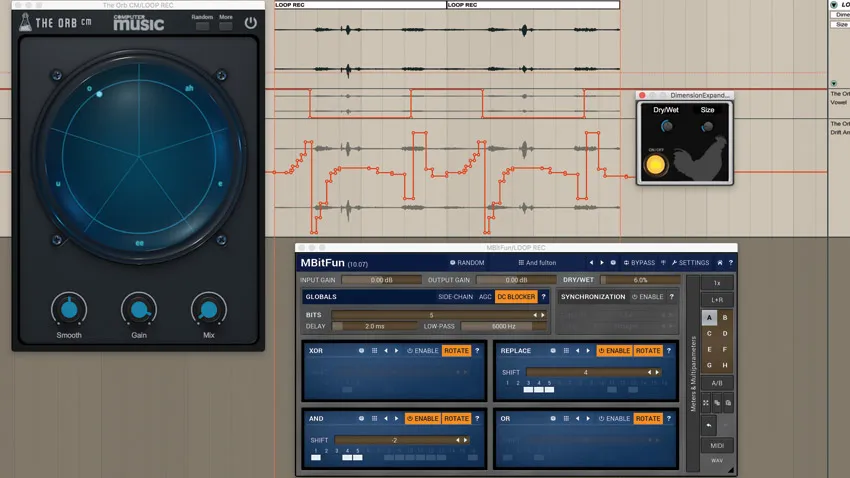
Step 8: Let’s try out a few creative processors to give the loop more personality. First, with its Mix set to just 5% for subtlety, we’ve automated The Orb CM’s main Vowel and Drift amount for a faint touch of talking formant-filter sweeps; next, Xfer Records’ OTT pulls up the loop’s quietest points with a combo of upwards and downwards compression; and Xfer’s free Dimension Expander creates lush stereo information.
