How to get the most out of in-ear monitors
Master your on-stage IEMs

Ready to take your band’s live sound to the next level? Take a major step in the right direction by reducing or eliminating your stage monitors. There are plenty of reasons to make the change: Loud wedge monitors create significant audio issues that are counterproductive to good sound; such problems include increased feedback, and sound spilling into the audience, making it difficult to control the house mix. Other problems include creating phase issues with the house speakers, generating “cross-talk” that enables one musician to hear another’s monitor mix, and increasing the chances of hearing fatigue.
Switching from wedges to ear mixes can reduce or solve many of these issues, and may even help preserve your hearing. In-ear monitors (IEMs) give performers control over their mix volume, and an ear mix remains consistent even when the performer moves around the stage. Here’s what you need to know before you stick it in your ear.
Earbuds are for kids
In-Ear Monitor Rule Number One: Leave the earbuds at home. Let’s review the entire point of using IEMs: Stage monitors, backline, and drums combine to create a fair (in some cases, insane) amount of volume onstage. The idea here is first to shut this external noise out from your ears, and then “bleed in” a controlled amount of what you need to create music. When in-ears are successful, the amount of isolation from ambient sound exceeds the amount of signal you’ll add into the earpieces to hear your mix, so the overall volume level at your ear is lower than if you were using wedges. Suppose you put on a pair of earbuds. Most earbuds offer poor, if any, isolation from outside noise, so you’d need to raise the volume of the buds to overcome the stage sound. The resulting volume at the ear is almost certainly unsafe and does long-term hearing damage.
You must use earpieces that effectively seal your ears from outside noise. Earbuds need not apply. Fortunately “good isolation” does not necessarily equate to “very expensive.” I’ve used earpieces priced in the stratosphere that offer only moderate isolation, and I’ve used generic earphones that provide excellent isolation. The most important thing is that your personal monitors do the job for you.
Generic versus prescription
Earphones can be divided roughly into two categories: generic and custom-fit. Generic earpieces run the price range from around $50 up to north of a thousand bucks a pair. Expect to pay at least $100 for earphones that will not be sonically disappointing, and won’t fall apart after a few gigs. The two-to-four-hundred-dollar-per-pair price range is probably the “sweet spot” where you’ll find a significant increase in quality as you climb the ladder, but spending more yields diminishing returns.
Want all the hottest music and gear news, reviews, deals, features and more, direct to your inbox? Sign up here.
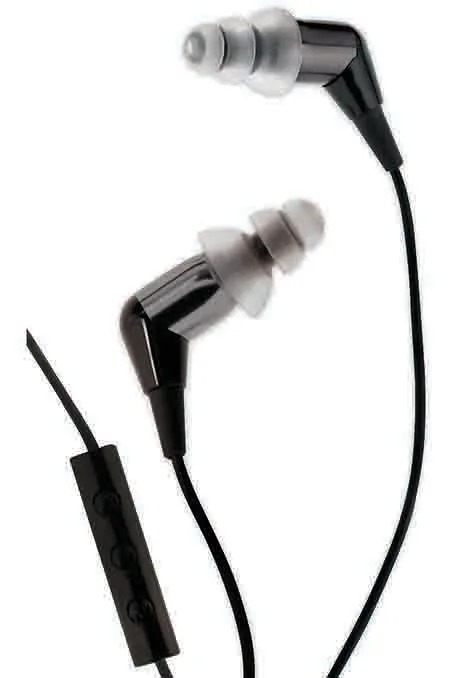
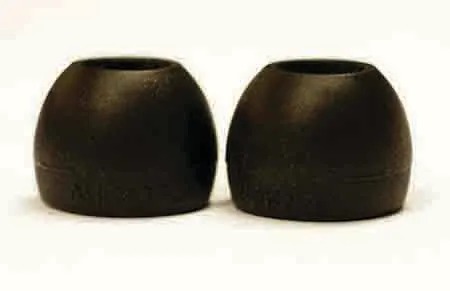
Most generic-fit earpieces (See Figure 1) come with removable foam, rubber, or flanged ear tips that fit over the nozzle end and can be easily removed simply by pulling them off — so try a variety of tips until you find the ones that work best for you. (They run abut two to three dollars a pair.) I’ve had great luck with the triple-flange silicone ear tips (see Figure 2a), but for other people, foam (Figure 2b) or rubber (Figure 2c) tips might work better. Be aware that if you sweat a lot, foam tips can absorb moisture and fall out of your ear. Some manufacturers include a small “kit” of ear tips with their earpieces so you can try different options, and a plethora of aftermarket ear tips are available in various materials, shapes, and sizes. In addition to ensuring maximum isolation from outside sound, a proper fit maintains good bass response; look for an attenuation spec of at least 20 dB, preferably closer to 30 dB.


A feature worth looking for (and one that can be difficult to find in lower-priced earphones) is a replaceable filter. As you might imagine, your ears generate a lot of gunk (ick!) and you don’t want it clogging up the port through which the driver delivers sound. Periodically changing the filters ensures that nothing blocks sound coming out of the earphones. If the earpiece does not employ filters you may find that over time, sound quality suffers and for this reason, some manufacturers supply a tool for cleaning the nozzle. A detachable cable is another useful feature, which lets you change a damaged cable without sending the “cans” in for repair.
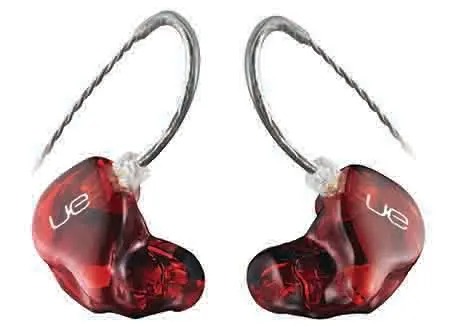
The next level of ear monitors features custom-moulded earpieces made to fit your ears (see Figure 3), promising an airtight seal. Custom moulds start with a visit to an audiologist, who will take impressions of your ears. Many manufacturers of custom earpieces can recommend an audiologist in your area and it’s probably a good idea to go with the recommendation. Expect to pay somewhere between $100 and $200 for the visit to the audiologist and anywhere from $300 and up for the earphones. Typically the audiologist sends the impressions directly to the manufacturer, they build the earpieces and send them back to you. The process takes a few weeks so if you’re leaving on a world tour, allow enough time for delivery. The impressions used to create the earpieces generally have a lifespan of a year or two because A) they can shrink, and B) the shape of your inner ears can change, influenced by things like having a wisdom tooth removed.
Custom earpieces can be constructed from hard plastic, soft rubber, or silicone. My first set of custom ear cans were the soft type and provided very good isolation. My second set was made from hard plastic and I felt the isolation was not as good as with the soft moulds. I initially thought that the hard plastic moulds would be uncomfortable when worn for long periods of time but that proved not to be the case at all (and I even fell asleep more than once with them in my ears — though I promise it wasn’t in the middle of a gig). Bottom line: I can’t tell you whether soft or hard moulds will be more comfortable for you; you’ll have to try them. Most manufacturers have demo versions of their phones that can be auditioned using generic ear tips, so you’ll be able to test drive before you buy.
The driver debate
Two varieties of driver technology are used in earphones: dynamic and balanced armature. A dynamic driver operates much like a miniaturized loudspeaker, whereby a moving coil of wire is suspended in a magnetic field. When electricity (audio) is applied to the coil, the coil moves. The coil is attached to some sort of diaphragm that sets the air in motion, creating a sound wave. A balanced armature employs similar components, but the coil and magnet are fixed. The coil surrounds a long, pivoting arm. When the audio signal is applied to the coil, it magnetizes the arm and the arm vibrates. Attached to the arm is a drive rod, which in turn is attached to a diaphragm. The arm transfers vibration to the drive rod, which excites the diaphragm, creating sound.
Both technologies have advantages and disadvantages. Dynamic drivers tend to be very durable and less expensive. They produce pleasant midrange and better bass response but are less efficient than balanced armatures. A dynamic driver may require “venting” to extend the low-frequency response—which opposes our original requirement of isolation from outside noise. Dynamic drivers may not offer as much detail like a well-designed balanced armature system, and the drivers tend to be larger.
Balanced armature (BA) drivers generally offer a faster transient response and resolve more detail in the high-frequency range. They typically have a more narrow frequency range than dynamics, but can be tuned for specific frequency regions — thus the need for multiple drivers in a full-range system. As a result, BA designs tend to be more costly because earpieces contain more components such as low-, mid-, and high-frequency drivers, plus the requisite crossover to mesh the drivers’ output. The multidriver approach often used with balanced armatures also yields the ability to deliver slightly higher SPLs. Personally I think I’d be more concerned with whether or not I like the sound of the driver, rather than worrying about the technology behind it.
The sounds of silence
Now that your ears are plugged, you’ll notice that most of the room sound has disappeared, including the audience and chit-chat from your bandmates. This can be disturbing the first time you experience it, but there are remedies. One solution is to place a microphone near the edge of the stage, pointing toward the audience. Adding this sound into your ear mix provides a sense of the venue space. (You’ll also be able to hear what your hecklers are saying.) Another possibility is placing an omnidirectional microphone on stage (perhaps on the edge of the drum riser) and bleeding that into the ear mix. Be aware that adding these microphones increases the possibility of phase cancellation and delay due to the distance between the mics. For example, let’s say you have the snare mic in your ear mix, and you also have an audience mic ten feet away from the snare mic. Any snare that leaks into the audience mic will be heard roughly 10 milliseconds later than the close snare mic, a delay amount that most musicians can easily hear.
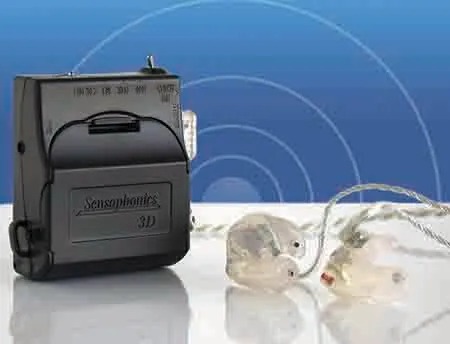
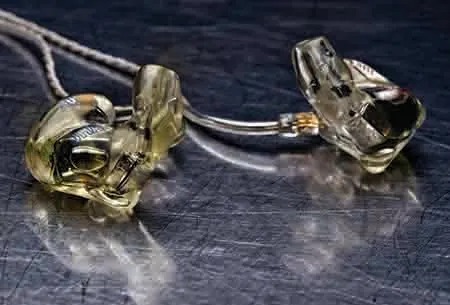
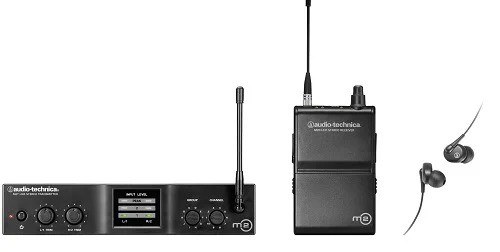
To combat these issues, some manufacturers have developed earpieces that mix ambient sound with the monitor mix. The concept was pioneered by Sensaphonics with its 3D Active Ambient™ IEM system which incorporates miniature microphones in the earpieces (see Figure 4), and allows a user to add those feeds to the monitor mix while still maintaining isolation from the din. It’s a much more elegant solution than removing an earphone between every song. JH Audio offers the Ambient FR (see Figure 5), which provides an “Ambient Bore” in each earphone to bleed in stage sound. The belt pack for Audio-Technica’s M2 system (see Figure 6) features an auxiliary input that accepts an external miniature microphone for ambient pickup. Ambient sound reaching the ears will also be influenced by the band’s stage volume and (perhaps more profoundly) the nature of the pickup pattern on the vocal mics. Not all directional mics exhibit the same amount of rejection (even when they employ the same pattern), and under the circumstances, a bit of stage sound leaking into the vocal mics might not be a bad thing.
Some musicians miss the kick in the butt they get from wedges, which is difficult to duplicate using ear monitors. A subwoofer or a wedge onstage can be used to reproduce the low-frequency thump that IEMs can’t generate, but beware that this setup can start a volume war. Seated musicians can try a “butt thumper”—a transducer that bolts to a drum or keyboard throne and produces vibrations that simulate low-frequency audio.
Going wireless
Most musicians will prefer wireless IEM systems, the exceptions being drummers and possibly keyboard players. There’s no doubt that wireless IEMs are more convenient but if you’re financially-challenged and stay put onstage, you can go wired, which cuts out the cost of the receiver pack and gives you the benefit of audio over wire, which is more robust and will not be subject to RFI. Most of the RF concepts we discussed in our Wireless 101 Master Class (in the September 2013 issue) hold true for wireless personal monitor systems, so revisit that article for an in-depth look at RF issues.
Mix it up
Moving to IEMs will require time for a proper soundcheck. If you’ve got a dedicated monitor engineer, bless you. Have the ME run discrete mixes for everyone in the band… Okay, back to reality. Many club bands don’t have a front-of-house engineer, let alone a monitor tech. That said, you have a few ways to approach creating monitor mixes. The tried and true approach is patching an aux send into the IEM transmitter, one per musician. Another approach is a personal monitor mix system that integrates with your mixing console. Digital mixers from Roland, Allen & Heath, and others incorporate audio networking, which enables a personal monitor mixer to be connected to the main mixer (either directly or using a hub), and “taps” signals from the main mixer. This option provides the ultimate control but requires a larger investment in hardware and setup time, and makes each musician responsible for his or her own mix.
Since you have two ears, it’d be nice if your ear mix were in stereo, but Murphy’s Law (Electronic Musician’s Corollary) dictates that the least expensive IEM systems will function in mono. That’s not such a bad thing; this configuration may actually work better if your mixing console is not equipped with multiple stereo aux sends. While it’s possible to use two separate mono aux sends to create a stereo mix, this setup is clumsy at best. So it may work out for practical reasons that you end up with a mono mix anyway. IEM systems from Sennheiser, Shure, and Audio-Technica offer different modes of operation such as stereo, mono, and 2-channel mix mode (see Figure 7). The two-channel configuration is a mode in which a band mix is sent to one input and a “me” signal is sent to the other, enabling the belt pack's L/R balance knob to function as a mix control between the two channels. If you plan to use the system in this manner, look for audio Through jacks that allow signals to pass through the rack transmitter to another device. A variation of this is the premise behind the PreSonus QMix AI, which provides mix control over two channels (band and ‘me’) via iPhone, with permissions defined at the mixer.
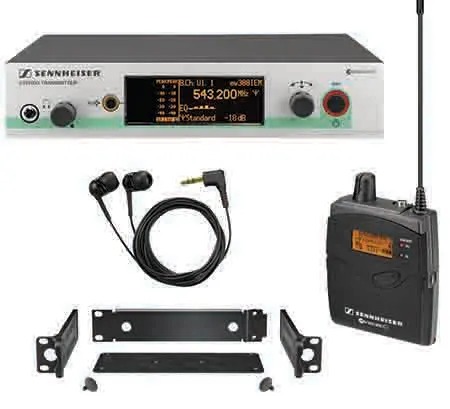
Utility features to look for in an IEM system include onboard EQ, adjustable input level, battery monitoring on both the transmitter and belt pack, and a limiter on the audio output jack that might help prevent someone’s head from exploding. Volume control on the belt pack is a must, and a mute switch certainly comes in handy. If you expect that your system will grow to a point where you’ll have multiple channels of personal monitors and wireless mic/instruments on stage, built-in networking will be valuable for system organization and monitoring.
IEMs could help you truly hear what’s happening on stage for the first time, resulting in a dramatic impact on your performance and that’s a good thing.
Electronic Musician magazine is the ultimate resource for musicians who want to make better music, in the studio or onstage. In each and every issue it surveys all aspects of music production - performance, recording, and technology, from studio to stage and offers product news and reviews on the latest equipment and services. Plus, get in-depth tips & techniques, gear reviews, and insights from today’s top artists!
