With knowledge of the anatomy of the bass drum, it's possible to synthesise its elements and manipulate the attack and tail to suit the track you're working on.
Getting the tuning of the boom right with a synth is essentially easier than on a real kick because you can match the pitch of the oscillator to the key of the song and marry it to the bass sound. You can control the tail length using an amplitude envelope's decay knob, and the brightness of the transient can be controlled using the attack of a filter envelope.
The beauty of a custom-made kick sound is that it's unique and tailored to your track, rather than an off-the-shelf version that's square-pegged into the role. Let's make one in Native Instruments' Massive synth…
Additional tutorial files are available to download.

Step 1: One-shot kick samples are convenient, but synthesising your own bass drum gives you far more control over the resulting sound's key, shape and timbre - so let's craft an electronic kick from scratch using NI's Massive. Open your DAW, set the project tempo to 128bpm, and insert Massive on a new instrument track.

Step 2: The techniques we're looking at here can be applied to most other synths, too. Start by programming an E0 note on every beat of the bar. A sine wave is the core ingredient of most synthesised kicks, so change Osc1's wavetable to Sin-Square and turn the WT-position dial fully left.
Basic sine

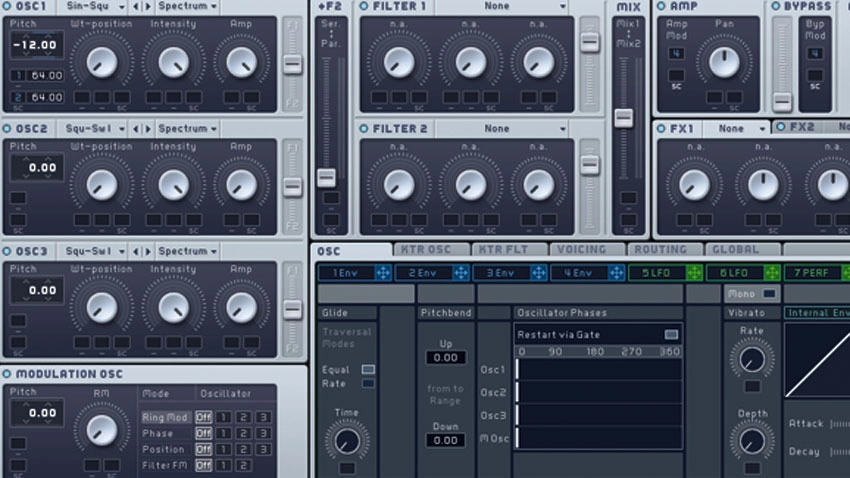
Step 3: A kick starts at a high pitch before sharply sweeping downwards, so we'll use an envelope to quickly bend the initial pitch of our sine wave from high to low. Assign 1 Env to OSC1's Pitch by dragging
1 Env's modulation handle to the slot directly below OSC1's Pitch, then set the modulation amount to +64 semitones by dragging up inside the modulation slot.
Sine's pitch being modulated by envelope

Step 4: Head into the 1 Env tab and copy the settings shown here to sculpt the pitch curve into more of a kick-like shape. The Level dial controls the amount of effect the envelope has - we've set it to
1 o'clock, reducing the kick's 'poppiness'. Tweaking the Decay Level will lengthen or shorten the kick's punch, or 'doof'.
Kick with shaped pitch envelope

Step 5: A second, tighter pitch envelope will add an extra click to each hit. Drag the 2 Env mod cross over to Osc 1's second mod slot, and set it to +64 semitones. Copy our Env 2 settings above. For extra 'tick', use Env 2 to modulate the Noise oscillator's Amplitude to around 3 o'clock. Turn the Color dial to full to make the noise brighter.
Kick with second pitch envelope
Kick with noise tick

Step 6: Go to the Osc tab and activate Restart via Gate to ensure the sine retriggers with each note for a consistent sound. The tail is also clicking a bit, so head into the 4 Env tab and increase Release a little. Add harmonic grunt and punch by increasing Massive's Feedback to about 11 o'clock, and - voilà! - you've got a custom kick you can tweak to fit other musical parts.
Finished kick
For more kick drum design tutorials, see the full Kick & Bass Power feature in theJuly edition of Computer Music (CM231).
