The basics of compression aren't that hard to grasp: simply set a threshold above which the input signal is reduced in volume to an extent specified by the ratio control, with the speed of that reduction and its subsequent recovery determined by the attack and release parameters.
However, there's much more to dynamic signal leveling than just that, and in this feature we'll show you 13 more esoteric compression features - control over most or all of which should be offered by any serious compressor plugin - that can be exploited to fine-tune, finesse and generally tailor the process.
For much more on compression, avail yourself of Computer Music 222, which is on sale now.
1. Upwards compression
This concept can take some time to comprehend - either theoretically or in use - and it's possible you may not need it in practice very often. Nevertheless, it's worth understanding what upwards compression is.
With a normal compressor, signal levels above the threshold are reduced by an amount dependent on the ratio setting. For upwards compression signals below the threshold are increased in level, often achieved using the 'expander' element of more advanced dynamics units. The result is to bring up the level of the noise floor, an effect that works well coupled with the auto-gain option on many compressors.
2. All buttons
Whether by design or not, pressing in all the ratio buttons on the classic Urei 1176 hardware compressor not only pins the meter needle to the endstop, but also creates unusual attack, release and ratio behaviour, often used to great effect on drum kit overheads. You'll notice how the initial transients get through, but that the behaviour is then more like a hard limiter. Overall, the effect can be very coloured.
UA's official 1176 emulations and IK Multimedia's Black 76 are two emulations capable of the 'all buttons in' trick.

3. Sidechain EQ/filter
Compressors typically use a duplicate of the input signal as the sidechain. However, this signal can often be modified as well, and although some plugins include fully parametric EQ, more typical is a simple high-pass filter. Adjust this gradually up from its minimum, and you'll find the compression becomes less and less responsive to low frequencies such as those from kick drums and basses, thus avoiding the 'pumping' problems caused by overreaction to heavy bass.
For more complex plugins with parametric sidechain EQ, use it for focussed, frequency-specific dynamic control.

4. Knee
This parameter affects the onset of compression - ie, how 'sharply' it kicks in with regard to the signal passing the threshold (or not). It can be very sudden (hard knee), very gradual (soft knee) or somewhere in between. With a hard knee, no compression is applied until the threshold is reached, upon which the full ratio comes into play; with a soft knee, the compression is applied gradually as the signal level approaches the threshold, eventually reaching the full ratio amount.
In practice, this influences the sound of the compression, moving from audibly obvious coloration with a hard knee (good for precise processing of drums), to more transparent level control (highly useful in mastering). In practice, the other thing you'll notice is compression starting sooner with a soft knee for any given threshold.
5. Dry/wet
Parallel or 'New York-style' compression involves blending your compressed signal with the original non-compressed signal. Many compressors now incorporate the option as a parameter - look out for a wet/dry mix control near the output section.
This feature allows us to retain transient definition and also be more aggressive with the compression settings, capturing the 'flavour' associated with heavier compression. It works particularly well when shaping individual raw beats, but can be used on submixes and full mixes, too.
Getting the balance between the compressed and dry signals can take time to master, so as a starting point, try a simple isolated sound, such as a snare or kick drum, rather than your whole mix.
6. Lookahead
In very simple terms, this option delays the audio but not the control signal - that's the sidechain - so the compressor reacts earlier than it should. It sounds like a good thing, but bear in mind that the release stage will also be early. To compensate for this, you may find it useful to set the compressor's hold parameter, if available, to the same time as the lookahead setting.
7. Analogue modelling
It's safe to say that analogue emulation plugins are really in their second era, and have moved on from simple 'end-to-end' analysis into individual component modelling, with a focus on dynamic behaviour. In compressors, you'll find some very good modelling in Slate's VBC series, with harmonic distortions playing an important role in the Fairchild-influenced FG-MU.
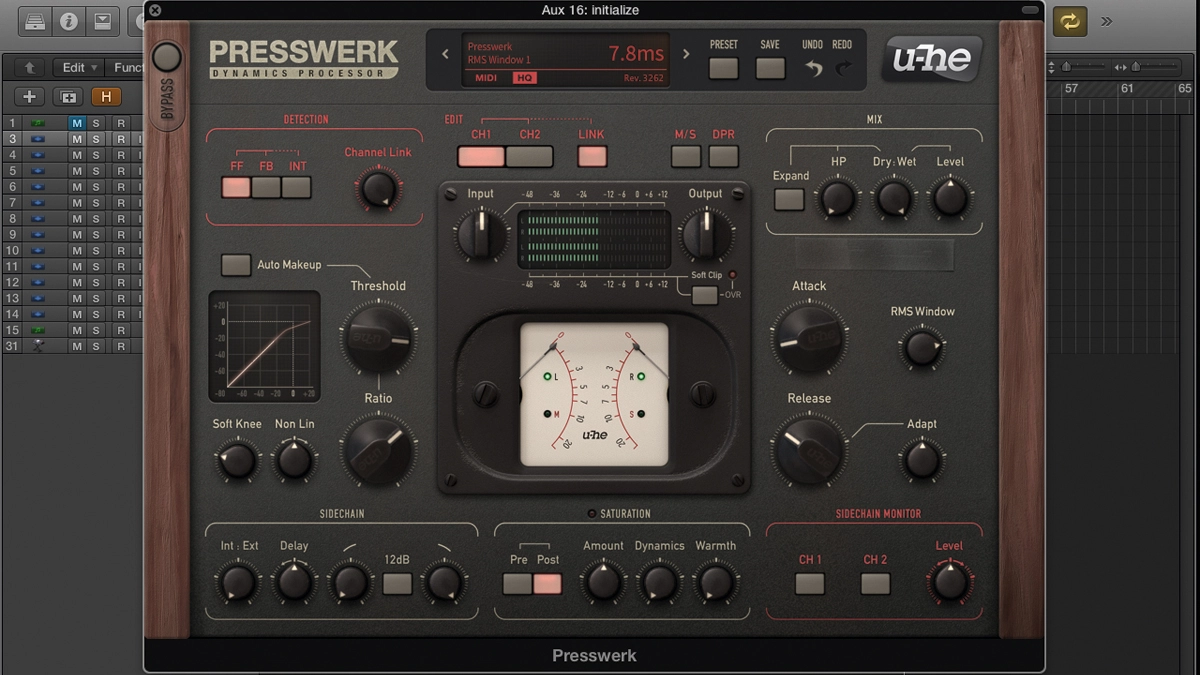
For user control, u-he's Presswerk offers some excellent features. The Saturation includes both drive (Amount) and compression-dependent distortion (Dynamics), with a third control (Warmth) acting like a tilt filter, with higher settings curtailing high-frequency harshness, much like tape saturation.
8. Limiting vs clipping
Compressor plugins sometimes include output clip or limiter processing. This can offer a useful extra flavour or just act as an additional leveling safety net. Options range from simple ceiling level parameters to more complex, fully fledged processors. DMG Audio's Compassion, for example, includes a full clip limiter, with Limit amount, Release, Ceiling and Drive variables, plus a Softness parameter for accurate control of soft clip and soft knee limiting.

9. Peak/RMS
It's not uncommon for modern plugins to provide control over how the detector circuit 'sees' the signal level in the form of both peak and RMS sensing. u-he's Presswerk, for example, has an RMS Window setting that adjusts the time allowed for sensing the incoming signal. At its minimum, setting it provides 'true peak' behaviour, meaning the absolute signal level triggers compression. As the value is increased, a longer portion of the signal is used, measuring the general loudness of the signal - settings between 1ms and 5ms work well. Increase the setting further and Presswerk begins to exhibit response lag, a bit like an optical compressor.
In practice, peak sensing works well when you want to compress hard and audibly, or simply want to catch transients - ideal for drums. RMS sensing is far more user-friendly, providing smoother compression for vocals, guitars, submixes and whole mixes.

10. Range
This is a parameter that you'll rarely find on hardware but that has become commonplace on plugins. In essence, it lets you put a limit on the amount of gain reduction that can be applied.
On Cytomic's The Glue, the Range starts at -80dB, which will be unnoticeable. However, with much lower settings - let's say -10dB - it can be a useful tool for preventing over-compression of louder elements, while still retaining the character you've carefully dialled in.
11. Auto release
Setting the release time is crucial to how a compressor sounds, and it's easy to gauge this when working on isolated elements. For more complex material such as a full mix, a release time that works well for, say, the snare drum, may be too aggressive for another element, eg, guitar. An auto - that is, 'programme dependent' - option can help here. This modifies the compressor's release time on the fly, to better accommodate both transient-heavy and non-transient-heavy material.
It's a classic feature of SSL-style compressors - Cytomic's The Glue is a perfect example - and some compressors even allow you to modify the specifics of how it works. DMG Audio's Compassion is such an example, with two release settings, Short and Long, and an intensity setting, Timing Scale (0 to 100%). This helps you control which transients - strong (0%), weak (100%) or somewhere in between the two - will invoke the slower release time.
12. Oversampling
The process of upsampling within plugins isn't new, but for critical processing, it can improve clarity. Realistically, it's really only worth using when you're dialing in heavy compression, and when you've set the attack and release times fairly short. In these circumstances, high-frequency content should sound subtly crisper and more defined with oversampling enabled.
13. Feedback vs feedforward
Modern compressors take their sidechain split directly from the input signal. Since this is done in the digital domain, this split creates a clean, exact duplicate, and a predictable attack and release - unless your plugin emulates any analogue quirks, of course. This 'normal' topology is called 'feedforward', but there's another system called 'feedback', where the sidechain signal is sourced after the gain control section - ie, from the compressed signal. This technique predates both feedforward designs and the use of VCA compressors, and is found in many classic units such as the FET-based Urei 1176, for example.
Both topologies are capable of delivering a super-fast response, so lag isn't an issue. In a feedback design, though, the attack and release are influenced by the amount of gain reduction and, most significantly, the compression ratio, resulting in differently shaped attack and release. For this reason, transient handling can be a little bit more design-specific in feedback compressors, and it's that flavour we're often after when opting for a classic feedback design.
