Once you've got all of the power-hungry kinks worked out of your system, you may still need to optimise your projects in your DAW in order to get the most from your CPU.
This sort of thing was more vital in the days of singlecore/single-processor machines, but such precautions and practices still apply. It never hurts to be frugal. Of course, if you happen to be stuck with an under-spec'ed relic, such precautions will save you a lot of frustration.
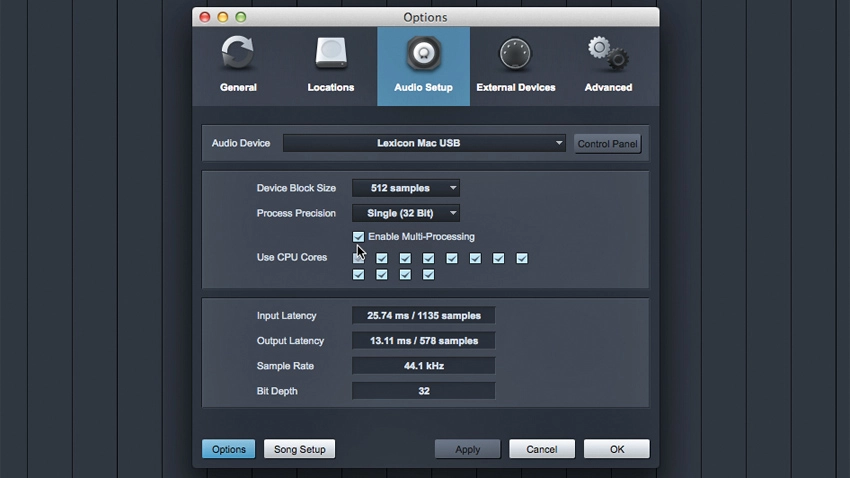
It's important to take advantage of everything your system has to offer. Most DAWs support multicore or multithreaded processing, but it's not always active by default, so be sure you have it activated if your own machine sports multiple cores or processors.
Also, you'll want to shut down any other programs that might be running. Is your browser open and active? While you're at it, consider disabling any random or scheduled program updates that might surreptitiously interrupt the free flow of data between DAW and system resources.
Bit and sample rates
You can reduce potential problems from the very start of your projects by recording material using bit depths and sample rates that your machine can handle. We'd suggest adjusting sample rates before bit depths. 24-bit recordings offer increased dynamic range that can be crucial in the home studio.
However, though your favourite virtual synthesizer might sound brilliant at a sample rate of 96 or 192kHz, it might be overkill, and it will almost certainly be too much for large projects. Reduce the rates to 44kHz or, at most, 48kHz. These rates can accurately handle frequencies well beyond what we can hear. And while it's true that this isn't the only reason to use higher rates, we've got to cut corners somewhere - especially if you're just at the stage when you're working on ideas and being creative, rather than handing in your final master to a record label.
Though your favourite virtual synthesizer might sound brilliant at a sample rate of 96 or 192kHz, it might be overkill, and it will almost certainly be too much for large projects.
As a very last resort, you can also reduce your recording bit depth to 16-bits. You'll wind up with less dynamic range, so you'll have to watch your levels a little more closely, but it could help take the strain off your drives.
Strip it back
Consider from the start exactly what's needed for your project. It's easy enough to use a DAW's default templates or your own saved setups, but they may be chowing down on more resources than necessary. For example, you needn't use the same default input configuration you'd use to track a huge drum kit if you're only recording a voiceover. Every input and output you activate will put a hit on your resources, so customise your connections appropriately.
You can gain a lot of cycles back by managing buffer sizes. Obviously, you'll want to use the smallest possible buffers when monitoring your inputs during the recording process to avoid latency, but you can crank 'em up during the mix stage, giving you more power for your virtual instruments and effects.
You can take it a step further by using your interface's input monitoring (aka direct monitoring) when possible. You won't be able to hear your voice or instruments through your plugin effects, but it'll allow for higher buffer settings while recording.
Having a different reverb on every track is an easy way to tax your CPU, so get used to those aux/return busses.
While we're on the subject of plugins, it's important to be aware of how much DSP a given plugin uses. Your DAW may have a means by which to see which processes are using the most power. Convolution reverbs or super-accurate modelled synthesisers, for example, can put a hurt on your resources, but you can ease the pain with judicious use of your DAW's "track freeze" or "bounce-to-track" features to render demanding plugins to audio.
Consider reducing the number of effects upon which you rely. Even commercial studios are limited to a finite number of outboard effects boxes, and those are used wisely. Reverbs and delays are often used on auxiliary buses and shared by many tracks. Having a different reverb on every track is an easy way to tax your CPU, so get used to those aux/return busses.
Likewise, it pays to be mindful of exactly what is going on in your tracks. Do you have hidden, minimised or muted tracks running? They could still be gobbling up CPU power!
For a more on optimising your computer for music making, check out Computer Music 215, April 2015, which is on sale now.
