While drums don't have to sound huge to be effective - witness funk, R&B, liquid DnB, etc - for many styles of music, bigger is almost always better.
While upscaling the 'unreal' drum sounds of electronic genres such as house and hip-hop is relatively easy, since they're usually either synthesised or sampled (so already processed), when it comes to inflating the acoustic drums of rock and pop, things aren't so straightforward. Totally dry acoustic drums always sound a bit feeble - load up a multichannel drum kit and zero all the overhead and ambient room mics to hear what we mean - so real effort is required on the part of the producer to improve them.
Fortunately, there are several areas on which this effort can be focused. If you have a suitably equipped virtual kit, you can push those room mics back up in the mix to add natural reverb. If you don't like the sound of the room in question, though, or you're working with a less involved instrument, a separate reverb will do the trick.
But reverb really just puts your undersized drum kit in an oversized space. To bolster the sounds of the kick, snare and hats themselves, dynamics processing is key, in the shape of compression and distortion.
Here we'll use all three techniques to power up an unobtrusive raw drum sound - first individually, then in combination.

Step 1: Here's a simple groove triggering Ableton Live's bundled SessionDry kit - an extremely dry acoustic drum kit. Although its individual drums aren't by any means tiny, collectively this isn't exactly what anyone would describe as a 'big' drum sound. There are several things we can do with plugins to beef it up…
Dry drums

Step 2: Compression should be your first port of call. By reducing the dynamic range - that is, bringing the volume levels of the louder parts down - and increasing the Gain to compensate, the whole thing becomes louder and punchier. Here, we're applying a compression Ratio of 4.5:1 with a 2ms Attack time to let transients through.
Full compression

Step 3: If your compressor has a mix control, you can make the kit sound bigger but still retain performance dynamics using parallel compression. We've set the Dry/Wet balance to 50/50, for an equal blend of compressed/uncompressed signal. The Attack is reduced to minimum, as the idea is to crush transients then blend them in.
Parallel compression

Step 4: Perhaps the most obvious effect to reach for is reverb, positioning the source signal in a virtual space. Your reverb plugin will probably include a few drum kit-orientated presets, so use those as your starting point. Don't go overboard with the wet signal: set it where you think it sounds right, then back it off a touch.
Reverb

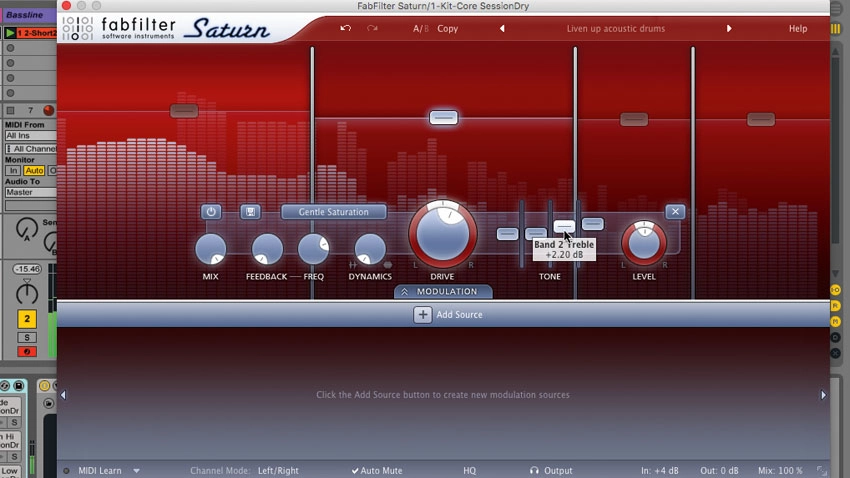
Step 5: Distortion - in all forms - is another solution to low-impact drums, implying added size with the harmonic shaping and natural compression it can introduce. Here, FabFilter's Saturn multiband distortion plugin is thickening up our drums gently but very effectively.
Distortion

Step 6: In reality, you'd most likely combine processes to get your drums sounding their biggest. Here we've inserted the reverb, parallel compression and distortion from the previous steps. Together, they not only sound huge but also give us plenty of options for tweaking the dynamics and spatialisation of the kit.
Compression, distortion and reverb
