How to make a programmed piano part sound more realistic
Learn how to program authentic ivories
Want all the hottest music and gear news, reviews, deals, features and more, direct to your inbox? Sign up here.
You are now subscribed
Your newsletter sign-up was successful
There are plenty of realistic sampled instruments available, but getting a convincing performance out of them can require some programming know-how. We'll use a piano here for demonstration, but many of these principles can also be applied to other instruments. The good news is that you don't necessarily need to rewrite your MIDI parts, but rather refine them.
Let's start by looking at how a pianist plays the instrument. Timing is crucial; when a pianist plays a chord, it's rare that they'll hit all the keys exactly at the same time due to natural human inconsistency. Slightly adjusting the timings and velocities on a note-by-note basis gives you a high degree of control and potentially the most realistic results. For example, a pianist might hit certain notes in a chord slightly harder than others depending on the fingers used - a thumbed note may carry more weight than a little finger.
Becoming more articulated
Another thing to consider is the use of an instrument's articulations. The piano's sustain pedal allows the strings inside to vibrate freely until either the vibration stops naturally or the pedal is released. Almost all virtual pianos offer this functionality via a sustain function that can be switched on and off via MIDI - using it, it's easy to make chords flow into each other in a realistic fashion.
Article continues belowAs mentioned, we're using piano to demonstrate, but you can apply this line of thinking to other instruments, too - take the accordion as an example. The velocity of the keys and buttons is fixed, with the dynamics of the instrument instead controlled by the bellows. Bearing this in mind, you could use volume automation instead of velocity edits, alongside articulation switching, to improve the realism of a programmed accordion part.
Now, let's get busy adding life to a moribund MIDI piano part. For more advice on getting your mixdowns sounding more organic, pick up Computer Music 224, which is on sale now.
Click here to download the files you need to follow this tutorial
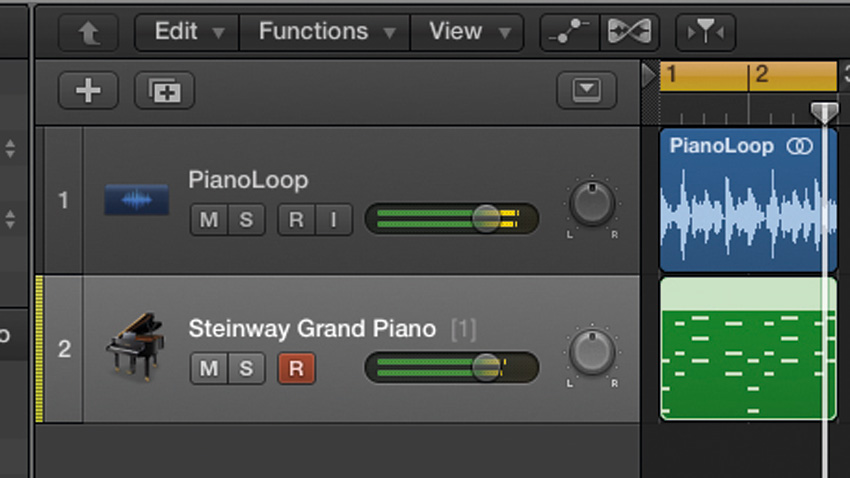
Step 1: We can use standard MIDI editing tools in any DAW to add a lifelike feel to a programmed piano part - let's take a look at how it's done. Open your DAW, set the tempo to 124bpm, and import BackingLoop.wav and PianoMIDI.mid onto the arrange page. With that done, loop the audio for playback.
Want all the hottest music and gear news, reviews, deals, features and more, direct to your inbox? Sign up here.
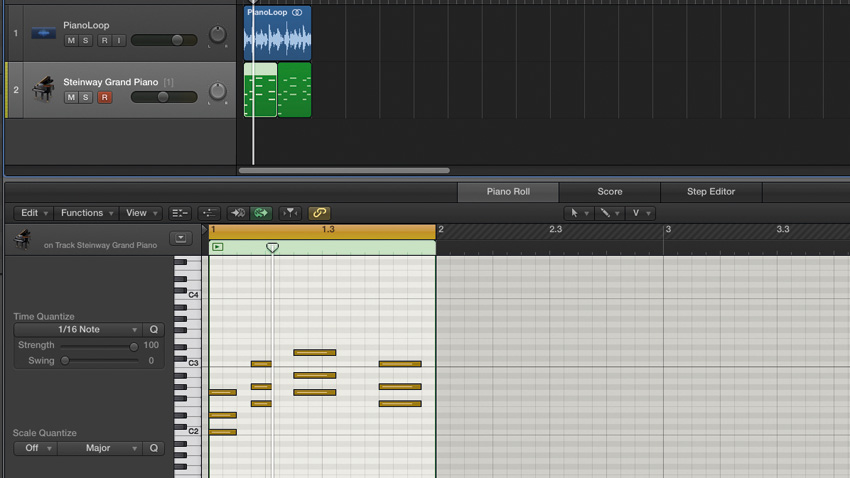
Step 2: Logic has assigned a piano to our MIDI track by default - turn it down by around 6dB to bring the levels into check. Split the PianoMIDI region into two single-bar sections - we'll edit the first and leave the second. Loop the first bar and double-click the first region to open the piano roll. The chords are tightly sequenced with identical velocity. Pretty robotic stuff. Let's bring things to life with manual edits.
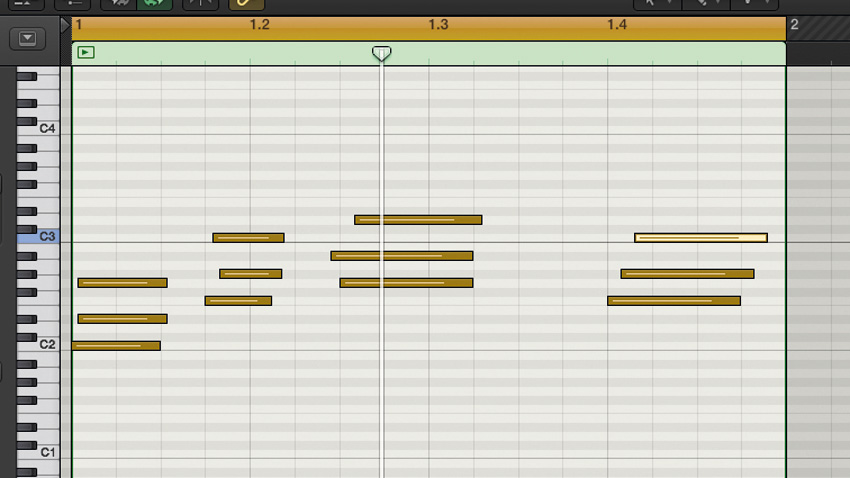
Step 3: We'll tweak each note's start and end points so that they're not all the same, imitating the slight inaccuracies of human playing. Turn Snap To Grid off and move the D#2 and G2 notes in the first chord slightly after the beat, making them late. Repeat this with the other three chords - feel free to move some of the notes forward in time, too. Adjust them until it sounds right to you.
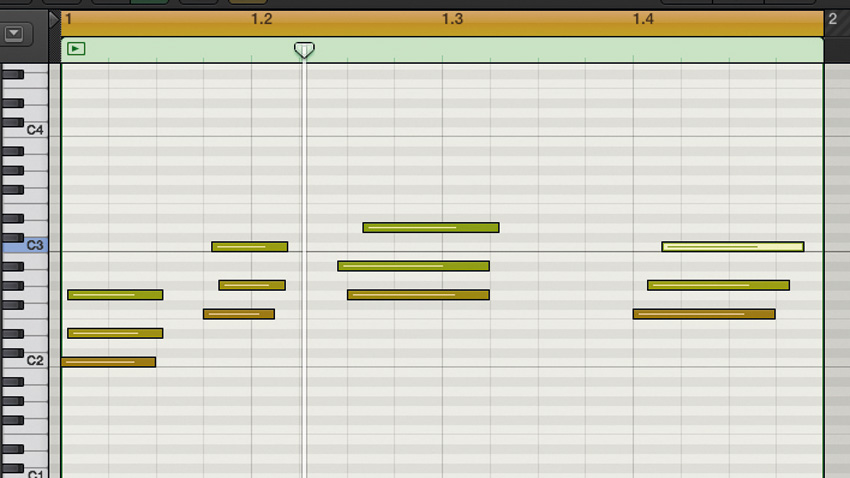
Step 4: We can use velocity to further imitate natural human variation in playing strength. Change the controller lane in the MIDI editor to Note Velocity, then change the velocities of the first chords' D#2 and G2 notes - we've set ours to 95 and 89. Then adjust the velocity of the other chords in a similar way. We make the lowest note loudest, simulating the harder notes from a player's thumb.
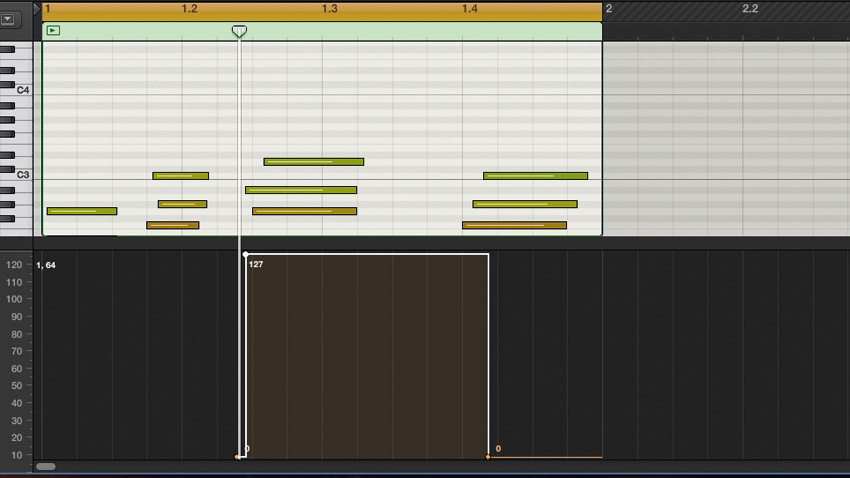
Step 5: An important part of piano technique is using the sustain pedal to allow played notes to ring out without the keys being held - we can work that in via the MIDI editor. Change the bottom controller lane to Sustain Pedal and draw in some sustain between the third chord and the fourth, taking care to make sure that the sustain ends just after the fourth chord starts.
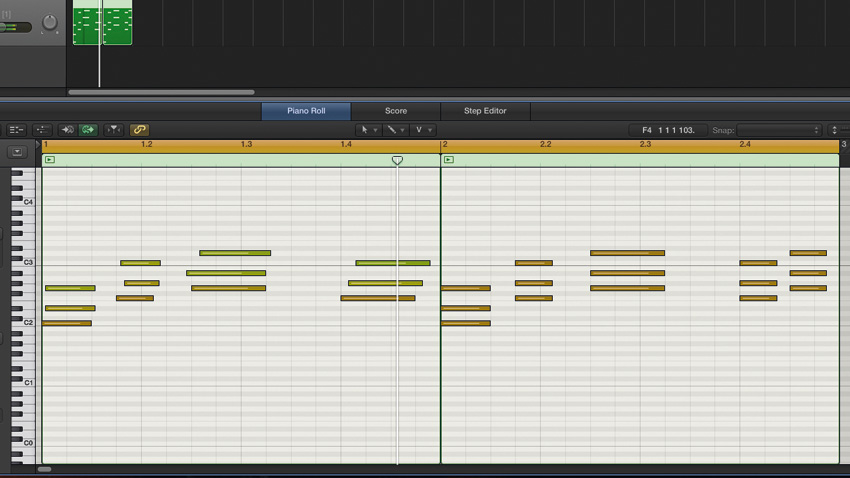
Step 6: Finally, select both of the PianoMIDI sections and loop them for playback. You can now hear how the piano sounds with our edits applied versus the original programmed piece. The edited section sounds much more interesting, natural and less static, with its subtle changes in dynamics and timing allowing the other elements of the mix to shine through.
Computer Music magazine is the world’s best selling publication dedicated solely to making great music with your Mac or PC computer. Each issue it brings its lucky readers the best in cutting-edge tutorials, need-to-know, expert software reviews and even all the tools you actually need to make great music today, courtesy of our legendary CM Plugin Suite.
