To the untrained keyboard player, the MIDI piano roll editor represents a means to work out musical passages using musically useful symbols and an easy-to-grasp grid-style note entry system. Events are represented by colourful horizontal bars arranged in the grid, their vertical positions delineating their pitch and their positions on the horizontal axis determining precisely when they occur in the sequence. To the muso, it's a neatly simplified alternative to the familiar musical staff.
You could never explore beyond this most basic understanding and still spend a lifetime composing satisfyingly complex musical arrangements. But with the right knowledge, the piano roll can become a playground, rife with sophisticated production tools that can take control of the nuances of every note, providing far more power than mere notation. Beyond pitch, volume and expression, the piano roll can be used to control the very timbre of the sound itself to a microscopic degree of precision and accuracy.
Here, we'll reveal a trove of piano roll tips and tricks used by the pros to create perfect arrangements.
Go even deeper with the piano roll by picking up Computer Music 210 (November 2014), which is on sale now.
1. Too much of a good thing
Now for a public service announcement: Quantising can save an otherwise bad performance, but it's all too easy to abuse. You can easily find yourself automatically tapping at your DAW's quantise key command after every recording, but down that road lie lifeless, robotic performances. That's fine if you're aping Kraftwerk, but not so good if you're attempting to craft a killer drum groove. Try instead to quantise selected notes or groups of notes, leaving others as they were. Or use different amounts of quantising on different groups of notes. For example, maybe you want the kick to be bang on the bar line, but leave the snare some wiggle room. This kind of attention to detail can make the difference between a boring beat and a groove that really moves.
2. Quantise - in reverse!
What's the opposite of quantising a performance? That'd be 'humanising' a track. If you're a programmer rather than an instrumentalist, you'll likely be more comfortable entering notes one-by-one into your piano roll. However, this can lead to less-than-convincing results, particularly when sequencing emulative instruments like drums or keys. Some DAWs can humanise a track by gently nudging the notes and beats ever-so-slightly off the beat - it might simply be billed as 'random' quantise. Most DAWs now even allow you to impart predefined "grooves" onto your programmed material. Failing that, though, in a pinch, you can just manually nudge your notes backwards and forwards in the piano roll. Give it a shot - it really can do wonders for your rigidly electronic tracks!

3. Audio and the piano roll - the next step
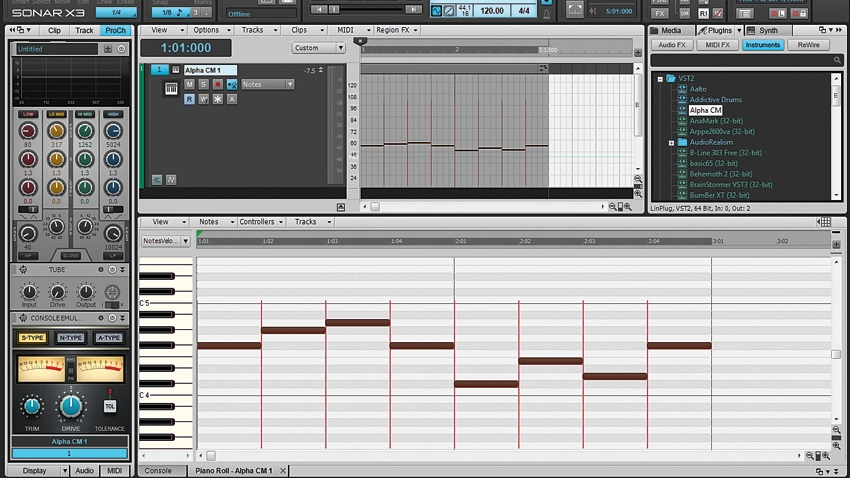
Piano rolls first appeared back when sequencers were MIDI-only affairs. Since then, MIDI sequencers have grown into digital audio workstations, and now audio and MIDI sit side by side. Indeed, in some cases, the two have almost converged. For example, Cubase can analyse a monophonic audio recording and detect the pitch of each note. You can then edit the pitch using familiar piano roll-style functions, even transferring the results to a MIDI track. Sonar X3 Producer users get even more power with a perfectly integrated version of Celemony's miraculous Melodyne, a pitch adjustment system that allows audio to manipulated in a piano-roll style grid. With tools like these, the lines between MIDI and audio editing are all but obliterated.
4. Aligning MIDI to audio
Here's a neat trick for FL Studio users. Sometimes when working in the piano roll, you may find that your notes or events need to be tightly aligned with the project's audio events. In such cases, you can make use of FL Studio's Waveform Helper View. This enables you to drag a waveform preview image from the Channel Settings directly into the piano roll, where it appears as a dark silhouette behind the notes in the grid, giving you a visual timing reference. You can then show or hide the waveform's image using the key command Alt+N. It's a great feature that comes in particularly handy when working with the Fruity Vocoder.
5. Creative quantisation
Logic Pro features 'Q-Range' and 'Q-Flam' parameters. The former sets a timing threshold within (or without) which notes are quantised. You could, say, quantise only notes that are more than 1/32 away from the nearest quarter note. Cubase's Magnetic Area option does the same thing.
Q-Flam incrementally nudges the notes in a group that fall on the same beat (a chord, for example) by a specified amount. Positive values offset each note of the chord a little more than the one just below it, while negative settings offset each note a little more than the one above it. This can create realistic flams as well as strummed chords.

6. Get inline
By default, the piano roll usually floats in a dedicated window or is docked to a major section of the overall layout. However, it can be a real drag constantly switching back and forth between project windows, and a docked piano roll can eat up a lot of screen real estate, making it difficult to manage a busy project.
Enter the inline piano roll! Here, the piano roll appears as a clip in the project timeline view, right alongside your audio tracks and automation lanes. Cubase users have it - it's called the In Place MIDI Editor - and Sonar users get the Inline Piano Roll. If your DAW has the same, you should get to know it.
