What’s so great about Pro Tools? A beginner’s guide to the industry-standard DAW
Find out why you might still consider using Avid’s famous production software
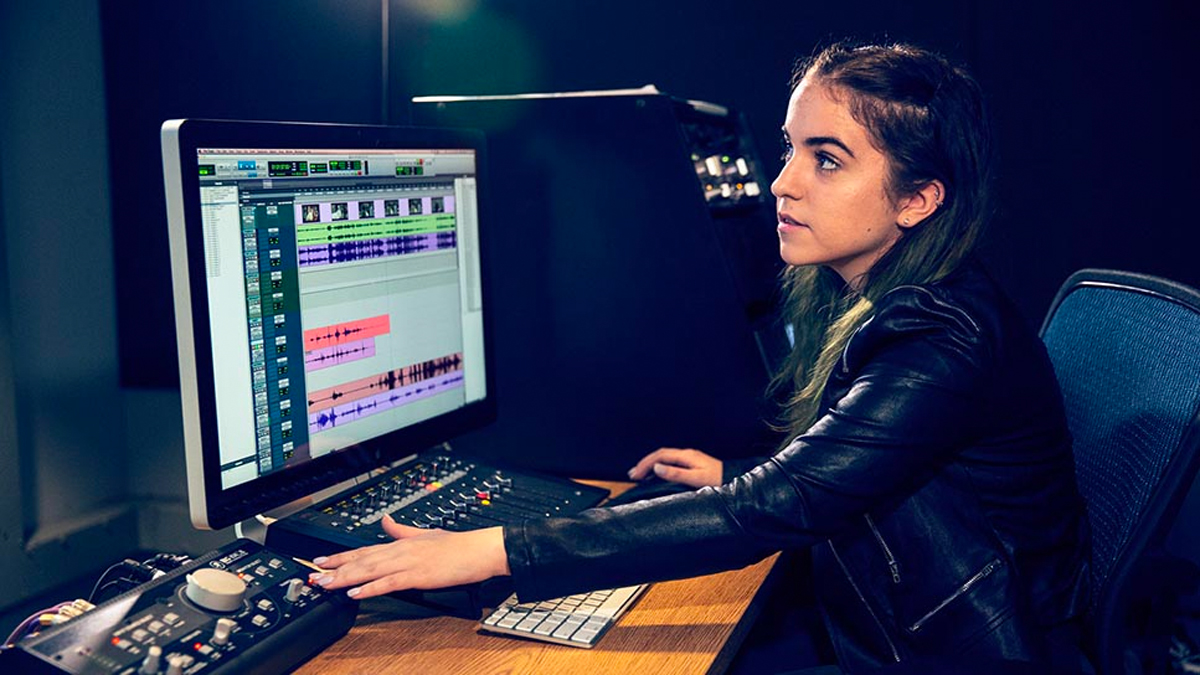
If you have been anywhere near a recording studio in the last three decades, or had any interest in music production at all, the odds are you have probably heard of Pro Tools.
An industry standard in music production, Pro Tools was at one time so dominant that it practically became the generic name for DAW.
To newer music producers, who are bombarded with options for recording and sequencing their music, it might seem puzzling why Pro Tools is so lauded. So, we’re going to dive into a brief history of Pro Tools, talk about some specific use cases for which it is uniquely suited, and give you a quick overview of the software.
Pro Tools history
Pro Tools had its beginnings in the early 1980s as Sound Designer, a Mac-based sample editing software package created to edit samples for hardware samplers by E-MU, Akai and Roland (among others).
Sound Designer evolved into Sound Tools, a two-track digital recording and editing system complete with outboard converters for editing DAT tracks. This introduced the SDII file format, which would become an industry standard file format for nearly a decade.
The 1990s saw the introduction of Pro Tools which for the first time featured multitrack digital recording, editing, DSP and mixing. Version 1 supported between 4-16 channels and was priced at $5,995.
In the years that followed the release of the original Pro Tools, the platform would grow more capable via software updates and new hardware offerings. The TDM system (Time Division Multiplexing) allowed for plugins to be run in real-time on dedicated hardware and were a major breakthrough in digital audio.
Want all the hottest music and gear news, reviews, deals, features and more, direct to your inbox? Sign up here.
Later, the HD system, with its ubiquitous silver and blue HD hardware units, would continue to push the limits of what was possible with digital audio.
The nucleus of an HD system was an HD core card which would be slotted into a PCI (or later PCI-e) slot in the computer and a compatible interface. As a user's needs grew over time, they could scale their setup by adding more inputs via additional interfaces, or expand their track or plugin counts by installing additional accelerator cards.
Of course, this expandability came at a price, with a full-fledged Pro Tools system easily topping tens of thousands of dollars.
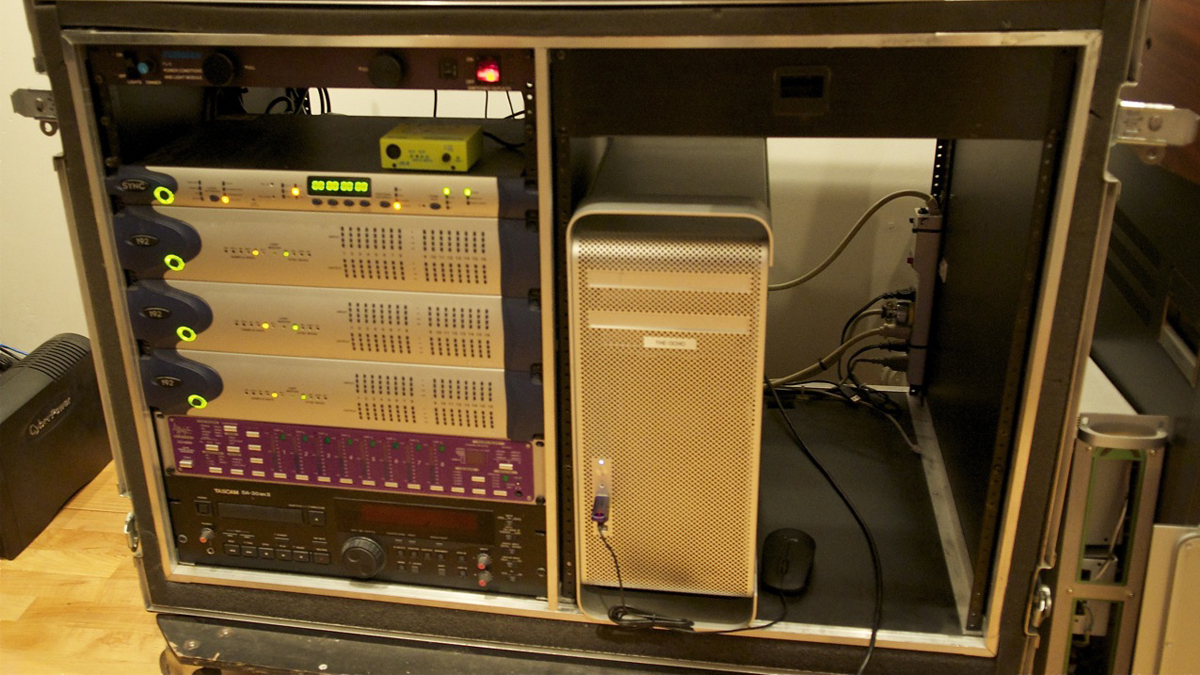
While users had to pay a premium to be in the ecosystem, the tradeoff was stable, ultra-low latency performance with track counts that were simply not possible with native systems like Logic Pro, Cubase, et al. However, as computers got more capable, the need for hardware accelerated workflows has all but diminished for most users.
However, despite heavy competition from myriad native DAWs in the market, Pro Tools continues to be a mainstay in a few niches within the audio industry.
Film scoring
Composers for film often keep a second rig to which they ‘print’ stems from their scoring DAW of choice, such Cubase, Logic Pro or Digital Performer. Since the majority of post mixing is done in Pro Tools, having a secondary rig dedicated to stems saves time creating the final deliverables for the dub stage.
The majority of scoring stages around the world also depend on Pro Tools for recording soundtracks with large orchestras, due to the rock solid, low-latency performance when recording many tracks via HDX hardware.
Post production
Audio post production for television and especially feature film is still one application for which Pro Tools really shines above its competition.
For starters, support for multi-channel formats like 5,1, 7.1 up to Atmos to make Pro Tools the ideal application for theatrical film post production. Integration with large format, multi-operator control surfaces, network workflows and support for multiple video files in a single timeline are among other features that make Pro Tools ideal for film post production.
Pro Tools Versions
Pro Tools First (free)
The free version of Pro Tools, Pro Tools first can be a good introductory step to get familiar with the software without making an investment, though it may be impractical for daily music making. There are, however, a number of limitations, namely:
- Cloud storage only (1GB of free space included)
- Save up to 3 projects for free
- 96Khz limit
- Fewer loops (500mb vs 2GB) and virtual instruments and plugins compared to paid versions Last but not least is the limitation of 16 simultaneous tracks and four inputs
Pro Tools ($29/month,$299/year,$599 perpetual license)
- 32 simultaneous inputs
- 128 audio tracks
- Sample rates up to 192khz
- 115 plugins
- Mono and Stereo mixing
Pro Tools Ultimate ($79/month, $799/year)
- 192 inputs (with HDX hardware)
- 384 tracks (768 with HDX or voice packs)
- Sample rates up to 192khz
- 115 plugins
- Mono, Stereo, Surround, Immersive
Which version of Pro Tools is right for you?
For most music producers working in stereo and not working in music for film or games, the standard version of Pro Tools ought to be enough. The cost of entry is relatively low and requires no additional hardware, allowing you to use the interface of your choice.
Anyone working in music or audio for post, especially in surround, may want to consider Pro Tools Ultimate, which can be used with or without HDX cards and will be much more accommodating to the workflows of an audio post engineer.
Mac or PC?
It is true that, once upon a time, Pro Tools worked exclusively with Mac, but long gone are the days of that paradigm. Current versions of Pro Tools are compatible both with WIndows 10 and macOS.
In terms of hardware, Avid provides a list of certified Macs and PCs that are officially supported to work with Pro Tools on its website. Mac compatibility is straightforward enough, and while you will only officially see a variety of HP workstations supported, in practice, PT plays well with a variety of PCs with reasonably powerful CPUs.
Getting Started with Pro Tools
Don’t let the name ‘Pro Tools’ intimidate you; despite its niche as a tool for high-end so-called ‘pro’ users, getting started is a straightforward enough affair.
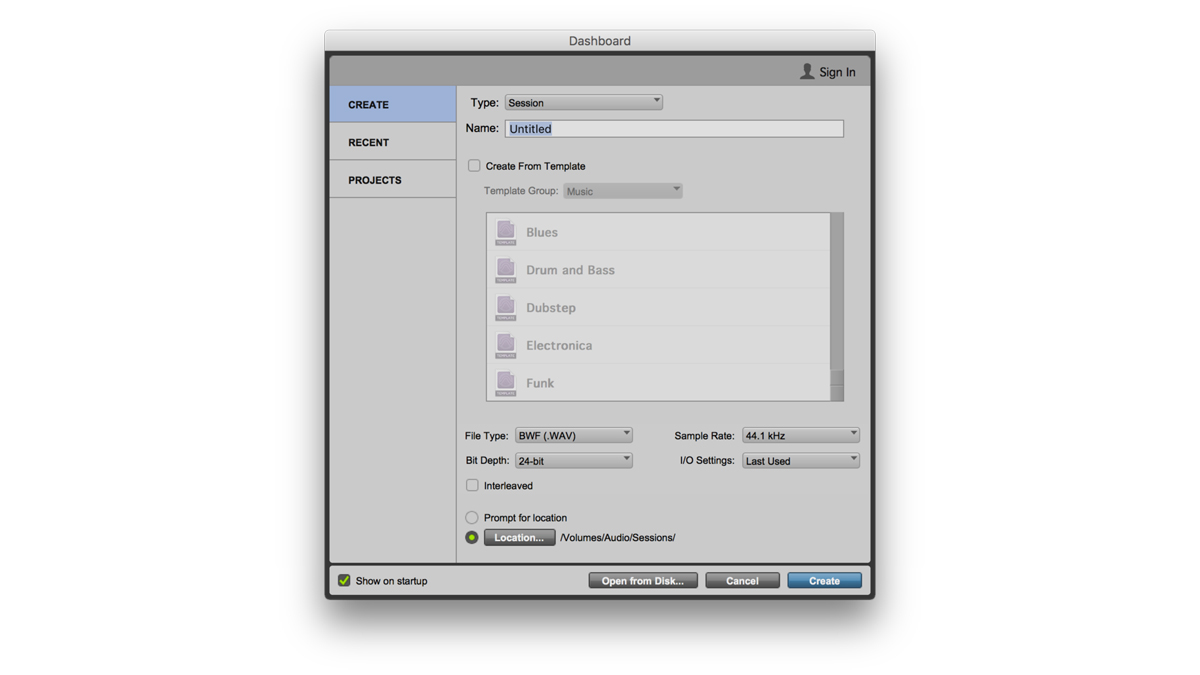
Once Pro Tools is installed, open the program and you will be greeted by the dashboard, which gives you options for creating your new session. In this window you will want to give your session a name, choose a recording file format (WAV, AIFF, etc), sample rate, bit depth and a project location.
If you are using an external sound card or interface then the next thing you should do is make sure it is configured properly.
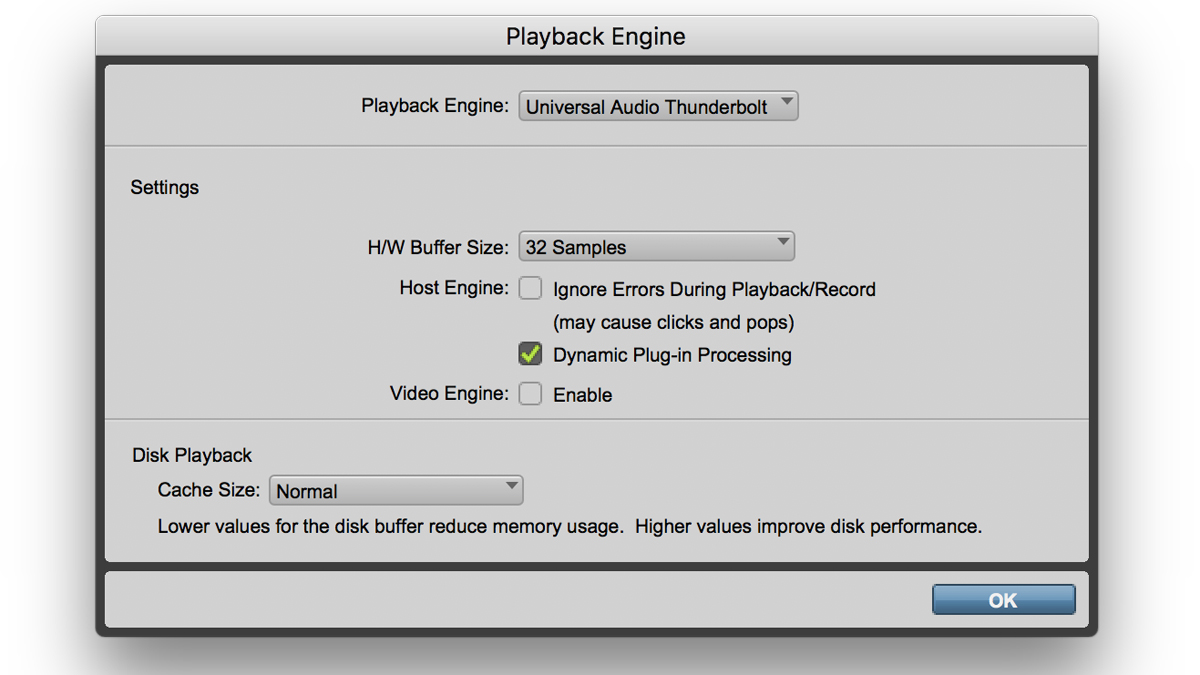
From the Setup menu, choose Playback Engine. In this menu you will be able to choose from the available audio devices on your system and select a buffer size.
Next, configure your I/O settings by choosing I/O from the Setup menu. Here you will find separate tabs for Inputs, Outputs and Busses. In this menu you will see all of the available I/O in your system and have the ability to name inputs and save settings for easy recall.
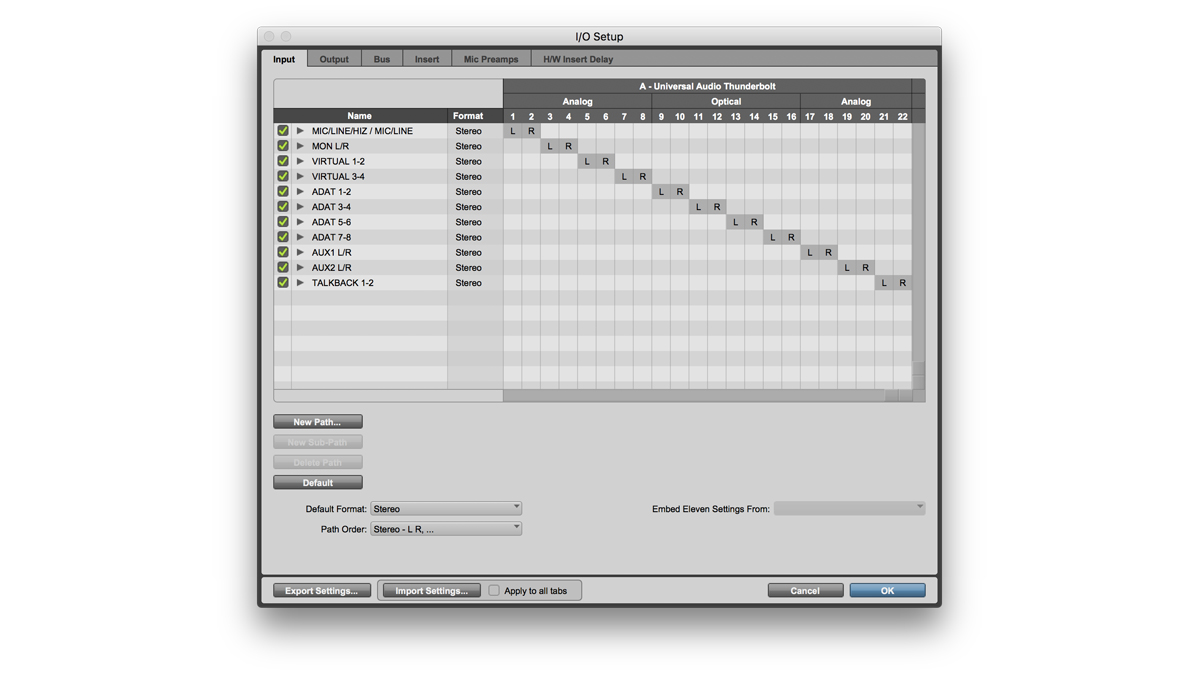
Add Tracks
Adding tracks to your session can be done either by selecting Track>New or with the corresponding key command (shift+command+N on a Mac or shift+ctrl+N in Windows).
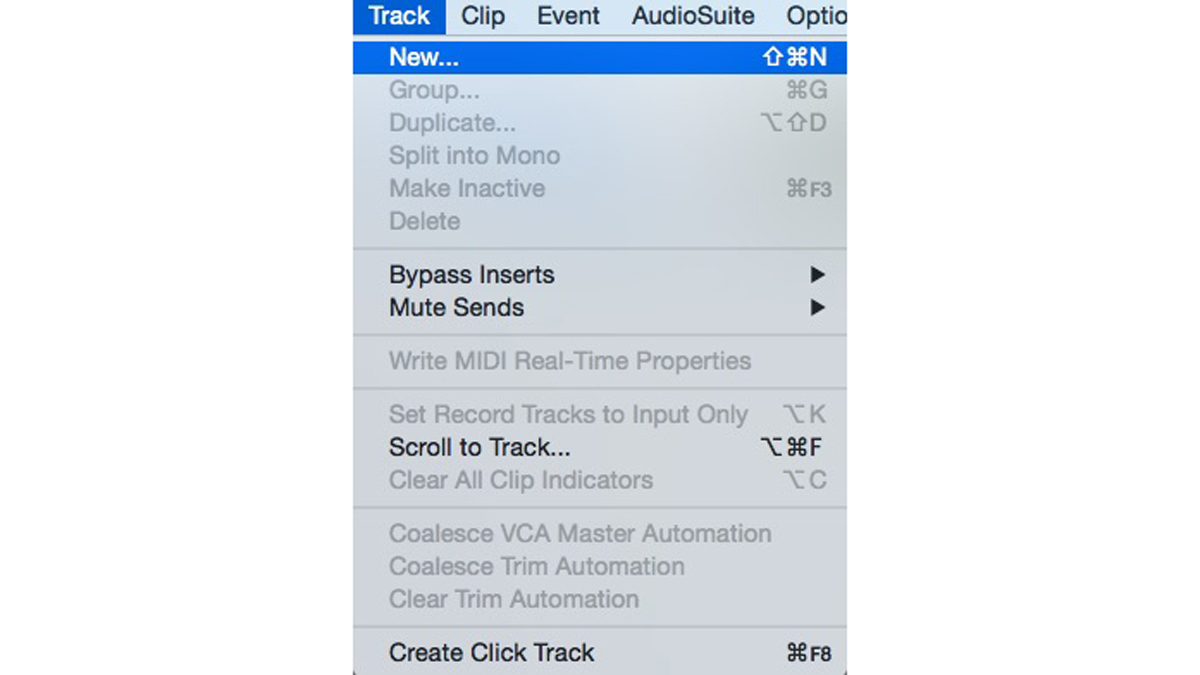
In the dialogue that follows you can choose between audio, MIDI and virtual instrument tracks. Select the track type that you would like, the number of tracks and press create.

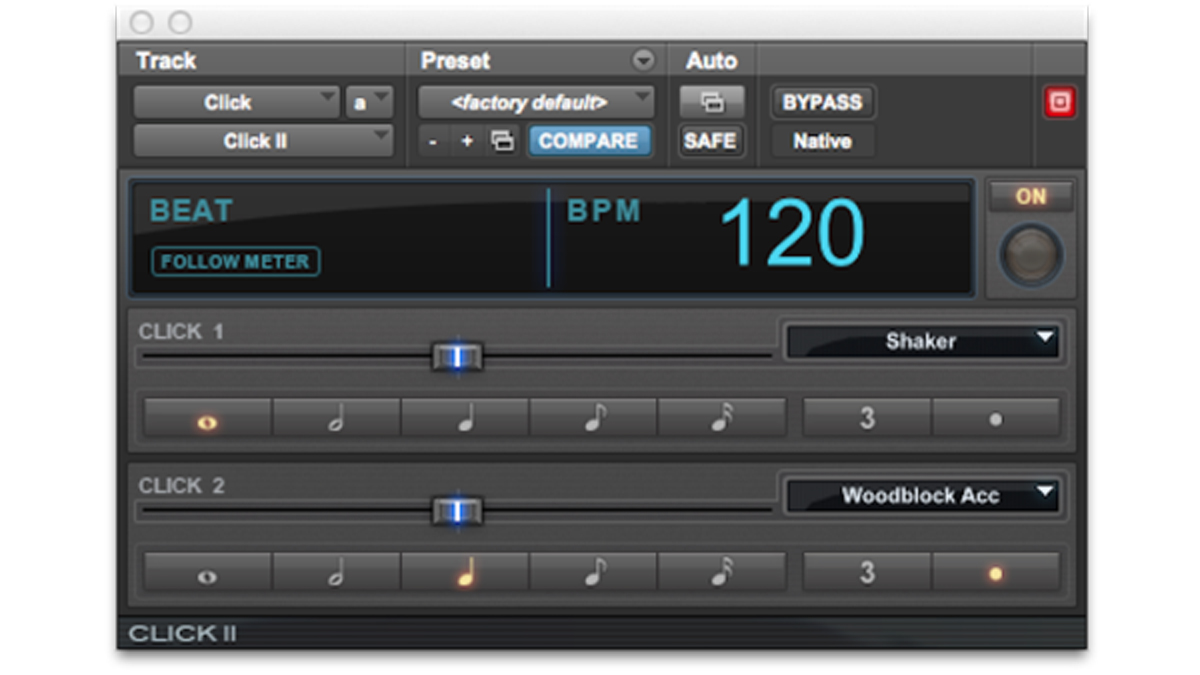
Now that you have some tracks in your session you will probably want to record, but before you do that you may want to add a click track. The way click tracks work in Pro Tools is perhaps slightly, unintuitive so it is worth a look.
Start by creating a new virtual instrument track and instantiate the instrument Click II. Choose a sound from the source menu in the Click 1 window - this will be the click sound for the down beats.
If you wish for all of the beats to be unaccented, choose the same sound in the Click 2 source and keep the volume of each source equal.
Set inputs and arm
Select your track’s input and outputs and press the Record Enable button before recording.
MIDI
If you will be recording virtual instruments instead of audio you will first need to enable a MIDI device by choosing Setup>MIDI>MIDI Input Devices. Choose your device from the menu and press OK.
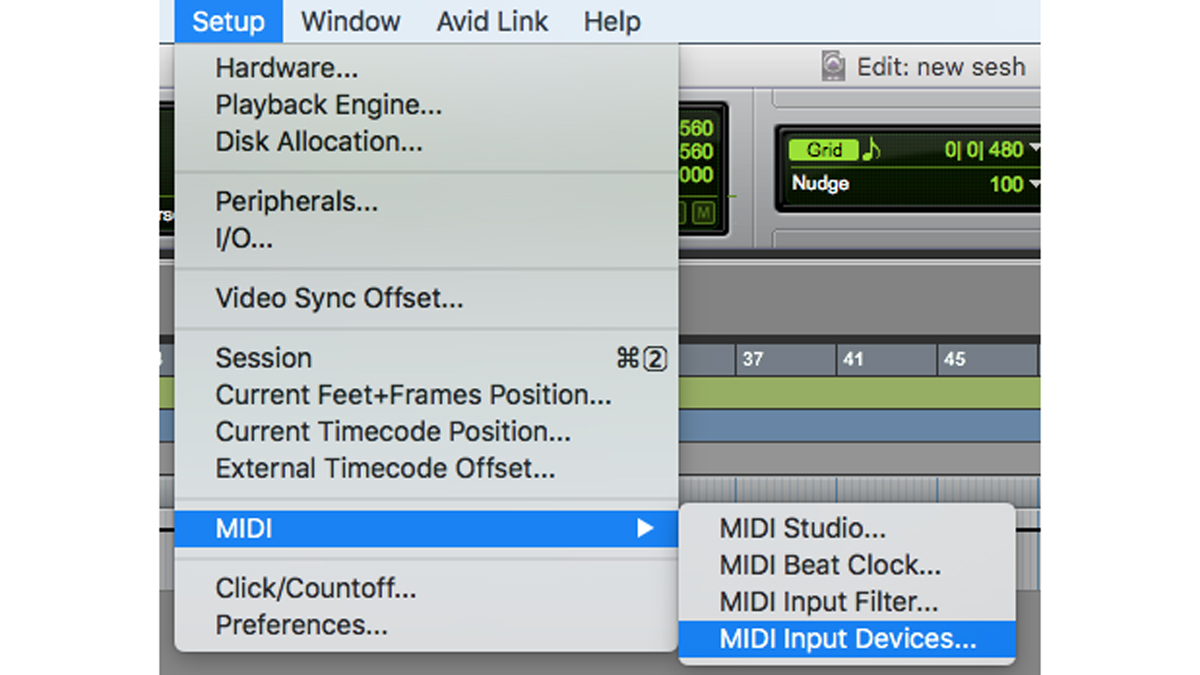
Insert a virtual instrument on a virtual instrument track in the Mix window (Cmd + = or Ctrl+ = on a Windows computer).
Recording and Editing
Now that your click is set, arm tracks for recording and hit Command+Spacebar, F12, or 3 (on numeric keypad) or Ctrl+Spacebar, F12 or 3 (on numeric keypad) on a PC to begin recording.
Obviously there is much more to know about Pro Tools than we can cover in this article, but hopefully you now have a better understanding of which Pro Tools version is right for you and the steps you need to take to get started.